If Windows 11 Time is not updating on your PC, then follow this guide to know the tips to troubleshoot the issue. Seeing the wrong time can be confusing and tends to mess up the schedule of the user. Usually, the Windows 11 time is set to retrieve the time as per the location of the PC. Often due to a buggy software update installed on the PC, such glitches with time can be experienced.
Also, there can be more reasons for time not updating on Windows 11. It may be something as simple as time is not set to update automatically. The user has to manually set it. Windows 11 time on the display is managed by the dedicated time service which is one of the various Microsoft Windows services present on the computer.
If the Windows time service has been stopped then time won’t update. Also, the w32time dll file needs to be registered on Windows 11. This allows them time to display correctly. Otherwise, you will experience that Windows 11 time is not updating.
Best Ways to Fix Windows 11 Time Not Updating
Here are the various troubleshooting tips that you can use to set the time correctly on your PC.
1. Reset w32time dll
To register the w32time.dll file you have to use the command prompt. here are the exact steps.
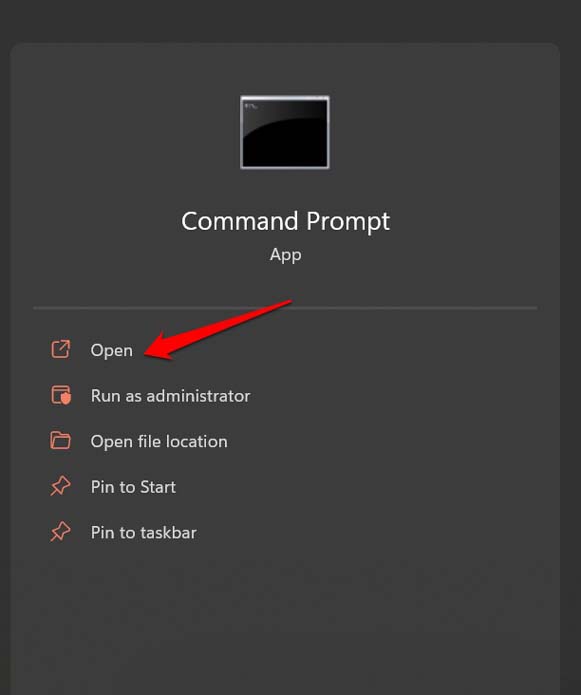
- Launch the Command Prompt on your PC.

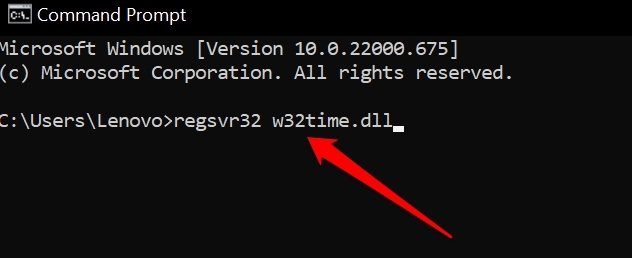
- Enter the command
regsvr32 w32time.dll

- Press enter.
- Once you are done, close the command prompt and reboot the PC.
Check the time and see if it is set correctly now.
2. Start the Windows Time Service
Follow the steps mentioned below to restart the Windows Time Service.
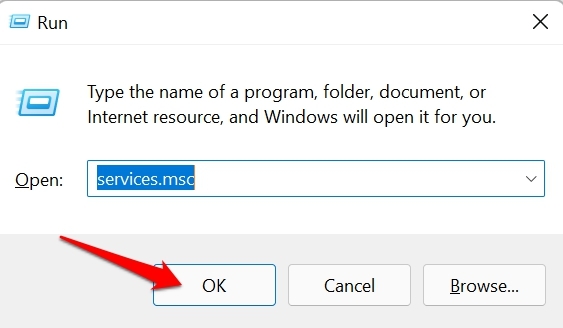
- Press Windows + R.
- Enter the search term services.msc

- Press enter.
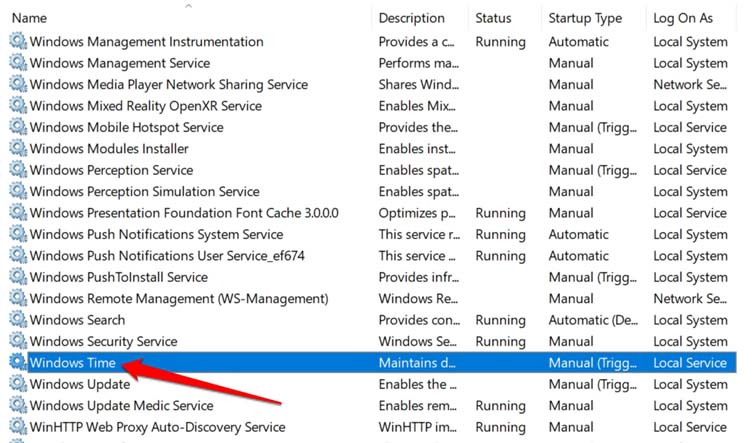
- Once the services list opens, scroll to Windows Time. Double-click on it.

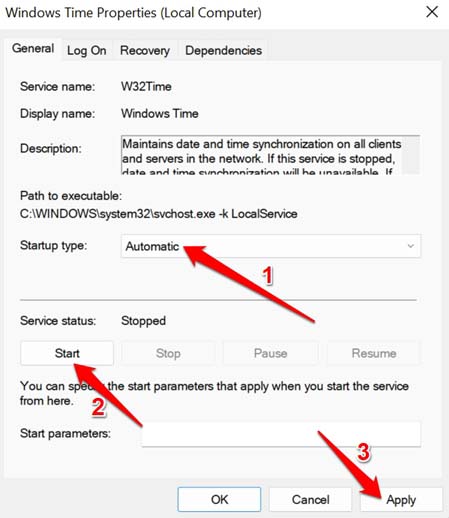
- Set the Startup Type to Automatic.
- Click on Start and click Apply to confirm the changes you have made.

- After completing the above steps, restart your PC to check the correct time.
3. Enable Set Time Automatically on Windows 11
It is important to check that you have set your computer running Windows 11 to fetch the correct time automatically as per your time zone.
To enable automatic time on your PC,
- Press the Windows key to bring up the search console.
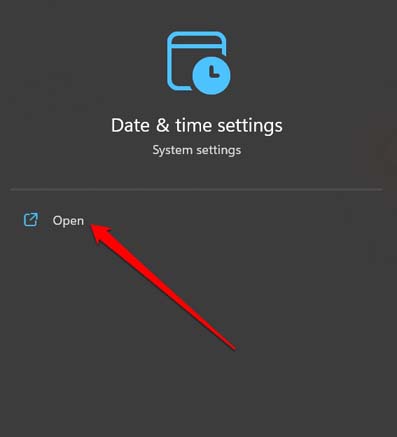
- Type the term date and you should see a search result for Date & Time Settings.
- Click Open.

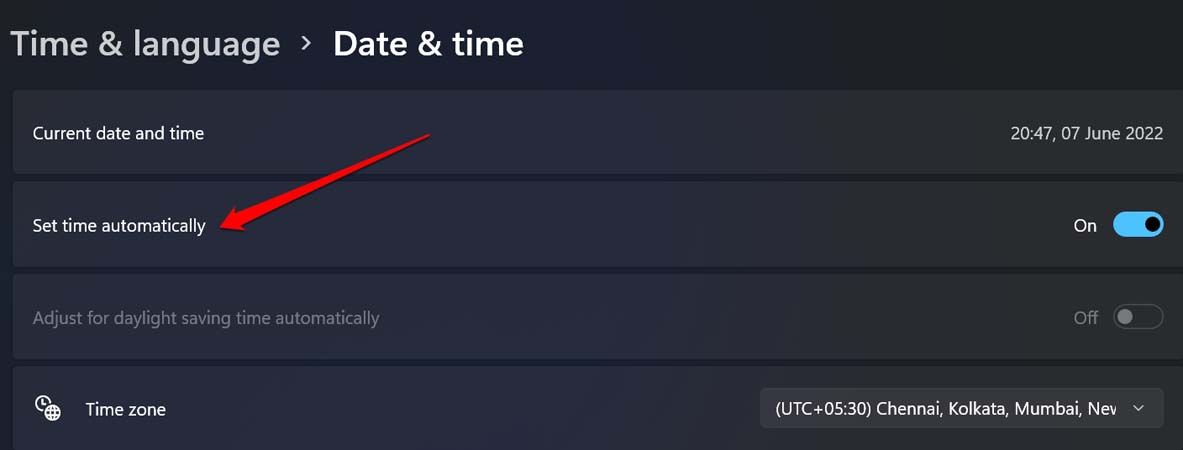
- You will get to the date and time settings for Windows 11.
- Click on the toggle beside Set Time Automatically to enable it.

4. Update the Server of Internet Time
Your PC fetches the correct time based on your time zone from internet-based servers. You have to update this server to get the correct time on your computer.
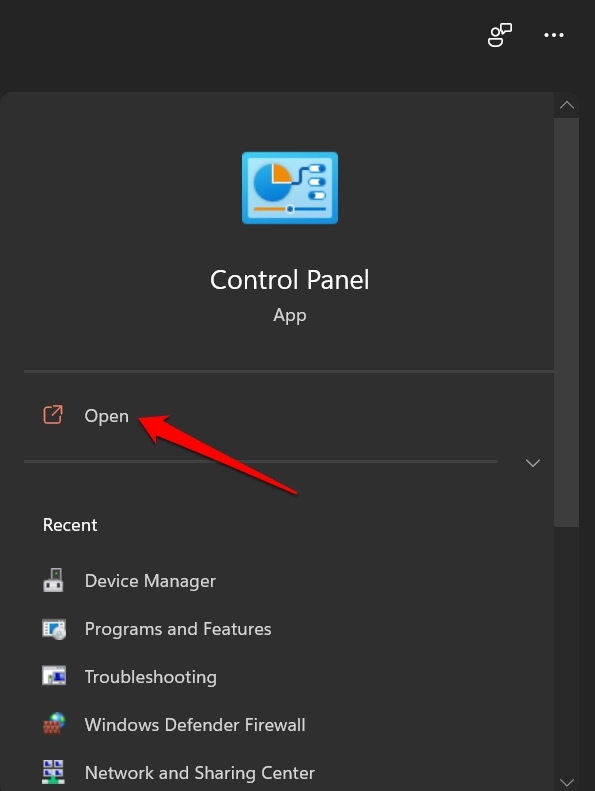
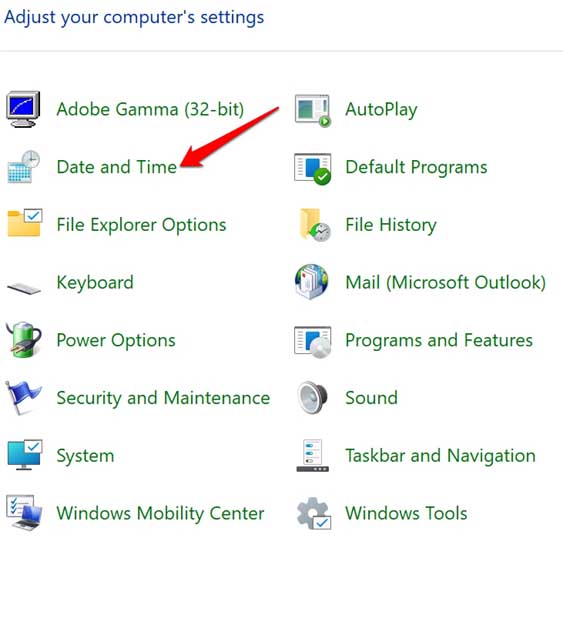
- Open the Control Panel using the Windows search console.

- Click on Date and Time.

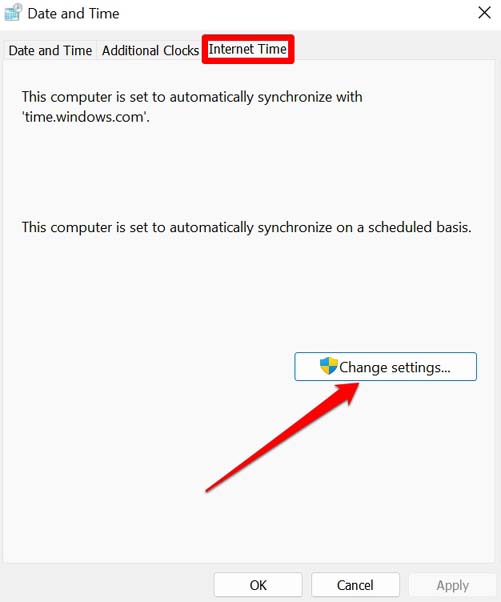
- When the Date and Time properties open, click on the tab Internet Time.
- Then click on Change Settings.

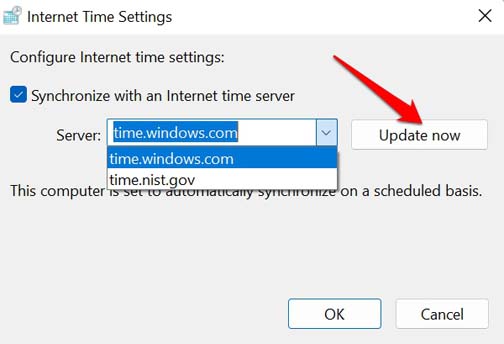
- Change the time-server.
- Click Update Now to make the changes.

5. Use Command Prompt to Set Time on Windows 11
You can even set the time using the command prompt It’s quite easy. here’s how to do it.
Setting the date,
- Launch the Command Prompt.
- Set the date as per dd–mm–yy or mm–dd–yy format.
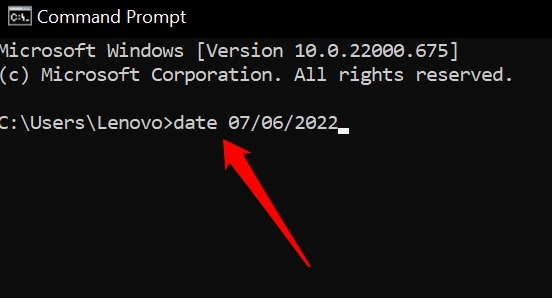
- For example, to set it to 7th June 2022, you have to give the command like this.
date 07/06/2022

- Alternatively, you may give the command to set the date in mm–dd–yy format.
date 06/07/2022
- Press enter after typing the command.
- Now, you can set the time to AM or PM as well using the cmd.
- To set time in AM give the command like this.
time 9:00
- Press enter
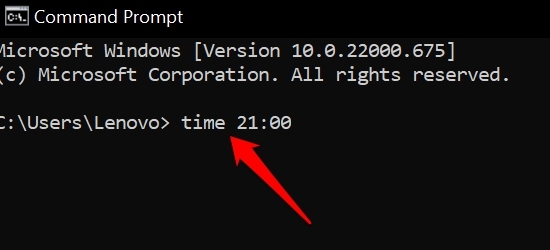
- If you wish to set the time in PM, enter the command mentioned below.
time 21:00

- Once you have set the time and date exit the command prompt.
6. Scan for Corrupt System Files
If you were trying to install an update and it got interrupted in the middle, then you may end up with a few corrupted system files on the PC. This can cause the services to get disabled or the DLL files we fixed earlier to get affected. While fixing the time no updating issue on Windows 11, do scan for the presence of corrupt system files.
To do that,
- Open the command prompt.
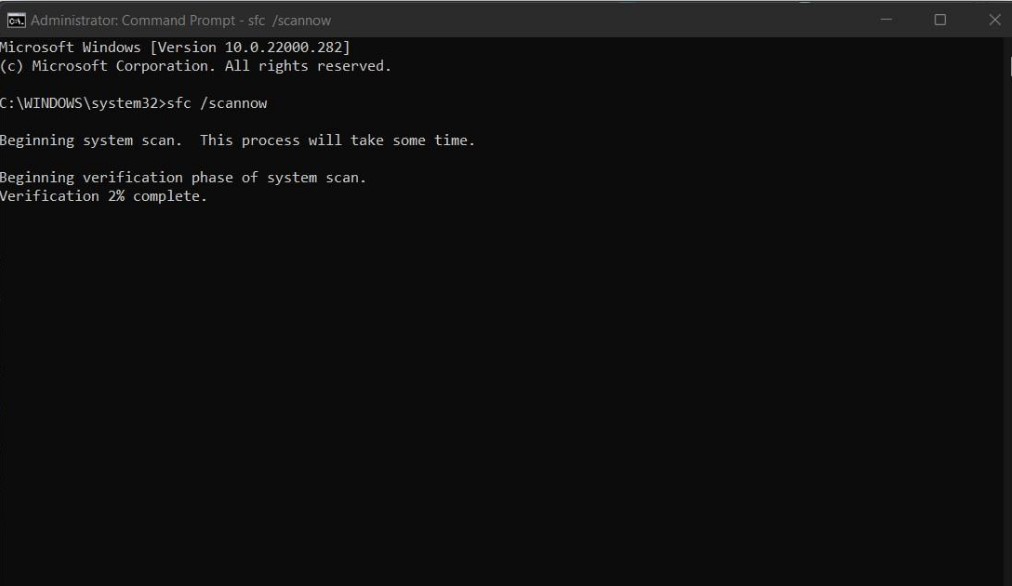
- Insert the following command
sfc /scannow

- Press Enter key.
- Let the Windows OS check for possible corrupt files and fix them. Do not interrupt the process and it may take some time to finish.
7. Re-enable Auto Time Zone Updater Service
Here is another service of Windows 11 that is associated with the time being displayed on your PC. You can disable this feature and re-enable it to fix the time on Windows.
- Press Windows + R.
- Enter the search term services.msc

- Press enter.
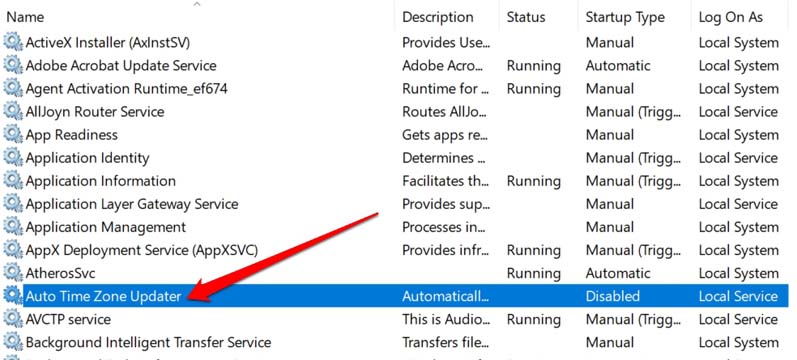
- Once the services list opens, scroll to Auto Time Zone Updater. Double-click on it.

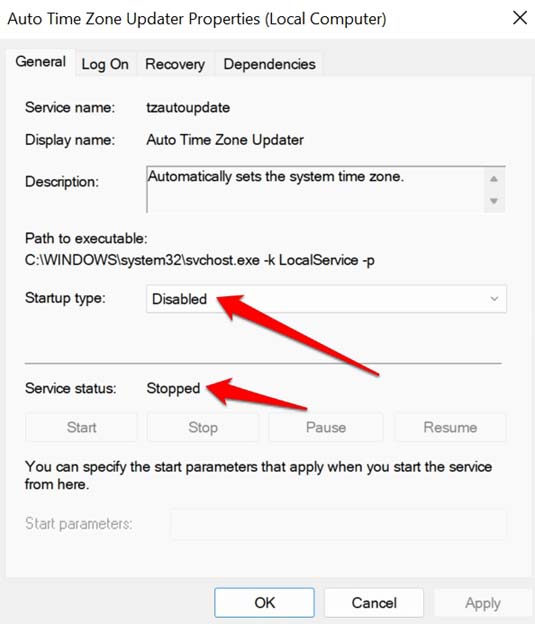
- As the Auto Time Zone Updater properties dialog box shows up, click on the Startup Type dropdown and set it to disabled.
- Also, change the Service Status to Stopped.

- Close everything and restart the computer to re-enable the Auto Time Zone Updater.
8. Install Latest Windows 11 Update
Fixing the bugs on the Windows 11 is important as well. If time is not updating try to install a newer version of Windows 11. You can manually check for an available update.
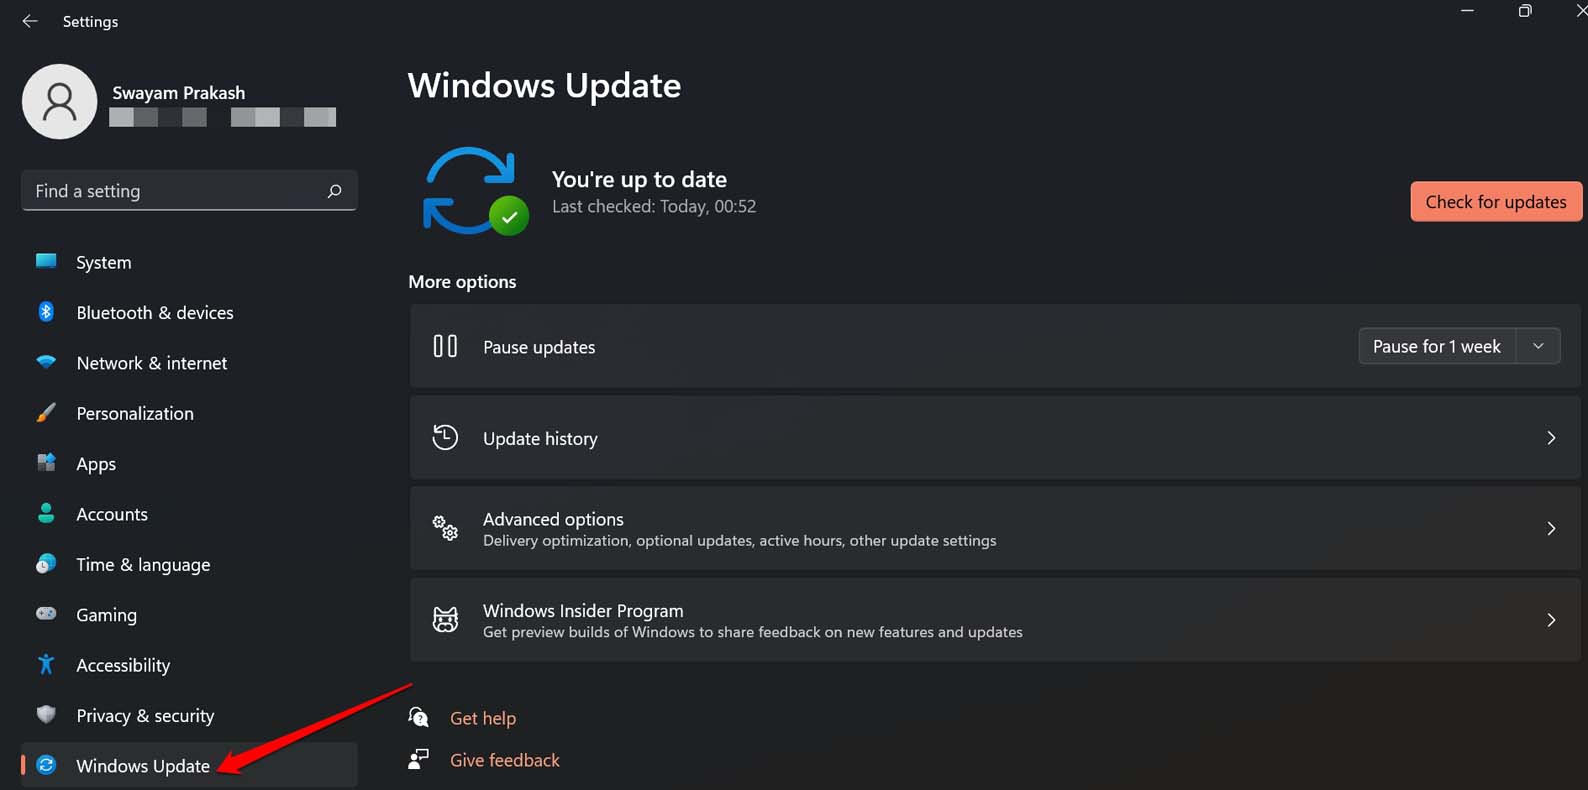
- Press Windows + I to access the settings.
- On the left-hand side, click on Windows Update.

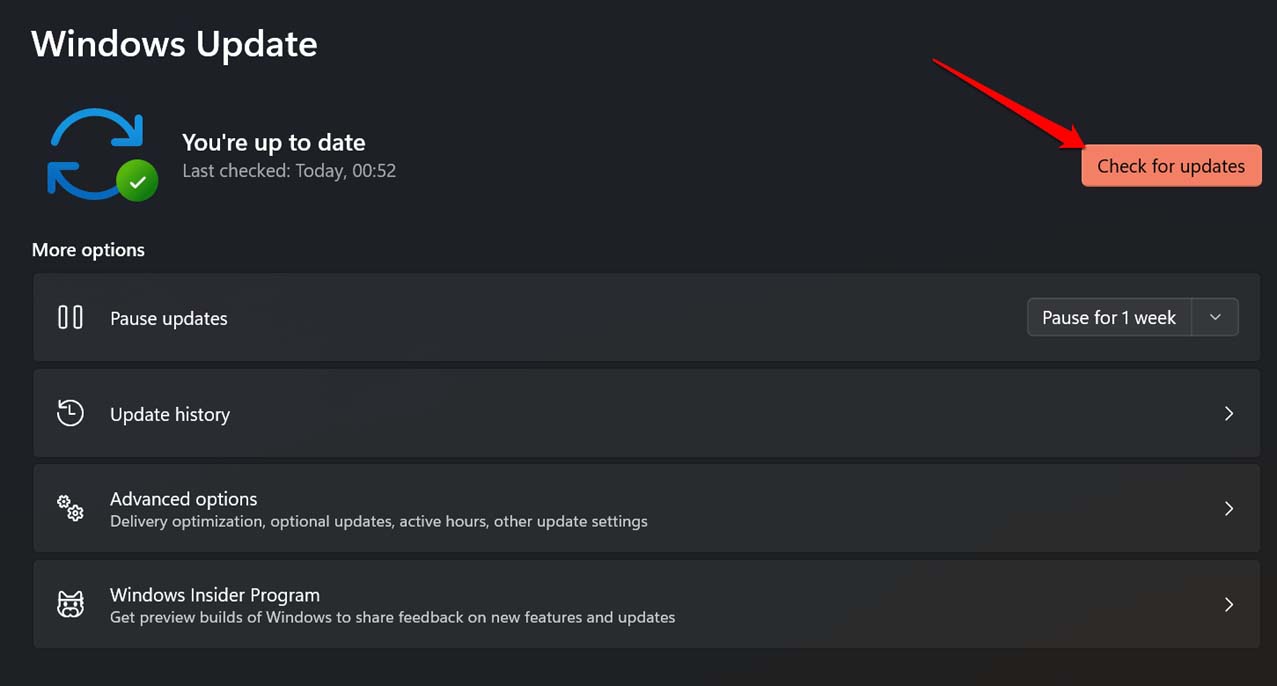
- Click on Check for Updates.

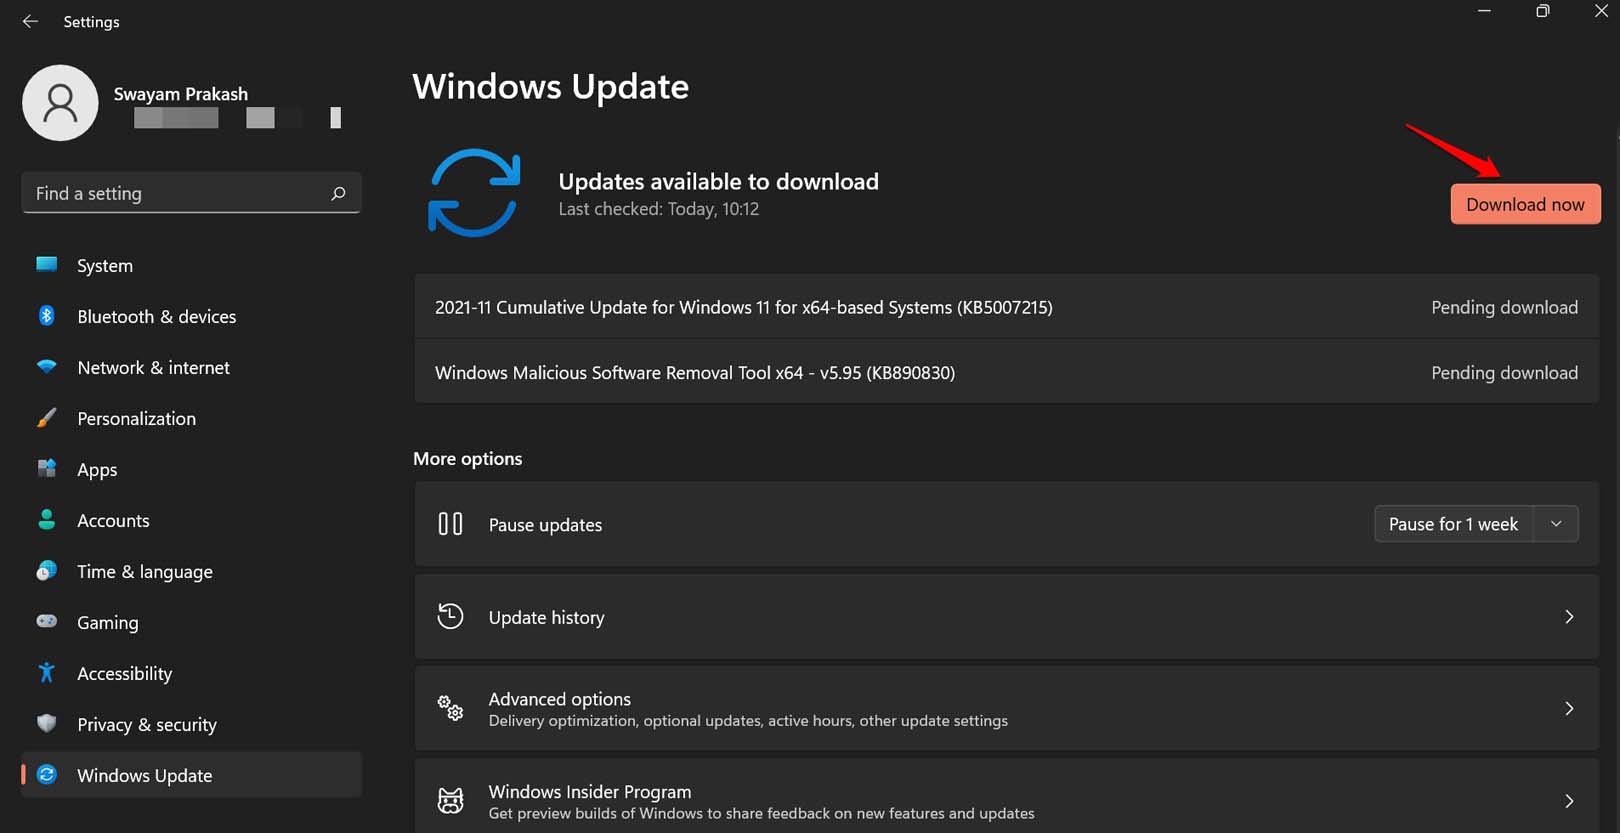
- If a new build of Windows 11 is available click on Download Now to grab it and start the installation process.

- After the installation is over and the PC reboots, check if the time has been updated.
Conclusion
Having the wrong time on your PC may look like a smaller issue. On the contrary, it is an indication of buggy system updates, disabled services, or the presence of corrupt system files. So, follow the tips mentioned in this guide and fix the issue of time not updating on Windows 11.
If you've any thoughts on How to Fix Windows 11 Time Not Updating?, then feel free to drop in below comment box. Also, please subscribe to our DigitBin YouTube channel for videos tutorials. Cheers!

