Is your Windows 11 PC getting slow? Is your PC not using all its RAM? Luckily, you are at the right place if you are facing these issues.
RAM, or Random Access Memory, is an important resource that allows you to multitask on your PC. Sometimes your Windows 11 PC cannot use all the RAM, which slows down your PC and brings other performance issues. Due to this problem, you won’t be able to access your Windows 11 PC to its full potential.
There are many ways to take care of this issue. Read this article to find out how you can increase usable RAM.
Fix 1: Disable RAM Virtualization.
Follow these steps to turn off RAM virtualization:
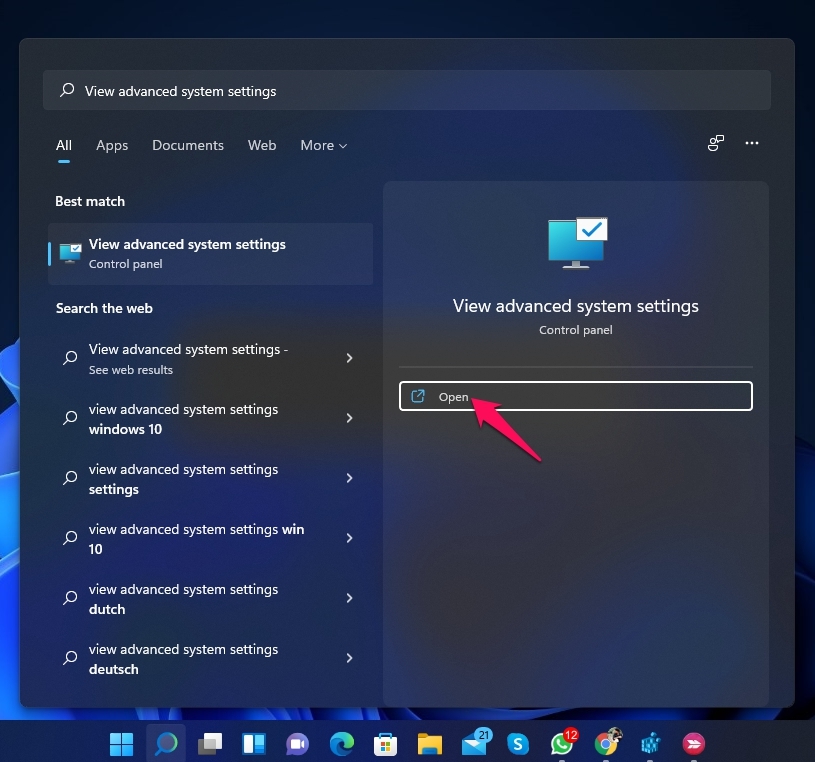
- Click on Start and search for View advanced system settings.

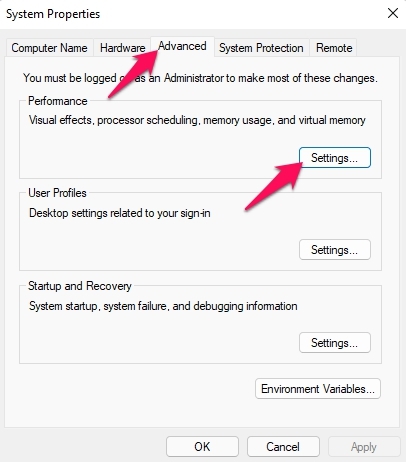
- Navigate to the Advanced section and click on Settings under Performance.

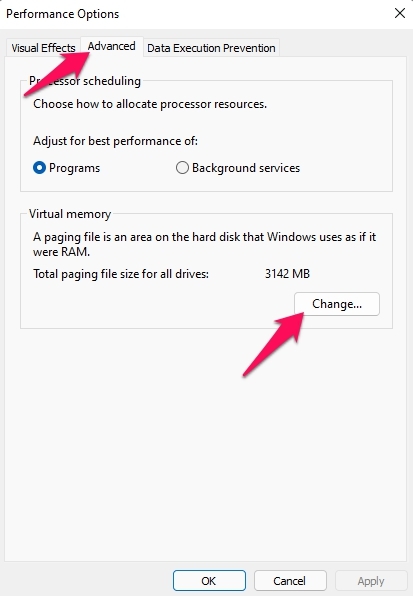
- The Performance Options window will appear. Navigate to the Advanced tab and click on Change.

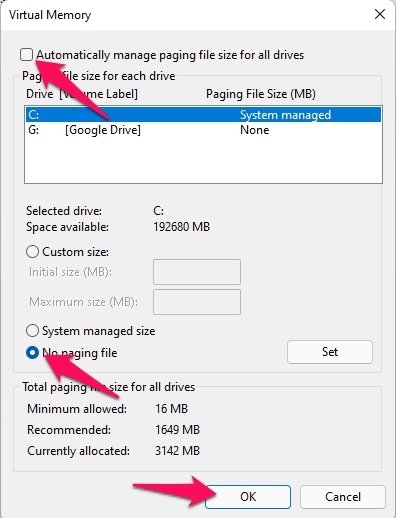
- Uncheck Automatically manage paging file size for all drives options, select each drive on the list, and click on the No paging file option.
- Click on Ok.

- Restart your PC and check if the problem is solved or not.
Fix 2: Modify Usable RAM
Modifying the usable amount of RAM when your system starts could help you solve the problem. Here is how you can change the usable RAM:
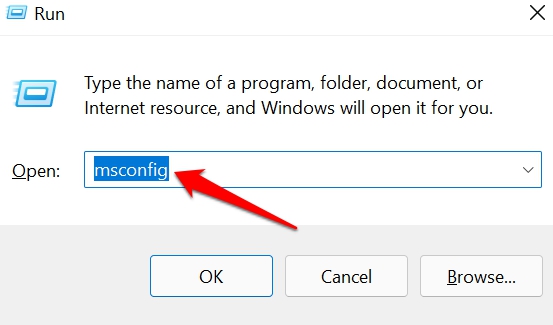
- Open Run by pressing Windows Key + R together.
- Type msconfig and press Enter.

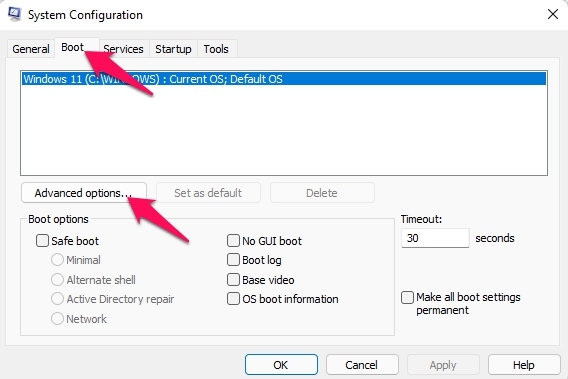
- Navigate to the Boot tab and click on Advanced Options.

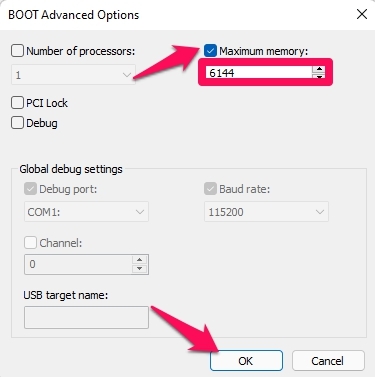
- Check the box beside Maximum Memory.
- Now enter how much RAM is installed on your PC in MB. Here, I have 6 GB of RAM, which means I have 6*1024=6144 MB of RAM.
- Click on Ok.

- Restart your computer and check if the problem is solved or not.
Fix 3: Check if RAM is Installed Properly
Check if the RAM is properly installed on your PC or not. This issue is sometimes caused by a faulty connection between the RAM and the motherboard. Contact an expert if you don’t know how to check your RAM.
Fix 4: Repair the Registry
Here is how you can repair registries to increase usable RAM:
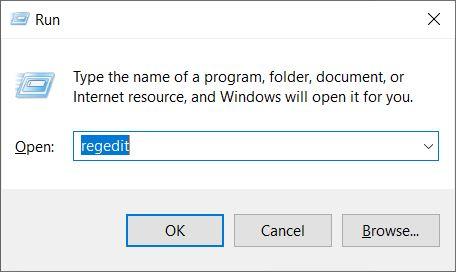
- Press Windows Key + R to open Run.
- Type regedit and press Enter.

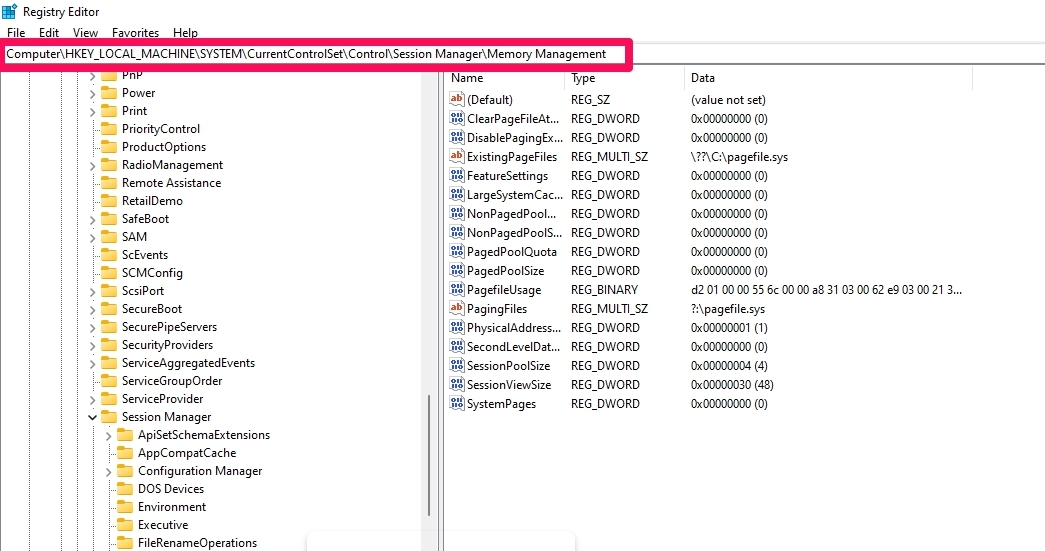
- Follow this path once you open the Registry Editor.
HKEY_LOCAL_MACHINE\SYSTEM\CurrentControlSet\Control\Session Manager\Memory Management

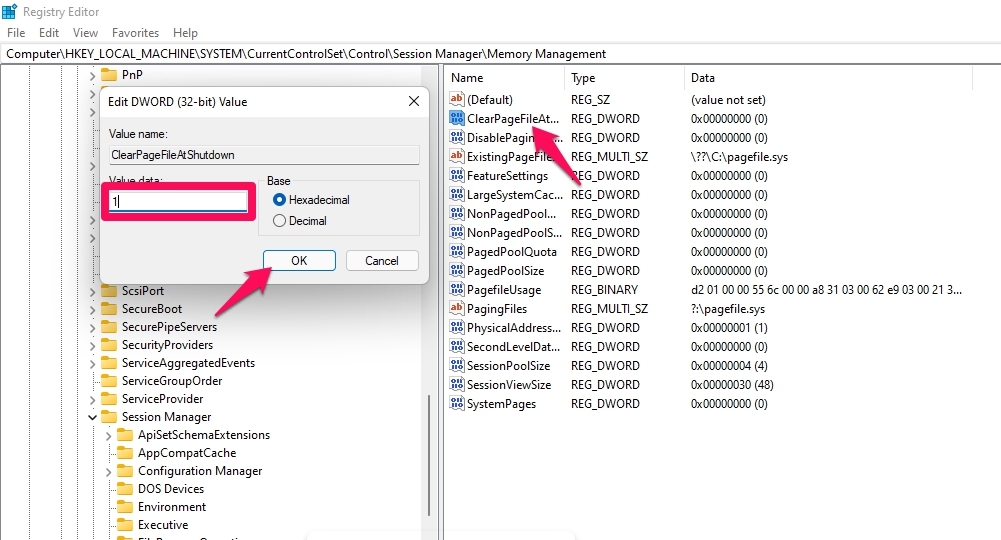
- Double click on ClearPageFileAtShutdown in the right pane to open its properties.
- Set the Value Data to 1 and click Ok.

- Restart your computer and check if the problem is solved or not.
Fix 5: Update the BIOS.
Outdated BIOS settings can also be responsible for this error. Update your BIOS and check if the issue is resolved or not. Here is how you can do it:
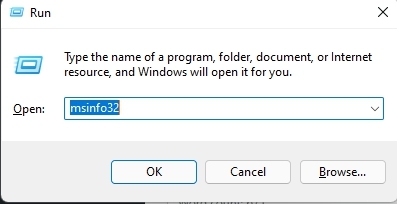
- Press Windows key + R together to open the Run Dialogue Box.
- Type msinfo and click Ok.

- Scroll down and look at your BIOS Version/Date to find out who made it.

- Visit your BIOS manufacturer’s website to download the latest BIOS updates and install them on your Windows 11 PC.
Fix 6: Run Memory Diagnostics
By running memory diagnostics, it will be easy for you to detect memory corruption that could decrease usable RAM. Here is how you can run memory diagnostics:
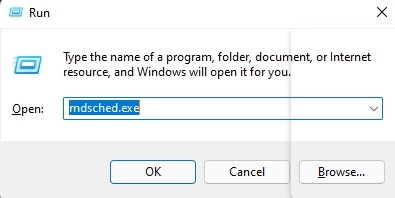
- Press Windows key + R to open the Run Dialogue Box.
- Type mdsched.exe and press Enter.

- Upon pressing Enter, the Windows memory diagnostic popup will open. There will be two options present:
- Press Restart now and check for problems(recommended) if you want to restart and check the system now.
- Press Check what problems the next time I start my computer if you want to perform the procedure the next time you start your PC.

Fix 7: Determine whether the installed RAM is compatible with your motherboard.
You can also face this issue if the installed RAM isn’t compatible with your motherboard. If the RAM isn’t compatible, your PC won’t be able to recognize the RAM and use it. To fix this problem, check the motherboard manual and see if the current memory module is supported.
Fix 8: Reset your PC
If none of the above-mentioned troubleshooting methods were able to solve your problem, reset your PC and check if your problem is solved or not. Here is how you can reset your PC:
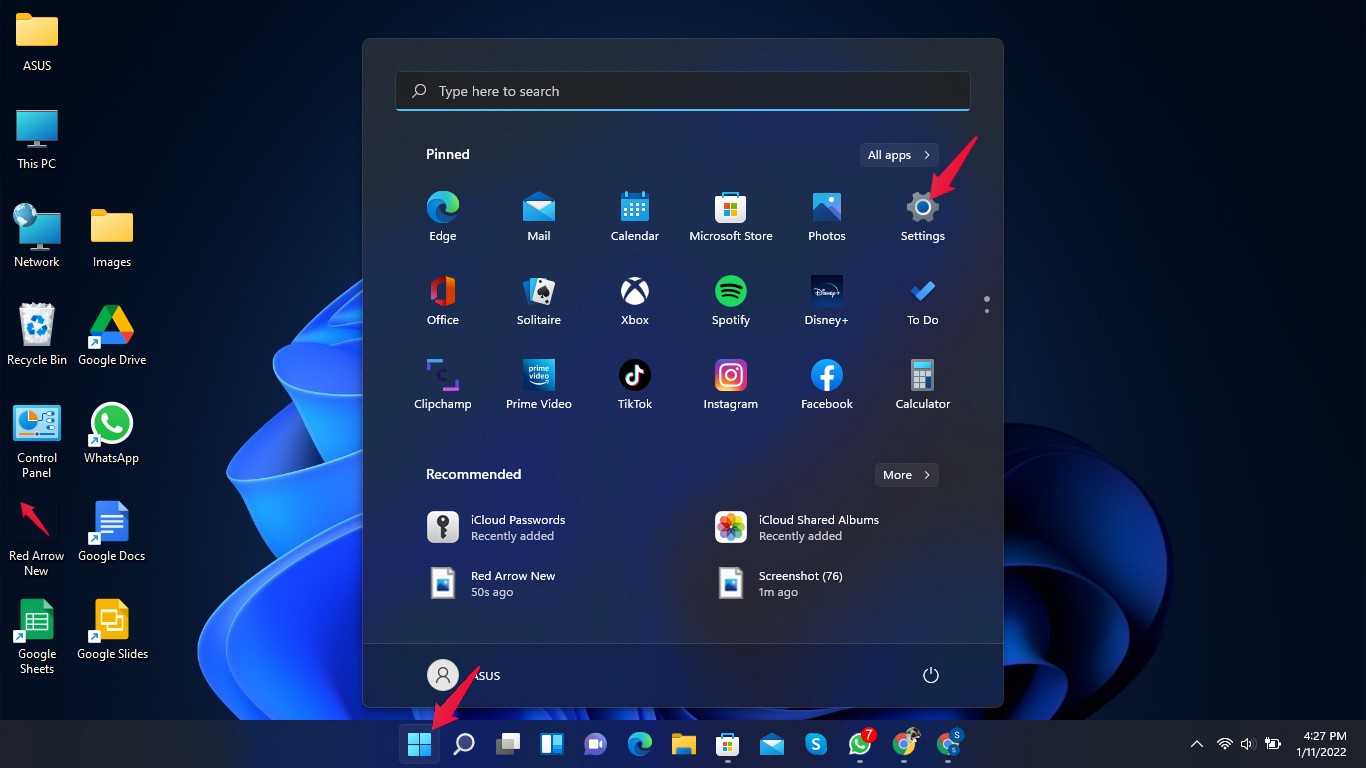
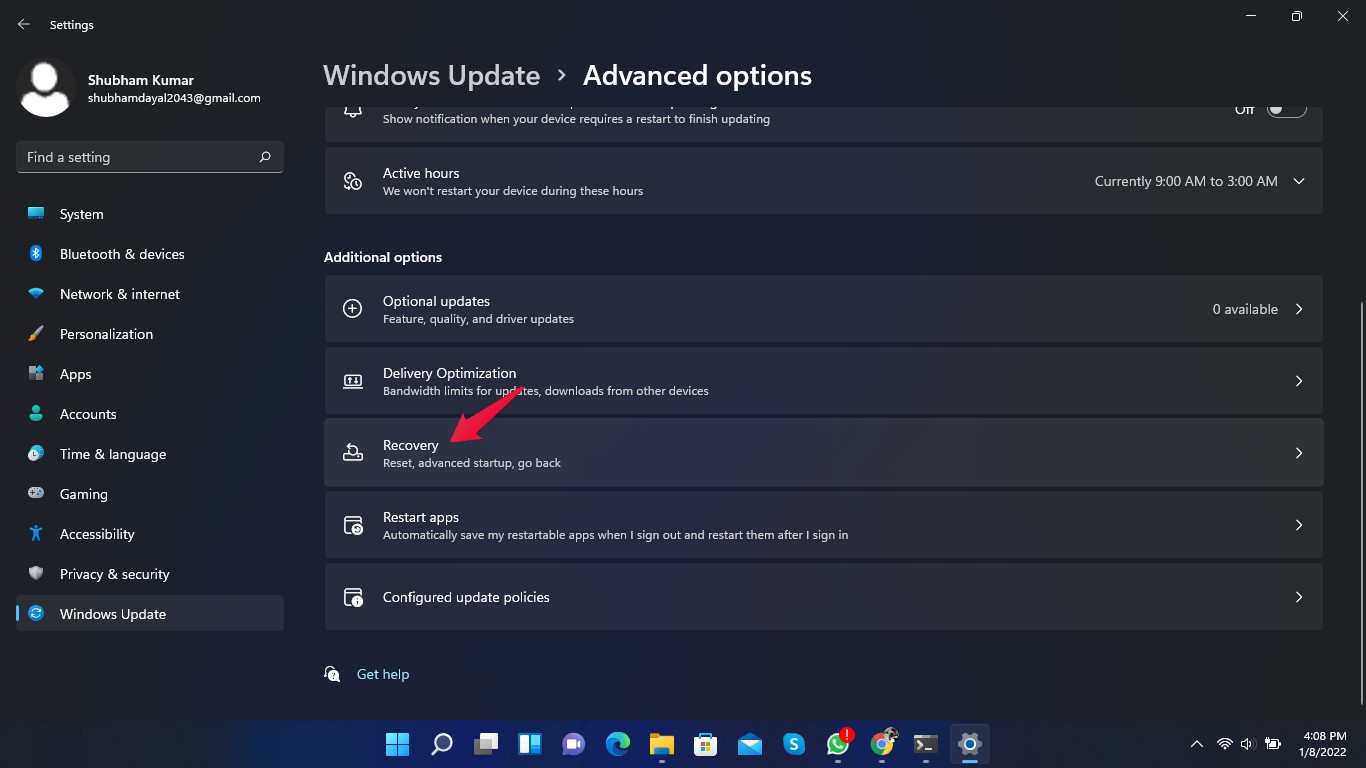
- Click on Start and go to Settings.

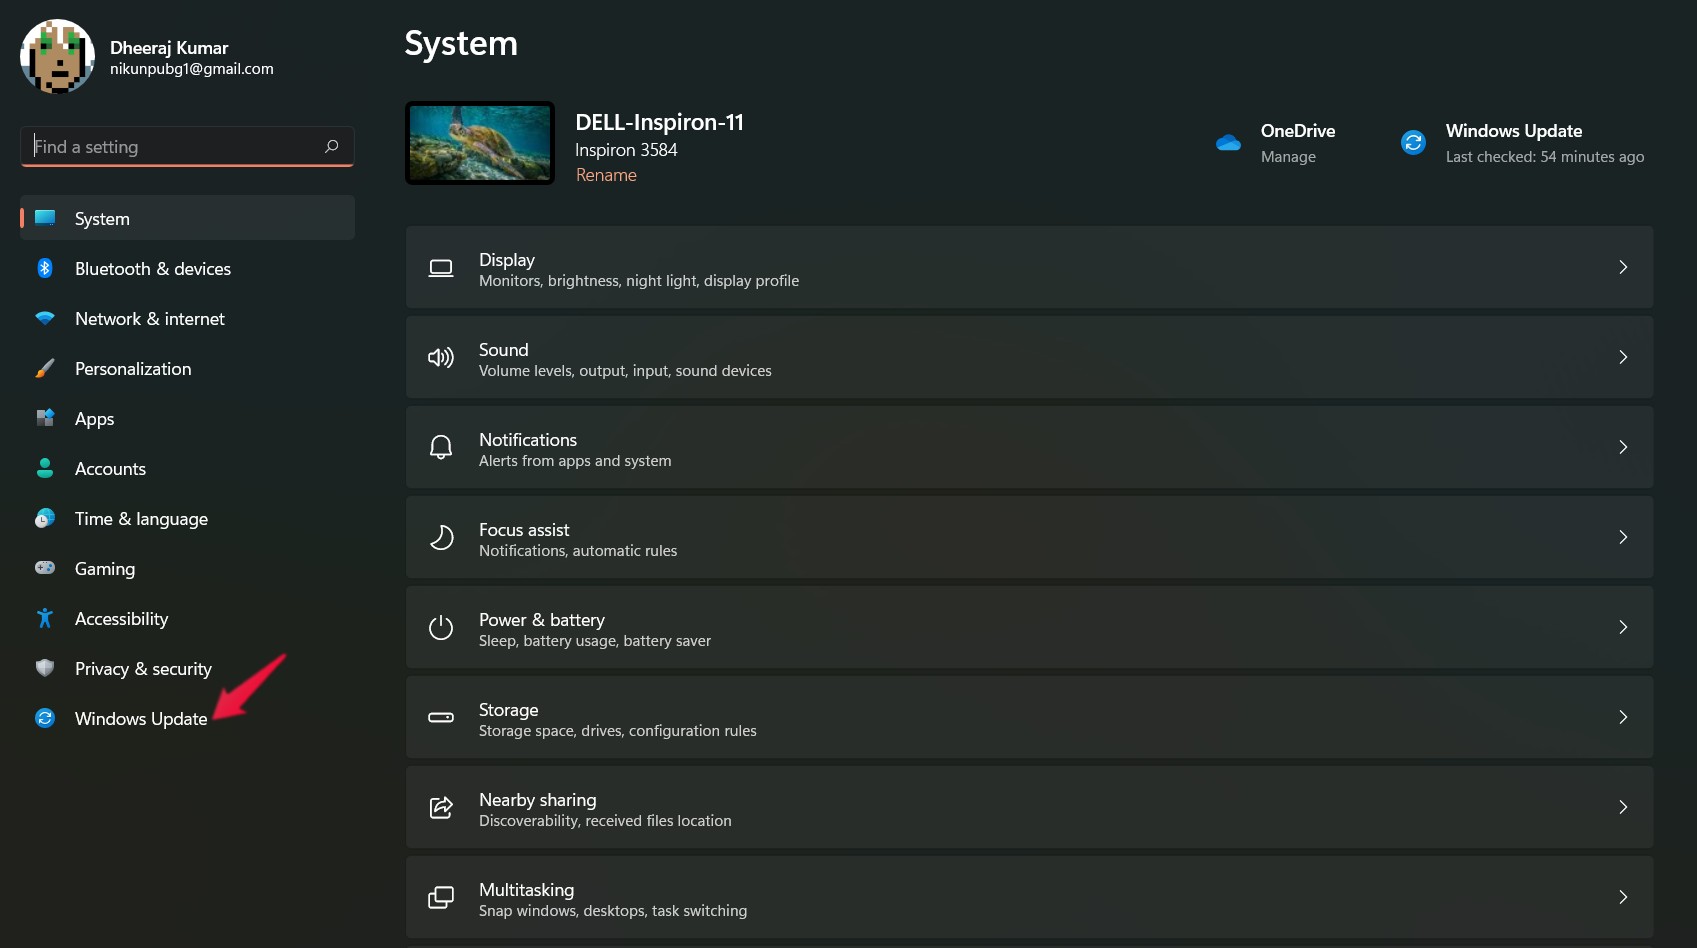
- Click on Windows Update.

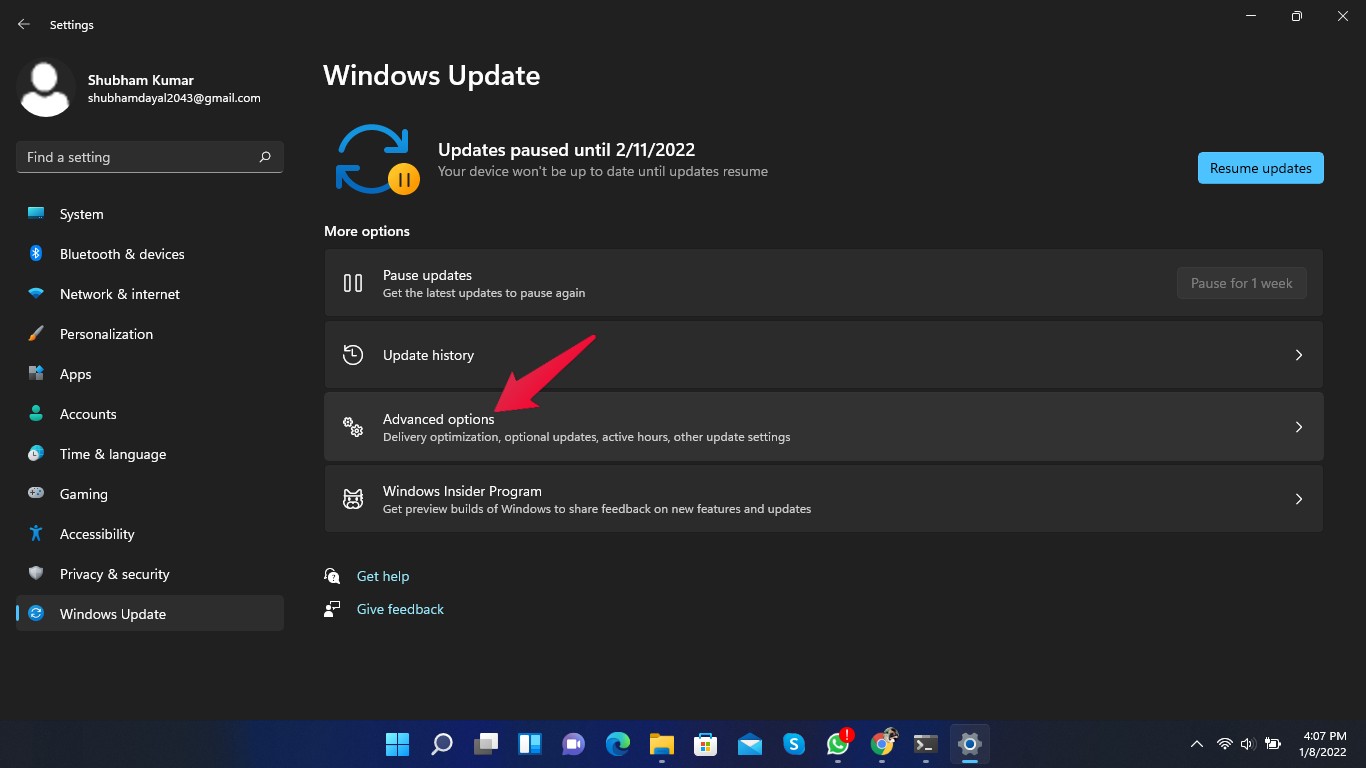
- Click on Advanced Options.

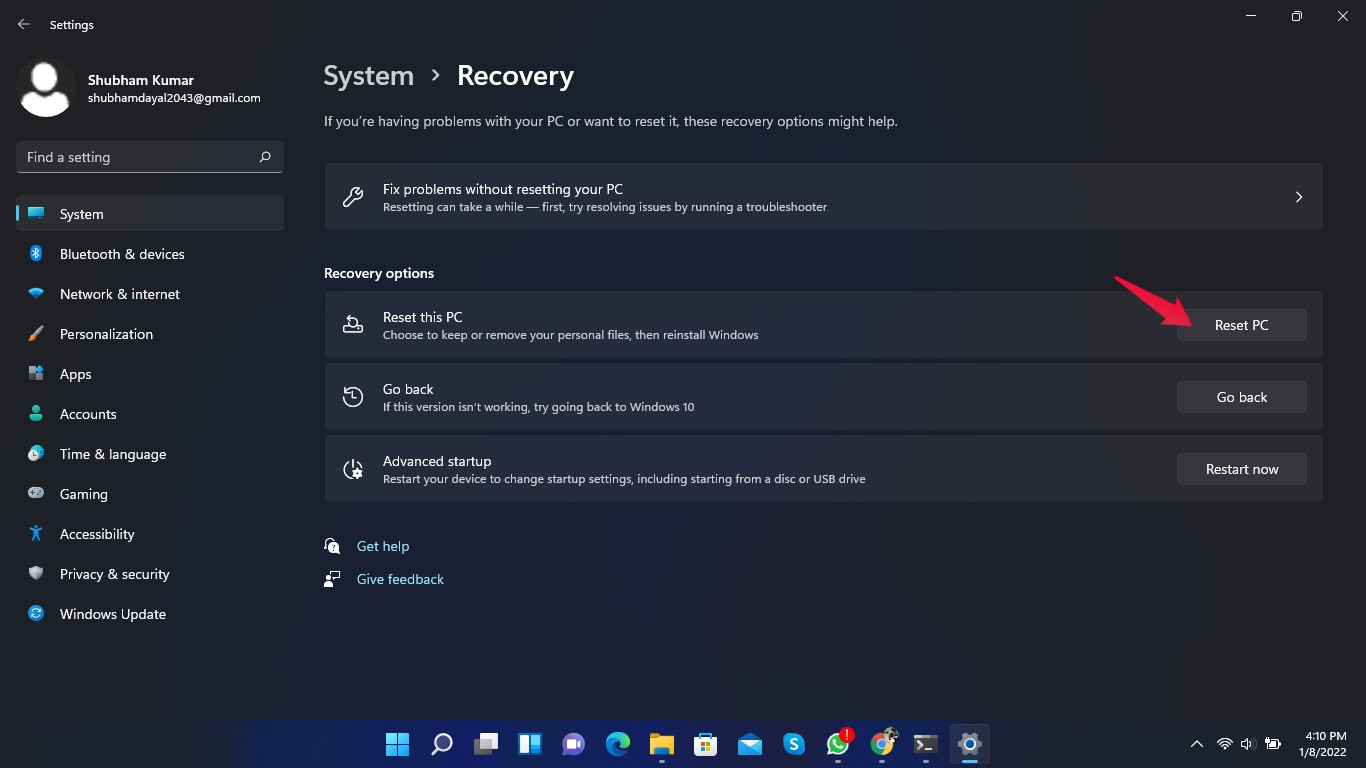
- Scroll down and click on Recovery.

- Click on Reset PC and follow the instructions on the screen.

Wrapping Up
This was how you can increase usable RAM on your Windows 11 PC. Follow the troubleshooting methods mentioned above to solve the problem.
We hope you were able to fix Windows 11 by not using all the RAM. Still, if you have any problems, feel free to contact us in the comments section.
If you've any thoughts on Windows 11 Not Using All RAM: How to Increase Usable RAM?, then feel free to drop in below comment box. Also, please subscribe to our DigitBin YouTube channel for videos tutorials. Cheers!
