Using Windows Installation Assistant is one of the most straightforward ways to update your Windows PC. It is a Windows utility tool to upgrade your PC to the latest available version for your Windows device. Microsoft launched Windows 11 on October 5, 2021, and offered three official ways to Update your PC running on Windows 10 to Windows 11, including the Windows Installation Assistant. The others are Windows 11 Media Creation Tool and Windows 11 Disk Image (ISO) Download.
If your PC is already running on Windows 11, then the Windows Installation Assistant will update your device to the latest available Windows 11 build. This way, you will update your Windows PC to the latest version.
To help you out, in this guide, we will delve into the detailed procedure of updating your PC to Windows 11, the latest available version using the installation assistant tool. But before you proceed towards it, let’s check out the minimum requirements specified by Microsoft to run Microsoft Assistant utility on your Windows PC and the system requirements your PC should meet to update to Windows 11.
Minimum requirements to Run Windows Installation Assistant
Before you proceed to Update Windows using the Windows Installation Assistant tool, you should know that it is not compatible with ARM64 devices. Besides this, your device should meet the following requirements as well.
- You should have a Windows 10 license.
- Your PC should at least be running on Windows 10, version 2004 or higher.
- The PC should have at least 9 GB of free disk space.
- Your PC should meet all the Windows 11 device specifications for upgrade requirements and supported features.
Minimum System Requirements to Update to Windows 11
Moving further, below are the minimum system requirements that your PC should meet to update from Windows 10 to Windows 11 successfully.
- Processor: 1 gigahertz (GHz) or faster with 2 or more cores on a compatible 64-bit processor or System on a Chip (SoC).
- Memory: 4 GB RAM.
- Storage: 64 GB or larger storage device.
- System firmware: UEFI, Secure Boot capable.
- TPM: Trusted Platform Module (TPM) version 2.0.
- Graphics card: DirectX 12 compatible graphics/WDDM 2.x
- Display: Greater than 9 inches with HD resolution (720p).
You can download and run the PC Health Checker utility by Microsoft to ensure that your PC is compatible with the Windows 11 version.
Steps to update your Windows using the Installation Assistant program
Now that your PC fulfills the minimum requirements required to update your Windows PC from Windows 10 to Windows 11, let’s go through the step-by-step process of updating your Windows PC using the Windows Installation Assistant tool.
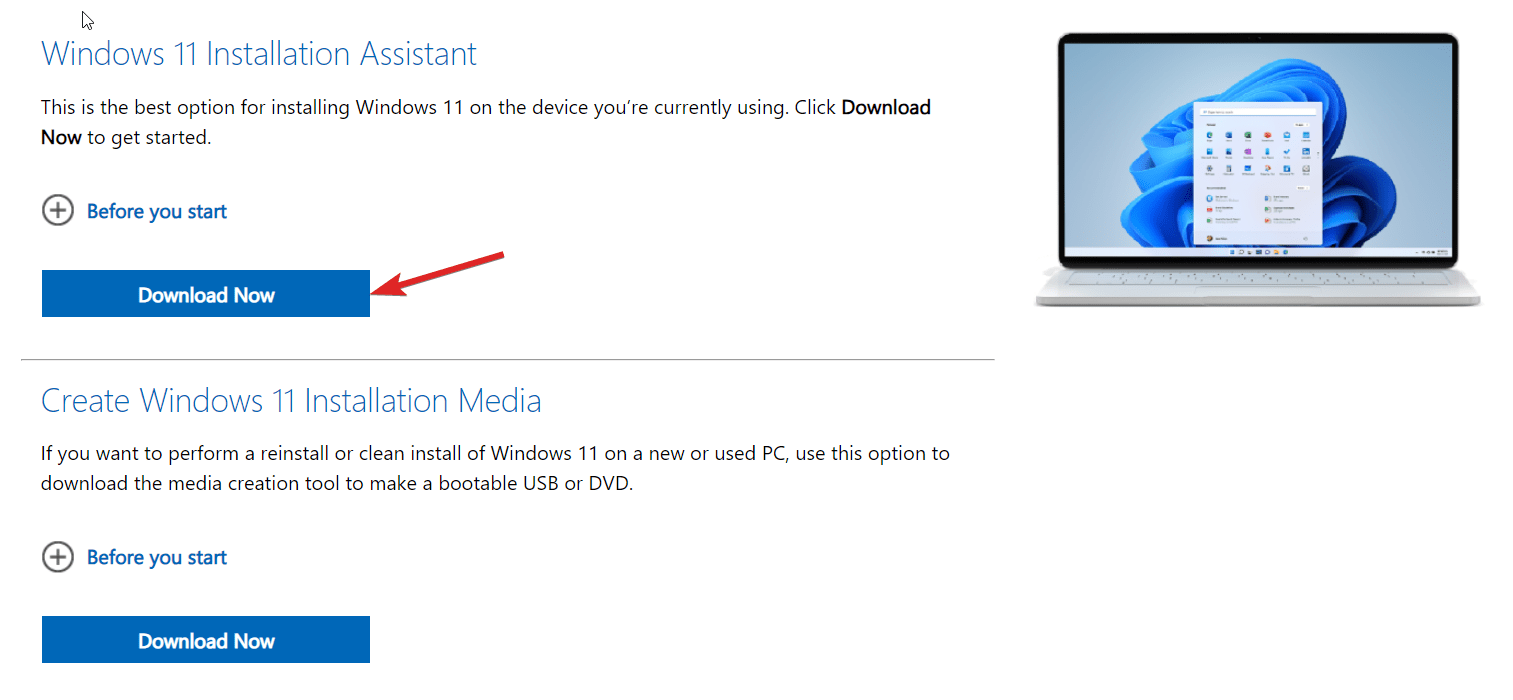
- First of all, you need to visit the official download page of the Windows 11 operating system using your preferred web browser and hit the Download Now button, located under the Windows 11 Installation Assistant section.

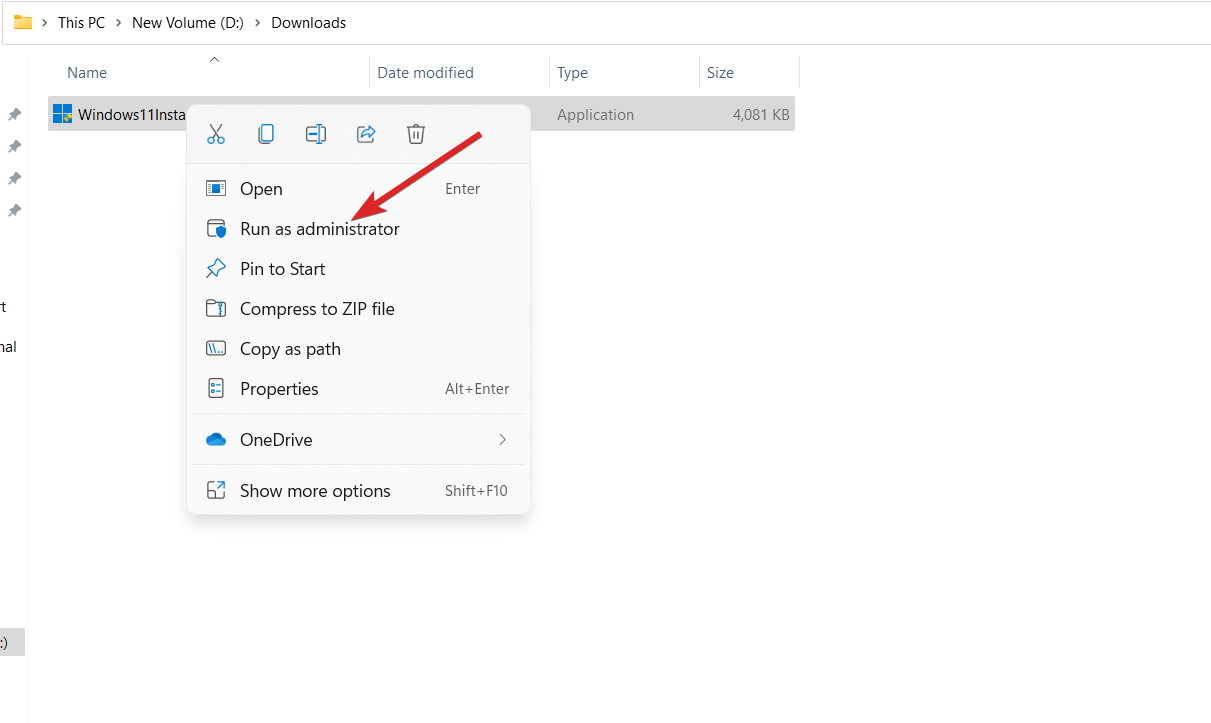
- Wait for the Windows 11 Installation assistant to download successfully, and then navigate to its download location in the File Explorer window.
- Right-click the executable program and choose Run as administrator option from the context menu to run the Installation Assistant with administrative privileges.

- Click the Yes button on the User Action Control prompt to confirm the action.
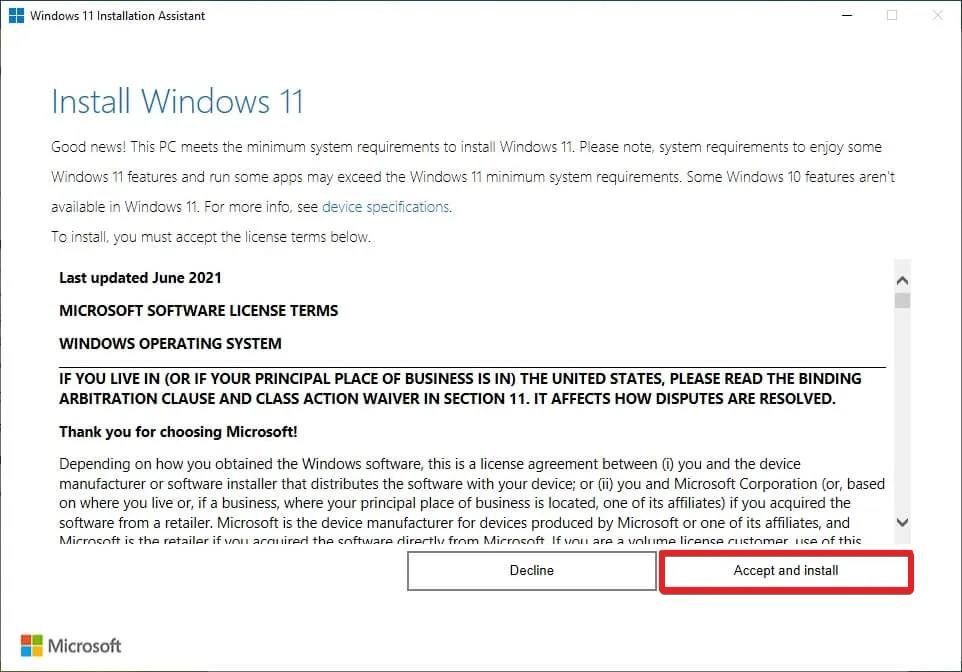
- Let the Windows 11 Installer Assistant check for the minimum requirements and then present you with the Microsoft Software License Terms window. Scroll down the license terms and press the Accept and install button on the bottom right.

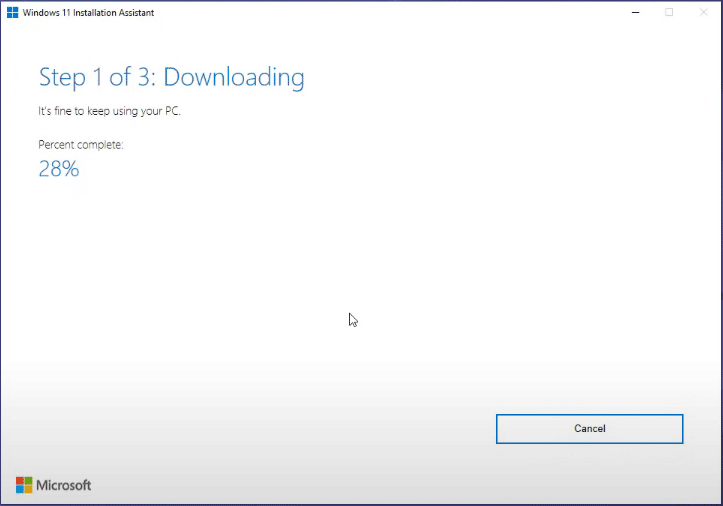
- Now, sit back and wait for the installation assistant to download and store all the related files on your hard disk drive. The time that this step will take completely depends on the strength of your internet. You can visualize the status of the Windows 11 download in the progress bar. During this time, you can continue with your work as the download is in progress in the background.

- After the Installation Assistant finishes downloading all the files, it will take a short time to verify the download and installation of the Windows operating assistant.
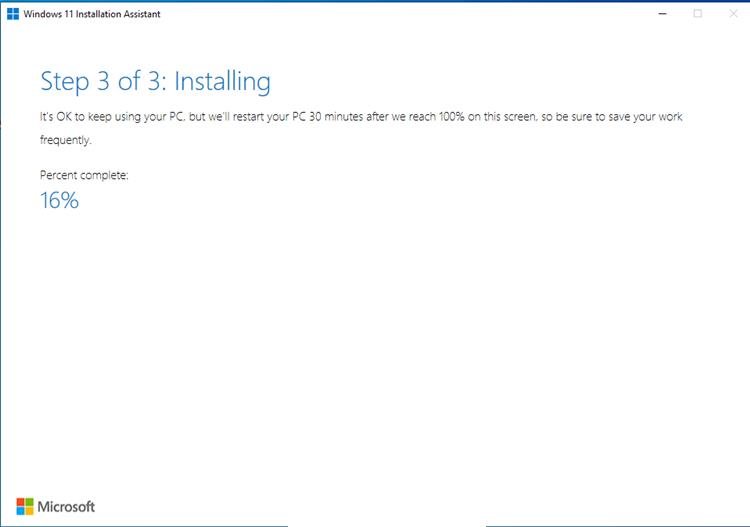
- Once the verification process of the downloaded files is completed, the Windows 11 installation process will begin right after. At this time, you should save all your work to prevent loss of data due to restart.

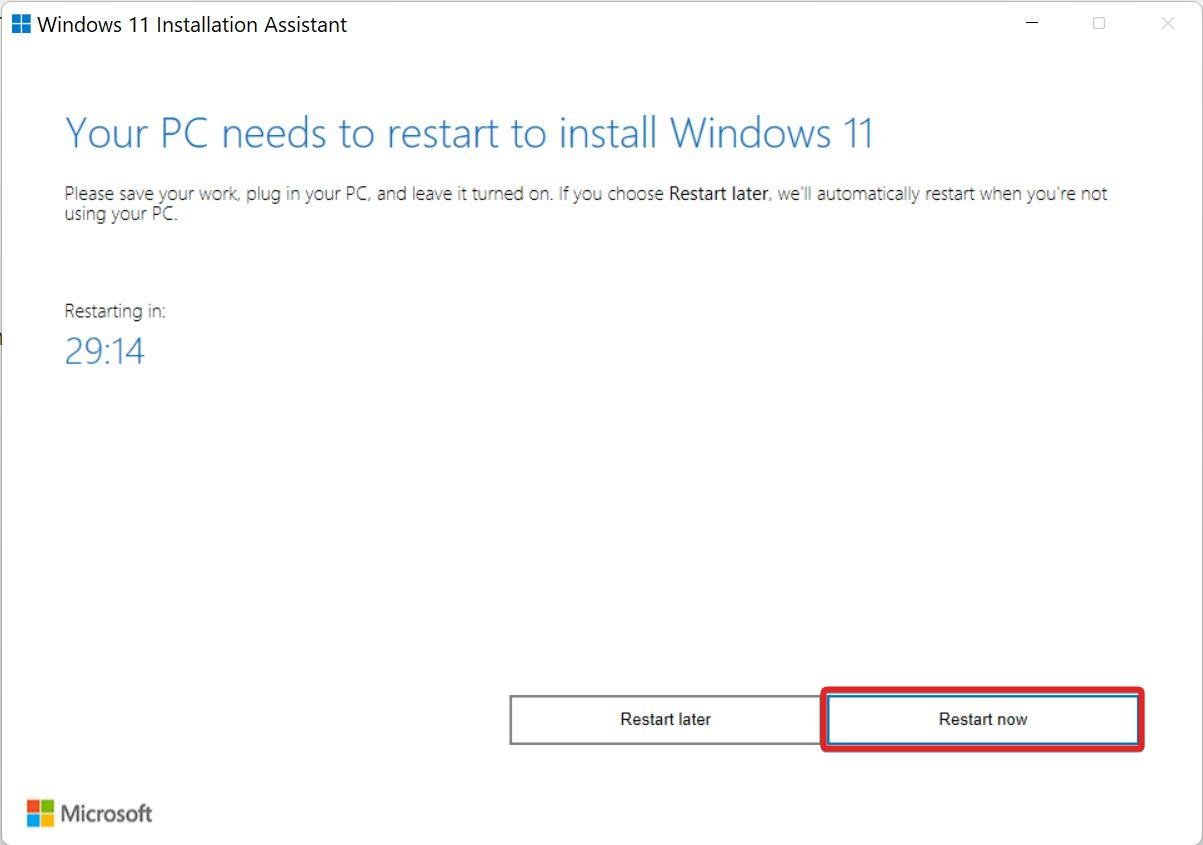
- After installation is halfway through, you will be prompted to restart your Windows PC to complete the installation procedure. You can hit the Restart Now button to reboot your PC right away. You can click the Restart Later button to let your PC restart when you are not doing any work.

Your Windows PC will restart several times unless the update procedure is not 100% complete. Eventually, you will be presented with the lock screen. Provide your login credentials to access your PC and let Windows complete the setup process of Windows 11. As soon as the setup process is completed, you will have successfully updated your PC to Windows 11.
Wrapping Up
That’s all in this comprehensive guide about updating your Windows PC using the Windows Installation Assistant tool. Thankfully, updating your Windows PC using the installation assistant does not delete your personal data or remove the apps installed on your PC. However, we advise you to backup your data before beginning the procedure to avoid losing your data if something goes wrong during the update process.
In case you have any queries or need our assistance, feel free to reach out to us in the comments section.
If you've any thoughts on How to Update Windows with Installation Assistant?, then feel free to drop in below comment box. Also, please subscribe to our DigitBin YouTube channel for videos tutorials. Cheers!

