Prefer the older macOS version? Simply uninstall the update, and you’re good to go! Keeping your MacBook up to date is important for its best performance and security. But sometimes, you might want to stick with an older macOS version. In those situations, you’ll need to uninstall the recent update on your MacBook. Wondering how? This guide will show you. We’ll cover easy methods like using Terminal or removing updates from the App Store or library. Let’s roll in and explore how to manage updates effectively.
Preliminary Steps
Uninstalling updates on your MacBook carries a potential risk to your valuable data, although data loss rarely occurs due to this reason. To ensure data safety when uninstalling an update, it’s worth creating a backup of your essential files and documents before proceeding so you can restore your data in case of any unexpected data loss.
Here’s how to create a Time Machine backup on your Mac:
- Plug in an external drive to your MacBook that has sufficient space for your backup.
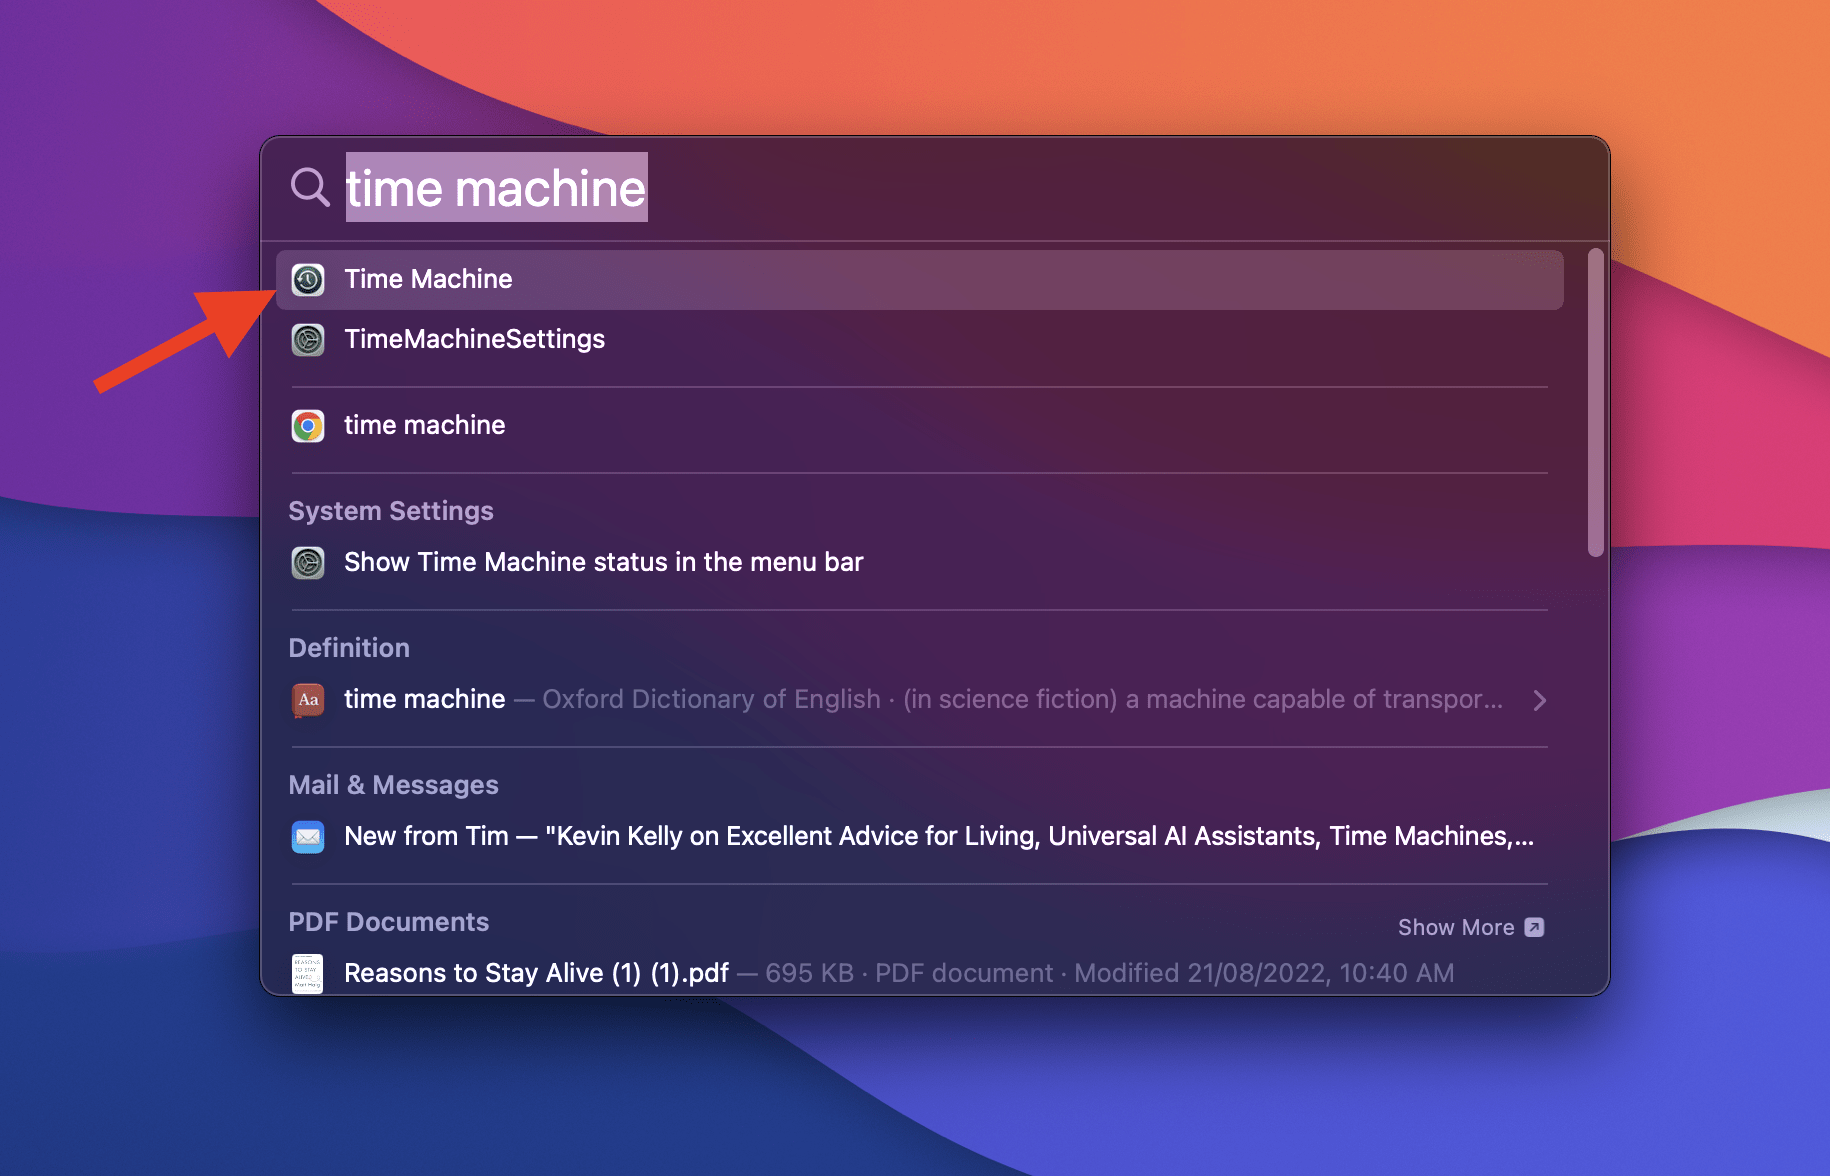
- Access Time Machine through System Settings or the Time Machine icon in the menu bar. You can also use Spotlight to look up Time Machine.

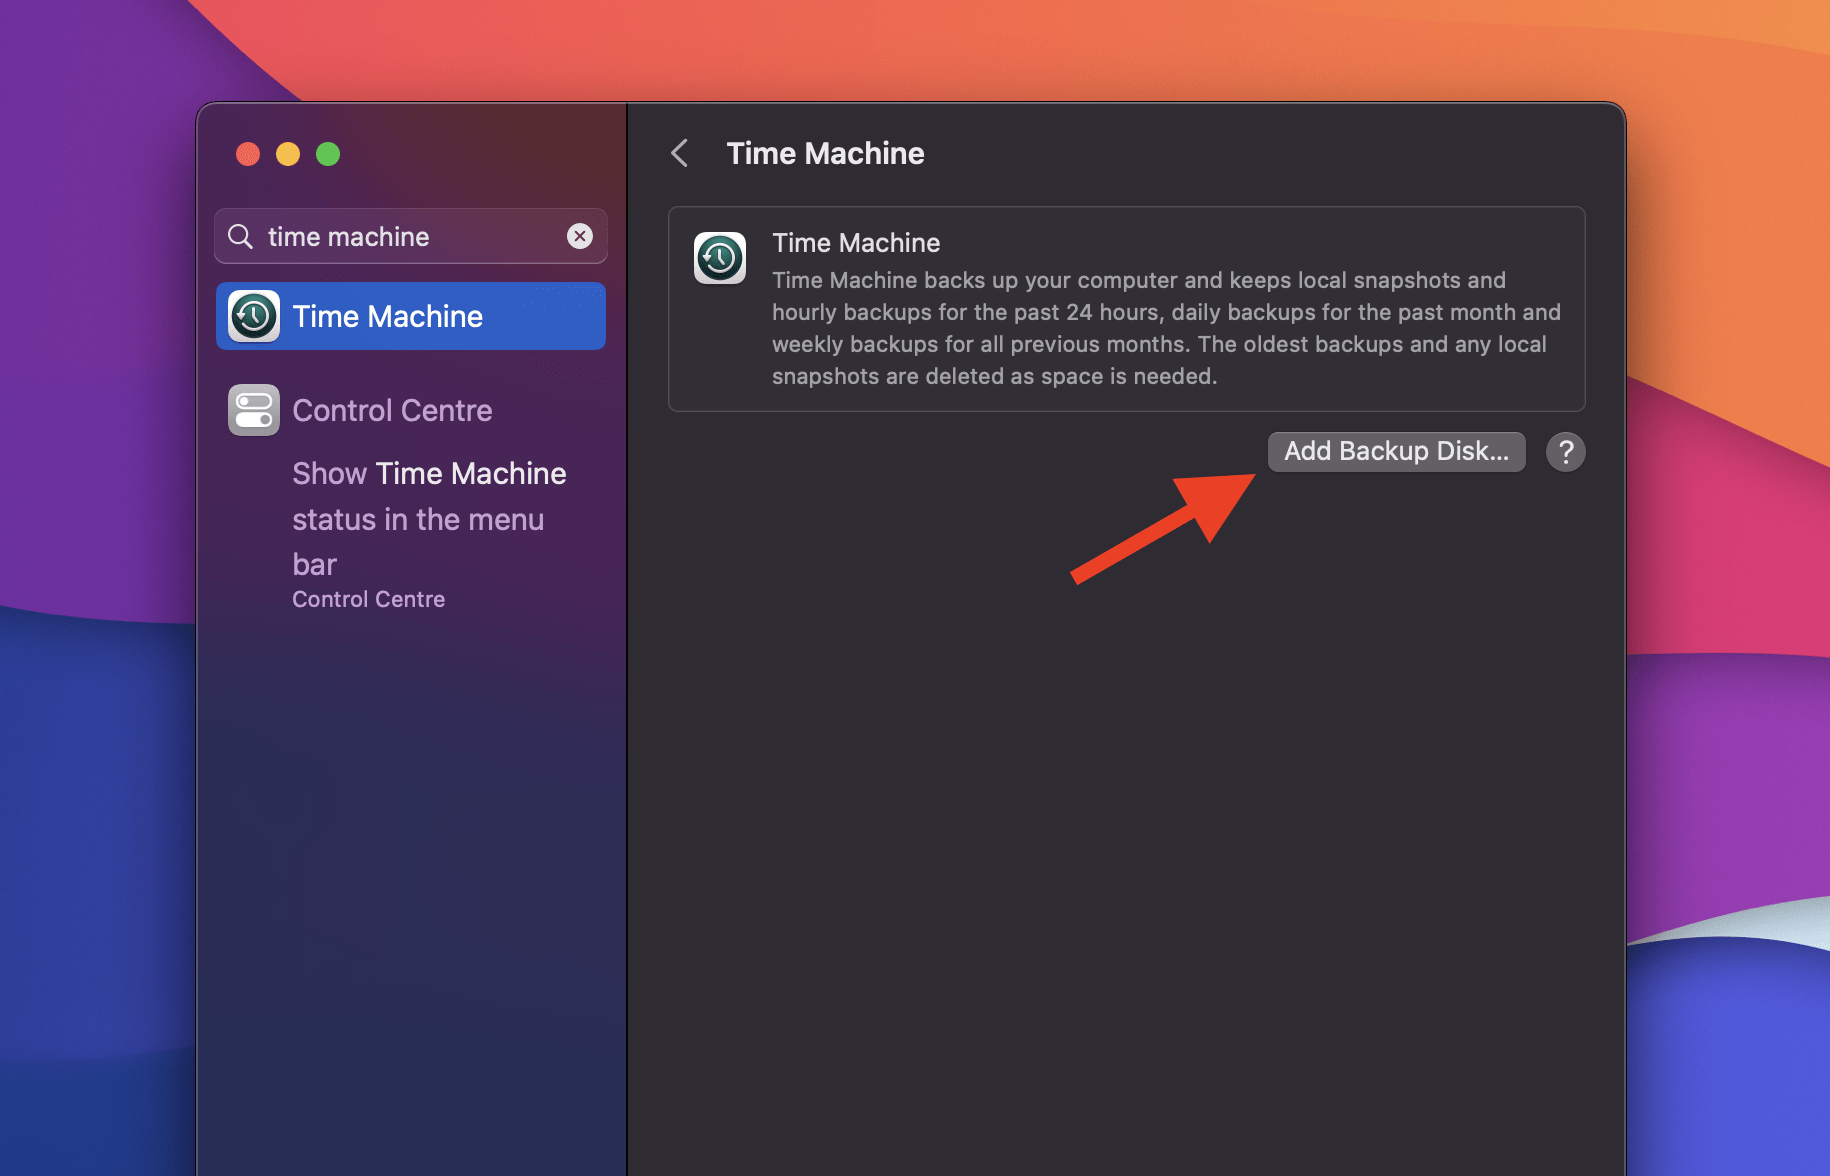
- Choose the “Add Backup Disk” option to add the external drive you want to use for the backup.

- Select the desired disk and click “Use Disk” to confirm your selection. As you do that, the backup creation process will begin. Once your data is backed up in your external drive, you can move forward with uninstalling updates on your Mac.
With these preliminary steps, your important data will be secure, and you’ll be ready to proceed with the update uninstallation process.
What to Know Before Uninstalling a Recent Update on Your MacBook?
When considering the uninstallation of a recent update on your MacBook, be sure never to do it when a related application is in use. For example, don’t uninstall the update during its setup or installation procedures. Interrupting this process can lead to instability or corruption.
Moreover, you can also remove the macOS software update app when it’s not actively in use. Deleting this app won’t impact the macOS system since they have separate files. Also, removing the macOS software update app frees up space without affecting the operating system’s integrity.
How to Uninstall Software Update on Your MacBook?
When your Mac updates, it stores update files in a Library folder and deletes them after installation. Sometimes, if updates fail, files might be left behind. Here’s how to check:
- Open Finder and click the Go menu.
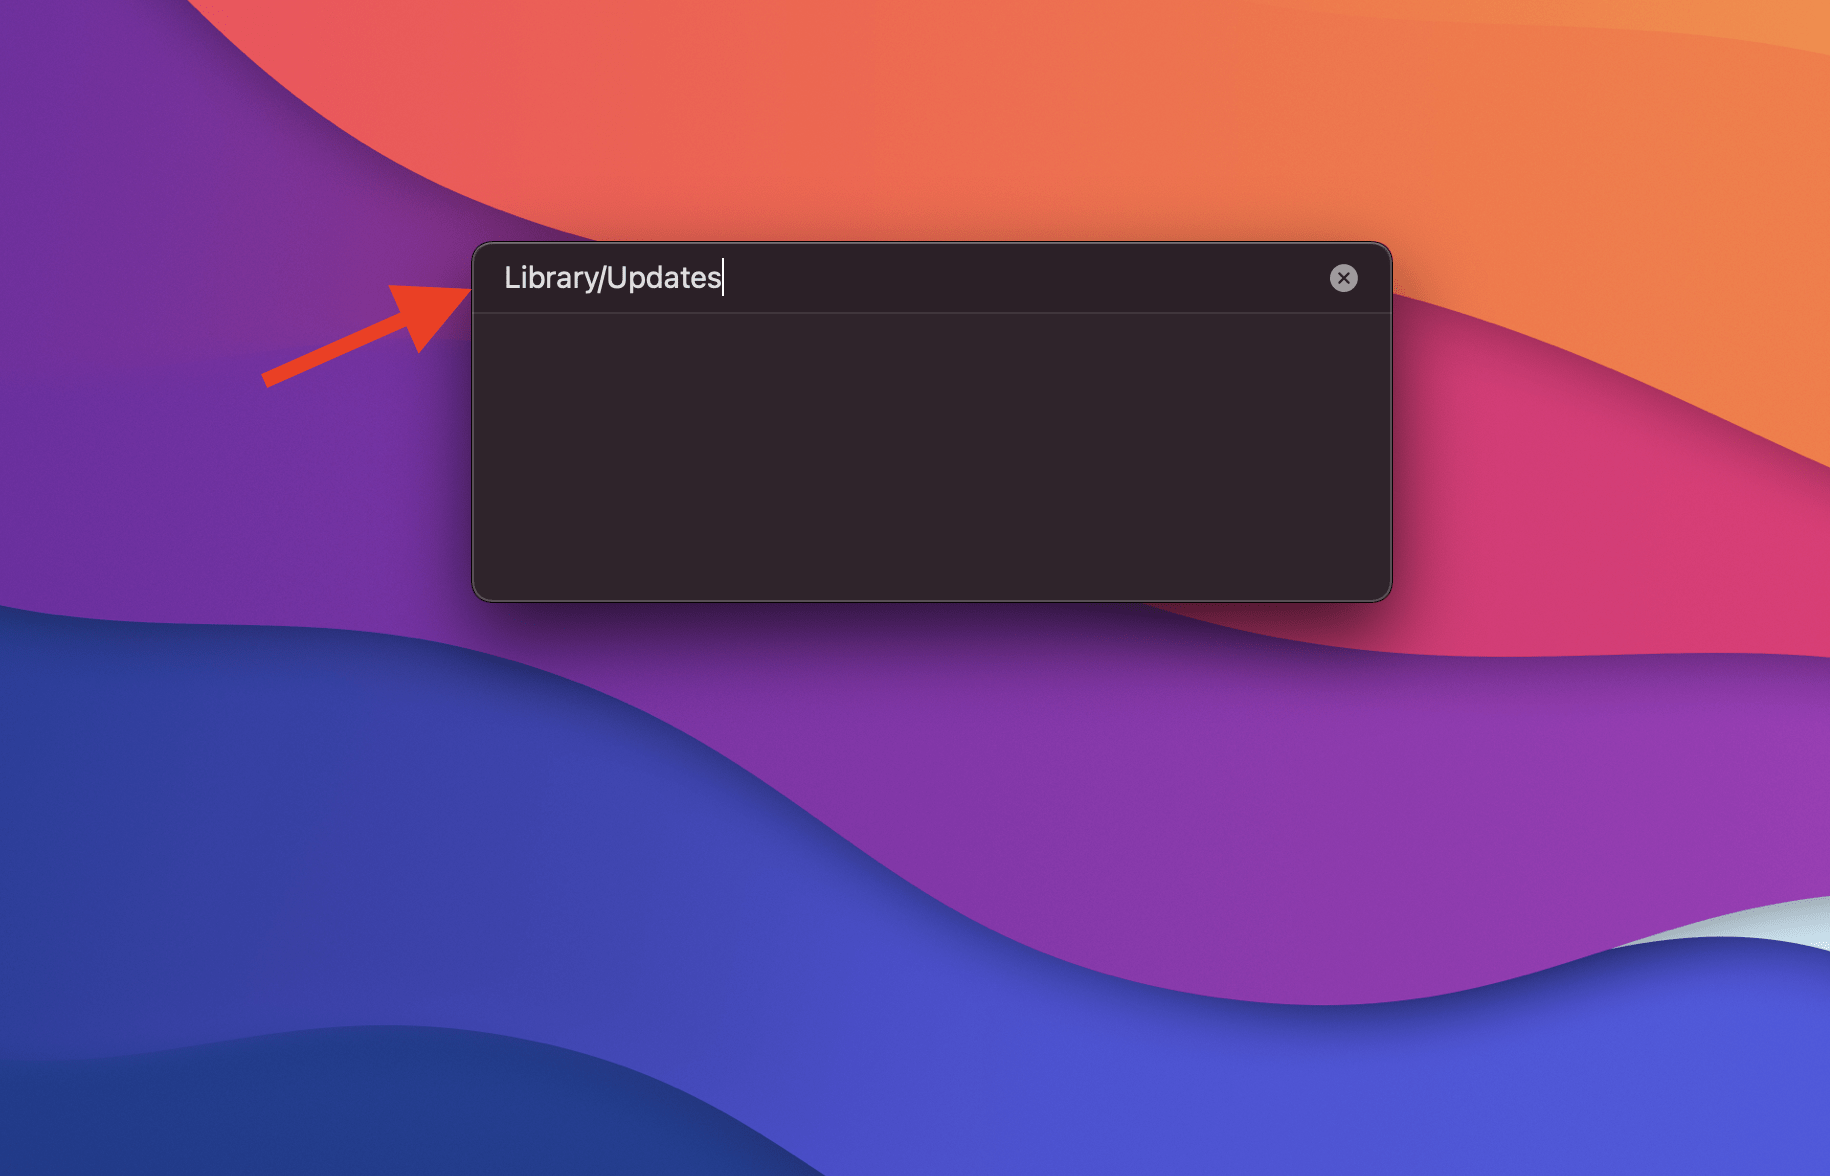
- Choose “Go to Folder” and enter “/Library/Updates.”

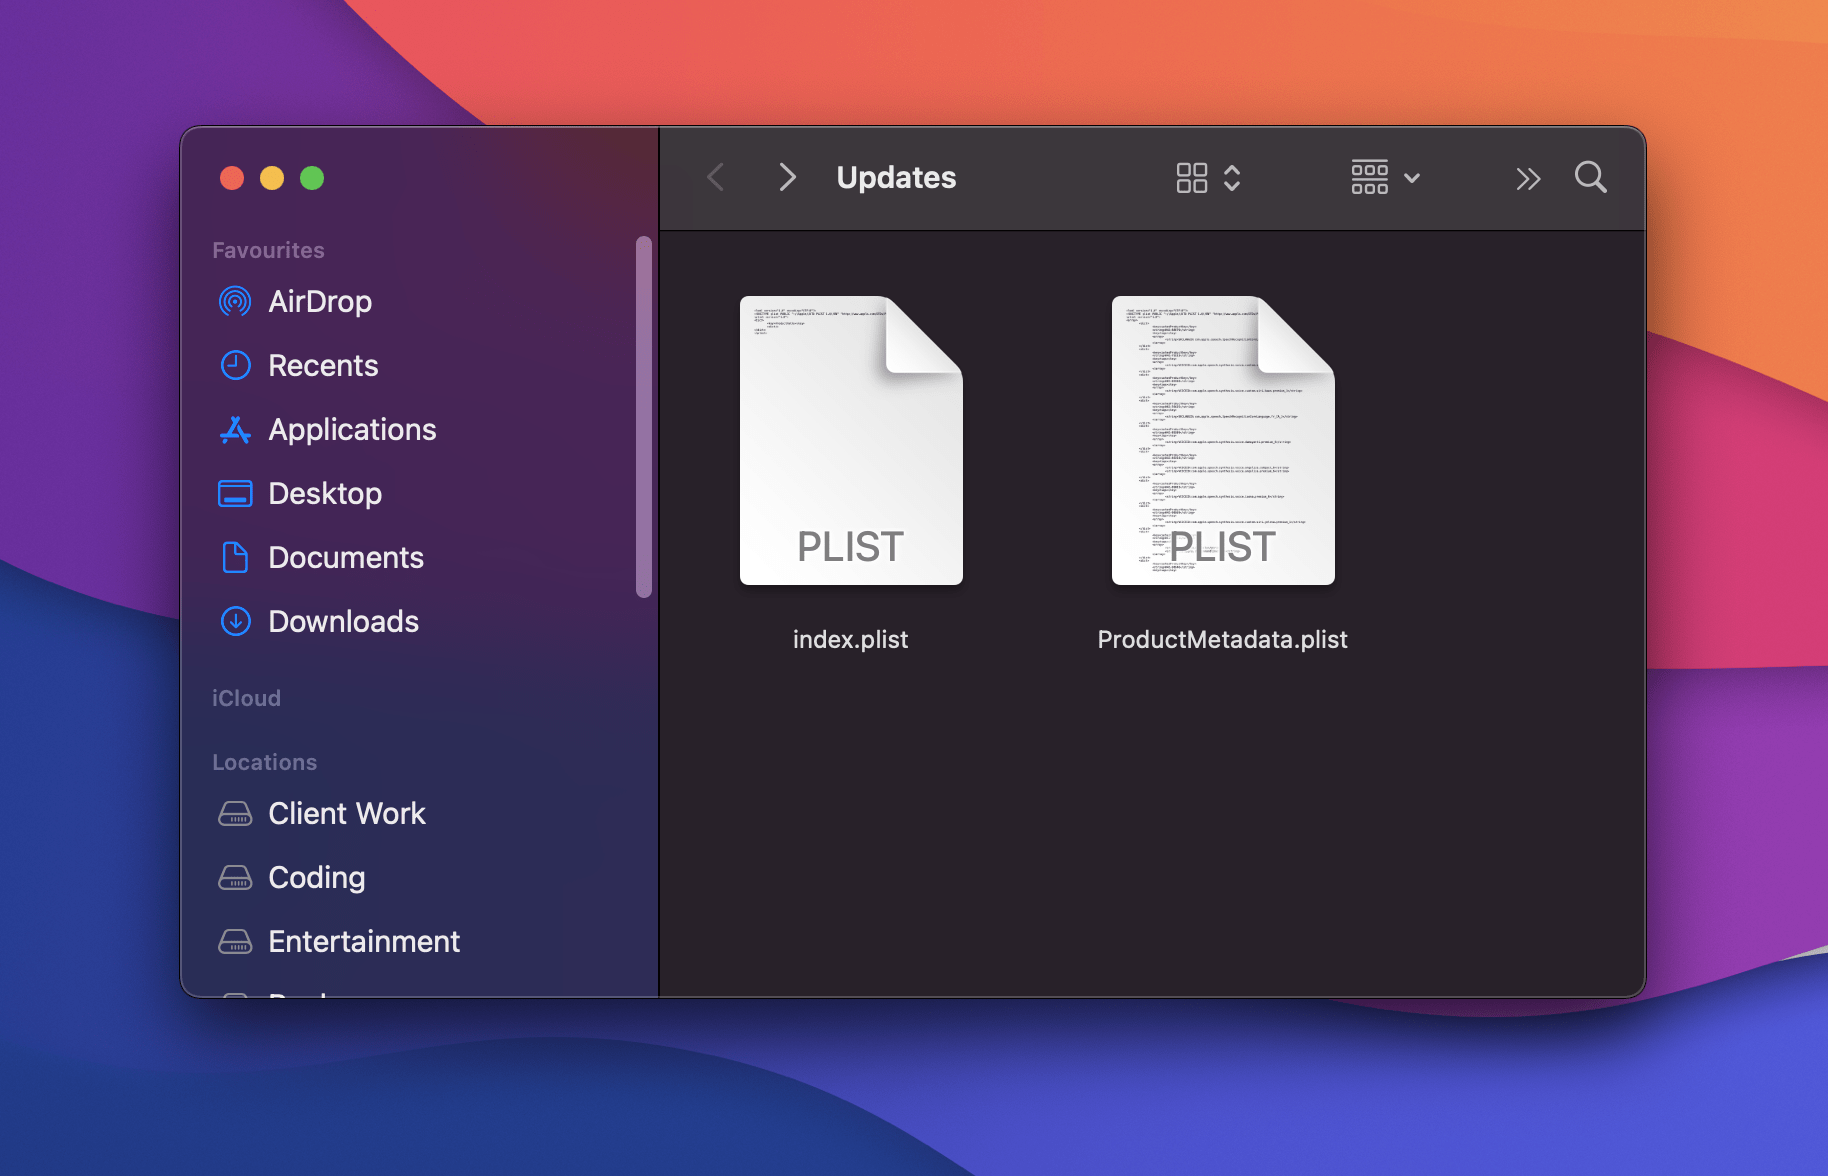
- Look for installer packages or non-text files in that folder.

If you only see plist text files, no action is needed. If there are other files, you can delete them to free up space. Deleting these files is safe, but they might be protected by System Integrity Protection (SIP), so you’ll need to disable SIP first. Be cautious and only proceed if you’re comfortable with Terminal.
To turn off SIP, first, you’ll need to restart your Mac in recovery mode.
Recovery Mode for Intel-Based macOS
If your MacBook runs off an Intel processor, here’s how to boot it into recovery mode:
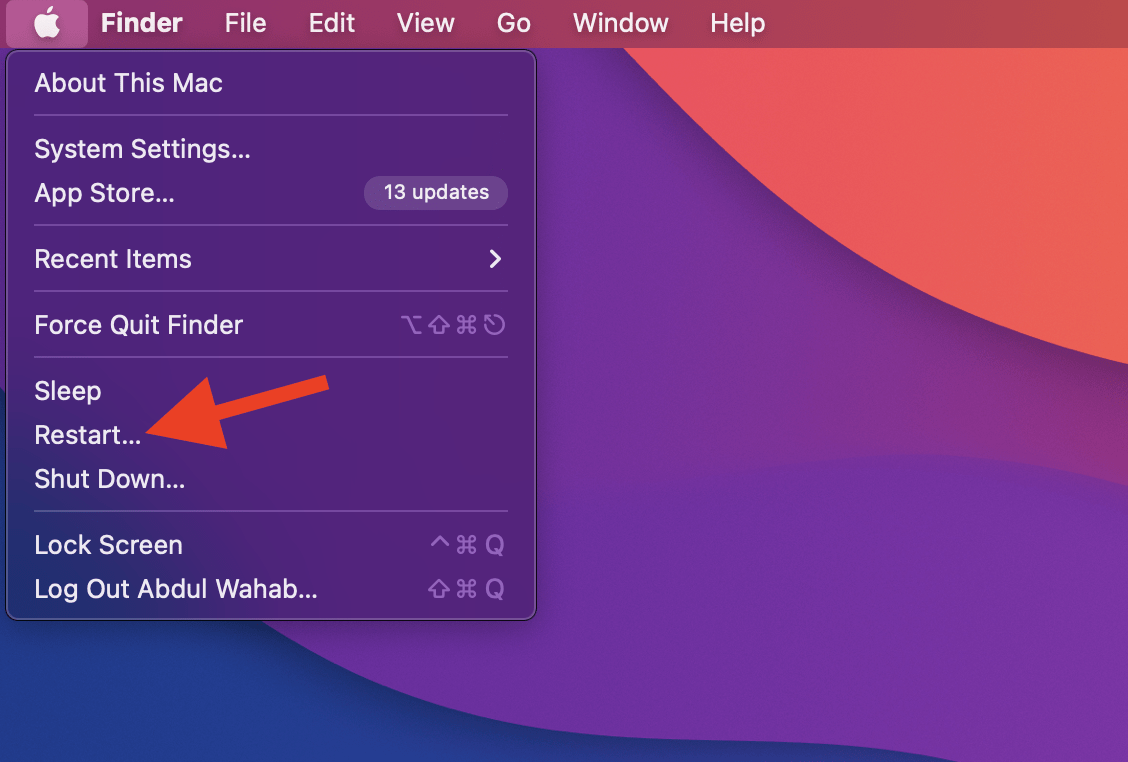
- Click on the Apple menu and select “Restart.”

- Right after, press and hold Command+R.
- Keep holding until you hear the Mac’s startup sound or see the Apple logo.
- Release the keys at that point.
Recovery Mode for Apple Silicon macOS
For MacBooks with Apple Silicon processors, the process of booting into recovery mode is as follows:
- Start by powering on your Mac. Press and hold the Power button.
- Maintain the pressure on the button until startup options become visible.
- Locate and click the Gears icon (Options), then proceed by selecting “Continue.”
- You may need to choose a user and input their administrator password. Follow any on-screen prompts and press “Next” after each action.
- Complete the process as directed.
By following these steps, you’ll be able to boot your Mac into recovery mode. Here’s what to do next:
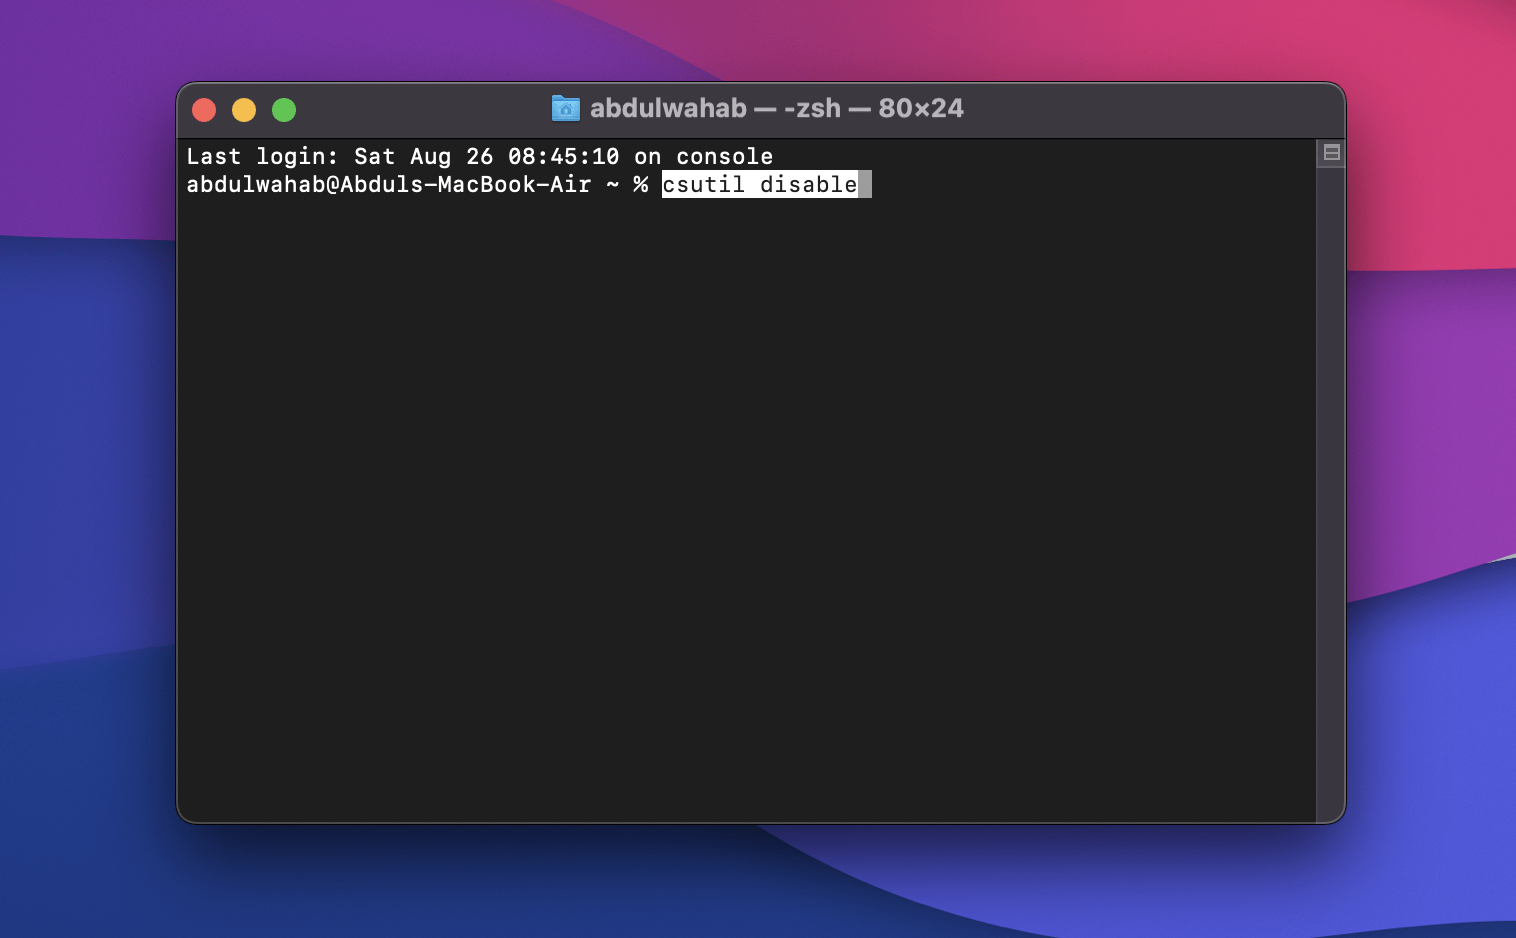
- As your Mac restarts, access the top menu and select “Terminal.”
- Paste this command: csutil disable.

- Restart your Mac using the regular method.
- Afterward, open Terminal from Applications > Utilities.
- Launch the command: sudo rm, then drag the desired file you wish to delete into the Terminal window.
- Press the “Return” key.
- Repeat the process outlined in steps 5 and 6 for each additional installer file you want to remove.
- Once all installer files have been deleted, initiate a restart of your Mac in recovery mode.
- Launch the Terminal within recovery mode.
- Enter the command: csutil enable.
- Lastly, restart your Mac once again.
How to Delete App Updates From the App Store
You can also manage software updates using the App Store. Here’s how you can remove updates you no longer need:
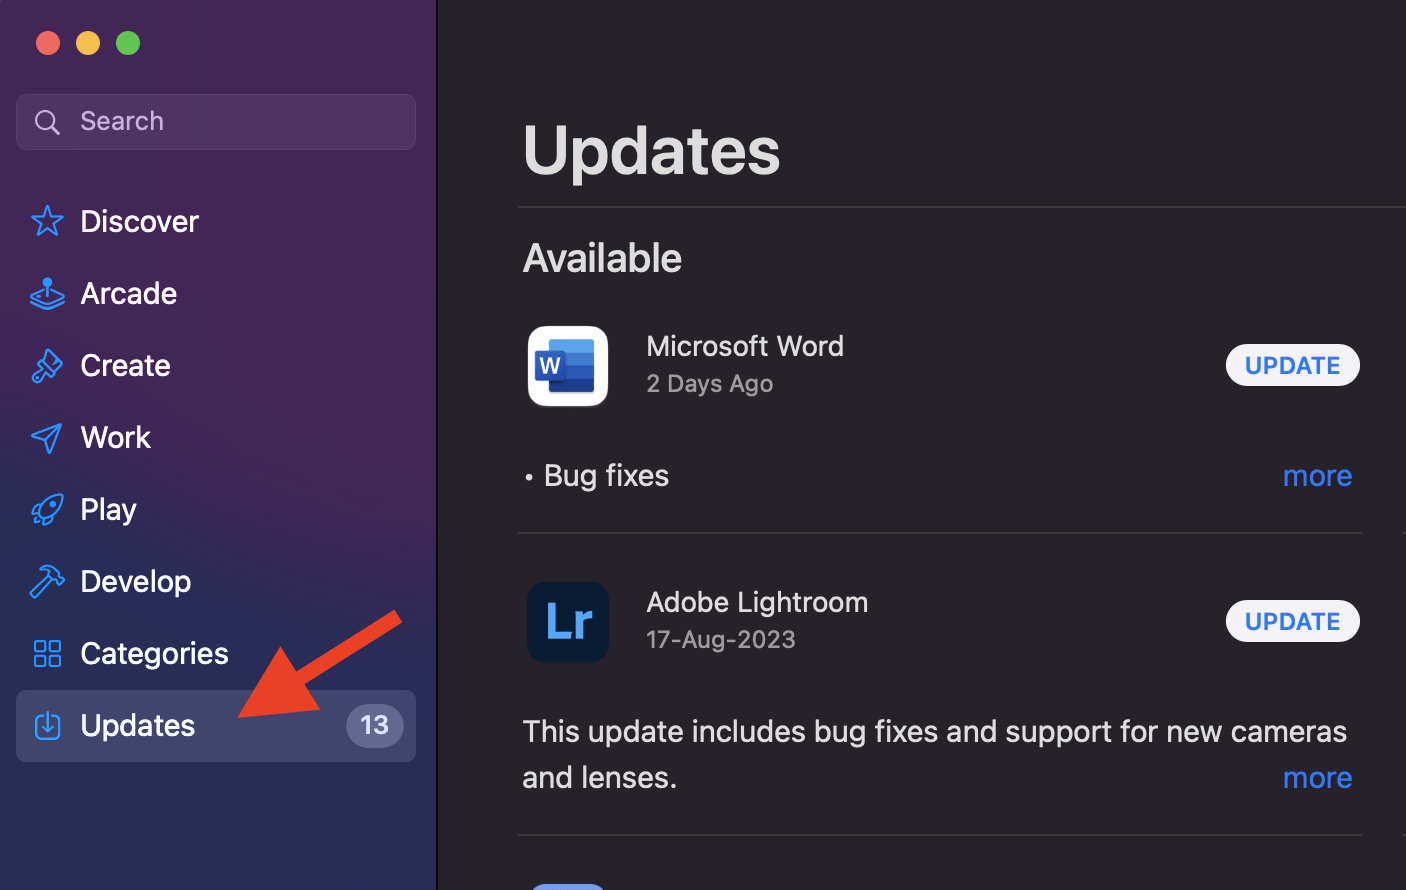
- Launch the App Store on your Mac.
- Navigate to the “Updates” section.

- Locate the update you wish to delete.
- Click on the update, and then press the “Delete” button to remove it from the update list.
How to Delete a Software Update From the Library
Another way to delete software updates on your MacBook is by using your Mac’s Library folder. Here’s how you can remove updates using this method:
- Go to the menu bar and choose “Go,” then enter “/Library/Updates.”
- You’ll find the update files in this folder. Move the unwanted updates to the trash to delete them.
How to Delete Software Update Installation File on Your MacBook
In case you want to delete the software update installation file from your MacBook, there are two methods you can use:
Finder
To delete software update installation file using Finder, carry out these steps:
- Open Finder.
- Click on “Go” in the menu bar.
- Navigate to Applications and locate the macOS software update file.
- Right-click on the file and select “Move to Trash.”
Launchpad
If you prefer Launchpad over Finder, follow these instructions:
- Open Launchpad and locate the desired file.
- Hold down the Option key to reveal the “X” button.
- Click the “X” button to remove the file.
- As you do that, the software update will disappear.
FAQs
Is it safe to delete updated files on Mac?
Yes, it’s safe to delete update files on Mac, especially those no longer needed or unsupported by your system. It’s always a good idea to create a Time Machine backup before deleting them so you can recover your important data in the event of data loss.
Can you uninstall an iOS update on Mac?
Yes, you can uninstall an iOS update on a Mac. Simply click the Apple icon and select About this Mac. In the Storage tab, click Manage. Now, choose iOS files and click Delete. That said, the iOS category may not appear for different reasons. For instance, you won’t see it if you haven’t backed up your iPhone or iPad data on your Mac.
Where are updated files stored on my MacBook?
Update files on your MacBook are temporarily stored in the Finder Library Updates folder. These files are typically deleted once the update process is completed. However, you can also manually delete them by going to the menu bar, clicking Go, and entering “/Library/Updates.” From there, you can move the update files to the trash.
Get Rid of Unnecessary Updates on Your MacBook!
Having the latest macOS is great, but it doesn’t fit everyone. Some folks prefer older versions due to hardware limits, compatibility, or what they’re used to. If this sounds like you, this guide helps you remove updates smoothly, customizing your MacBook to work just right. But remember to create a backup of your important data beforehand to avoid data loss even if something goes wrong when uninstalling an update.
If you've any thoughts on How to Uninstall an Update on MacBook?, then feel free to drop in below comment box. Also, please subscribe to our DigitBin YouTube channel for videos tutorials. Cheers!

