This guide outlines the steps to turn Off or turn On notifications in Windows 11. Likewise, the steps to customize these notifications are also discussed. Follow along for the detailed instructions.
Notifications on your Windows 11 PC are a great source of information as they help you in keeping up to date with the latest changes and developments. In this regard, there is no doubt that these alerts come in handy in many scenarios, however, sometimes they tend to disrupt the normal workflow as well.
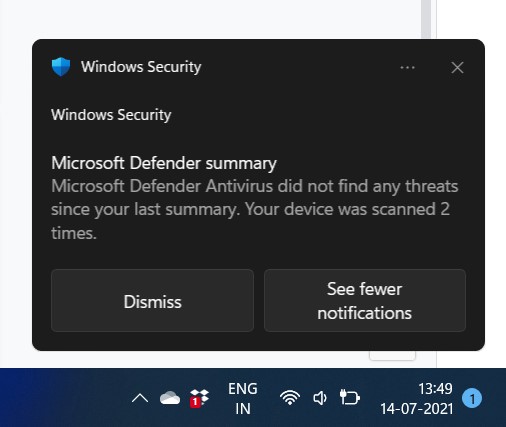
There can’t be any worse interruption than by constantly getting bugged with these alerts at regular intervals. And if these notifications are from any third-party apps, then chances are you won’t even interact with them in the first place.
So your best course of action might be to disable those notifications right away. And this guide shall show you how to do just that. Given here are the instructions to turn off notifications in Windows 11, both on the system as well as the individual apps level. So without any further ado, let’s get started.
How to Completely Turn Off Notifications in Windows 11?
This is a more aggressive approach of the two and carrying out this task will stop all the notifications from appearing on your PC. This includes both third-party apps as well as system-level notifications. So if you wish to try it out, then here’s what you need to do:
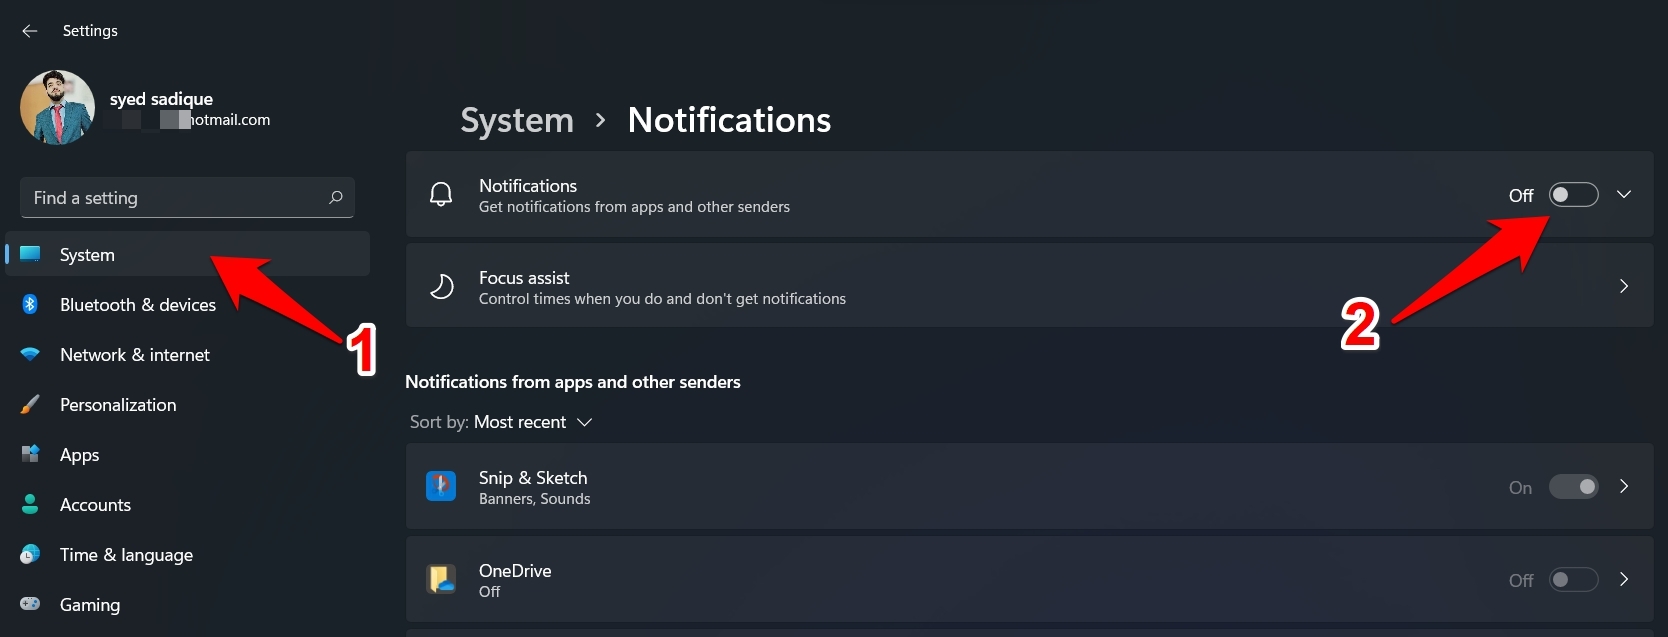
- To begin with, use the Windows+I shortcut keys to bring up the Settings page.
- You should now be taken to the System menu by default.
- So go to its right-hand side menu and turn off the toggle next to Notifications.

That’s it. These were the steps to turn off notifications in Windows 11 from all the apps and settings.
Turn off Notifications for Individual Apps in Windows 11
If you don’t want to put a blanket ban on these notifications, then there’s another way out. You could get granular controls over these alerts and tweak them as per your requirements.
In other words, you could stop notifications of some specific apps only and let all the other ones continue to send you alerts as before. Here’s how it could be done:
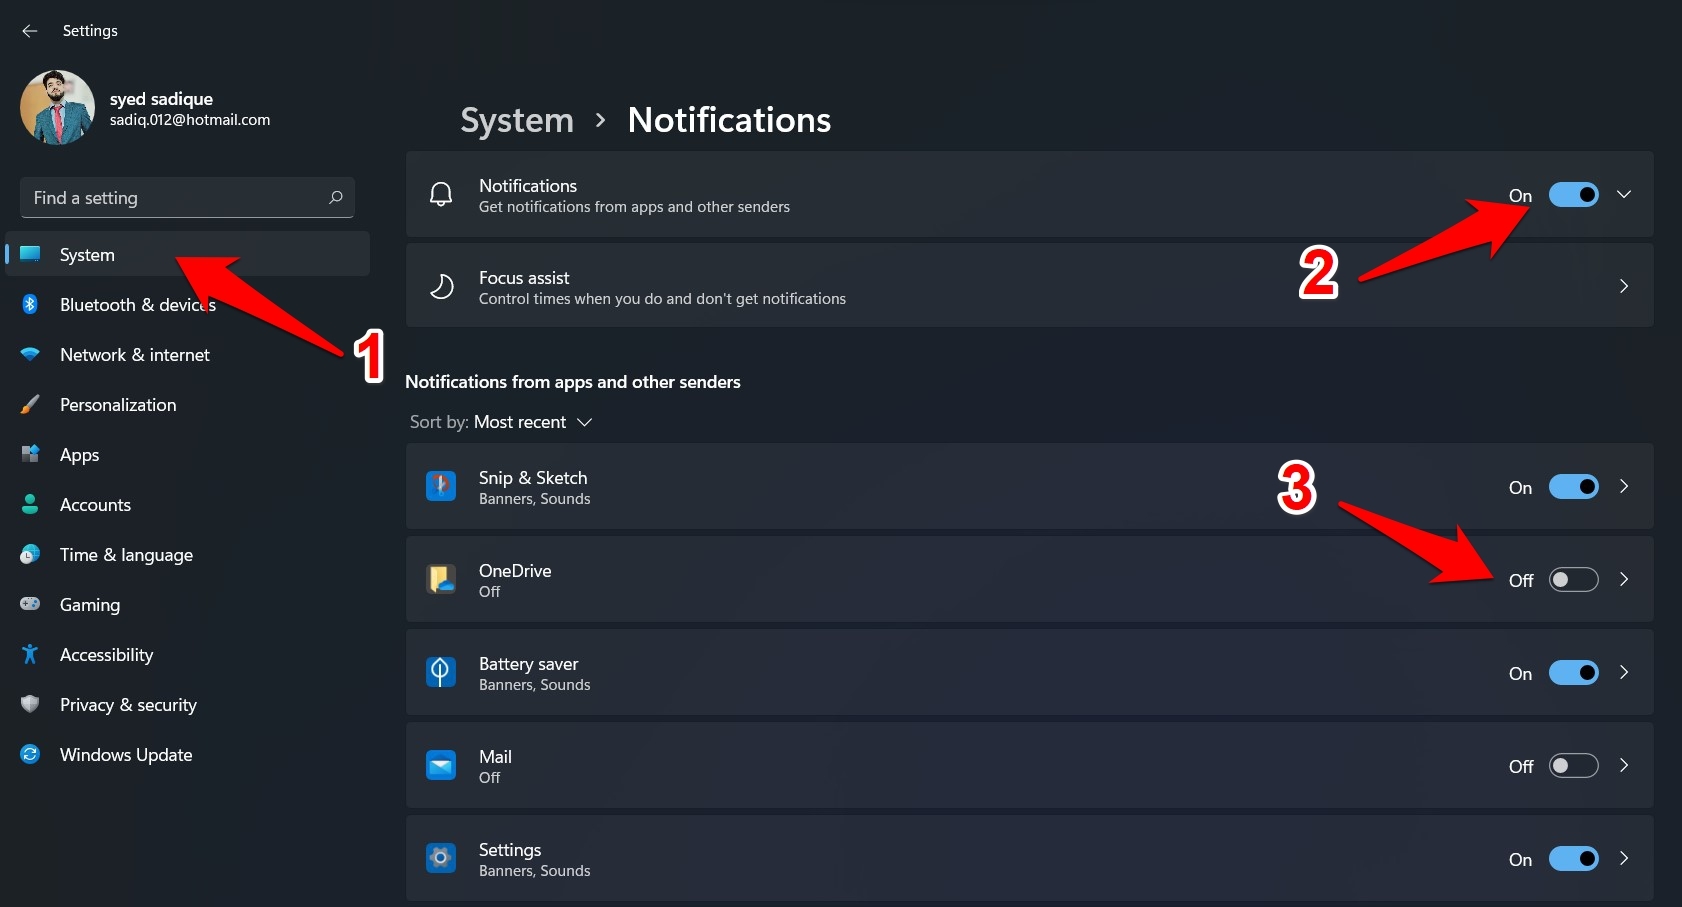
- Use the Windows+X shortcut keys and select Settings from the menu that appears.
- Under the System tab, make sure that the Notification toggle is turned on.
- Then go to the ‘Notifications from apps and other senders’ section.
- Finally, turn off the toggle next to the one whose notifications you no longer wish to receive.
So these were the steps to turn off notifications in Windows 11 on a per-app basis. Let’s now turn our attention towards customizing these alerts and molding them according to your needs.
Tweak Notifications Alerts on Windows 11
If you don’t want to completely stop these notifications, but rather prefer to customize them according to your requirement, then Windows has provided some handy tweaks for that as well. Here’s how you could access the same and make changes accordingly:
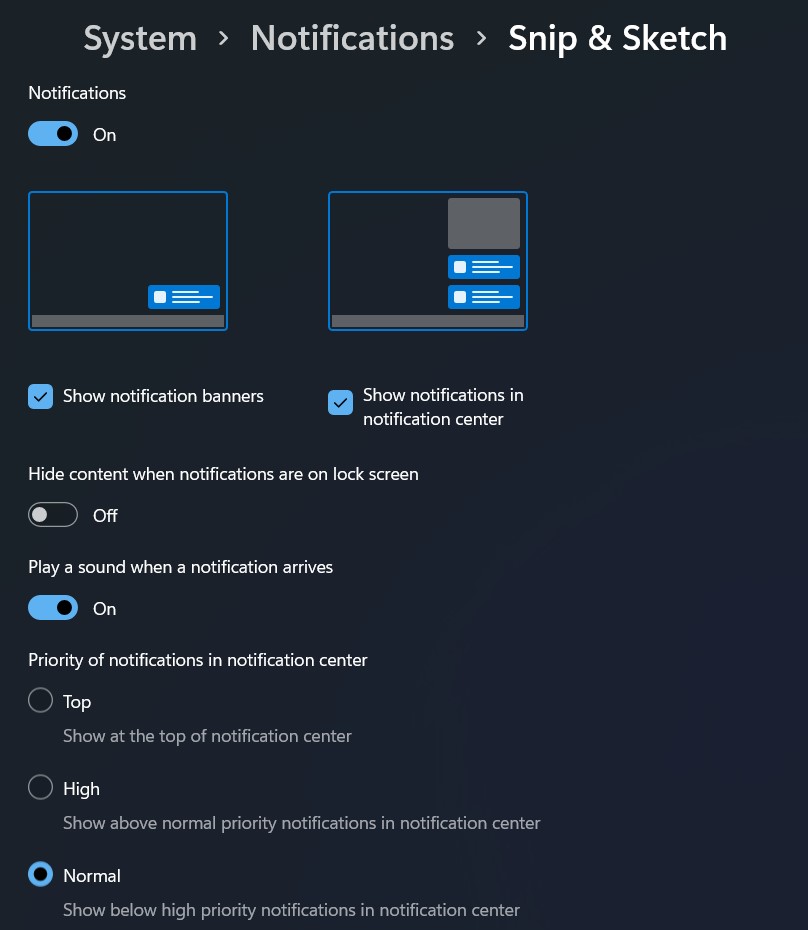
- Start off by going to the System > Notifications section.
- From there, click on the rightward-facing arrow next to the app of your choice.

- You could now enable/disable the notifications banner, disable alert sounds, hide these notifications on your lock screen, or change the priorities of these notifications.

Conclusion
With this, we round off the guide on how you could disable notifications in Windows 11. We have shared two different methods for the same. Likewise, we have also listed the steps to customize these notification alerts as per your preference. If you have any queries concerning the aforementioned steps, then do let us know in the comments section below.
If you've any thoughts on How to Change Notifications Settings in Windows 11?, then feel free to drop in below comment box. Also, please subscribe to our DigitBin YouTube channel for videos tutorials. Cheers!

