Activity history on Windows 11/10 tracks the apps and services you use, websites you visit, and files you open. This can be a privacy nightmare for many, especially if they are using a machine for work. While this feature can be “disabled” from the settings, it doesn’t entirely disable the feature.
Yes, even after disabling activity history from the settings, Microsoft still collects your data for certain features and services. This guide will show you how to permanently turn off activity history and stop data collection on your device. So, let’s get started.
Disable Activity History from Settings
First, let’s see how you can disable the Activity History from the Settings app. We’ll then move on to disabling it permanently. Follow the steps below:
- Open the Settings app. Press the Windows key + I to do so.
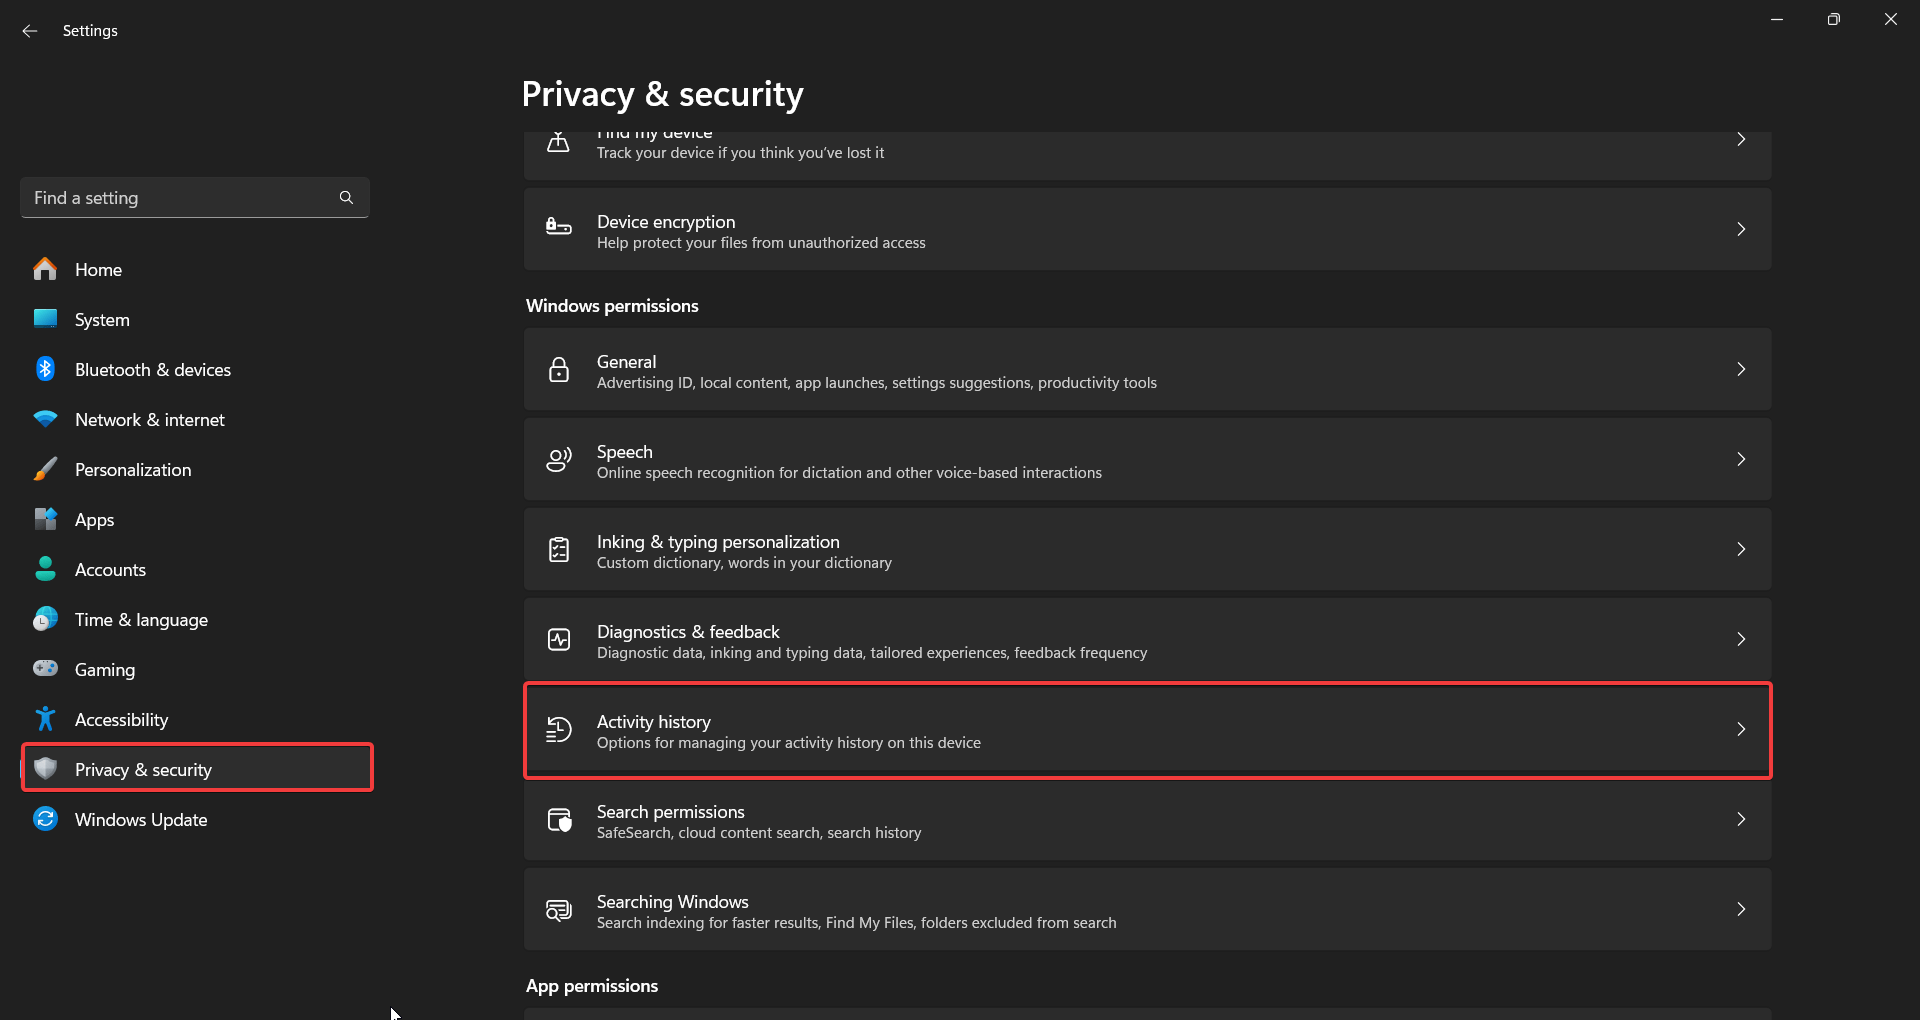
- Now, click on Privacy & security from the side panel.
- Click on Activity History under the Windows permissions section.

- Then, turn off the toggle next to Store my activity history on this device.
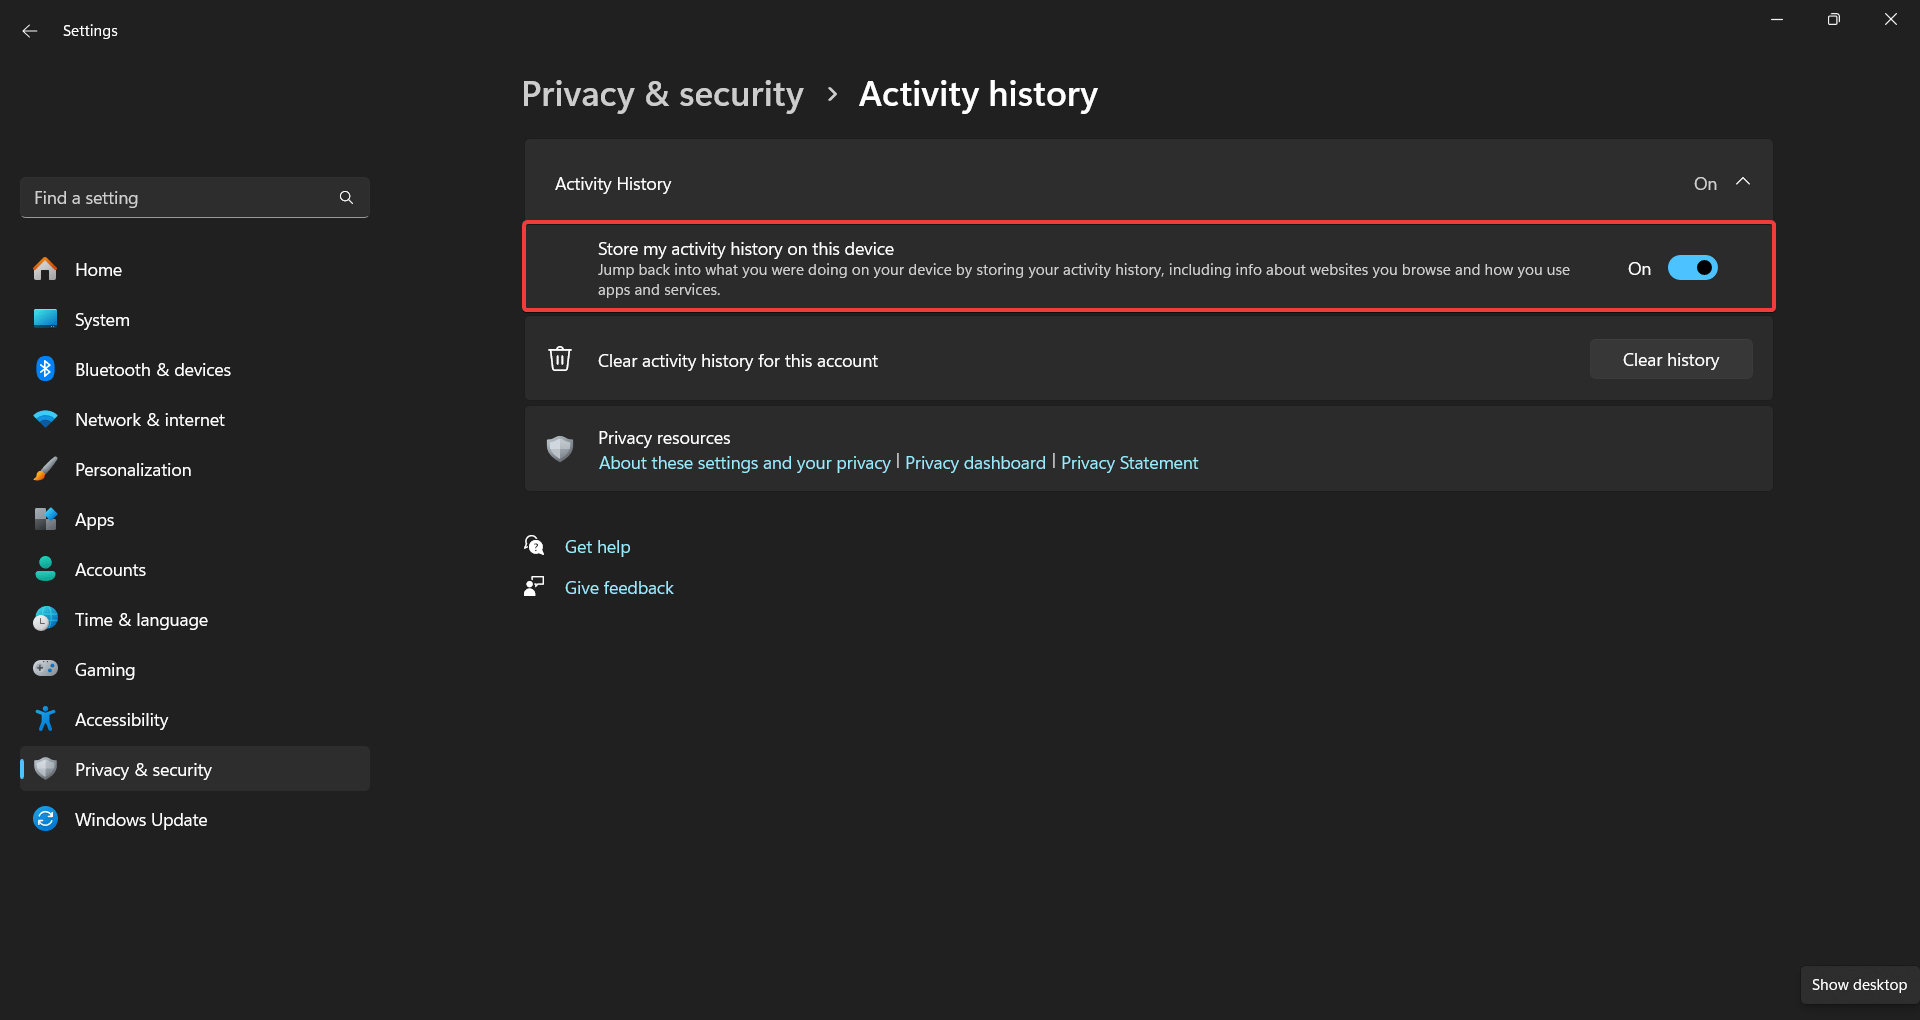
This will stop storing new activity history on your device and sending it to Microsoft. However, this doesn’t remove the existing history or completely prevent data collection.
Clear Existing Activity History
If you would like to delete the activity history that has already been collected, follow the steps below.
- Open the Settings app. Press the Windows key + I to do so.
- Now, click on Privacy & security from the side panel.
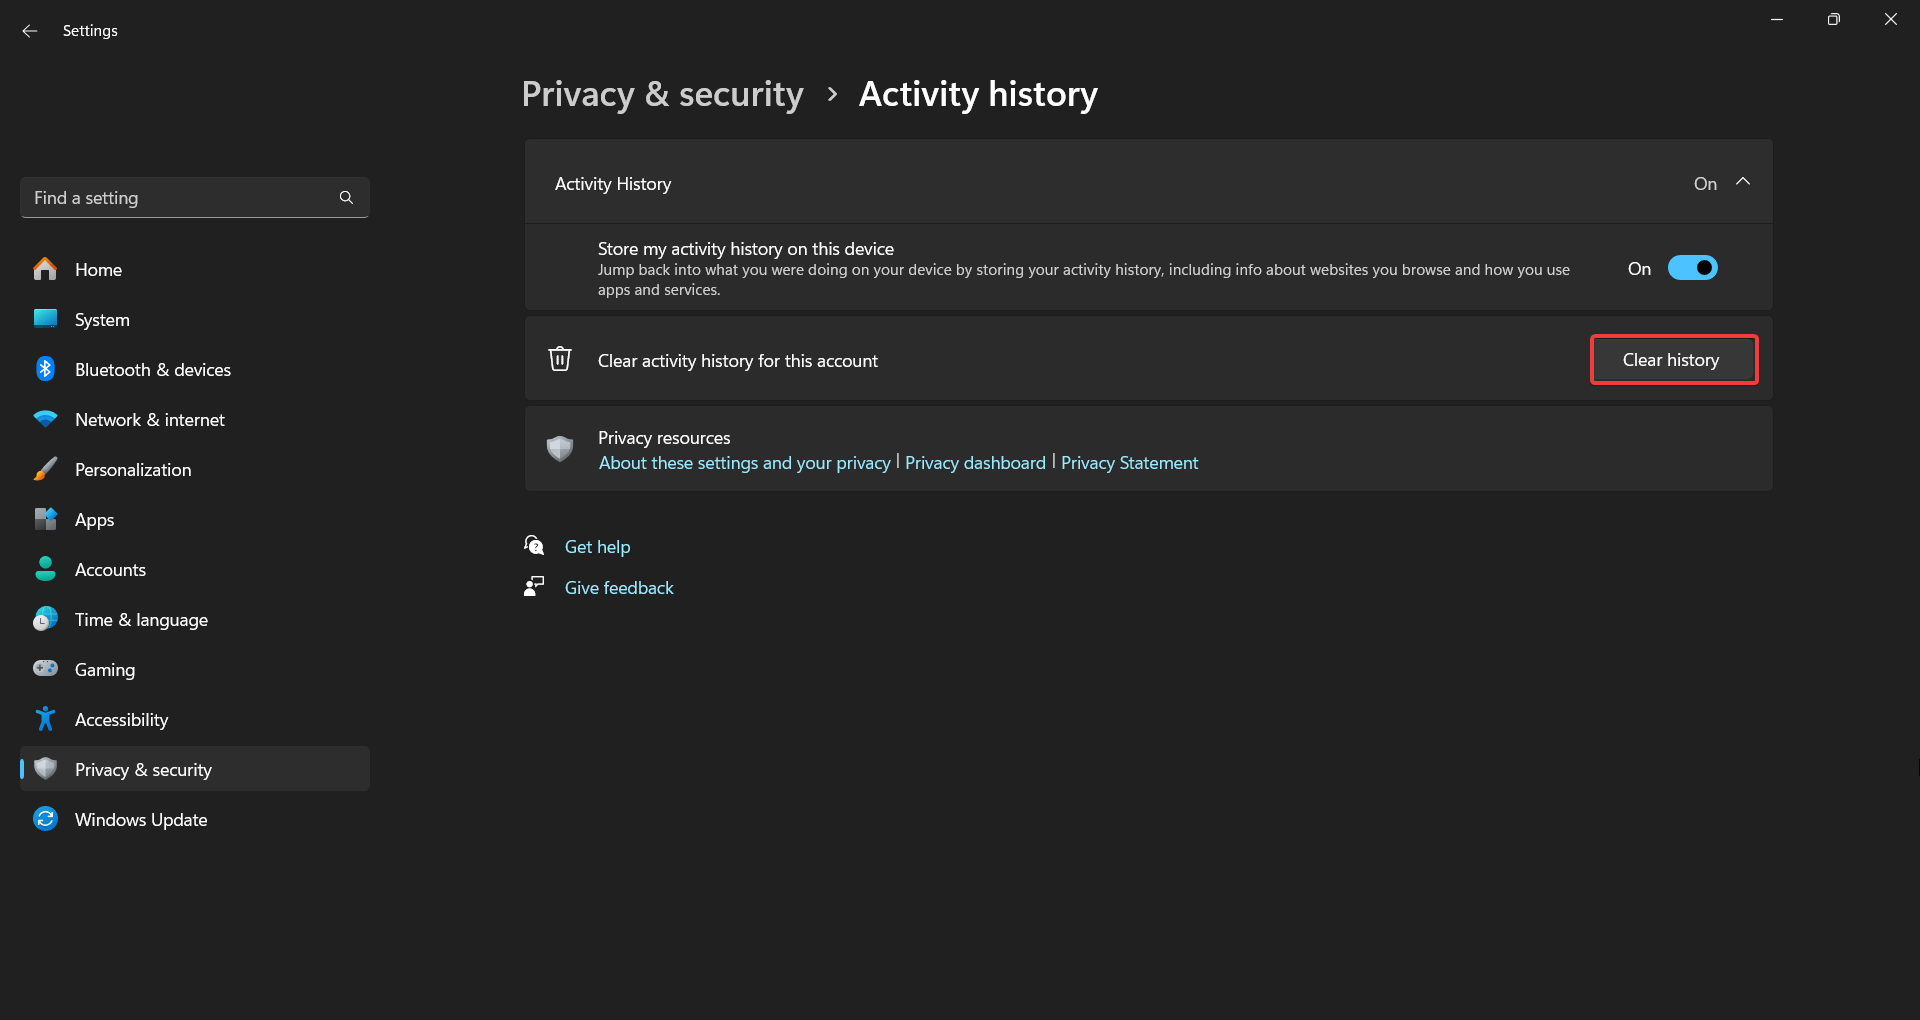
- Click on Activity History under the Windows permissions section.
- Also, click on Clear History> Clear. This will remove the stored activity history from your device.

Disable Activity History from Group Policy Editor/Registry Editor
The Registry is the heart of your Windows machine. You can make system-level changes using the Registry Editor. While some of these changes can be useful, incorrect changes can break your system.
We’ll use the Registry Editor to disable the Activity History completely. So, make sure to only make the changes mentioned below and nothing else.
Note: This only works for Windows 10/11 Home users.
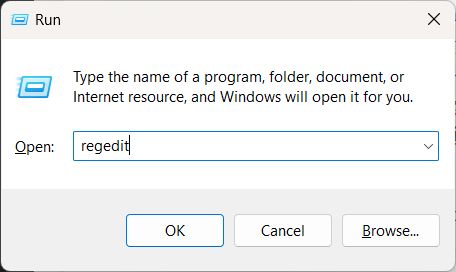
- Press the Windows key + R to open Run.
- Type regedit and hit Enter.

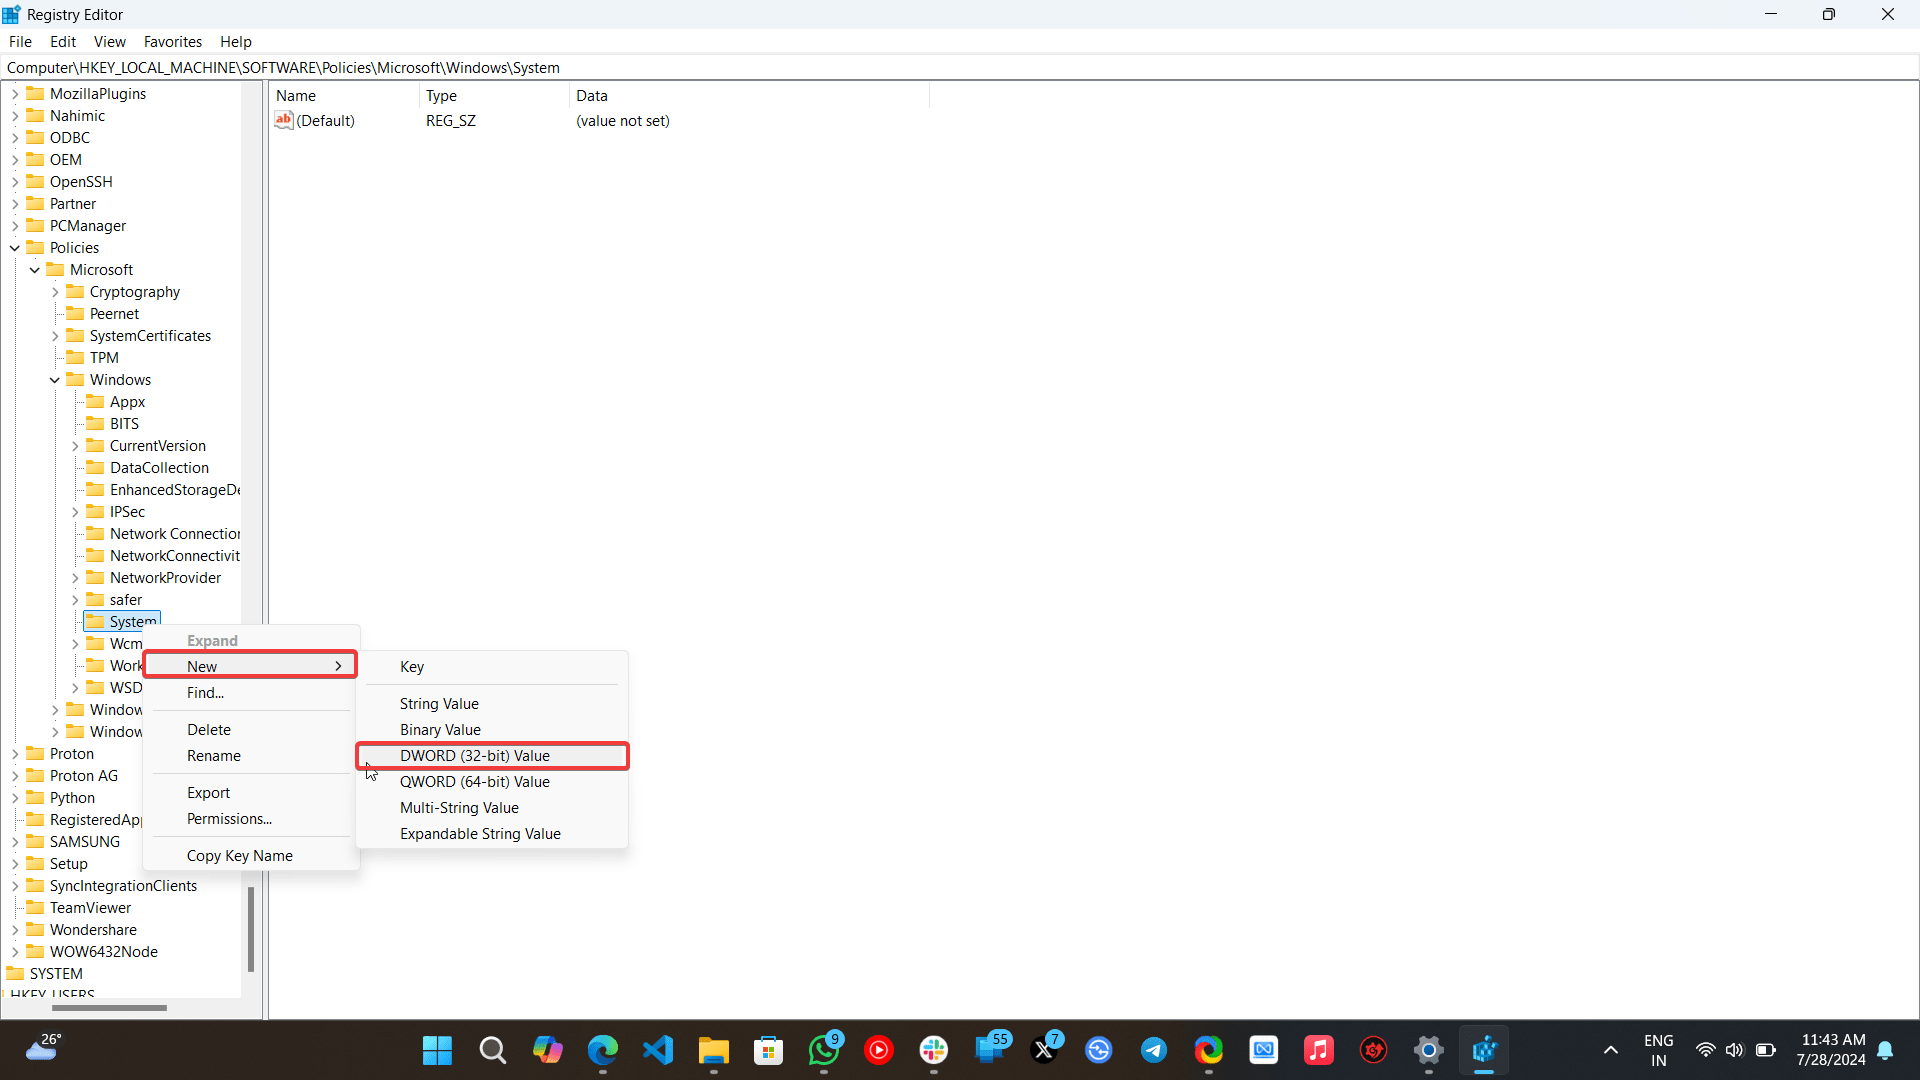
- Navigate to:
HKEY_LOCAL_MACHINE\SOFTWARE\Policies\Microsoft\Windows\System
- If System isn’t there, right-click on any space in the Windows directory, select New > Key, and name it System.
- Right-click on System, select New > DWORD (32-bit) Value and name it PublishUserActivities.

- Double-click on PublishUserActivities and set the value to 0.
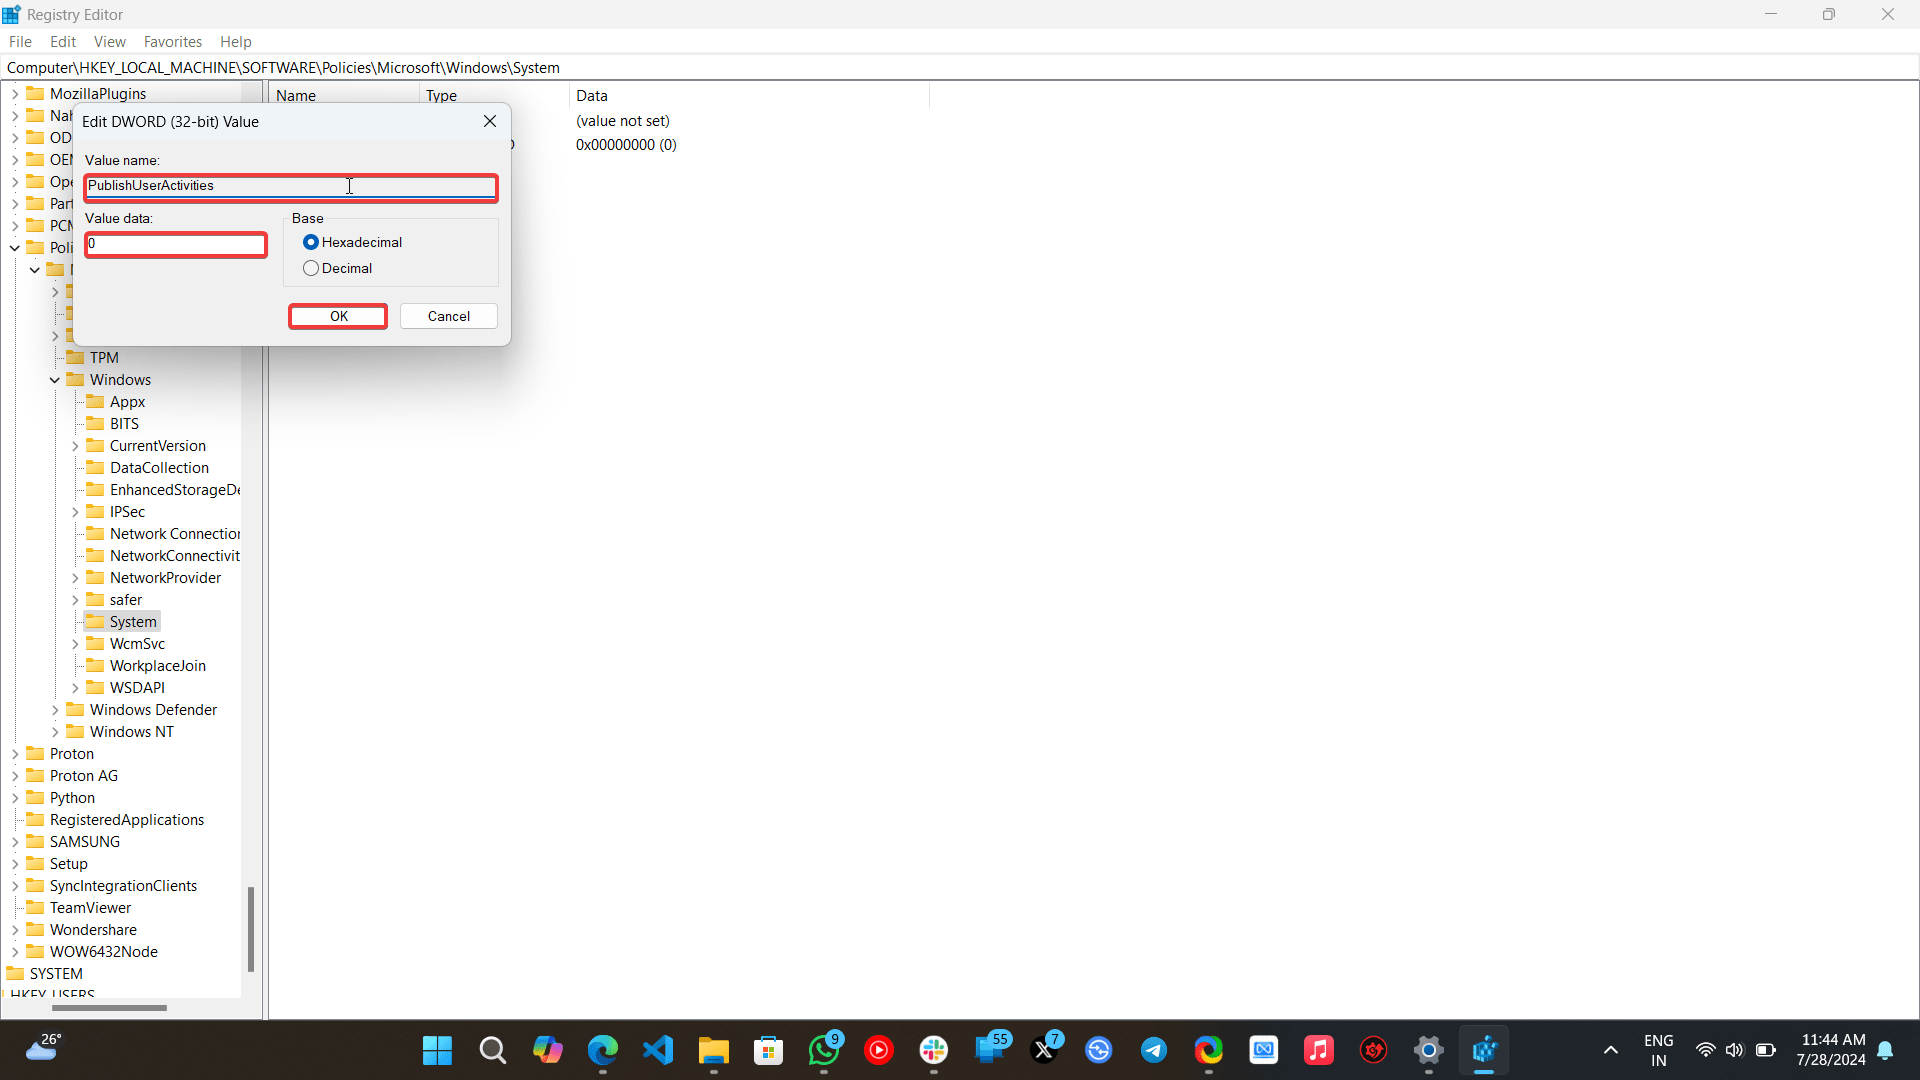
- Finally, restart your PC.
If you are using Windows 11/10 Pro, Enterprise, or Education, then you need to use the Group Policy Editor to disable Activity History. Follow the steps below.
- Press the Windows key + R to open Run.
- Type gpedit.msc and hit Enter.


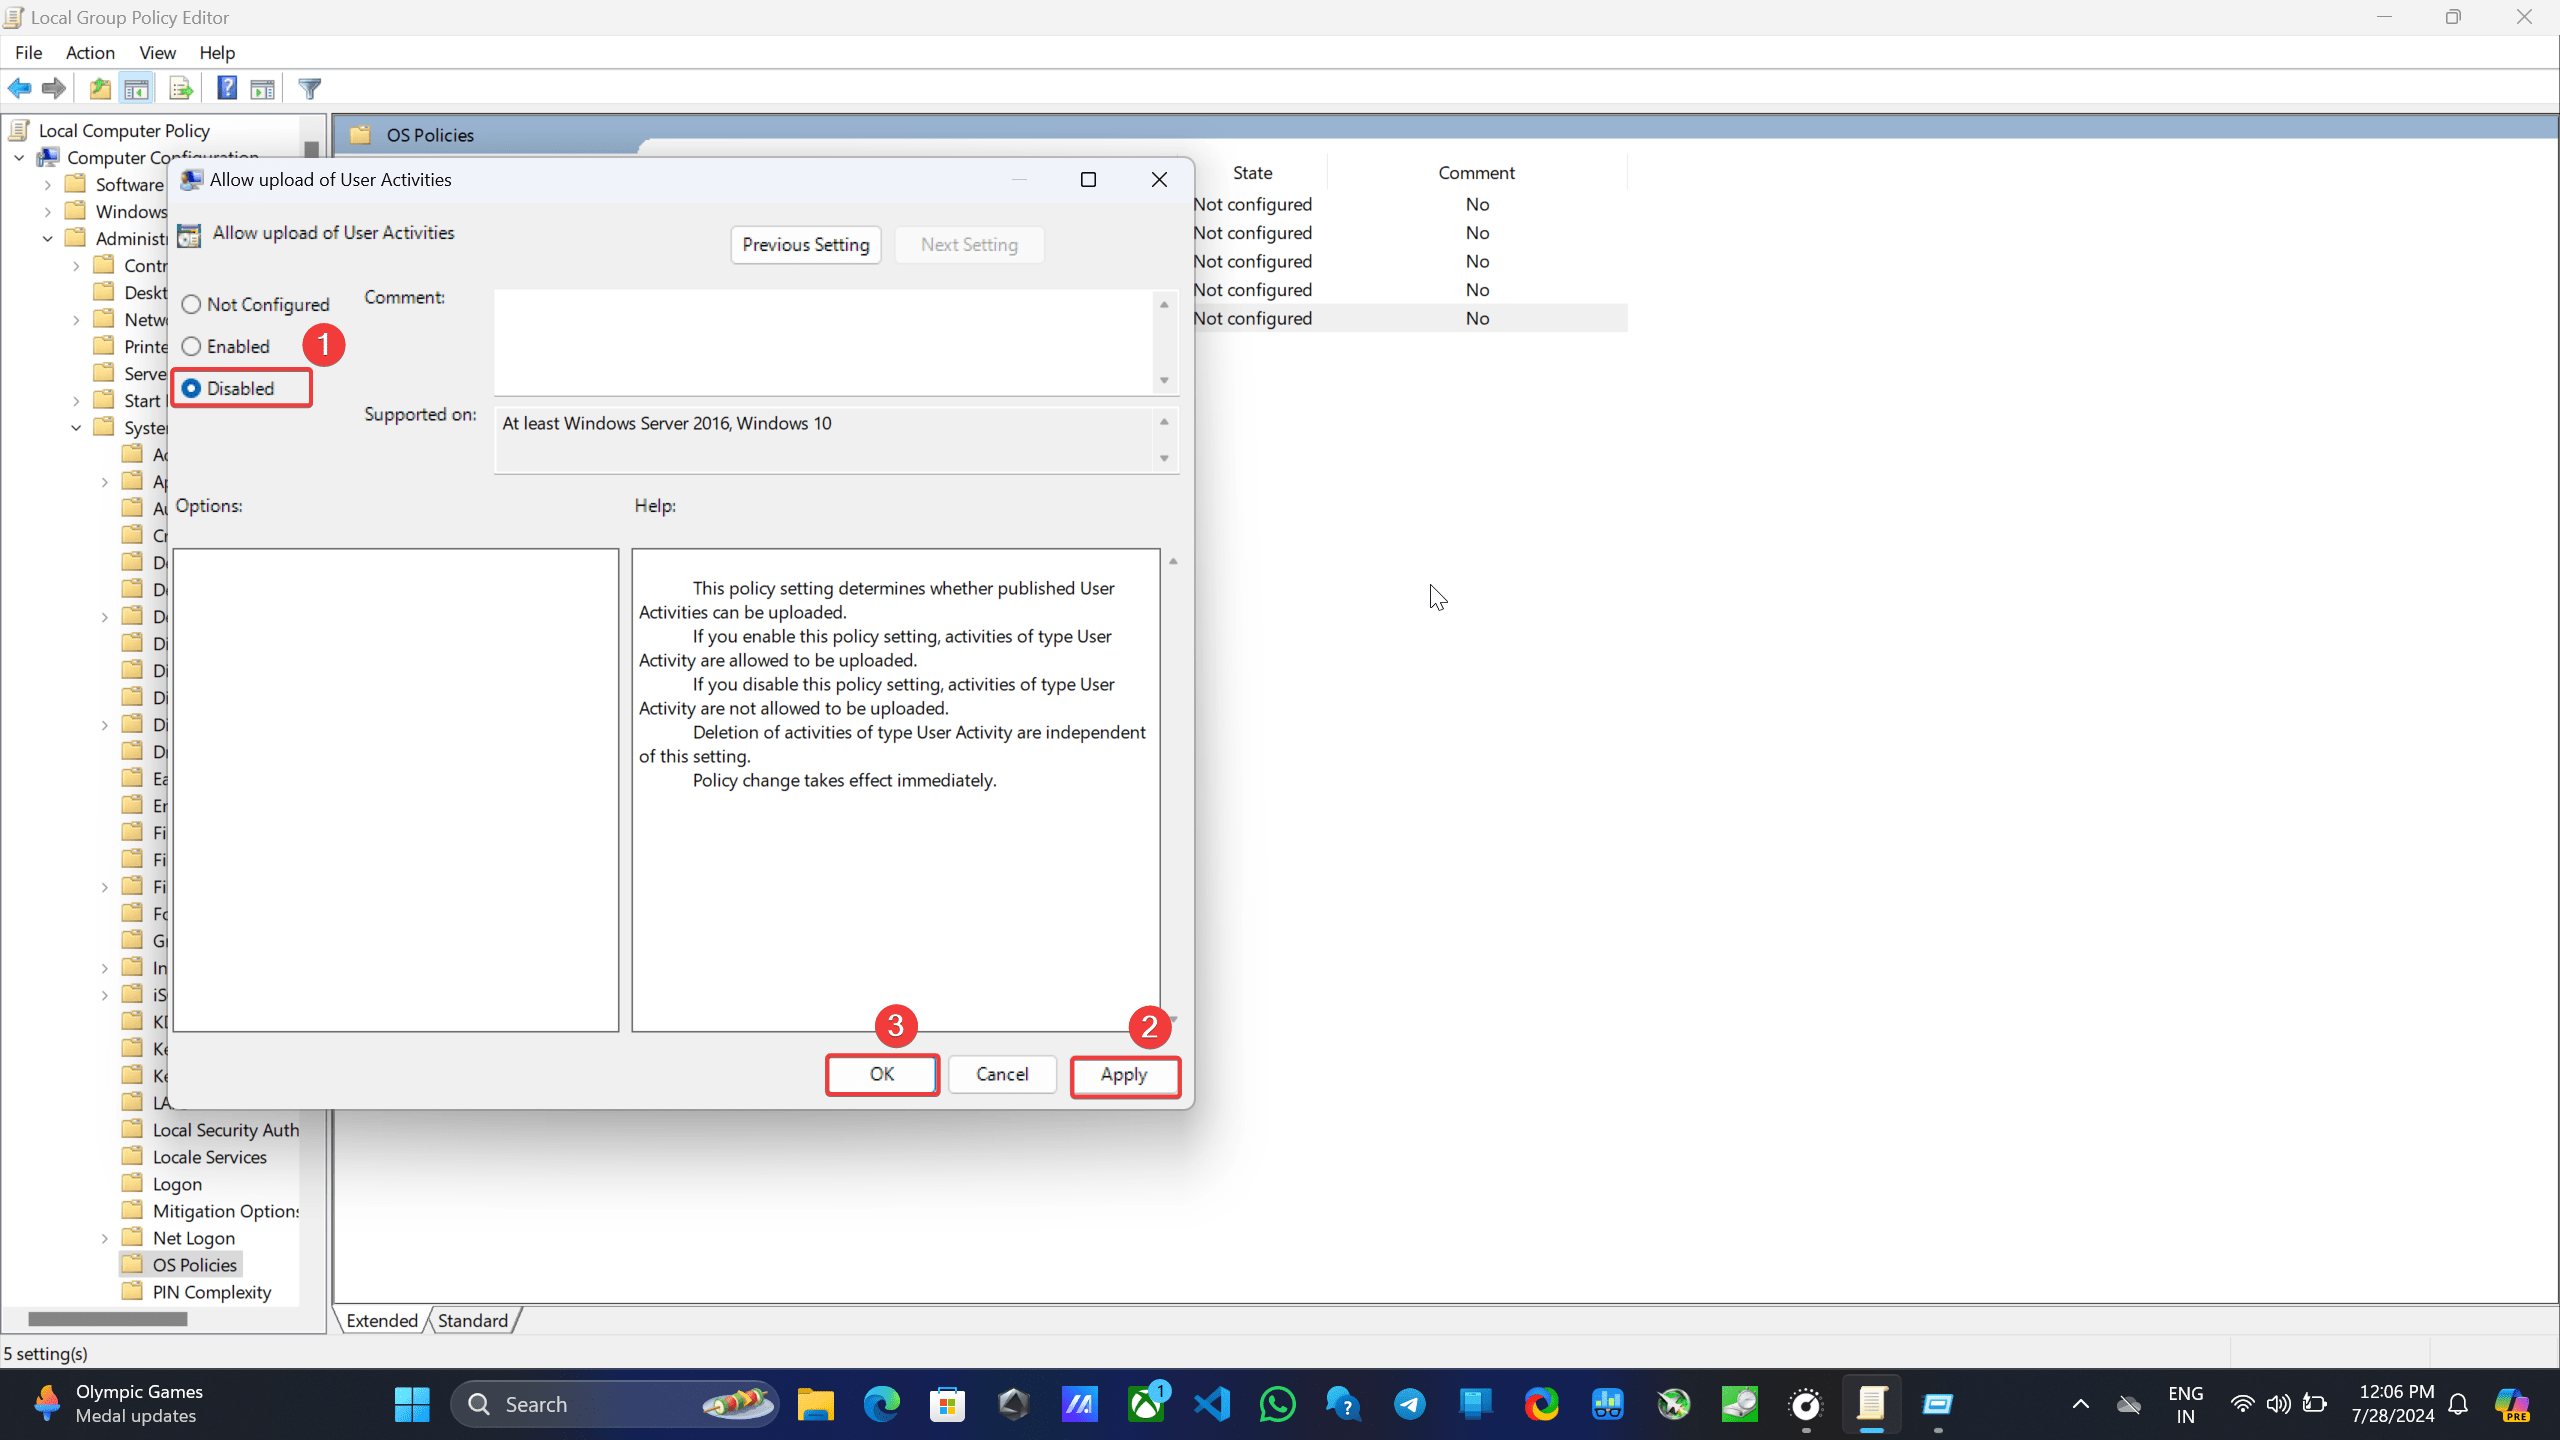
- Navigate to Computer Configuration > Administrative Templates > System > OS Policies.
- Double-click on Allow upload of user activities.
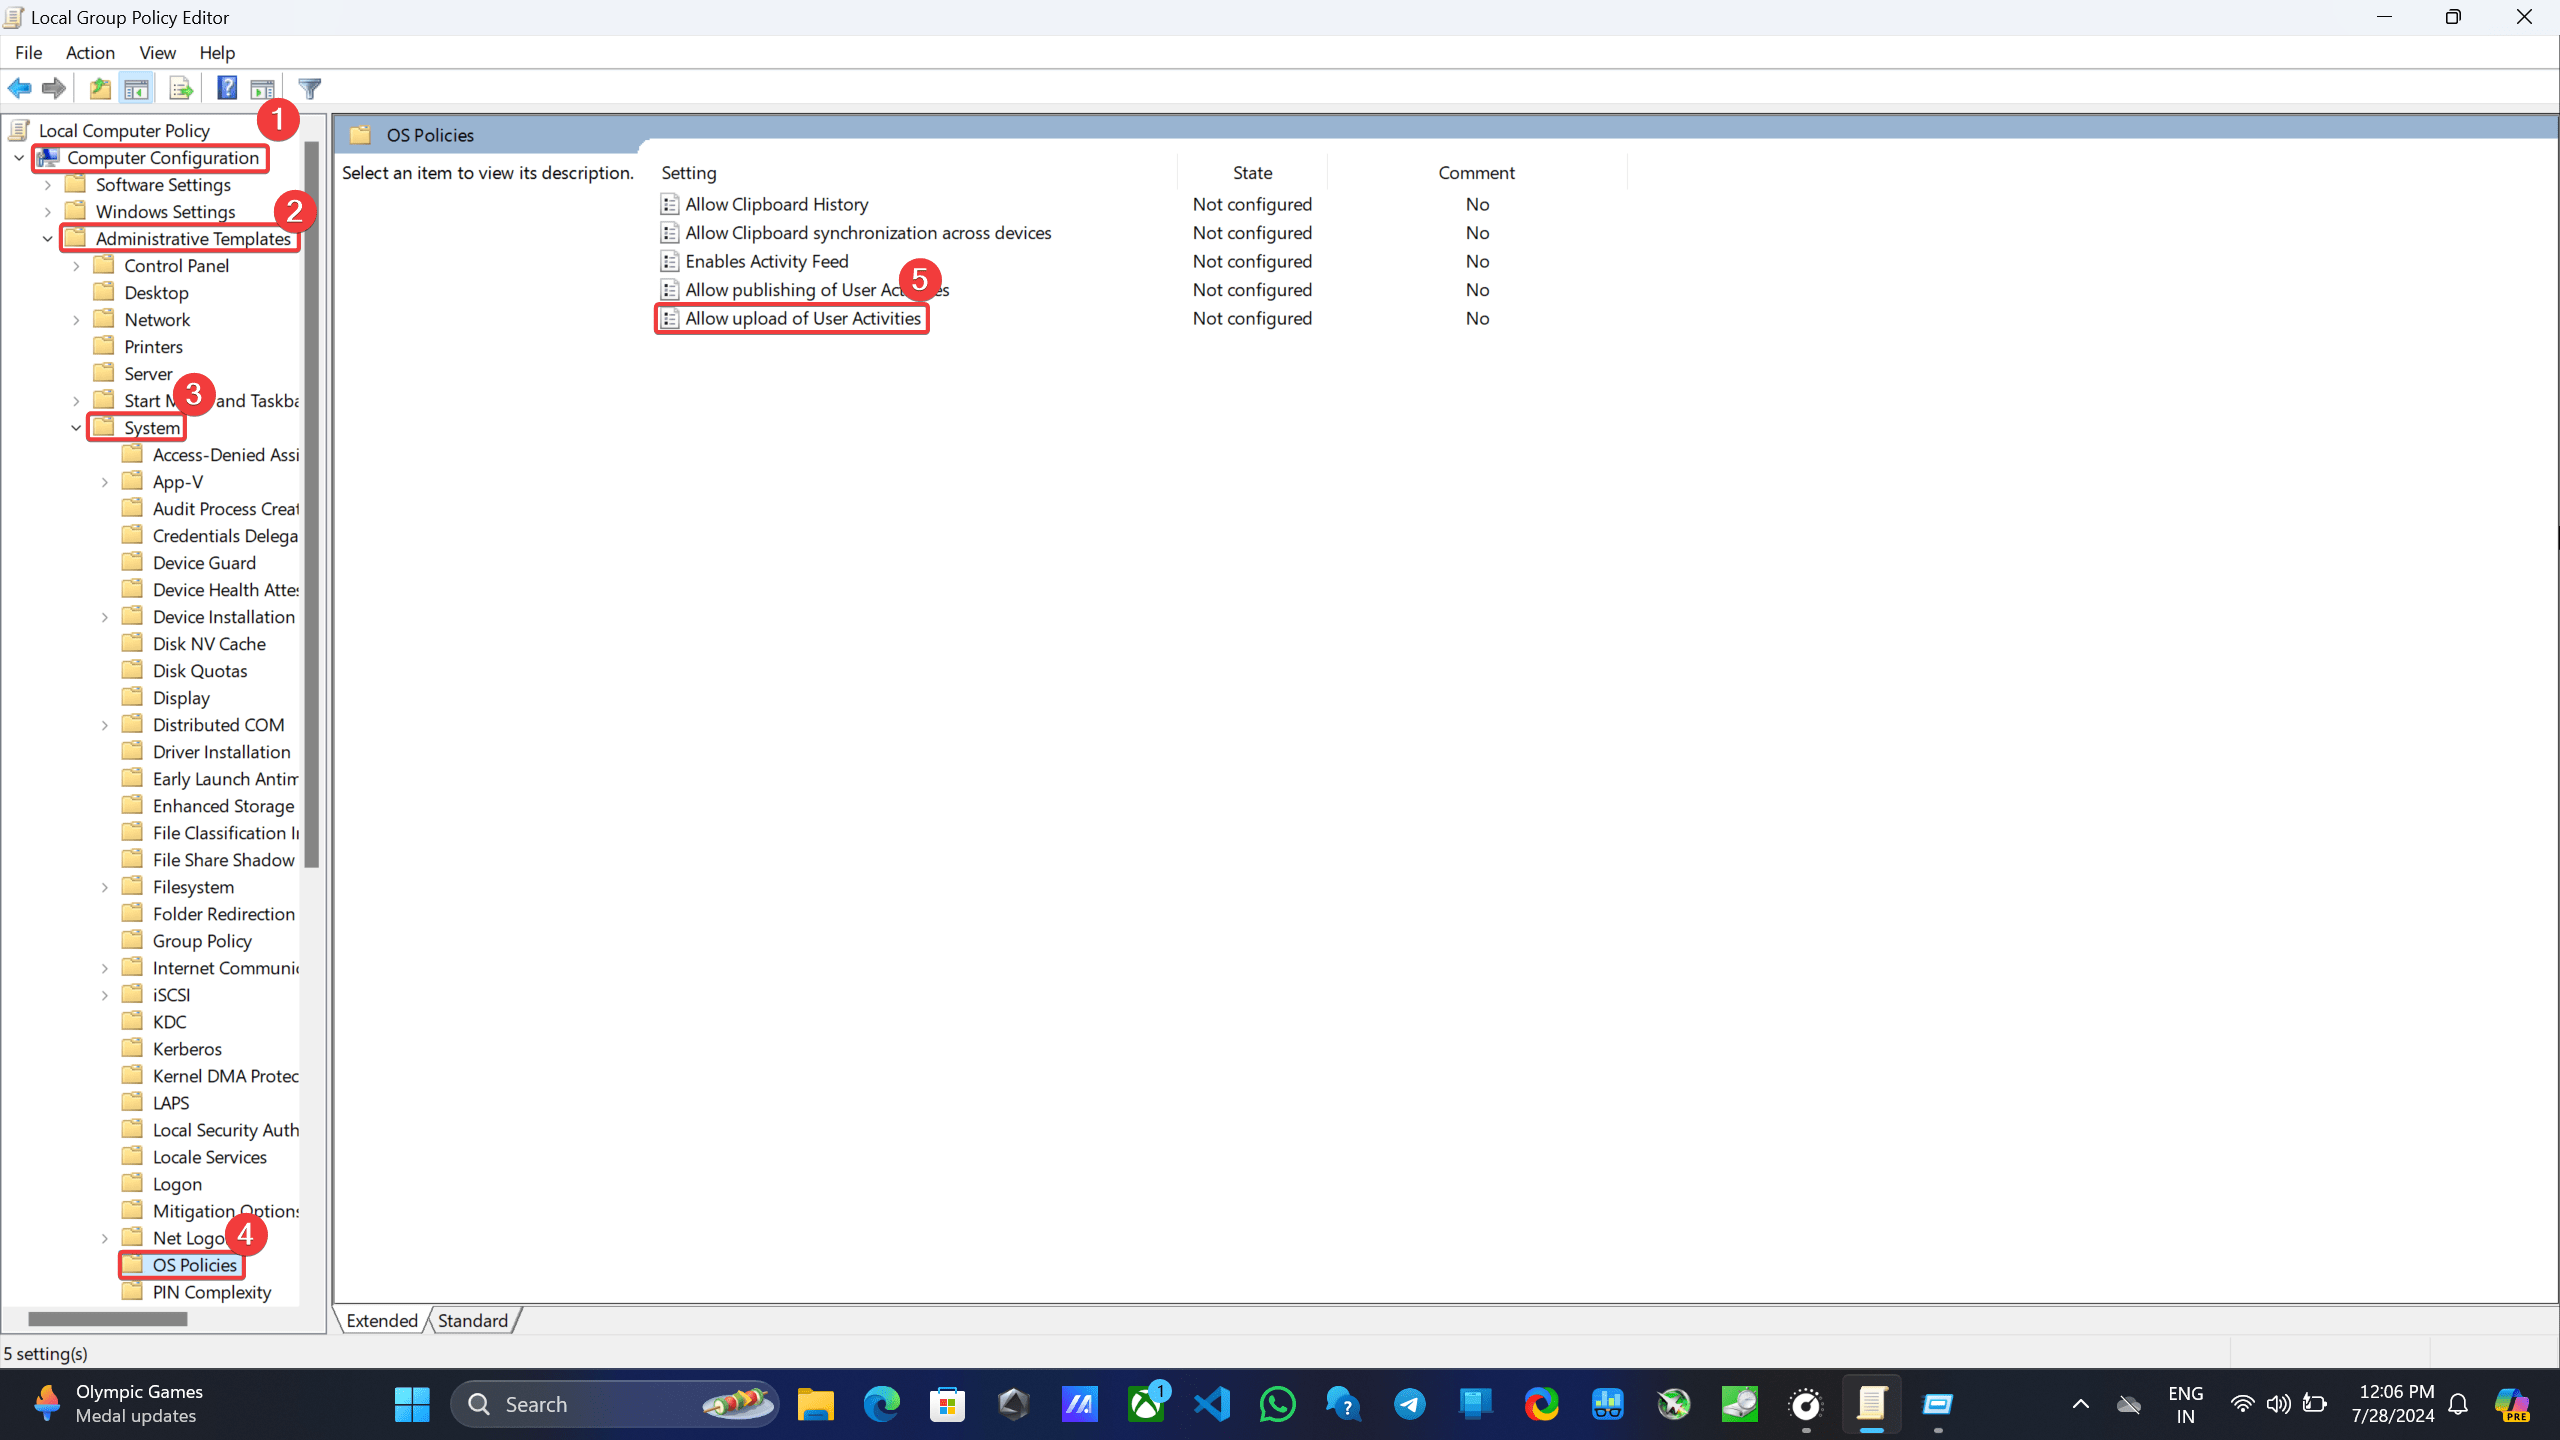

- Select Disabled, then hit Apply and OK.
Conclusion
In conclusion, by following the steps outlined in this guide, you can take control of your privacy on Windows 11 by permanently turning off activity history and stopping data collection on your device.
If you've any thoughts on How to Disable Store Activity History in Windows 11, then feel free to drop in below comment box. Also, please subscribe to our DigitBin YouTube channel for videos tutorials. Cheers!