
Imagine you’ve just come back from a trip, and your iPhone is filled with beautiful photos and videos. You want to share them with friends, create a slideshow, or maybe just back them up to keep those precious memories safe. As you sit down with your Windows PC, you start wondering: how do I get these files from my iPhone onto my computer? Transferring photos and videos from your iPhone to a Windows PC is a simple task, and there are several ways to do it.
Moving your media files is quick and easy, whether you want to create backups, free up storage on your iPhone, or edit photos on a bigger screen. Whatever the reason, transferring your iPhone photos and videos to a Windows PC is something almost everyone needs to do at some point. Thankfully, there are multiple ways to do it. In this article, we will discuss different ways to transfer local iPhone photos and videos to a Windows PC.
Ways to Transfer iPhone Photos and Videos to Windows PC
One of the most common methods is using a USB cable. By connecting your iPhone to your PC, you can access your photos and videos directly through File Explorer. This method is straightforward and doesn’t require any additional software. Another convenient option is iCloud Photos.
If you have iCloud set up on your iPhone, you can access these files from your PC by logging into iCloud.com or using the iCloud app for Windows. Below we will explore these methods in detail so you can easily transfer your favourite photos and videos to your Windows PC.
1. Using iTunes
iTunes provides a convenient method to sync and transfer your files. It is the official software provided by Apple that syncs data between your devices efficiently and securely. Below are steps for transferring your local iPhone photos and videos to your Windows PC using iTunes. Before you begin, Make sure your iPhone is charged optimally as the sync process usually takes a bit long time.
- First, download the latest version of iTunes on your Windows PC. You can download it from Apple’s official website.

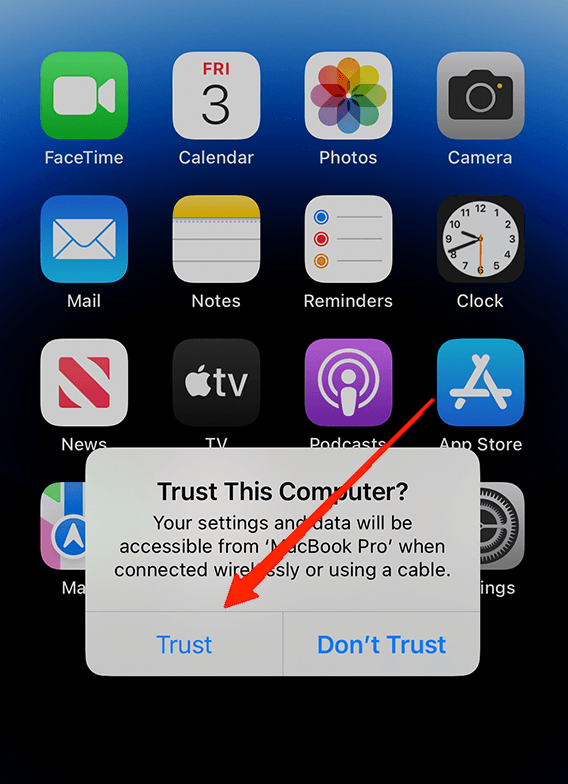
- Use a USB cable to connect your iPhone to the computer.

- Click on the “Trust This Computer” option and enter your passcode on your iPhone.
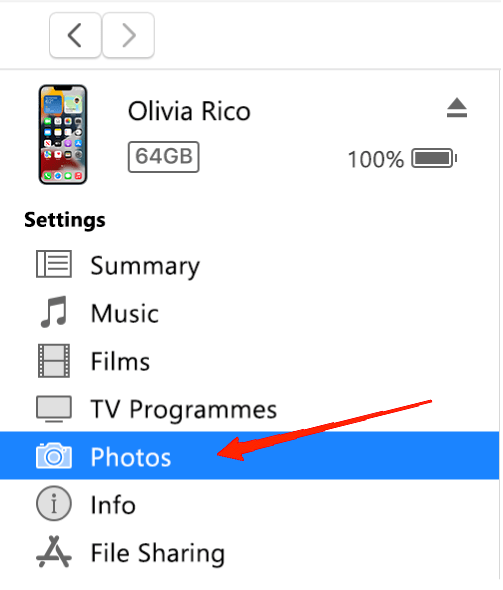
- Wait for iTunes to detect your iPhone. Once it does, click on the photos section present in the left pane.
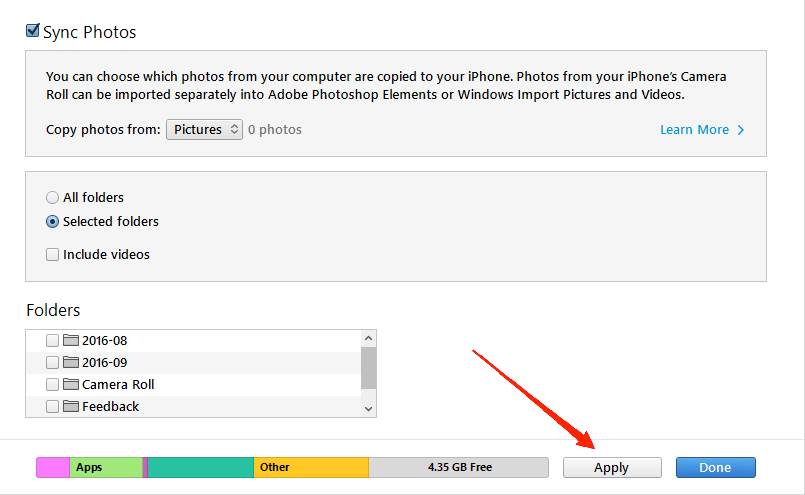
- Here, select all photos that you wish to sync and click Apply.
2. Using Windows Explorer
Windows provides an easy way to share files between devices. Once you connect your iPhone to a Windows computer, you can open its contents and take a backup of files manually.
The only drawback here is that sometimes you will also end up with some gibberish temporary files that are of no use to you. Here is a step-by-step method of transferring local iPhone photos and videos to a Windows PC using Windows Explorer.
- Use a USB cable to connect your iPhone to the computer.
- Click on the “Trust” option and enter your passcode on your iPhone.
- Open File Explorer on your Windows PC.
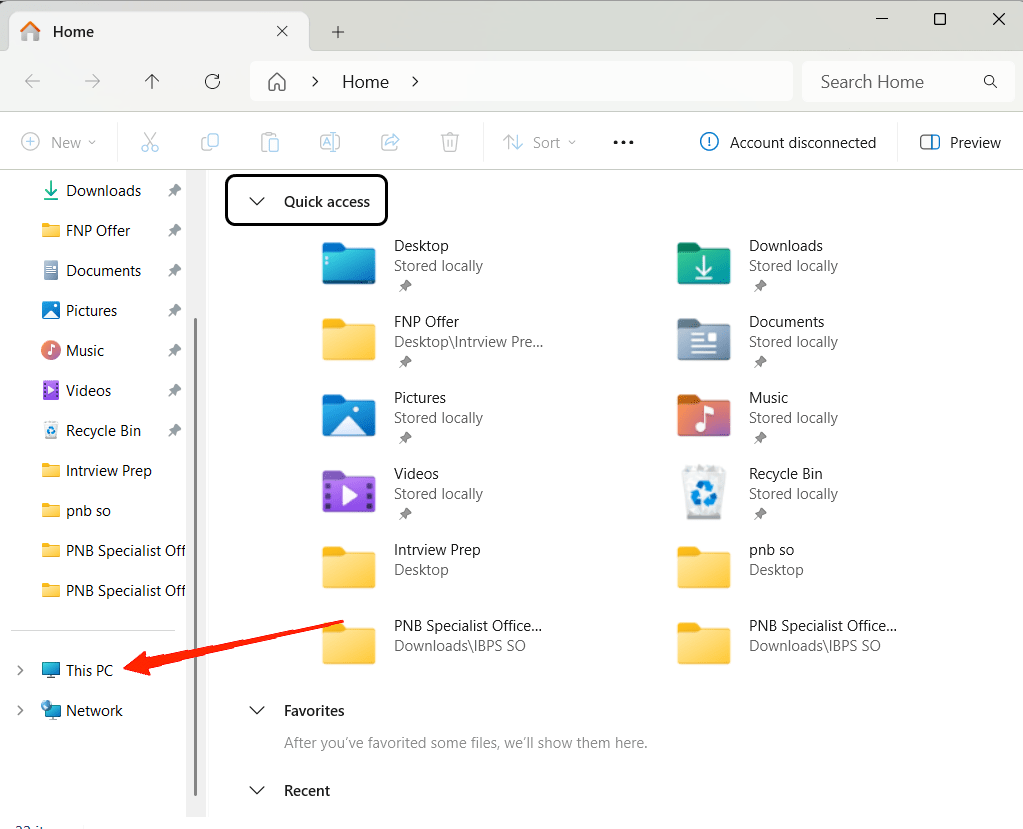
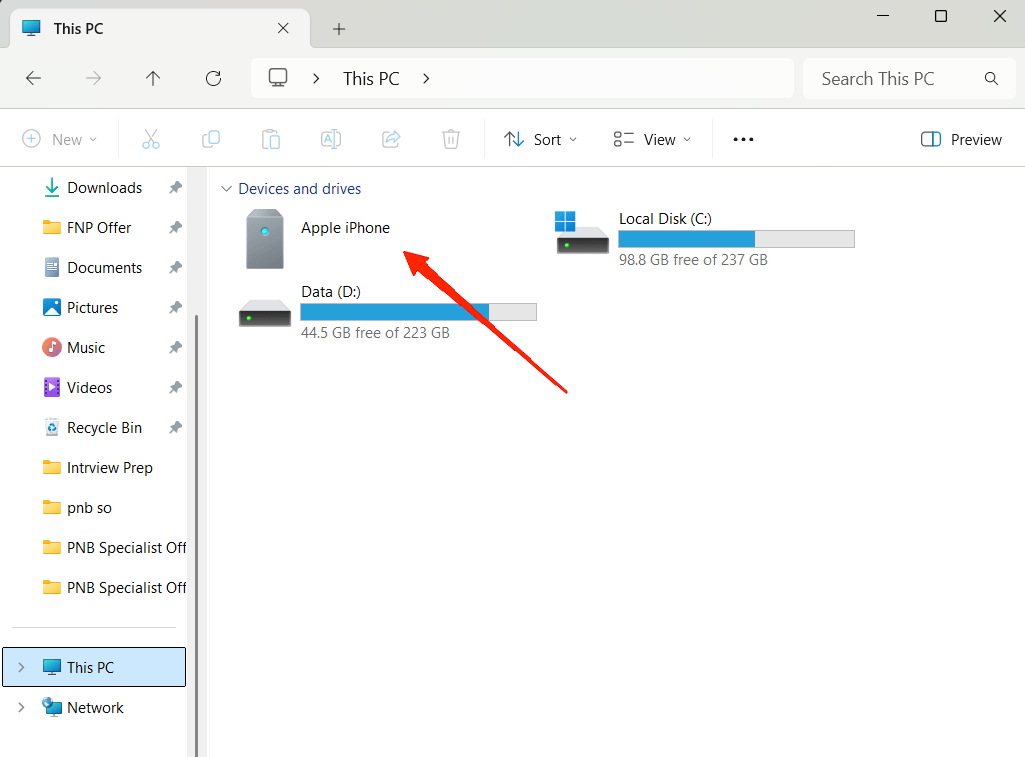
- Click on “This PC” and locate your iPhone under “Devices and drives.”
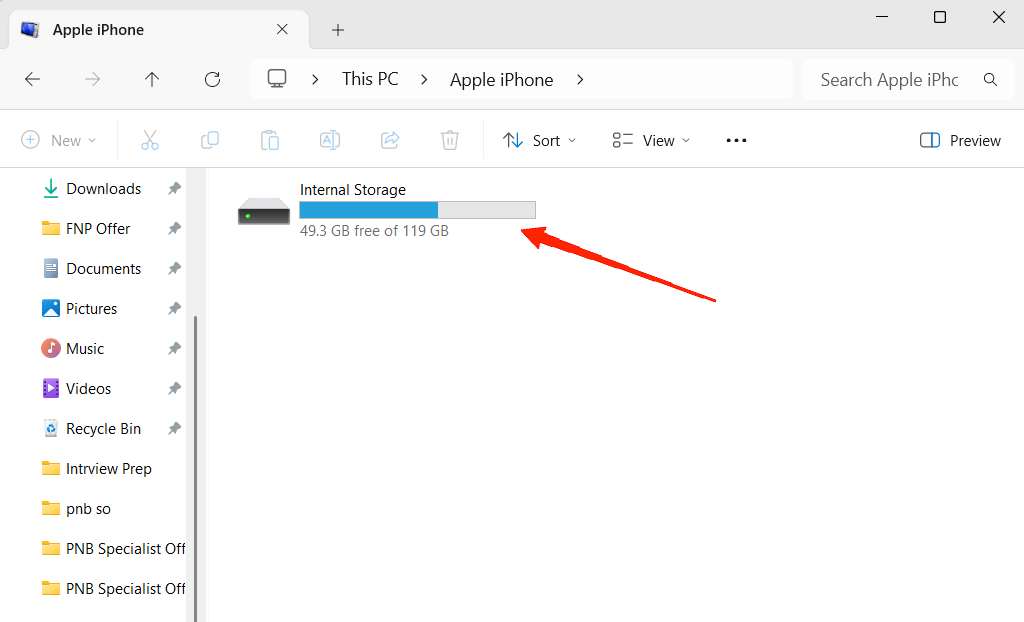
- Double-click your iPhone and navigate to Internal Storage.
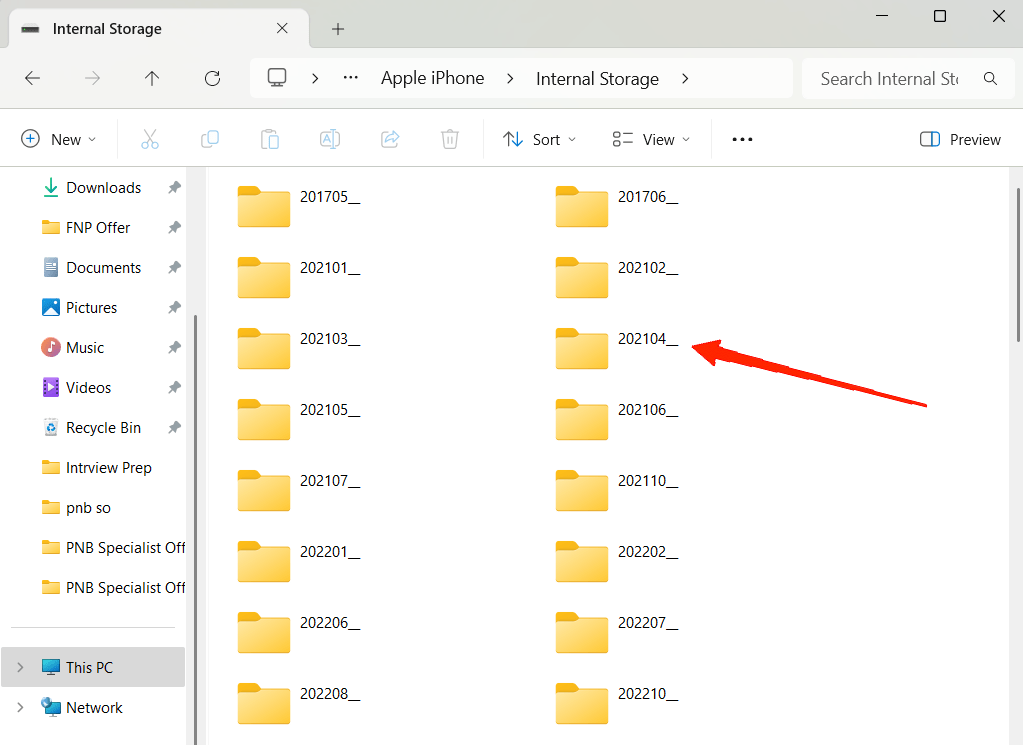
- Inside internal storage, you will see multiple alphanumerical folders. These folders will contain your photos and videos along with other system files.
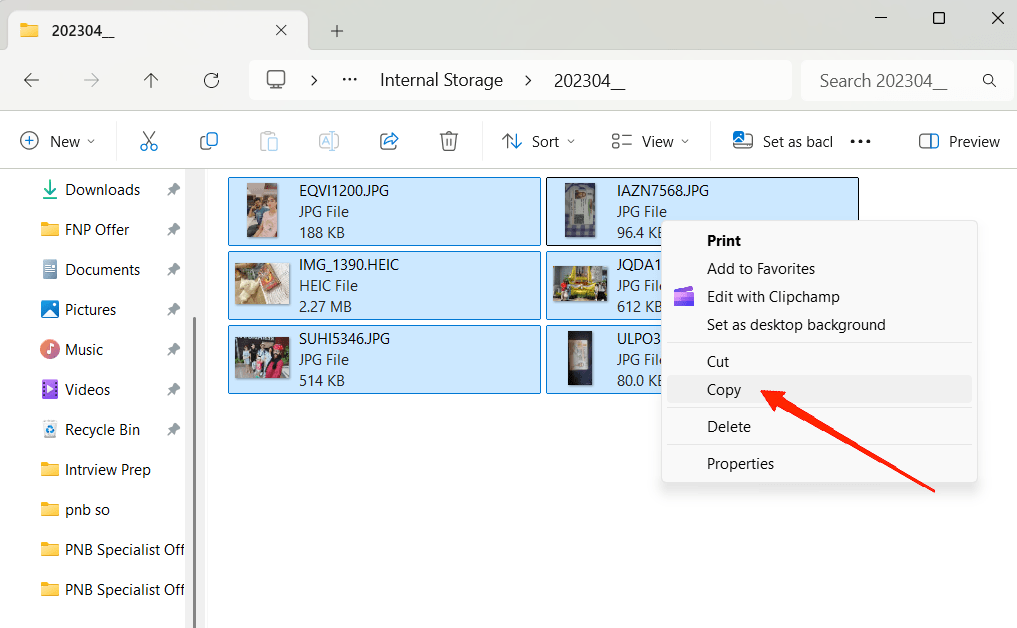
- Select the files you want to transfer and copy them to your preferred location on the PC. If you want to take a complete backup, you may select all files and copy them to your computer.
3. Using Windows Photos App
For those who want a seamless experience, Windows Photos App is another handy tool. It can import your media files with just a few clicks once your iPhone is connected. Here is step by step process to backup your iPhone photos and videos using Windows Photos app.
- Use a USB cable to connect your iPhone to the computer.
- Click on the “Trust” option and enter your passcode on your iPhone.
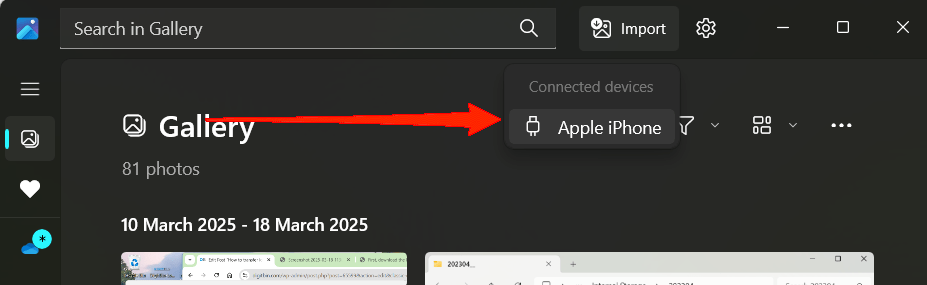
- On your PC, open the Photos app. Then, click on the Import button at the top right corner of the window.
- Choose the photos you want to transfer. You can pick specific ones or select all of them.
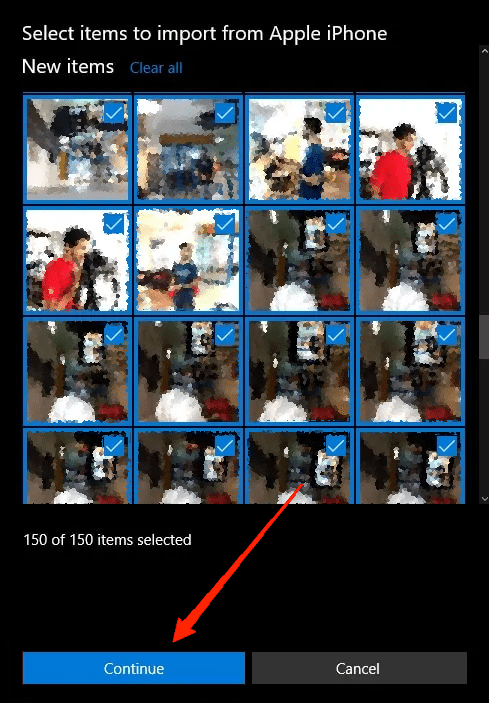
- Once done, click “Continue” to start the import process.
4. Using iCloud
If you prefer wireless transfer, you can use iCloud Photos instead of iTunes. However, this method is data intensive and is only recommended when you have a fast wifi connection available. Additionally, you will first have to back up your device photos and videos to iCloud.
Oftentimes, this method is best for users who have less amount of pictures and media on their device, but once you have a huge pile of photos and videos after attending a celebration or a vacation, the iCloud basic storage of 5GB doesn’t help much. If you wish to transfer local iPhone photos and videos to Windows PC over the cloud, follow the below step by step method.
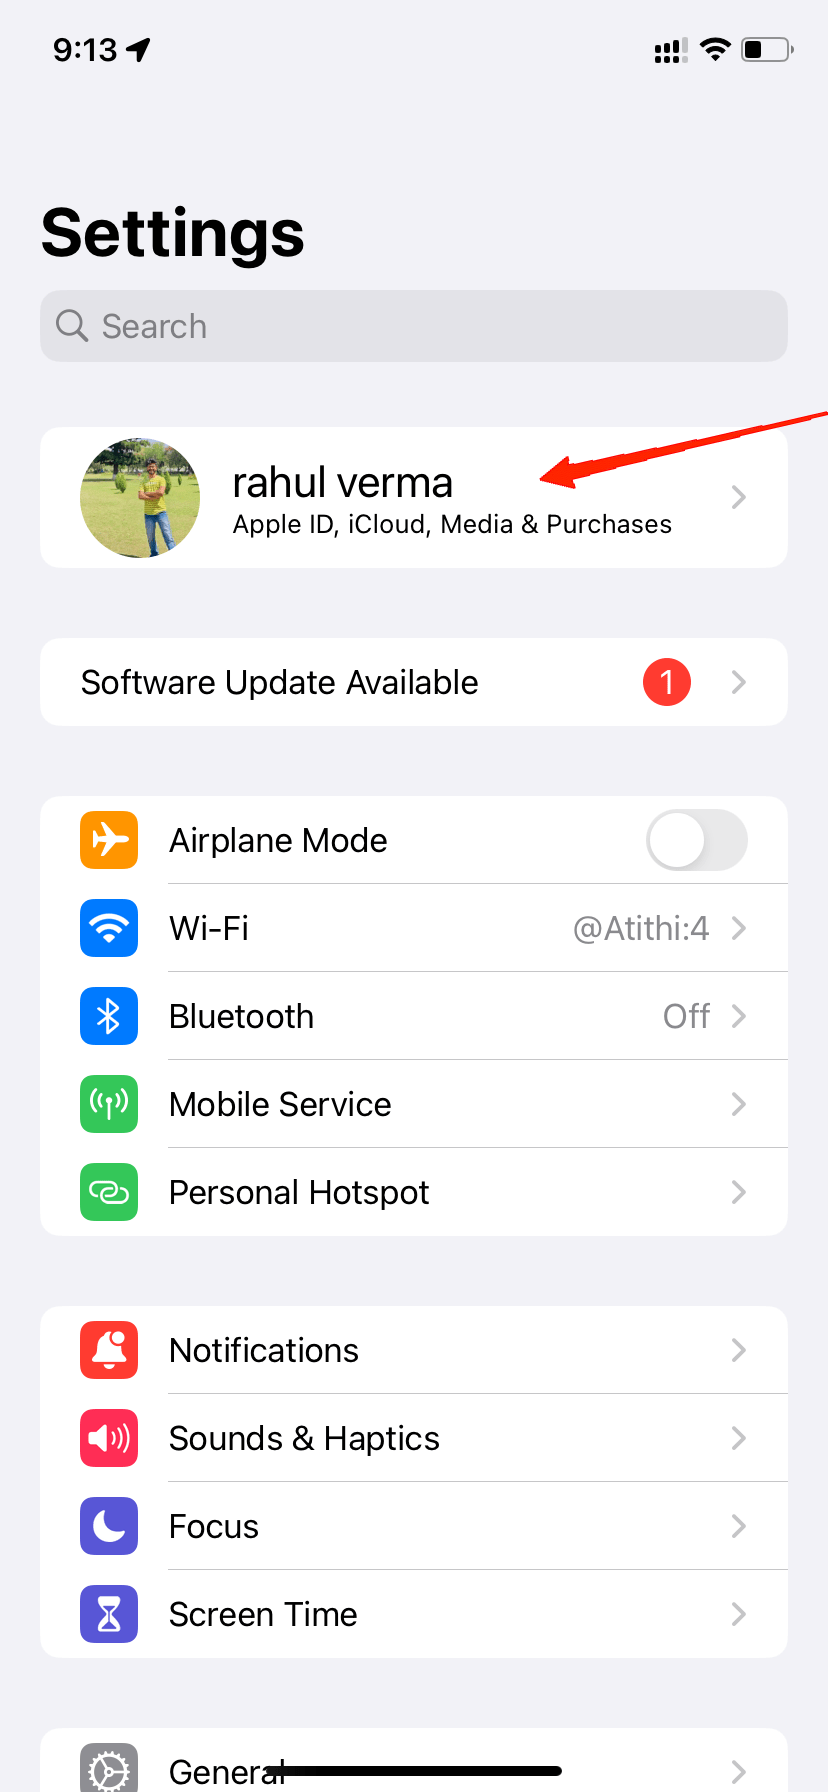
- On your iPhone, Navigate to Settings > Your Account Name > iCloud > Photos.
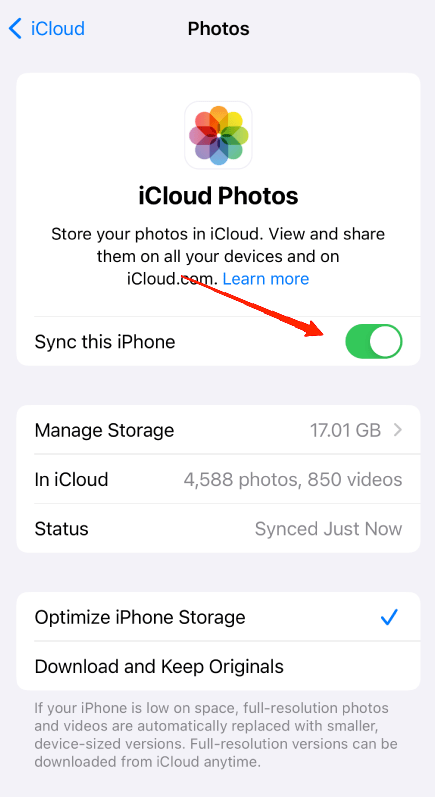
- Here, enable the iCloud Photos option and wait for the backup process to complete.
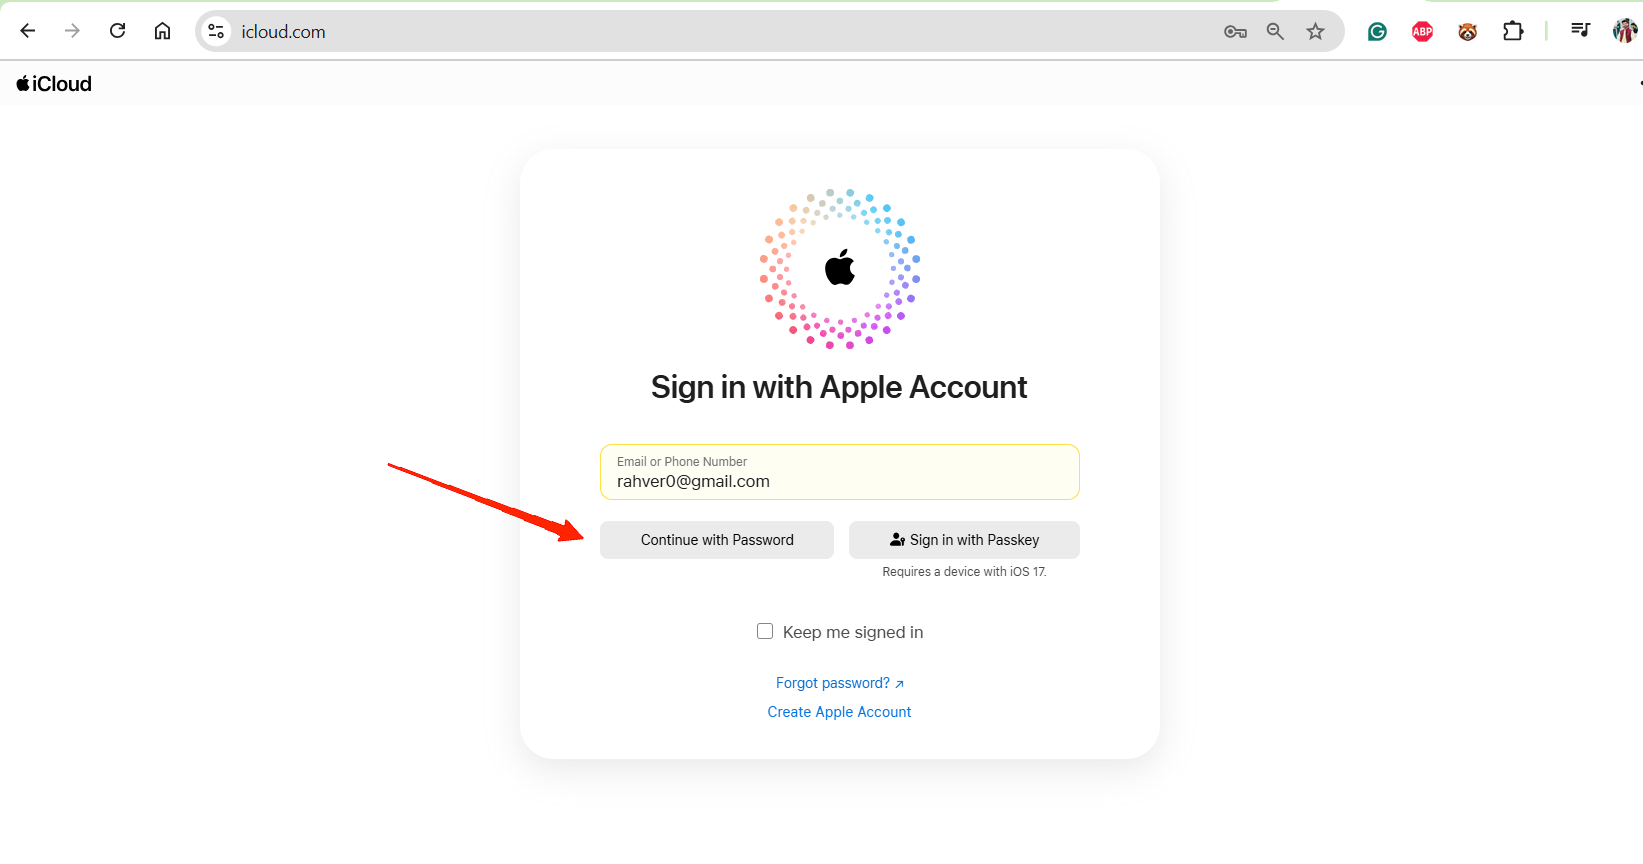
- On your Windows PC, open a web browser and visit the iCloud website.

- Sign in with your Apple ID and enable Photos syncing to access your iPhone photos on your PC.
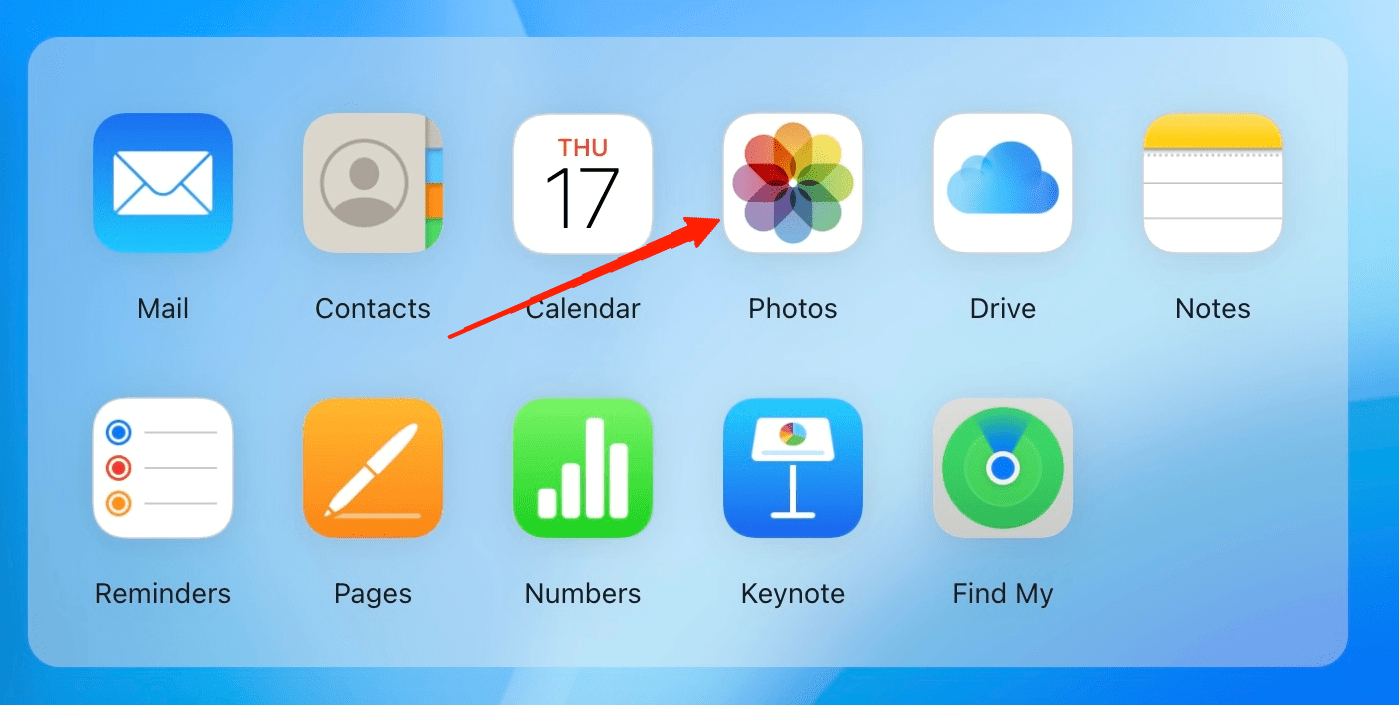
- Click on Select Photos and choose the images you’d like to download.
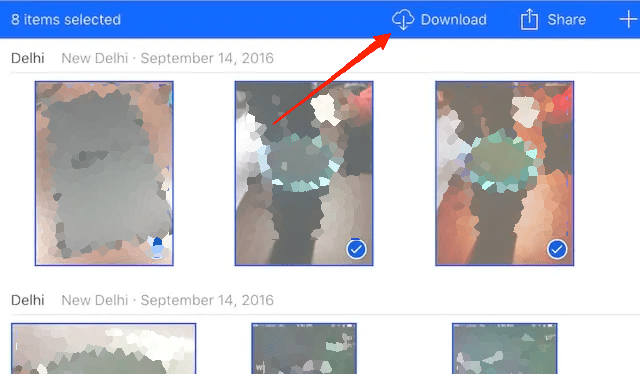
- To select multiple photos, hold down the Ctrl key while clicking each photo.

- After selecting your desired photos, click the Download button to save them to your PC.
5. Using Third-Party Apps
You can also use third-party apps like Google Photos, Dropbox, or OneDrive. These cloud services offer automatic backups and make it easy to access your files from any device. If you prefer a quick, wireless transfer without using the cloud, apps like Quickshare, AirDrop alternatives, or dedicated transfer apps can help.
Conclusion
This brings us to the end of this guide on how to transfer local iPhone photos and videos to a Windows PC. We have shared multiple methods for transferring photos and videos from your iPhone to a Windows PC. Whether you prefer using a cable, cloud storage, or third-party apps, each method has its advantages. Choose the one that fits your needs best and enjoy having your memories safely stored on your computer.
If you've any thoughts on How to Transfer Local iPhone Photos and Videos to Windows PC?, then feel free to drop in below comment box. Also, please subscribe to our DigitBin YouTube channel for videos tutorials. Cheers!