Whenever you are inactive on a computer for a certain period, your system locks automatically. In certain cases, it might be helpful as it protects your PC from unknown access.
However, few users don’t find this feature useful as the screen will automatically lock due to inactivity. It can be daunting, especially in the case where users are preparing documents and notice the screen turn off.
If you want to stop your Windows computer from locking itself, we have shared with you three effective ways that will help you stop Windows from auto-locking the screen.
Top Ways to Stop PC from Automatically Locking Itself
Below, we have listed three different ways to turn off the screen automatically lock on the Windows computer.
1. Increase Lock Screen Timeout
If the screen timeout is set to less time then your computer will automatically lock quicker. It is suggested you increase the lock screen timeout duration on your computer. Here’s how:
- Press the Windows + I key together on the keyboard to launch the Settings app.
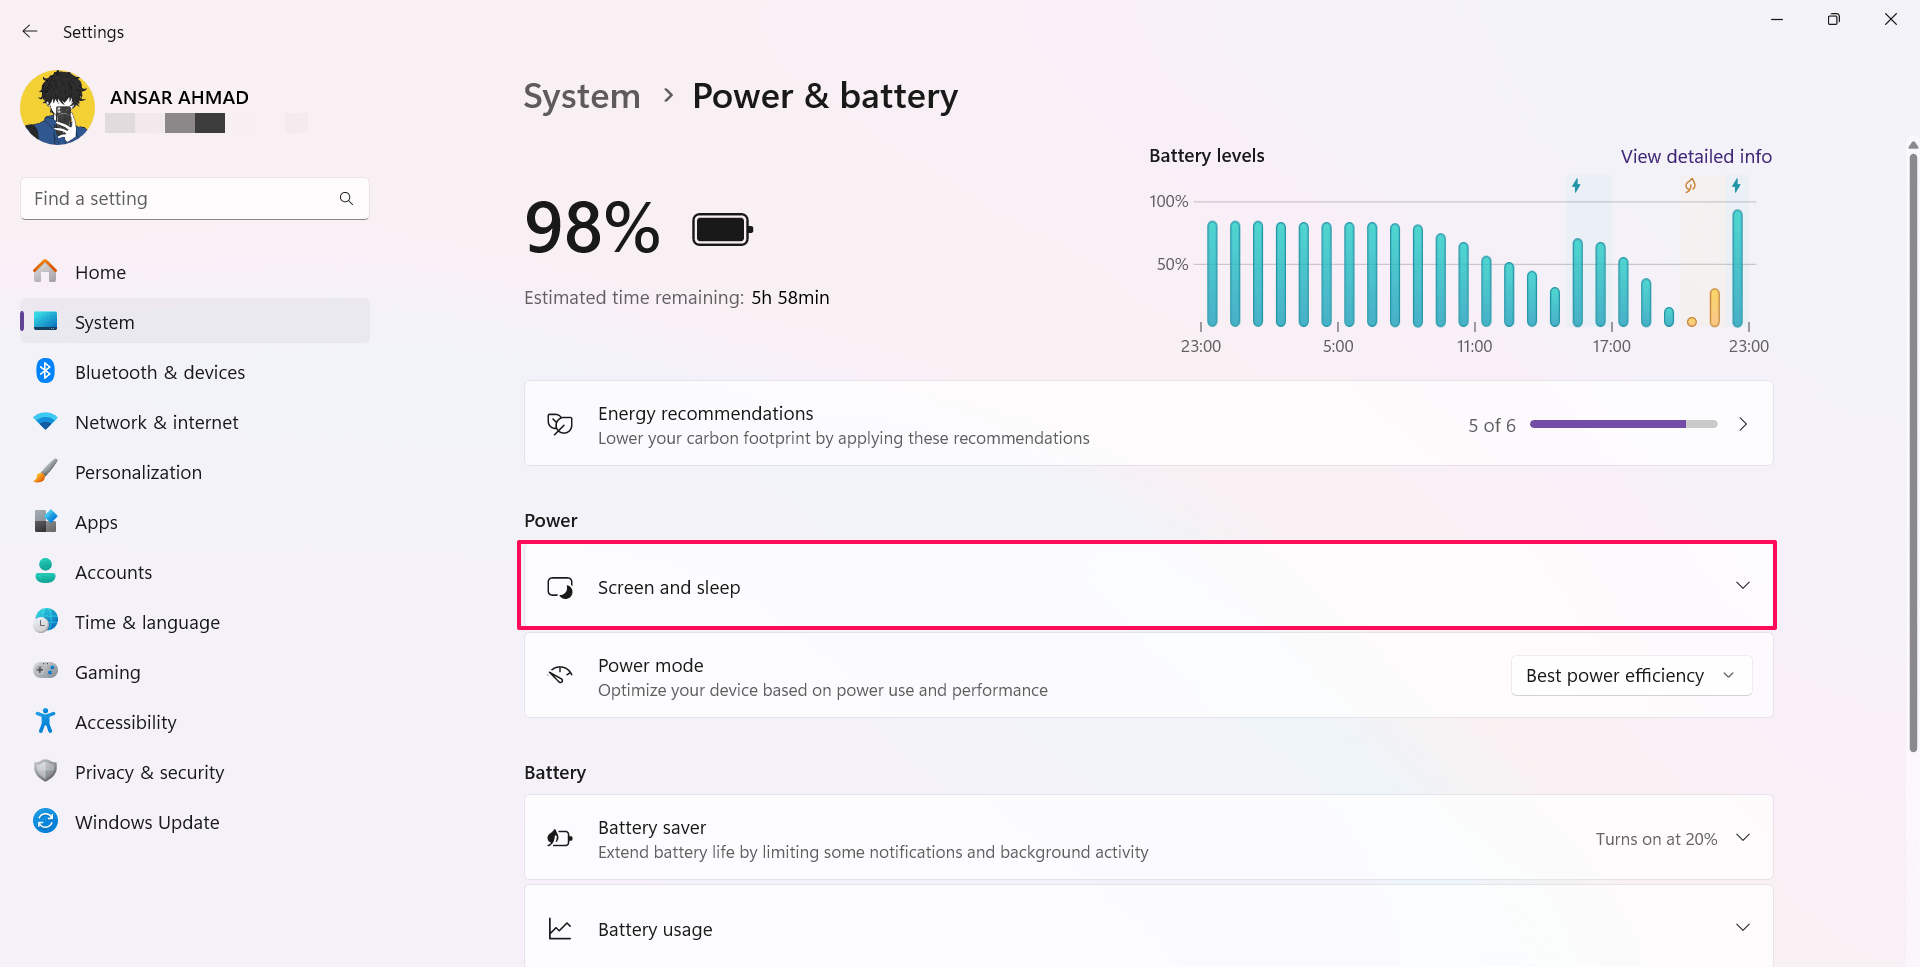
- Click on the System and choose “Power & battery” on the right side.
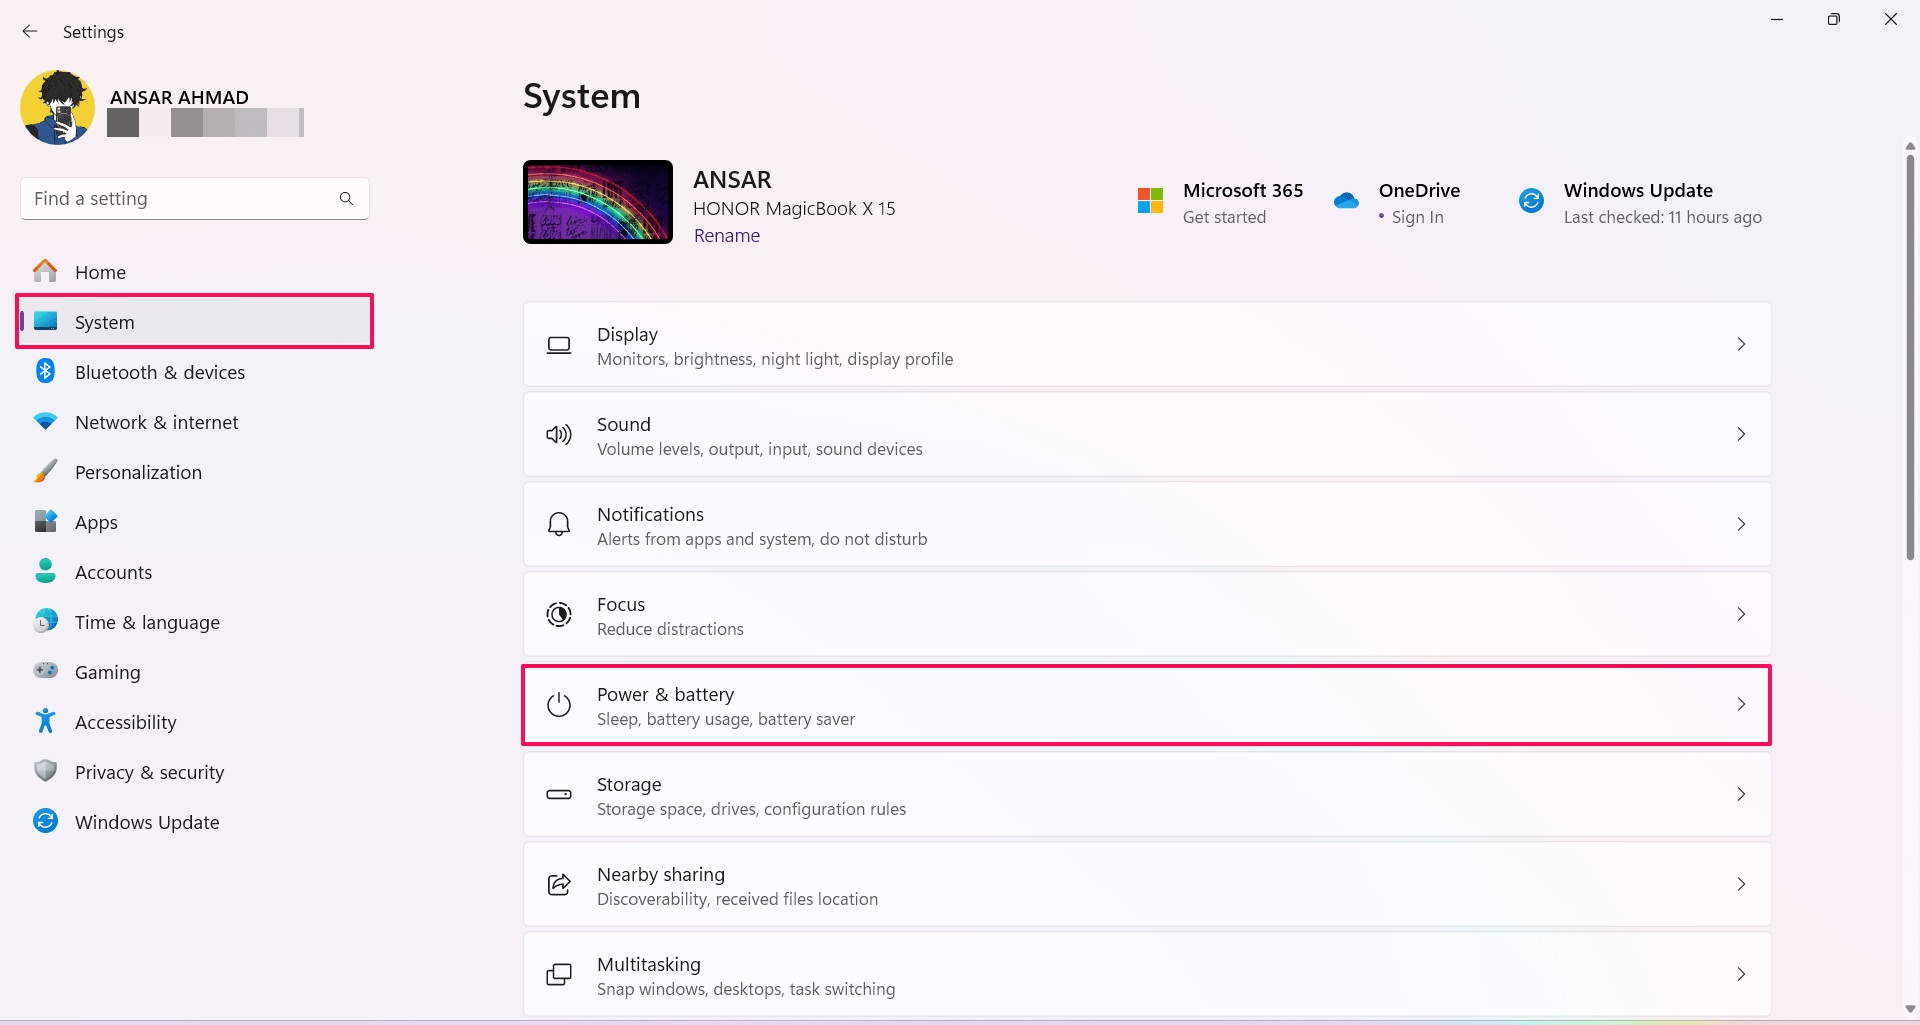
- In the Power section, click on “Screen and sleep” to expand it.
- Here, you can see different options with individual time durations. Click on the drop-down menu next to the desired option and select the Time duration.
- By clicking on the drop-down menu, you will get various time durations like 5 minutes, 10 minutes, etc.
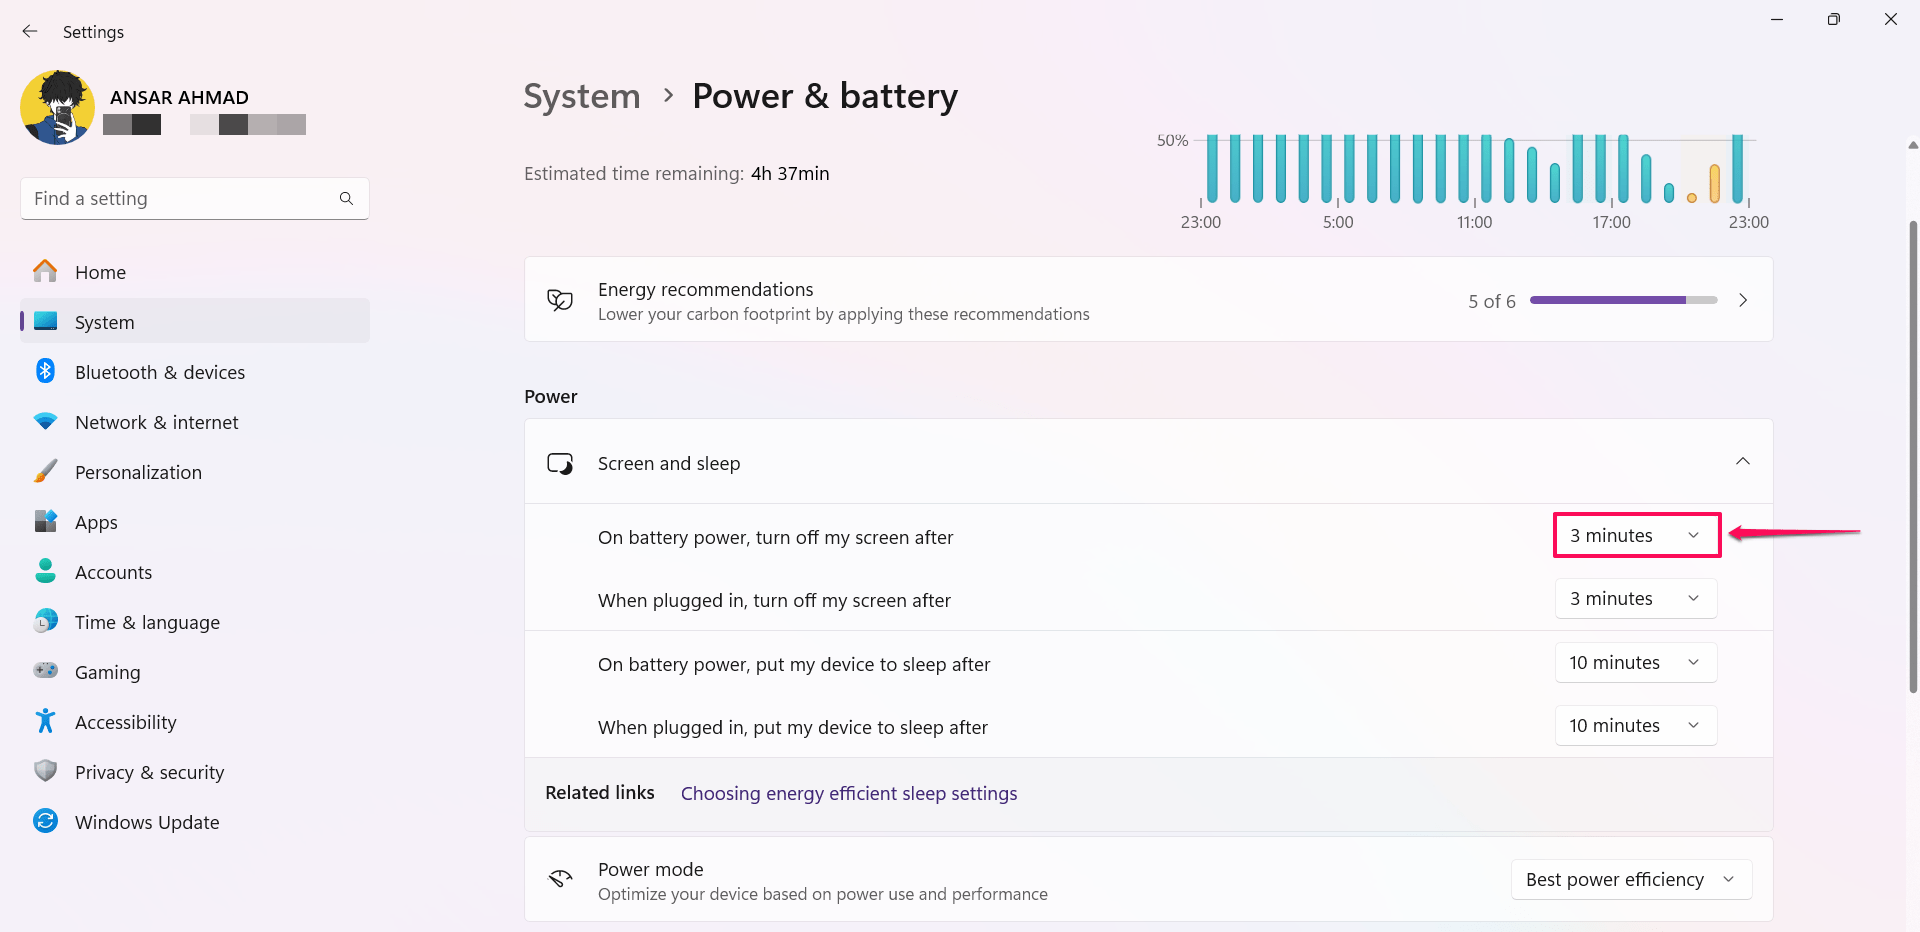
Alternatively, you can choose “Never” from the drop-down menu to keep your Windows computer from getting sleep. This means the computer will keep on until you physically turn off your computer.
2. Turn Off Dynamic Lock
Dynamic Lock is one of the useful features on Windows that automatically locks your computer when you leave it unattended. This feature relies on Bluetooth technology to operate. When you leave Bluetooth range for at least 30 seconds, the connection between your PC and phone weakens and ultimately breaks.
- Press the Windows + I key together on the keyboard to launch the Settings app.
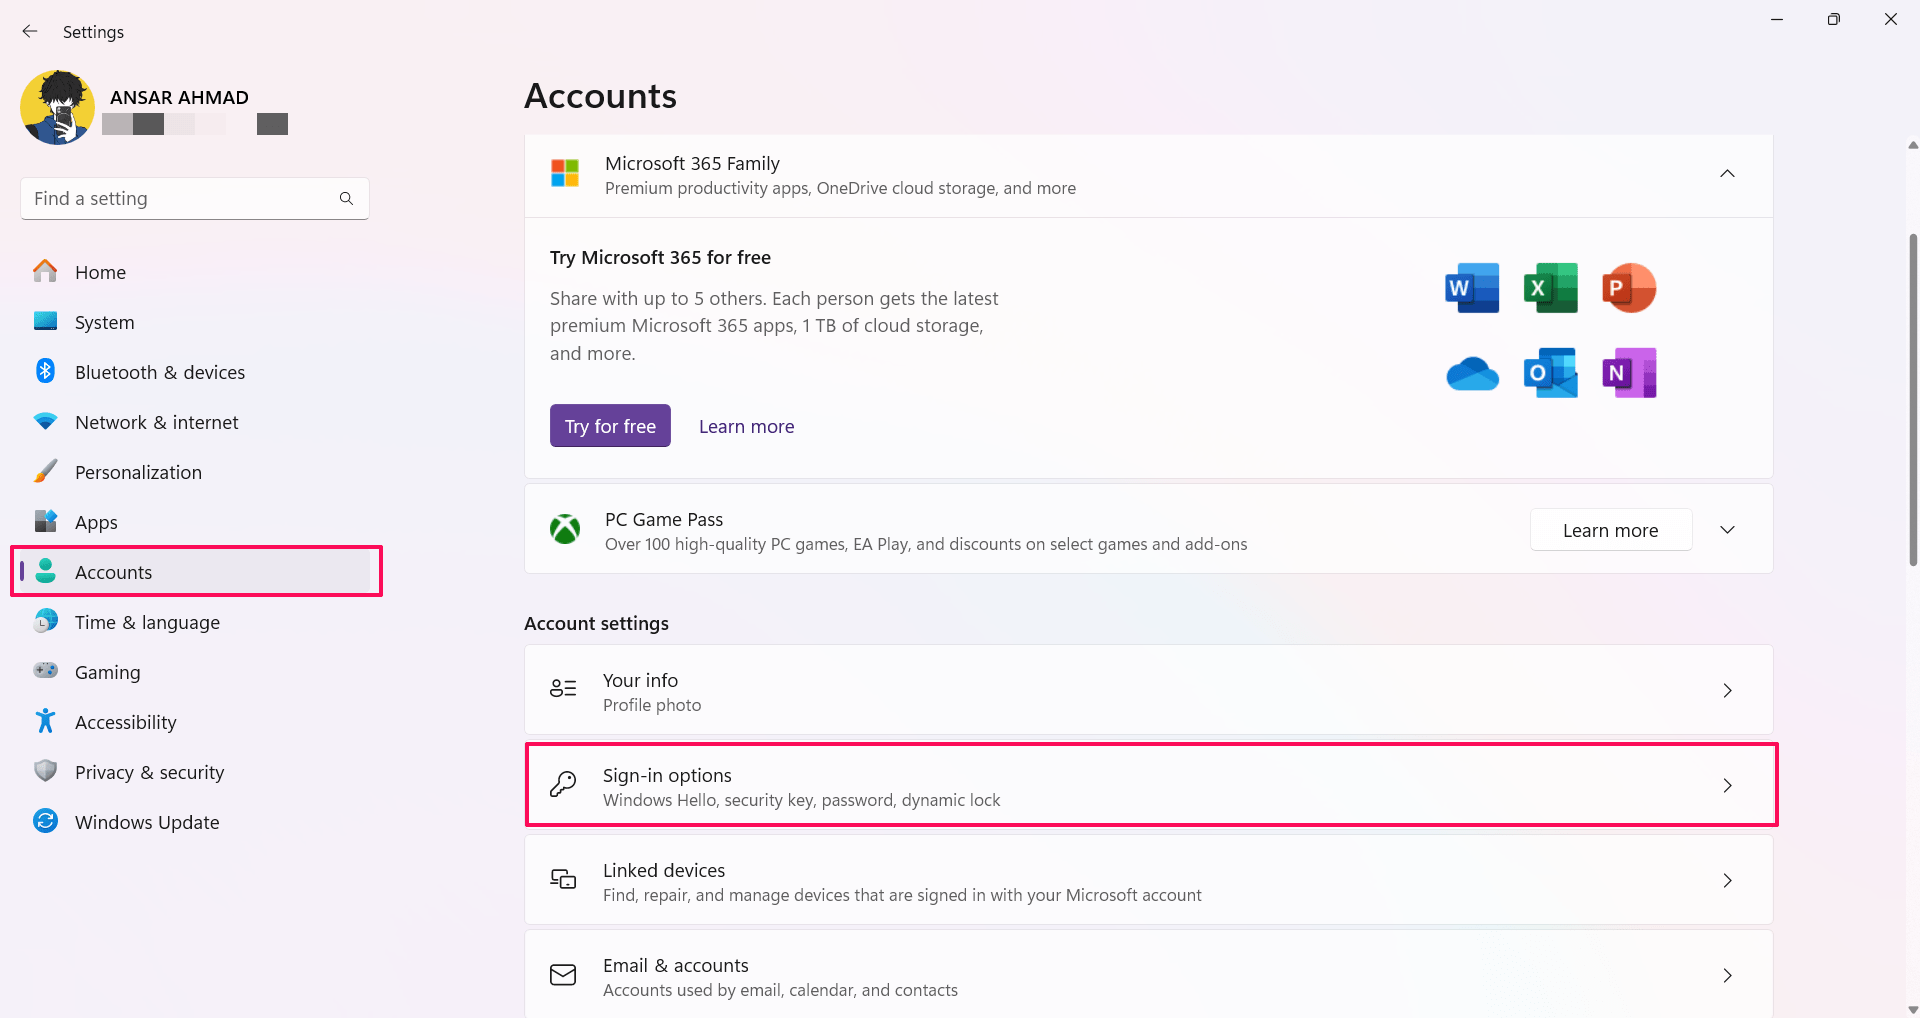
- Click on Accounts on the left-hand side and choose Sign-In options.
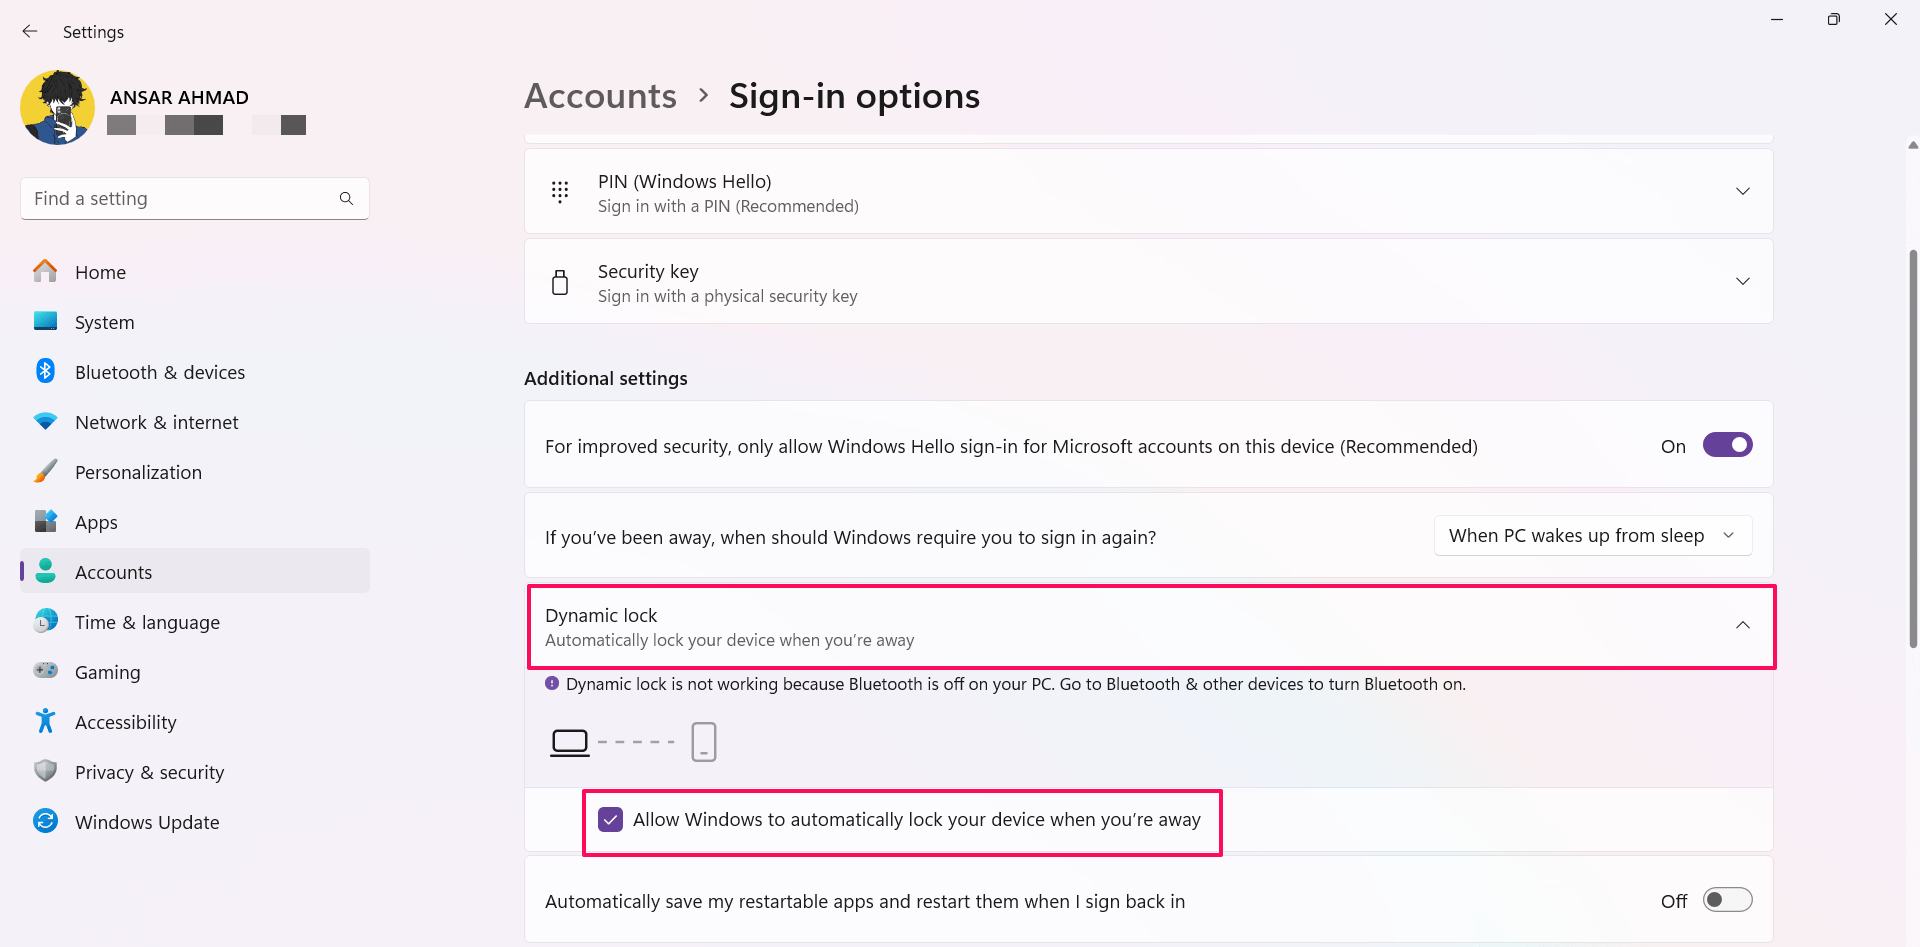
- In the Additional settings, click on the “Dynamic Lock” and uncheck the “Allow Windows to automatically lock your device when you’re away” to disable Dynamic Lock.
3. Edit the Windows Registry Tool
You can use the Registry Editor on your computer to stop Windows from automatically locking itself. Make sure to take a complete backup of your registry files or create a restore point just in case.
Editing the registry files can be challenging or risky. We suggest you follow this method if the above methods don’t work.
- Navigate to the start menu, type “Registry Editor” and click “Run as administrator.”
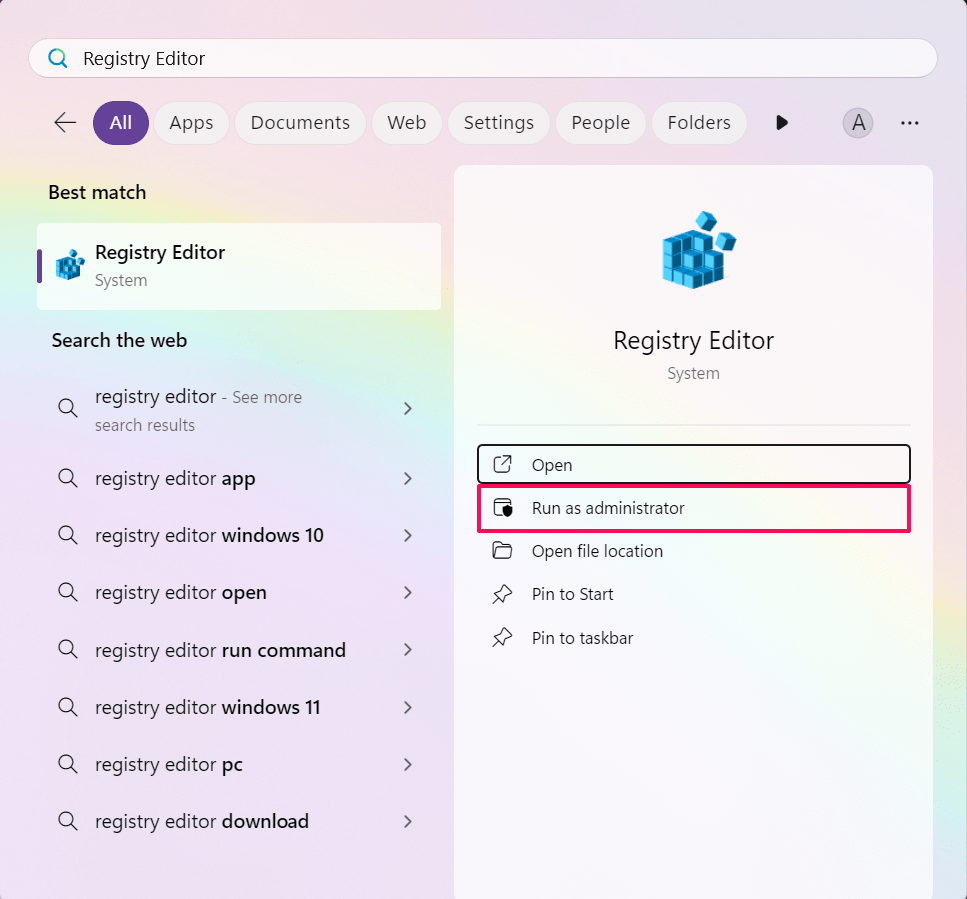
- If the User Account Control (UAC) menu pop-up on the screen, click Yes to proceed.
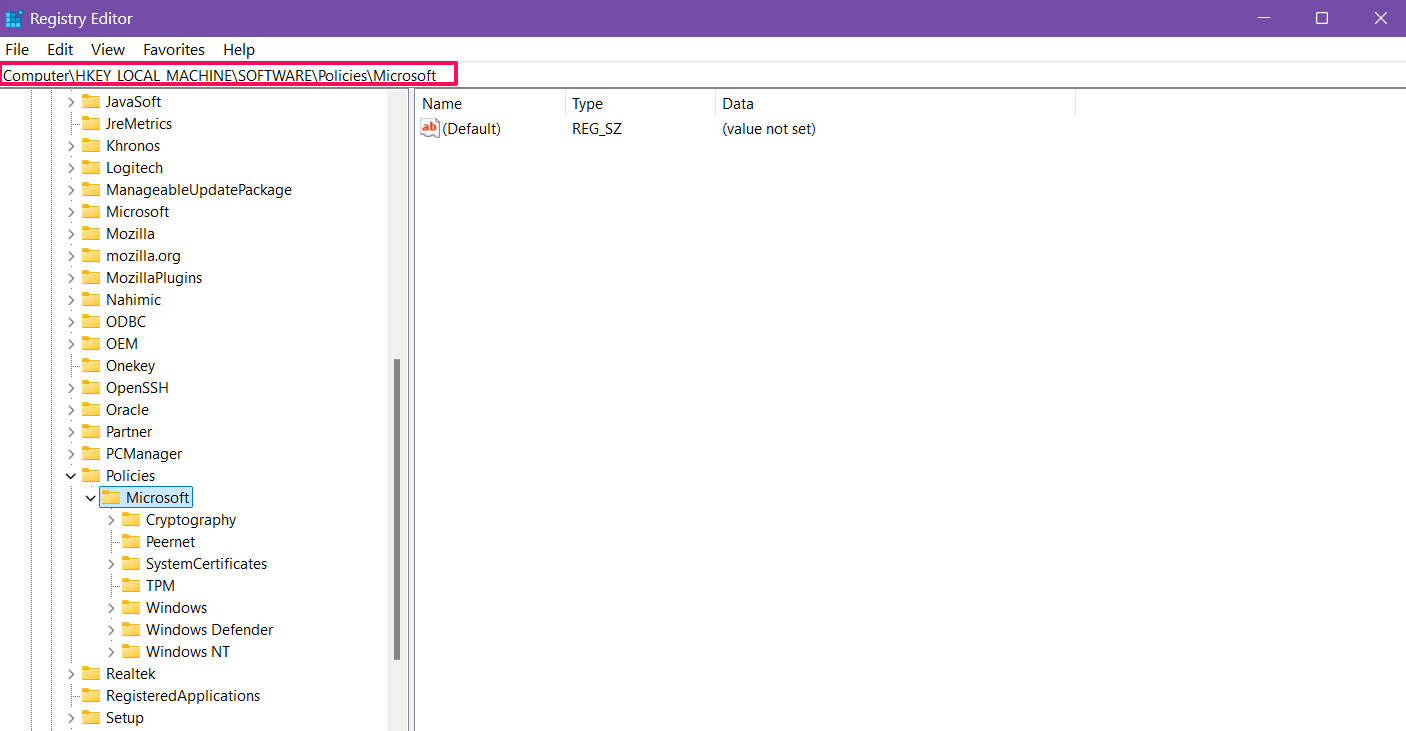
- In the Registry Editor window, head over to HKEY_LOCAL_MASCHINE > Software > Policies > Microsoft on the left-hand side.
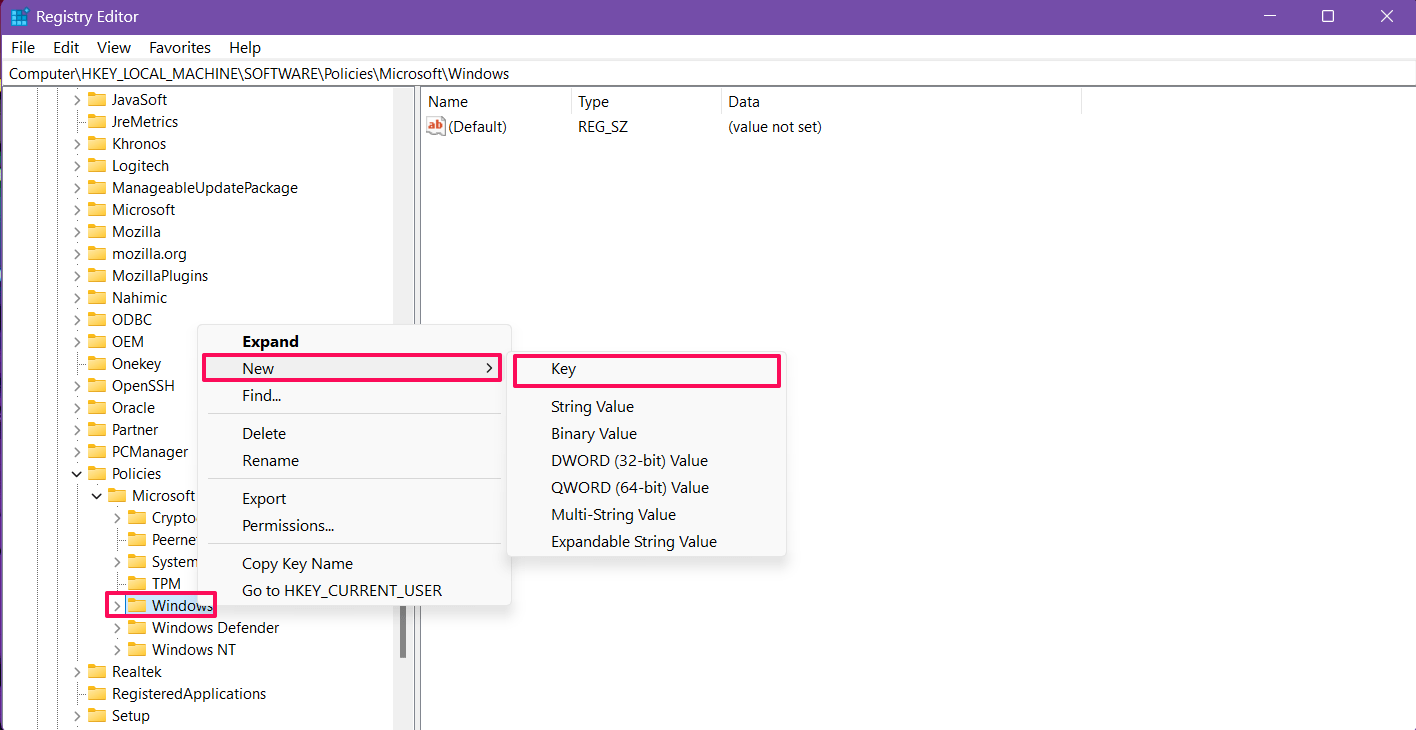
- Right-click on Windows and choose “New” > “Key.”
- Name the new key to “DisableAutoLock” and hit Enter.
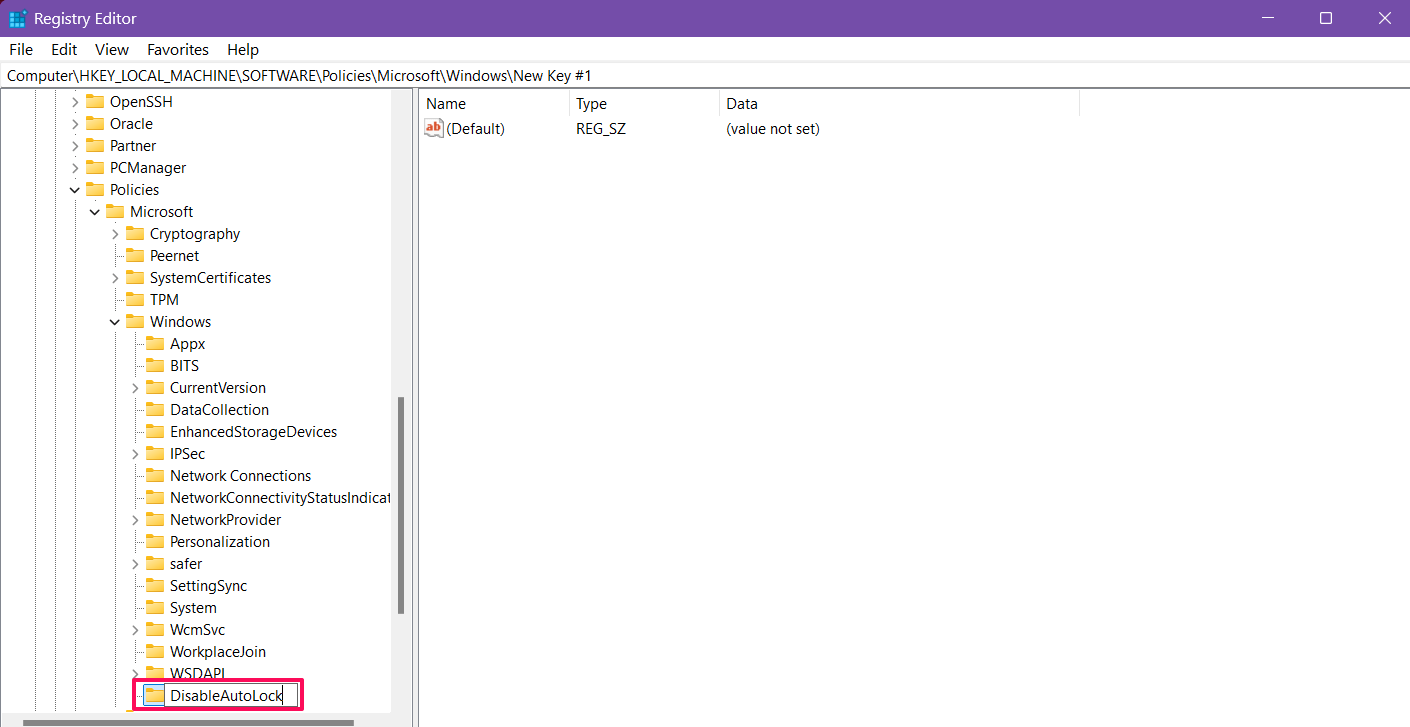
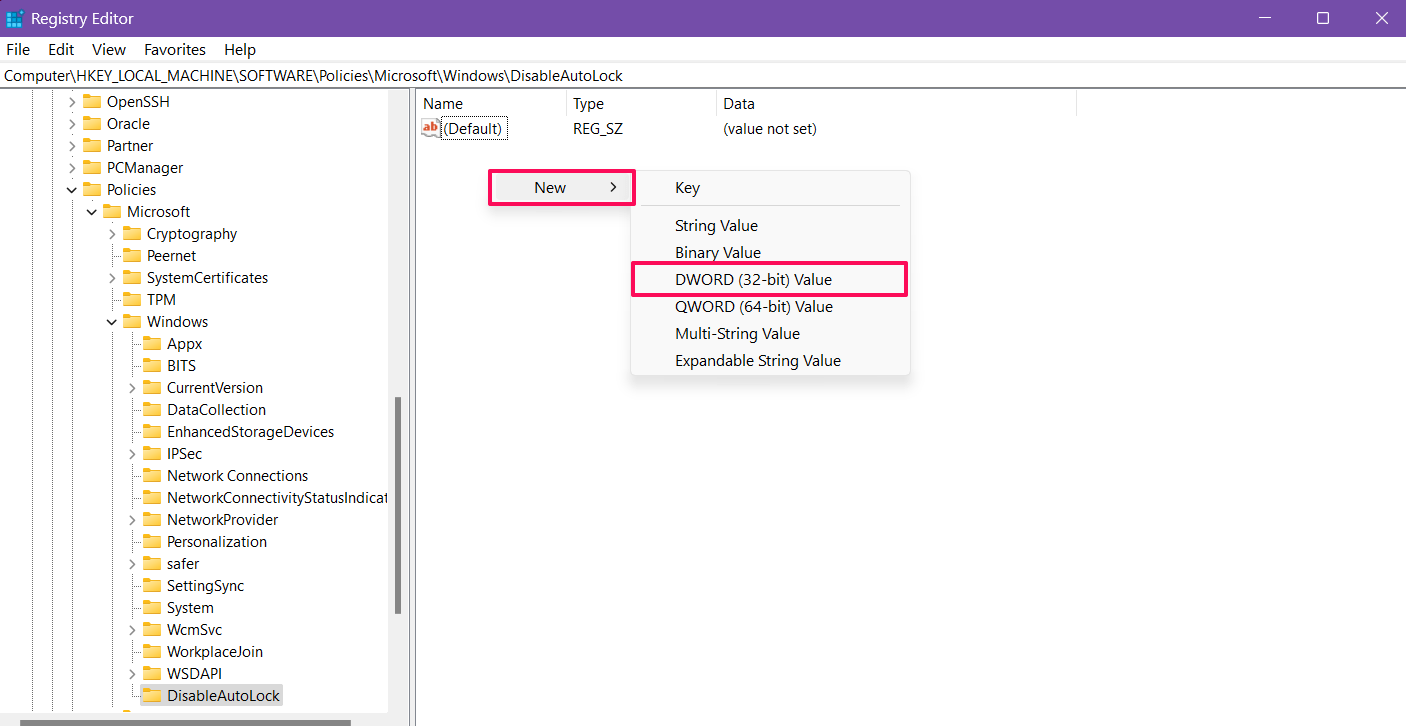
- Click on the “DisableAutoLock” key and choose “New.” Then, select “DWORD (32-bit) Value.”
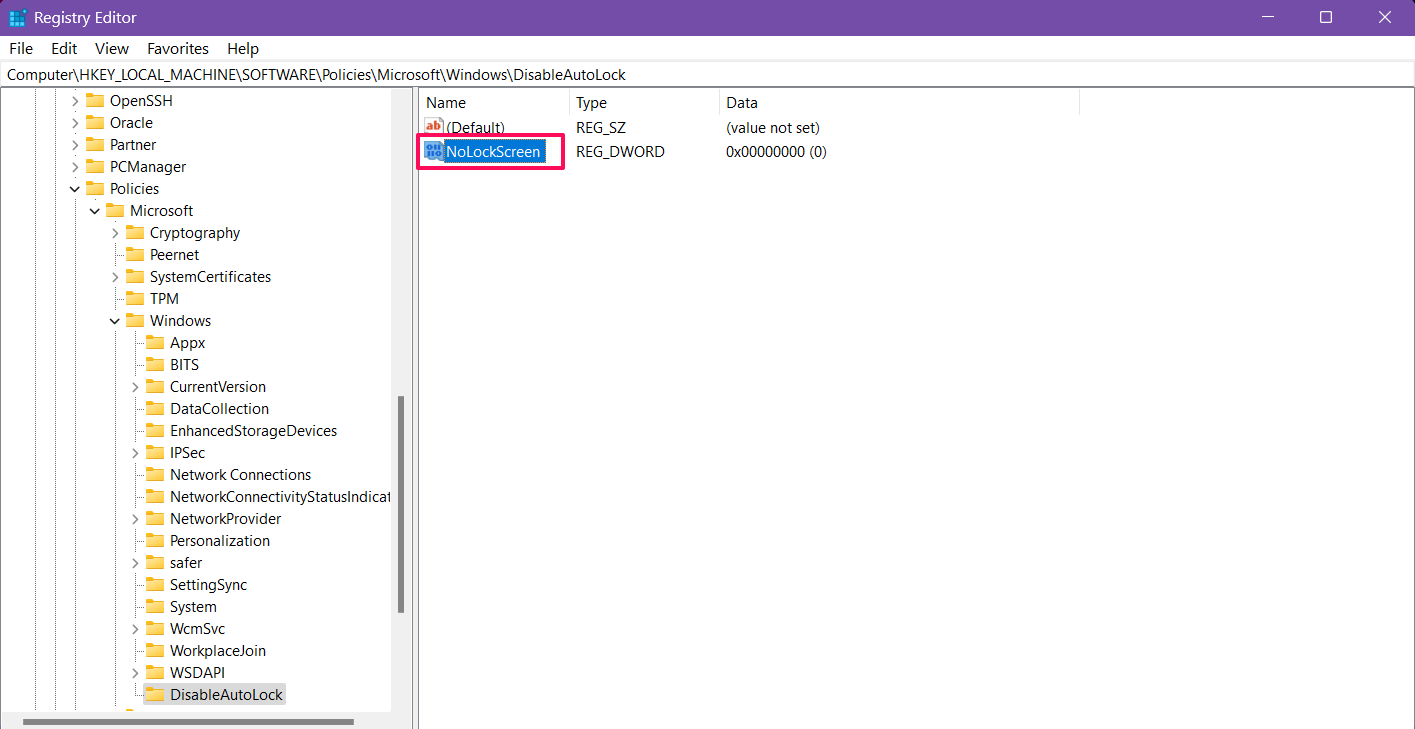
- Name the new value to “NoLockScreen” and hit Enter.
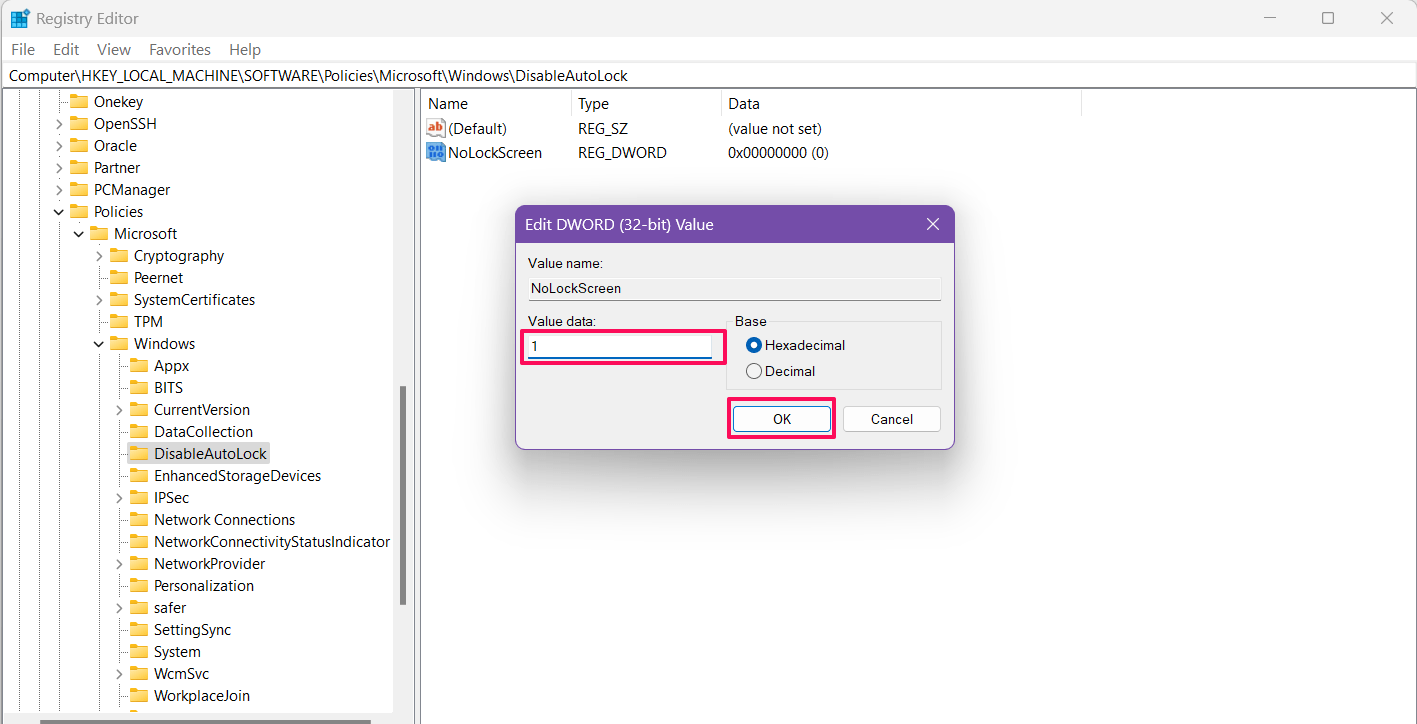
- Double-click on the NoLockScreen value and set the value data to 1.
- Finally, click OK and restart your computer to apply the changes.
Final Words
That’s it! Following the aforementioned workarounds, you can prevent Windows from automatically locking itself. If you’re a student or someone who requires constant on-screen attention, this will allow you to prevent your computer from locking itself and continue working on your ongoing projects without interruptions.
If you've any thoughts on How to Stop Windows 11 from Automatically Locking Itself, then feel free to drop in below comment box. Also, please subscribe to our DigitBin YouTube channel for videos tutorials. Cheers!