Google Photos is the best platform to back up pictures and videos from Android mobile. When you enable the backup and sync option on the Photos app, it will upload the photos and videos automatically from your Camera roll by default to the selected Google account.
Generally, users like to back up only photos and avoid videos due to limited storage space on the Photos app. But Google Photos by default uploads all the media captured on the Android Camera.
If you only want to backup photos and not videos to Google Photos on Android, this guide provides step-by-step instructions to stop video backups on Google Photos.
Steps to Make Google Photos Backup Only Photos Not Videos
In case you don’t know, the default camera app stores all photos and videos by default in the DCIM folder. If you have enabled the backup option, the G-Photos app will start uploading the photos and videos from the DCIM folder.
If you only want to backup photos to the cloud, then you have to either change the folder path for recorded videos to store them in a separate folder or move videos from DCIM to any other folder. As videos will not be available in DCIM, the backup will only upload photos to Google.
Here we have provided the automated and workable solution that will stop the video backups on Google Photos.
- Download the FolderSync app from the Play Store.
- Open the FolderSync app.
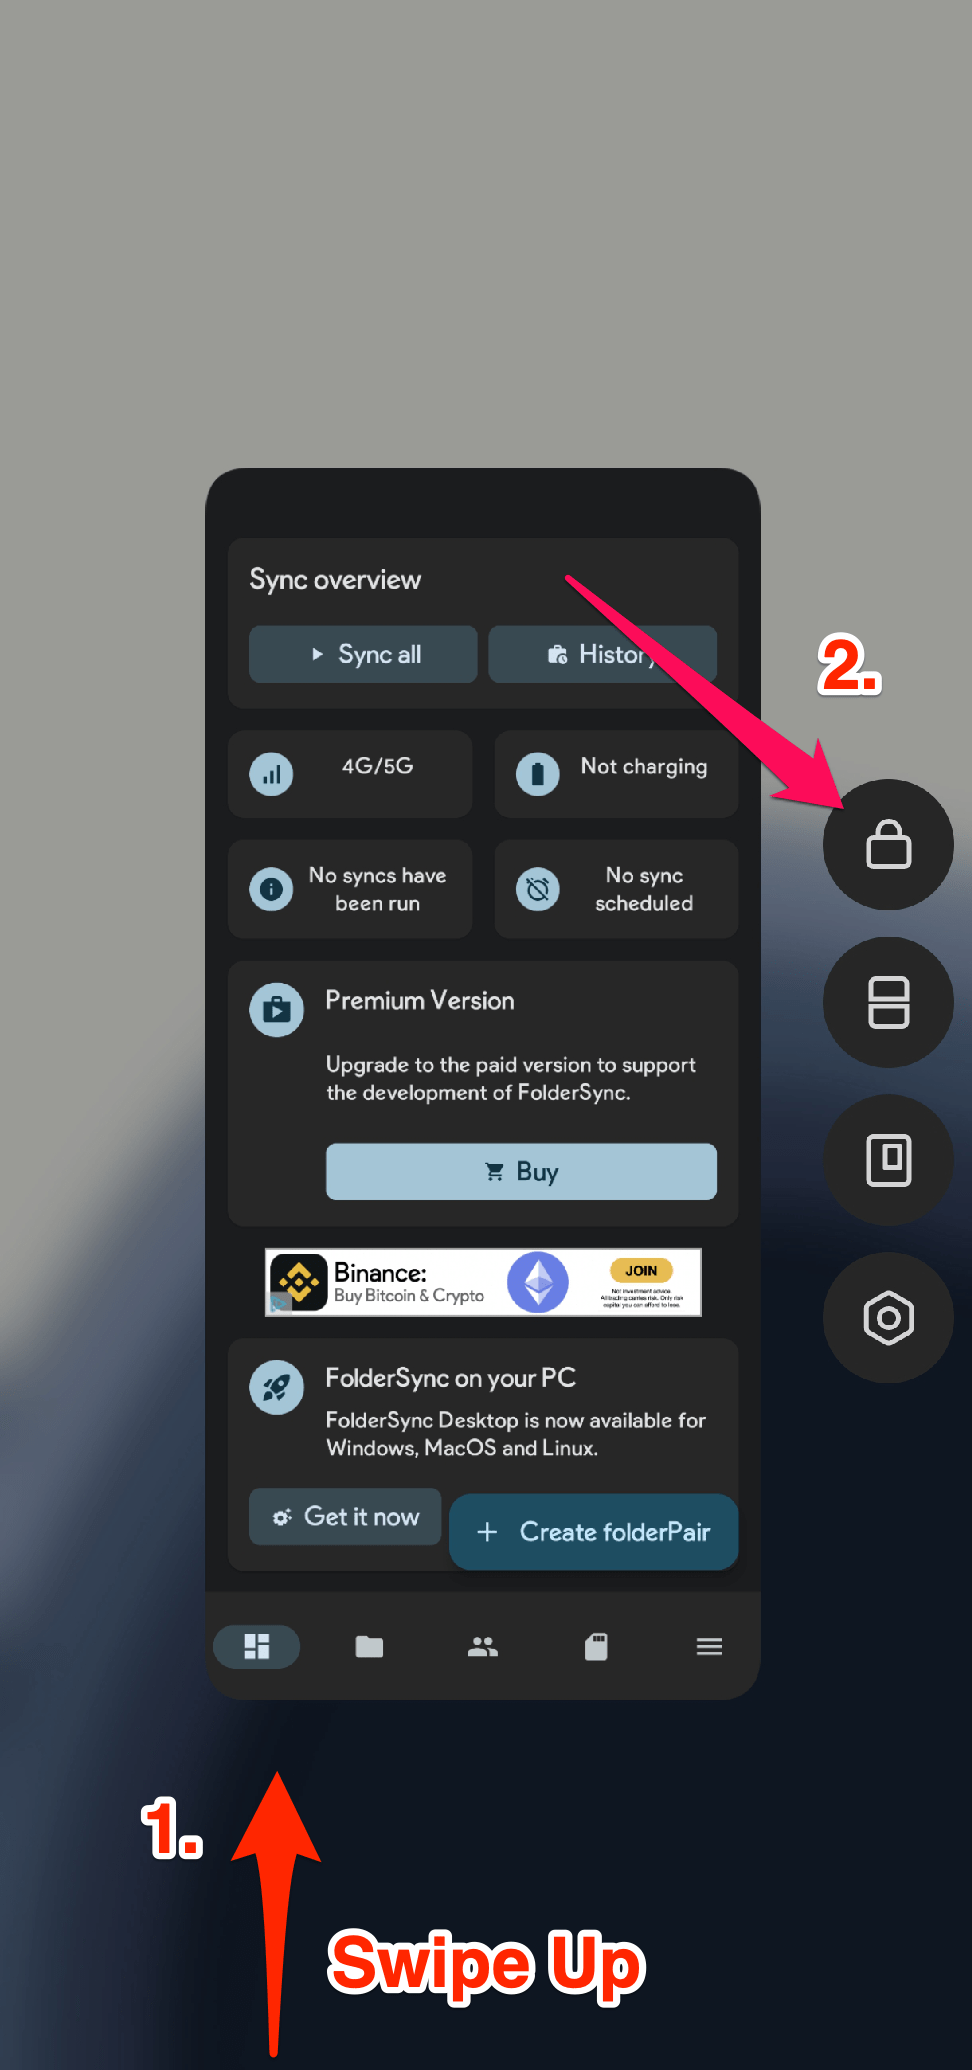
- Now, swipe up from the bottom of your screen to access the recent app’s view, long press on the FolderSync app, and tap on the Lock icon to lock the app. (This will ensure, the app works in the background)

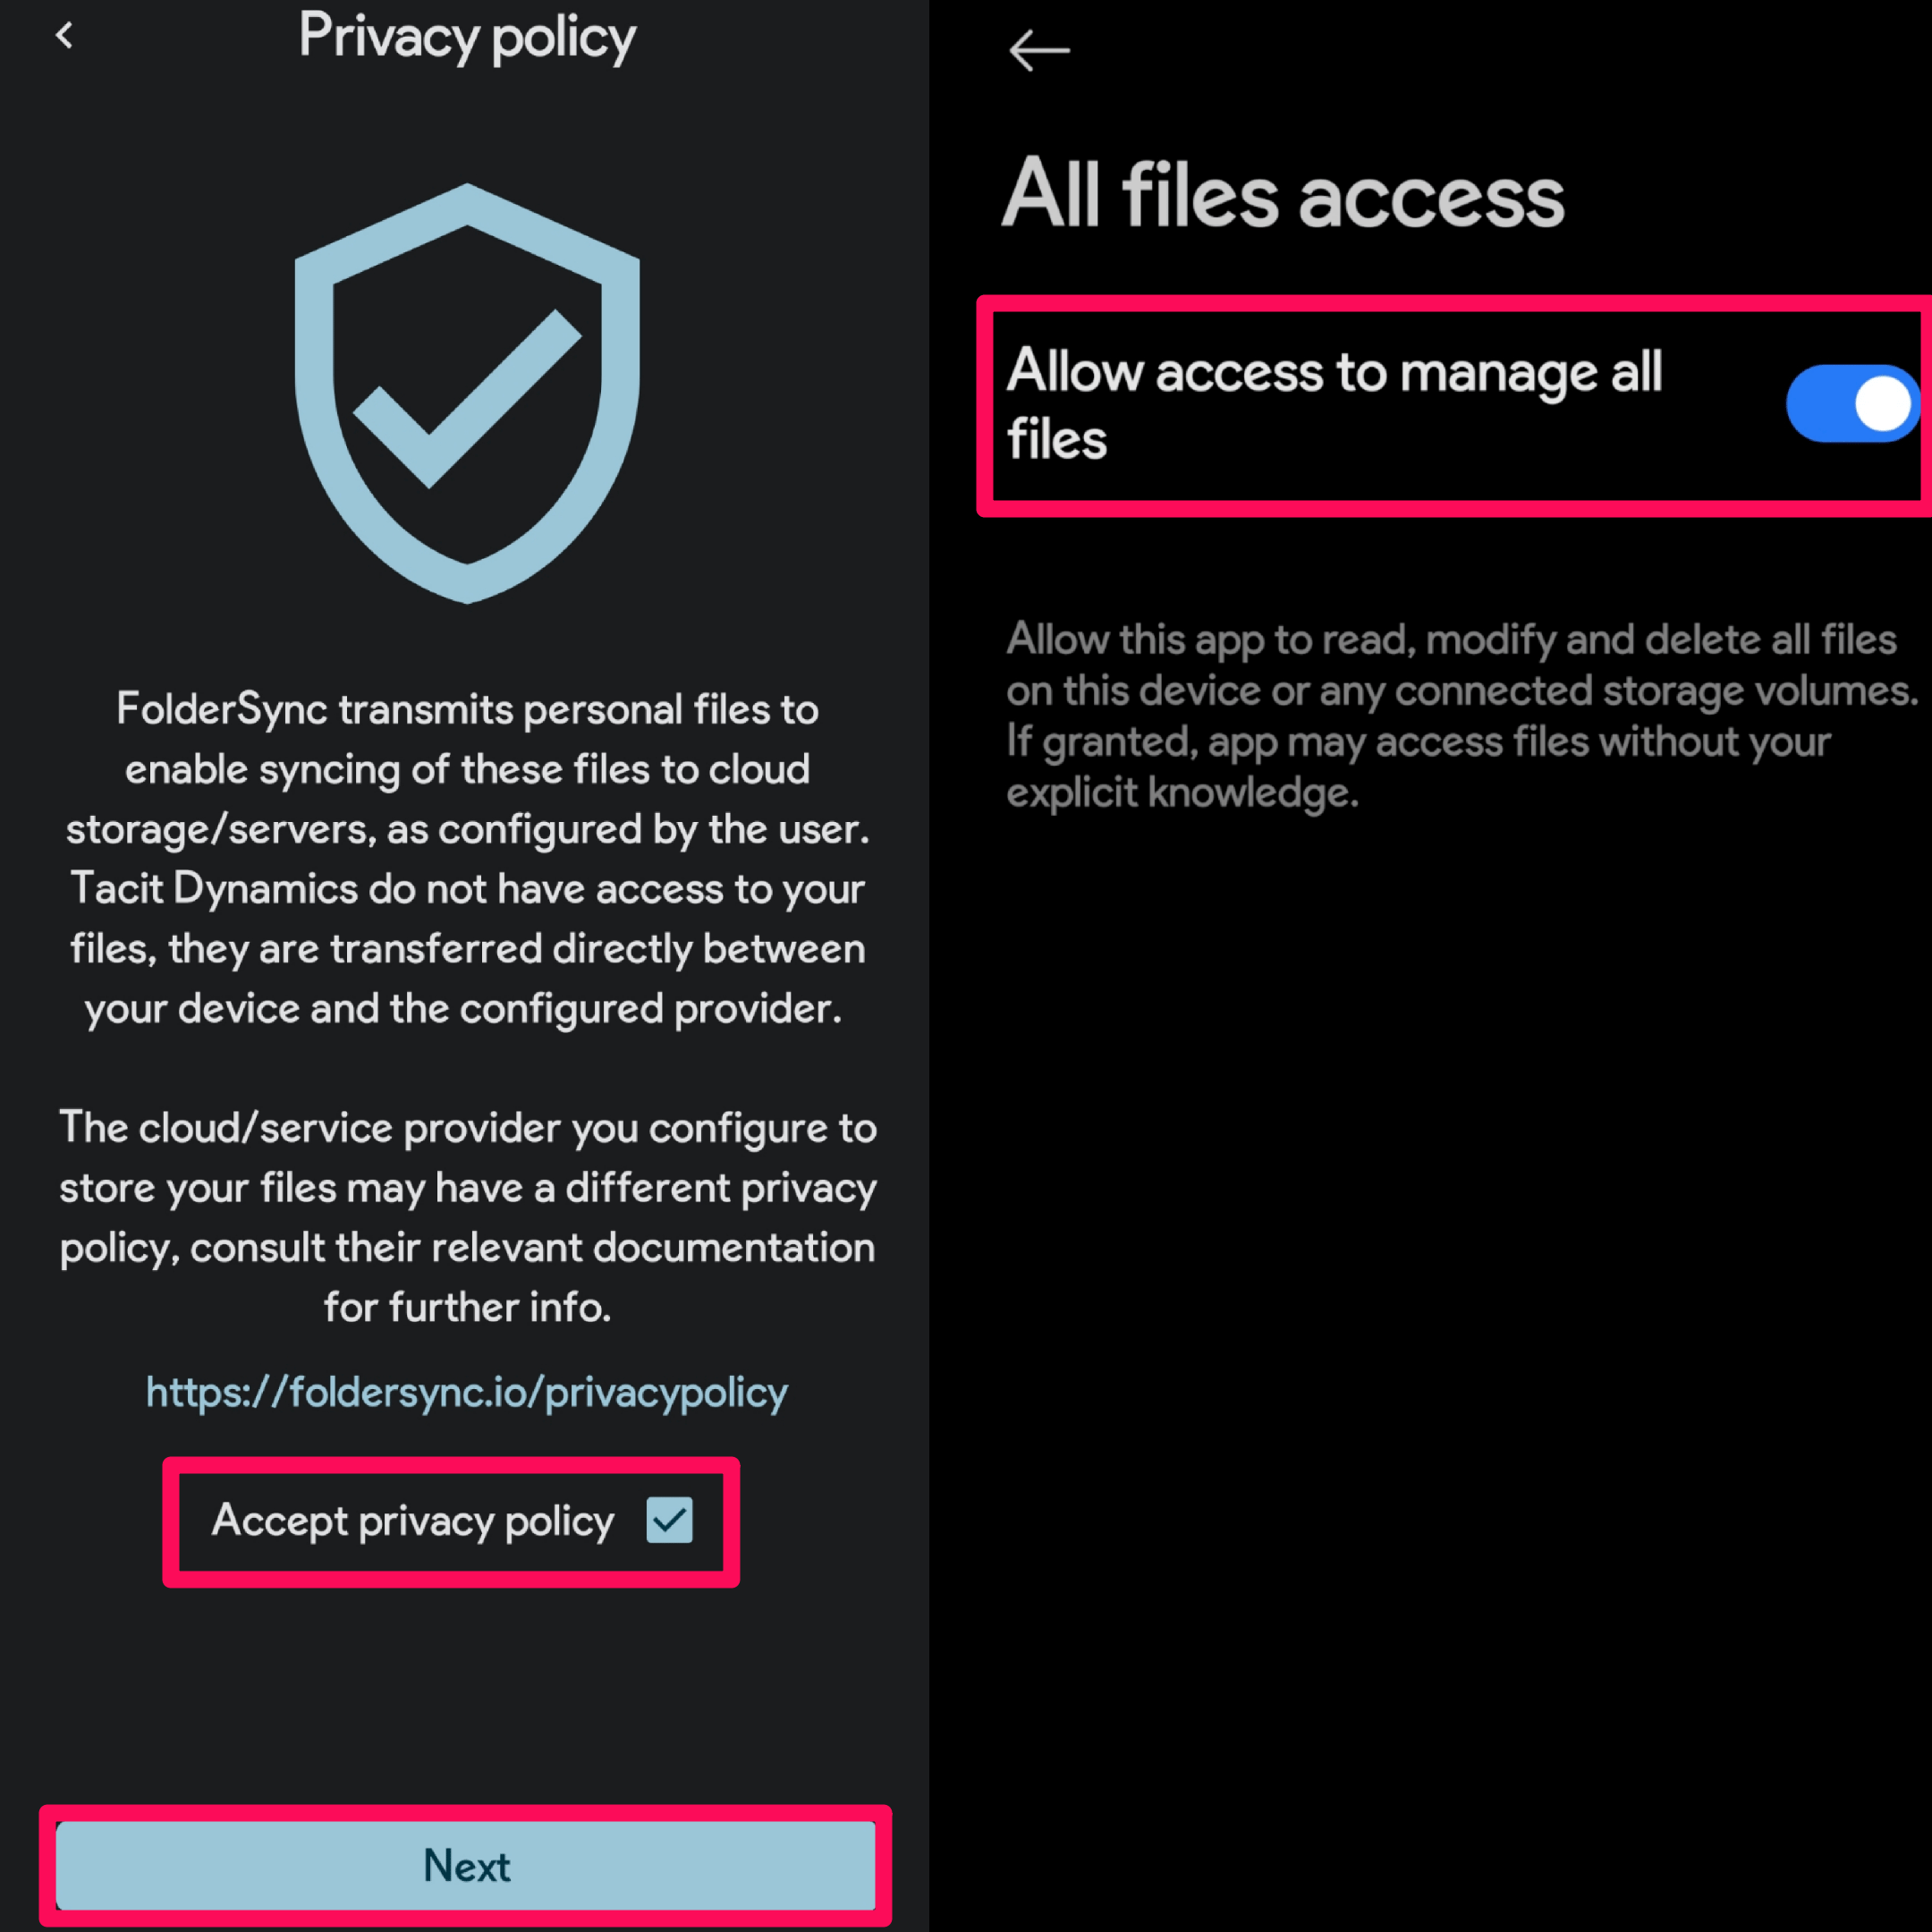
- Open the app, agree to the terms, grant all permissions, and finish the setup. Make sure to enable “Allow access to manage all files”.

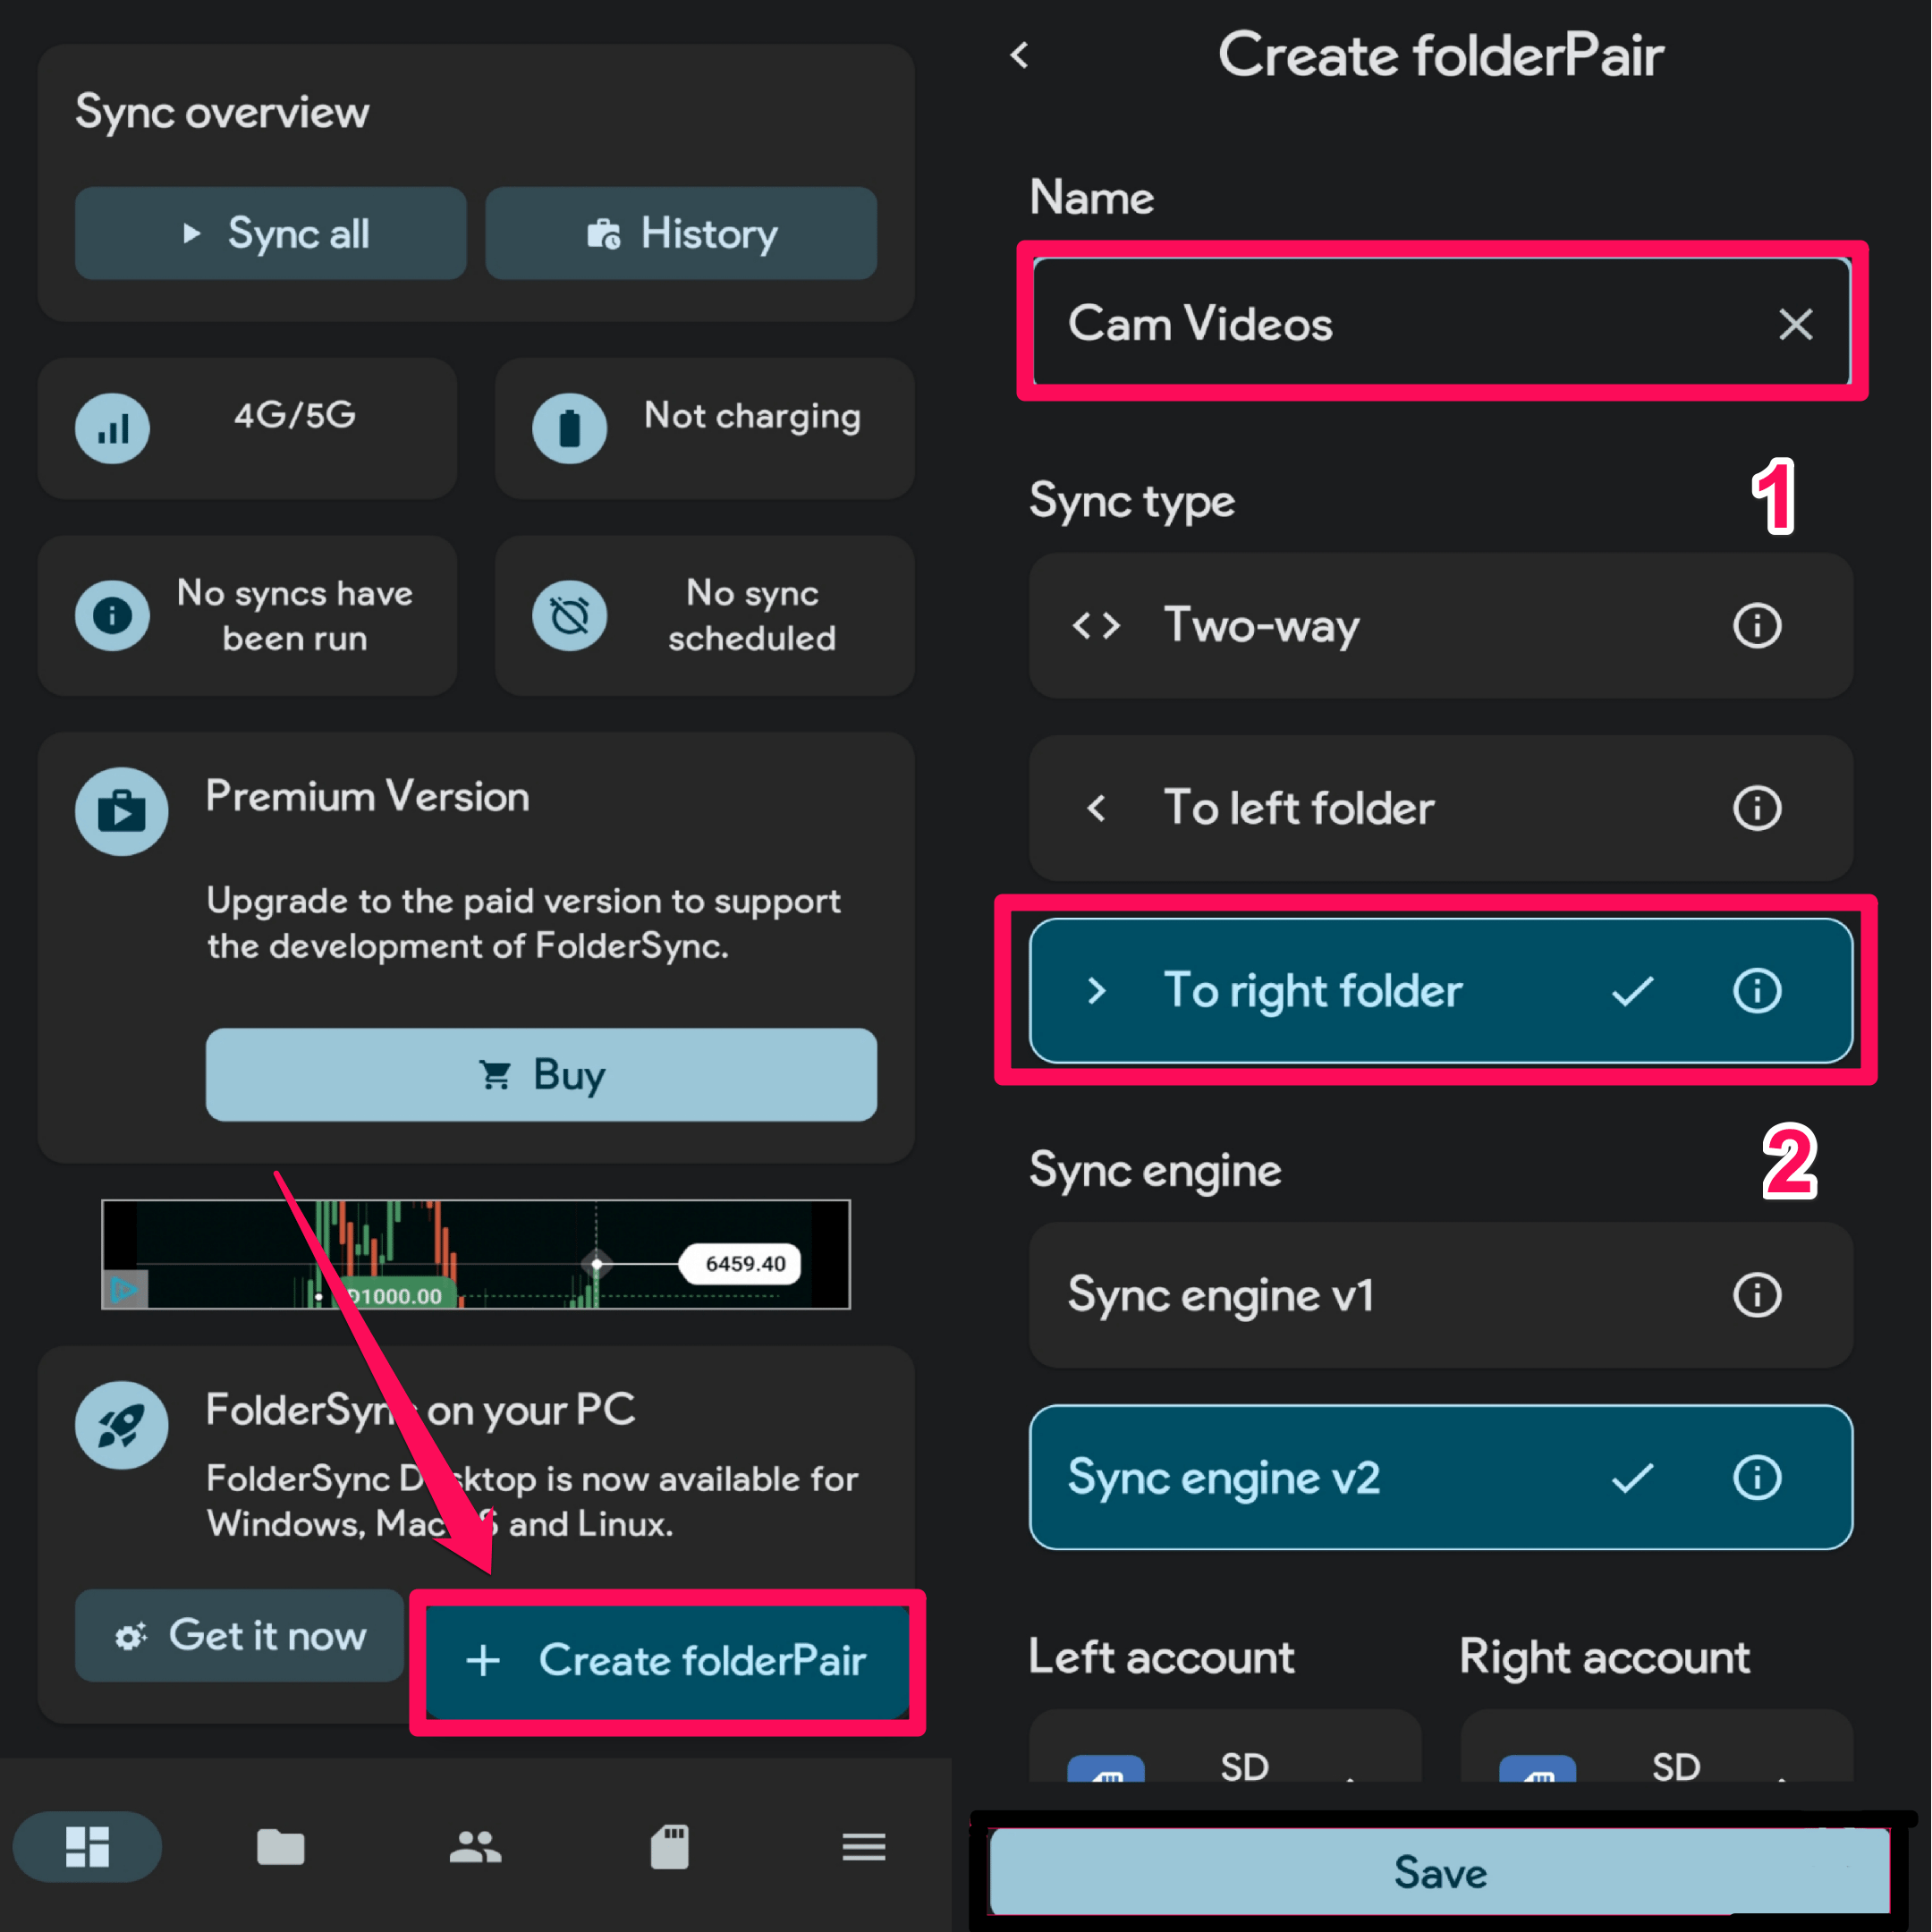
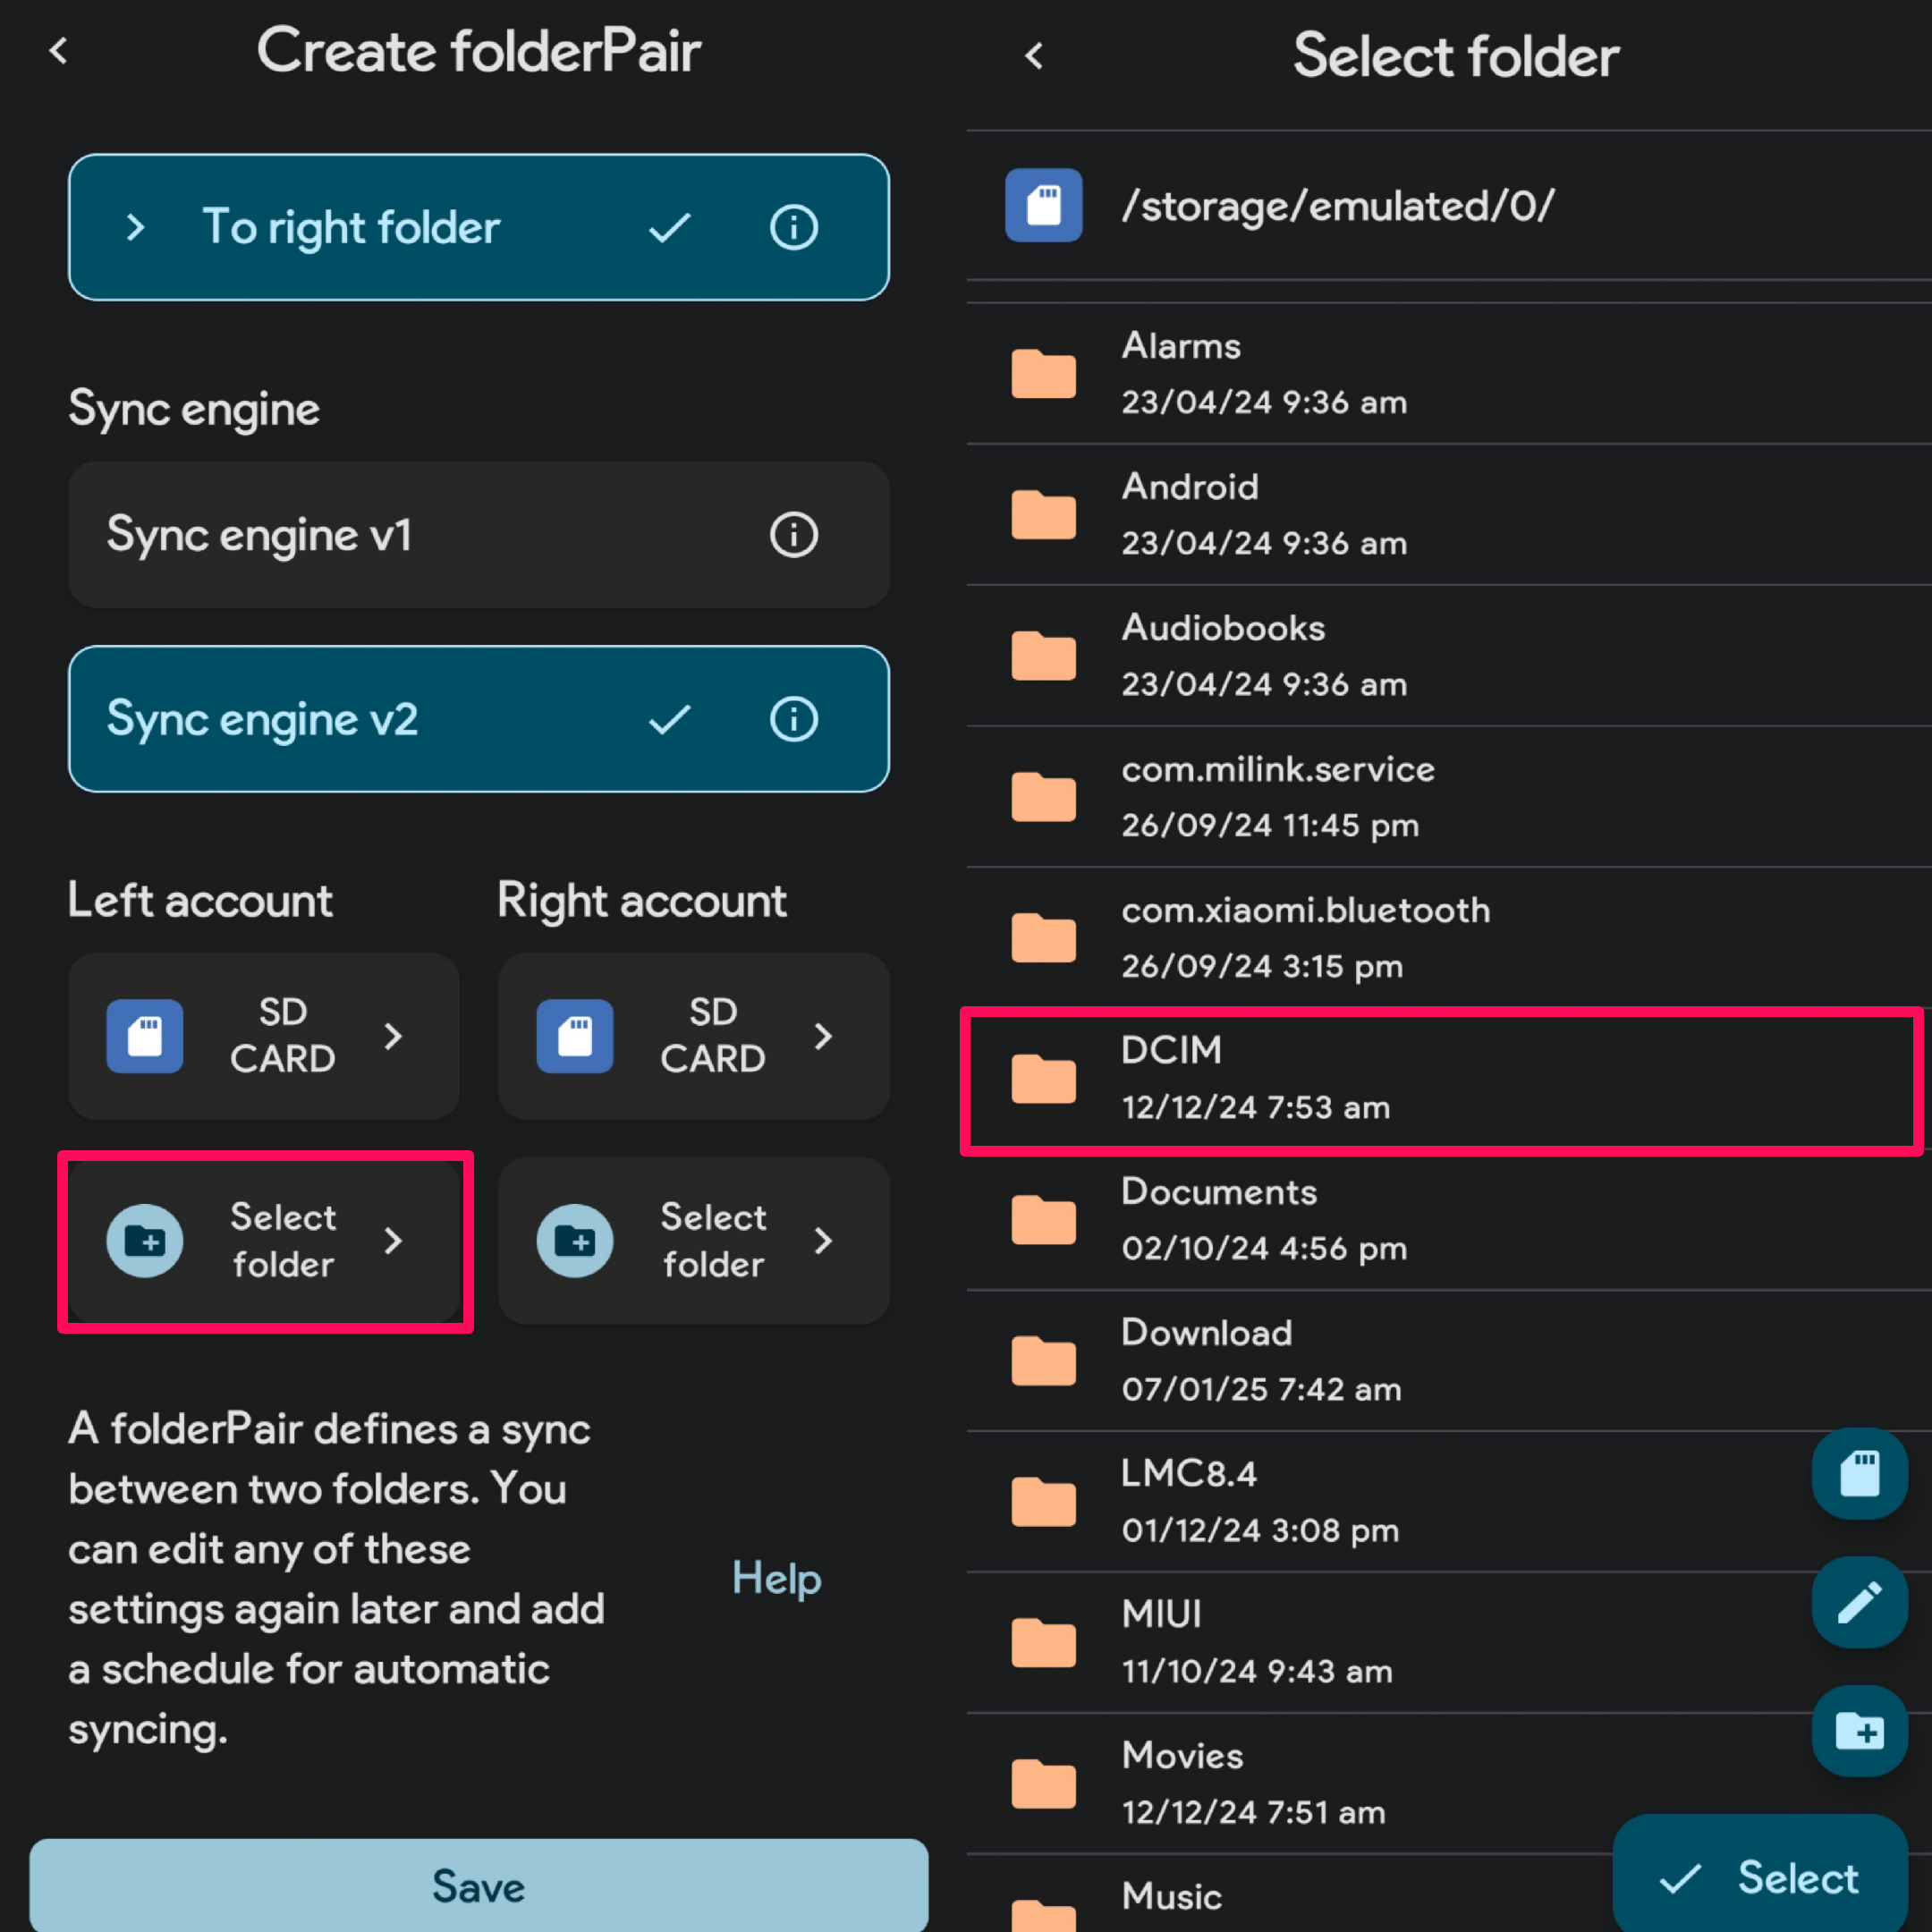
- In the app home screen, tap on the “Create FolderPair” option at the bottom right corner.
- Next, give a name to the Folderpair and select the “To right folder” under the Sync type.

- Now as we are moving videos internally from one folder to another, you can select your device storage for both left and right accounts.
- Tap on the Select folder from the left account and select the DCIM folder.

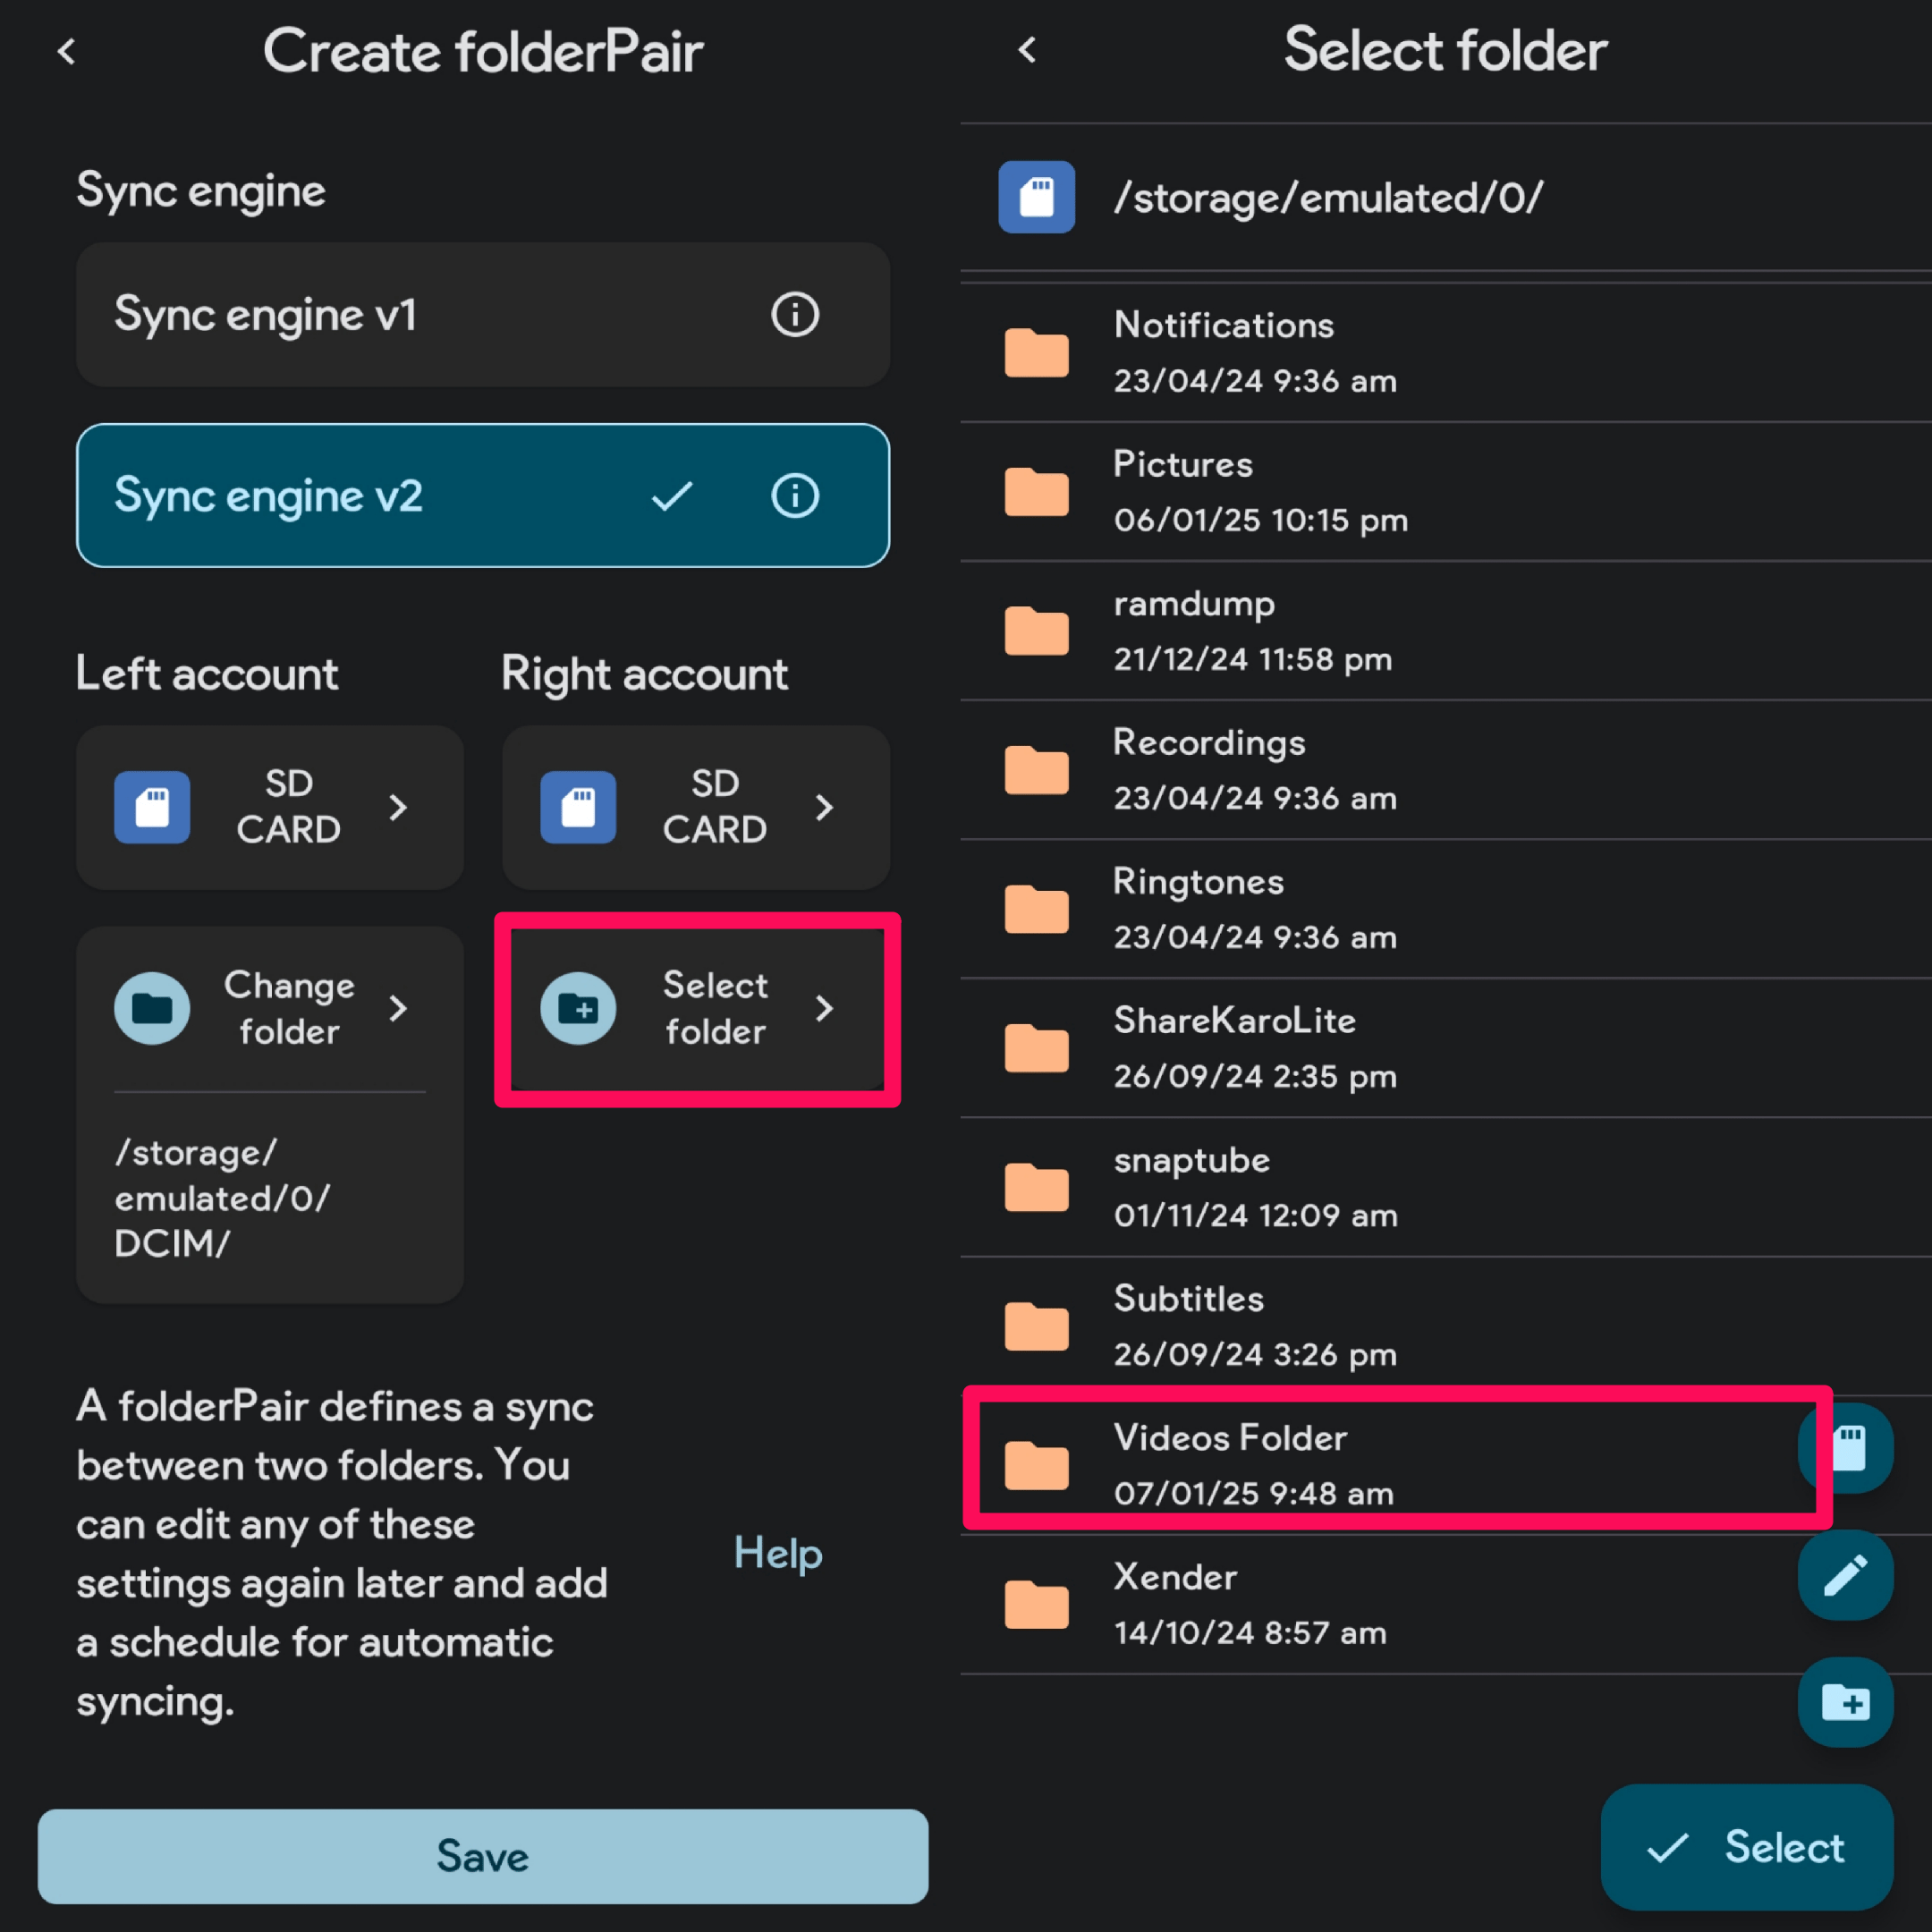
- Next, tap on the Select folder from the right account and then select a target folder where you wish to move the videos from the DCIM folder.

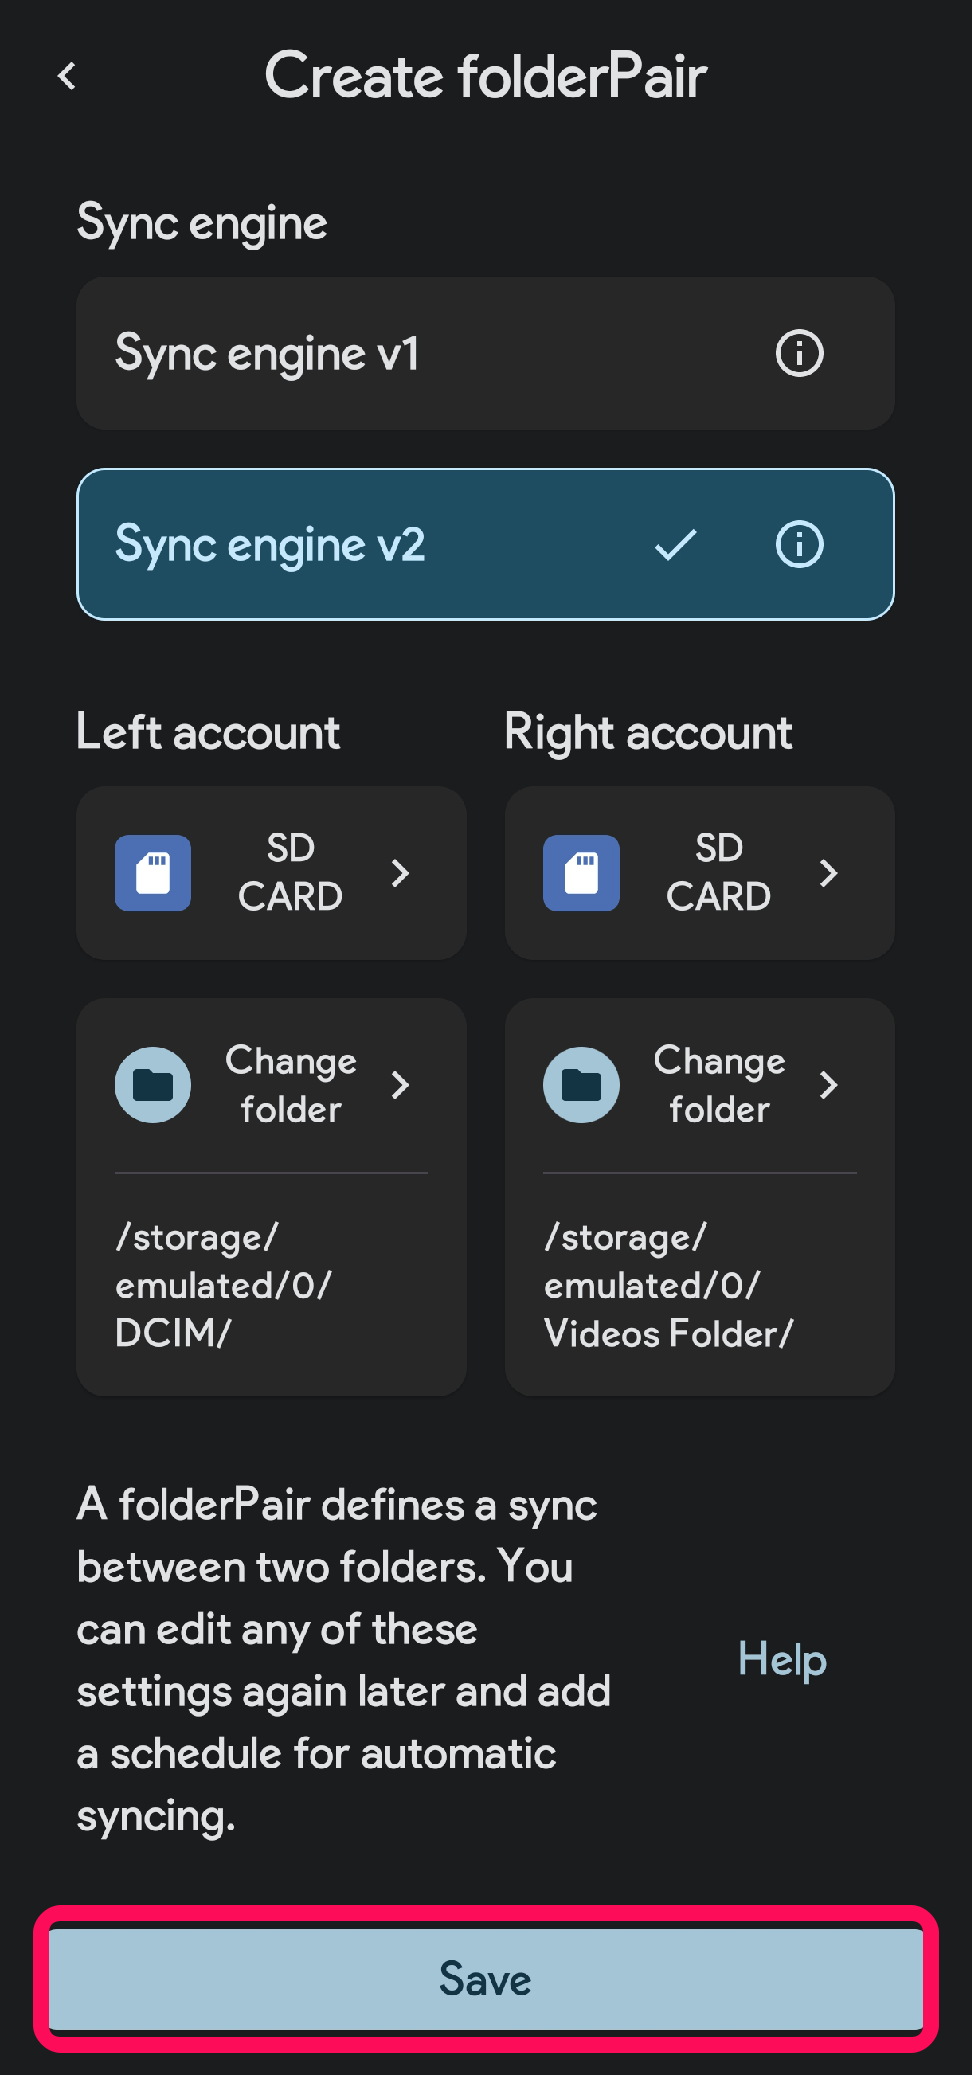
- Once both folders are selected, click on the Save button to confirm the changes.

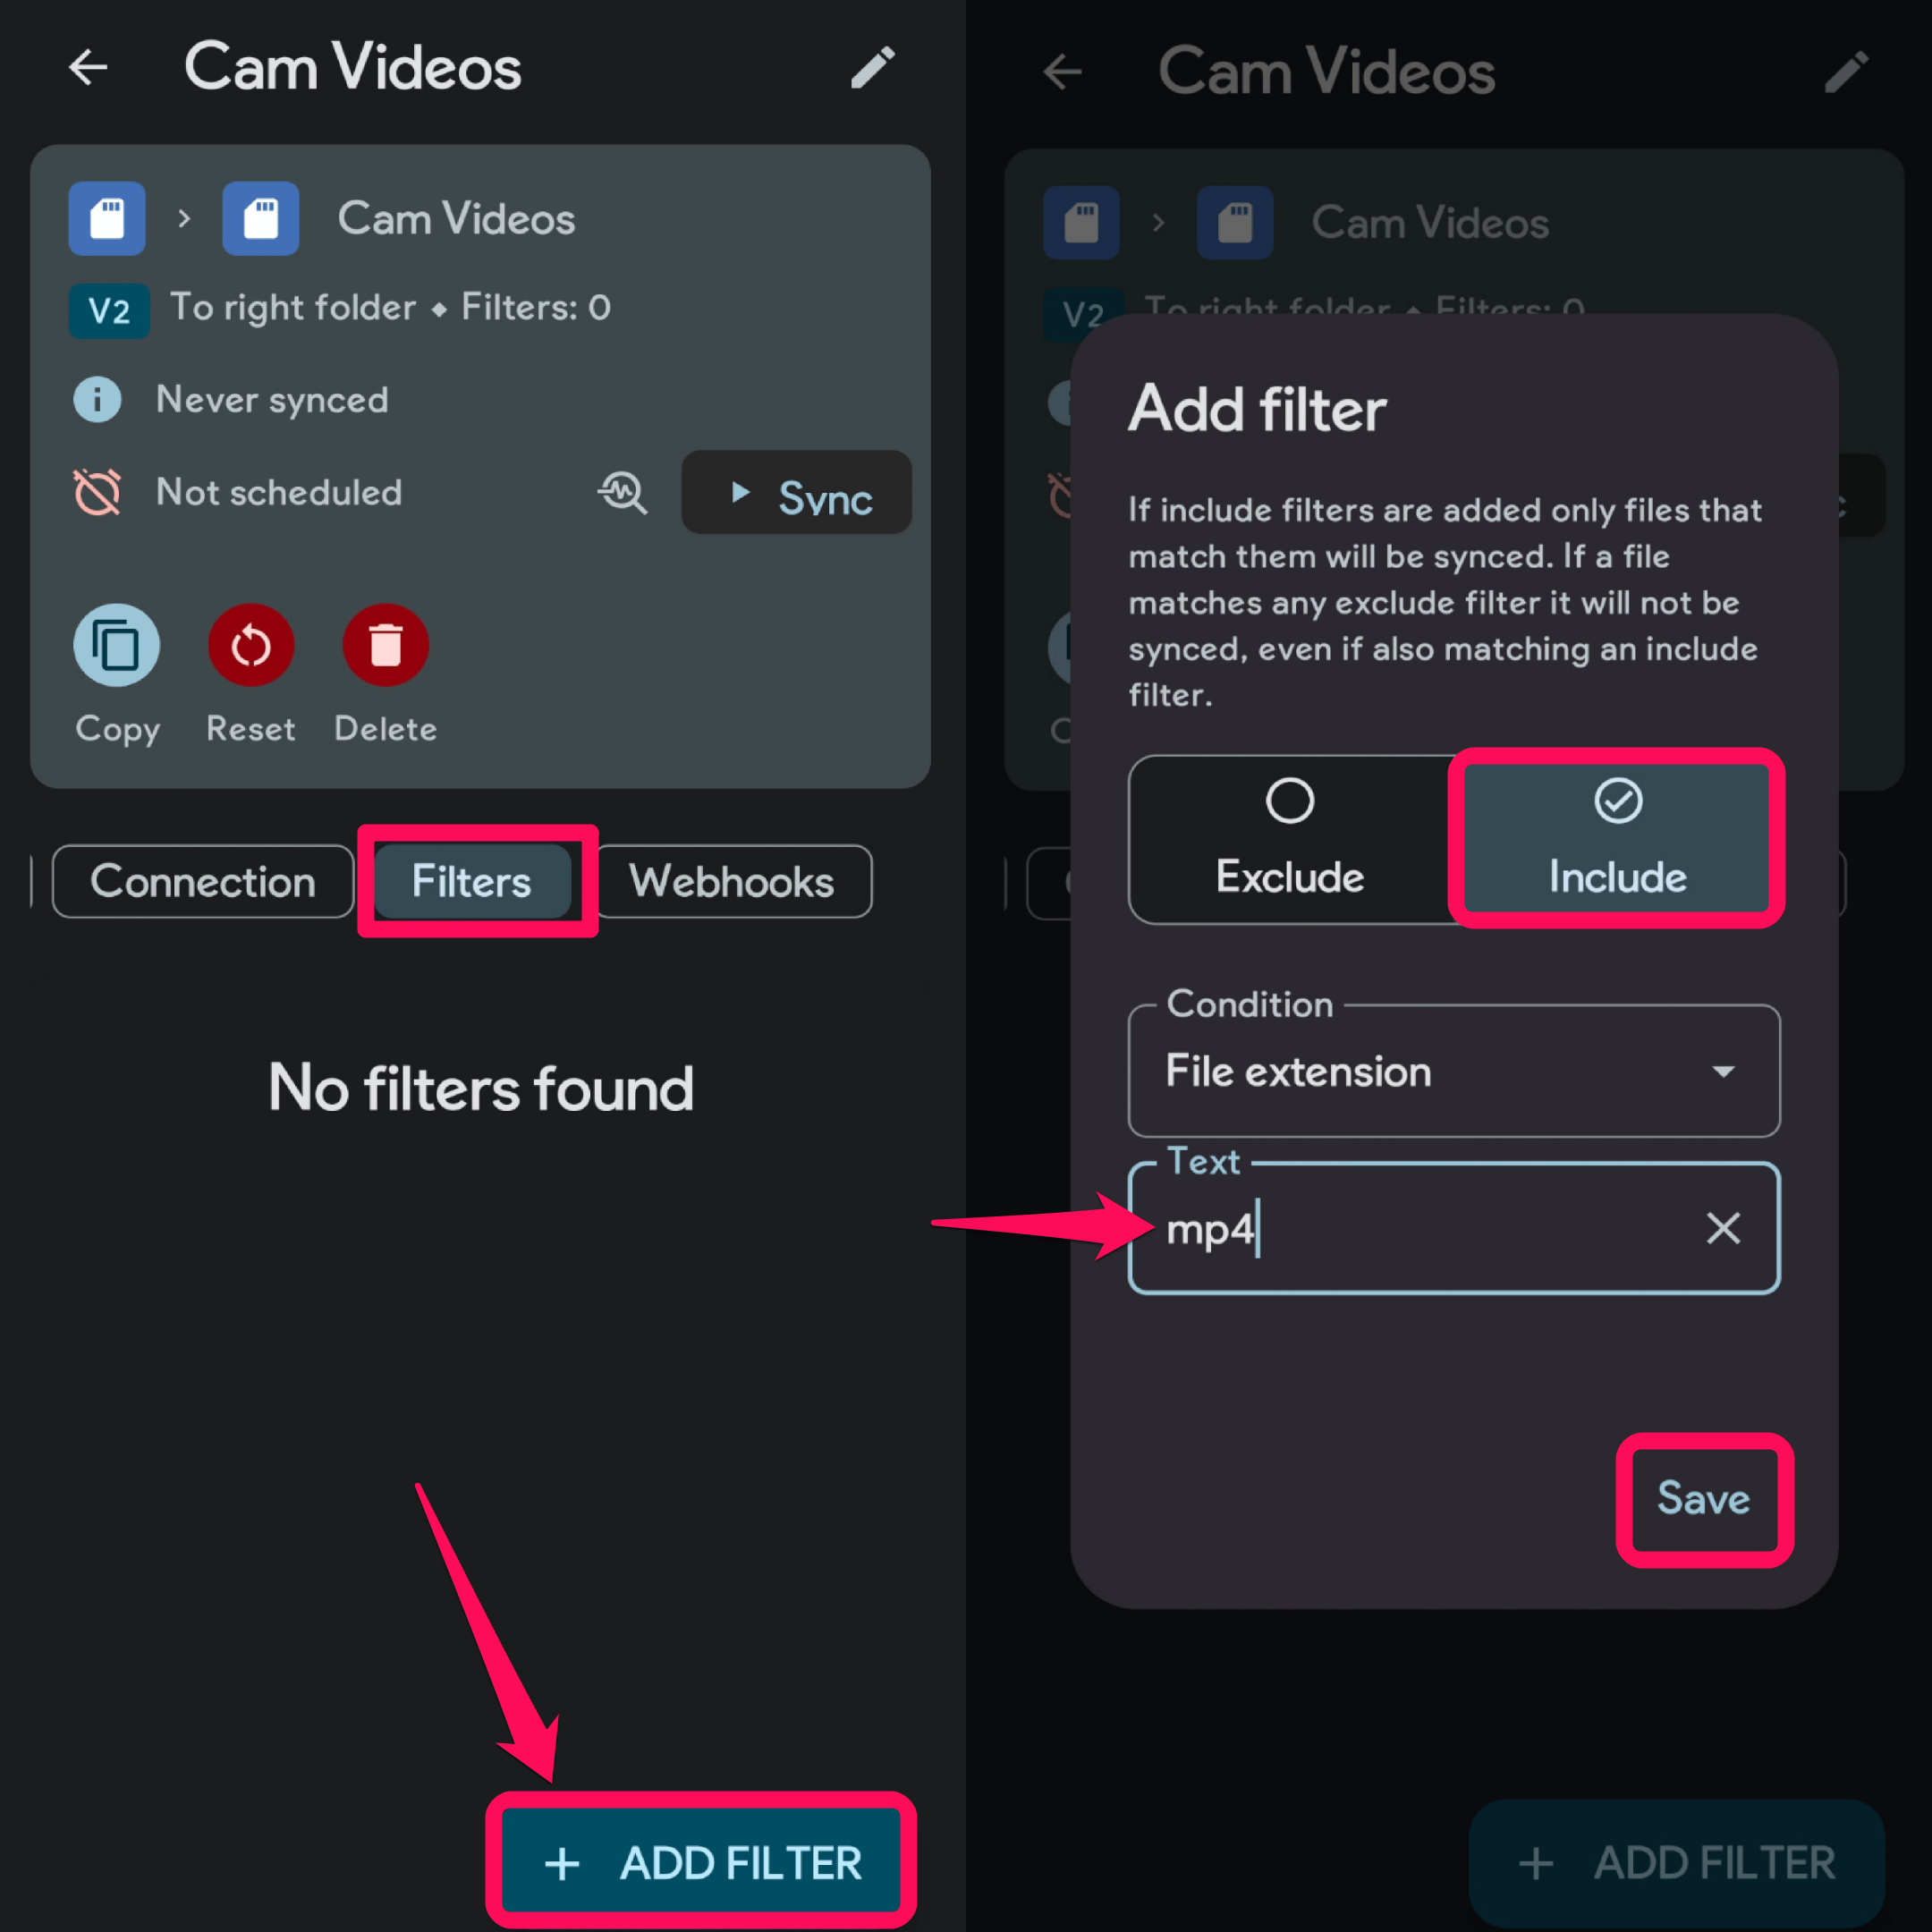
- Open the Filters tab, and tap on the “+ Add Filter”.
- In the “Add filter” menu, select the ‘Include’ option, type “mp4” in the Text field, and hit the Save. (If your videos are recorded in any other format include the same in the filter section.)

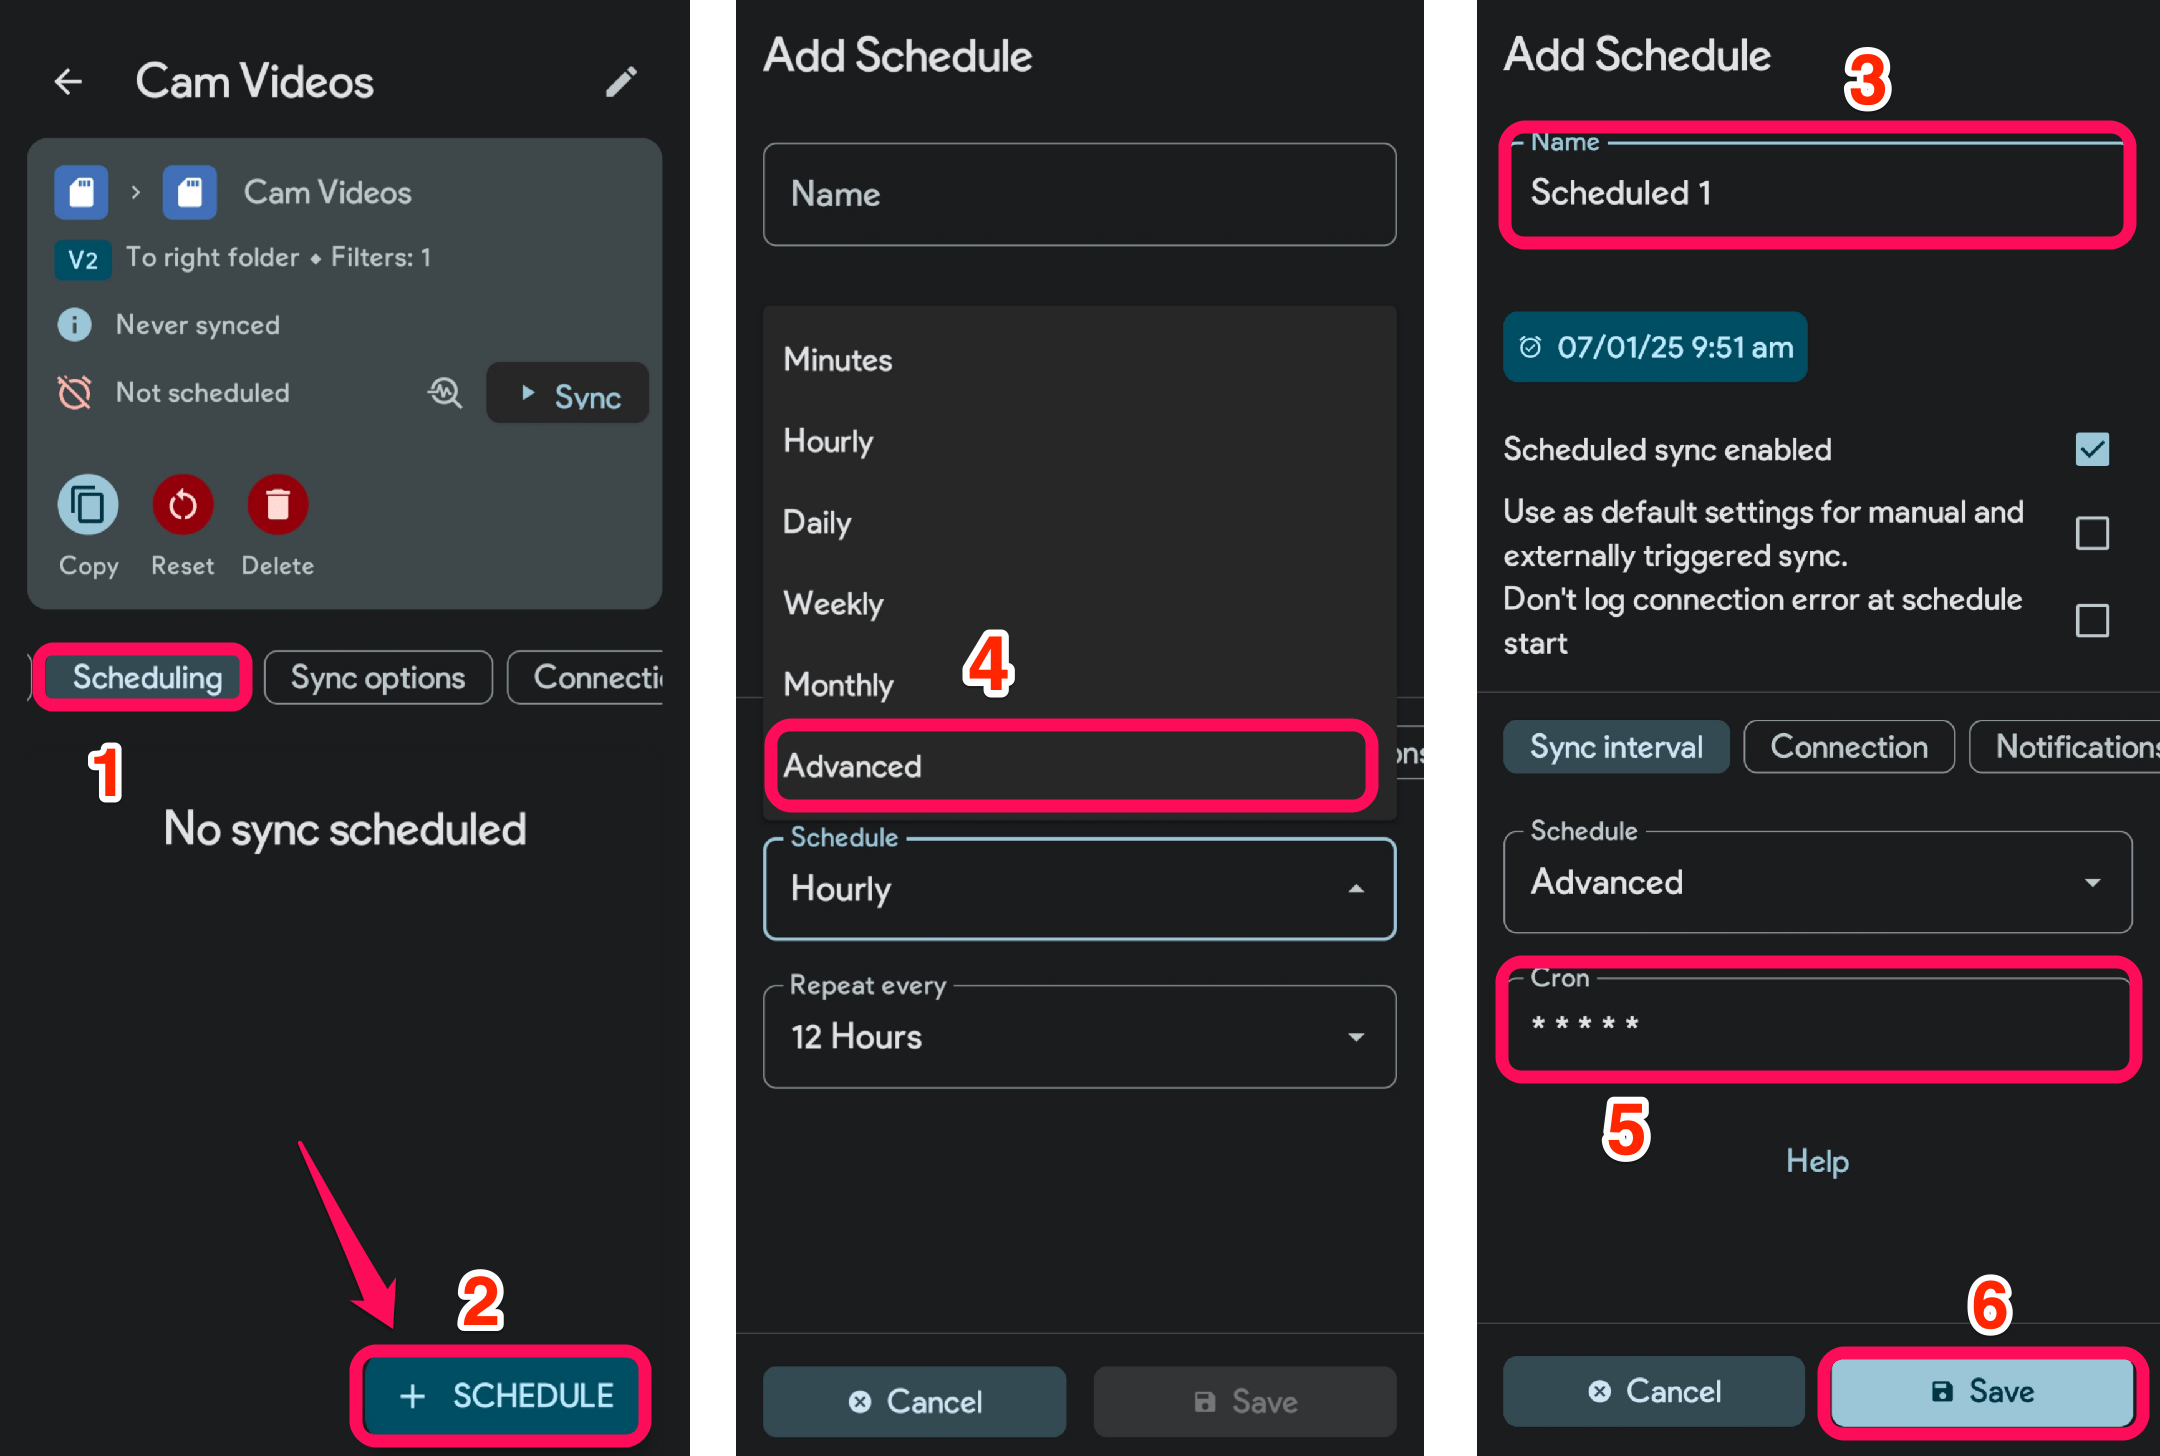
- Navigate to the Scheduling tab and tap “+Schedule”, and give it a name.
- Open the Schedule drop-down menu and select Advanced. In the Cron section, enter asterisk (*) 5 times with space in between and hit the Save button.

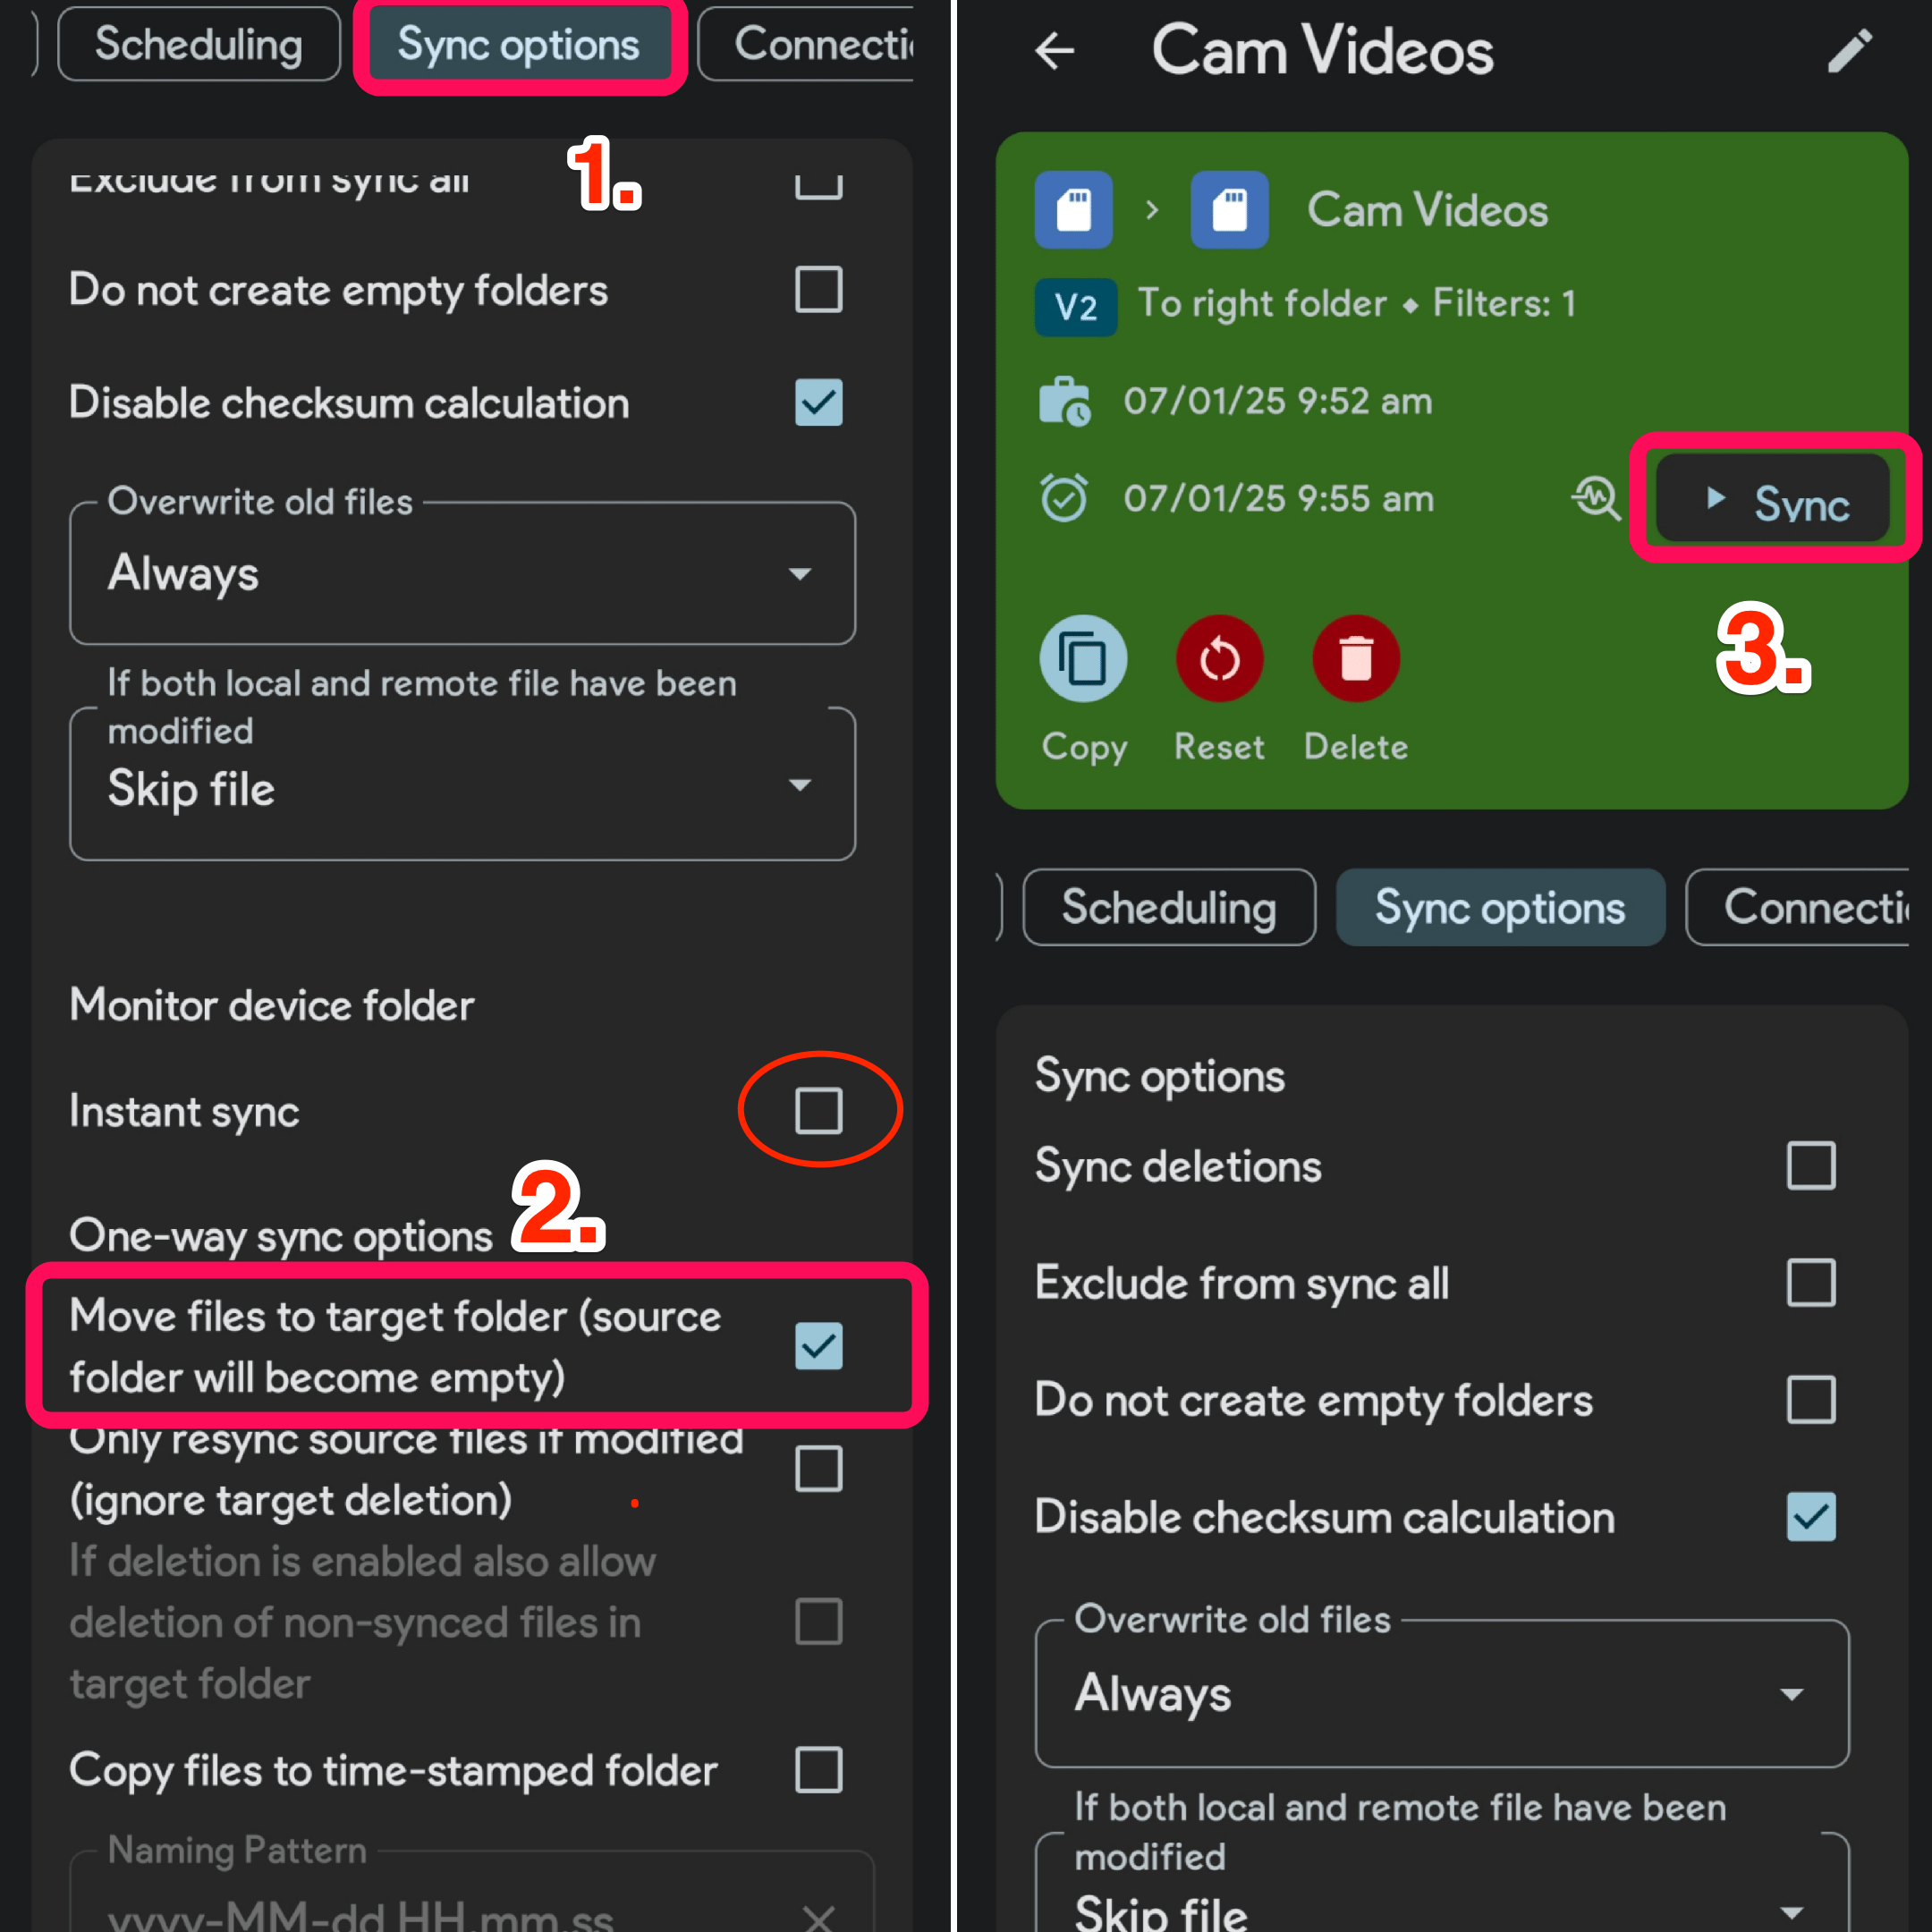
- Now open the Sync options tab and make sure you enable the “Move files to target folder (source folder will become empty)“ toggle.
Note: You can also, right tick Instant Sync checkbox option. This will make the FolderSync to monitor DCIM folder real-time to move videos instantly to the target folder once recorded . But if your Camera app crashes I recommned you to disable it.
- Once you complete the process, tap the Sync button and it’s done!

- The FolderSync app will automatically move videos to the selected target folder from the DCIM folder.
Related: How to Backup Android Photos to Google Photos?
Now only captured photos will be stored in the DCIM folder, and the videos will automatically move to the target folder. As videos are out of DCIM only photos will be backed up to the Google Photos app.
Tips to Make FolderPair Run in the Background
If the FolderSync is not auto-moving the videos from DCIM, here are the tips to follow:
- Lock the app in the recent tabs view.
- Make sure to allow all the app permissions.
- Allow unrestricted battery access to the app – Open Settings → Tap App → Select FolderSync → Battery → Select Unrestricted/No Restriction.
Conclusion
Learn how to back up only photos to Google Photos on Android by stopping video uploads. Follow our step-by-step guide to use the FolderSync app for efficient media management, ensuring your precious memories in the form of Photos are stored without taking up unnecessary space.
If you've any thoughts on How to Backup Only Photos, Not Videos to Google Photos on Android?, then feel free to drop in below comment box. Also, please subscribe to our DigitBin YouTube channel for videos tutorials. Cheers!
