In this guide, we will learn about Spatial Sound in Windows 11. Also, I have explained how to enable it on your PC. While listening to music or watching videos, there is always a need for better sound quality. That can be achieved by switching to Spatial audio.
Spatial Sound is also called 3D Audio. It gives an enriched sound playback experience while watching movies on your PC. You can feel the dynamics of 3D Audio better when you use a headphone with your computer.
Different 3D Audio Formats Supported on Windows 11
The good thing about Spatial Sound is the variety of sonic experiences it has to offer. There are three types of Spatial audio formats in Windows 11.
Windows Sonic
It is the native 3D Audio format offered on all Windows 11 PCs. It is free and doesn’t require you to pay any subscription fee.
Dolby Atmos
This is the premium sound experience you get in movie theaters. You can enjoy Dolby Atmos on your Windows 11 PC as well. It has a limited free trial. After that, pay a subscription fee to enjoy a better sound experience with Dolby Atmos.
DTS Audio
This format of 3D Audio is suitable when you use headphones most of the time. You must download the DTS Sound Unbound app on your Windows 11 PC to experience DTS Audio.
Enable Spatial Audio in Windows 11
There are different ways to turn on Spatial Sound in Windows 11.
1. Windows Settings
Turn on the 3D Audio from Windows system settings using these steps for your primary sound output source.
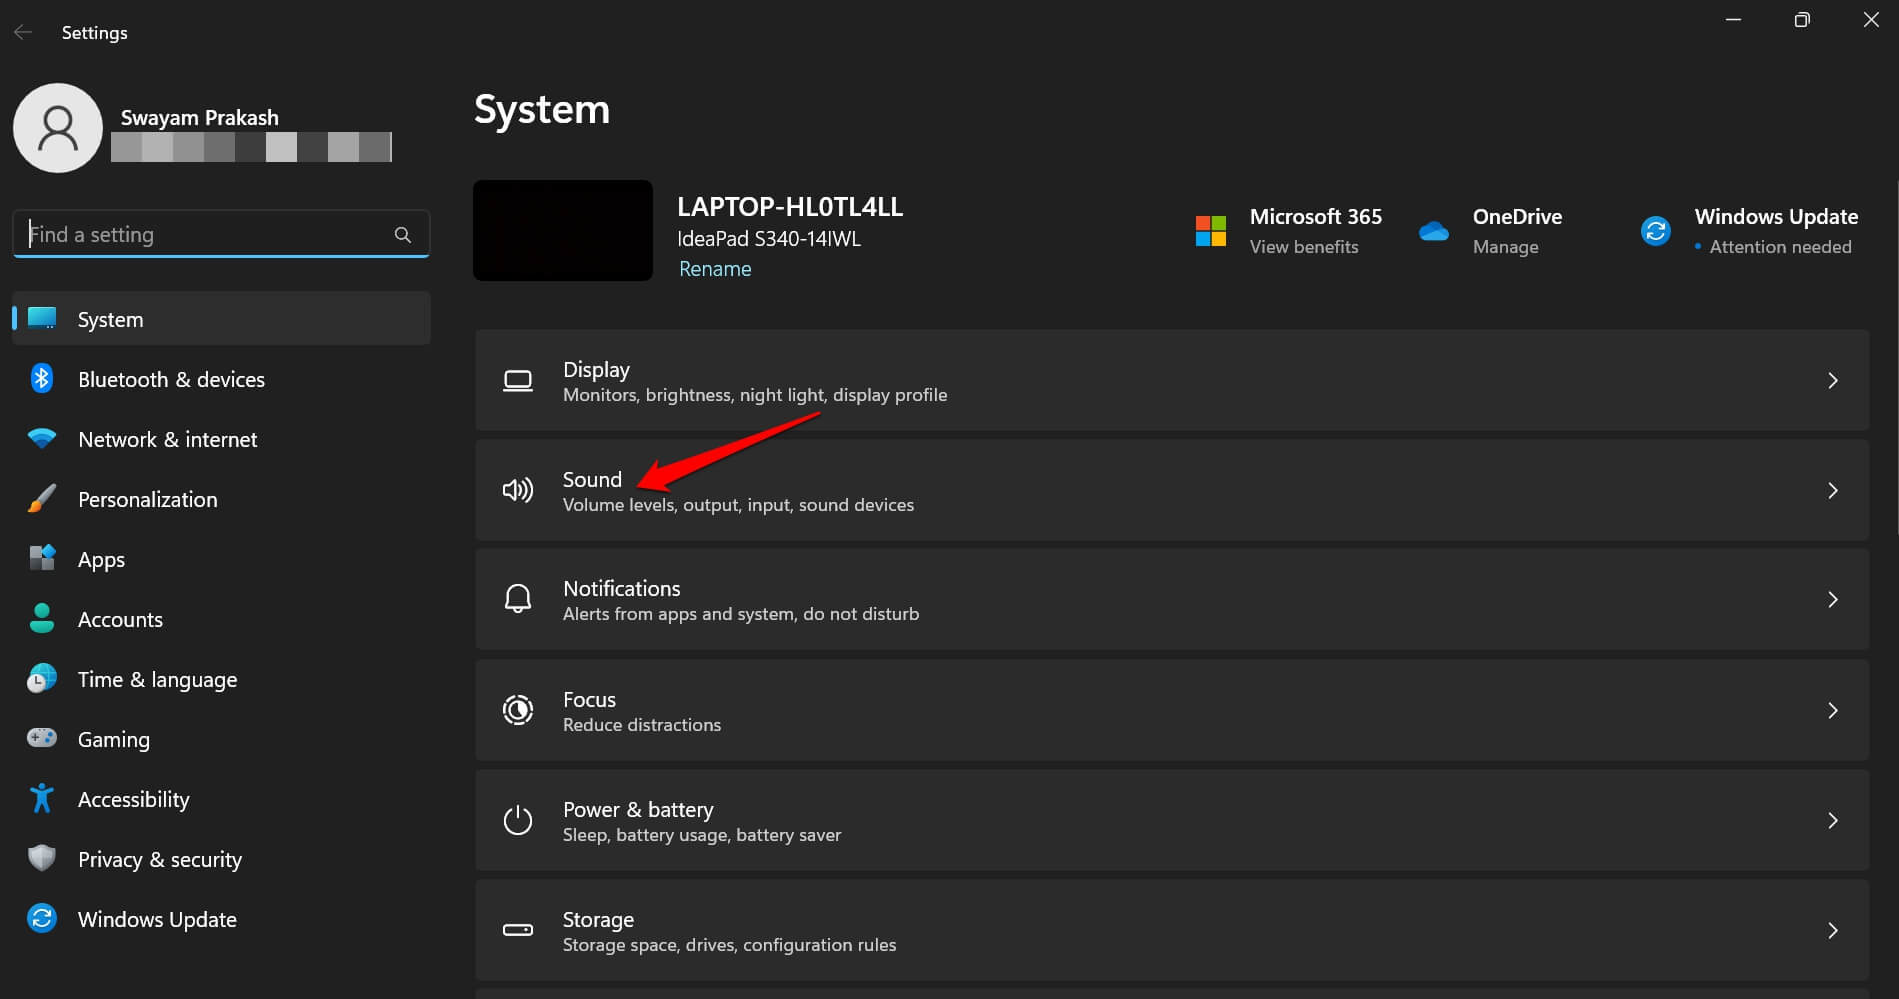
- Press Windows + I to access system settings.
- On the left-hand side, click on System.
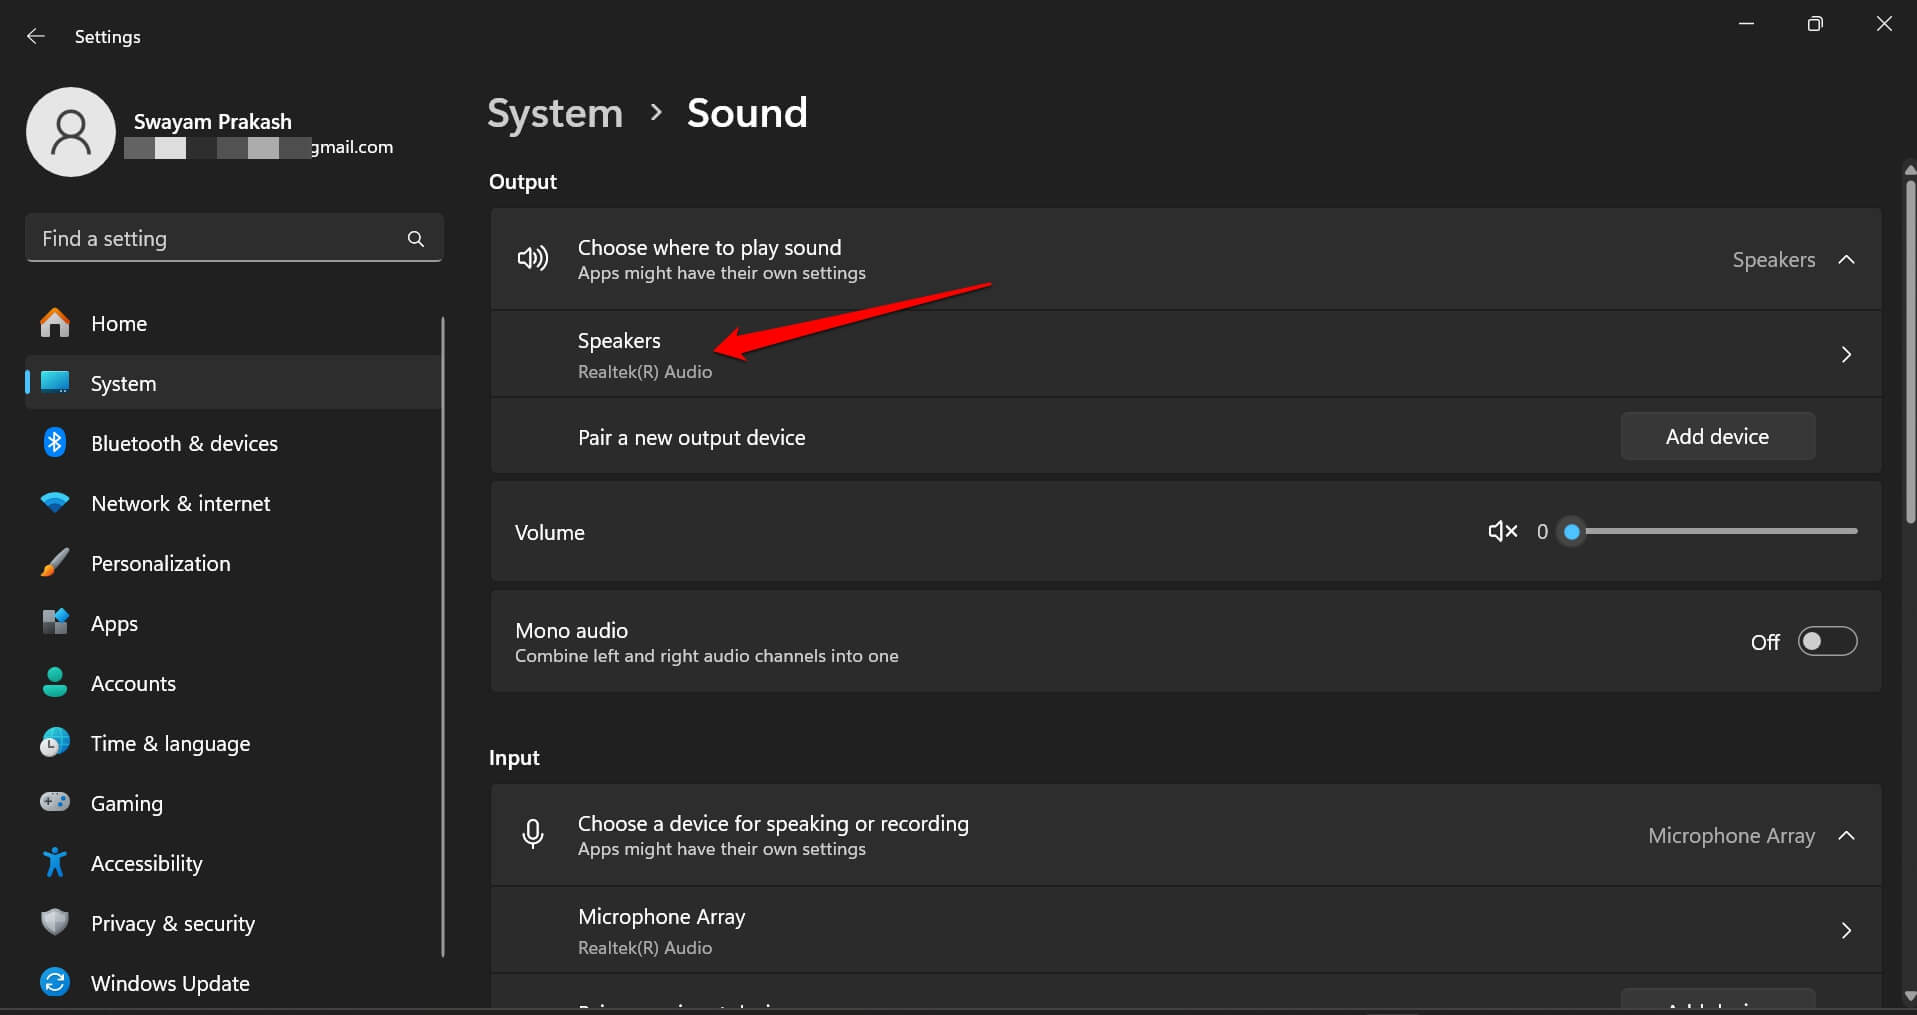
- Click on Sound.

- Next, click on Speakers.

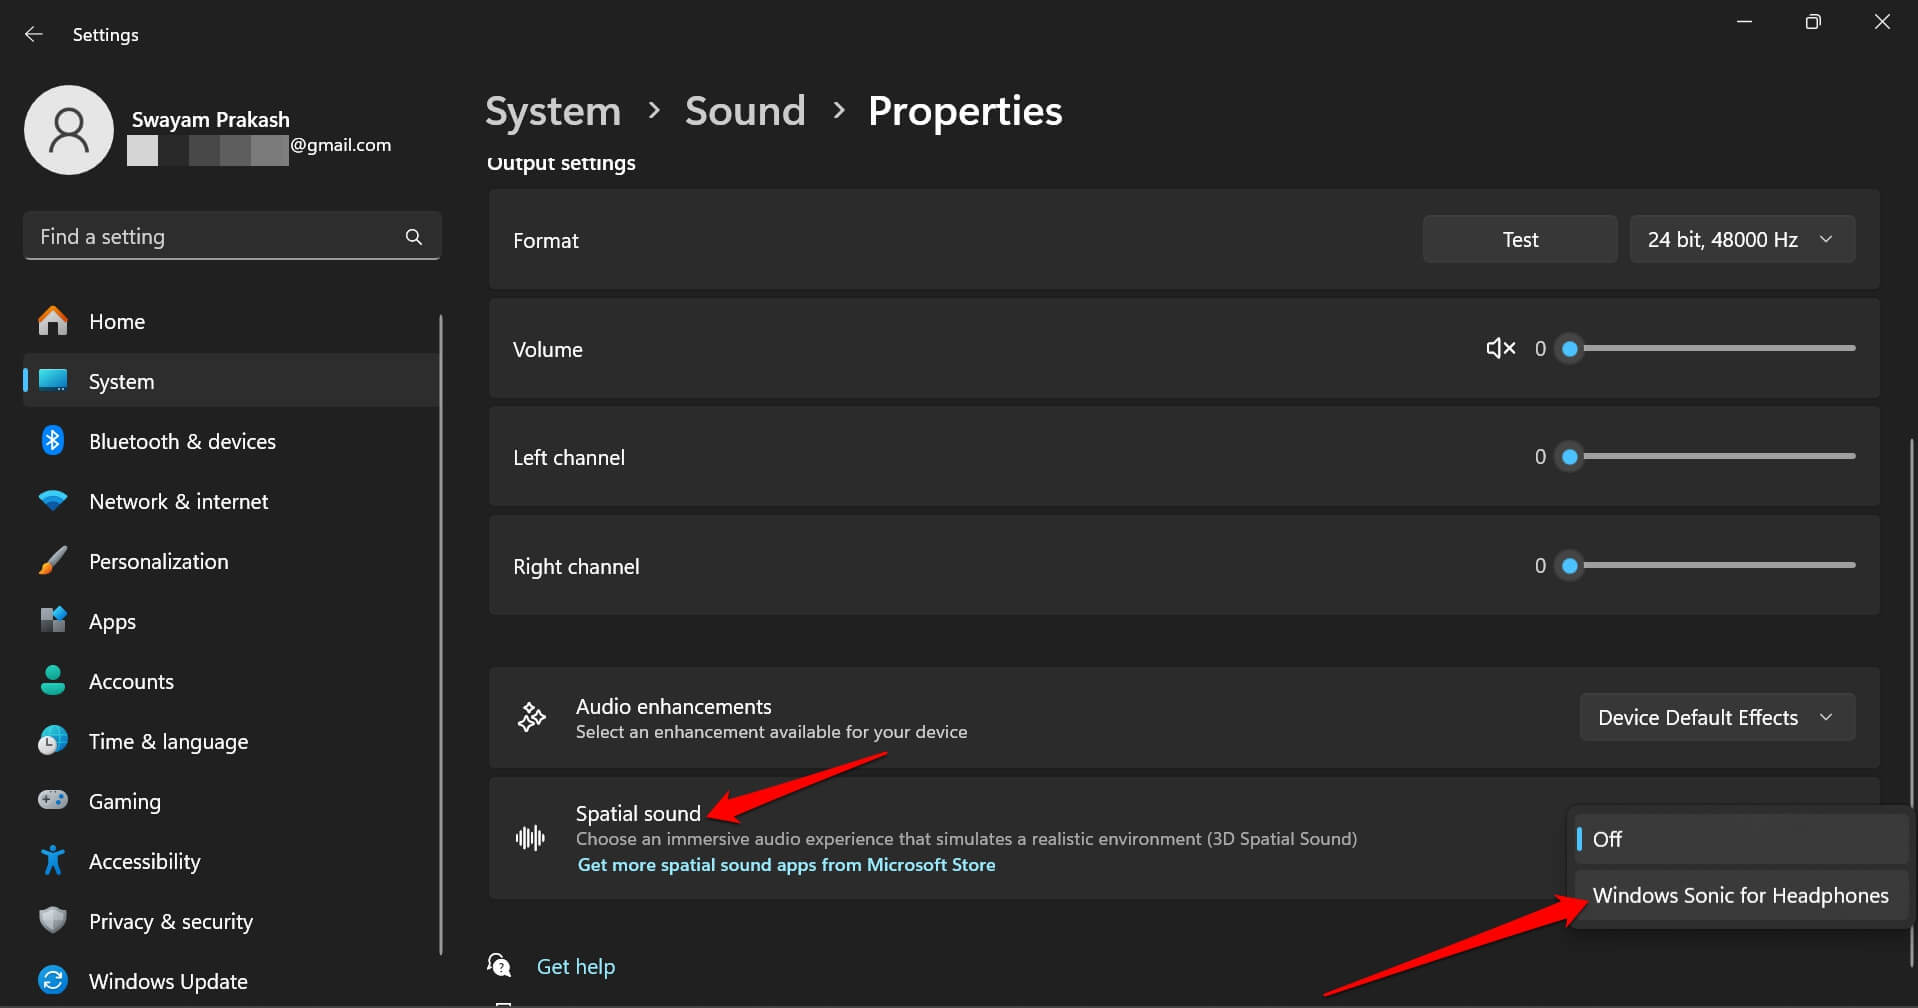
- Scroll to Spatial Sound and set it to Windows Sonic for Headphones.

2. Control Panel
Follow these steps to enable Spatial Sound from the Control panel.
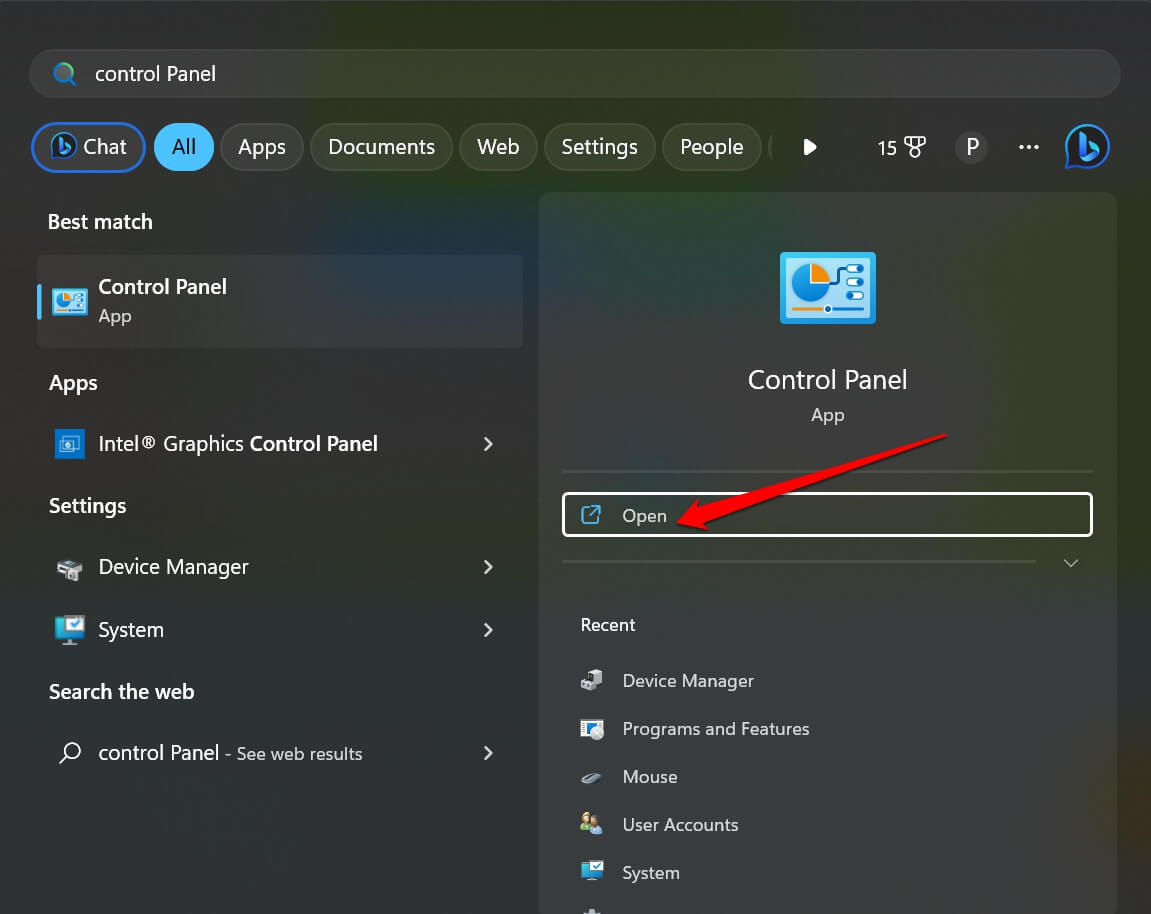
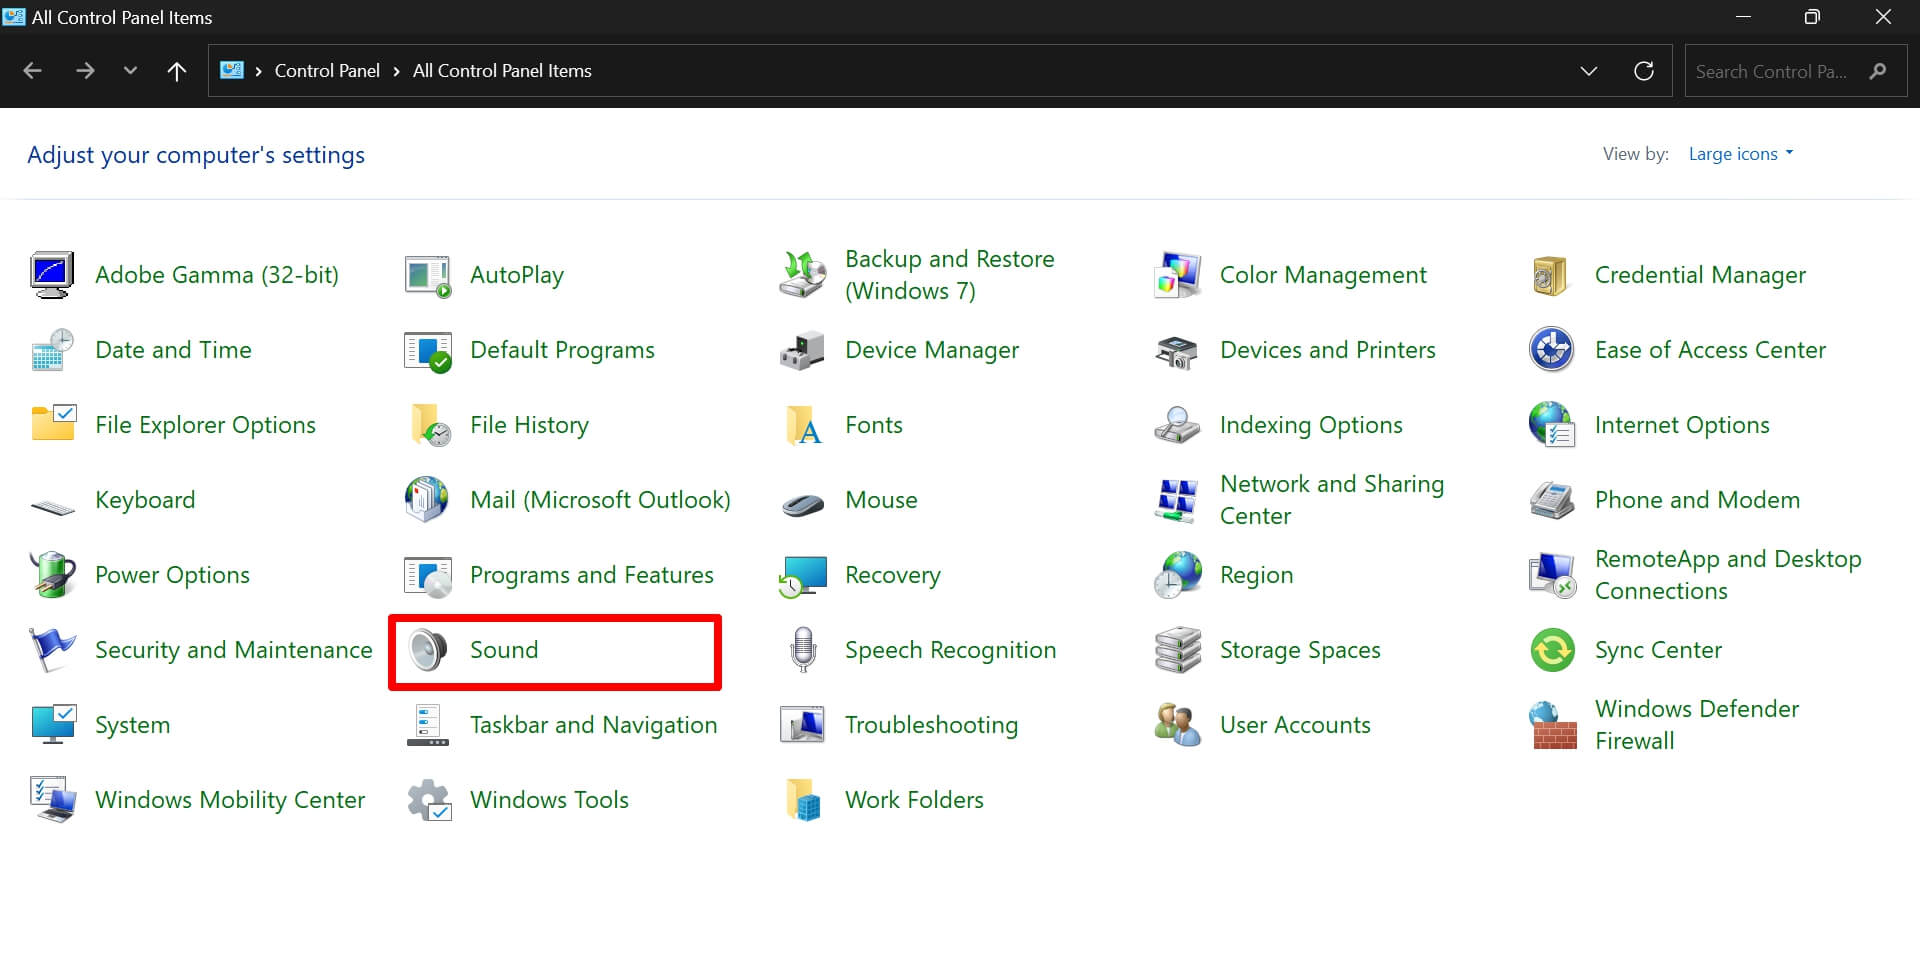
- Launch the Control panel.

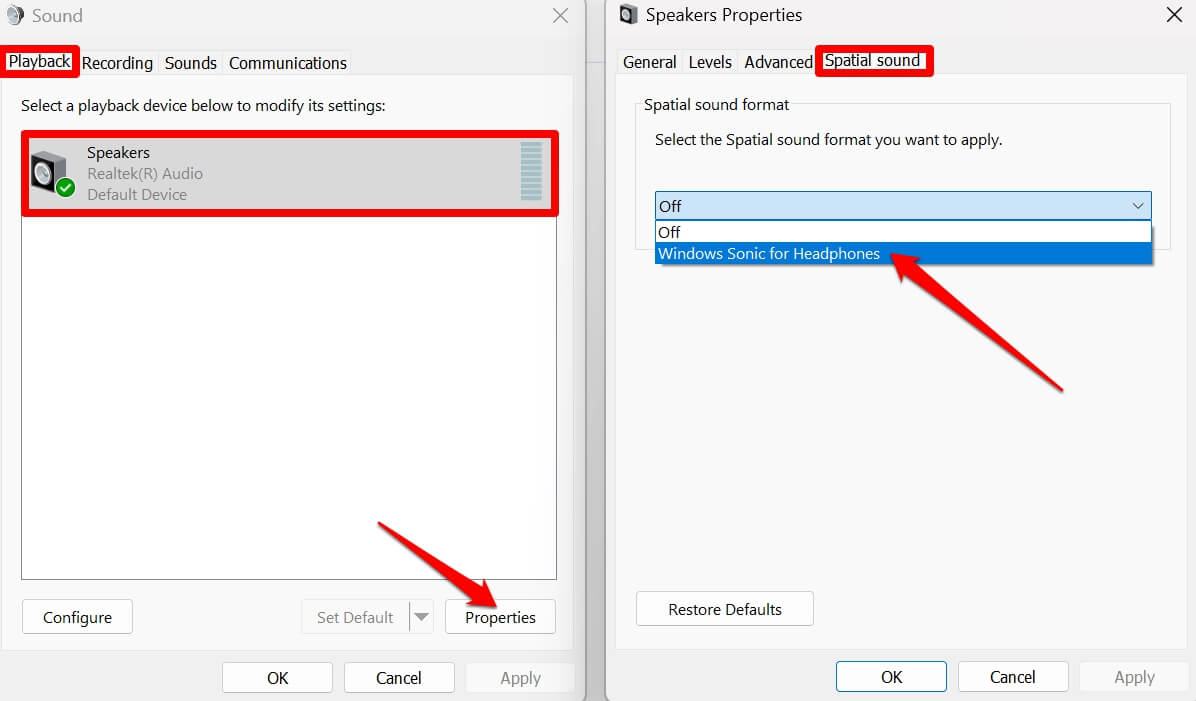
- Click on Sound.

- Select your primary sound output source > click on Properties.
- Go to the tab Spatial Sound.
- Set the status of 3D Audio to Windows Sonic for Headphones.

3. Enable 3D Audio from Volume Mixer
To activate Spatial Sound in the Windows volume mixer, follow these steps.
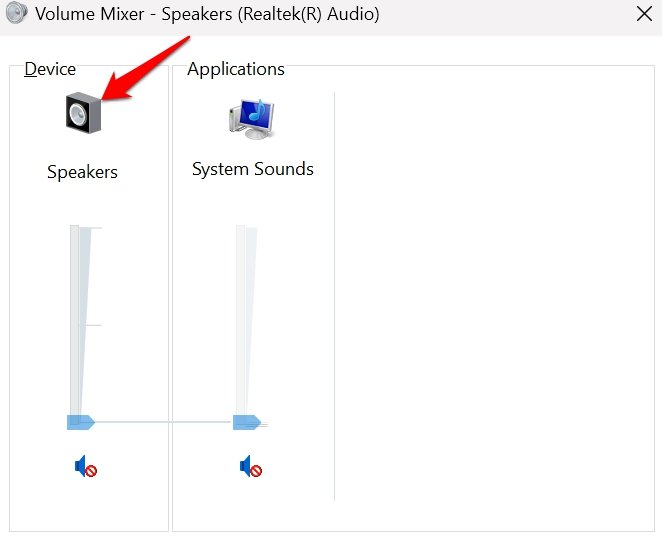
- Press Windows + R to open the Run box.
- Type sndvol.exe and press enter.

- Select the sound device from the volume mixer. It could be headphones/Realtek Speakers.

- Click the tab Spatial Sound.
- Choose the option Windows Sonic for Headphones from the dropdown.

Spatial Sound Not Working on Windows 11: How to Fix?
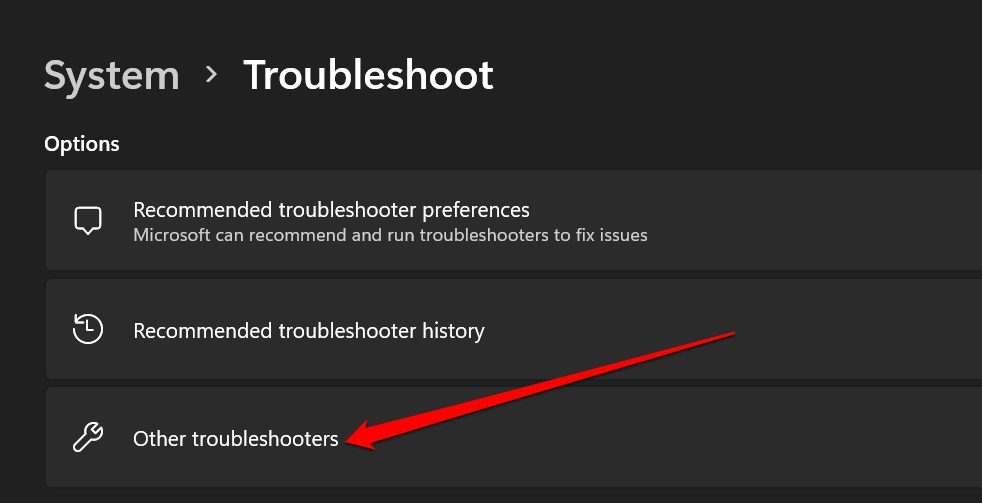
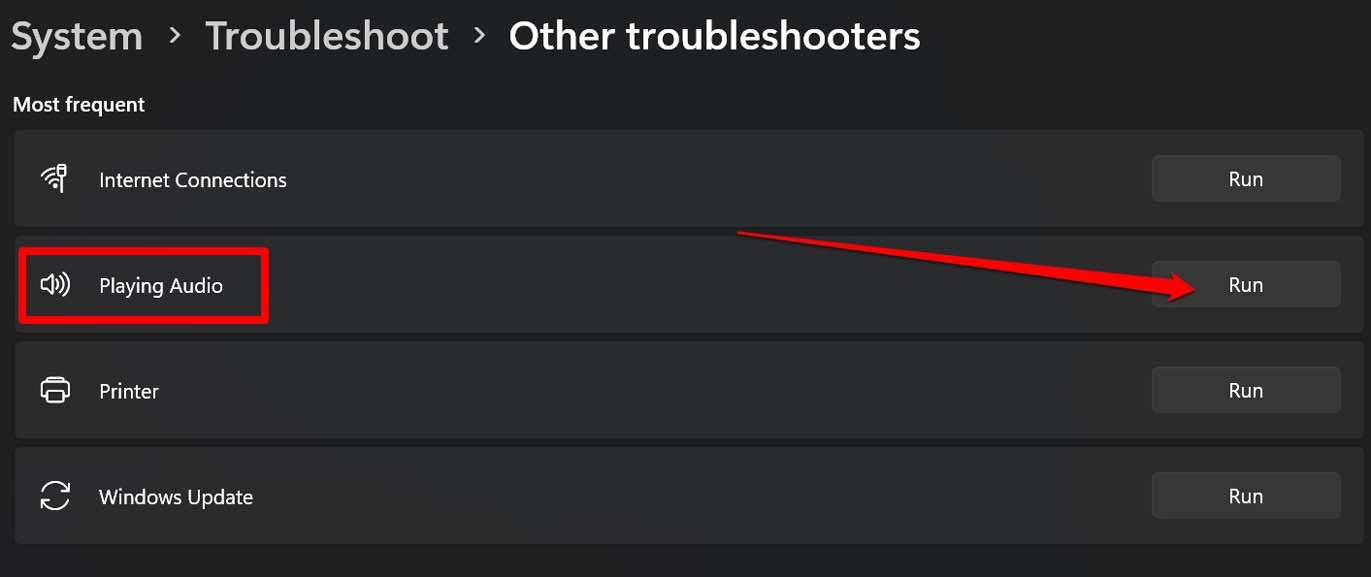
Often, you may encounter this issue where the option for Spatial Sound is greyed out. Also, when you enable it, the feature may not work. To fix the issue with the Spatial Audio, use the native Windows Audio troubleshooter.
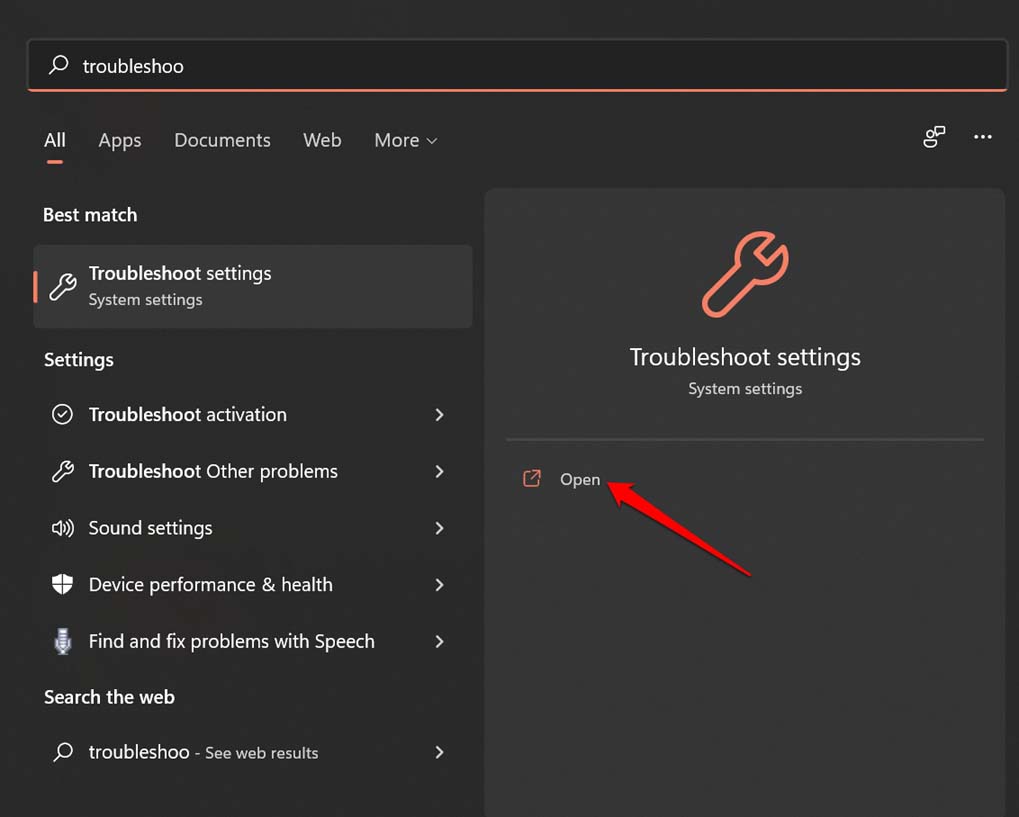
- Launch the Troubleshoot Settings.

- Click on Other Troubleshooters.

- Hit the button Run beside Playing Audio.

Apart from the above troubleshooting, you may restart your PC or install the latest Windows 11 update that is available.
Also, make sure that you have connected your headphones correctly and that they have no faulty cables. Otherwise, you cannot experience or feel Windows Sonic for headphones.
NOTE: Every time you change your primary sound output source from Speaker to Headphones or vice versa, manually enable Spatial Audio for the concerned device.
Enjoy a Dynamic Sound Experience with Spatial Audio
Now, enable Spatial Sound in Windows 11 and enjoy vivid audio playback on your PC. If you can’t enable the 3D Audio, try the basic troubleshooting methods to overcome the problem.
If you've any thoughts on What is Spatial Sound in Windows 11 and How to Use it?, then feel free to drop in below comment box. Also, please subscribe to our DigitBin YouTube channel for videos tutorials. Cheers!

