Auto-login is a convenient feature, particularly when utilizing a personal computer within a secure environment where unauthorized access is unlikely. If you are the sole user of your PC and it is well-protected, enabling auto-login is beneficial.
However, in a shared work environment where others may have access to the computer, it’s advisable to maintain password protection for your user account.
However, a password-protected PC usually requires you to type in your login data each time you log in, which can be an annoyance if you only require short access to your computer.
Whether you’re using the PC for personal or professional use, if you’ve taken the proper security precautions, you can utilize the auto-login feature for your convenience.
If you are curious about the auto login feature and want to know the ways to activate the auto login feature, you are at the right place.
In this guide, we have listed the different ways by which you can enable the auto-login feature in Windows 11.
What is the Auto Login Feature in Windows 11?
The auto-login feature in Windows 11 simplifies the computer authentication and access procedure by eliminating the need to input login credentials such as passwords or pins. Some of the notable advantages of the auto login feature are listed below:
- The most obvious benefit is the time saved during computer access. Removing a login step lowers startup or boot time, improving the overall efficiency.
- Auto-login authorizes non-administrative users to freely operate a predetermined user account, making it more suitable for multiple users who need access to the same computer.
- Windows 11’s auto-login on your local account is particularly beneficial for public computers, ensuring a seamless user experience, not necessitating a password or PIN.
Since concerns about this feature’s security implications have been raised, we recommend enabling it only on computers intended for shared use within a group. On private PCs, it is advisable to exercise caution and refrain from allowing auto-login to maintain the highest level of security.
Top Ways to Enable Auto Login in Windows 11
You can easily enable automatic login on Windows 11 by following these steps.
1. Using the Settings App
You can access the sign-in options in the Windows settings app so that the auto login feature gets activated on your Windows 11 PC. Below is the detailed procedure.
- Use the Windows + I shortcut key to launch the Settings app on your PC.
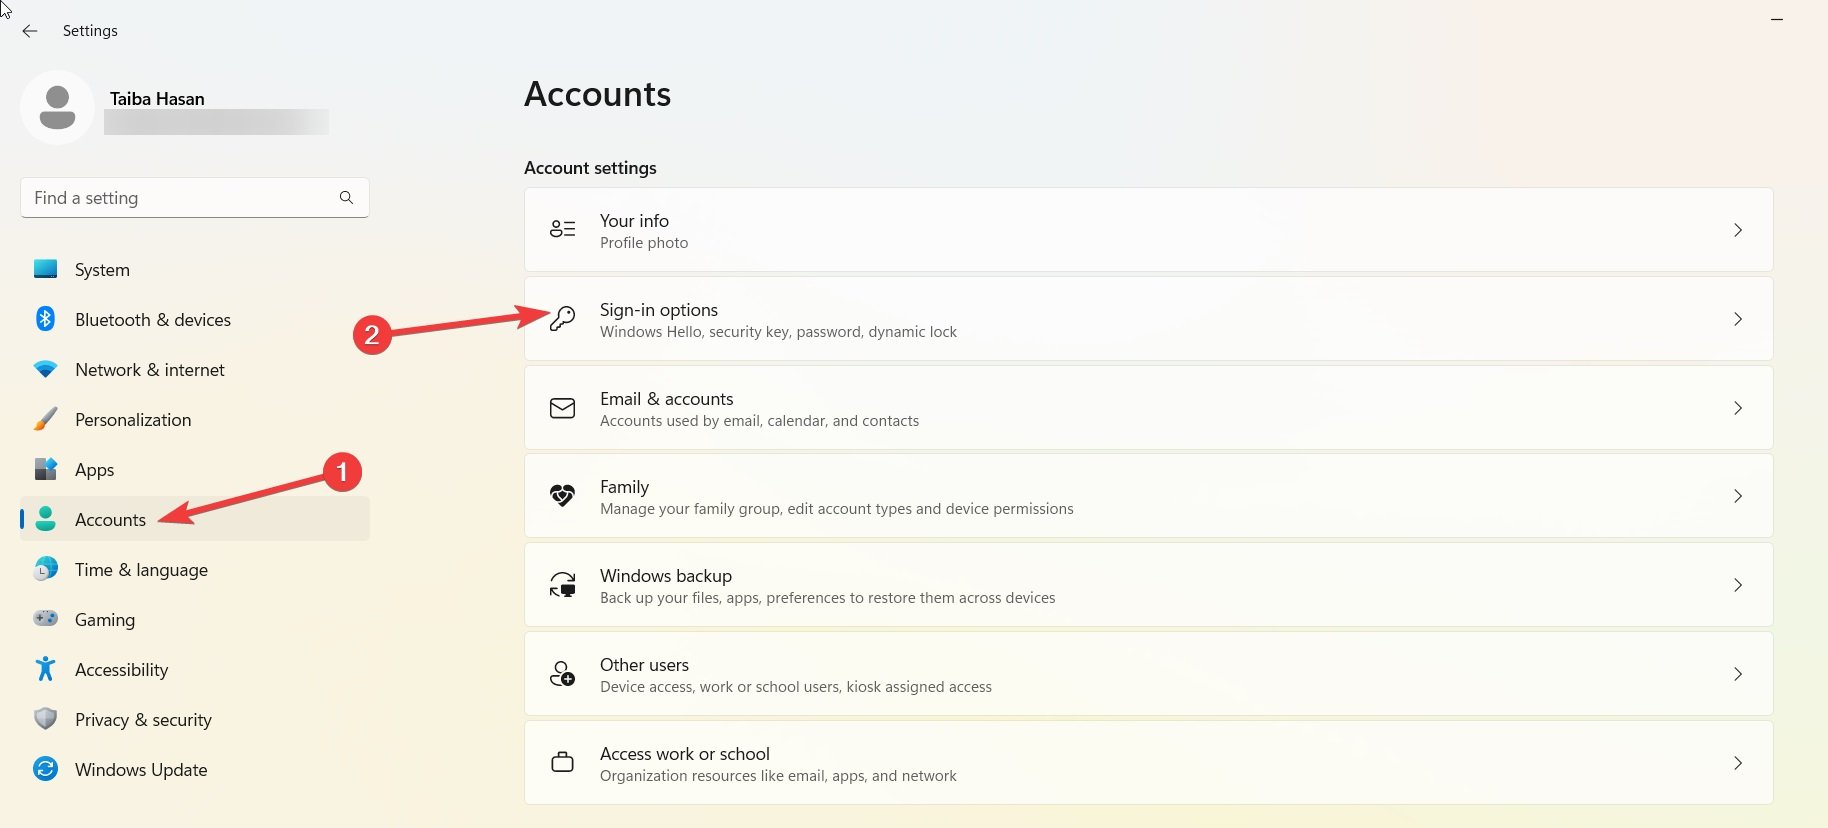
- In the Settings window, navigate to the Accounts option from the left panel, and then select Sign-in options from the right pane.
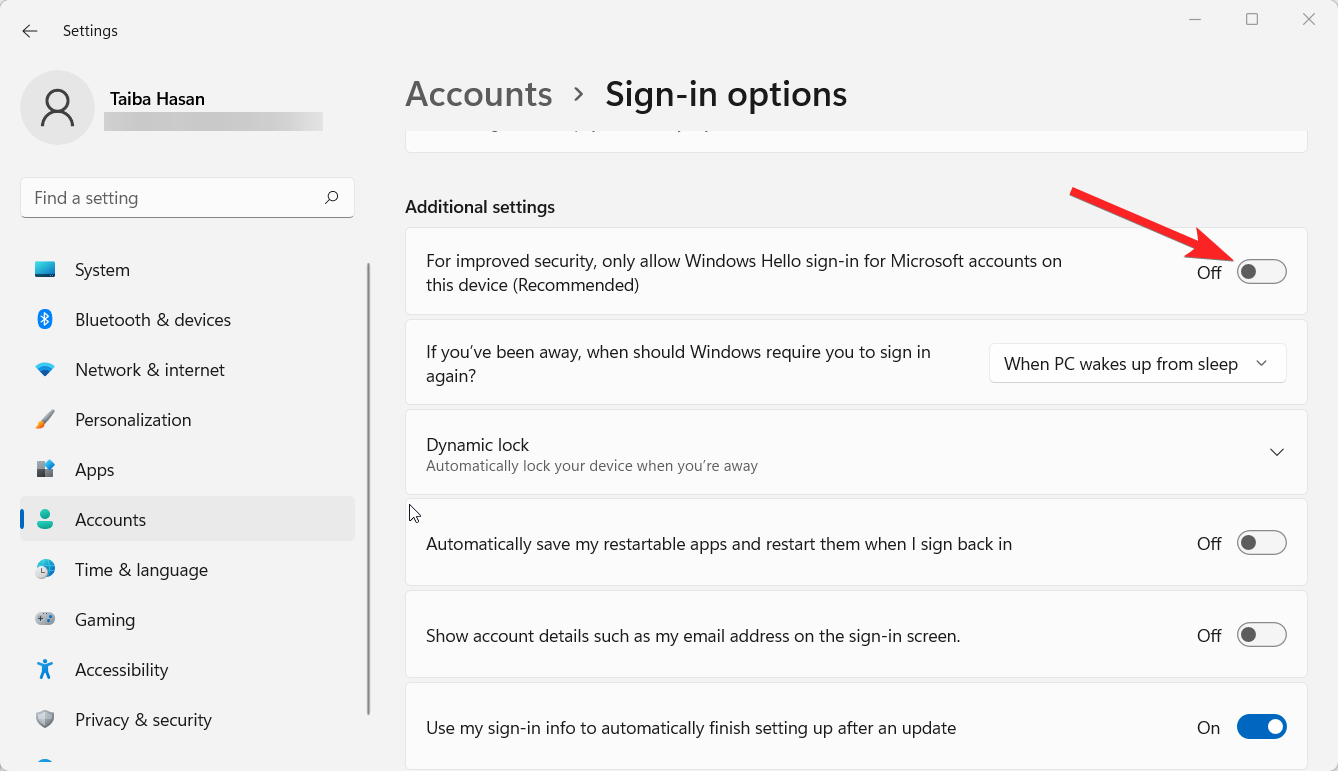
- Now scroll down to the Additional settings section and disable the For improved security, only allow Windows Hello sign-in for Microsoft accounts on this device (Recommended) option. In case the option is grayed out, sign out and then sign back into the user account.
- You might be prompted to enter your password to confirm the action. Go ahead and enter your password, then click the Yes button.
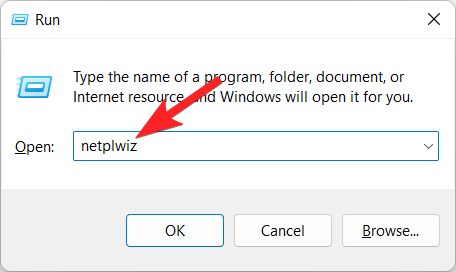
- Now you need to launch the Run command prompt utility and simultaneously press the Windows and the R keys (Windows + R). In the Run dialog that appears, type netplwiz and either press Enter or click the OK button.
- Unmark the checkbox next to the Users must enter a username and password to use this computer in the User Accounts window that displays. After that, click OK.
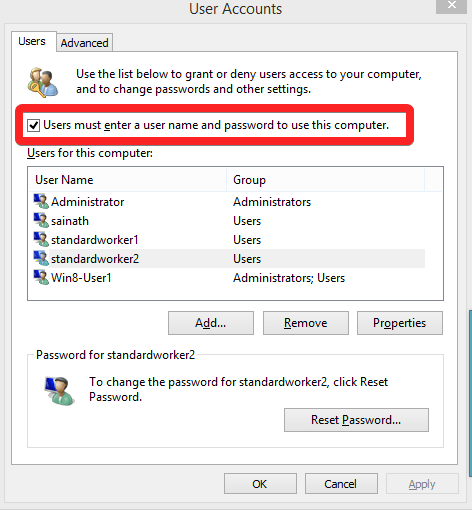
- To make these changes take effect, click the Apply button. You will be asked to enter your password once again to verify the changes.
With these steps completed, you have successfully enabled auto login in Windows 11. This means you won’t need to enter your password the next time you start your PC.
2. Via Computer Management
Computer Management utility to enable the auto login on Windows 11 PC. To initiate the process, follow the steps described below:
- Right-click the Start icon in the taskbar and choose Computer Management from the list of options available.
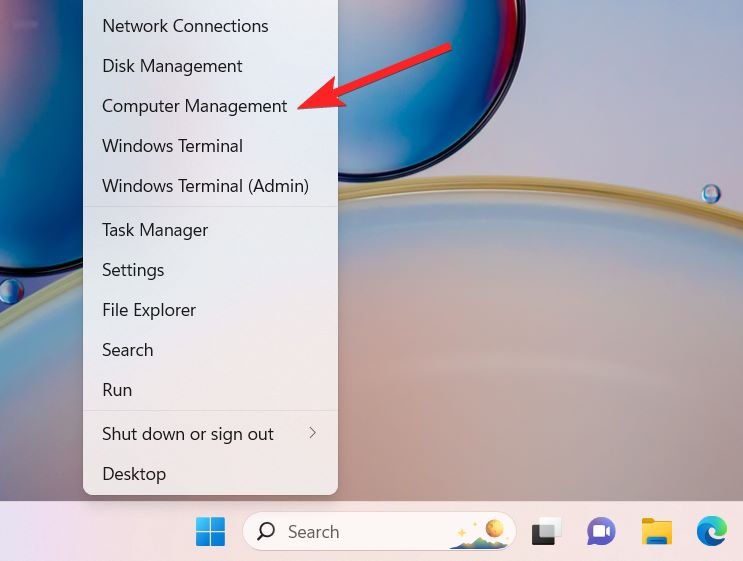
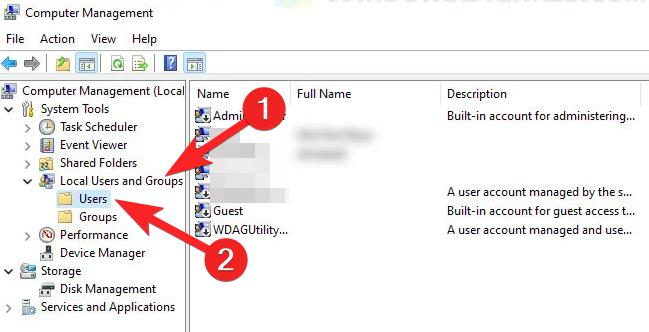
- Next, navigate to the Local Users and Groups tab, which can be found in the left pane. You should locate and click on Users from the expanded list within this tab.
- Now, perform a right-click action on the user profile for which you expect to activate auto-login on Windows 11. In the context menu that pops up, select the option labeled Set Password.
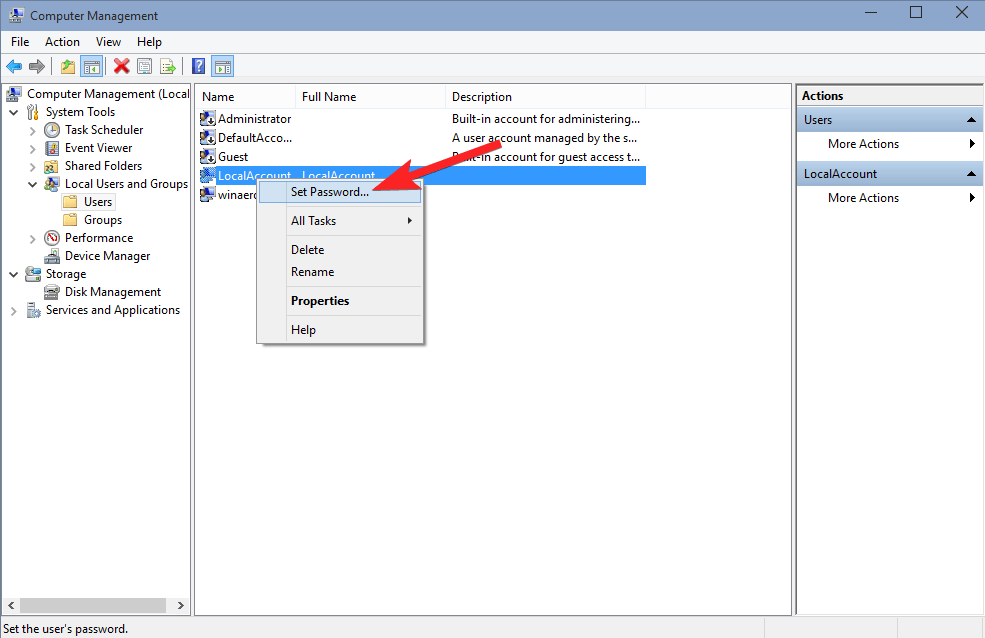
- A warning message will appear; click on the Proceed button to proceed with the process. Following this, click OK in the Set Password window without entering any password.
- Lastly, to ensure that these changes take effect, restart your PC.
3. Modify the Registry
The Windows Registry houses critical details about your Windows 11 operating system. Therefore, it’s crucial to exercise caution when making any modifications, as inaccurate alterations can lead to consequential issues. To proceed safely, adhere to the following instructions:
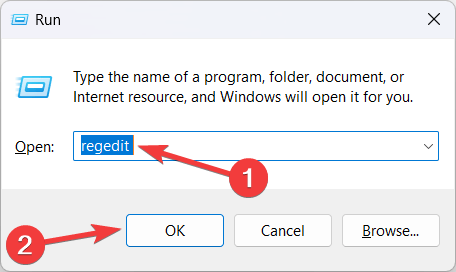
- Launch the Windows Run utility by pressing Win + R, type regedit in the command box and press Enter.
- Access the following registry path by pasting the following location in the Registry Editor path and then hitting the Enter key.
HKEY_LOCAL_MACHINE\SOFTWARE\Microsoft\Windows NT\CurrentVersion\Winlogon
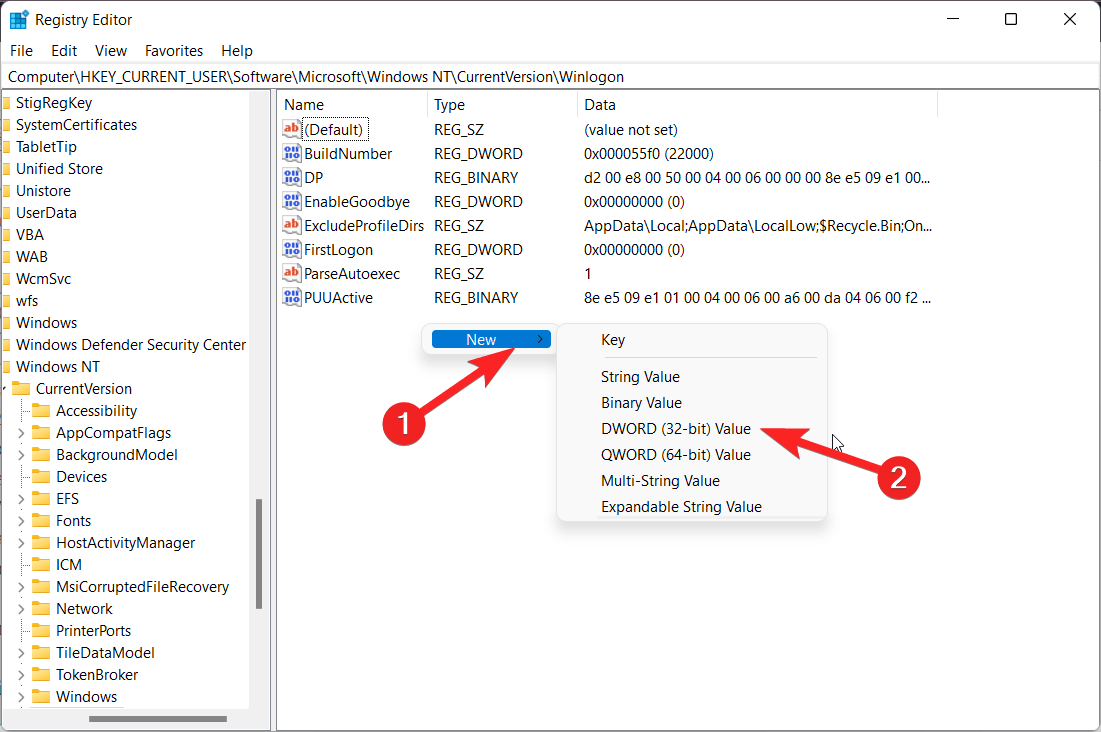
- In the left pane, right-click the Winlogon folder and select the New option followed by DWORD (32 Bit) Value from the submenu.
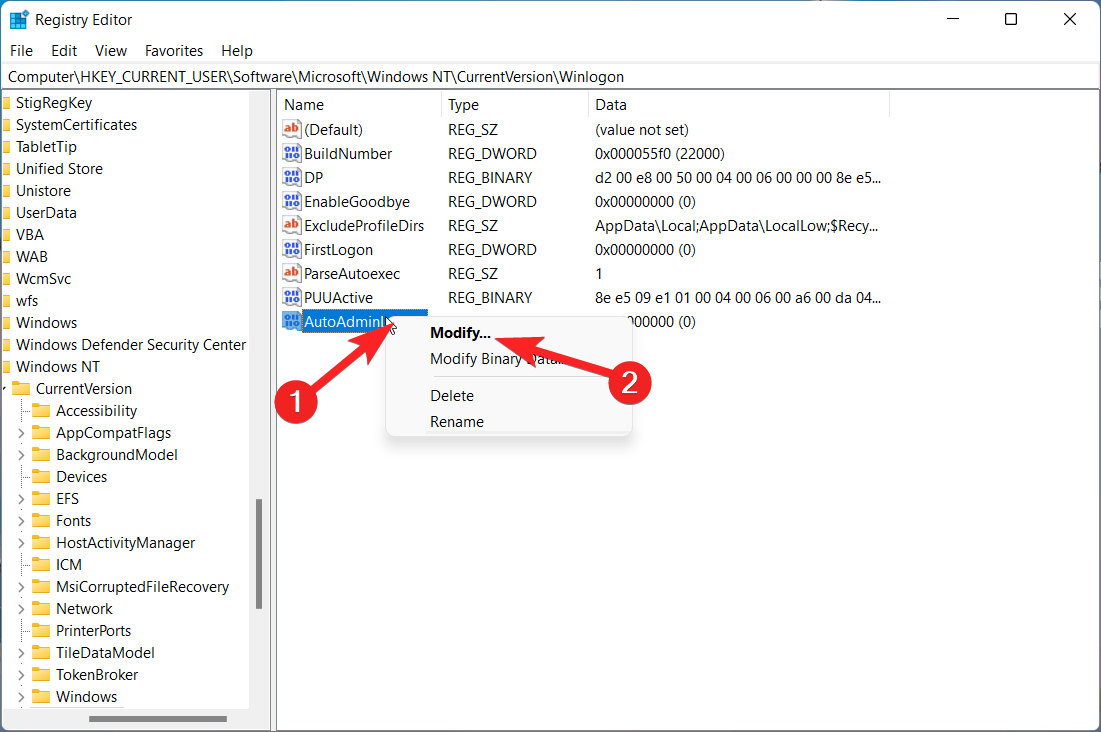
- Rename the newly created DWORD value in the right pane as AutoAdminLogon.
- Next, right-click the DWORD and choose Modify from the context menu.
- Now set the DWORD value as 1.
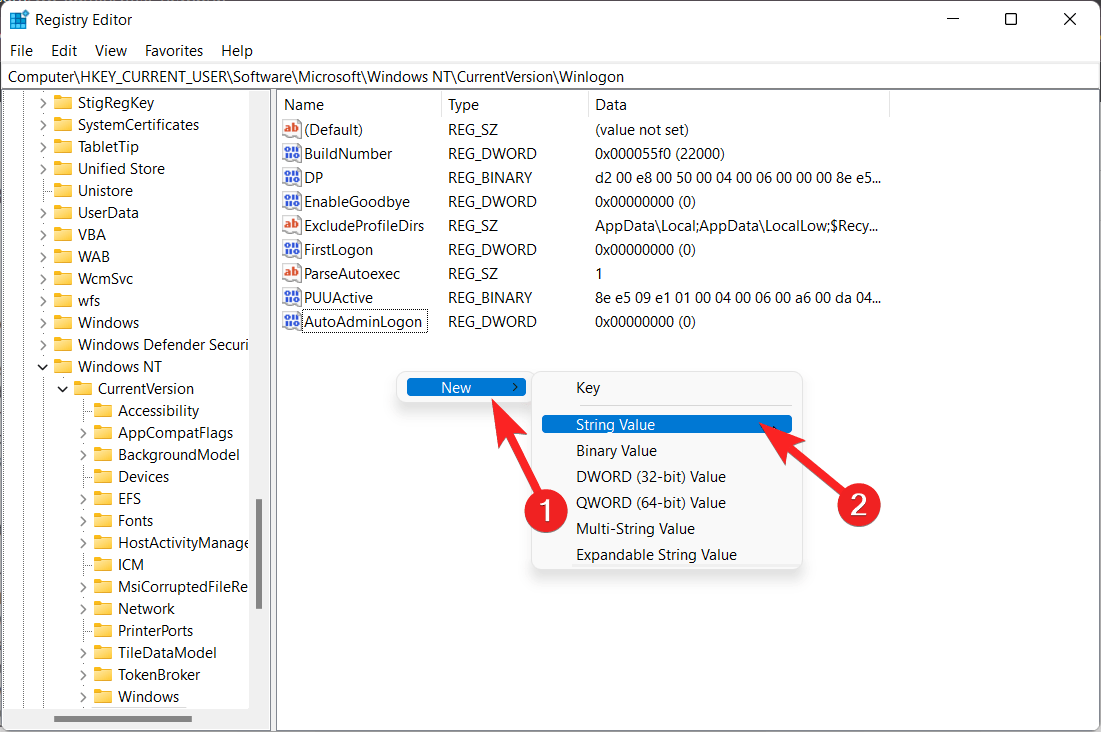
- Right-click the Winlogon folder once again and select the New option followed by String Value from the sub-menu.
- Provide the name DefaultUserName for this new string value.
- Double-click the newly created DefaultUserName to modify its data. Within the Value Data field, input your Username, and then click the OK button.
- Again, right-click the Winlogon folder and select the New option followed by String Value from the context menu.
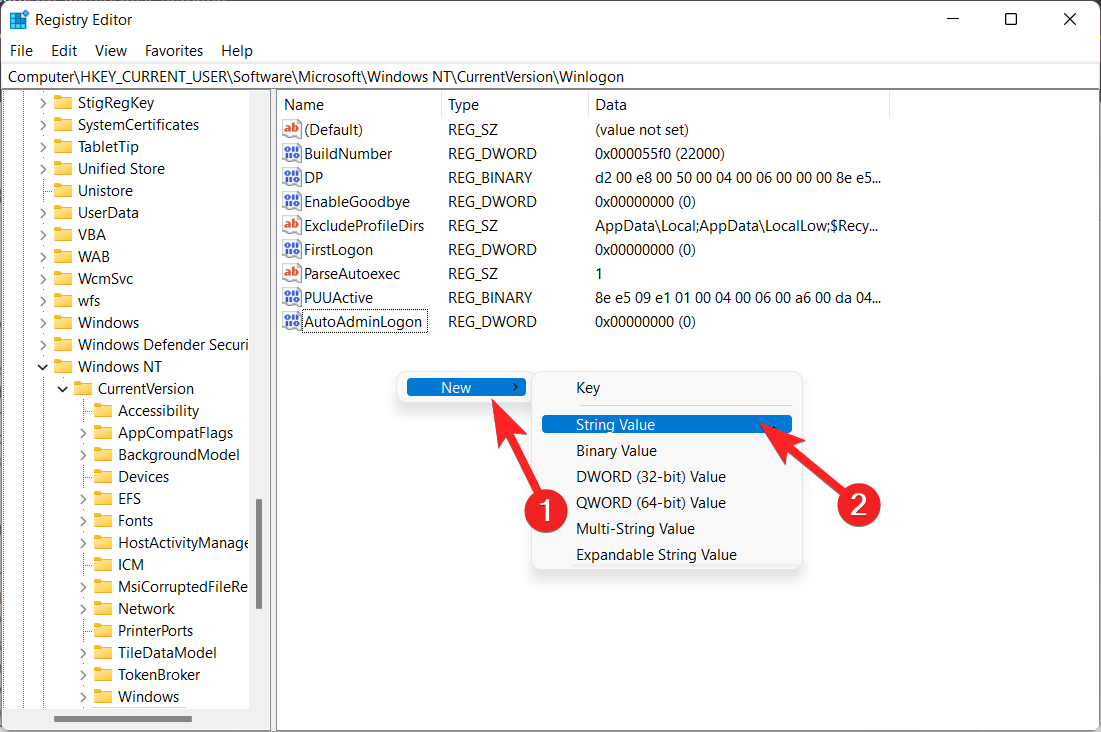
- Name this new string value as DefaultPassword.
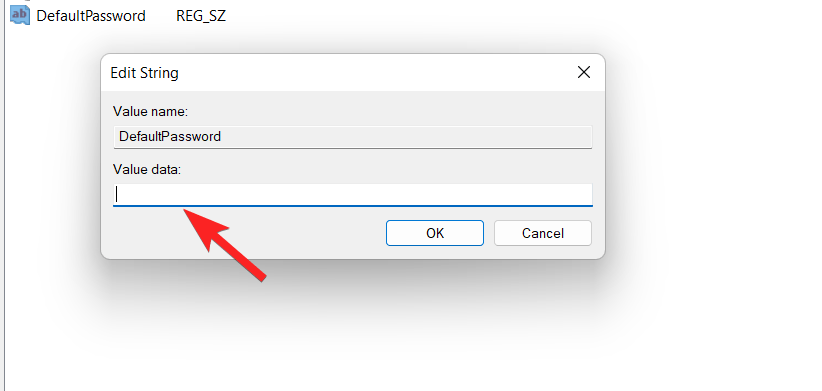
- Now right-click DefaultPassword and select Modify from the context menu.
- Type your password in the Value Data field and click OK to save the changes.
4. Using the Third-Party Tool
AutoLogon, a valuable utility developed by Microsoft, facilitates automatic system login and ensures the encryption of login credentials within the Windows Registry, defending them from prying eyes.
- Go to the source website and press the download button to acquire the AutoLogon tool on your Windows PC.
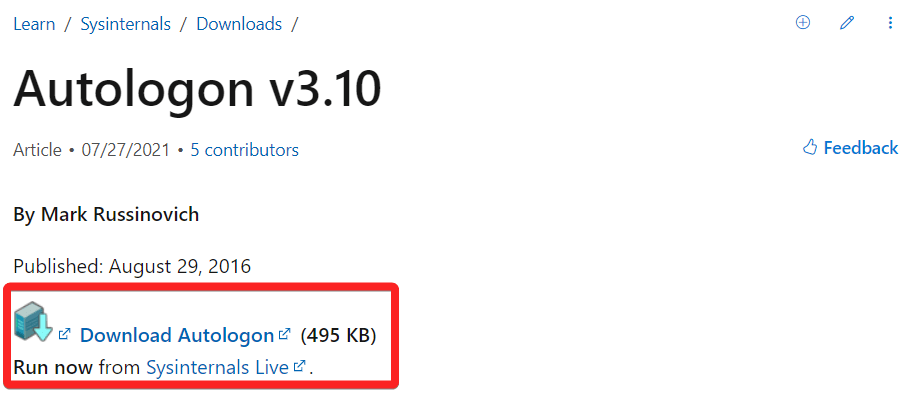
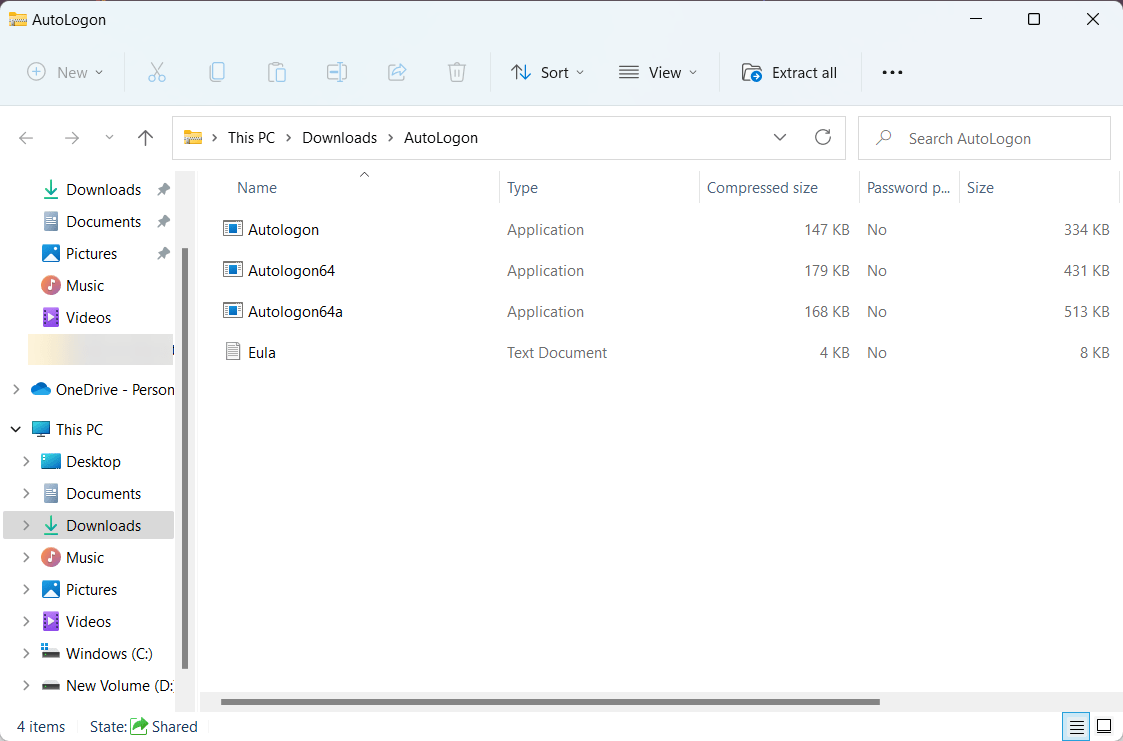
- You will receive a compressed zip archive following the download, including the different files.
- Extract these files to a familiar computer location and then double-click the appropriate file that matches your system configuration.
- Upon running the file, you will undergo a prompt requesting your account password.
- Enter your password and confirm by selecting Yes. In the subsequent window, re-enter your password and click the Enable option.
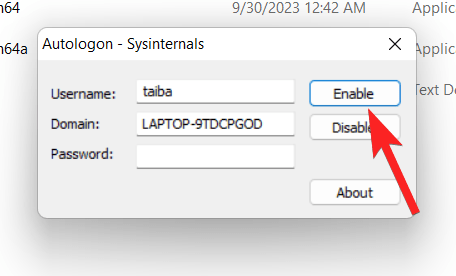
- A notification will inform you that AutoLogon has been successfully configured. Acknowledge this message by clicking OK.
- Once you restart your system, you will no longer be required to input a password when logging in.
Conclusion
With the methods above, enabling auto login on Windows 11 can be a simple procedure. However, it’s essential to operate this feature with prudence and only on a safe computer accessible to you. Your data and privacy could be in danger if you don’t do this.
What’s your take on this feature? Do let us know in the comments section.
If you've any thoughts on How to Set Up Auto Login in Windows 11? , then feel free to drop in below comment box. Also, please subscribe to our DigitBin YouTube channel for videos tutorials. Cheers!


