Are you sick of hearing the same old advice to use a password manager? Using passkeys could be the way to up your security game. They provide a two-factor authentication technique, making them a more reliable and user-friendly substitute for conventional passwords. Directly on your operating system, you may easily create and manage Passkeys with the Windows 11 Copilot upgrade or version 23H2. This tutorial will show you how to configure and easily manage Passkeys on Windows 11.
What are Passkeys?
Passkeys are now included in the 22H2 edition of Windows 11 (and the anticipated 23H2) after previously existing on mobile devices. Using Passkeys, you can utilize Windows Hello to download a token onto your Windows 11 computer, thereby strengthening the security of your website accounts.
The next time you need to access the website, you can use your Windows Hello PIN, Fingerprint, or Face to authenticate with the Passkey instead of depending on a conventional password. By not requiring a password, this technique raises security and makes it harder for hackers to obtain your login information. Microsoft claims passkeys are made to be recoverable and phish-resistant, offering a quicker, more secure user experience.
How to Set Up Passwords for a Website?
To create a Passkey for a Windows 11 online service or application, take the following actions:
- Launch Google Chrome or your preferred browser on Windows 11.
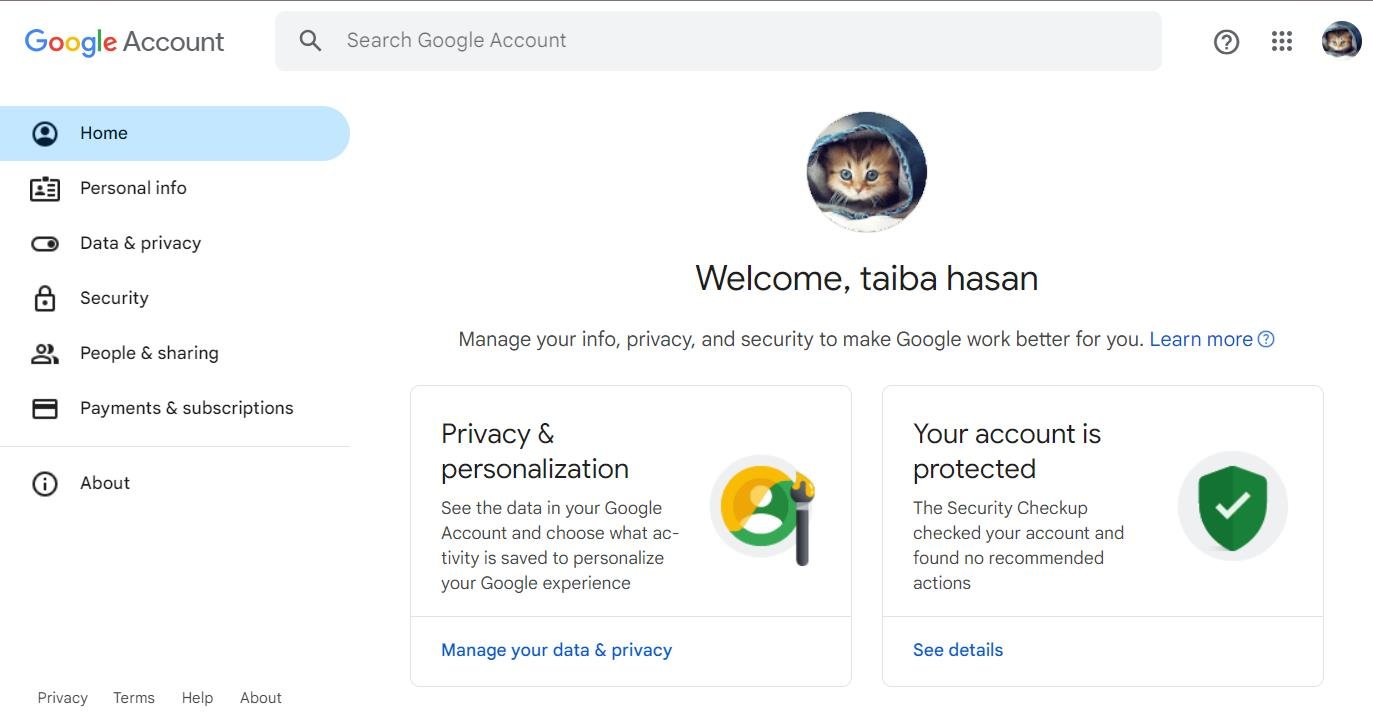
- Visit a website that supports Passkeys, like Google Account.
- Visit the Security option from the left sidebar.

- Scroll down and select Passkeys located under the How you sign in to Google section.

- After logging in, you may access your account settings.
- Turn on the Passkey sign-in feature.
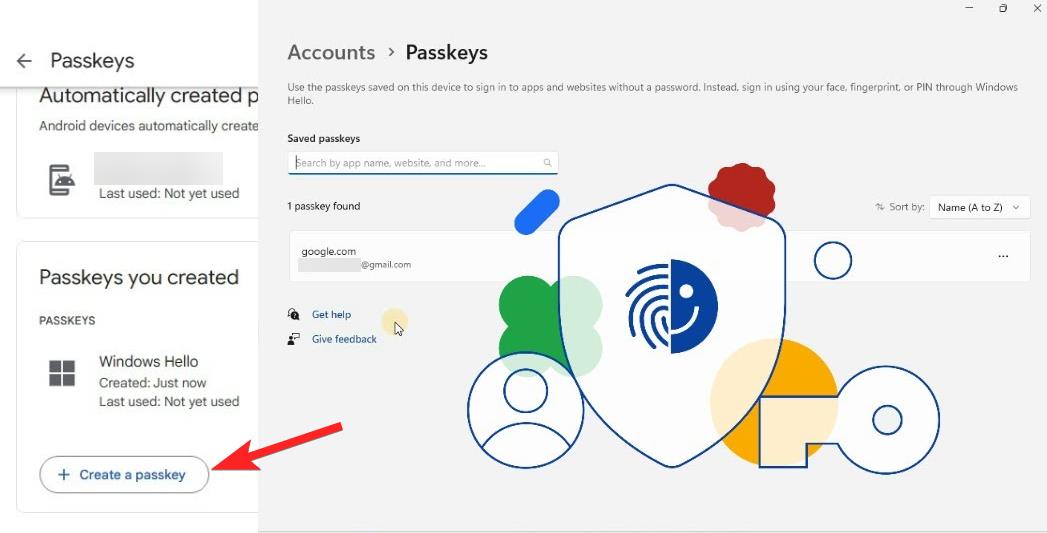
- Select the option to Create a Passkey.

- Click the Continue button to proceed further.
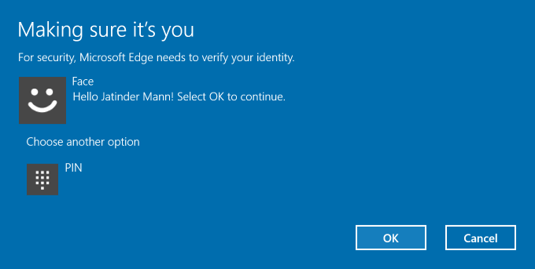
- Enter your Windows Hello account credentials.

- To confirm, click the OK button.
- Click the Done button to complete the procedure.
Your Passkey will be generated and safely saved on your Windows 11 PC after you have finished these procedures. When you want to use the service or app later on, you can complete the sign-in process using Windows Hello authentication, which will remove the need for the service password.
How to Manage Passkeys on Windows 11?
Follow these procedures to view and remove Passkeys in Windows 11:
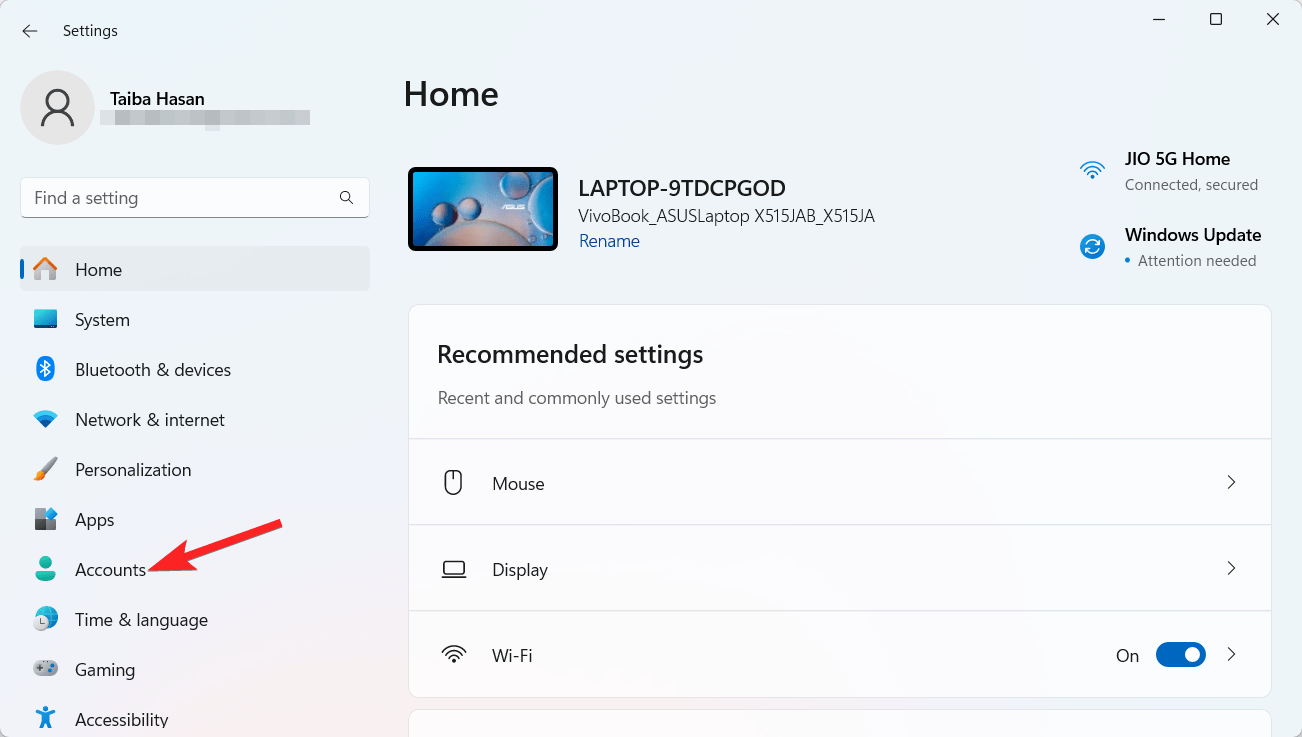
- Launch the Settings app using the Windows + I shortcut on your Windows 11 PC.
- Select Accounts from the left side panel.

- Scroll down and select Passkeys from the right section.
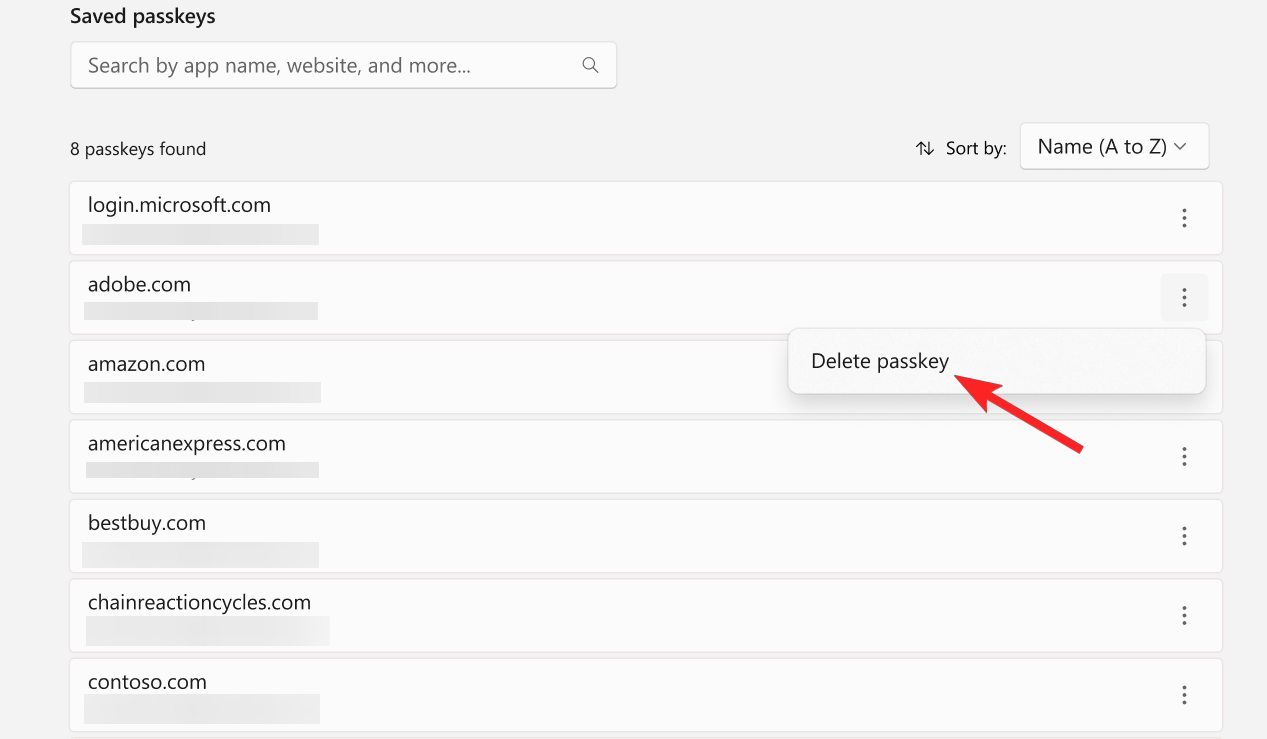
- Check all the Passkeys that are available for your apps and web services.
- Click the three dots on the right to reveal the related options and select the Delete passkeys option.

- Once the processes are finished, the online service or application passkey will be removed from your computer.
Conclusion
The precarious and irksome fact of living in a technological age is passwords. All dislike them, but up until now, there hasn’t been a viable substitute. Passkeys can alleviate the burden and danger associated with authentication by providing a dependable, easy-to-use system based on reliable devices.
If you've any thoughts on How to Set Up and Use Passkeys in Windows 11, then feel free to drop in below comment box. Also, please subscribe to our DigitBin YouTube channel for videos tutorials. Cheers!
