There’s a built-in feature on Windows operating systems called Windows Security or Windows Defender that helps your system from malware, antivirus, and other security threats. It offers to scan your computer to optimize it and enhance its capabilities. The major highlight feature of Windows security is its antivirus tools, which are available for free to use. With that, you can quickly scan your system for malware attacks, antivirus, etc.
Whenever you run a program or platform on your system, Windows Security raises an alert alarm in case the app contains viruses or security threats. In some cases, it removes the file automatically when it is detected as a harmful file.
But in a few cases, you may not need the defender as it is not needed or interferes with the operations of other programs on your PC. In this tutorial, we will show you how to permanently remove Windows Defender or Security on Windows 11.
Why Should You Remove Windows Security?
Before taking the steps, there’s something important you should know: what’s the need to remove Windows Security on the Windows operating system? Here are a few things you should keep in mind –
Performance Issues
The first and foremost reason that motivates to disable Windows Security is performance. Whether you are using an older computer or a powerful one, Windows security impacts your system performance. The majority of users reported the same on official support forums and other public forums.
False Alarms
False alarms force the users to remove Windows Security from their system. When your system detects any legit apps, it shows a false alarm, indicating that the app contains a virus, and automatically temporarily disables the defender. This might be frustrating specifically if the files are important for individual users.
But it is important to note that if you remove Windows Security permanently, then you won’t be able to access the capabilities that your system needs such as scanning viruses, malware, system optimization tools, etc. In addition, you don’t get a password manager, advanced malware protection, parental controls, and many more.
Ways to Disable Windows Security Permanently on PC
Here’s how you can remove Windows Security permanently on the Windows 11 operating system. You can follow any of the workarounds listed below and you will be good to go!
1. Disable Real-Time and Tamper Protection
Disabling Microsoft Defender Antivirus is quite simple but removing Windows Security apps isn’t straightforward. To remove the Windows security from the Windows operating system, you first have to disable Real-time protection and Tamper Protection in the Windows Security app.
Disabling the Real-time protection on the Windows security ensures that your computer may not scan for any system files. In addition, disabling the Tamper protection lets you make any changes to the Defender Antivirus settings.
Here’s how you can disable Real-time protection and Tamper Protection in the Windows Security app:
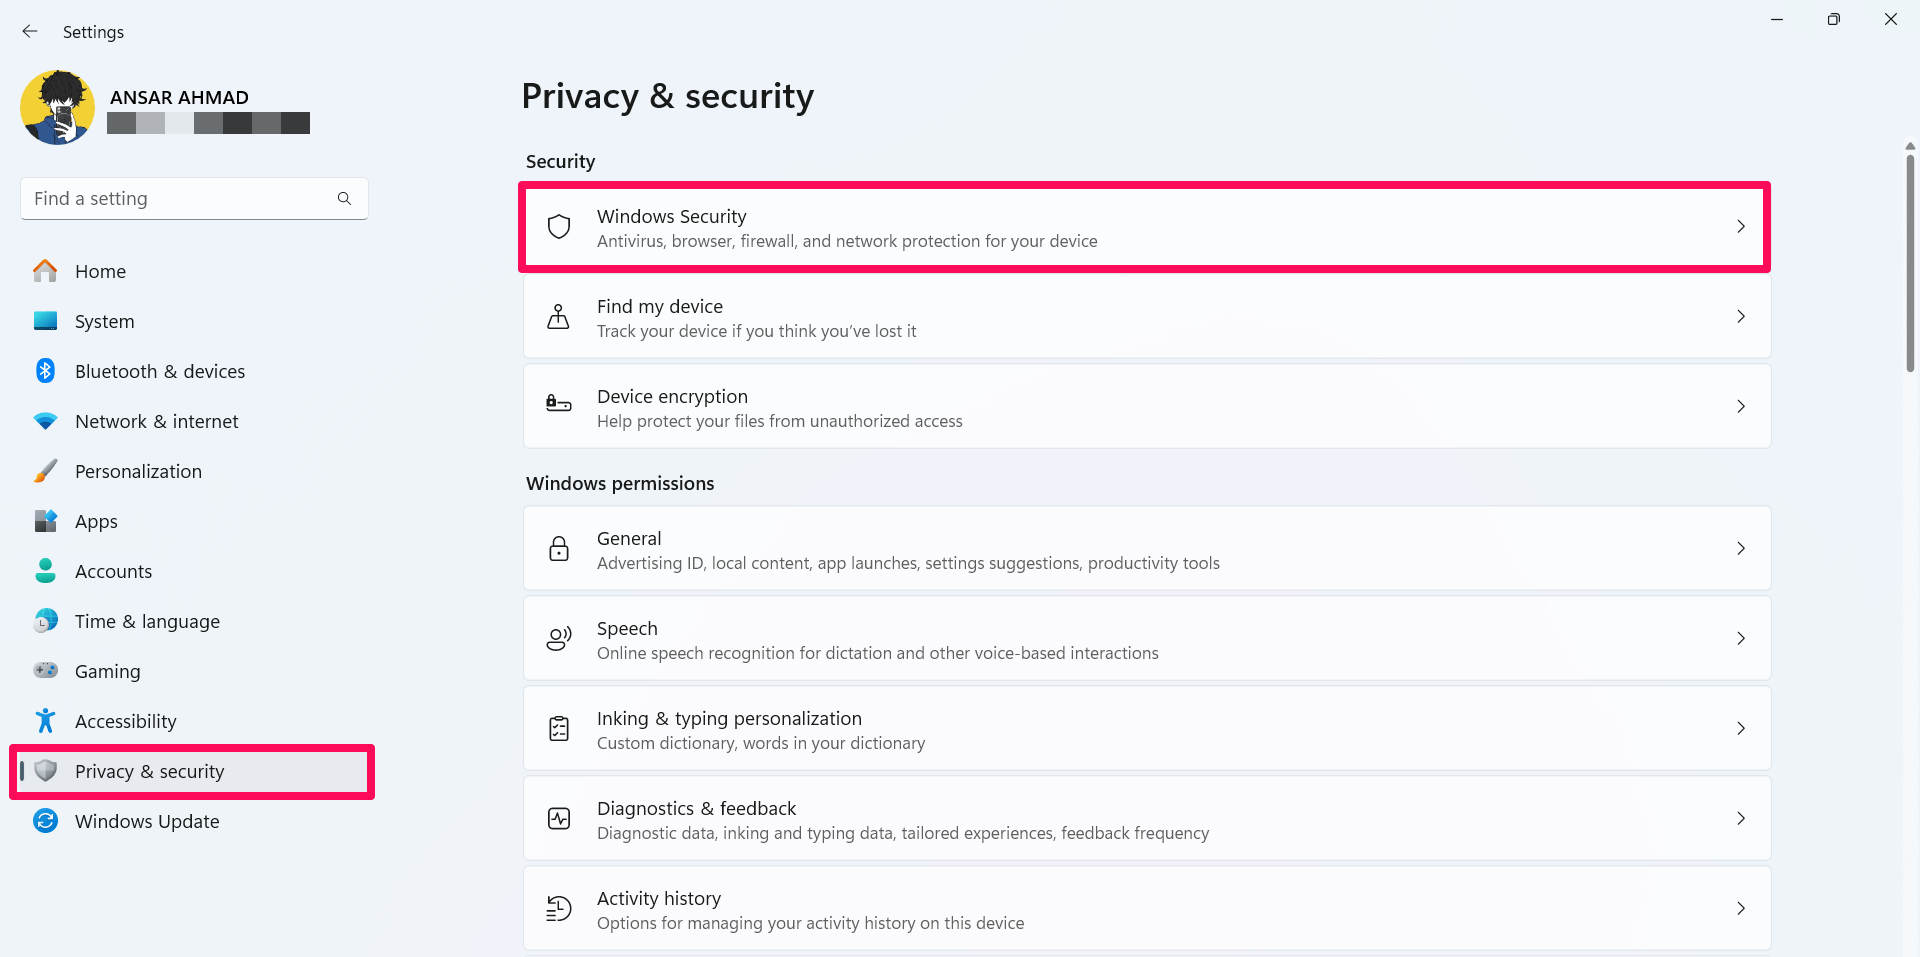
- Press the Windows + I key on the keyboard to open the Settings app.
- Click on Privacy & security on the left pane and select Windows Security.

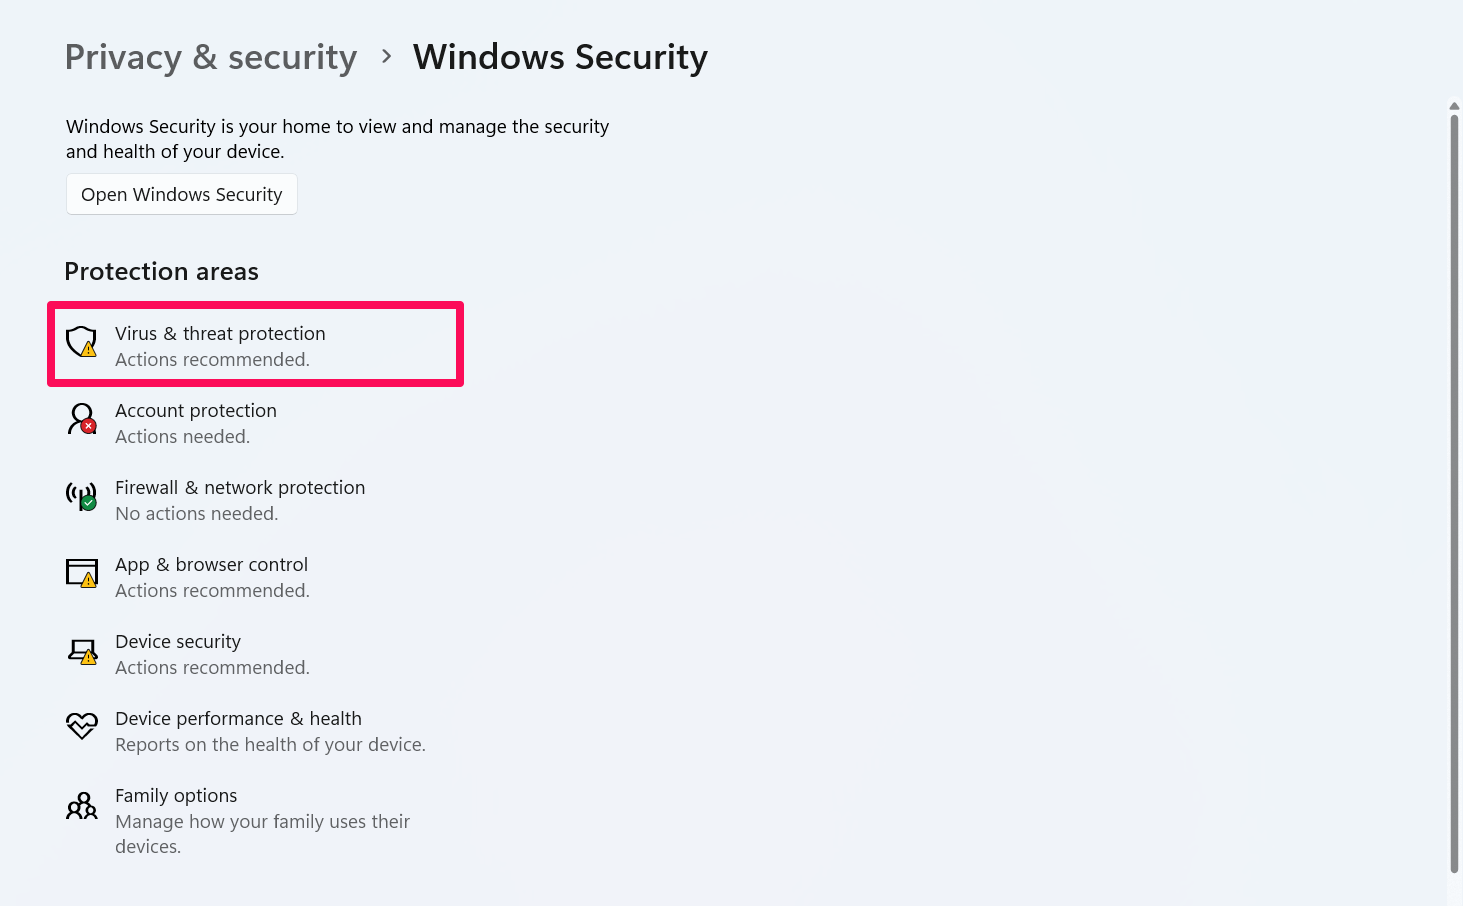
- Then, click on Virus & Threat Protection. (This will open the Windows Security app).

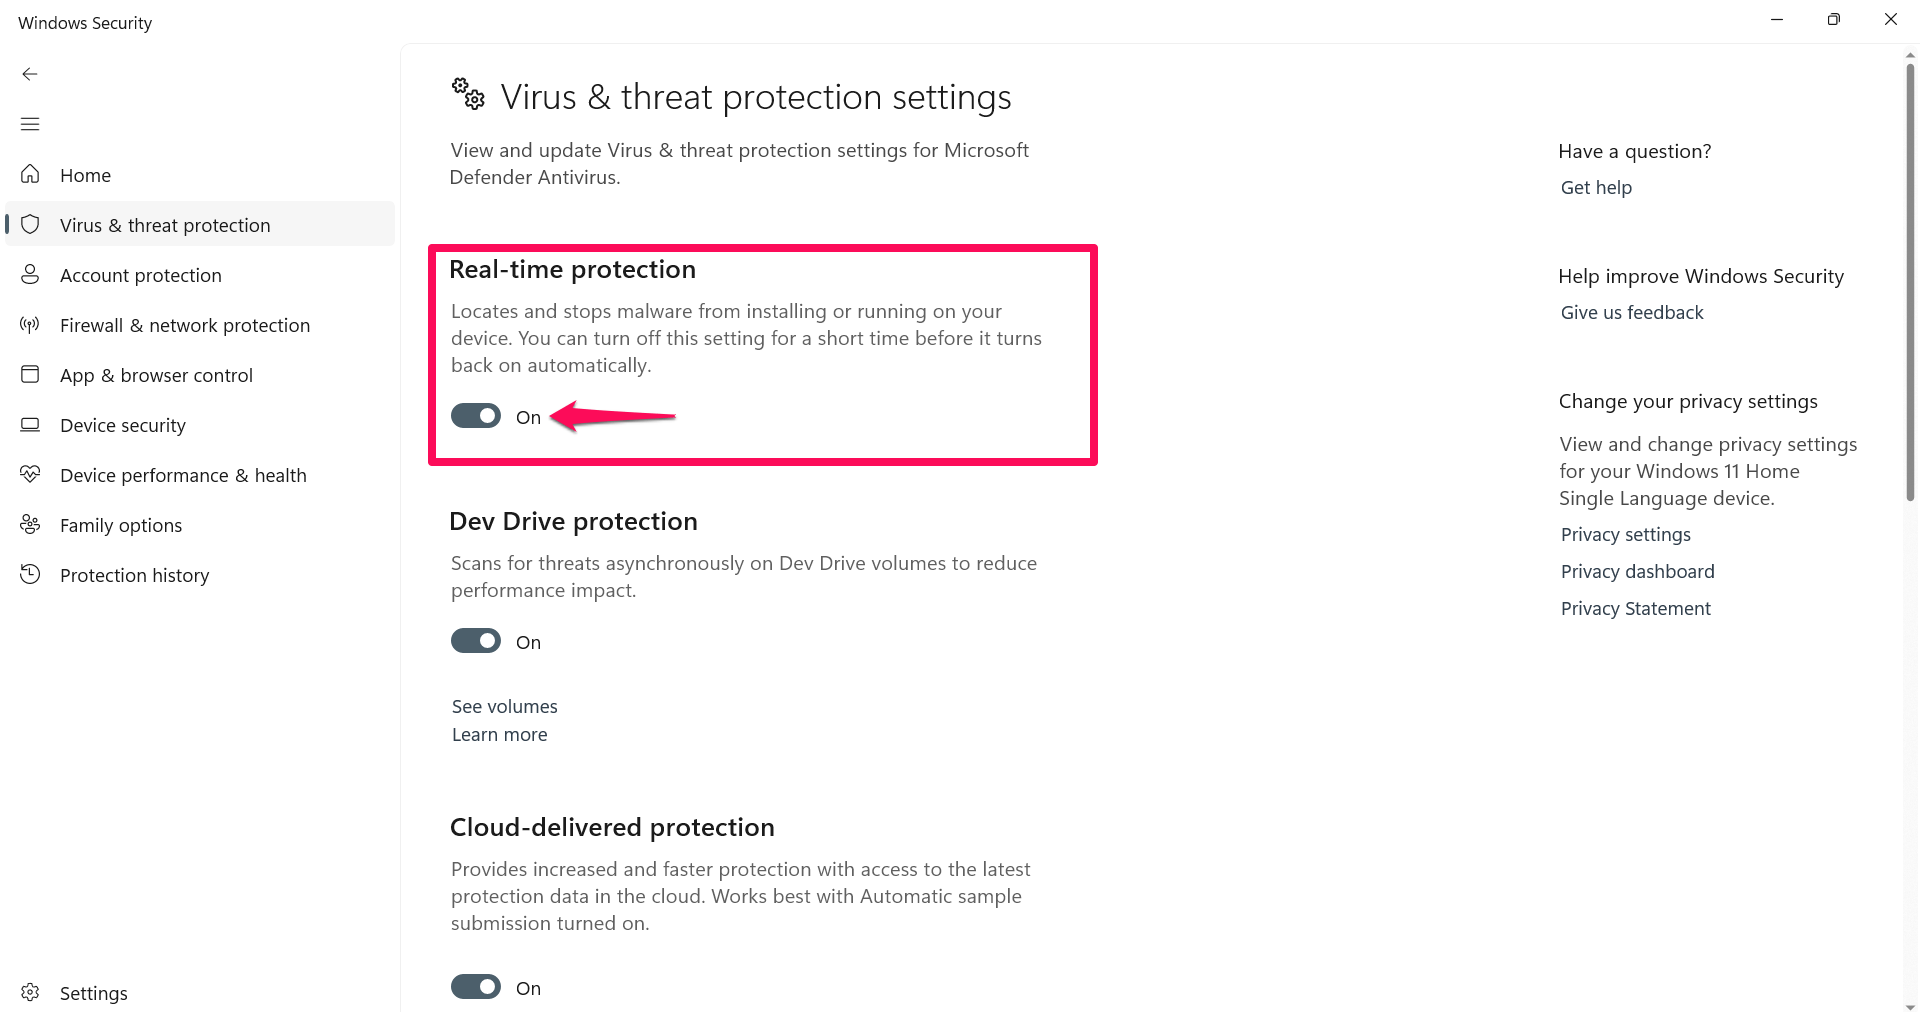
- Click on the Manage settings in the Virus & Threat Protection settings.

- Click on the Real-time protection toggle to disable it.

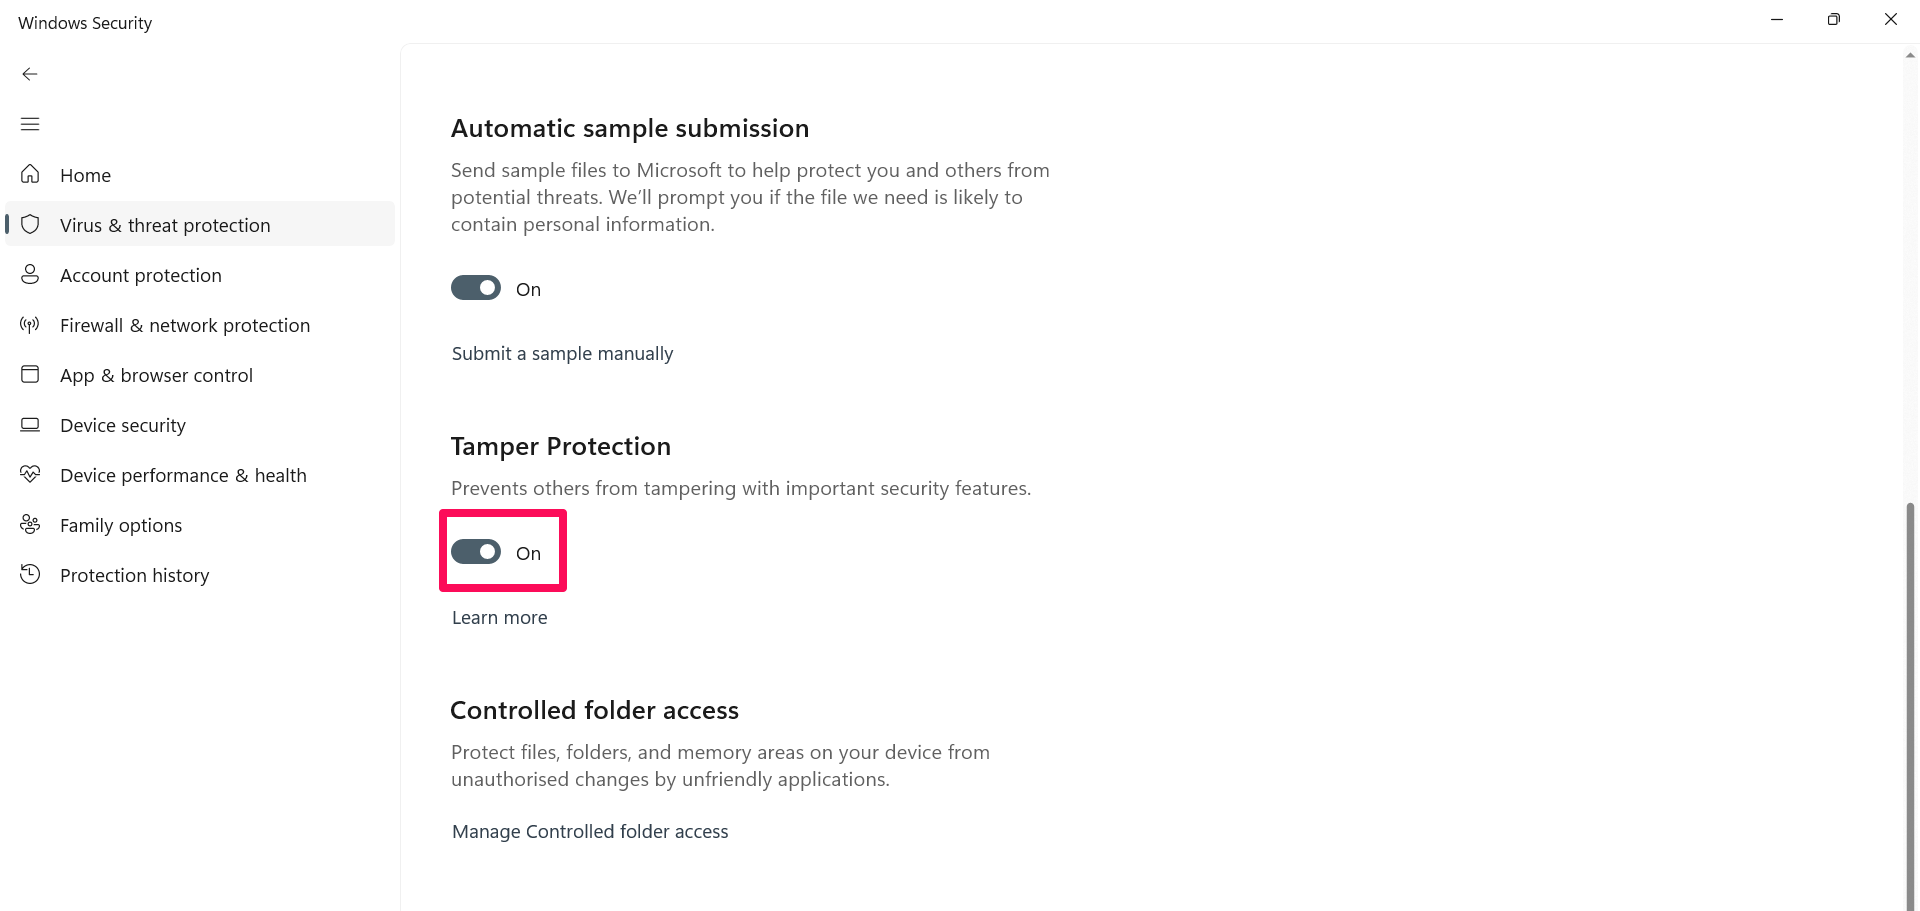
- Then scroll down and turn off the Tamper protection toggle.

- If any prompt appears on the screen, click Yes to proceed.
Now you have successfully disabled the Real-time protection and Tamper protection. Now you can disable the Windows Security app on the Windows 11 computer.
2. Remove Windows Security Using Windows Registry Tool
You can remove the Windows Security permanently on your Windows 11 OS using the Windows registry tool. Here’s how:
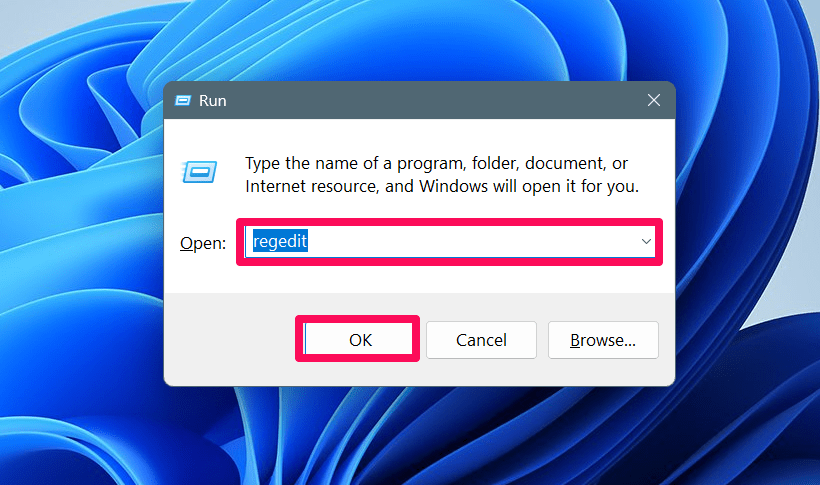
- Press the Windows + R key on the keyboard to get the Run dialog box on the screen.
- In the field section, type regedit and hit Enter.

- If any prompt appears on the screen, click Yes to proceed.
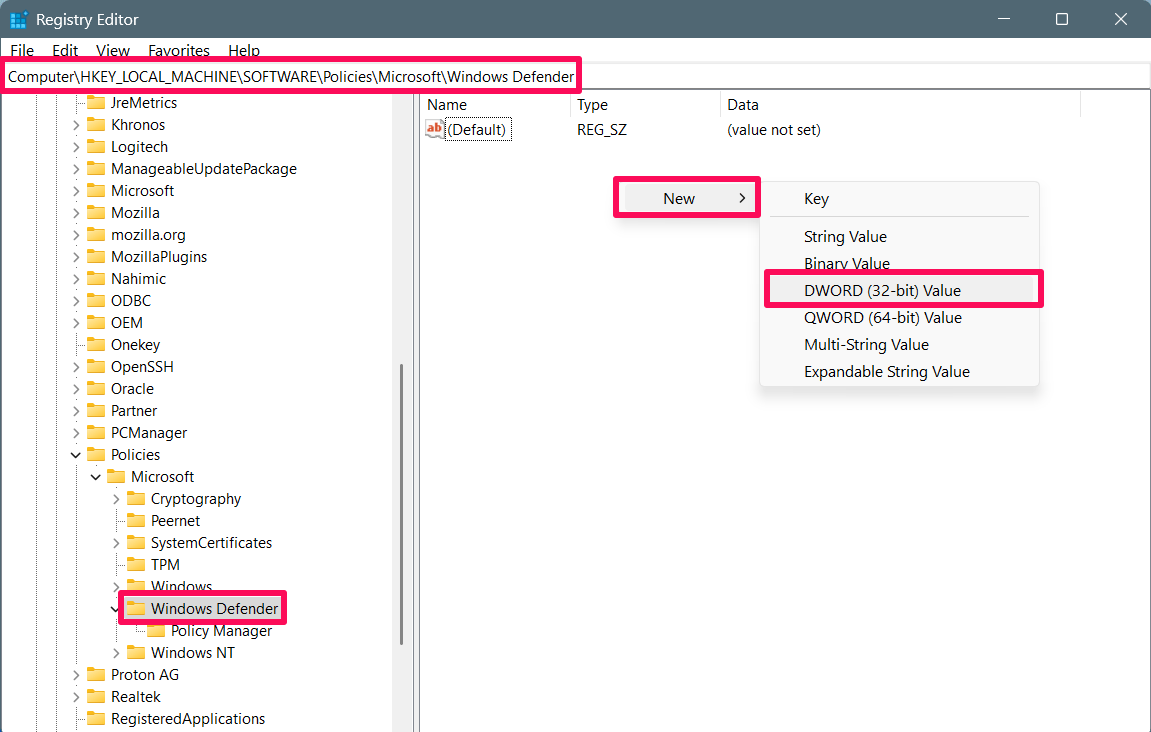
- In the search box, copy and paste the below path:
HKEY_LOCAL_MACHINE\SOFTWARE\Policies\Microsoft\Windows Defender - Right-click on a blank space on the right side and select New > DWORD (32-bit) Value.

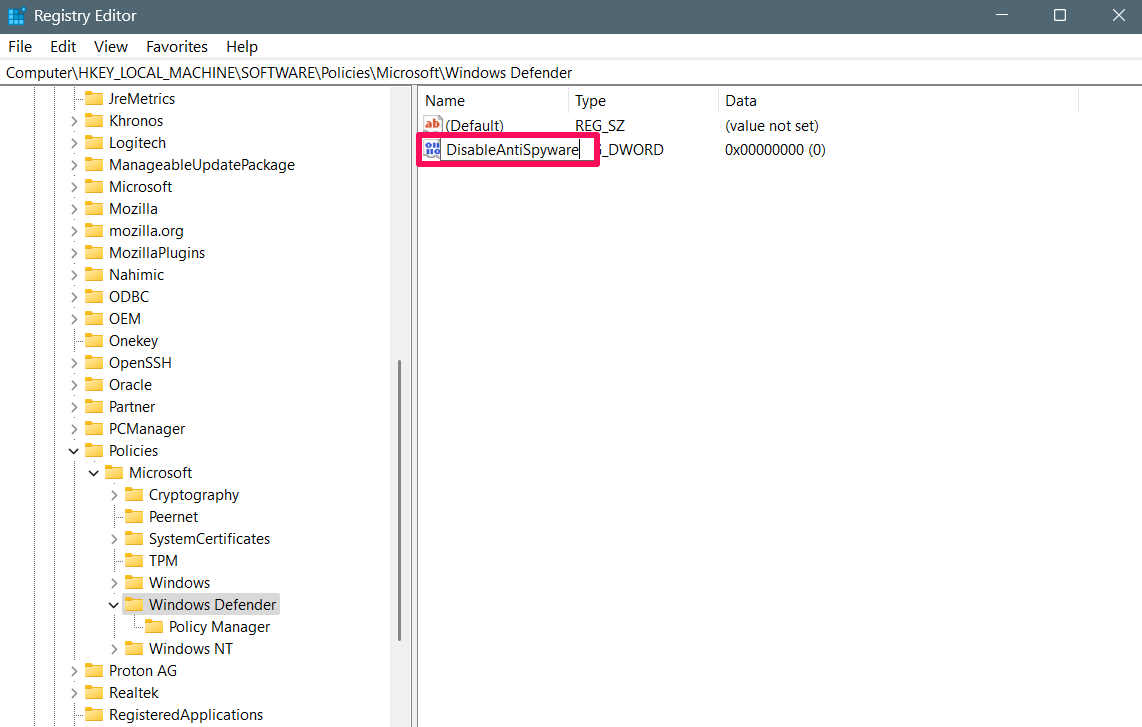
- Now, name the new key to DisableAntiSpyware and hit Enter.

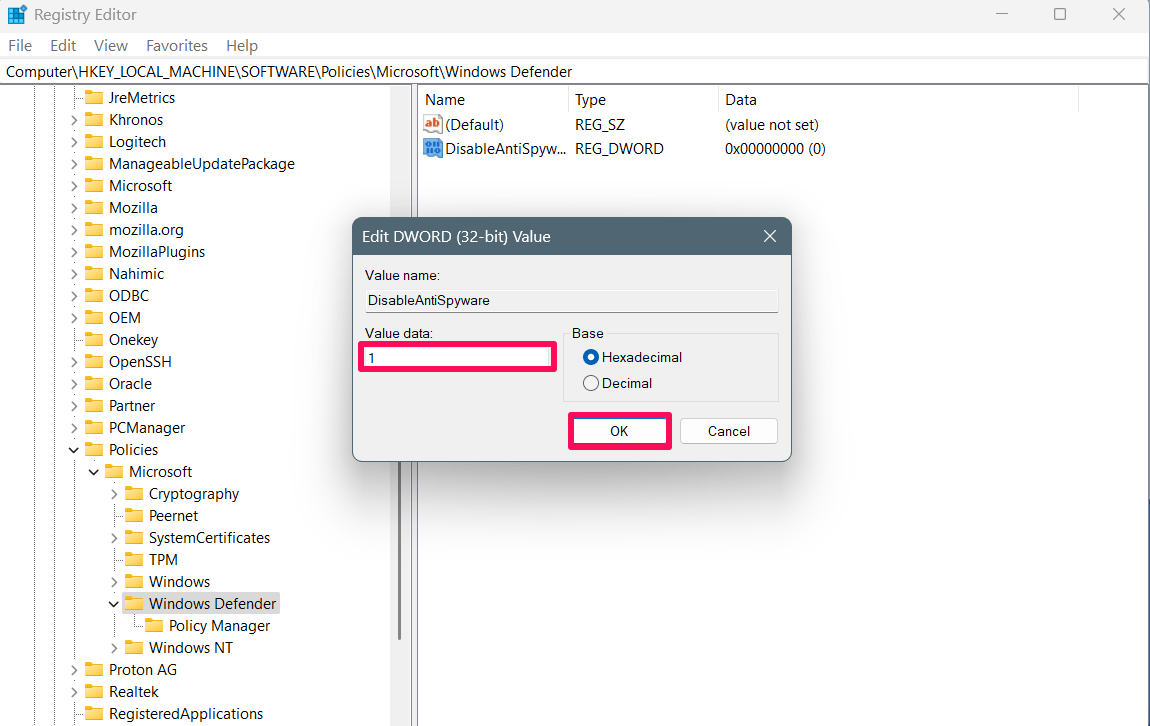
- Double-click on the new name key you just created and set the value data from 0 to 1.
- After changing the value data, click OK and restart your PC to apply the changes.

Note that this method will remove the Windows Security and from now, you won’t be able to access it. But it doesn’t mean the Windows Security was removed permanently; it is still there.
3. Remove Windows Security Through Local Group Policy Editor
Local Group Policy Editor is a built-in management console tool in Windows that allows you to manage and configure settings on your system. Through the Local group policy editor, you can remove the Windows security. Here’s how:
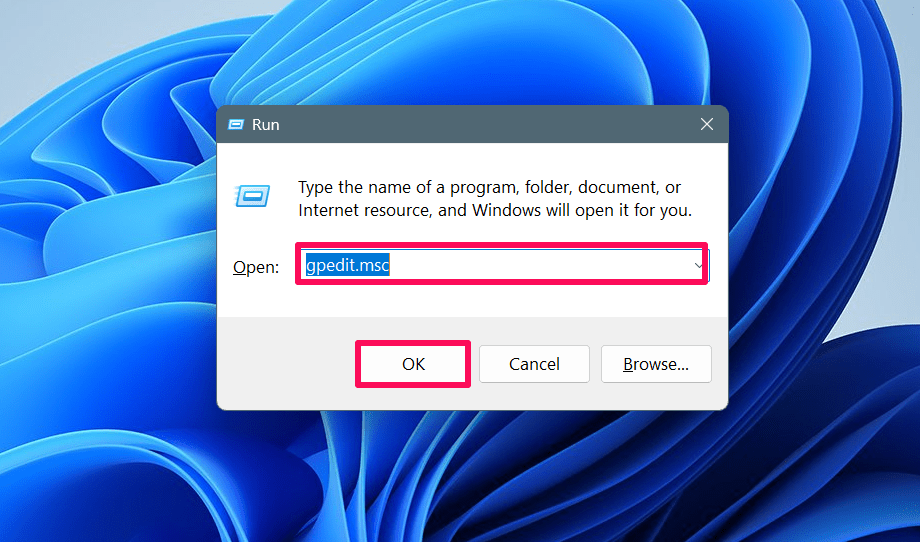
- Press the Windows + R key on the keyboard to get the Run dialog box on the screen.
- In the field section, type gpedit.msc and hit Enter.

- Navigate to Computer configuration > Administrative templates > Windows Components > Microsoft Defender Antivirus.
- Double-click on Turn off Microsoft Defender Antivirus policy on the right side.
- In the pop-up window, choose Enabled.
- Click Apply followed by OK to apply the changes and restart your computer.
You have now successfully removed Windows Security permanently on the Windows 11 PC. However, you can still find the “Shield” icon which appears in the taskbar, and this can’t be removed just because it’s a part of the Windows Security app.
Final Words
That’s it. This is how you can remove Windows Security apps on the Windows 11 operating system. The process to disable the Windows Security app is quite easy and simple with the aforementioned methods.
But before that, you have to disable Real-time and Tamper protection in the Windows Security app and then you can proceed. You can follow either the Registry Editor or the Local Group Policy Editor to disable the Windows Security app. We hope you have found this guide helpful.
If you've any thoughts on How to Permanently Disable Microsoft Defender Antivirus on Windows 11, then feel free to drop in below comment box. Also, please subscribe to our DigitBin YouTube channel for videos tutorials. Cheers!

