Are you not able to see the thumbnails of the images on your Windows 11 PC? Then follow this guide to know why this issue may happen on Windows 11 and how you can fix it. Usually, any image on the computer will be seen in a square thumbnail format with a small preview of the image.
After updating to Windows 11 some users are reporting that they are not able to see the thumbnail preview but the simple image file icon is visible. It may happen due to some corrupt system file. Such issues happen mostly when a major system update is interrupted. Also, there is a dedicated option that can disable the thumbnail preview of the images. Only the icon will show as mentioned.
The thumbnail cache may have become full with temporary files which acts like junk and messes up the memory. Apart from all these reasons, it may be some random bug on the version of Windows 11 OS installed on your PC that requires a fix.
Now, let us move to the troubleshooting part. Here are the various tips and tricks which will help you fix the issue of no thumbnail image on Windows 11.
1. Update Windows OS
When there is an issue with the Windows OS, always check if there is any pending software update that you missed out on. It could be some bug in the system build causing various technical snags to occur. So, update the operating system frequently on your PC.
To check for an update,
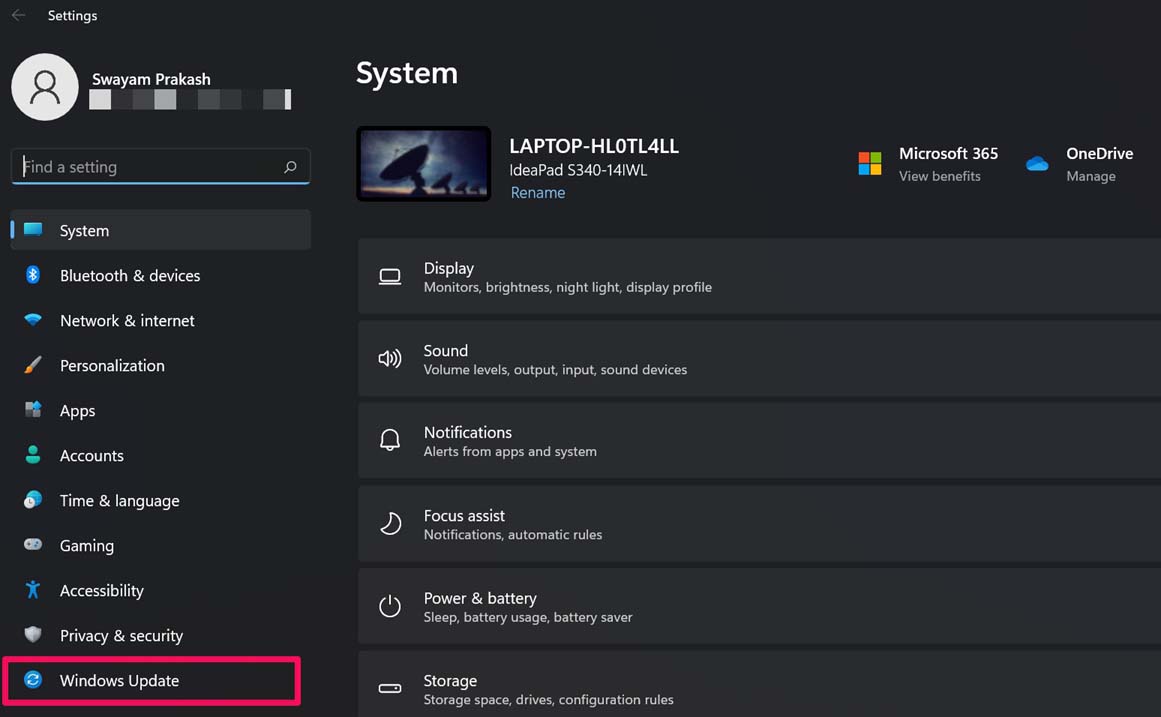
- Press Windows + I to get to the settings page.
- Then on the left-hand panel click on Windows Update.

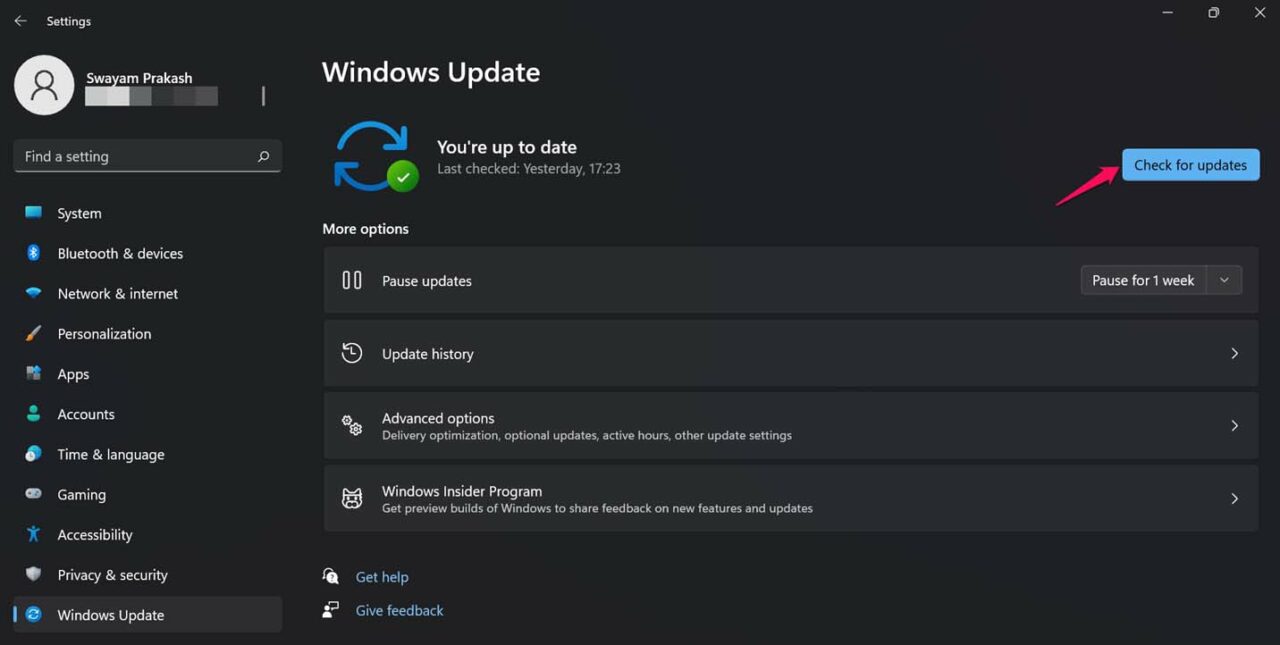
- Next, click on Check for Updates.

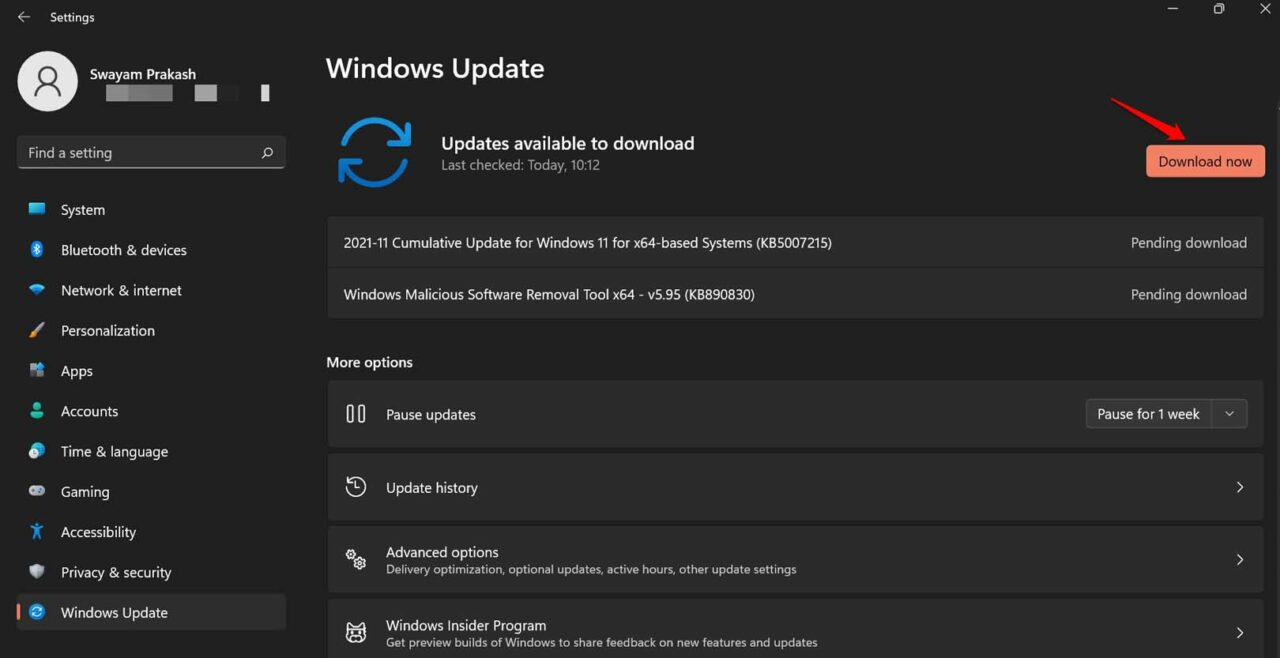
- If an update is available after the system searches for it, click on the option Download Now to get the update installation process started on your computer.

If it was a bug in the system not making the thumbnail to be visible, then it should be fixed now. Check your image files.
2. Restart the Computer
Often when I don’t get to see the thumbnail preview of images, I simply perform a reboot of the computer. This fixes up the issue in no time. As the computer boots up and I access the image files, I can see the thumbnail preview.
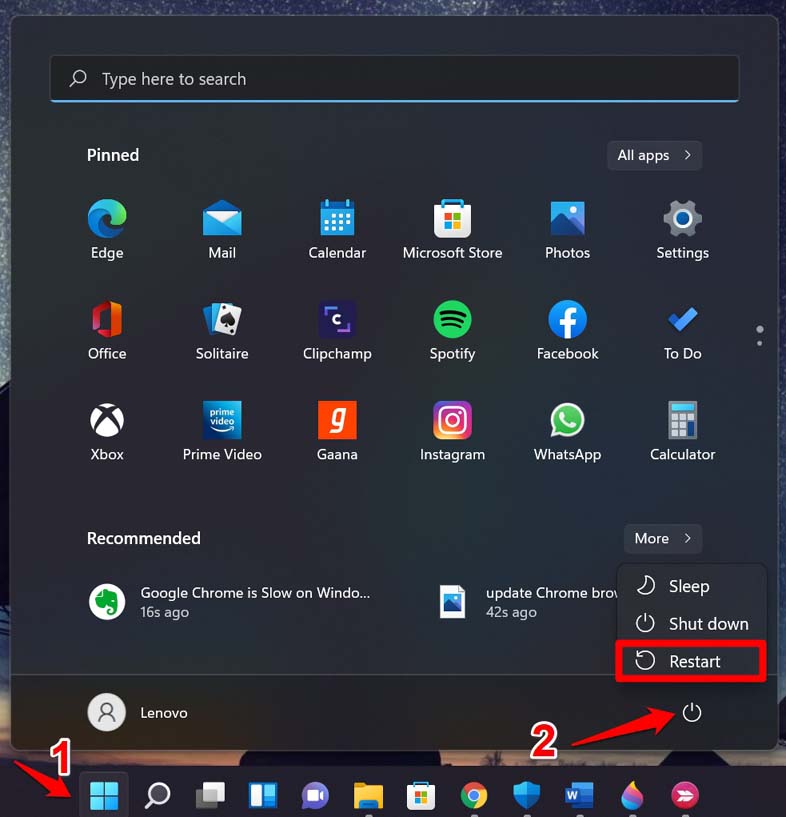
- Press the Windows button on the keyboard.
- Then from the console that shows up, at its right bottom corner, click on the Power icon.
- From the menu that opens, select Restart.

- After your computer restarts visit the folder in which your images are present. Check if the thumbnail view of the image file is showing or not.
3. Scan for Corrupt System Files
Here are two commands you can execute using the Command prompt to scan for corrupted system files and automatically fix them and perform a cleanup.
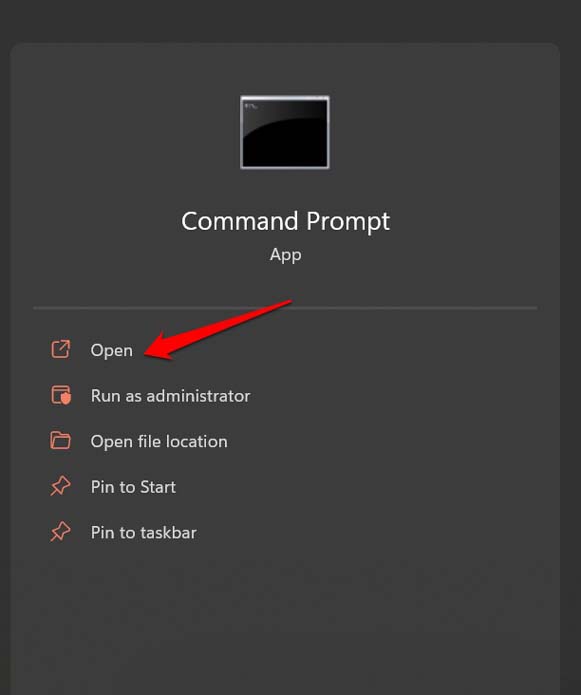
- Open the Command Prompt using Windows search.

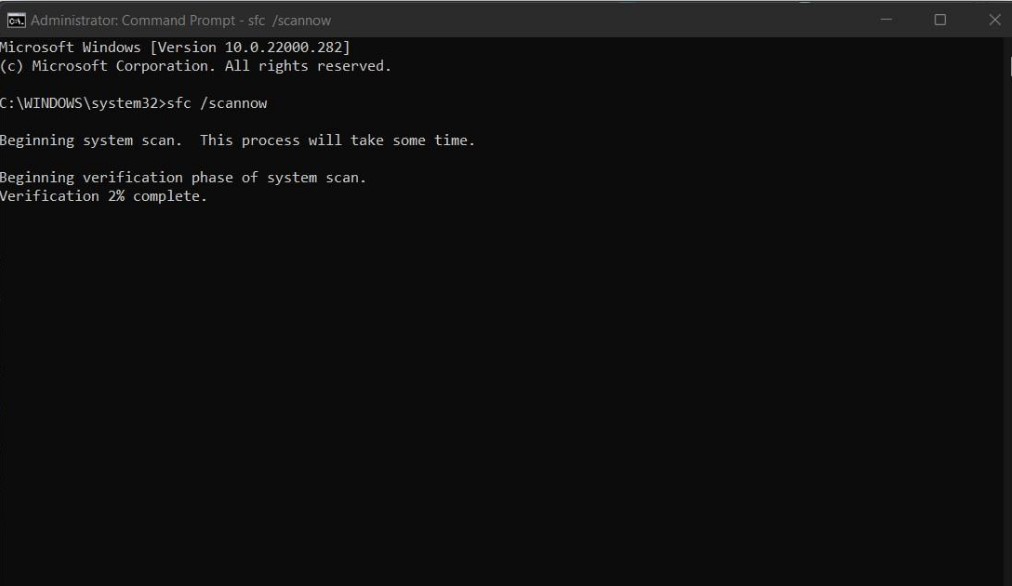
- Enter the command sfc/scannow.

- Press enter and wait for the process to finish. The system will search for possible corrupt files and fix them.
- Once it is done, you can invoke the Command Prompt once again.
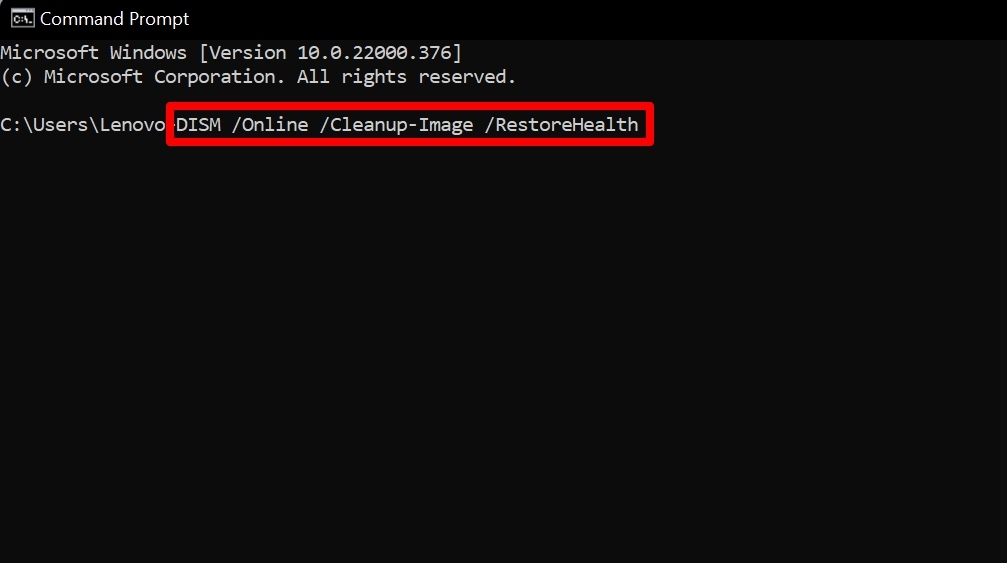
- Now, enter the command
DISM /Online /Cleanup-Image /RestoreHealth

- The above command will fix the corrupt files by replacing them with proper files from Microsoft’s web servers.
4. Enable Thumbnail View for Images
As mentioned earlier there is an option to enable thumbnail view of images on your computer. Here is how you can access it.
- Press the Windows key to bring up the search console.
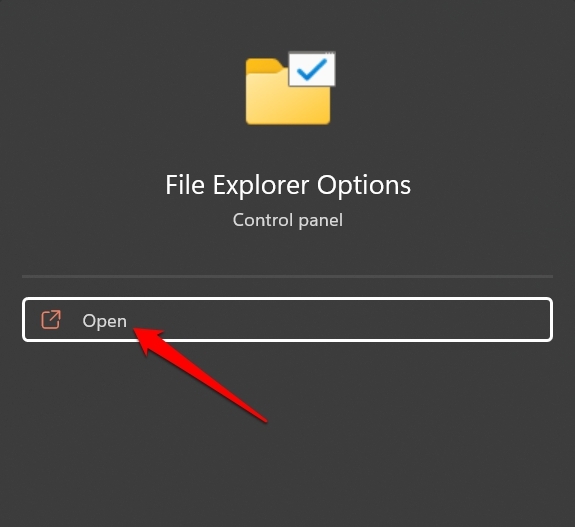
- Type File Explorer Options and you should see it in the search result.
- Click on Open.

- When the File Explorer options dialog box opens, click on the View tab.
- Look at the option Always Show Icon, Never Thumbnails. If it has been check-marked, then click and uncheck the option so that the thumbnail is visible.

Now, the image thumbnail will be visible for sure.
5. Reset Folder on Windows 11
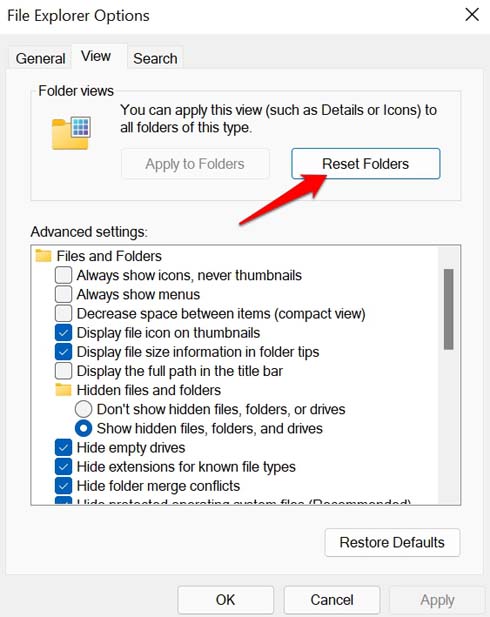
If there had been any unusual changes to the File Explorer, that may have affected the files of all types present on the computer or certain types such as image files. Then that would have led to the thumbnails not showing for the photos. So, to fix that you can reset the folders in File Explorer.
- Press the Windows search button to bring up the search console.
- Type File Explorer Options.
- Click Open.

- As the File Explorer Options dialog box opens, click on the View tab.
- Then click on Reset Folders.

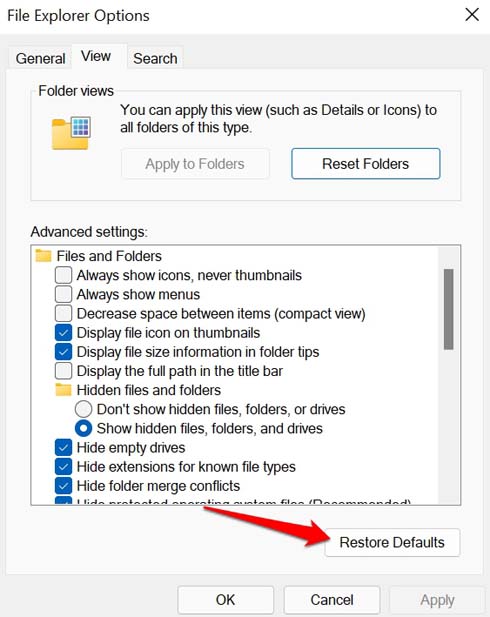
- Followed by which you have to click on Restore Defaults.

6. Clear the Thumbnail Cache on Your Computer
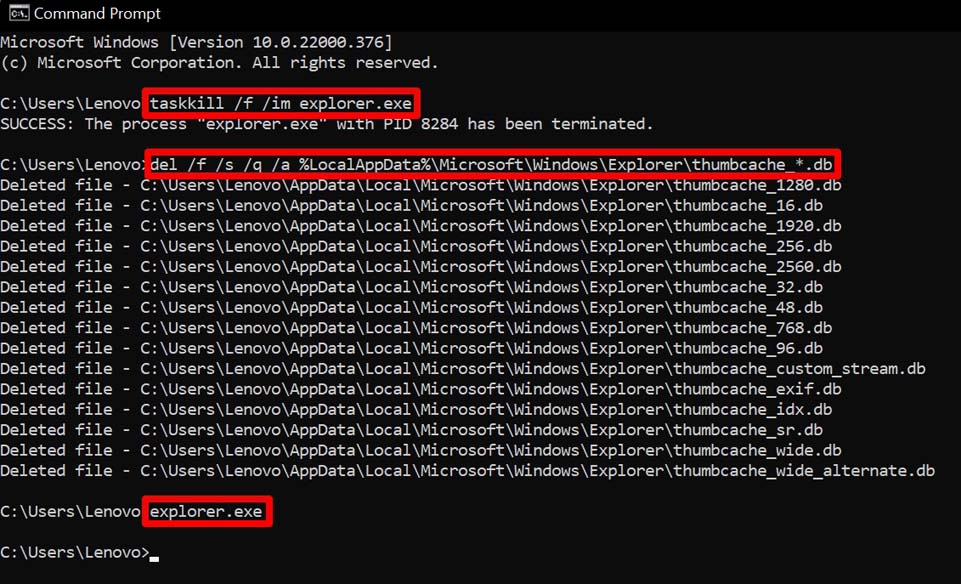
You can clear out the thumbnail cache to remove the temporary data accumulated over time. Here are the steps to do that.
- Open the Command Prompt.
- Type the command below and press enter.
taskkill /f /im explorer.exe
- Next, type the command mentioned below and hit enter.
del /f /s /q /a %LocalAppData%\Microsoft\Windows\Explorer\thumbcache_*.db
- The above command will delete the existing thumbnail and icon cache.
- Now, restart the File Explorer by entering the command I have written below.
explorer.exe

Now, you should be able to see the thumbnail of the photos.
7. Use Disk Cleanup to Retrieve Thumbnail Images Freshly
You can use the Disk Cleanup tool to remove the existing thumbnails and recreate the thumbnail images freshly. It’s quite easy to do.
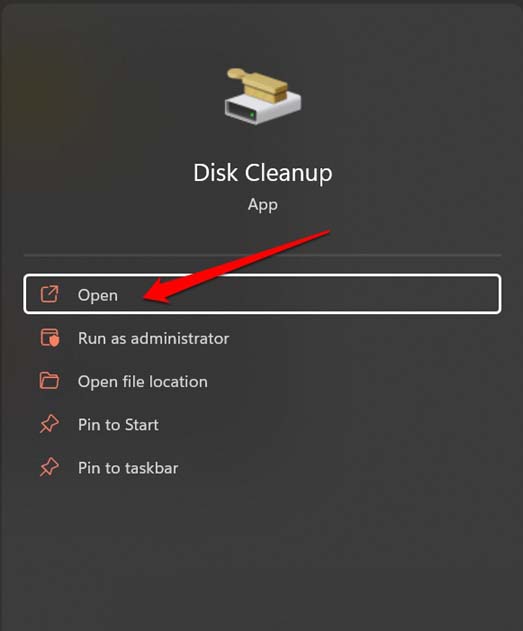
- In the Windows search type Disk cleanup.
- Click Open when Disk CleanUp shows up in the result.

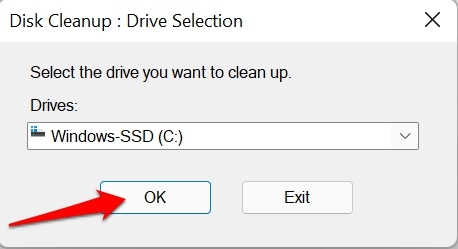
- Next, set the correct drive. For example, like I have selected the C: drive.

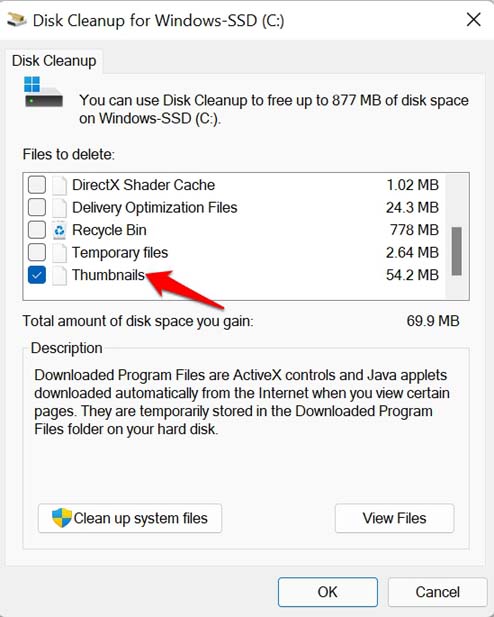
- Under the Files to Delete section, checkmark the box beside Thumbnails.

- Click OK to proceed.
So, that’s it. Use any of the above troubleshooting methods and you will be able to view the thumbnail image preview of all photos on your computer.
If you've any thoughts on Photos Not Showing Thumbnail in Windows 11: How to Fix, then feel free to drop in below comment box. Also, please subscribe to our DigitBin YouTube channel for videos tutorials. Cheers!





I have tried every single one of these and it’s still not working. I don’t know what else to try. It seems to be connected with OneDrive maybe? As those folders are trying to sync but there’s not enough space. I disabled it and they still won’t show. Any other suggestions?