Windows 11 is the most feature-rich Windows update by Microsoft to date. But it is still prone to bugs and errors. Recently, many users have been experiencing “No Battery is Detected” on their Windows 11 laptops. As batteries are the essential part of a laptop as it gives the user freedom to work from anywhere. Hence, it might be a problem if you face this issue. This issue could arise for many reasons and doesn’t mean you need to buy a replacement battery.
Read this article to find out how you can fix the “No Battery is Detected” issue:
Fix 1: Restart your Laptop
Before getting started with troubleshooting methods, restart your laptop and check if the issue is fixed. Restarting your laptop can fix small bugs and errors.
Fix 2: Reinstall your Battery
If your laptop has a detachable battery, try reinstalling it. This problem could be caused by a faulty connection between the battery and the motherboard. Once you detach your laptop’s battery, clean its terminals to get rid of any dirt or debris. Then restart your laptop and check if the issue is fixed or not.
Fix 3: Enable Battery in Device Manager
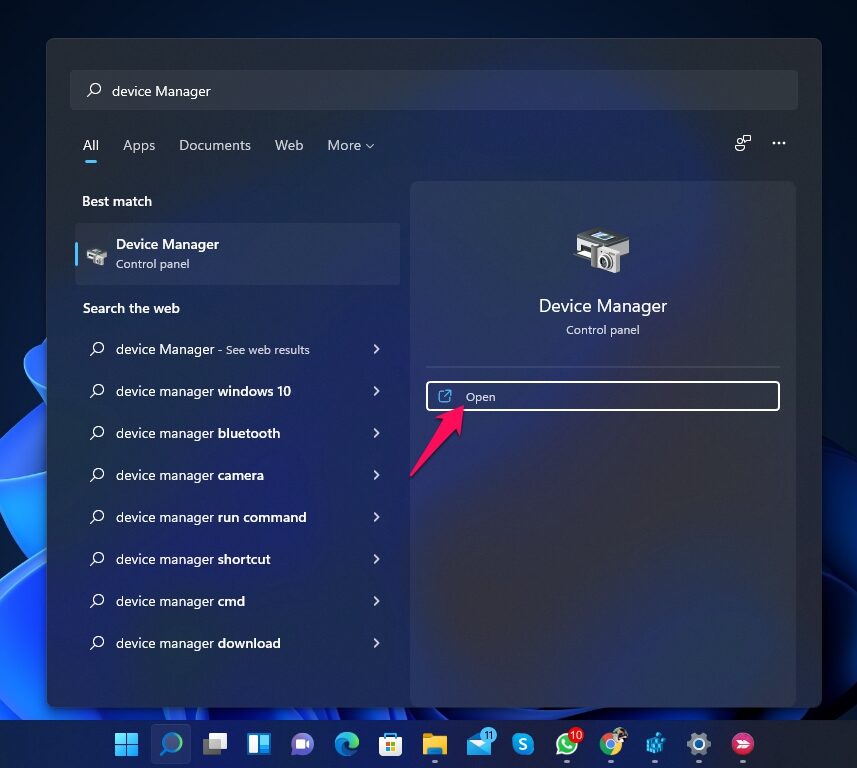
If the battery gets disabled in the Device Manager, you may face this issue. Open Device Manager and check your battery’s status to solve it. Here is how you can do it:
- Click on Start and search for Device Manager.
- Click on Open.

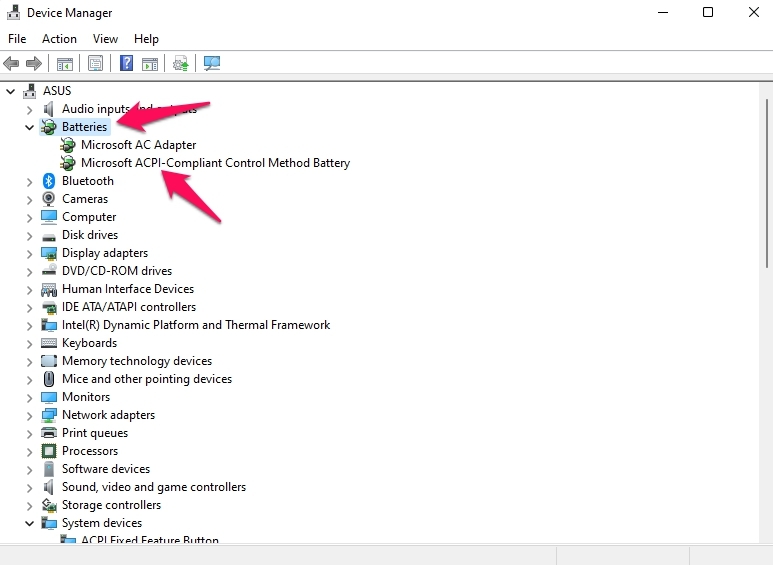
- Click on Batteries.
- Select Microsoft ACPI-Compliant Control Method Battery.

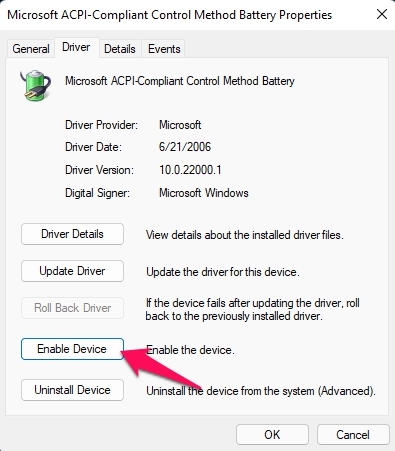
- Navigate to the Driver tab.
- Click on Enable Device and select OK.

- Restart your laptop and check if the issue is resolved or not.
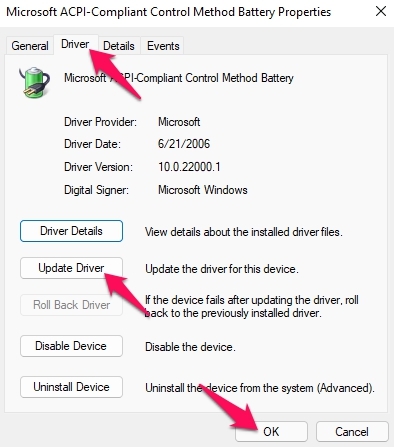
Fix 4: Update Battery Drivers
Outdated or corrupt drivers could be the reason why your laptop isn’t able to detect the battery. Follow these steps to update the battery drivers:
- Click on Start and search for Device Manager.
- Click on Open.
- Click on Batteries.
- Select Microsoft ACPI-Compliant Control Method Battery.
- Navigate to the Driver tab.
- Click on Update Driver and select OK.

- Restart your laptop and check if the issue is resolved or not.
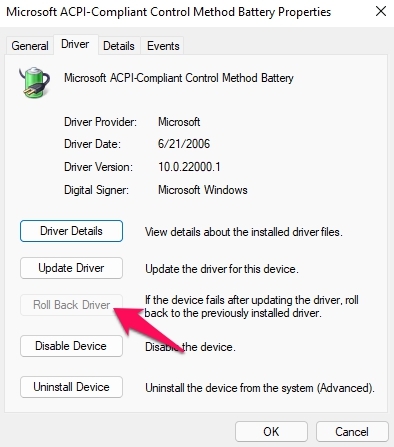
Fix 5: Roll Back Battery Drivers
If you started facing this issue after installing an update, try rolling back to the previous version of the driver. Here is how you can do it:
- Click on Start and search for Device Manager.
- Click on Open.
- Click on Batteries.
- Select Microsoft ACPI-Compliant Control Method Battery.
- Navigate to the Driver tab.
- Click on Roll Back Driver and select OK.

- Restart your laptop and check if the issue is resolved or not.
Fix 6: Run Windows Troubleshooter
Follow these steps to run the Windows troubleshooter:
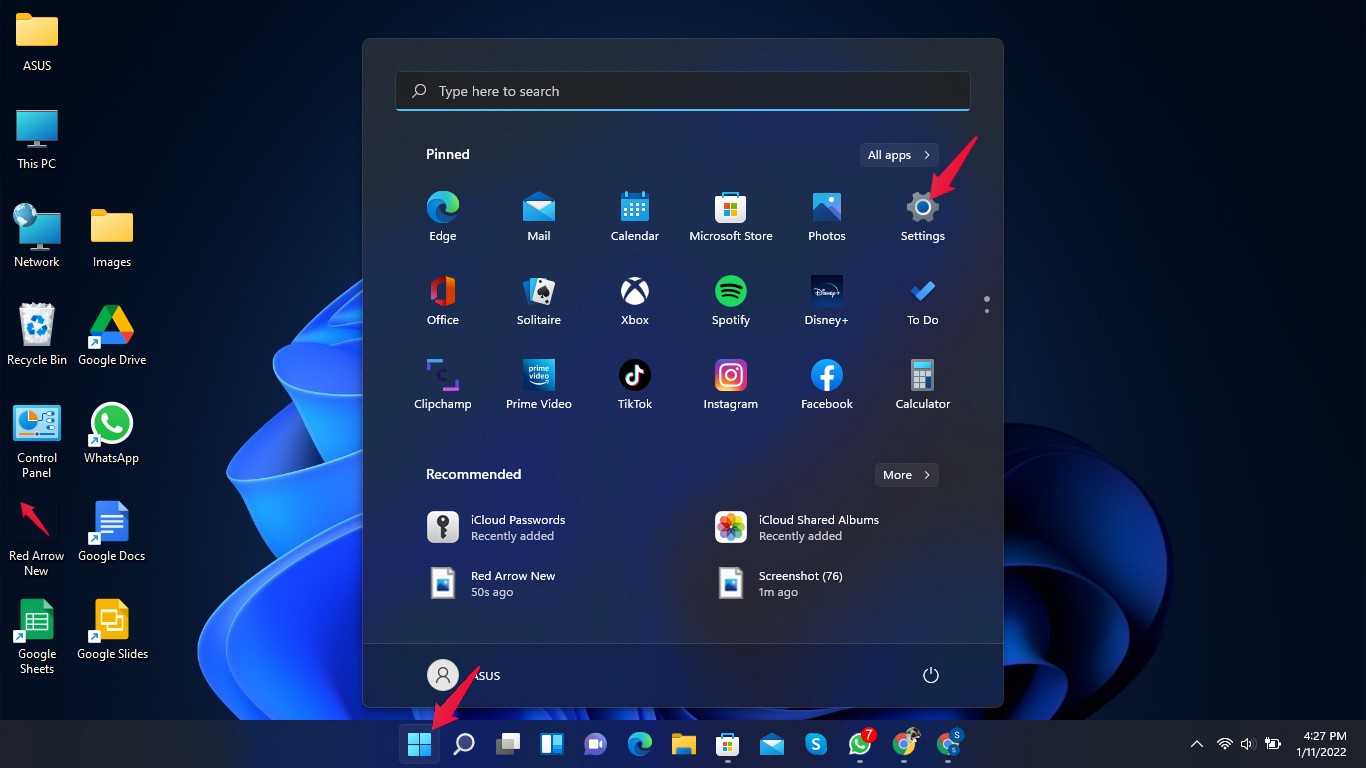
- Click on Start and open Settings.

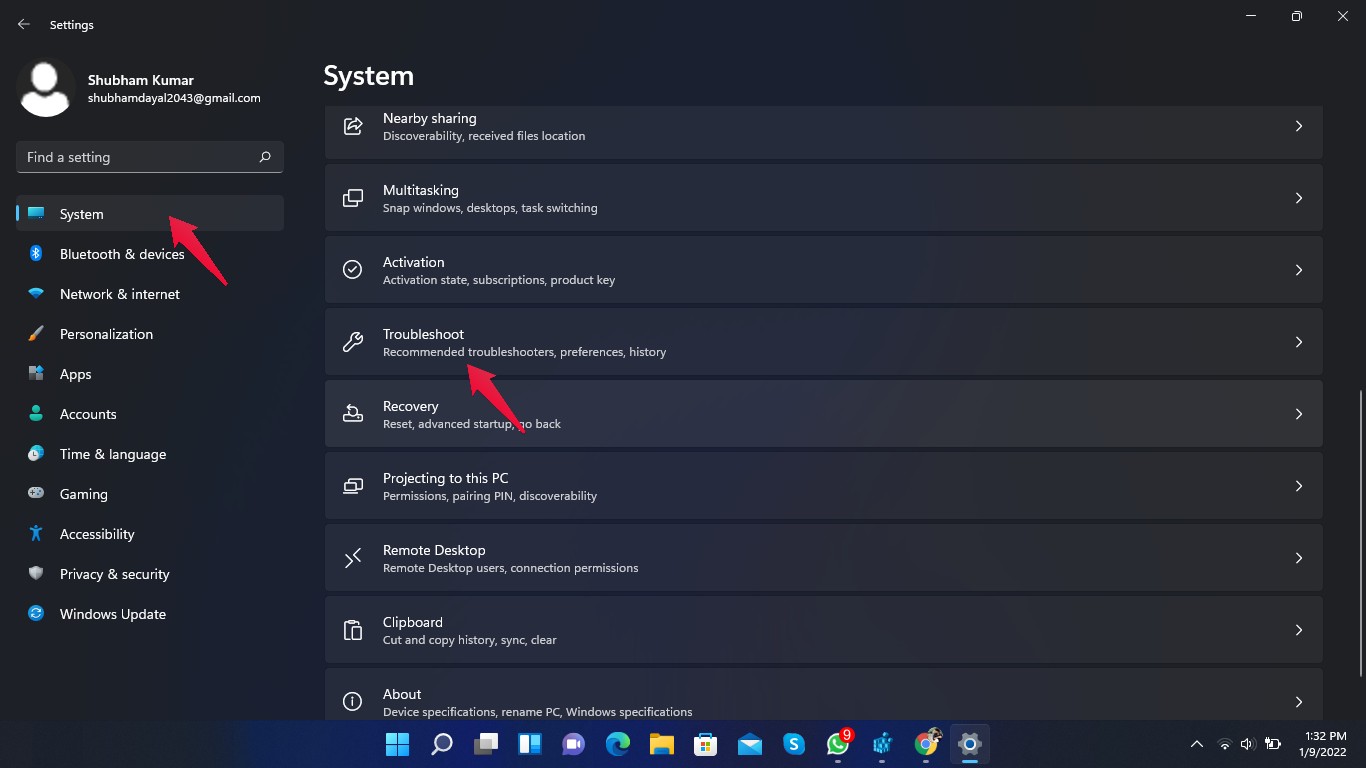
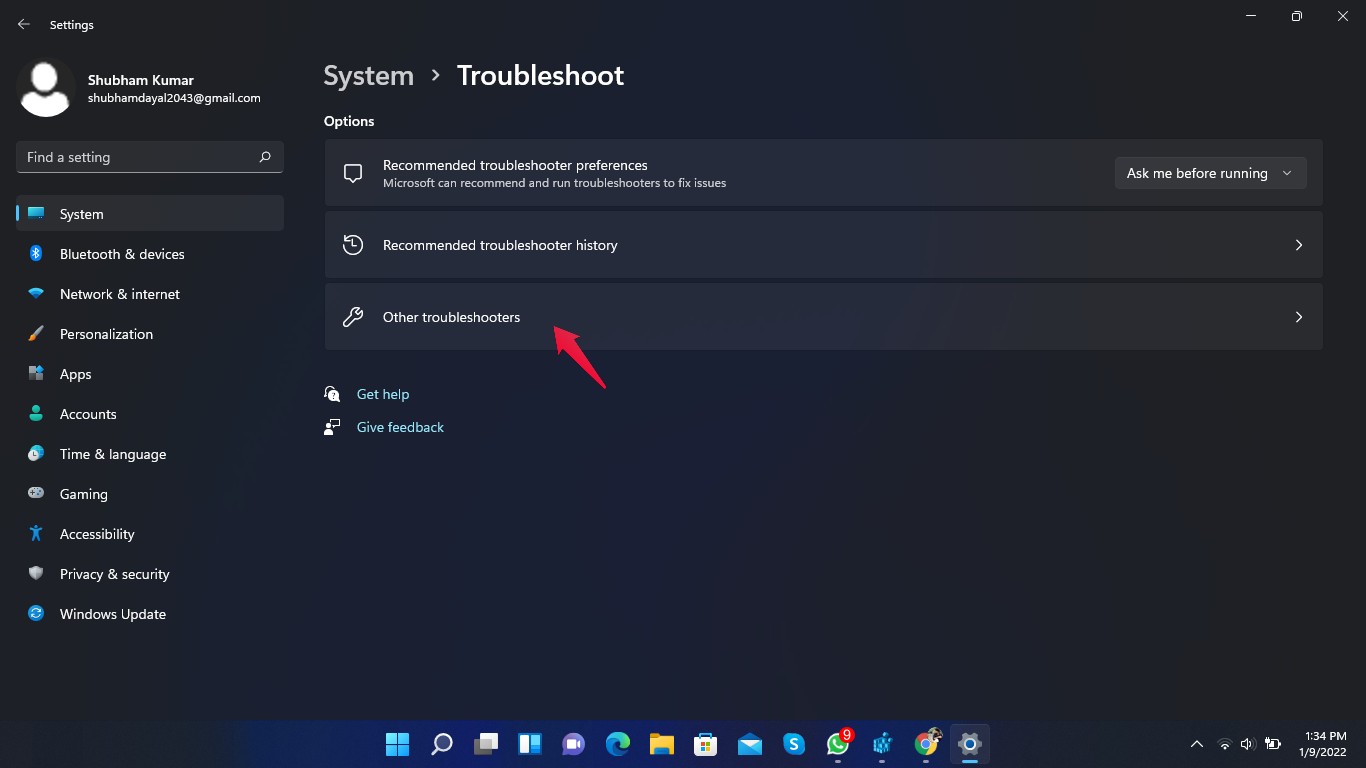
- Click on System, then scroll down and click on Troubleshoot.

- Click on Other Troubleshooters.

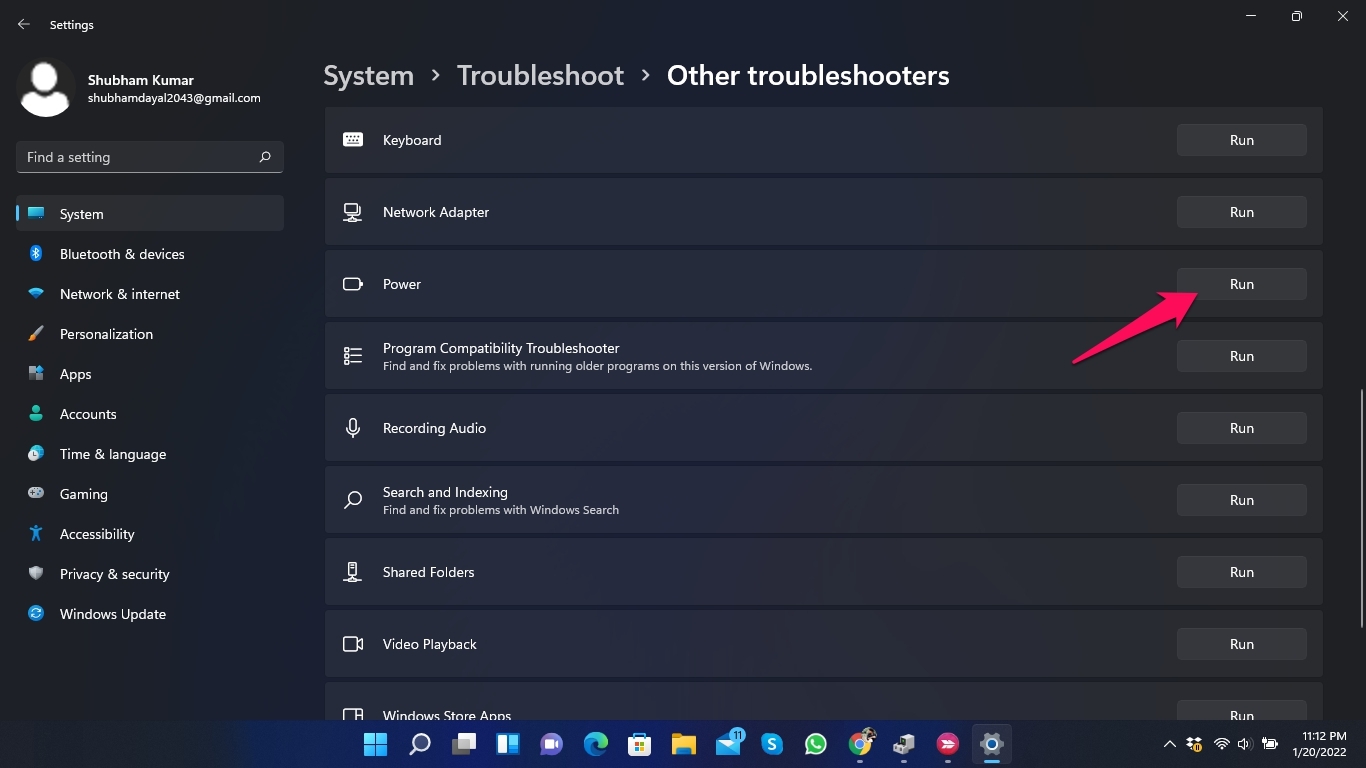
- Scroll down and click on Run beside Power.

- Once the process is complete, restart your laptop and check if the issue is fixed or not.
Fix 7: Update BIOS
Corrupt or outdated BIOS can also cause this error. Try updating your BIOS to solve this issue. Here is how you can do it:
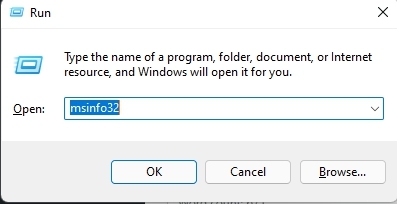
- Press Windows key + R to open the Run Dialogue box.
- Type msinfo32 and click Ok.

- Scroll down and check your BIOS Version/Date to know the BIOS Manufacturer.

- Now download the latest BIOS updates from the BIOS manufacturer’s website and install them on your laptop.
- Restart your computer and check if the issue is solved or not.
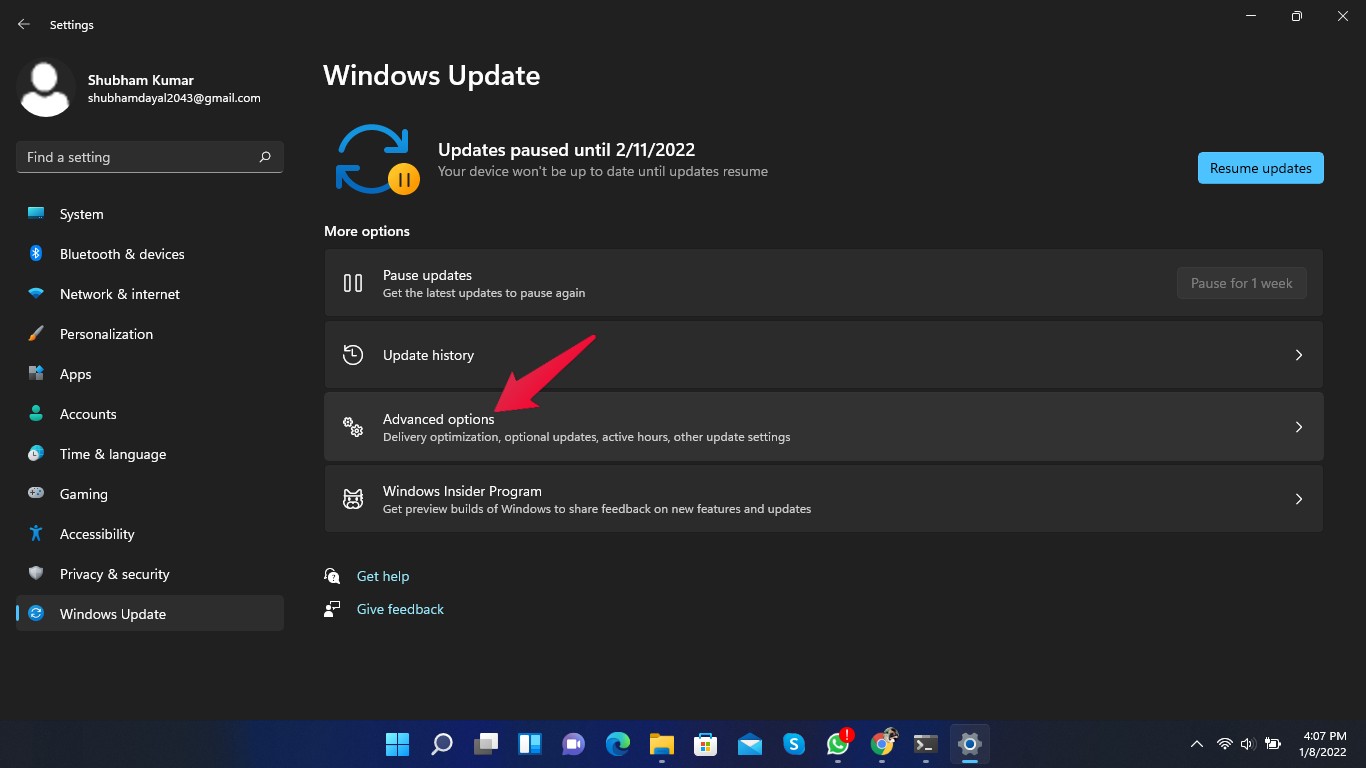
Fix 8: Reset your PC
If any of the above-mentioned troubleshooting methods didn’t work for you, reset your PC. Here is how you can reset your Windows 11 PC:
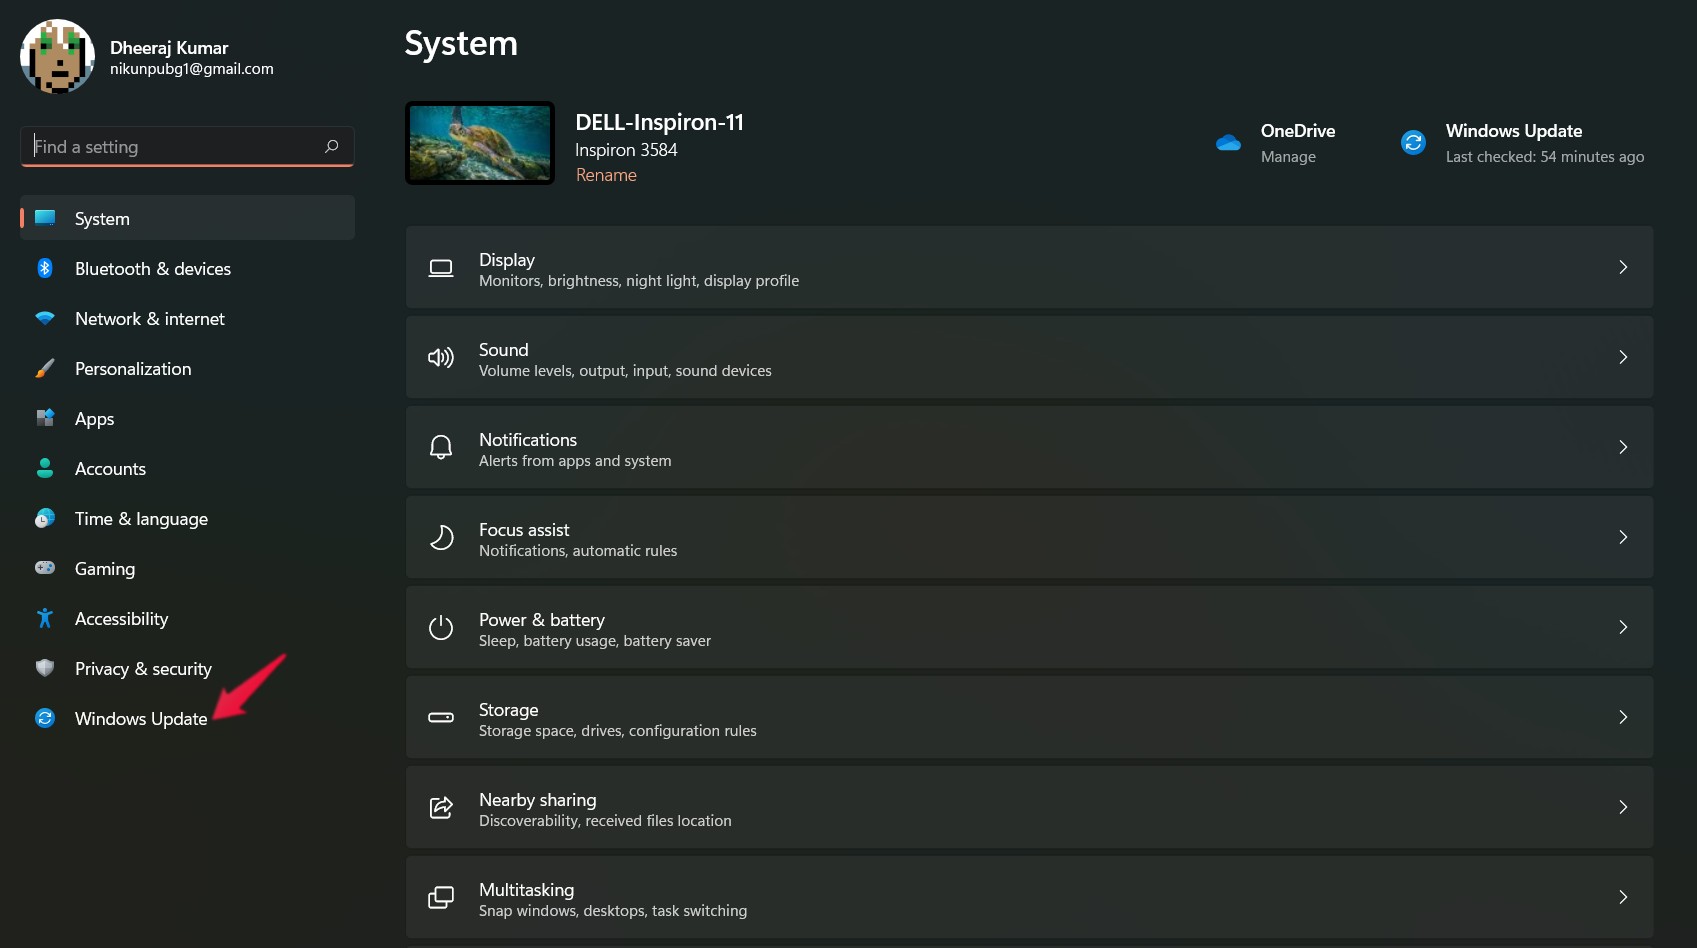
- Click on Start and go to Settings.
- Click on Windows Update.

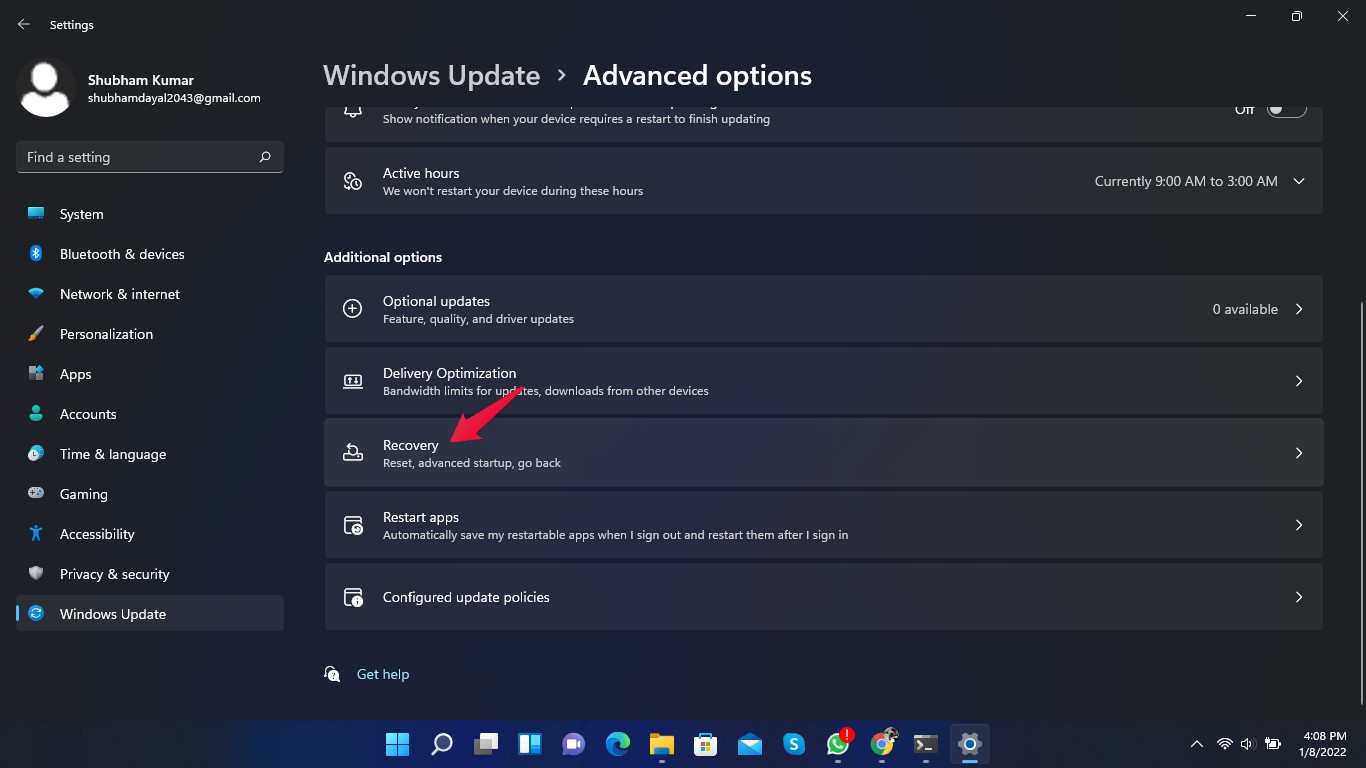
- Go to Advanced Options.

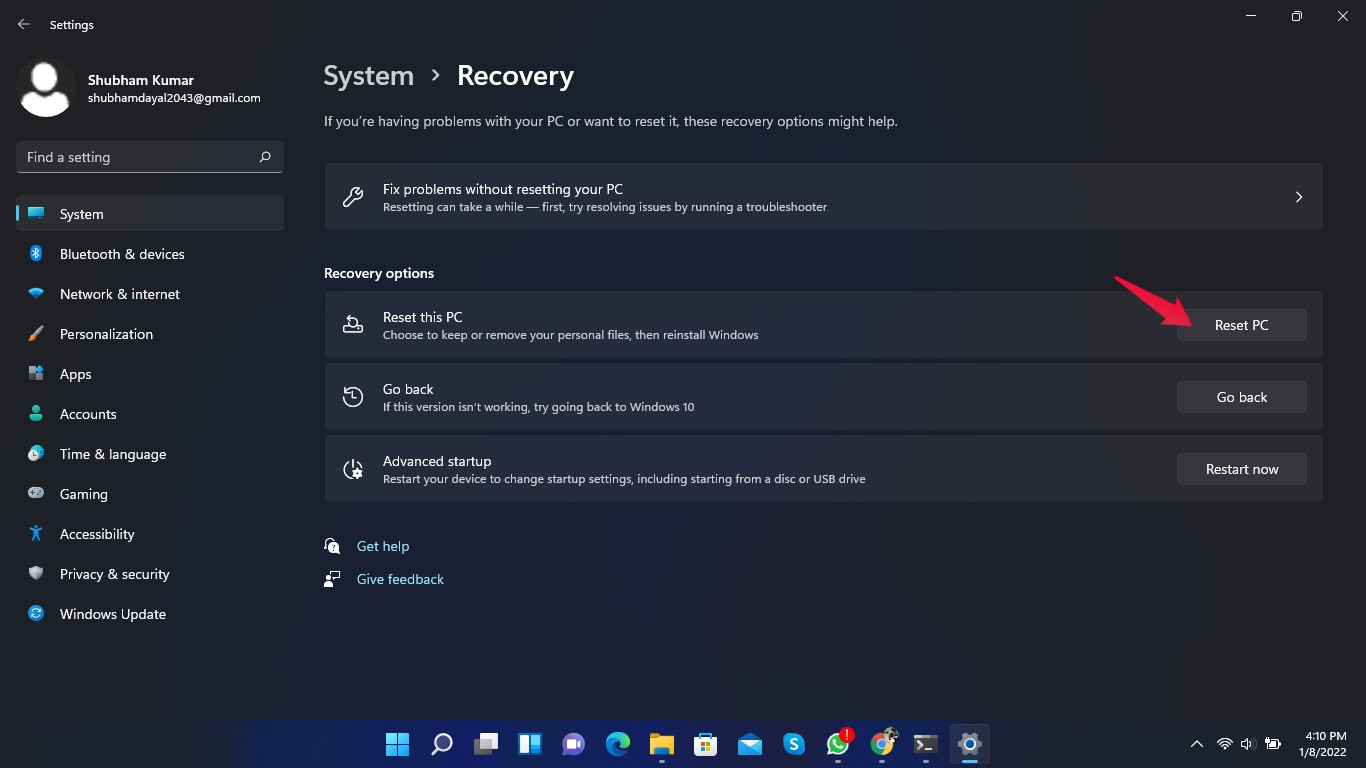
- Scroll down and click on Recovery.

- Click on Reset PC and follow the on-screen instructions.

Wrapping Up
This was all about how you can fix the No Battery is Detected on Windows 11. Follow the troubleshooting methods mentioned above to get rid of the problem.
We hope you can fix the No Battery is Detected on Windows 11 problem. Still, if you have any trouble, let us know in the comments section.
If you've any thoughts on Windows 11 No Battery is Detected Error: 8 Ways to Fix, then feel free to drop in below comment box. Also, please subscribe to our DigitBin YouTube channel for videos tutorials. Cheers!
