In this guide, I have explained how to make an image background transparent using the Windows Photos app. Microsoft Windows has improved its products by leaps and bounds over the recent years. Apart from making the background transparent, you can adjust the background blur in a photo.
Suppose you do not like the uninteresting background behind the subject of the photo. In that case, you can add a choice of solid color as the background, replacing the original imagery in the backdrop. Often, image editors keep switching from Windows Photos to other image editing apps to remove the background of a picture.
Now, right on the Windows Photos app, you can edit an image, remove/blur the annoying background, and fine-tune the background blur to your requirements. All these features are free to use on the Windows Photos app. Let’s check out the steps.
Make an Image Background Transparent in the Microsoft Photos App
Follow the steps to turn the background of an image transparent using the Windows Photos app.
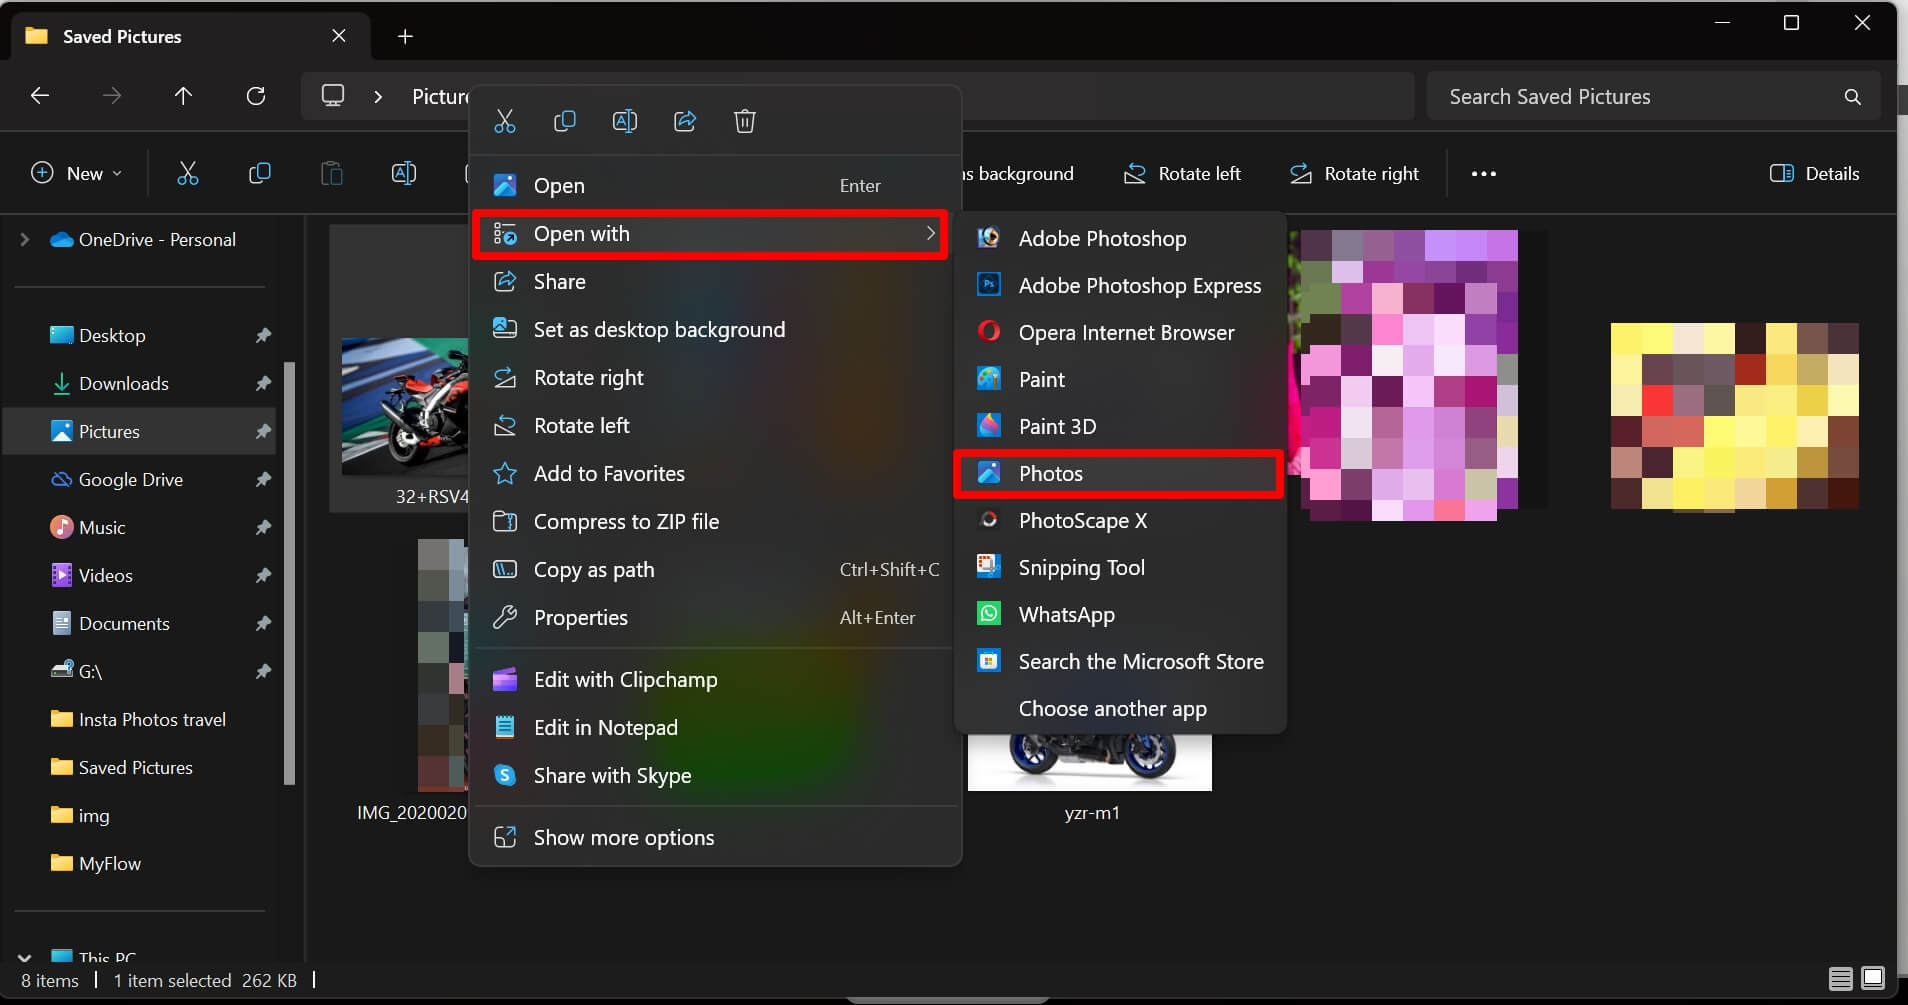
- Right-click on the image whose background you want to make transparent.
- Select Open with > Photos app.
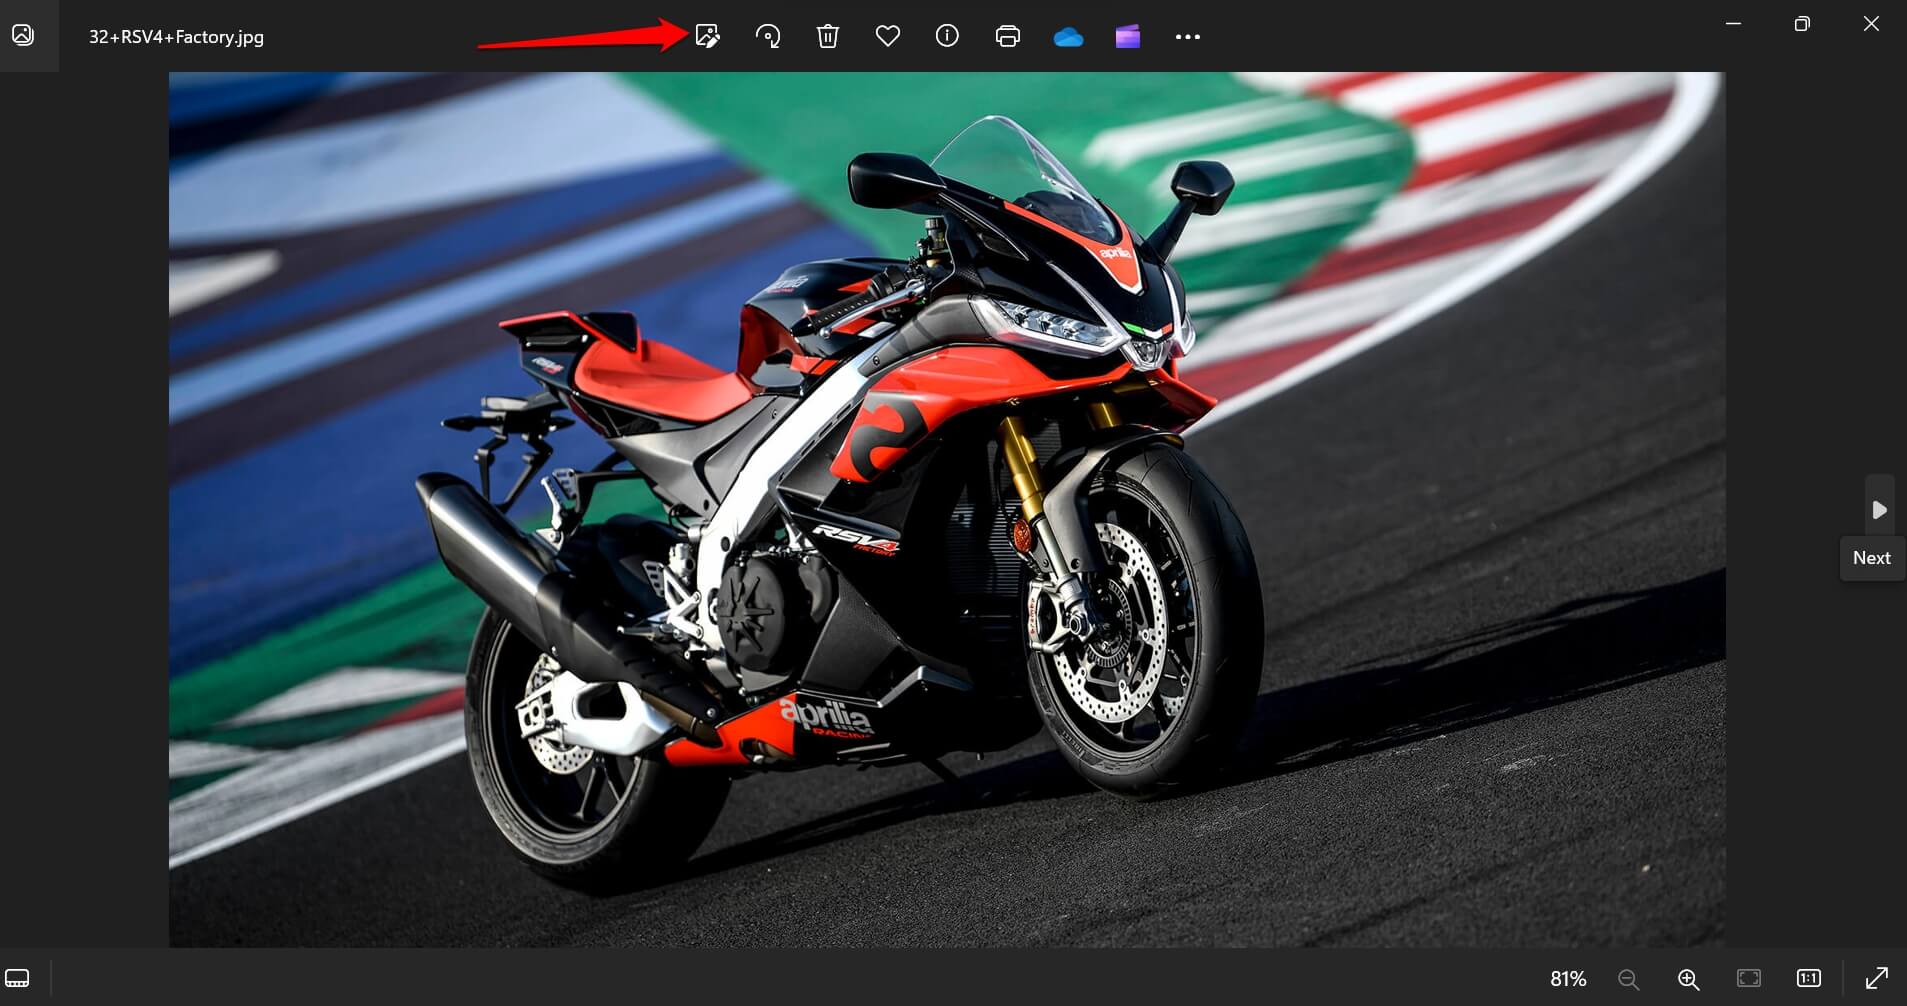
- When the image displays on the Photos app, click the Edit icon or press Ctrl + E.
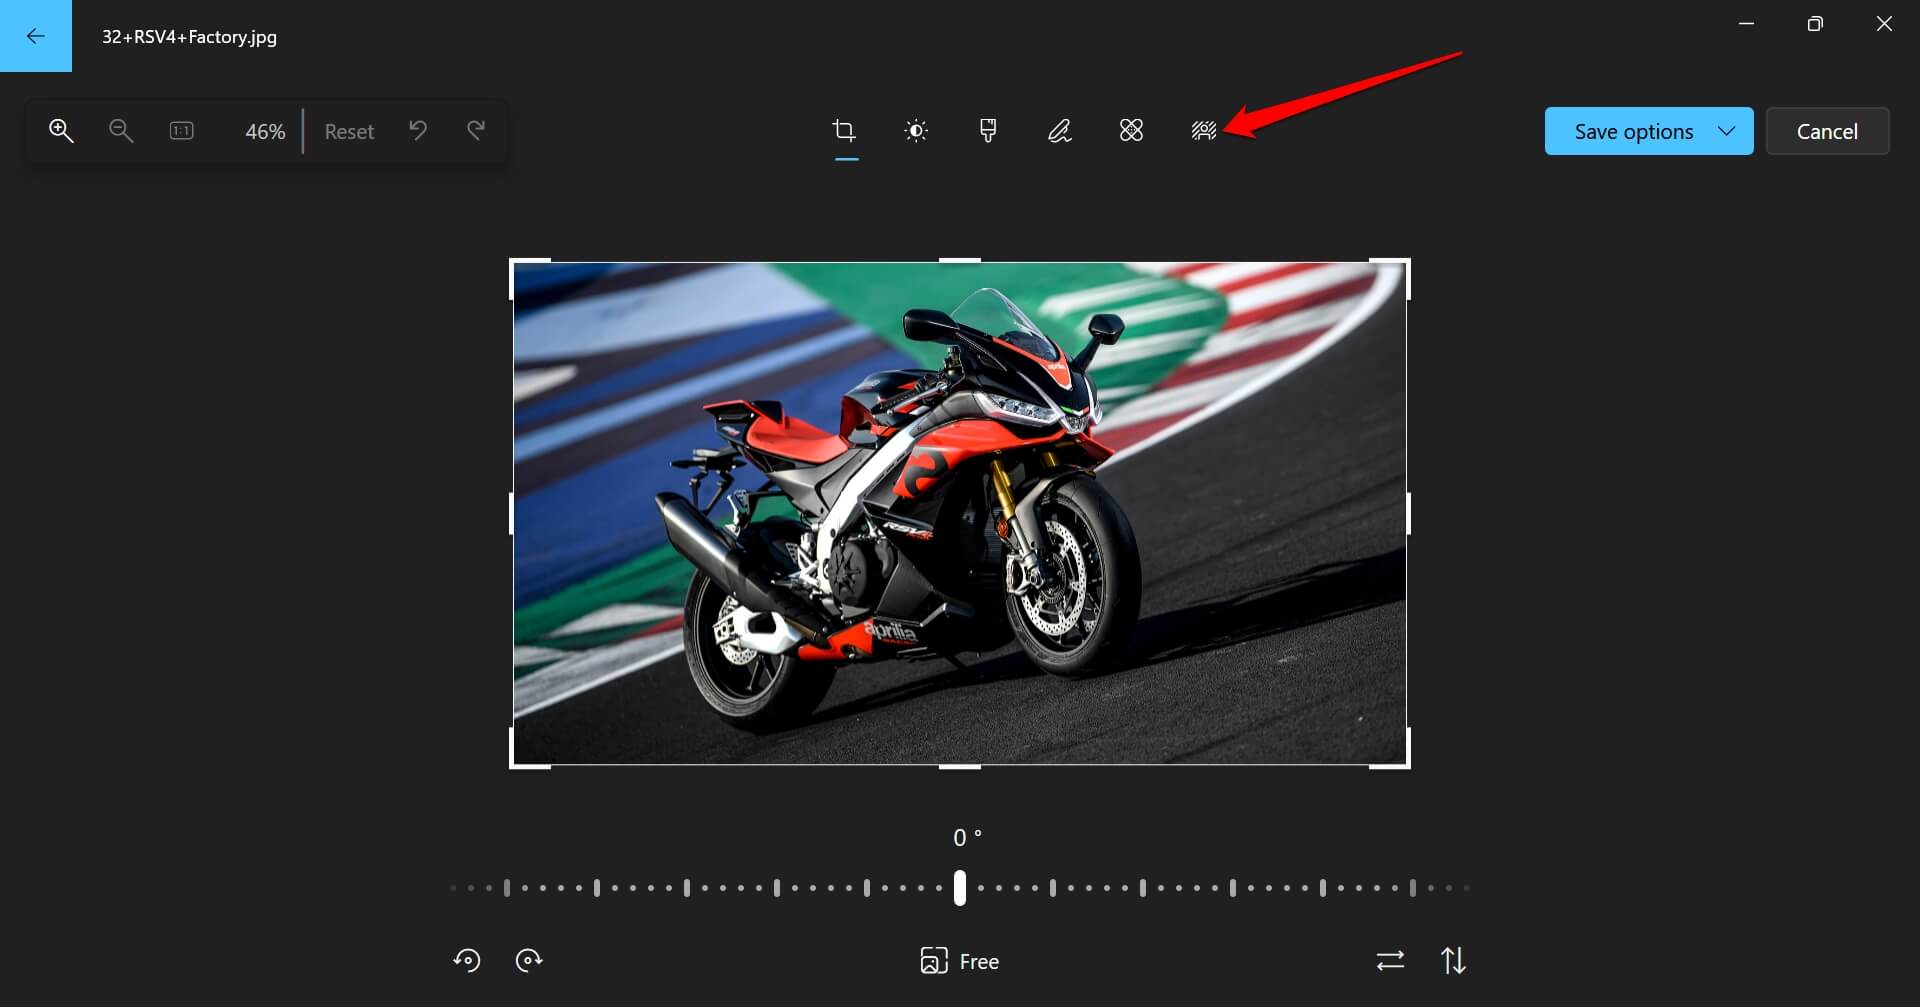
- At the top of the screen, click on the Background Blur icon.
- Click on Remove to get rid of the background of the selected image.
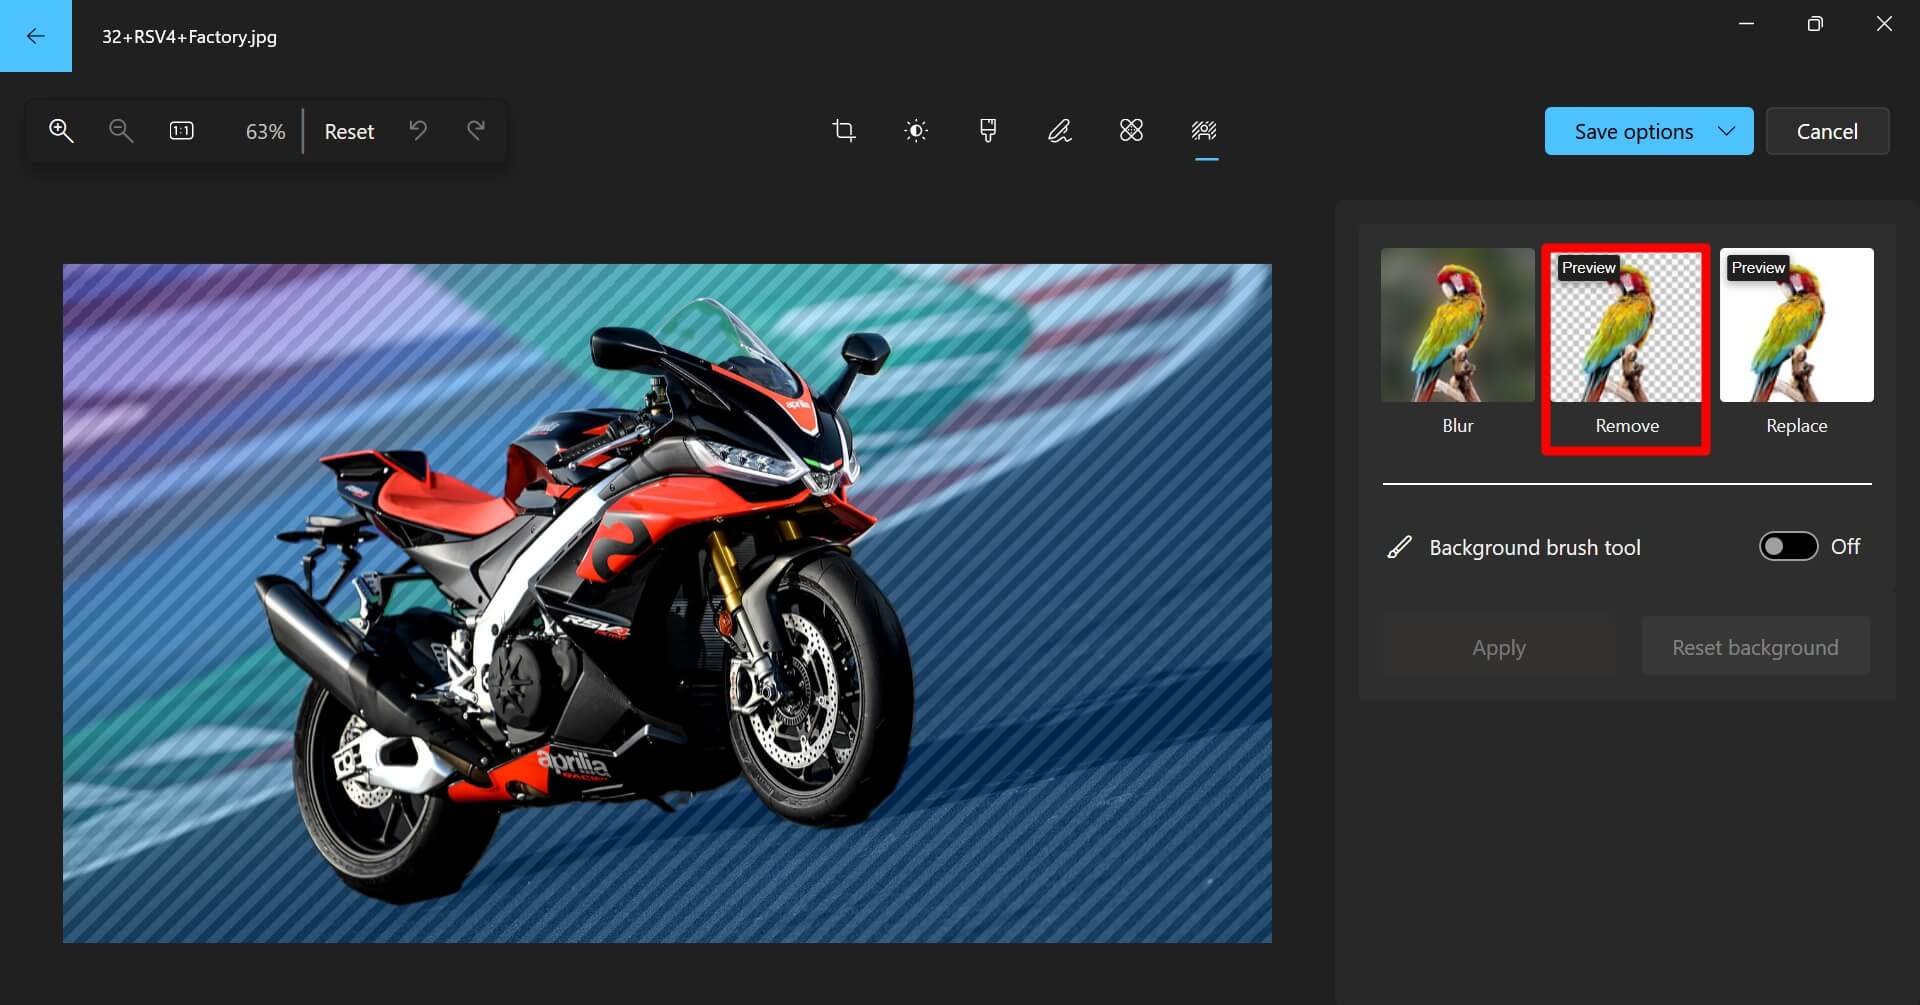
- To finalize the edit, click on Apply.
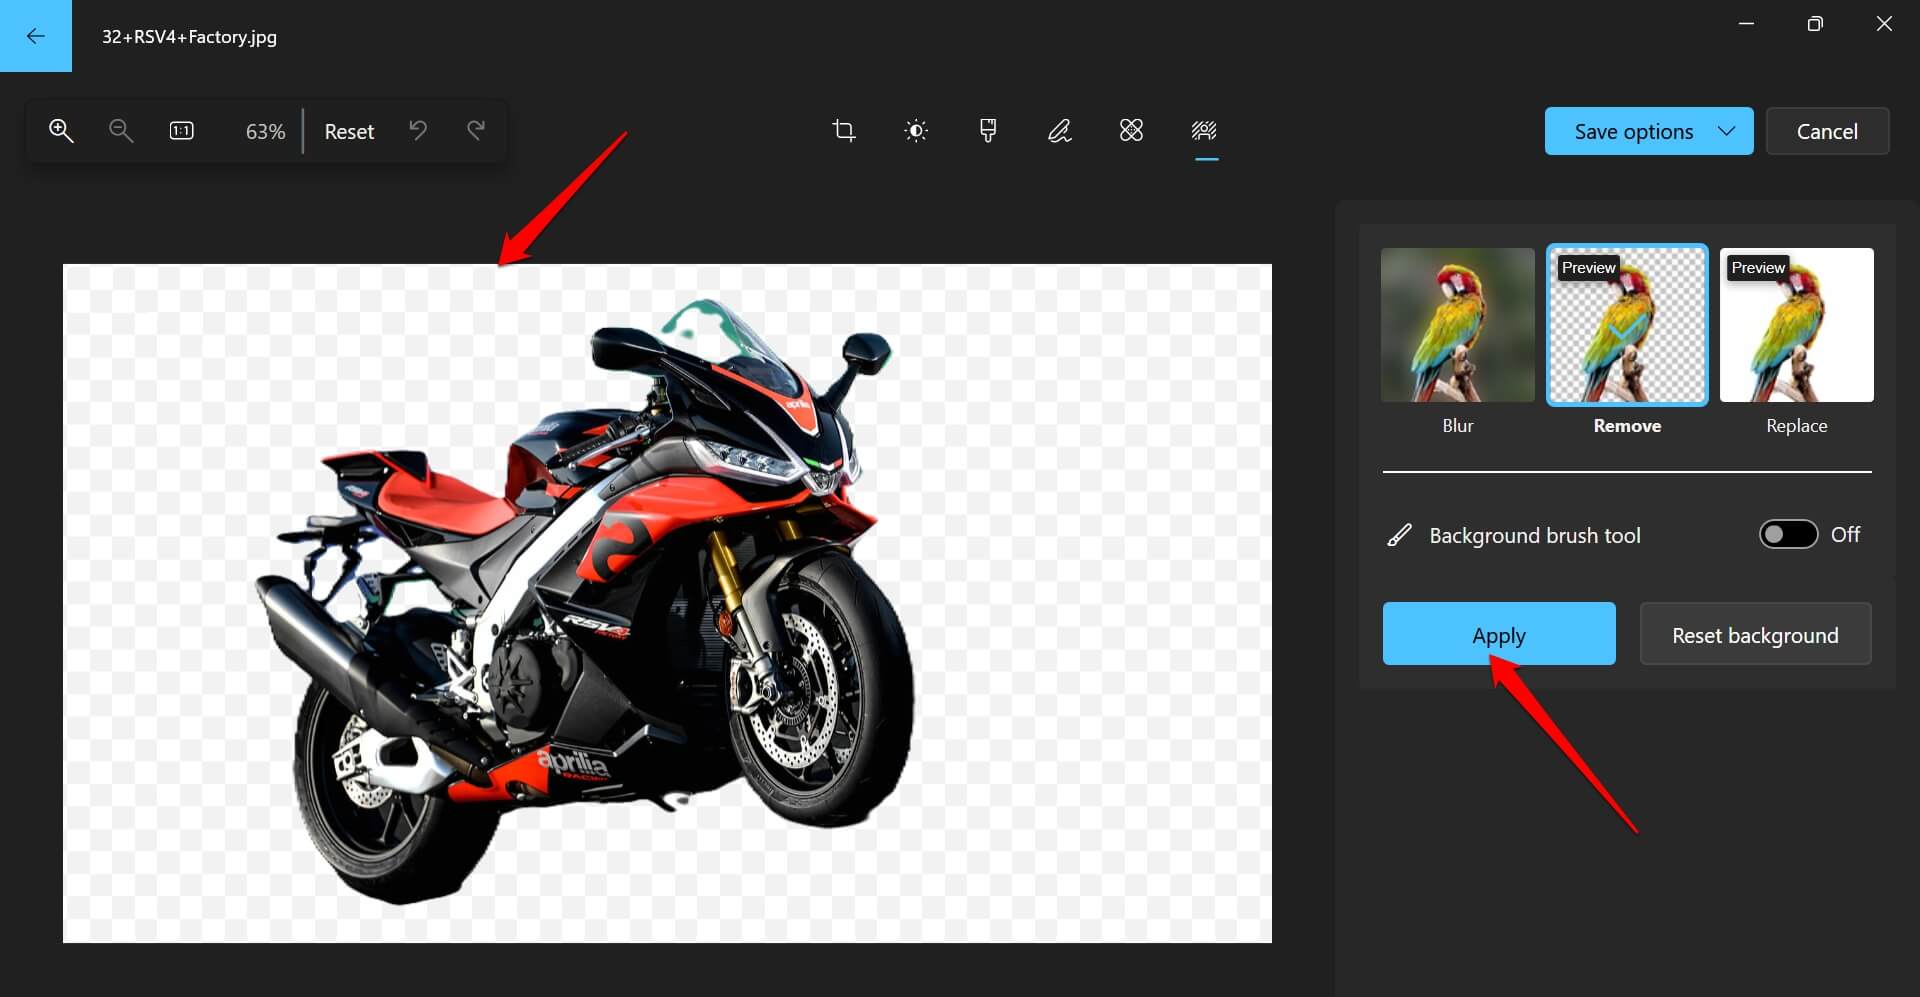
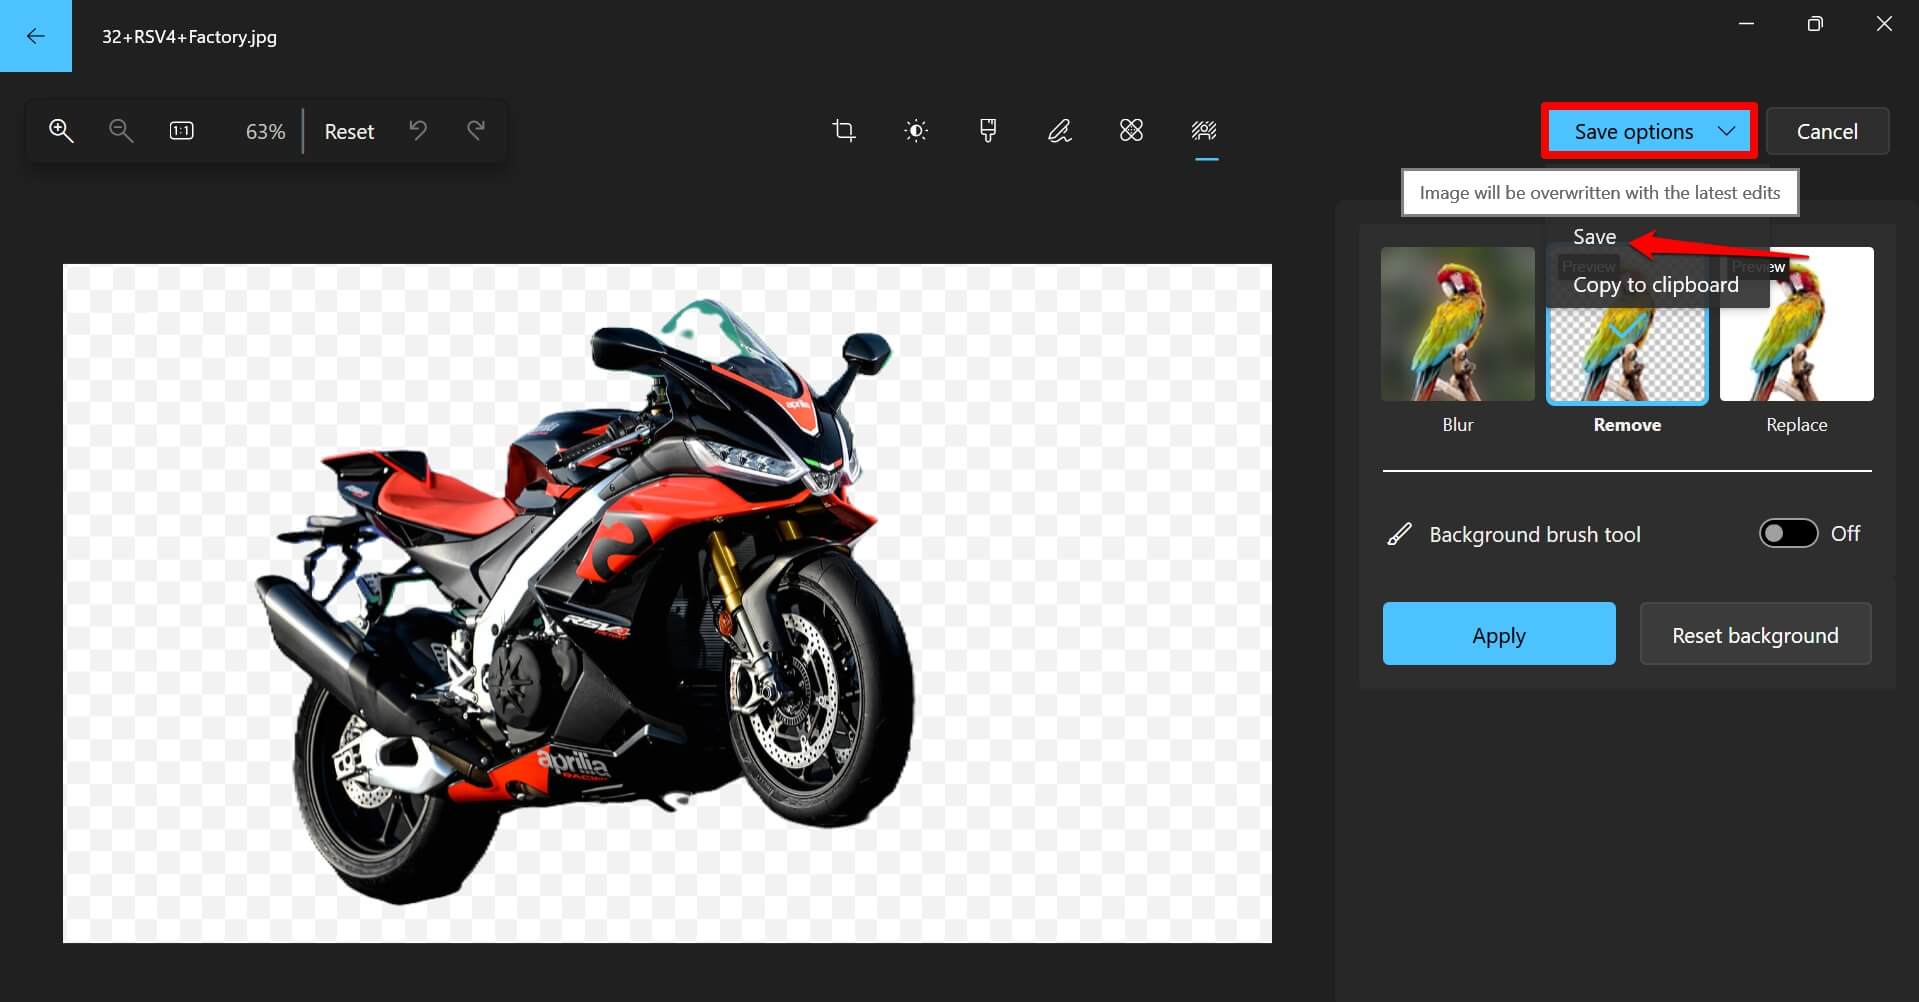
- Click on Save Options > select Save to store the edited image.
Increase or Decrease the Presence of the Image Background
To customize the background texture as per your need,
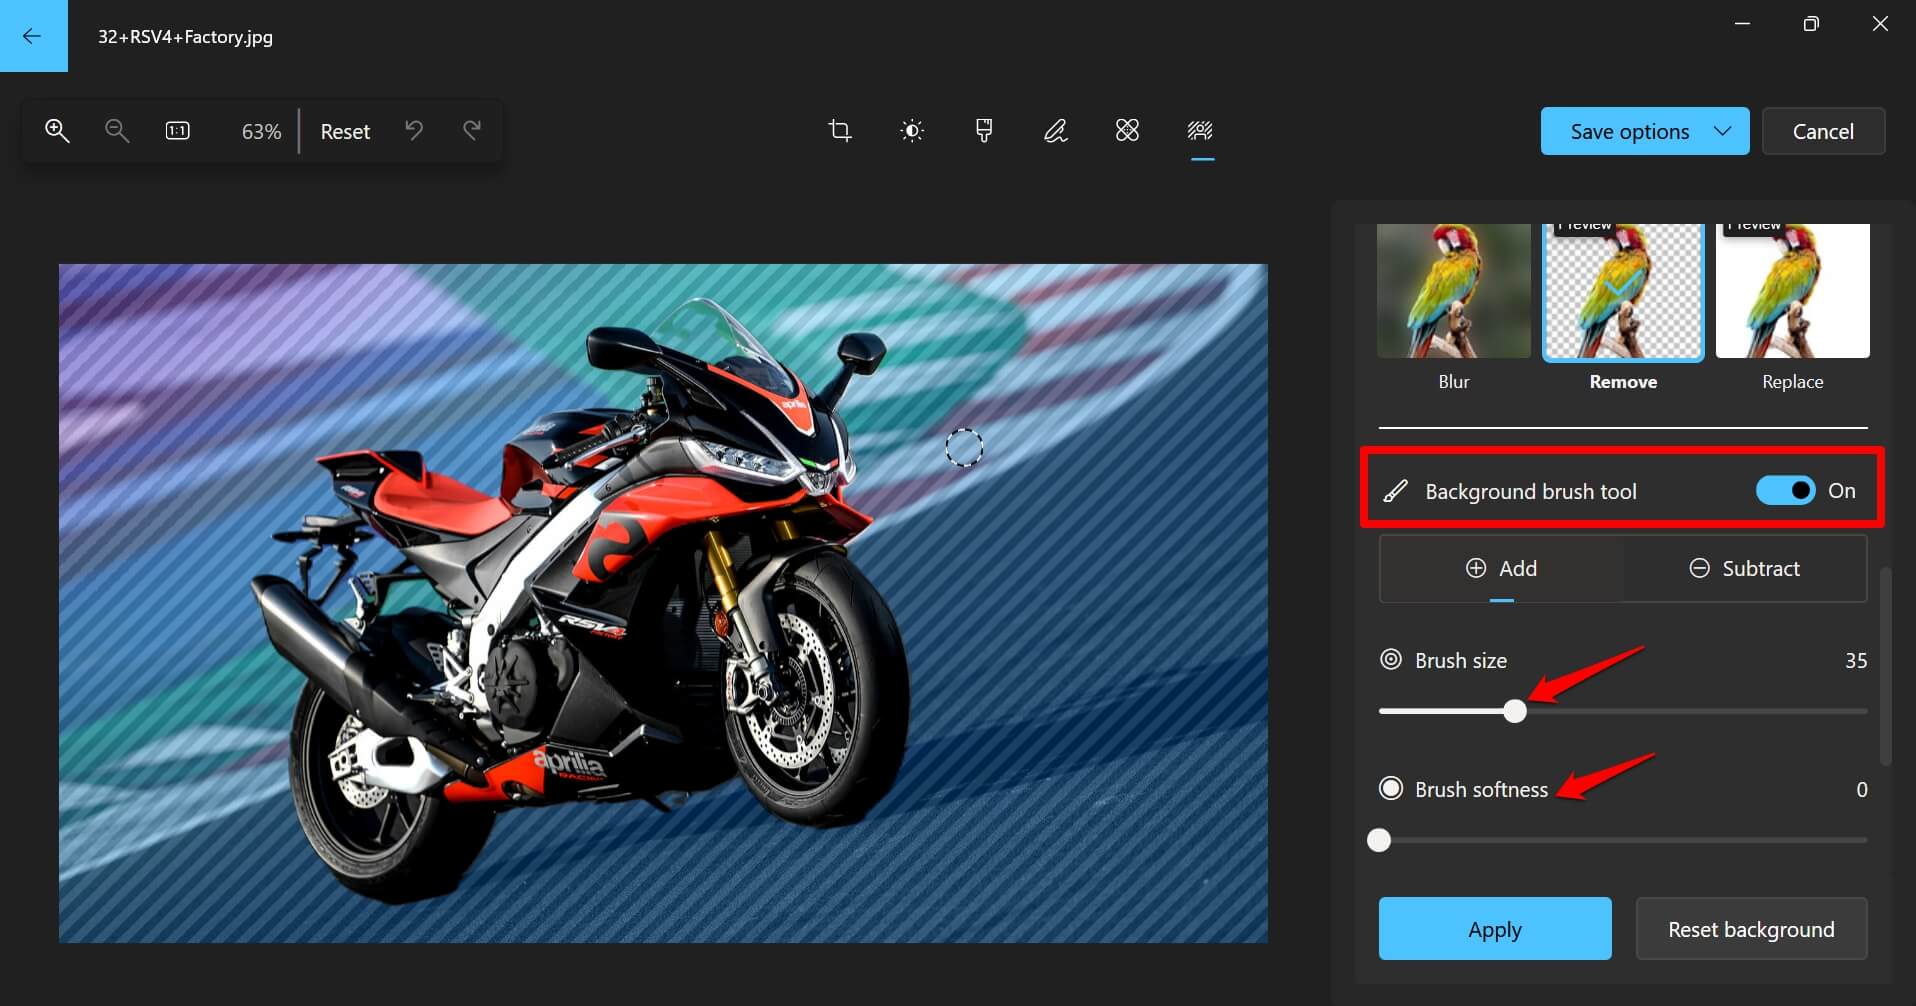
- Enable the toggle next to the Background brush tool.
- Click on Add to increase the intensity of the background.
- Click on Subtract to lessen the presence of the backdrop.
- You can increase/decrease the Brush size and Softness to manually fine-tune the background transparency of the image.
- Once you are done tweaking the presence of the image background, click on Save Options and select Save from the drop-down menu.
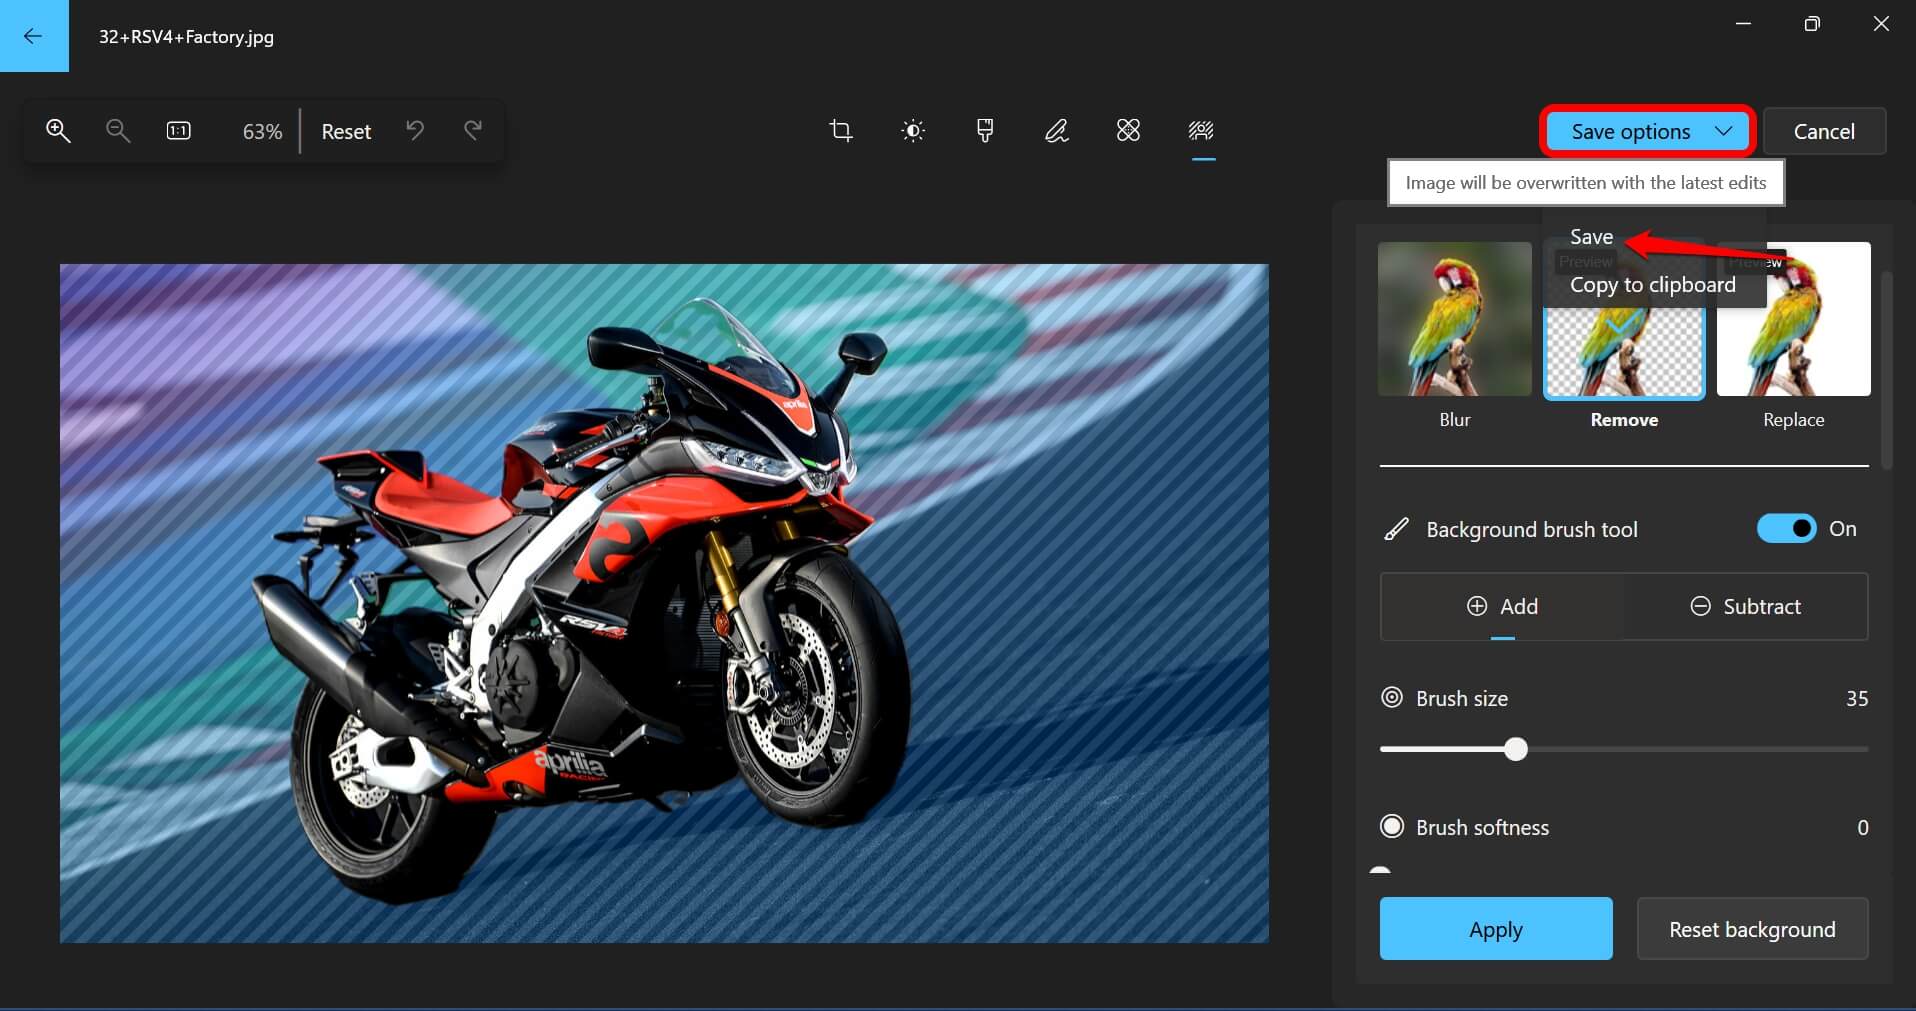
NOTE: If you select Save as Copy, both the original image with background and the edited image without background will be saved.
PNG is the default picture format in which the edited image is saved. However, you can change to JPEG or other image formats while saving the image.
If you need to use the edited image without the background instantly, take a screenshot using PrtSc or Windows +Shift + S (Snipping Tool). Select the portion of the image you want to use and paste it into the other image editor you are using.
Set Background Blur on an Image Background Using Windows Photos
Instead of making the background of an image transparent, you can blur it out.
- Open the image in the Windows Photos app.
- Click the Edit icon.

- Next, click the Background Blur icon.

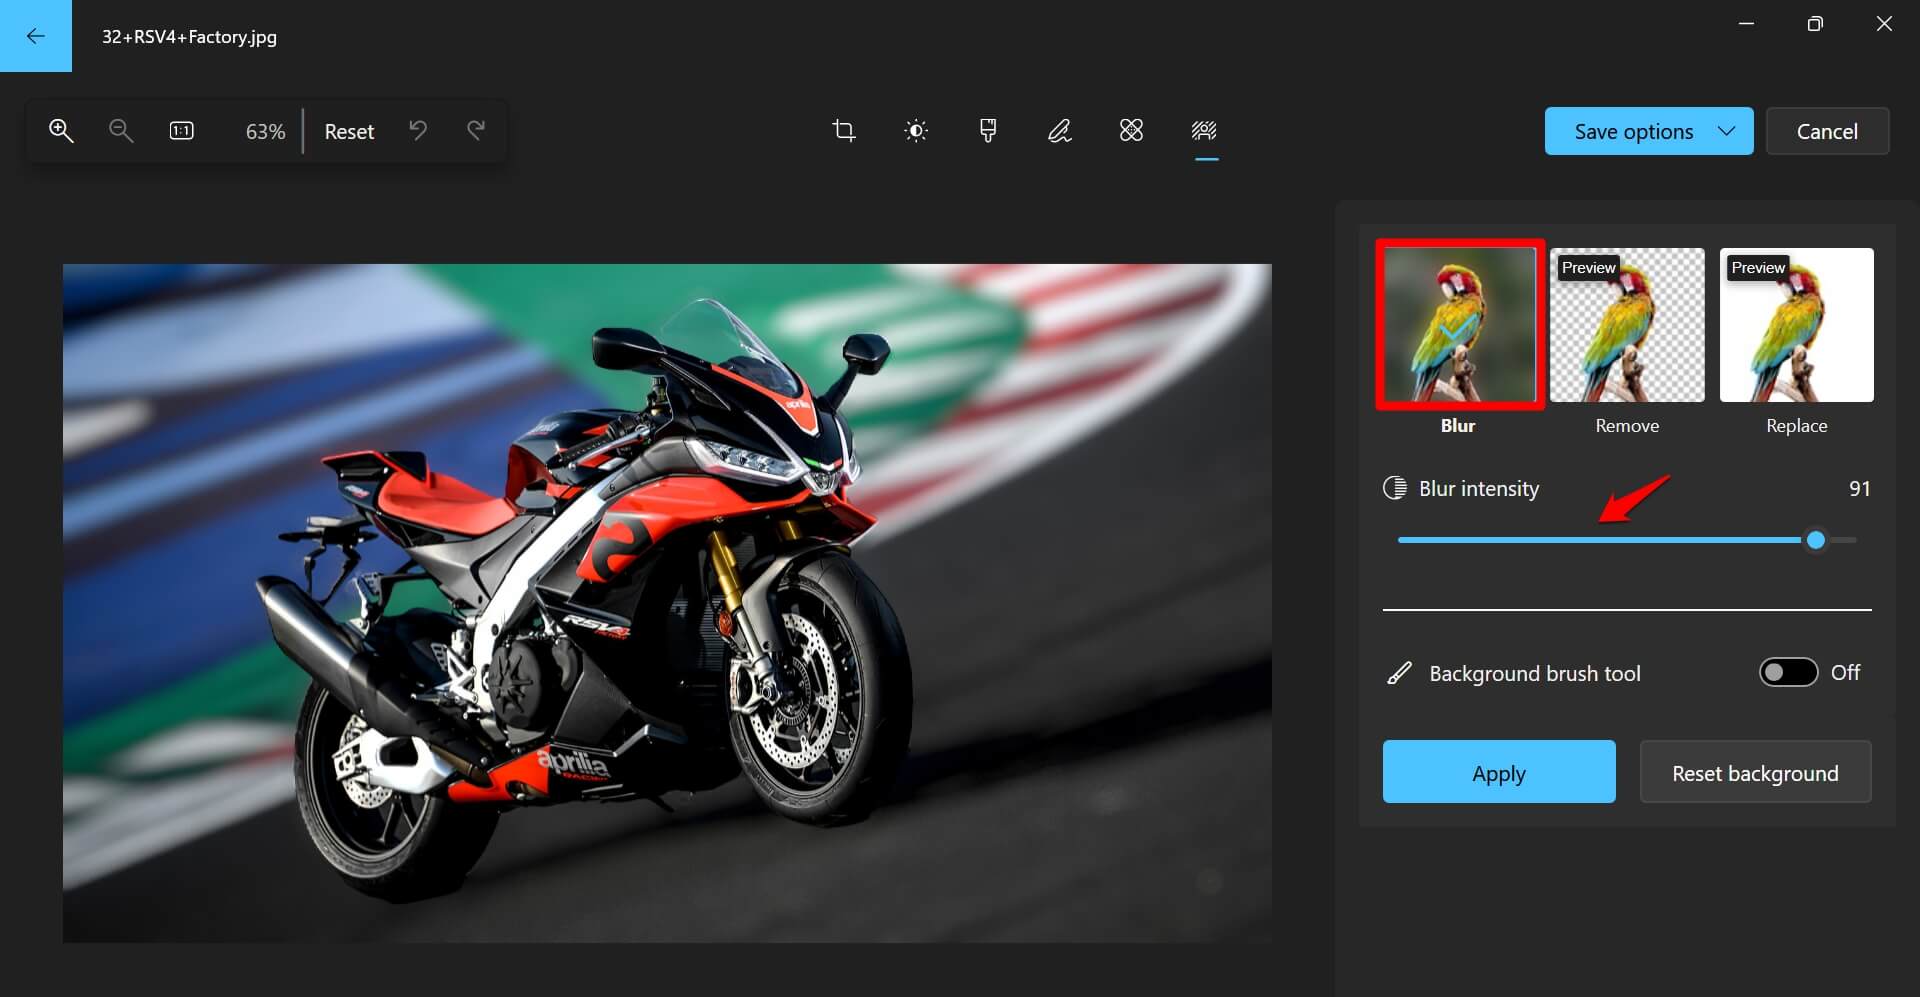
- Click on the effect Blur.
- Adjust the Blur Intensity by sliding the pointer back and forth.
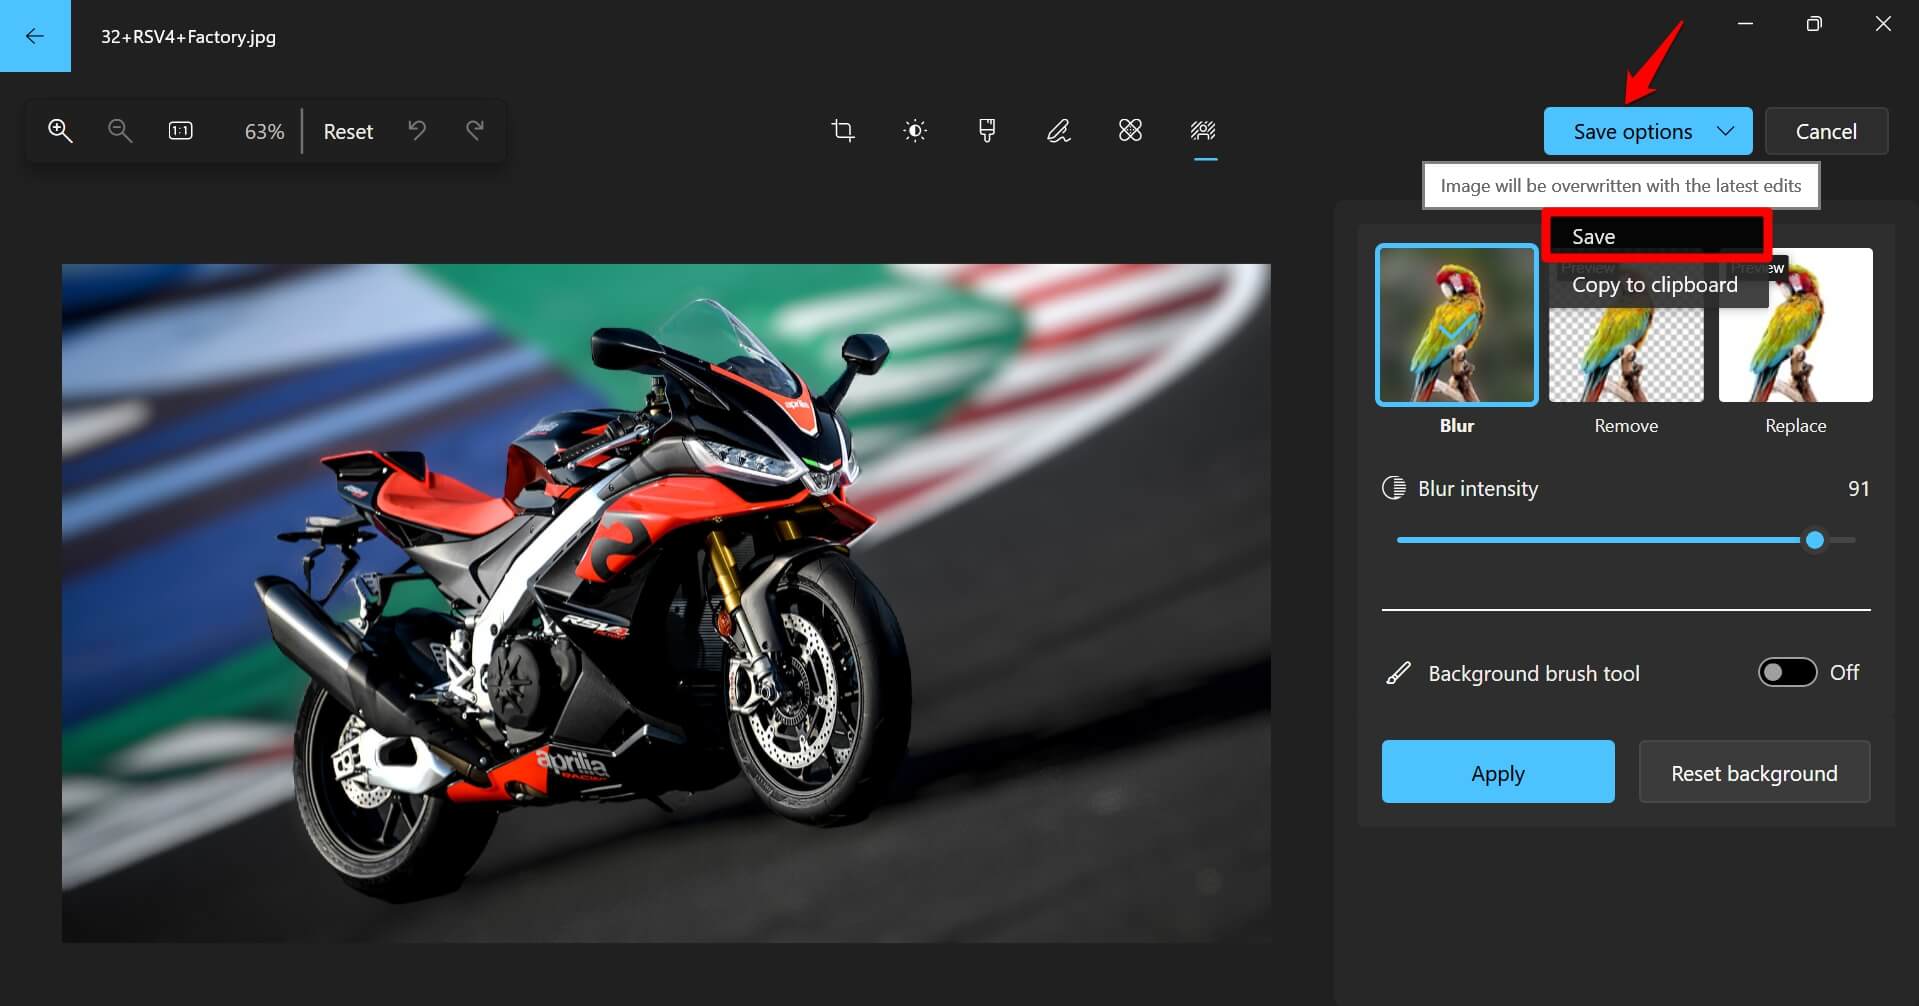
- To save the image, click on Save Options and select Save/Save as Copy.
Replace the Background Image in the Windows Photos App
Instead of the boring and distracting background of the image, you can use a solid color in the photo’s backdrop. Here is how to do it easily on the Windows Photos app.
- Launch the Photos app.
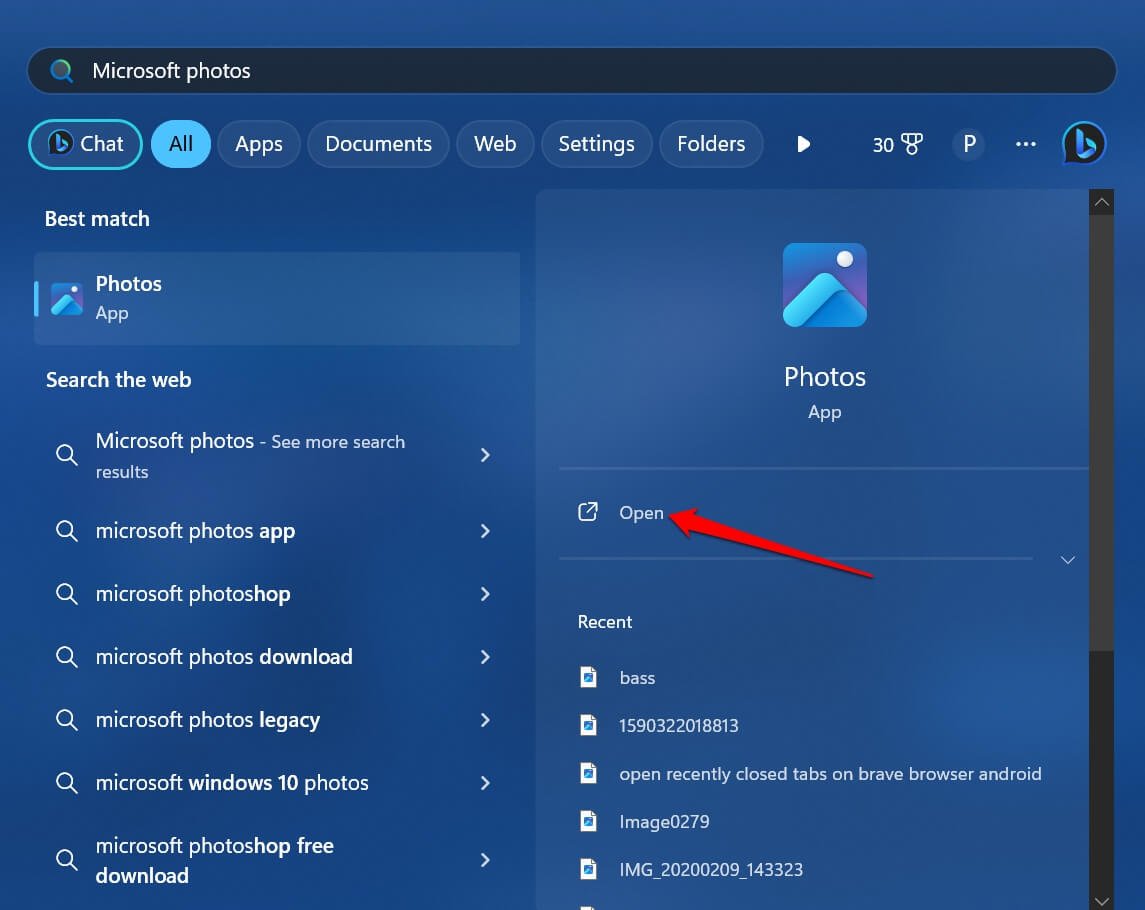
- Press Ctrl + O and browse for the image whose backdrop you want to replace.
- After the image opens on the Photos app, press Ctrl + E to open the editing panel.

- Click on the Background Blur icon.

- From the effects panel, select Replace.
- Now, select any shade of solid color from the color repository.
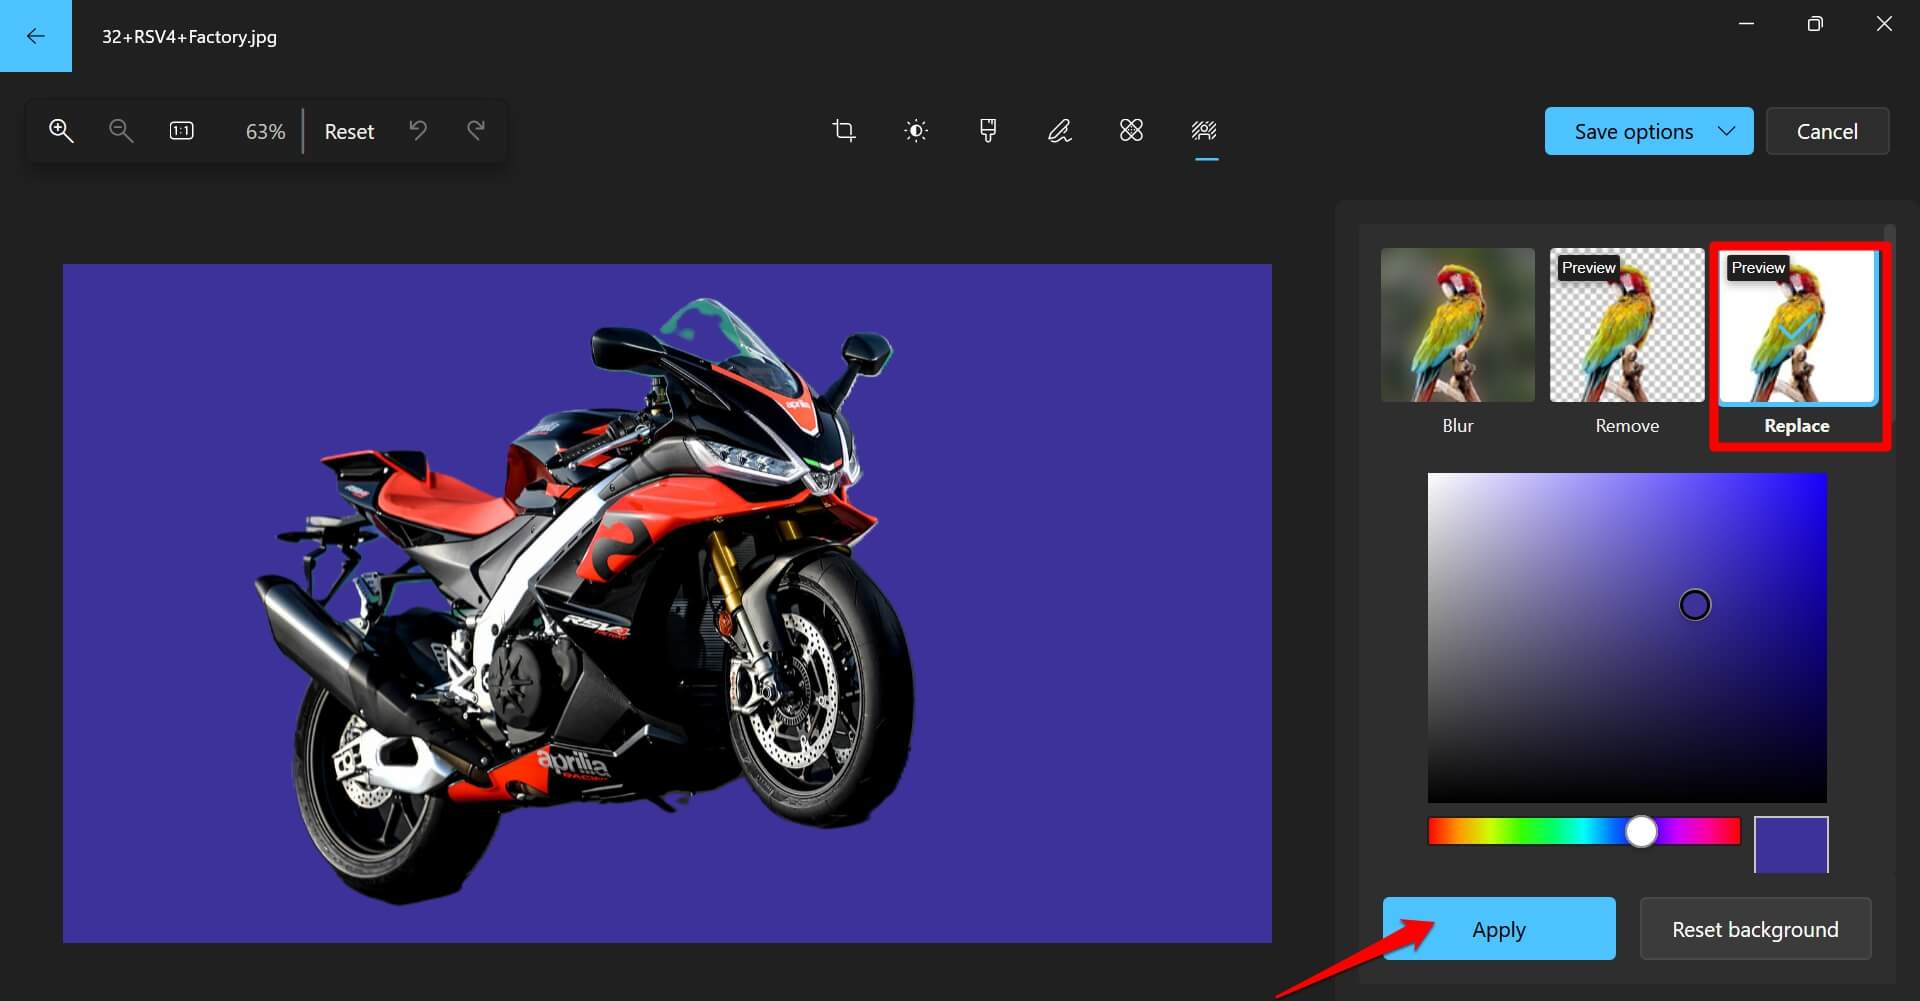
- Otherwise, you may enable the Background Brush Tool and tweak the texture of the backdrop by using the brush tool.
- To save the edited image, click on Save Options and select Save/Save as Copy.
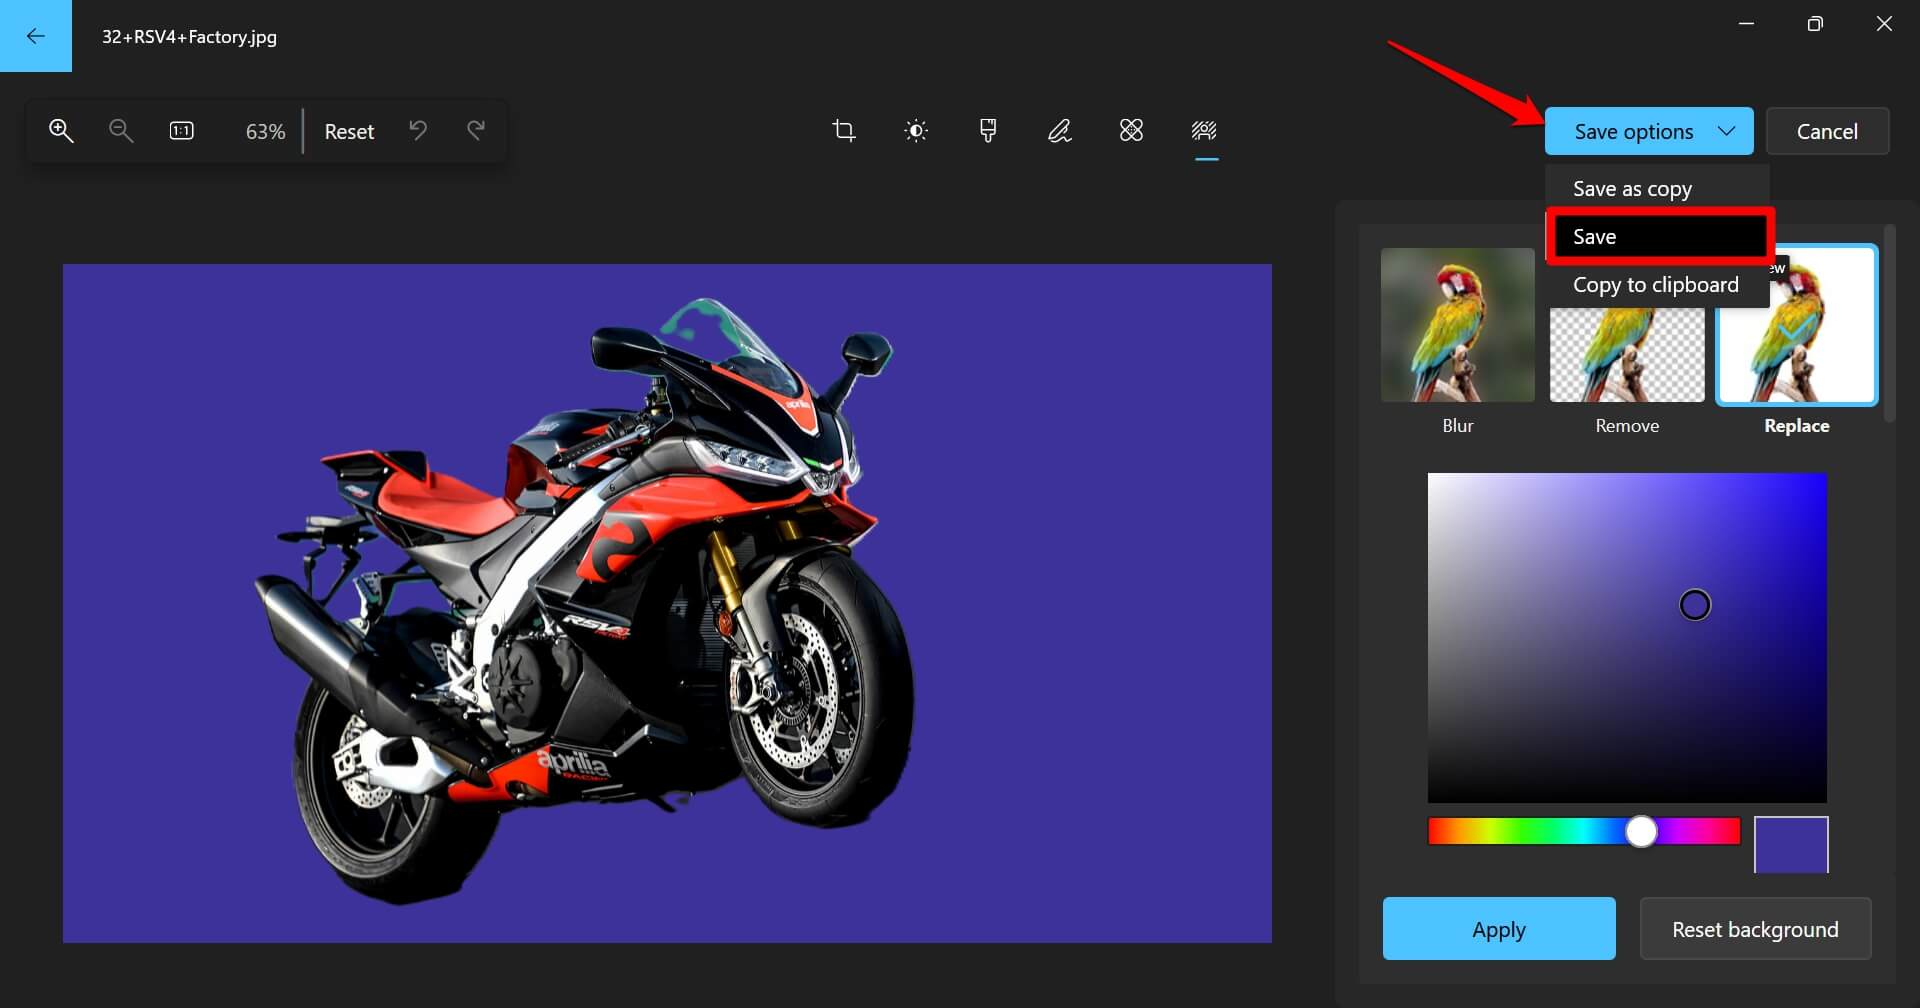
- Name the file and save it in any folder.
Frequently Asked Questions (FAQs)
I’m not seeing the Background Blur Options in Windows Photos Editing Panel
You may not be using the latest build of the Photos app. I suggest updating the Windows Photos app. Launch Microsoft Store and go to Library. Click on Get Updates to start installing available app updates.
Will the Image Quality Diminish if I Use the Background Blur Effects on the Photos App?
I suggest saving the image in PNG file format to retain the quality after editing it. Even if you save the edited image in JPEG format, there would not be any significant loss in the image quality.
Bottom Line
Removing the background of an image has become easier with the Microsoft Photos app. You don’t have to use any paid third-party apps to remove the backdrop of an image efficiently. You can blur the background, replace it with a solid color, or make it completely transparent instantly on the Photos app for Windows 11.
If you've any thoughts on How to Make Background Transparent in Windows Photos App, then feel free to drop in below comment box. Also, please subscribe to our DigitBin YouTube channel for videos tutorials. Cheers!


