Losing your phone can be quite depressing. Most importantly, a phone acts as your Google account’s passkey and 2FA code facilitator. Apart from receiving emails, a Gmail account is widely used to log into various apps and websites on the phone.
Gaining access to your Gmail account can be difficult if you have lost your phone. If you have enabled passkey authentication(specific to the phone you lost), it won’t be possible to use it anymore. Also, receiving the usual verification code via text from Google won’t work as the SIM was used on the lost phone.
All hope is not lost yet. There are some methods of Google account recovery if correctly followed can provide your access back to the Gmail account. This guide explains the different ways to log in to a Google account with 2FA when your phone is lost.
The Problem with Gmail Login When Phone is Lost
Let us assume this situation. You lost your daily driver, the smartphone that had Gmail, and access to other apps. Your immediate move would be to log into your main Gmail account from another device.
When you Don’t Remember the Password
It may not be possible on everyone’s part to remember their Gmail account password. You have to use the “Forgot Password” option on the login page. Google will offer signing in by accepting the verification code through a recovery email address, using backup codes, getting the 2FA code on the Google Authenticator app, or getting the verification code on your phone number.
It is necessary to set up 2FA on your new device through which you are currently trying to access Gmail. That is possible only when you can log into your Gmail account which won’t happen as the phone is lost. Again, it is also impossible to receive a verification code as your phone is not with you.
When you Remember the Password
If you do remember the password, then also your problem would be far from over.
After entering the password, You have to provide the 2FA code or passkey(biometric authentication) through the phone’s fingerprint scanner or face recognition. For this, you require the same phone that you lost through which you were previously signed to the Gmail account.
There is no way you can use the 2FA authentication code because the SIM was in the phone when you lost it. Google has to send the login verification code on the same phone via text. You won’t receive it because the phone is gone.
Similarly, biometric authentication is out of the question. It was exclusively possible on the lost mobile device in which face unlock or fingerprint was set as the passkey.
Best Ways to Log in to Gmail When Phone is Lost
Here are the three possible ways that you can use to login to your Gmail account even when your phone is lost.
Recovery Email
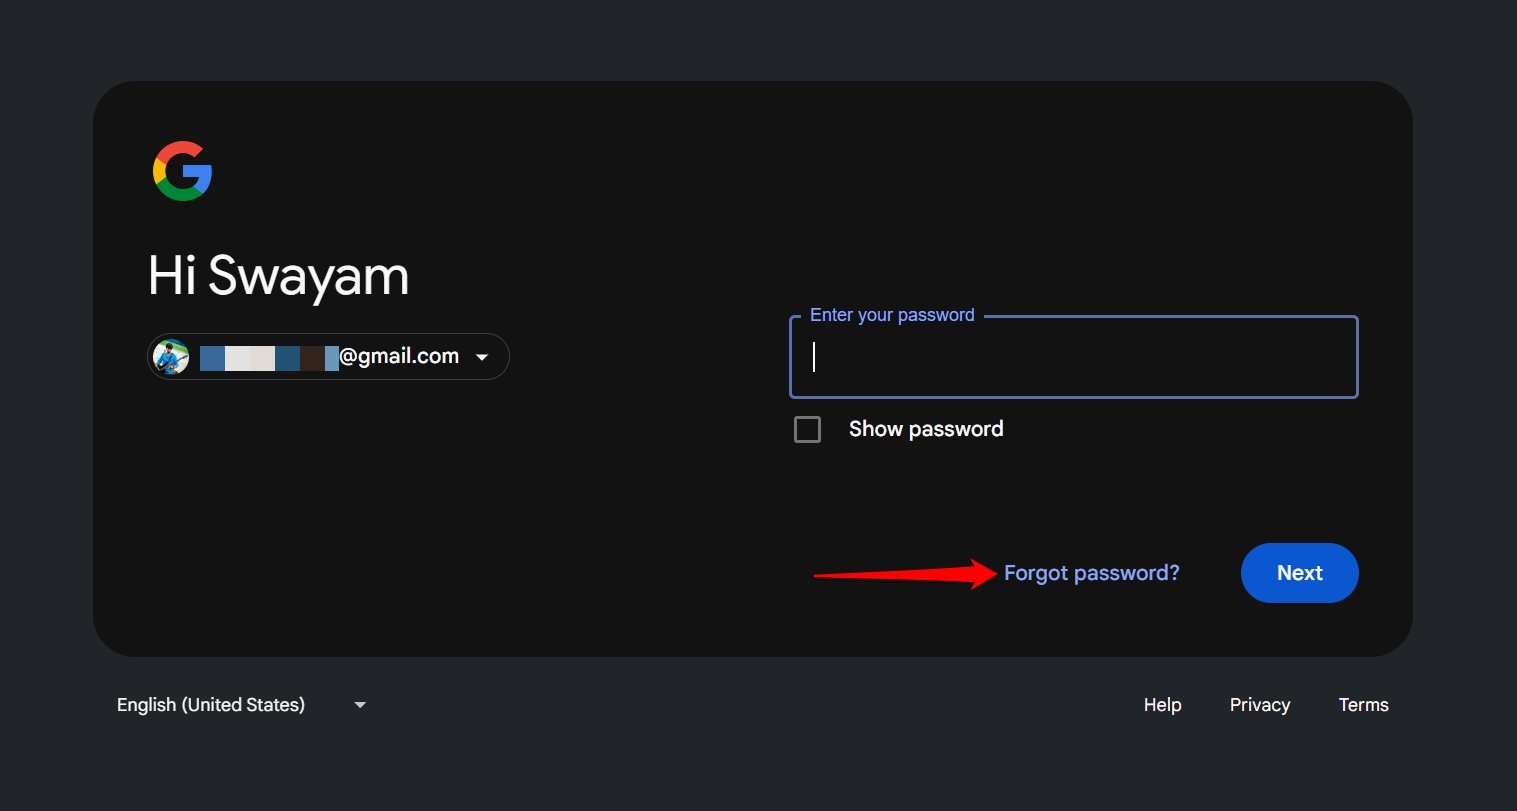
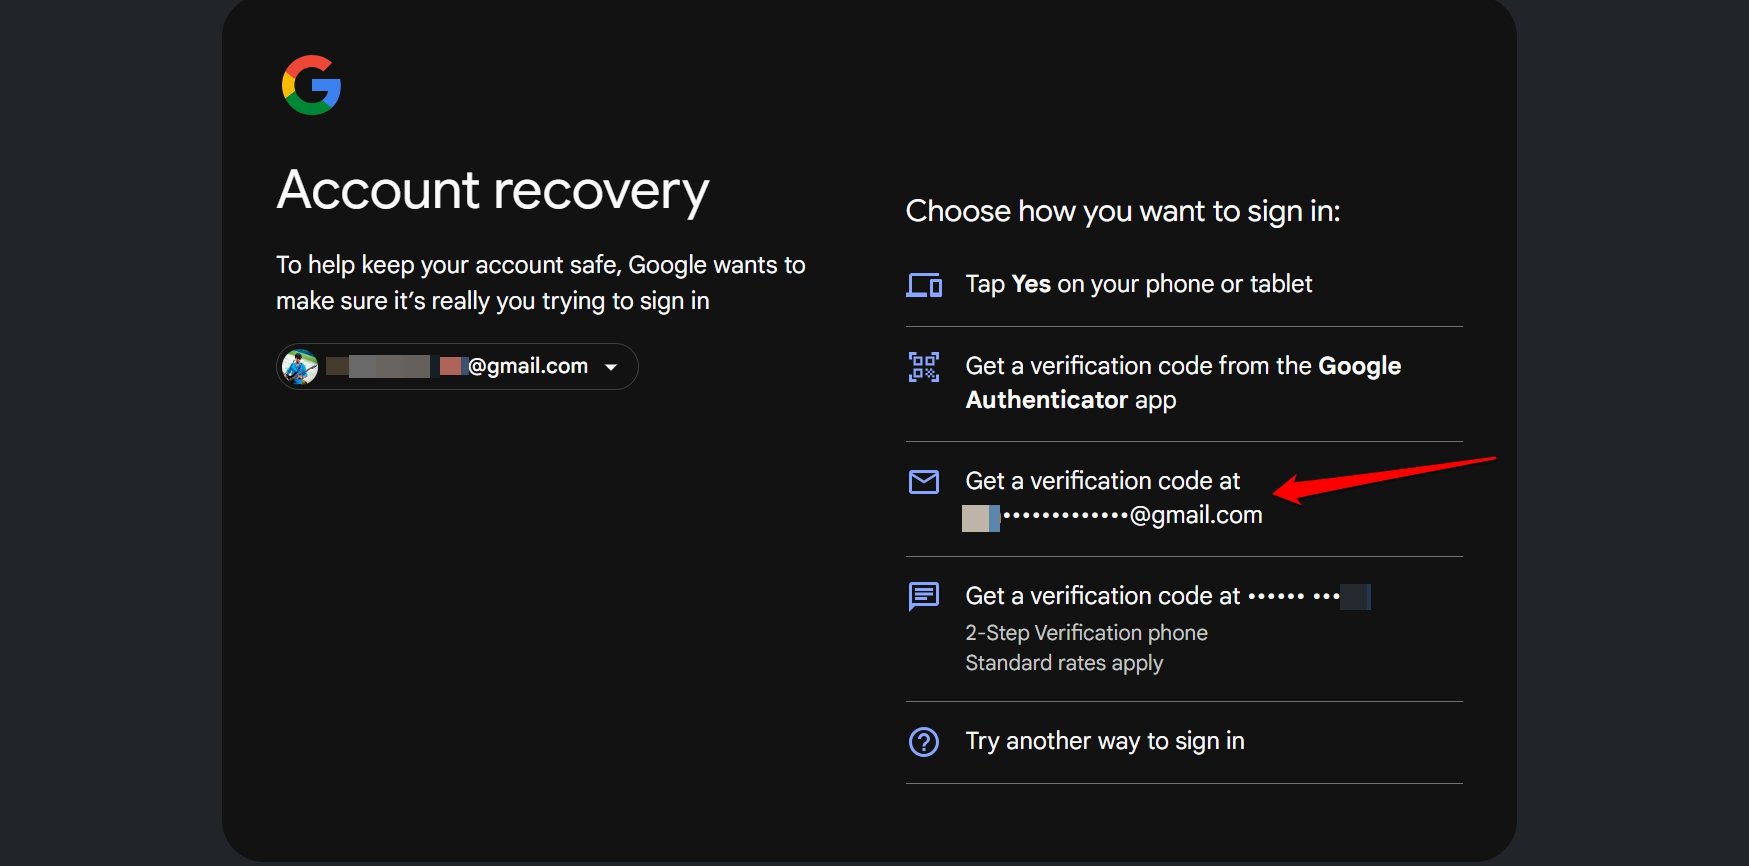
Remember hitting the “Forgot Password” option? That takes you to a new screen where Google asks you to send a verification code to your recovery email.
A recovery email ID is a mail address different from the one you are trying to log into. It is an alternate email address where verification codes can be sent in case you lose access to the main Gmail account.
If you have not set a recovery email or don’t have access to it, the chances of you logging in to your Gmail account are almost nil.
To use the recovery email ID for receiving the verification code, follow these steps.
- On the login page click Forgot Password.
- Select Get a Verification Code at xx****@gm***.com
- Now, log into the recovery Gmail account.
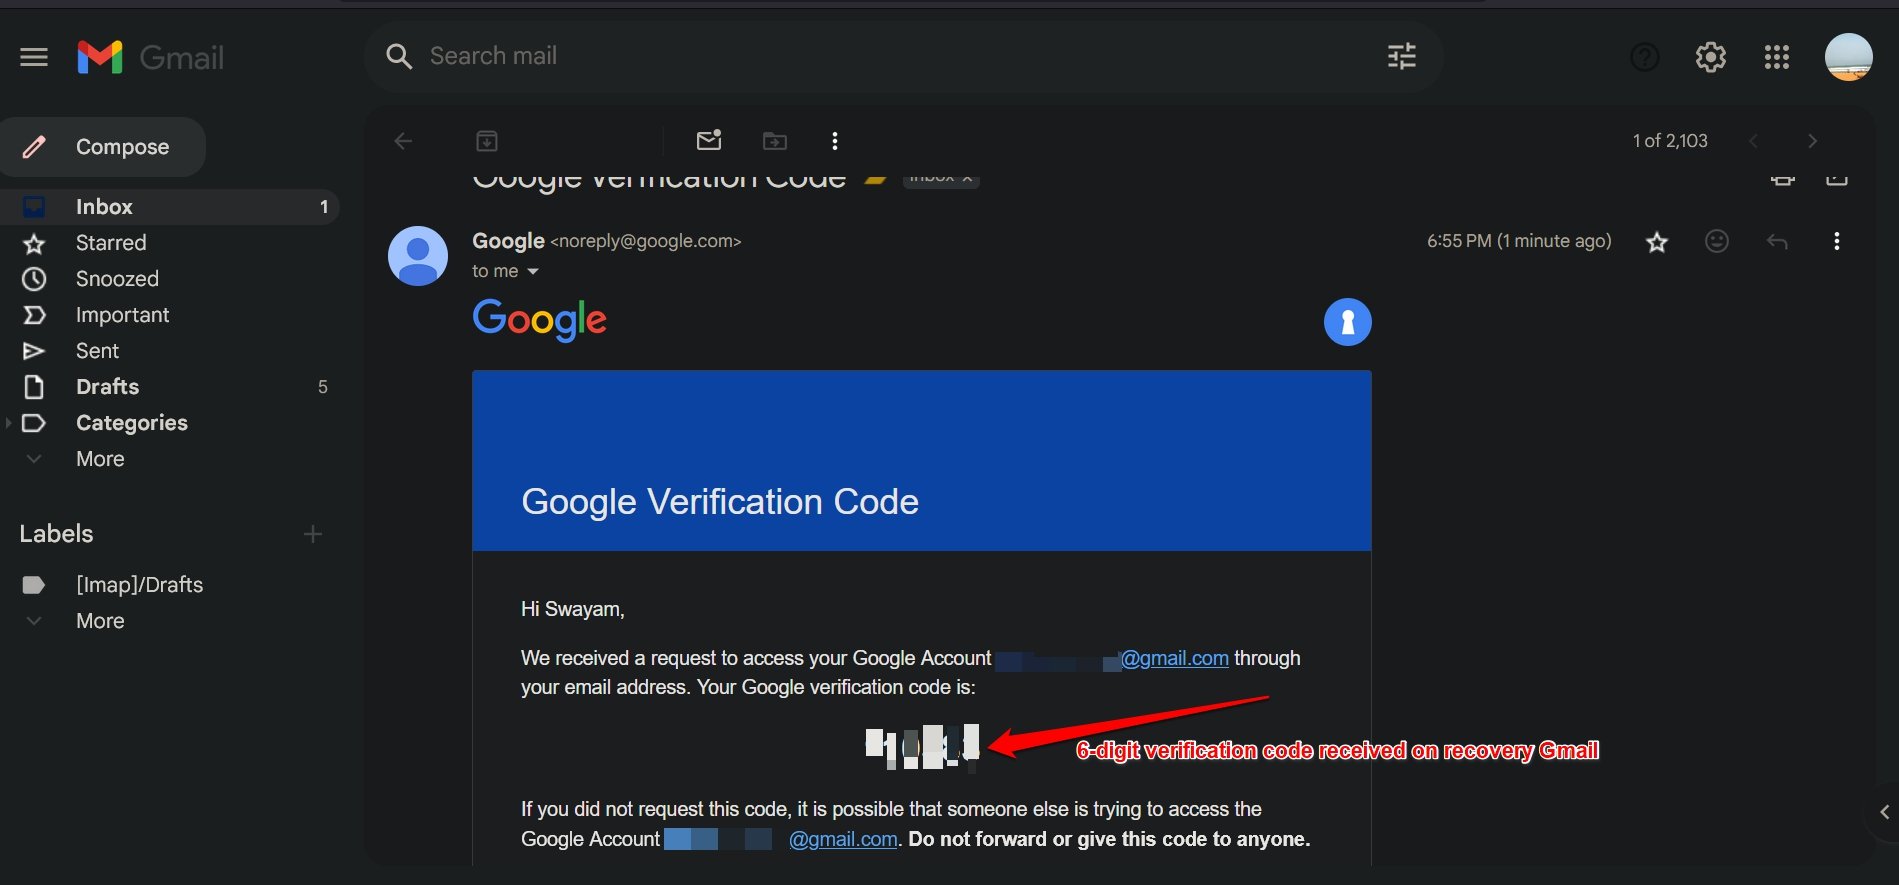
- Check the inbox or Spam folder for a 6-digit verification code from Google.
- Insert the code in the field on the Account recovery screen.
Now, you will be redirected to the primary Gmail inbox that you were trying to access.
If you cannot access the recovery Gmail account on other devices, don’t have a recovery Gmail account, or have lost its password, there is nothing that can be done now. Move on to the next method.
Backup Code
When setting up 2FA, you must have generated a bunch of backup codes and saved them somewhere. They are required in a situation like this where you don’t have the phone with you and Google is denying access to your account.
If you downloaded the backup codes as a text file on your computer, search for it on the PC. Use Windows search(Win+S) and type “backup-codes-username.txt” where the placeholder ‘username’ denotes the one used in the email address you cannot access.
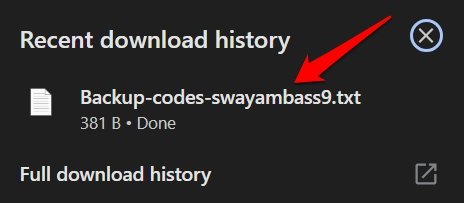
- Find the backup codes.
- Go to the Google log-in page.
- Click Try Another Way.
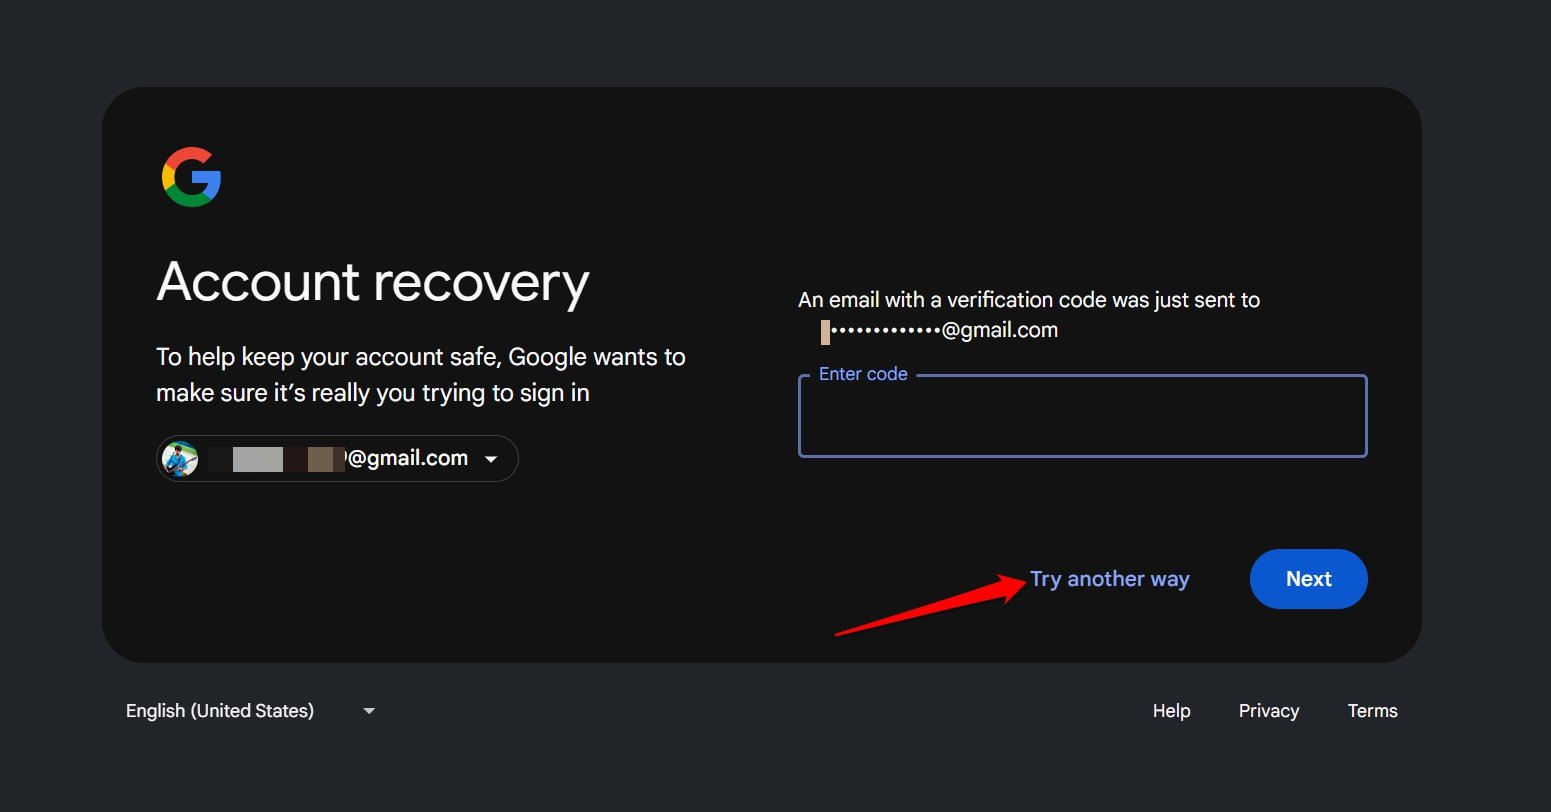
- Press Enter one of your 8-digit backup codes.
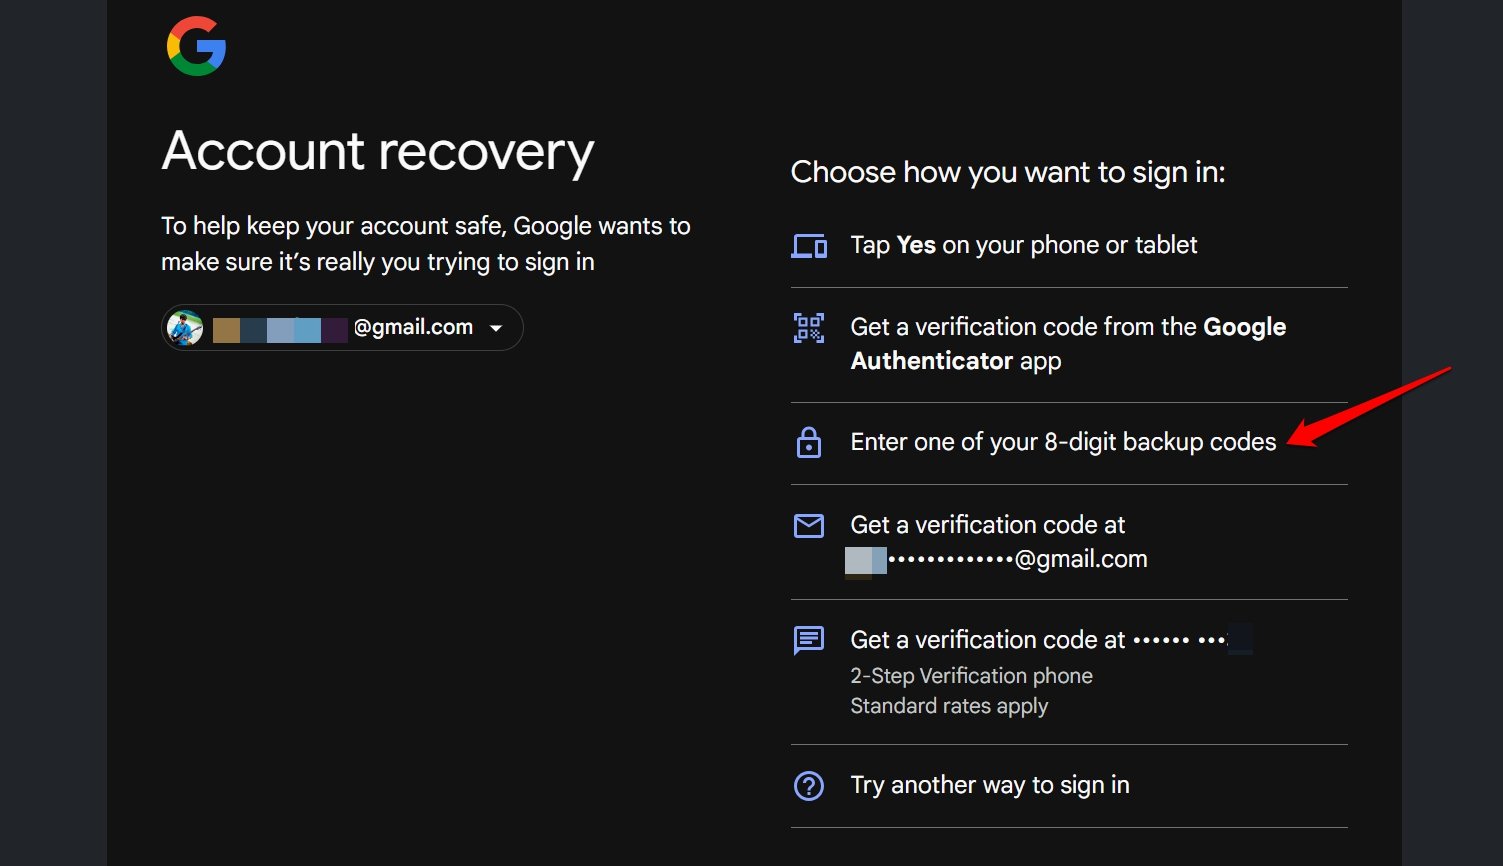
- Type the backup code.
You will be redirected to your Gmail inbox. Congrats, you regained your access to the Gmail account.
Around 10 sets of 8-digit backup codes will be generated. You can use each code once to sign in to your Gmail profile during the account recovery process.
If you have no codes left, never generated backup codes, or forgot/lost them, your chance to access the Gmail account is gone.
How to Generate Backup Code? [Bonus Info]
In case you have access to your phone and Gmail account, learn how to generate and save backup codes.
Somewhere in the future, if you lose access to your Gmail account, use backup codes to regain access.
Here is how you can generate the backup codes on your active Gmail account.
- Login to your Gmail account.
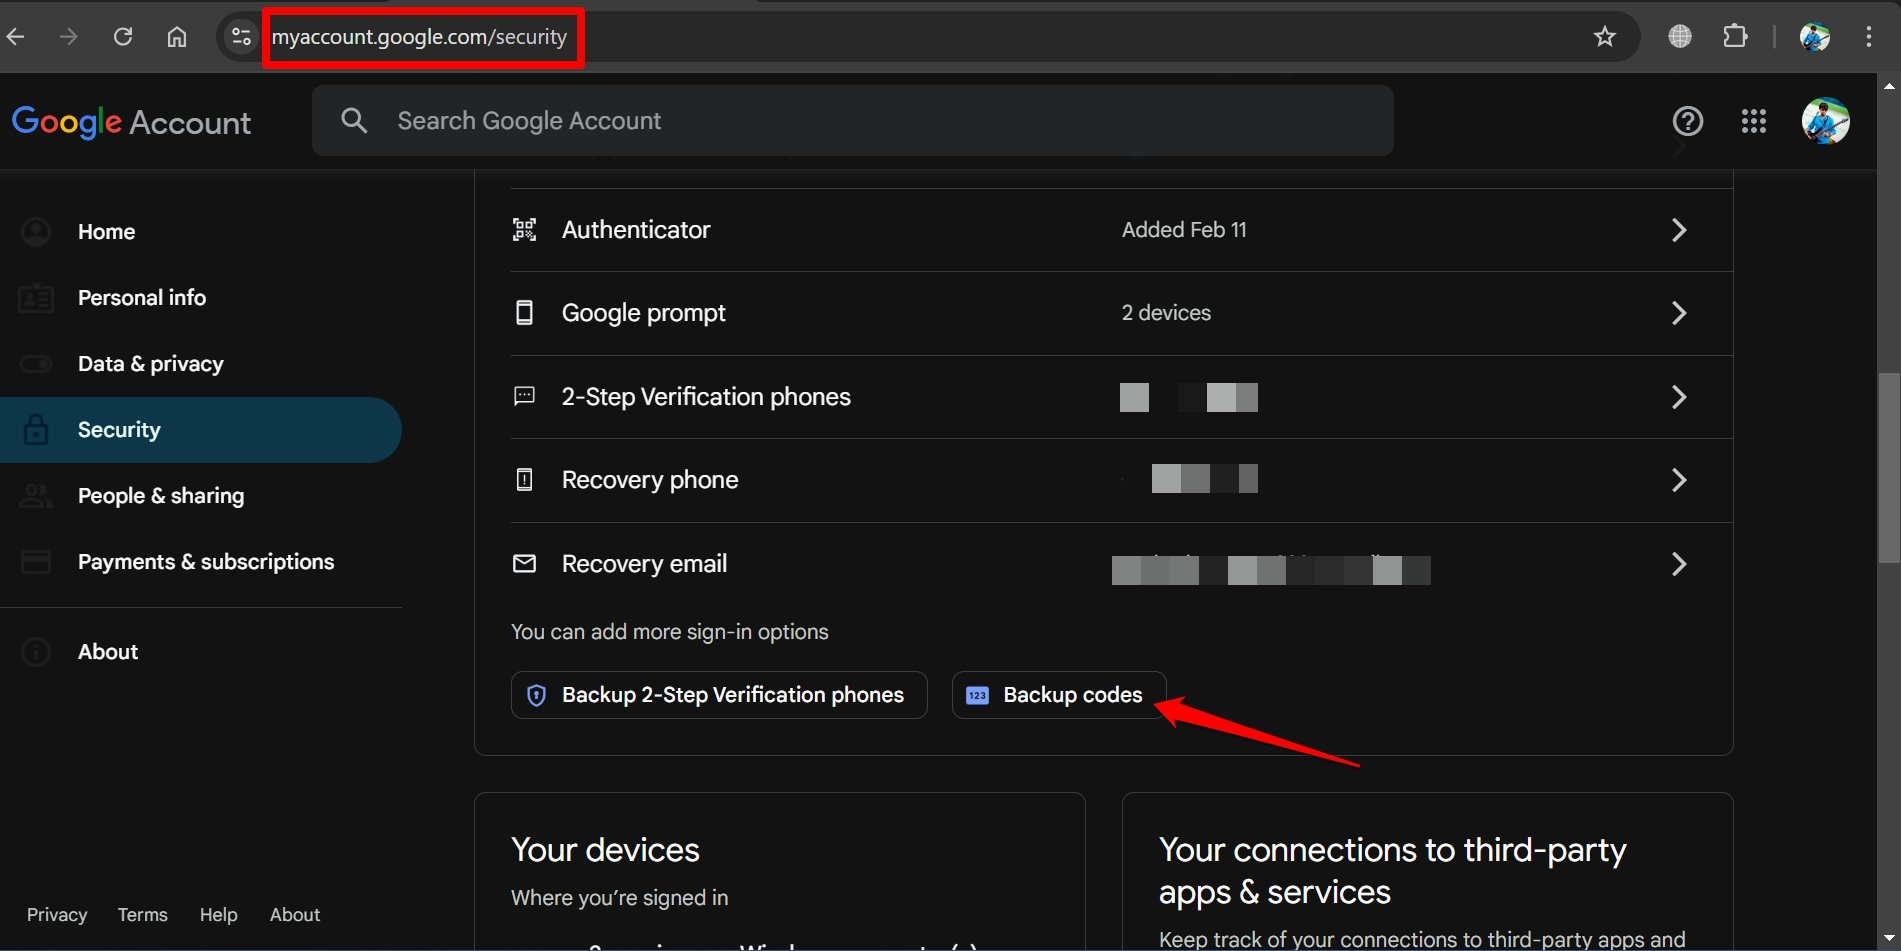
- Go to the Google Account Security Management page.
- Click on Backup Codes.
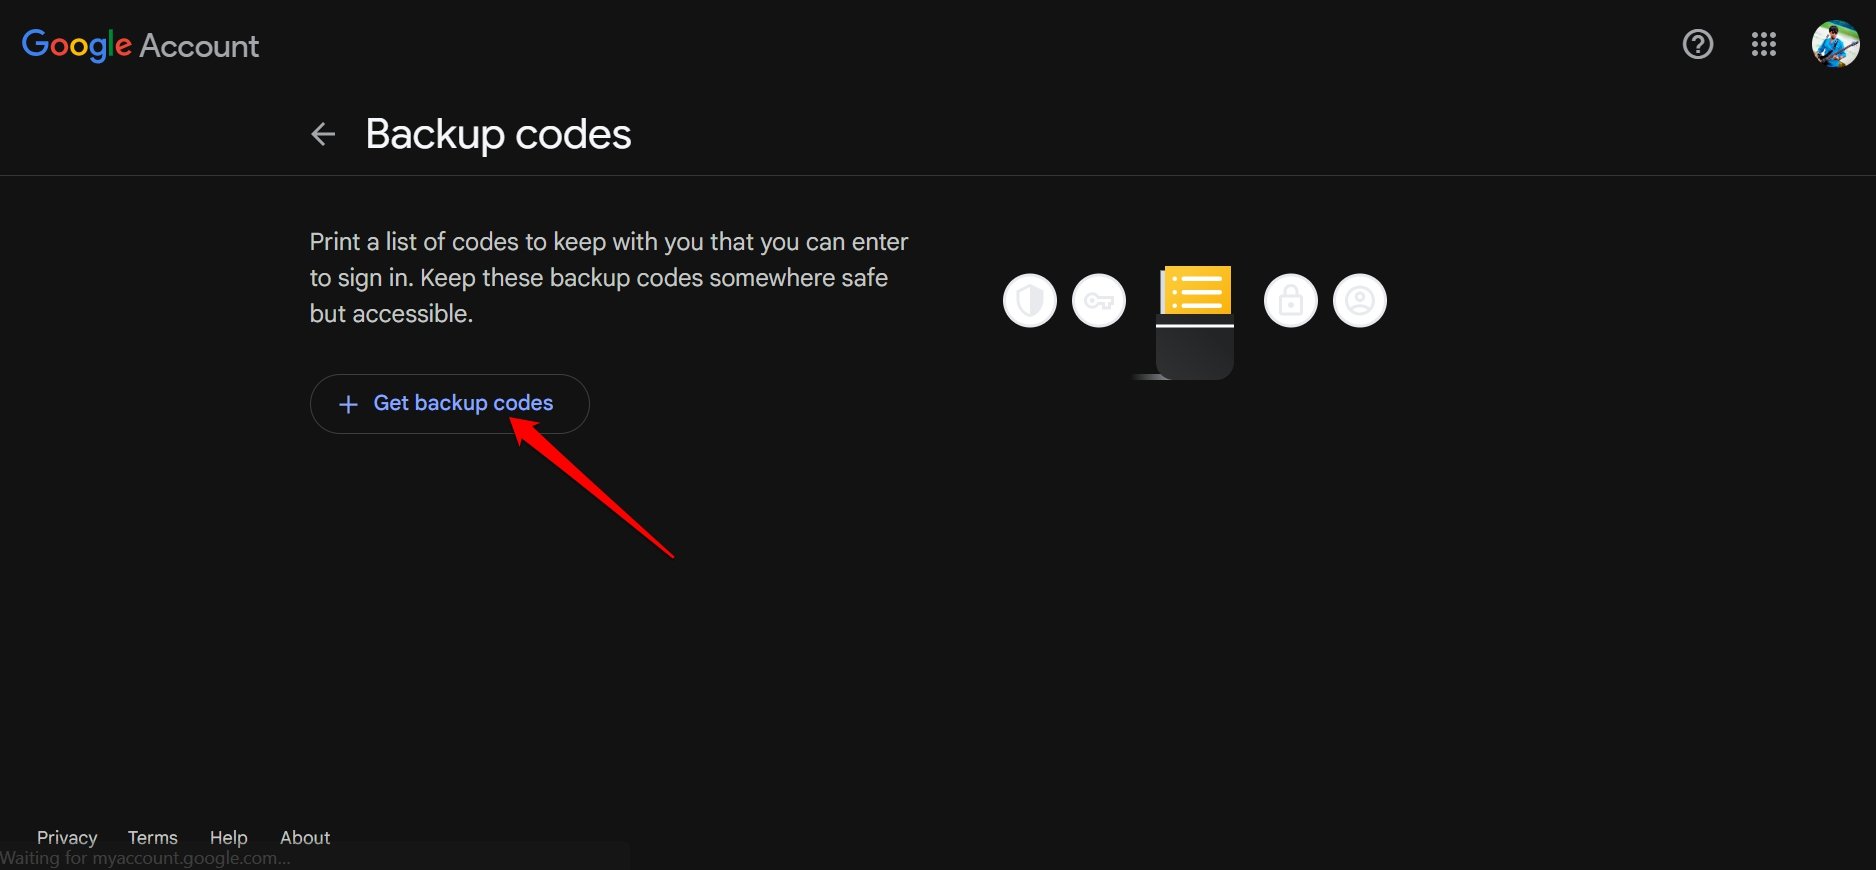
- Confirm by clicking on Get Backup Codes.
- Once the list of backup codes appears, click Download Codes.
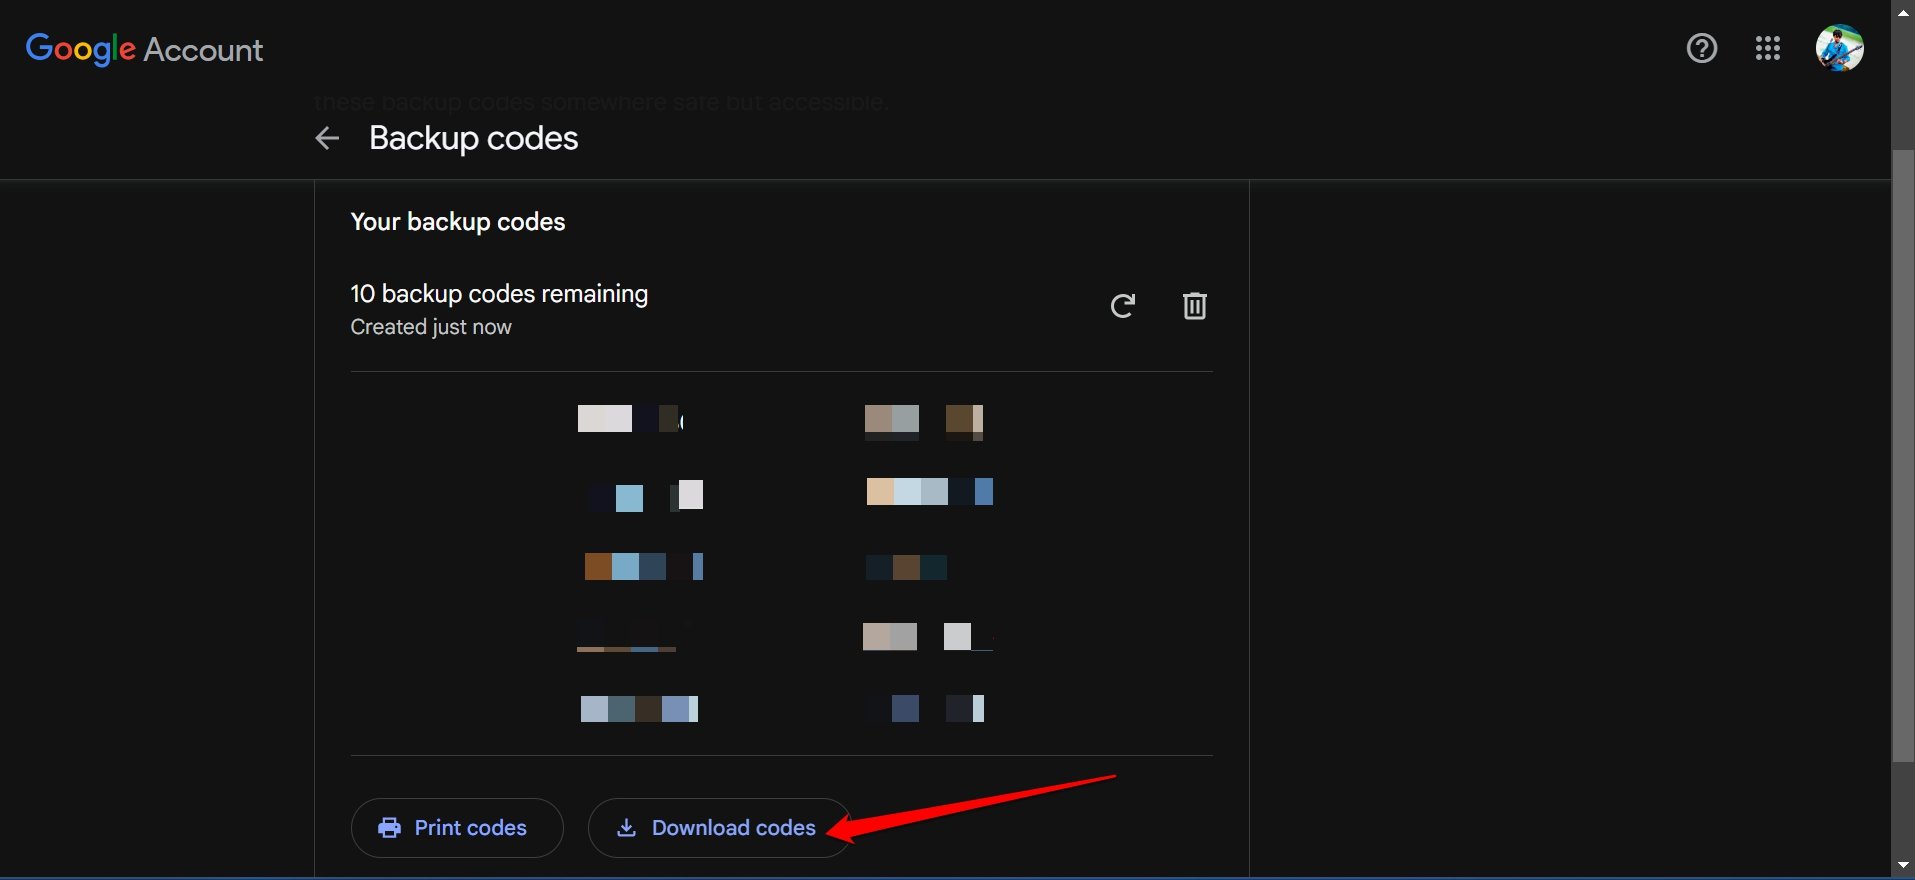
You may also print the backup codes and have them with you in the form of a hard copy.
Replacement SIM
Check out this method if you don’t have a recovery email or lost your Gmail backup codes.
The problem is you have lost the phone which contains the old phone number to which Google will send a verification code. You don’t have the phone, so you cannot receive the code, and all access to your Gmail ID is lost.
This is where the concept of SIM replacement will save your day. This process requires you to apply for a new SIM card from your service provider. Tell your service provider to transfer the same phone number from the old SIM to this new SIM.
- Grab the new SIM and put it on any other phone(or your new phone).
- Access the Gmail login page.
- Enter the username and password.
- Google will ask you how to send a verification code.
- Select the phone number that you now have on the SIM.
- Check the Messages app where Google will send the verification code via text message.
- Copy the code and paste it into the required field to enter your Gmail inbox.
NOTE: In some regions, SIM replacement will depend upon the local telecom regulations and the scope of the network provider.
Technical Limitation from Google’e End
Google doesn’t provide any live support for Gmail account recovery. If the backup codes, recovery mail address, and recovery codes are inaccessible to you, it is better to stop attempting the Gmail account recovery.
Unless SIM replacement is supported by your network provider the problem won’t be fixed and you cannot access your Gmail account.
As long as the lost phone is not found, you cannot access the specific Gmail account you were using, for the lost device was the only way to generate a 2FA code, or receive verification codes.
The next best move is to create a new Gmail account. It may seem like a dead end to run out of all methods to login into a 2FA-enabled Gmail account. However, Google does a perfect job of protecting accounts from getting hacked by being technically stringent with the login process.
Bottom Line
When you create a Gmail account, it is a good practice to set up a valid recovery email address, set 2FA on the primary email ID, and generate backup codes.
Use the verification code sent on the recovery email or the backup codes to access your Gmail account even when the phone is lost.
You may also consider replacing the SIM and using the new SIM with the old number on another phone to receive verification codes to access the Gmail account. I hope you found this guide informative.
If you've any thoughts on How to Login to Google Account if Phone is Lost with 2FA Authentication, then feel free to drop in below comment box. Also, please subscribe to our DigitBin YouTube channel for videos tutorials. Cheers!


