My Windows 11 machine crashed multiple times, and it was IRQL Not Less or Equal error. We have to take several points into account and get to the bottom of it, but it’s not easy for older hardware. Manufacturers have designed the newer hardware for Windows 11, but the older hardware suffers from a lack of support from the brand. We have to spend a few minutes figuring out what caused the IRQL_NOT_LESS_OR_EQUAL.
What Causes IRQL Not Less or Equal Error in Windows 11?
I have listed valid reasons why IRQL Not Less or Equal error showed up on your screen. However, you have to promise yourself that the list won’t affect your final decision and avoid jumping to conclusions. I suggest everyone follow the solutions that I have mentioned below, and it will help you to identify the root cause of it.
- Outdated drivers (Example: bugs or compatibility mode)
- Faulty memory (RAM)
- Faulty mechanical hard drive
- Overclocked CPU & GPU
- Overheating component
- Virus
- Unstable drivers
- Broken operating system updates
The list keeps going on, but I will end it here. I will start with the easy solution then move my way up to the advanced solutions, so brace yourself. Do not miss a single beat and move on to the next solution and kindly give every solution a try.
1. Windows Virus & Threats
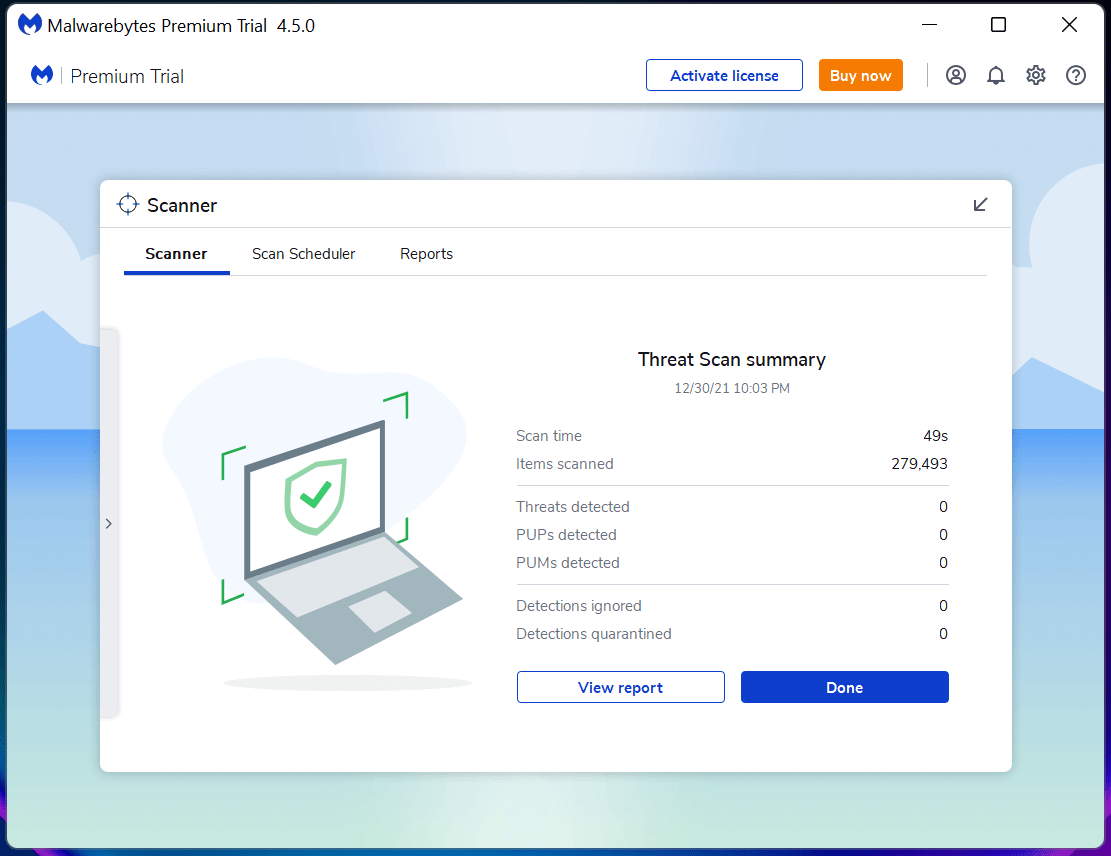
In 2020, there were 300 million malware pieces detected by the security tools. The numbers are even higher in 2021, and it wouldn’t be surprising to find malware in your system. Run a full system scan and don’t let a single partition or drive out of the radar.
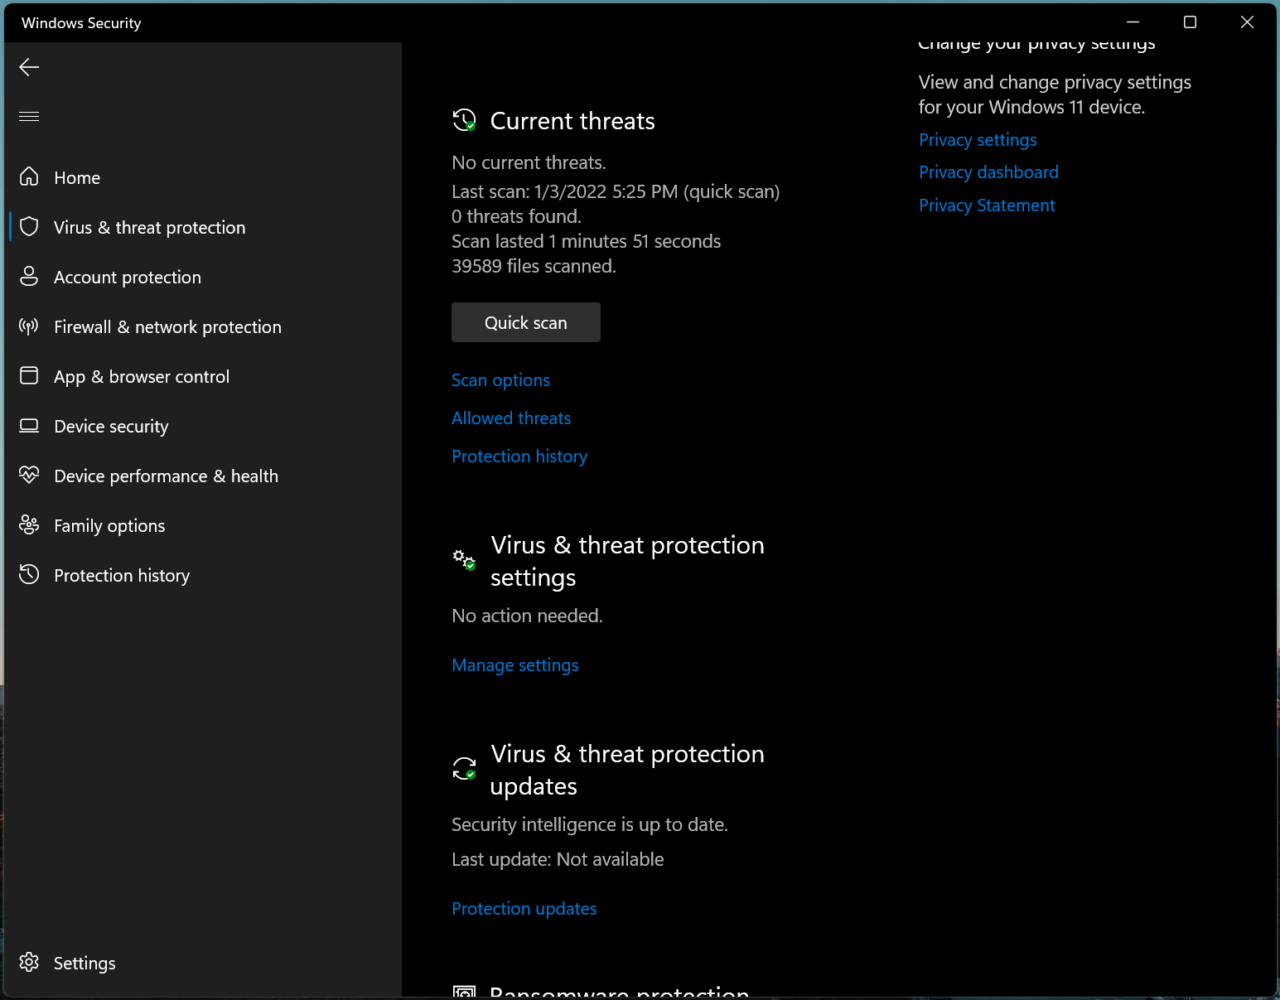
You can utilize Windows Security in the system but it found it to be inconsistent. There was research that concluded that malware bypassed the security layers. I’m not stating that it is completely useless but I recommend the readers to purchase premium security solutions from any company of their choice.
Nonetheless, you should be smart and stop visiting suspicious sites, downloading pirated software (including Windows OS), and focusing on surfing reputed sites only. Do not click random links coming from social media sites and your friends.
- Subscribe to a premium security solution.
- Run full system scan
- Turn on periodic scanning in Windows Security
Do not rely on free security solutions if you hold an important corporate role in the company.
Windows Security bestows the security part to the third-party security system, and you should turn on Periodic Scanning in the inbuilt antivirus system.
Privacy invaders have started to target corporate executives and individuals with an important role, so they can attack your system using Ransomware malware. You should be wary of the current situation in the global community and rely on the premium security system to prevent such attacks.
2. Overheating Components
I’m authoring the article on a six hours old laptop, and the thermals are optimal for the Core i3 processor. However, I wouldn’t say the same for older hardware, and I didn’t change the thermal paste of my old laptop for five years.
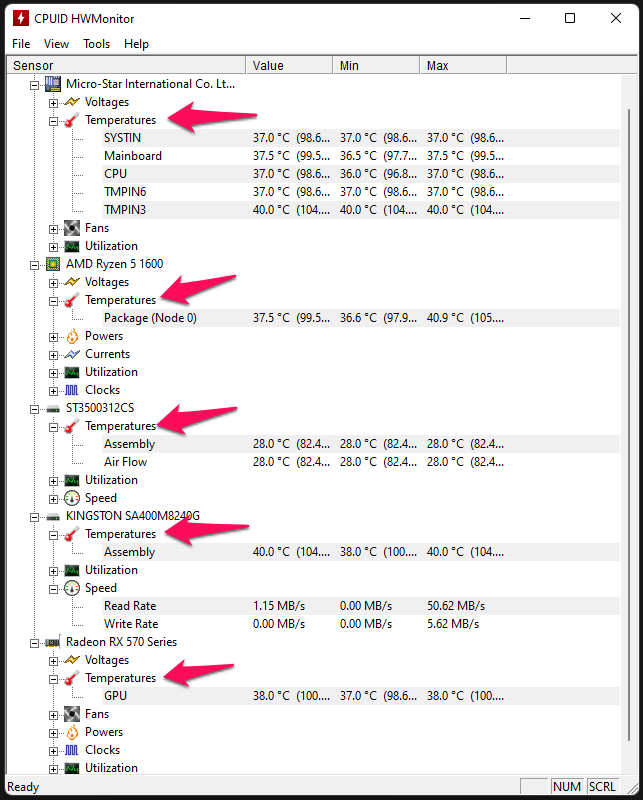
Unfortunately, the old AMD laptop required thermal paste replacement and it was hitting 50° on the idle state.
Take a look at the new Core i3 11th generation laptop, and the temperature is 35° – 45° during the idle state. I believe it’s a good number to improve the longevity of the hardware, and it will perform at a faster pace for many years to come.
3. AMD CPU and (dedicated) GPU Temps:
Intel CPU and (integrated) GPU Temps:
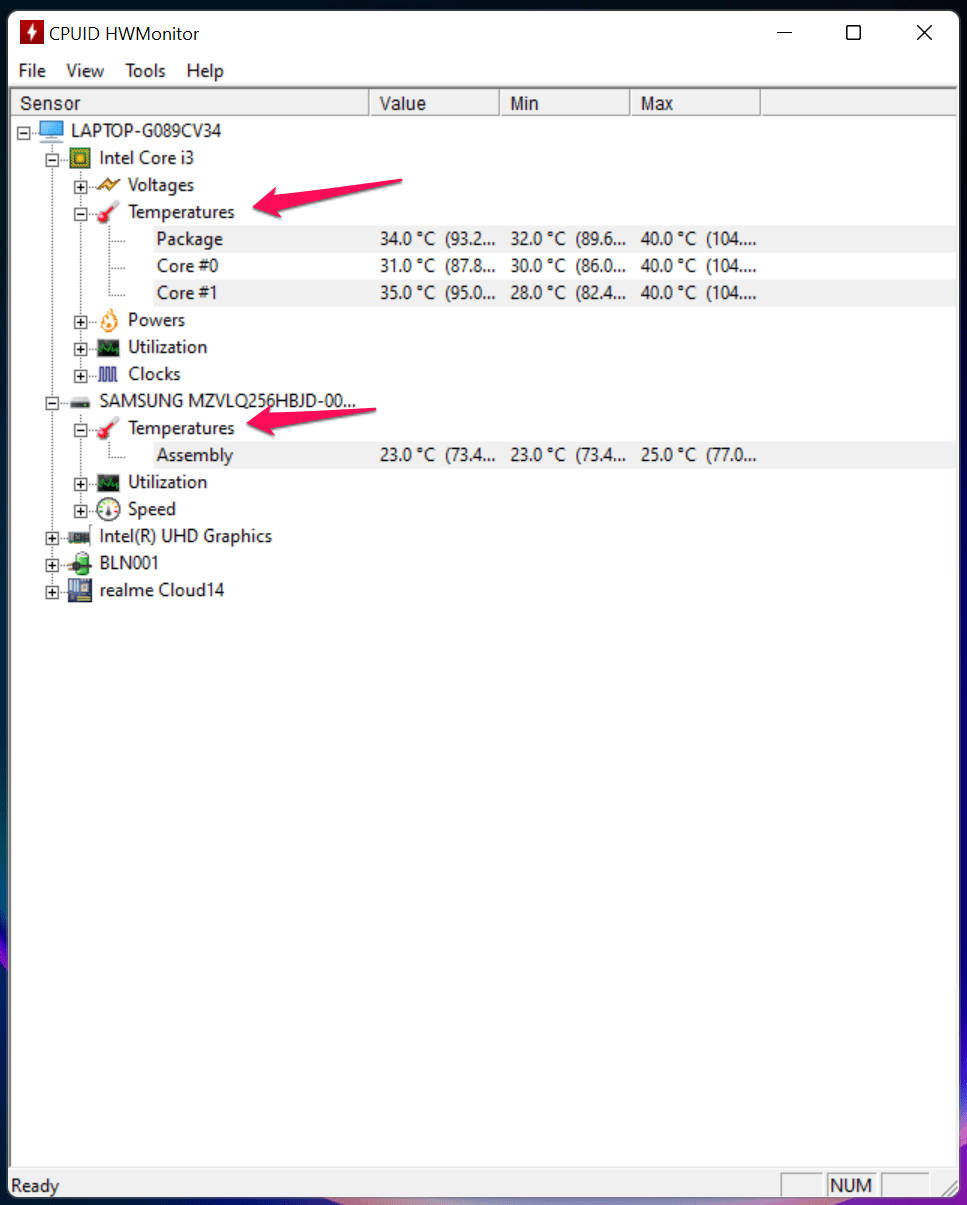
I’m using HWMonitor, and it’s freeware, so you don’t have to pay a single penny for it.
4. Scan Windows System Files
I have upgraded the software from Windows 10 to Windows 11 a few hours back, and it’s a brand-new laptop. I’m eager to scan the Windows system files because I had corrupted system files in the fresh installed OS in the old laptop.
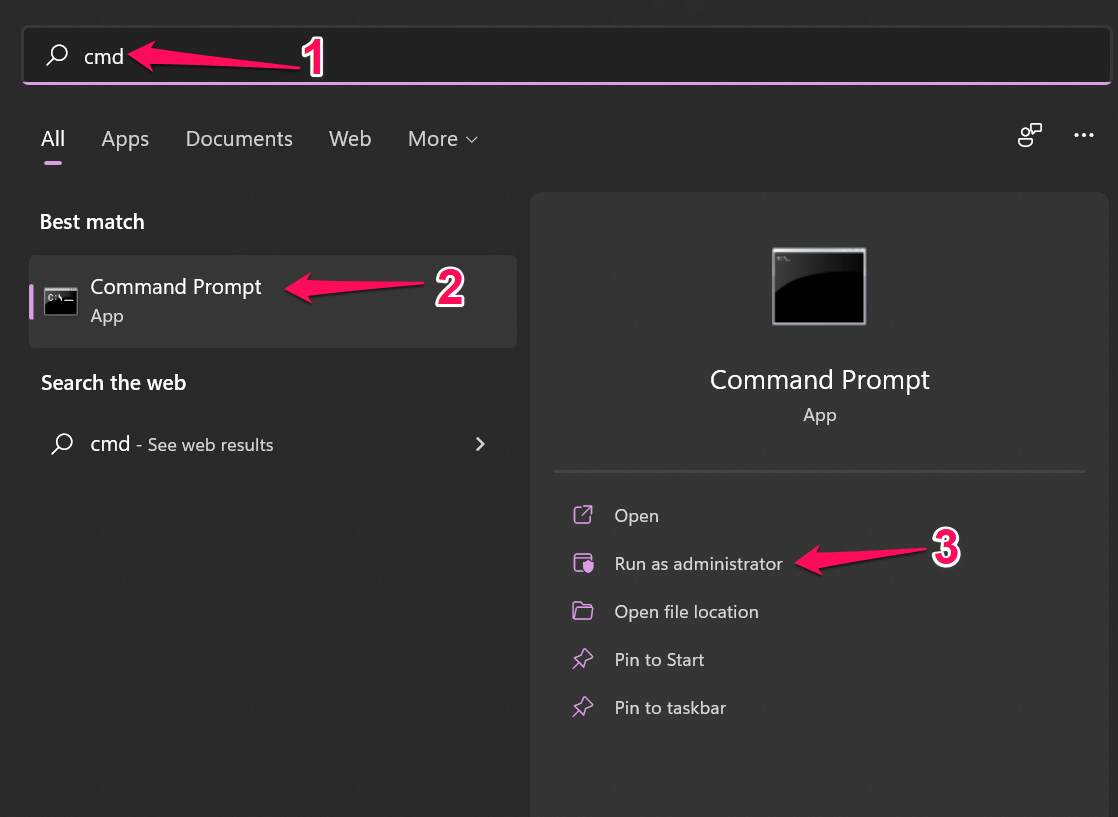
1. Run “Command Prompt” as administrator.
2. Type the command sfc /scannow in the CMD and press the Enter key.
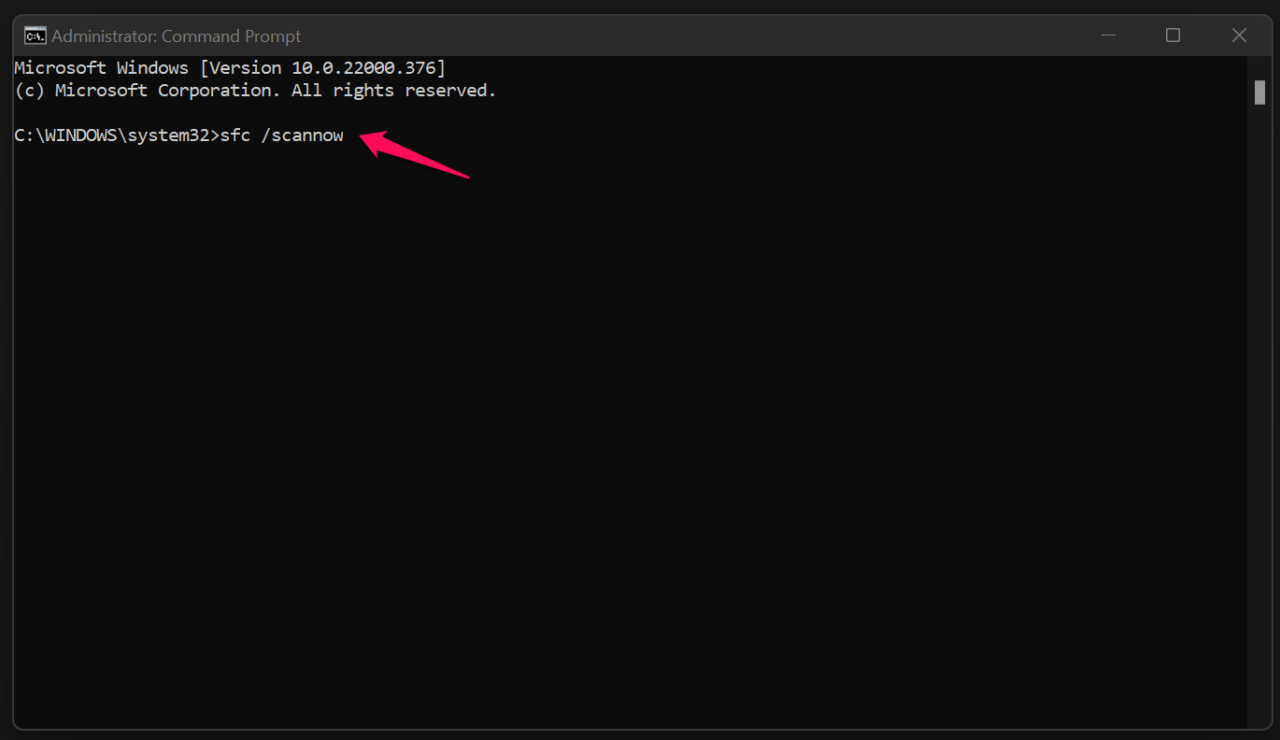
3. The system files verification process begins, and you should wait patiently.
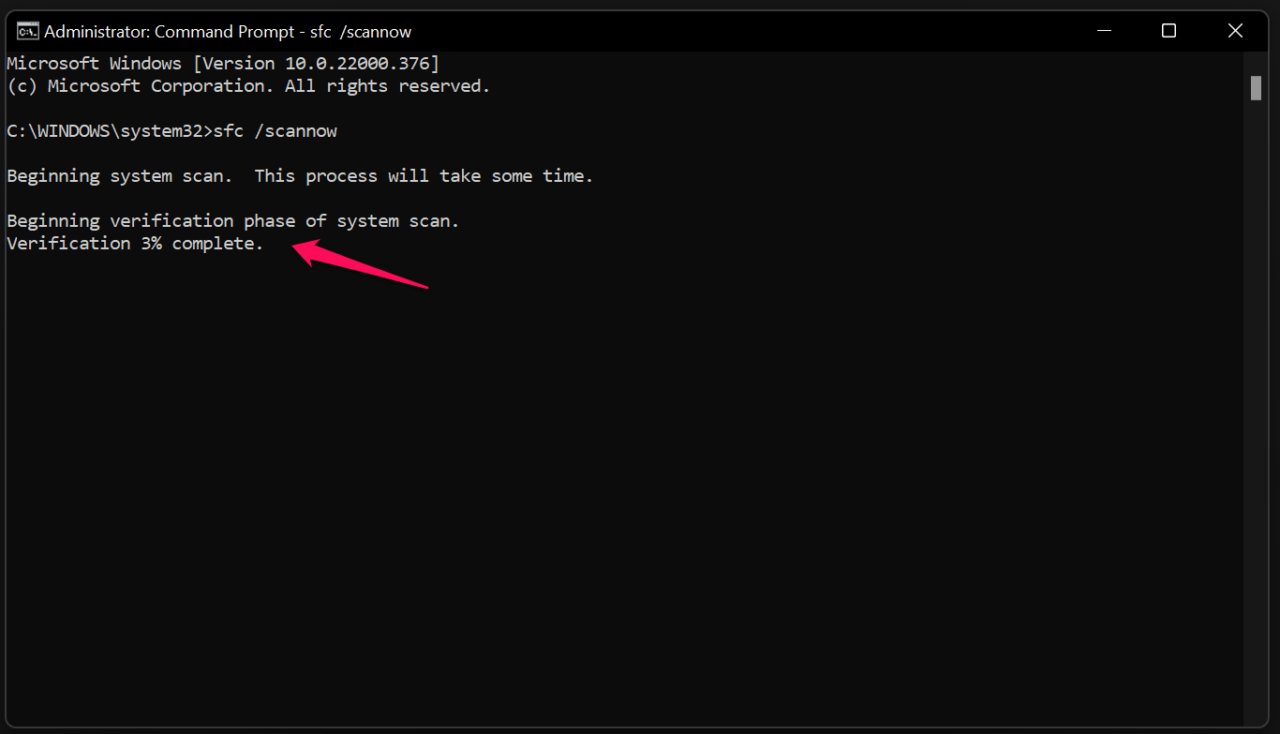
The Command Prompt consumes ten minutes to finish the process in Solid State Drive (SSD), and it will take up to twenty minutes on the mechanical hard drive. My old laptop had a 5200rpm hard drive, and the scanning was slower on it.
4. The verification process finished, and my Windows 11 copy doesn’t have any corrupted system files.
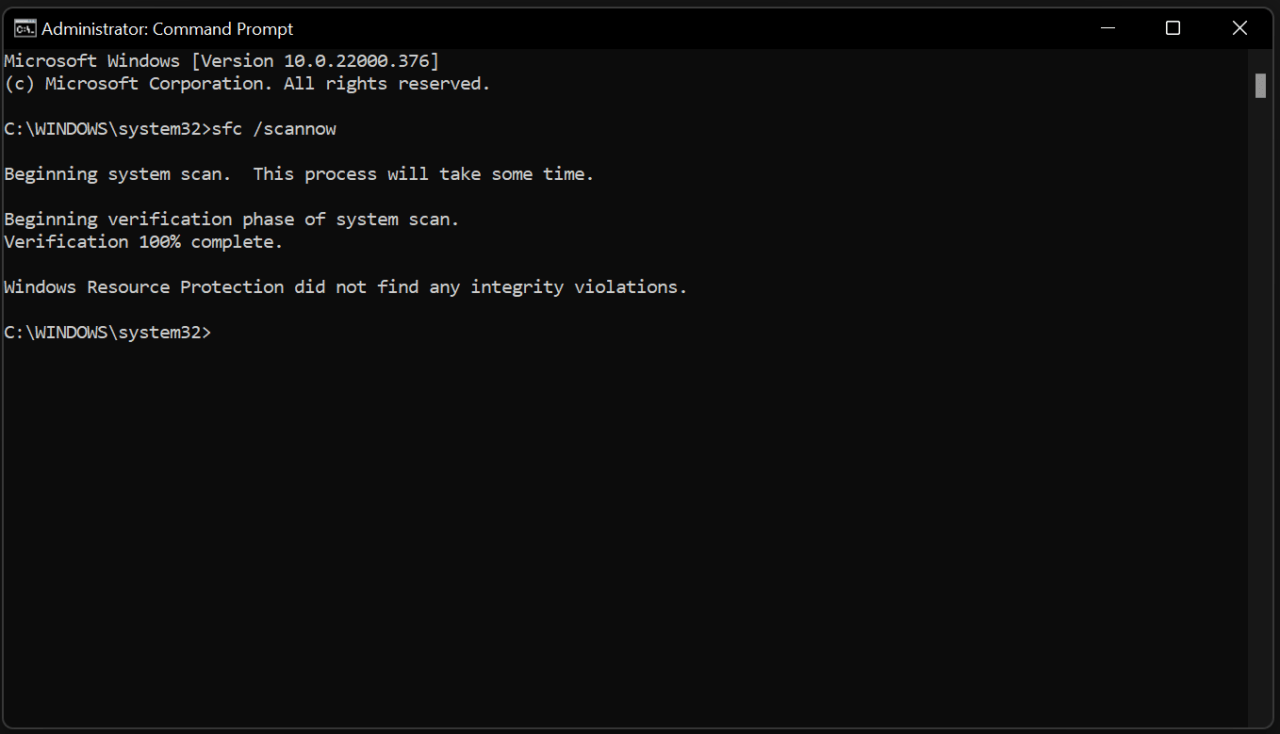
But what if you have a different result on the screen?
Enter into Safe Mode and run the command in the Command Prompt, if the error is “Windows Resource Protection could not perform the requested operation.”
Don’t think twice and reinstall the Windows OS, if the error is “Windows Resource Protection found corrupt files but was unable to fix some of them.”
Restart the PC and run the command again, if the error is “Windows Resource Protection found corrupt files and successfully repaired them.” Reinstall Windows OS if the results don’t change.
5. Windows Updates
Don’t miss the newer software updates, and they are vital to make the environment stable for the older hardware. Newer processors, motherboards, storage drives, and other components are compatible with Windows 11, but older hardware will struggle a little.
Of course, the older hardware supports the latest operating system, but you should update the software. Make sure to install quality updates, feature updates, and cumulative updates. You can ignore the optional updates from Microsoft but they are not necessary.
1. Press the Windows Key + I, and it will reveal the Settings app.
2. Choose “Windows Update” in the main menu.
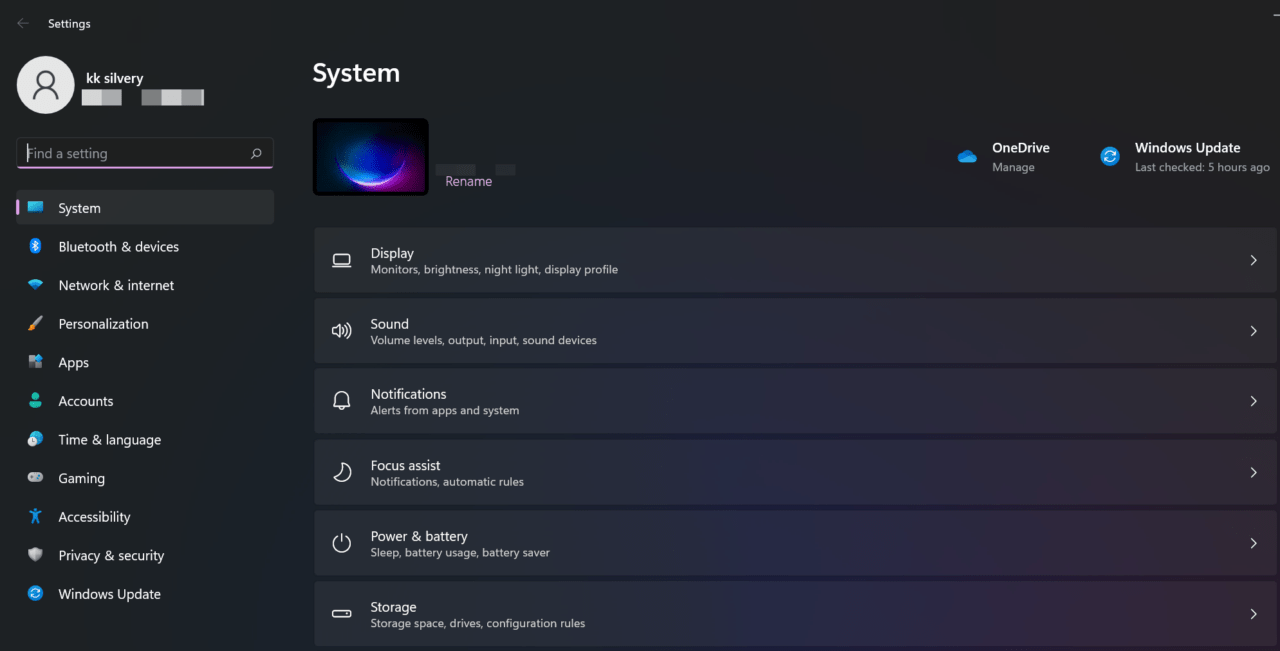
3. Click on “Check for updates” to continue.
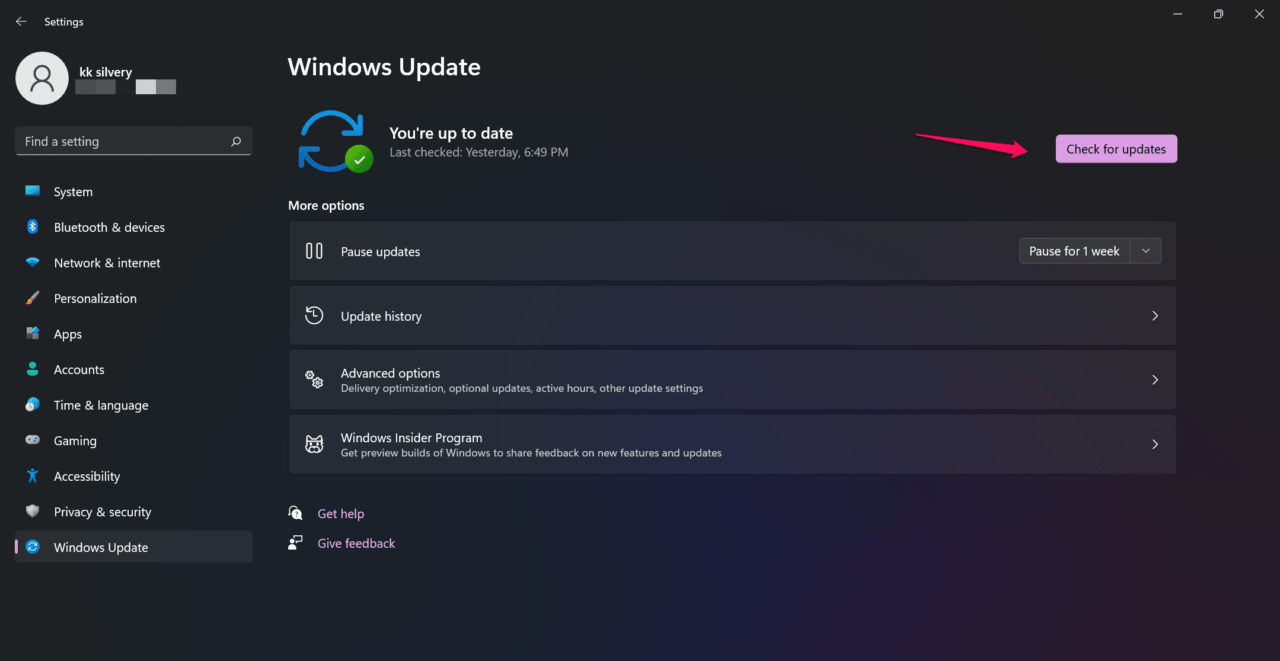
4. Install the drivers, quality updates, and other updates.
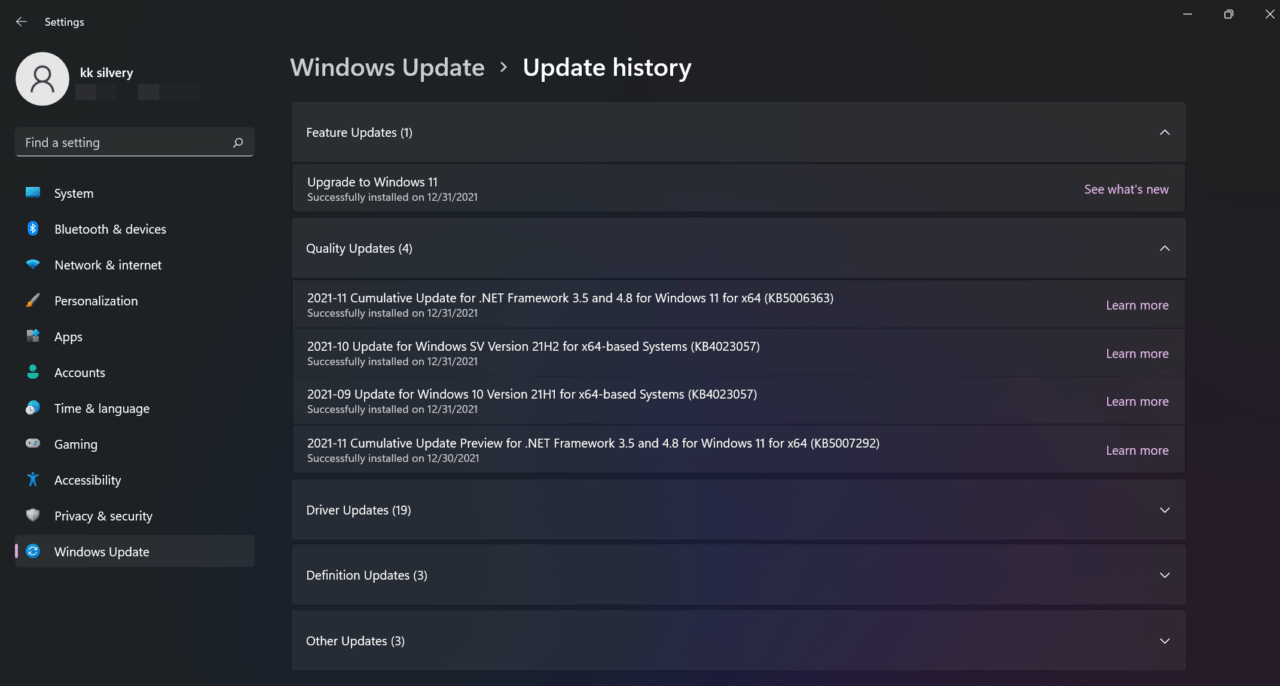
I have installed them all including audio, graphics, USB, and other updates from Microsoft servers. You should be a way of the Microsoft software update services because they do mess up the system instead. I have shown you how to correct the mistake in the latter part, so make sure to read the entire tutorial.
6. Update or Roll Back Drivers
My gaming desktop was having random crashes and it was the GPU driver that was updated from Microsoft servers. You should be careful of Windows Update or else the PC ends up with IRQL Not Less or Equal error. I will show you how to roll back the driver or update it.
1. Open “Device Manager” from the search bar.
2. Click on the suspicious driver and I selected “Display Adapters” from the list.
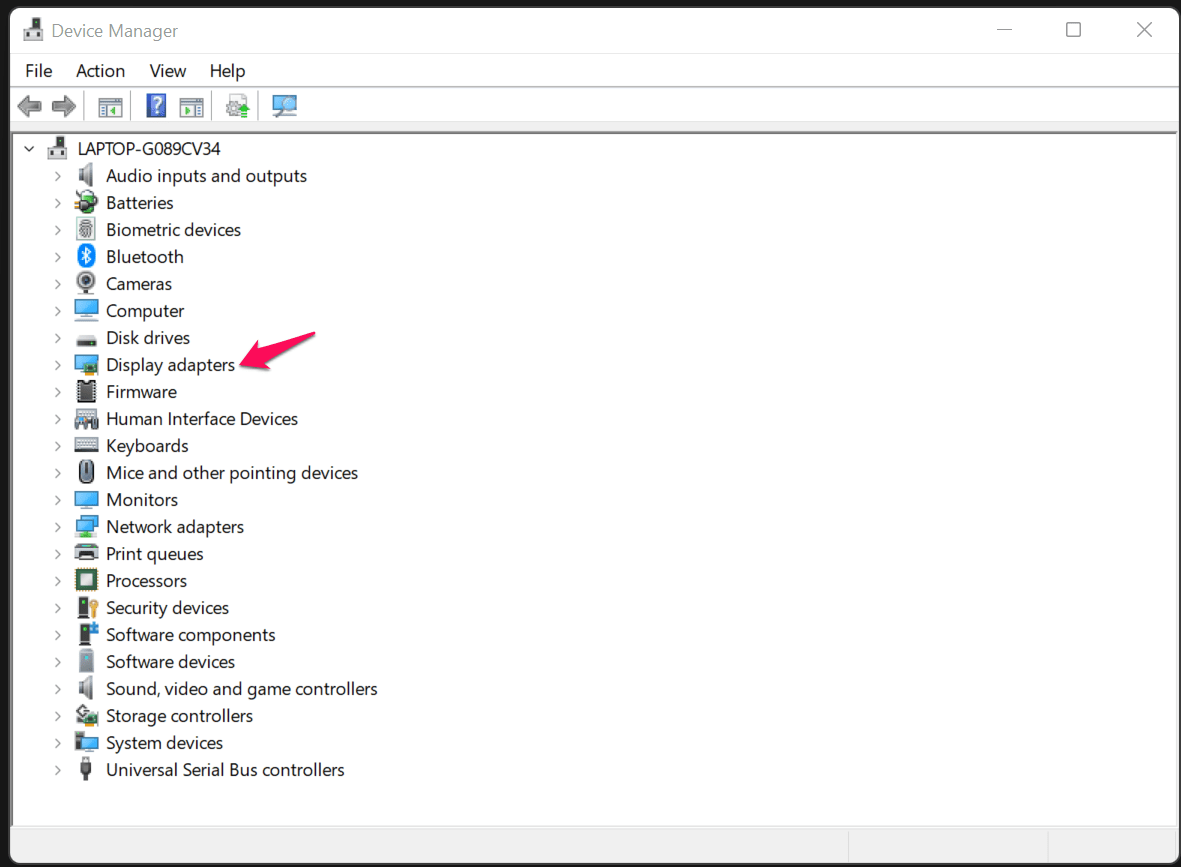
3. Select the driver and right-click more to click on the “Properties” option.
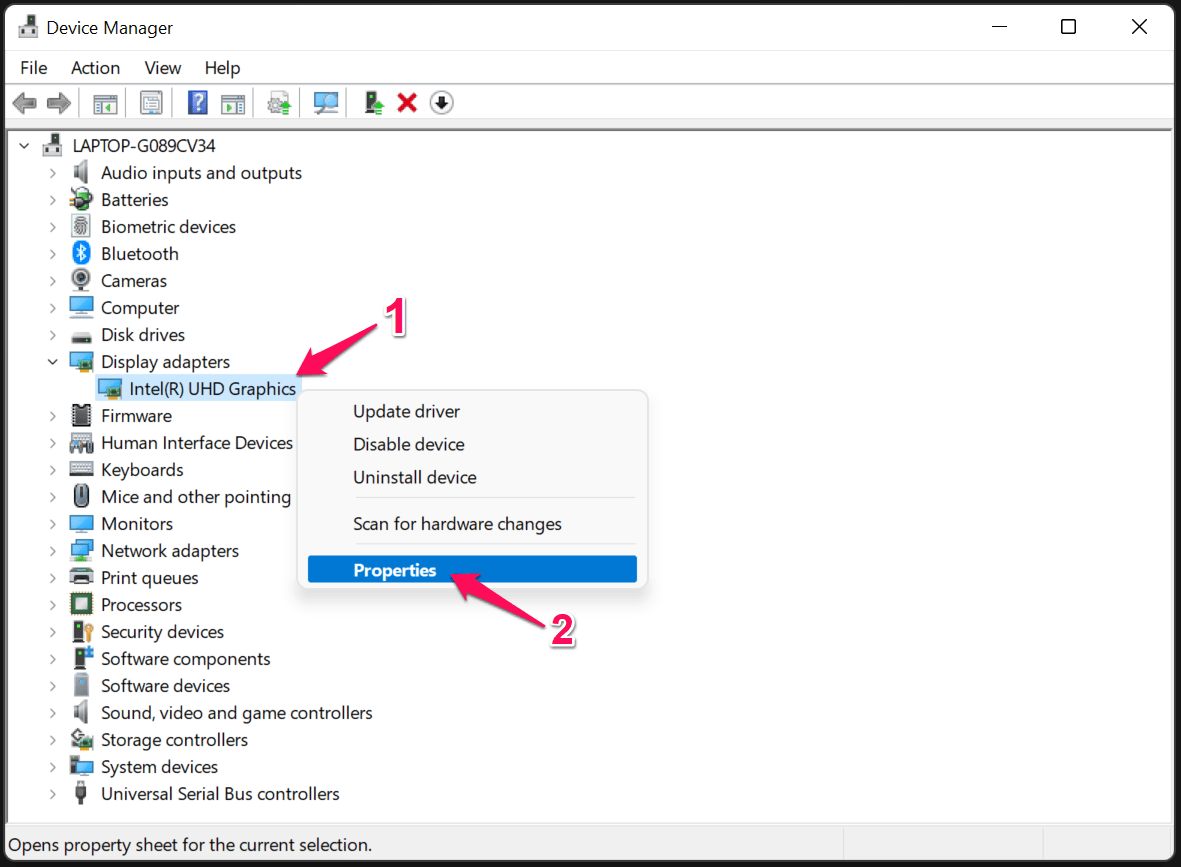
4. Click on “Driver” from the main menu.
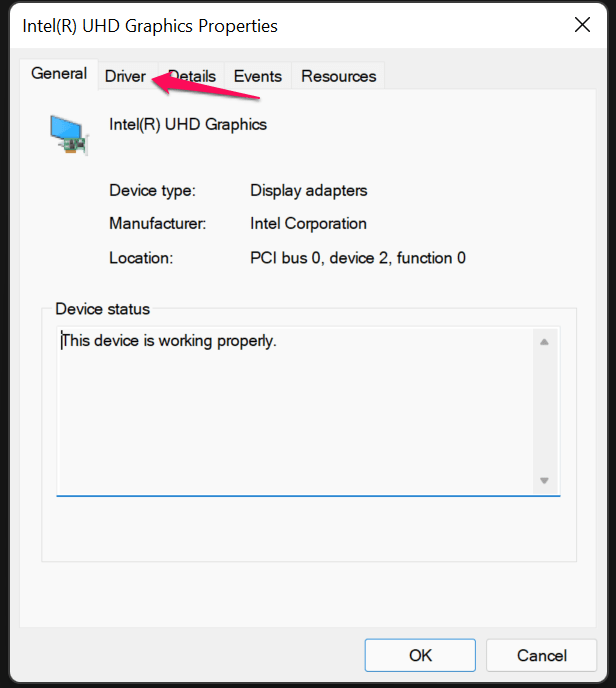
5. Click on “Update Driver” or “Roll Back Driver” to continue.
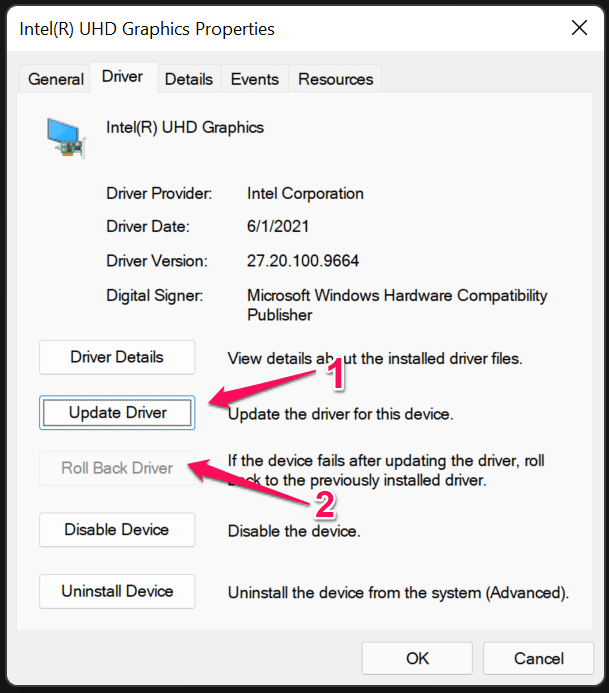
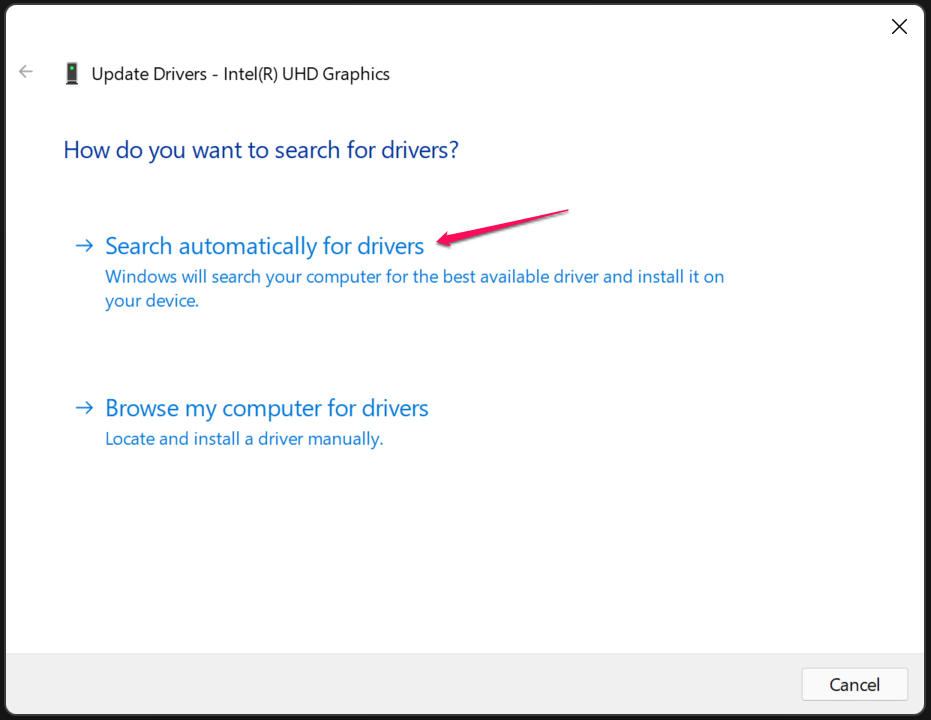
6. I selected “Update Driver” since I didn’t have the other option available, then click on “Search automatically for drivers”.
7. I have the latest Intel graphics drier in the machine.
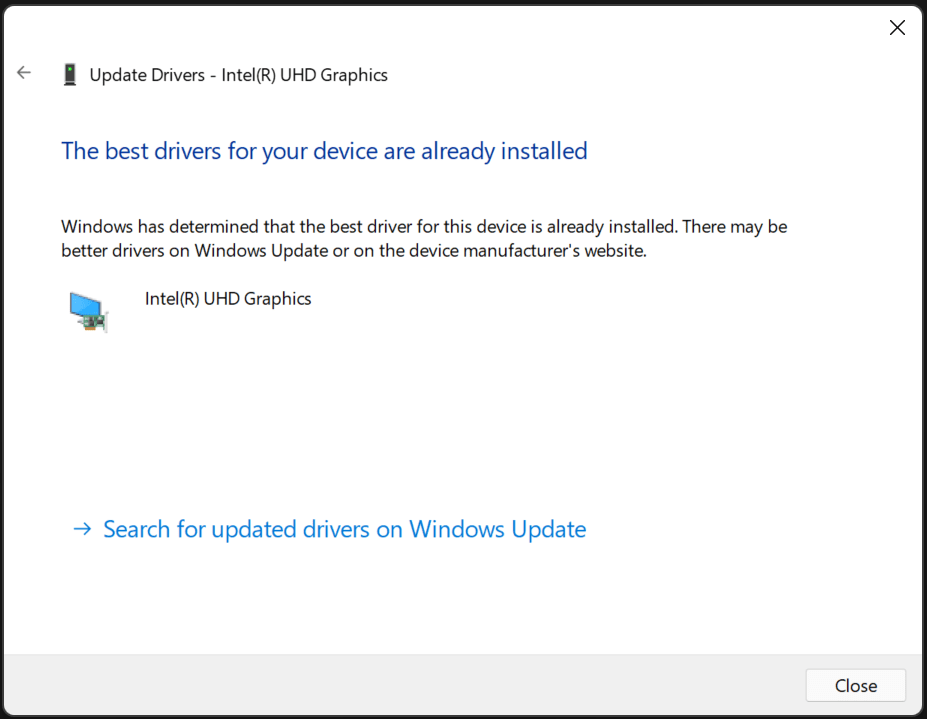
You can roll back the driver to an earlier version that has worked smoothly in the system. There are times when the latest graphics driver or other drivers create new problems instead of solving the existing ones.
7. Overclocked CPU & GPU
How many of you have overclocked the GPU, CPU, and RAM module? Nowadays, AMD & Intel gaming motherboards have features in the BIOS to overclock the memory modules. The latest Win 11 is heavy, and it consumes a large portion of hardware resources, which is forcing the users to overclock the CPU or GPU for the extra fps.
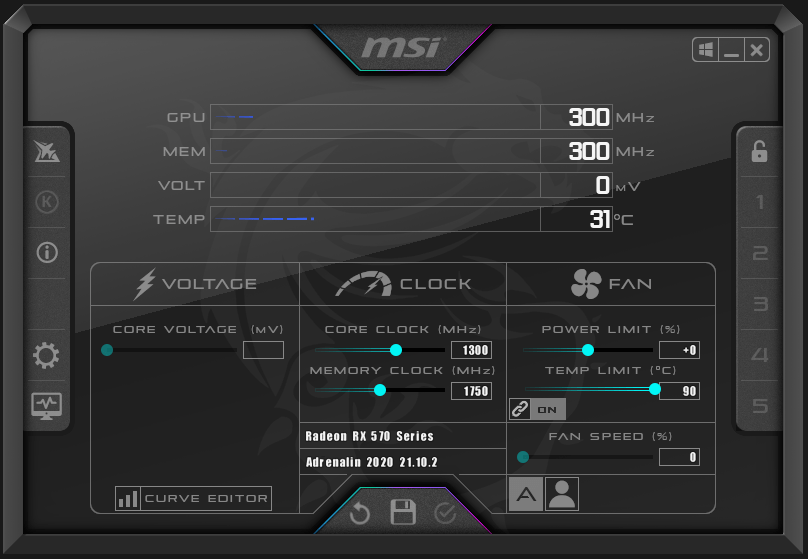
I’m not into RAM overclocking which can mess up the entire rig, and you should develop concrete knowledge in it. I recommend the readers switch to stock clock speeds of the components and get rid of the IRQL Not Less or Equal error.
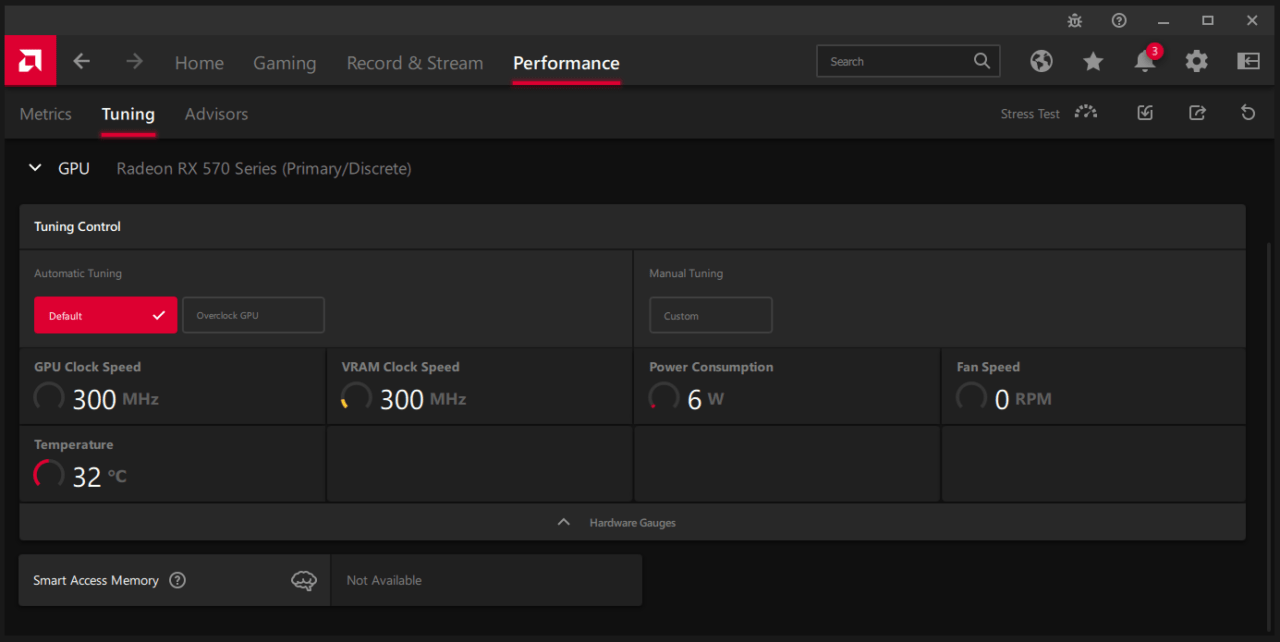
I want to inform the AMD GPU owners that if you have overclocked the graphics card for specific games then it will crash while you are playing the game. I disabled auto-tuning from AMD Radeon Software and my PC crashed multiple times. So you cannot let the AMD default tuning take care of the overclocking part.
8. Faulty Storage Drive
I chose a mechanical hard drive over SSD, and it was the logical choice for storage expansion. 1TB SSD costs $150, while a 1TB hard drive (7200rpm) costs less than $40 online. I prefer storing all games, videos, content, and files in the 1TB mechanical drive, but it has moving parts in it. Your HDD might be faulty, and you should determine the disk’s health.
1. Open “This PC” or file explorer.
2. Select the drive or partition, then right-click the mouse to choose “Properties” from the options.
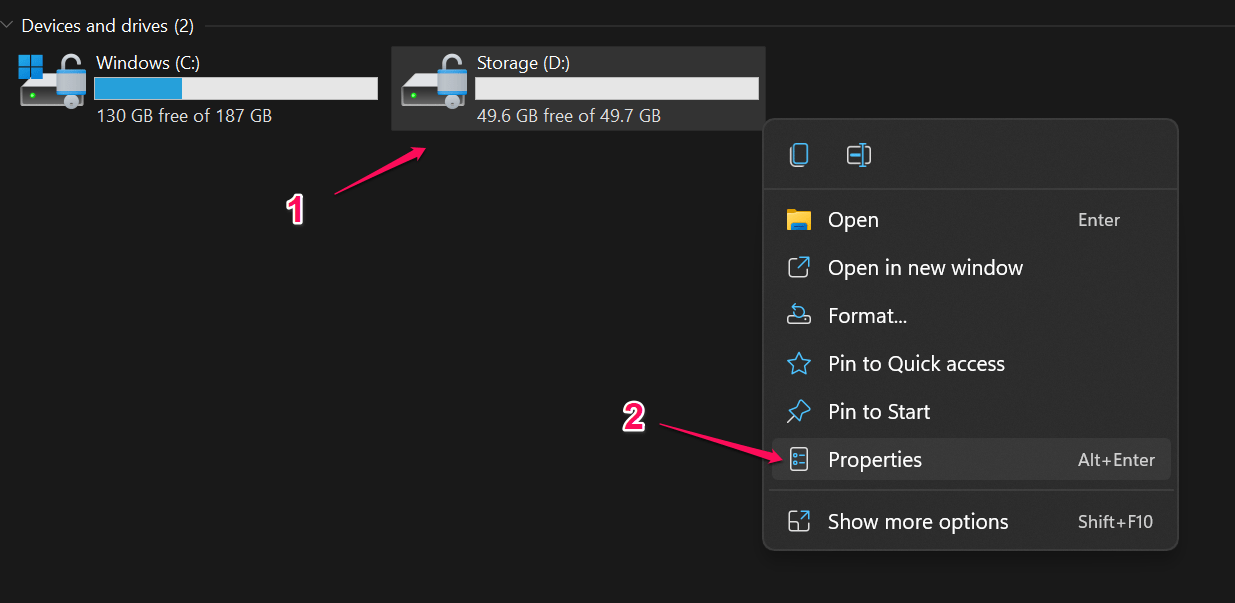
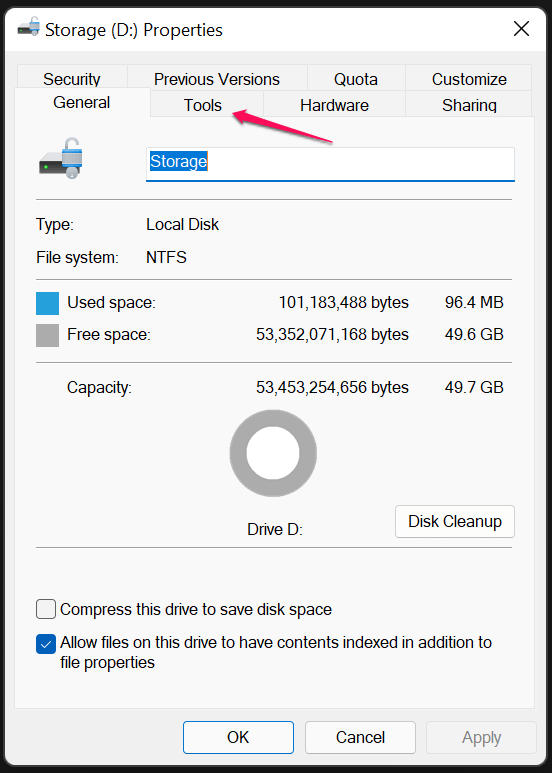
3. A new tab shows up on the screen and selects “Tools” from the main menu.
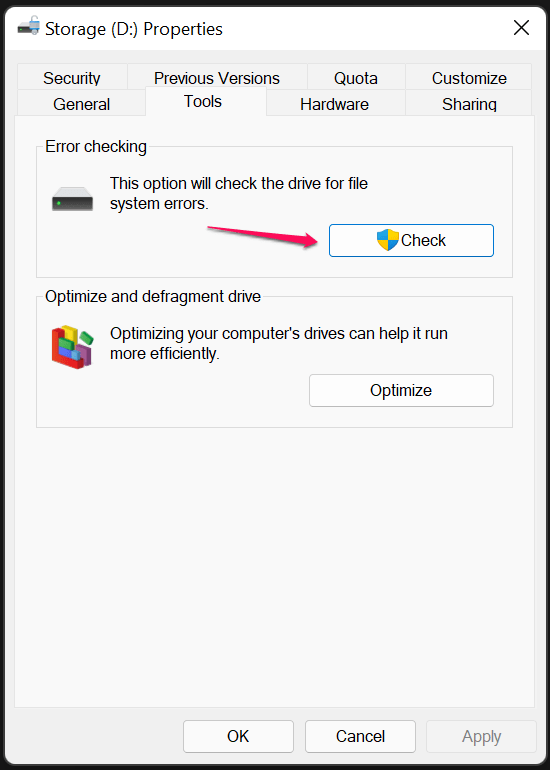
4. Click on “Check” to scan the drive.
5. A new tab shows up and selects “Scan drive” to begin scanning the drive.
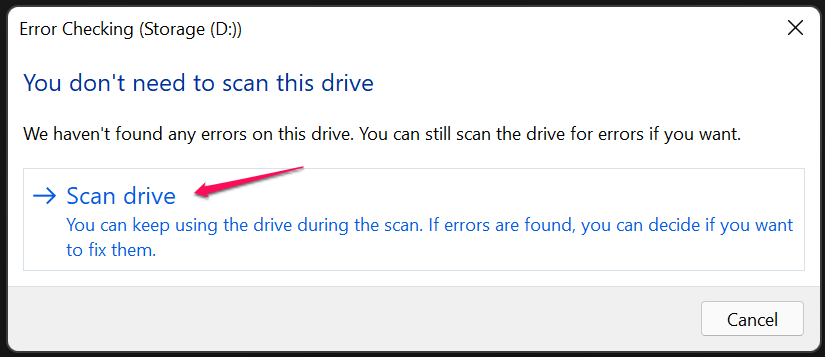
6. Click on “Close” when completed.
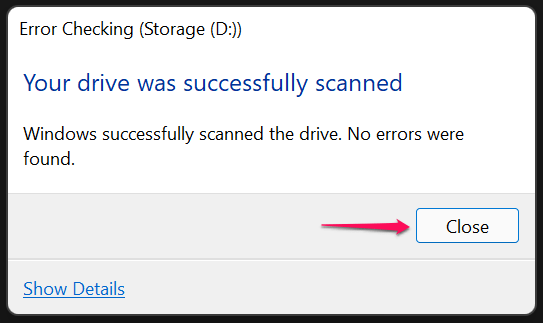
You should run the scan on SSD, HDD, and partitions to find the issue. Try to claim a warranty in the nearby service center if the storage drive has bad sectors or not working properly. You should visit the authorized service center if the hard drive is making cracking sounds or clicking sounds.
9. Identify Faulty Memory Module
RAM is a crucial component in the system, and Windows stores temporary program data in the Random-access memory. A faulty memory module triggers IRQL Not Less or Equal error in the machine. We will use Windows inbuilt tool to test the memory module and find out if it should be replaced or move on to the next solution.
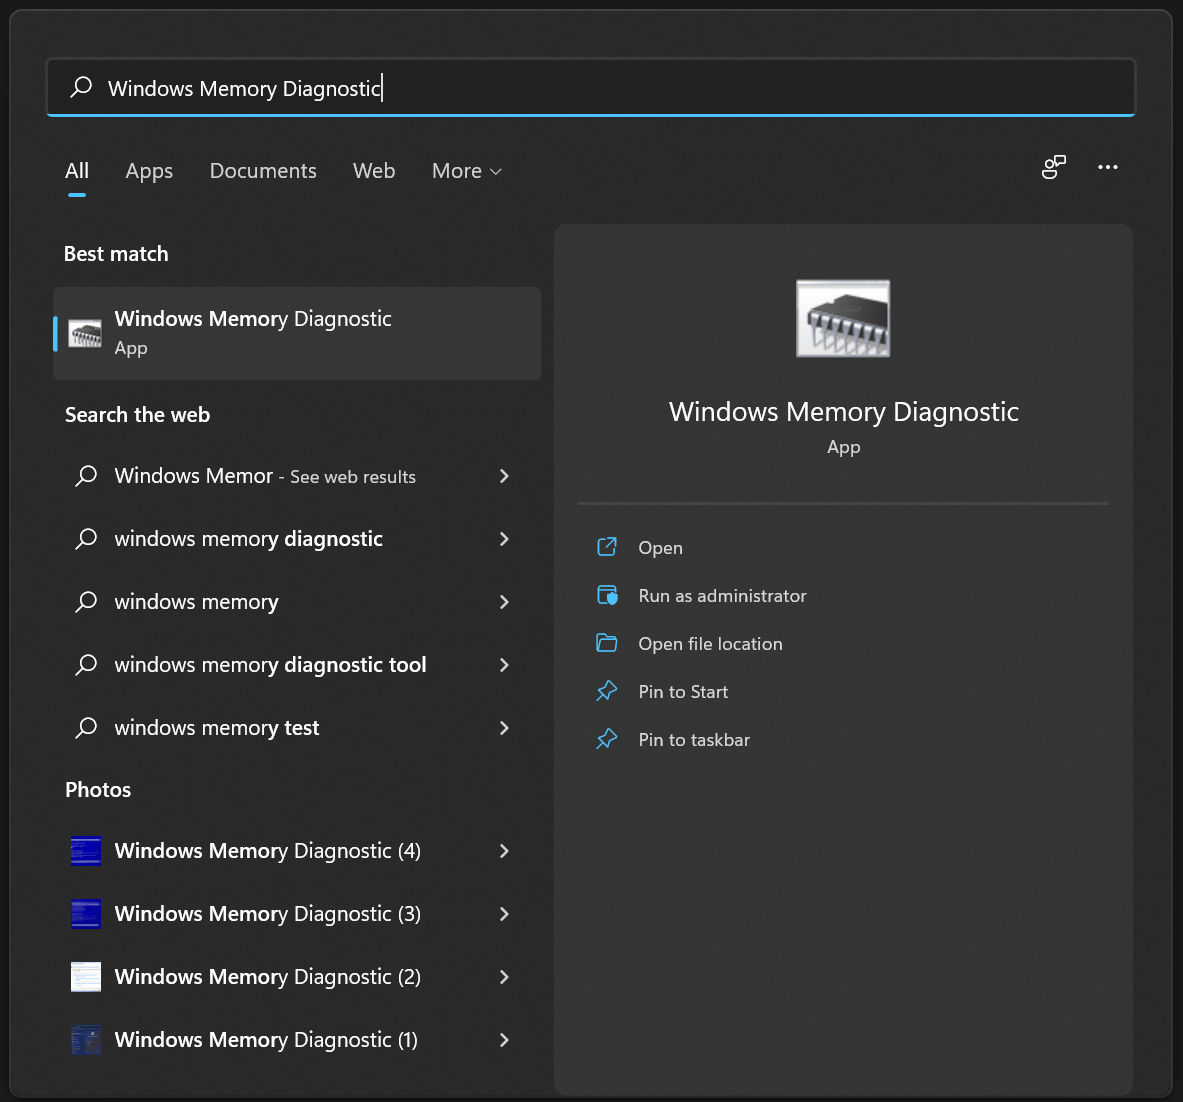
1. Open Windows Memory Diagnostic Tool from the search bar.
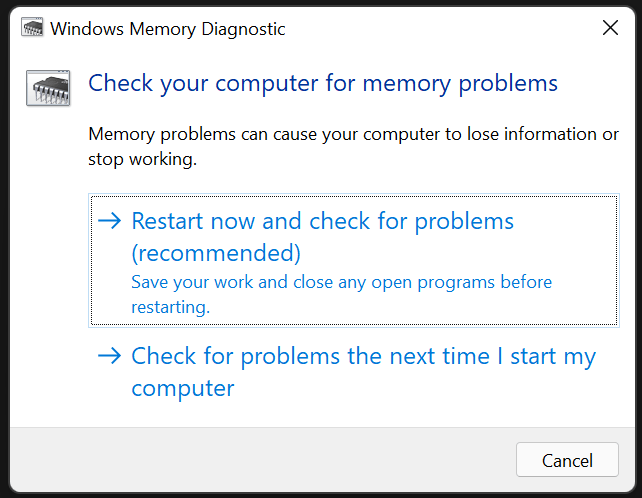
2. Windows Memory Diagnostic tool shows up on the screen, and click on the “Restart now and check for problems (Recommended)” option.
Your PC will restart.
Note: Save unsaved work in the system, and Windows will restart after you select the first option. Of course, you can choose the “Check for problems the next time I start my computer” option.
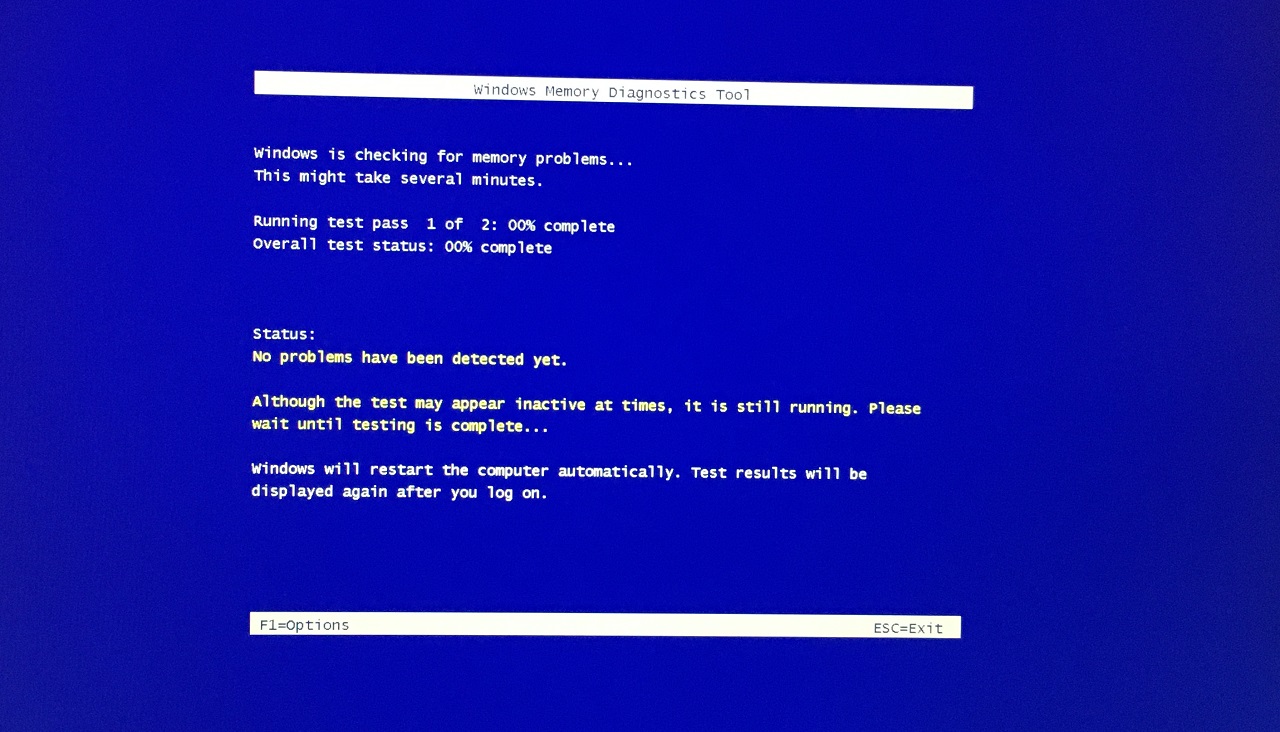
3. The memory module testing begins, and it is phase one.
4. The testing continues in phase two.
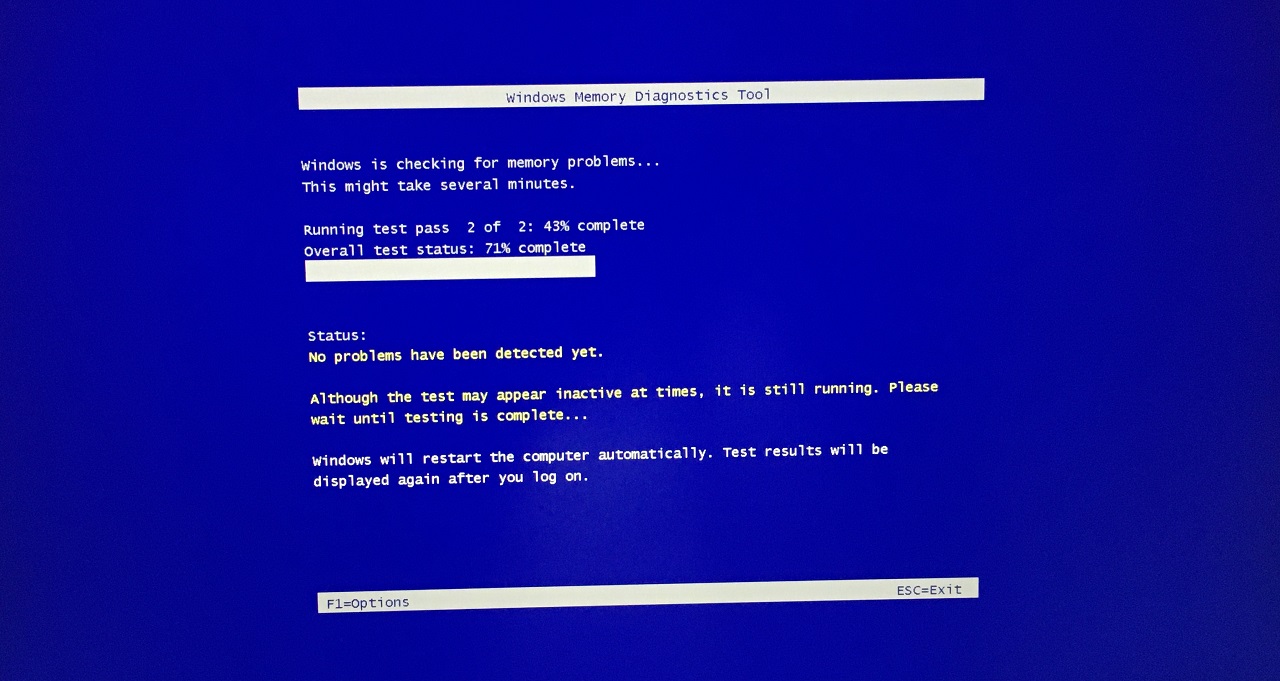
Note: The inbuilt tool, your PC will restart again, and it will load the Lock Screen. The memory module testing results show up in the notification area.
10. Uninstall Software Updates
Microsoft has messed up multiple times in the past and the contribution goes to the unstable updates. You can unload the recent quality and feature updates if they happened due to IRQL Not Less or Equal errors in the system.
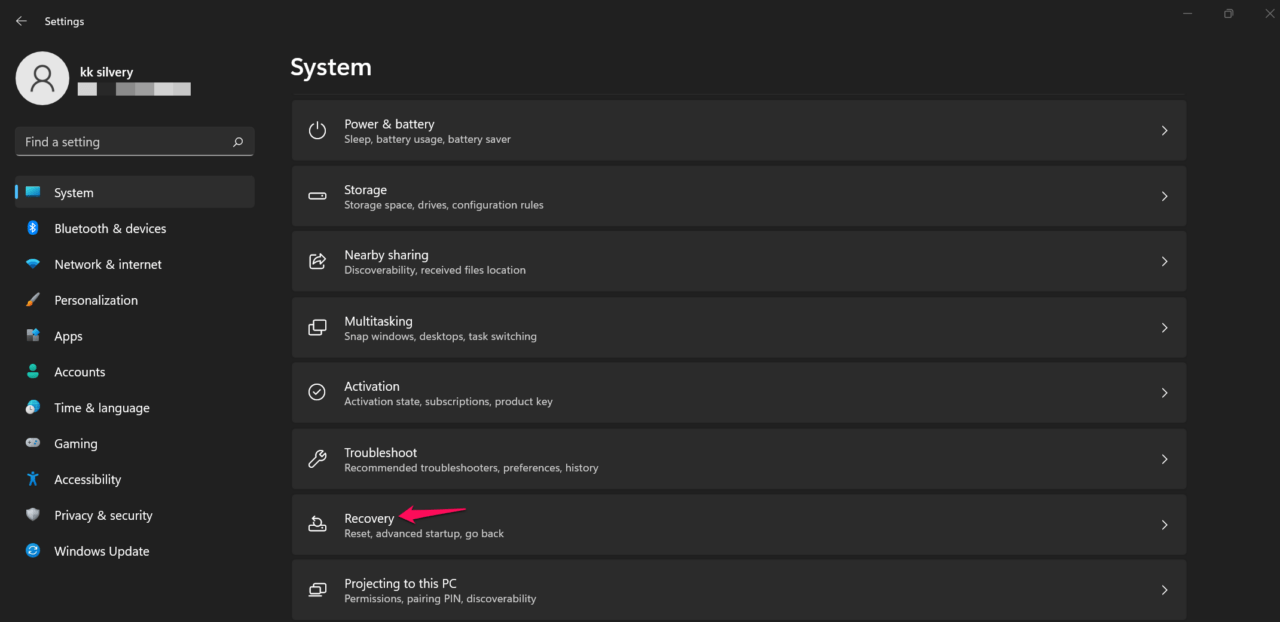
1. Open “Settings” from the search bar.
2. Select “System” then click on the “Recovery” option.
3. Click on the “Restart now” option.
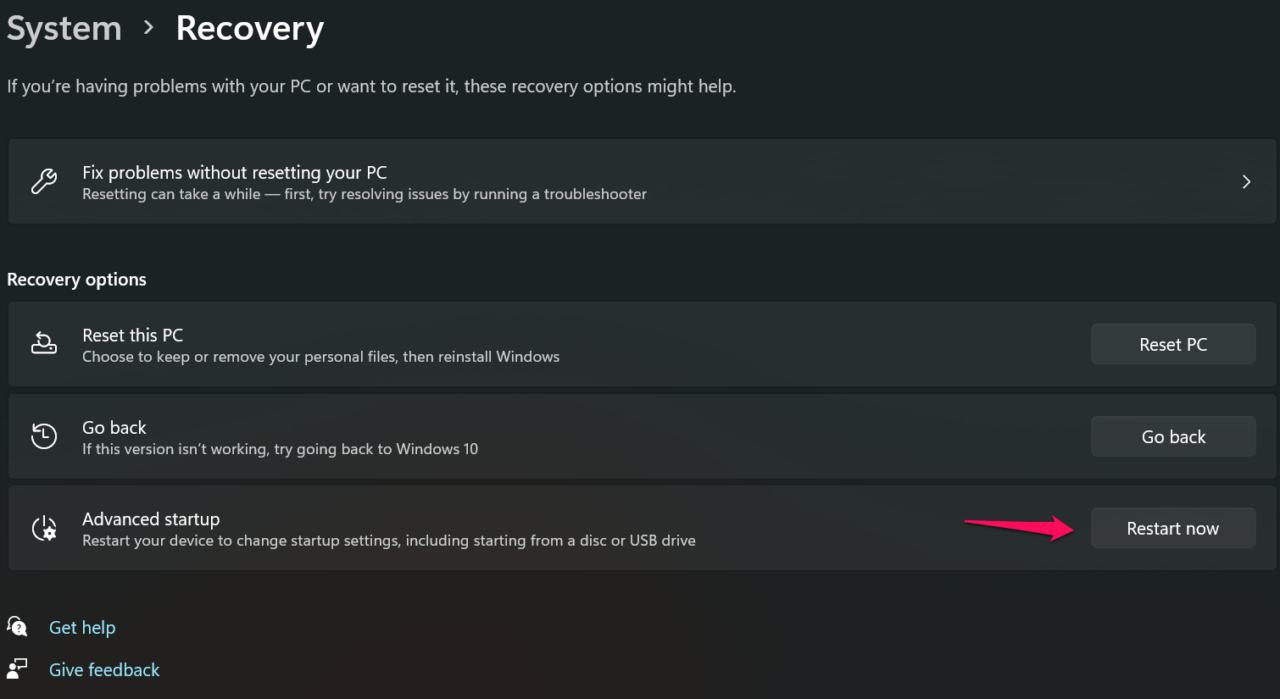
Your PC restarts, and it will land on recovery mode.
4. Choose the “Troubleshoot” option.
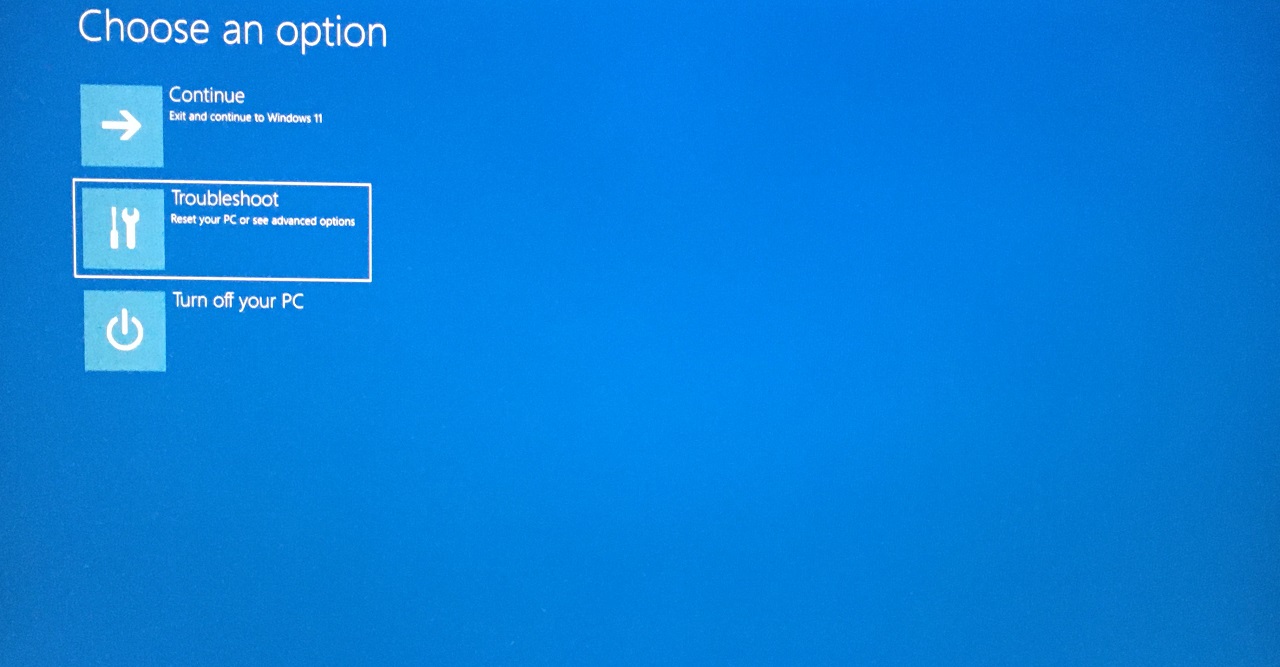
5. Choose the “Advanced options” option.
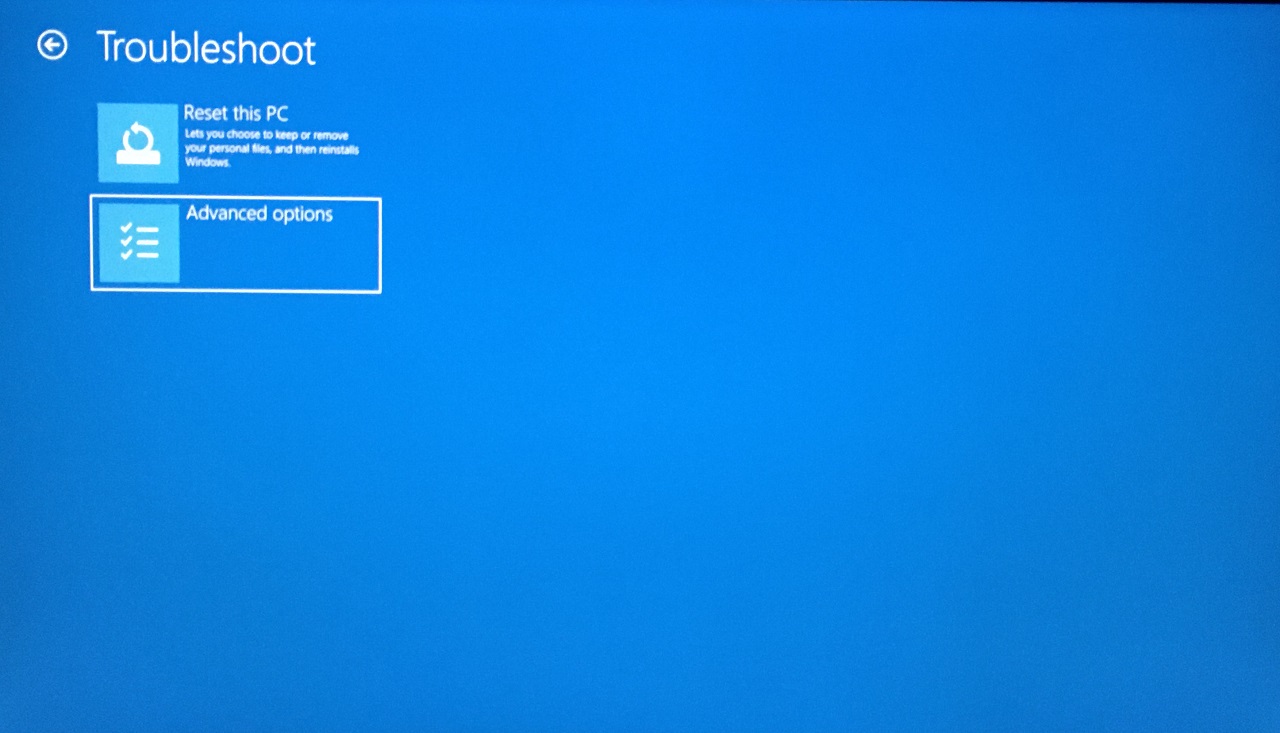
6. Select the “Uninstall updates” option.
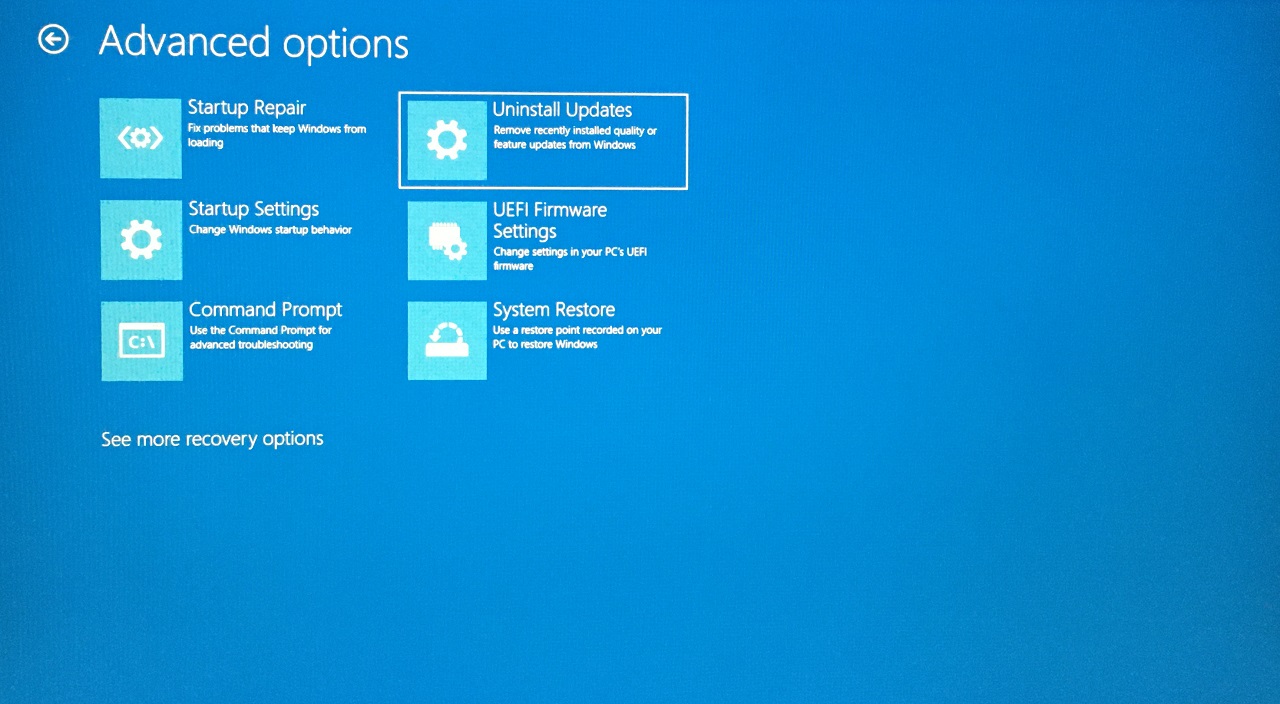
7. Click on “Uninstall latest quality updates”.
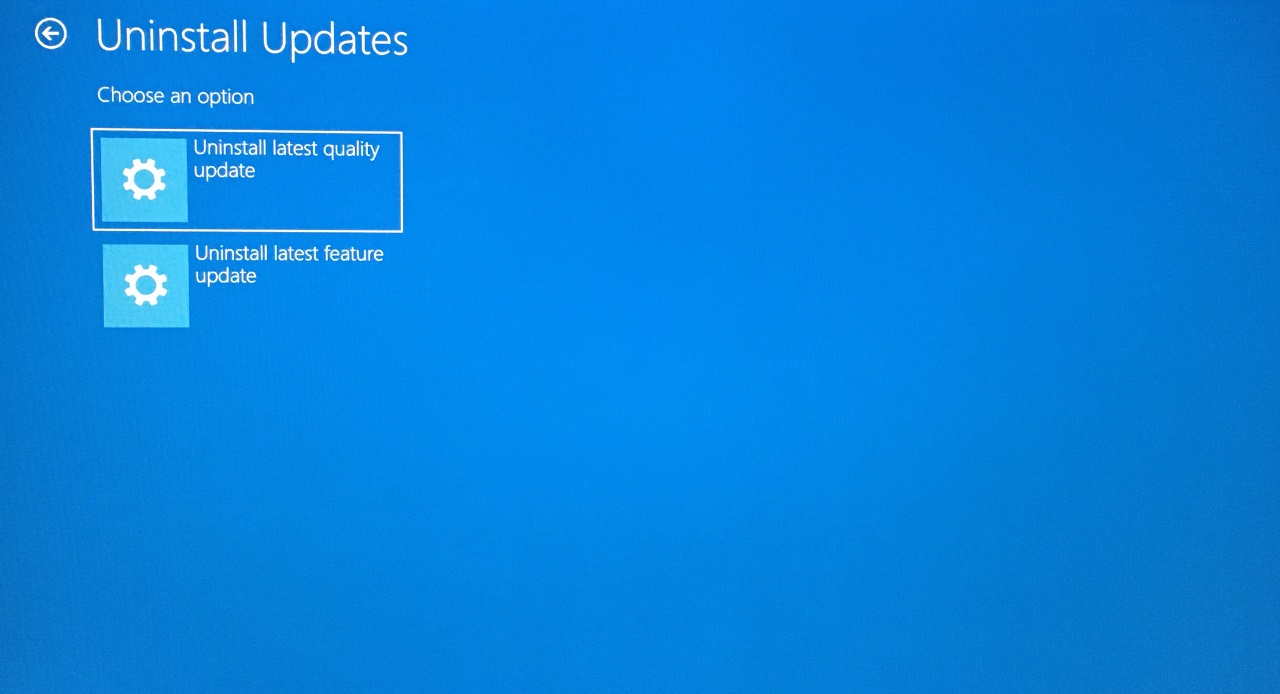
8. Click on the “Uninstall latest quality updates” button.
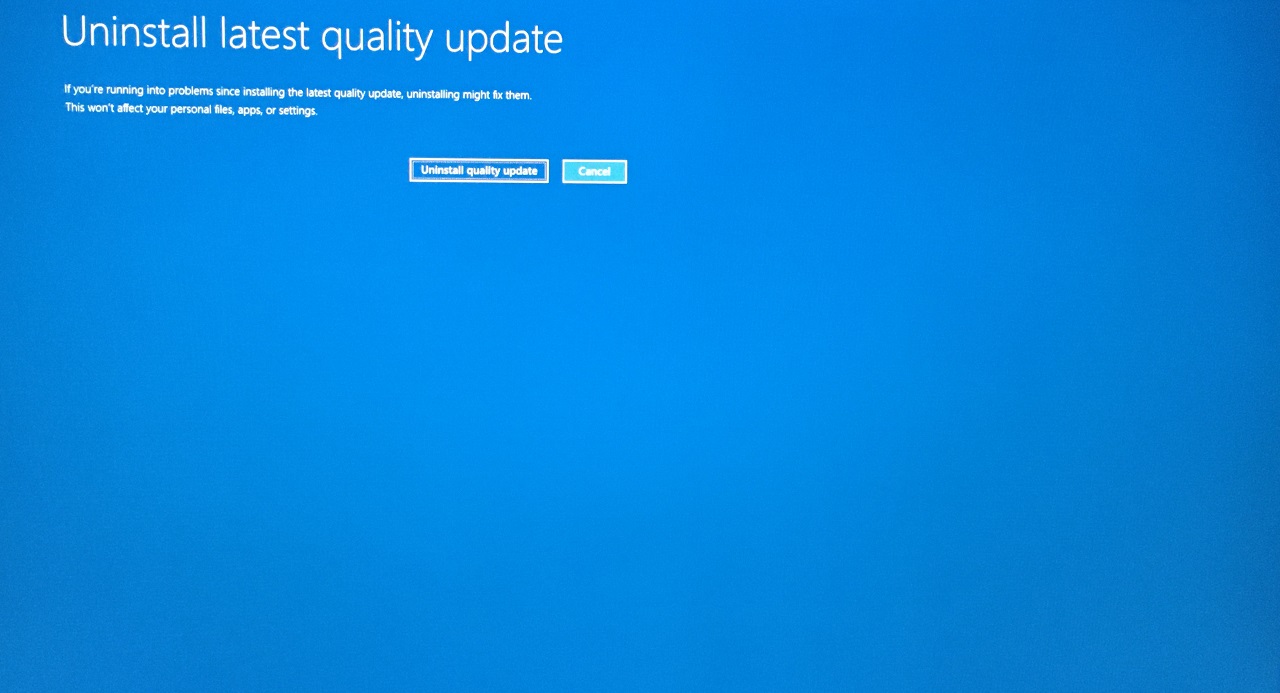
The system uninstalls the quality updates from the machine.
Go back and do the same with the latest feature updates, so you don’t have to worry about the IRQL_NOT_LESS_OR_EQUAL code.
11. Perform System Restore
The operating system creates multiple restore points so you can go back to an earlier point. You have to be ready for the worst-case scenario, and there is a chance that system restore may fail.
1. Open “Settings” from the search bar.
2. Select “System” then click on the “Recovery” option.
3. Click on the “Restart now” option.
Your PC restarts, and it will land on recovery mode.
4. Choose the “Troubleshoot” option.
5. Choose the “Advanced options” option.
6. Select the “System Restore” option.
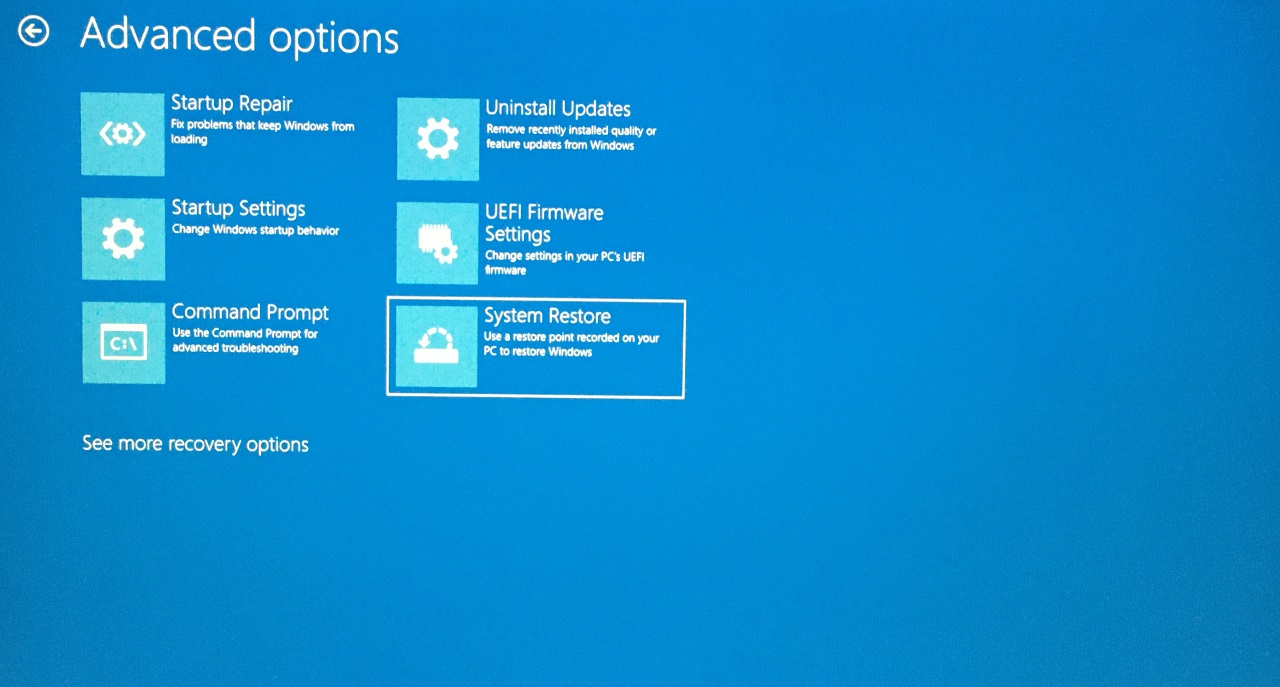
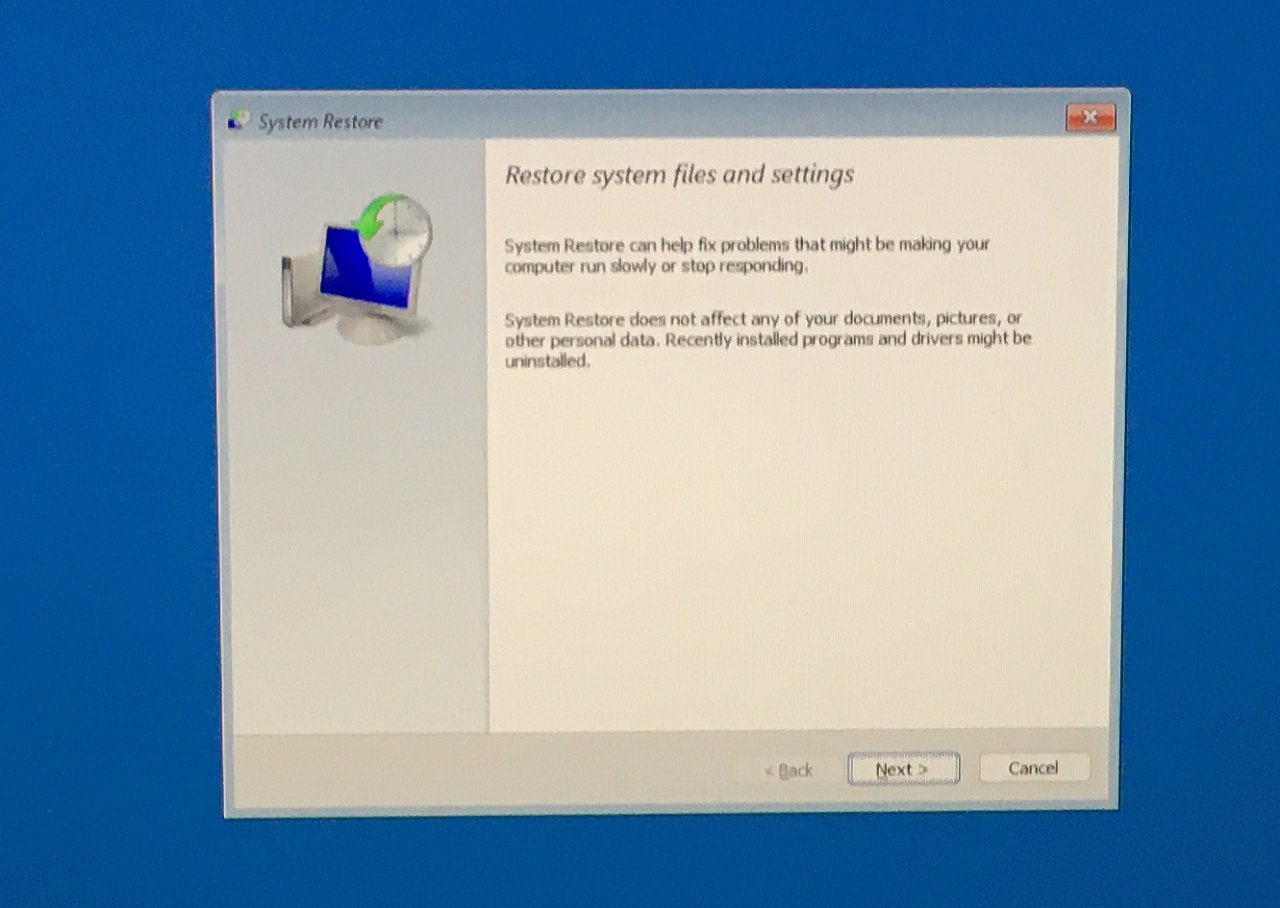
7. System restore wizard shows up on the screen and click on “Next” to view restore points.
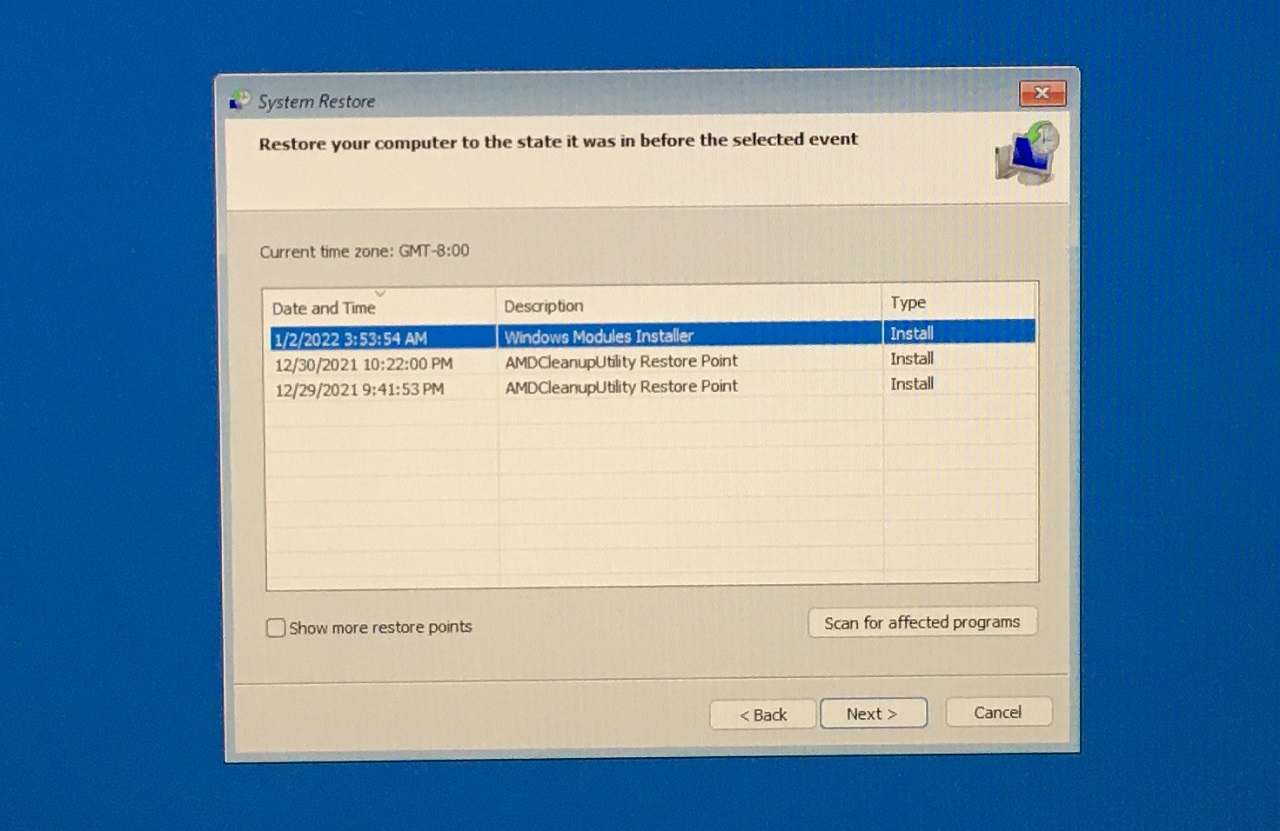
8. Select a restore point then click on “Next” to continue.
9. Click on “Finish” to begin the process.
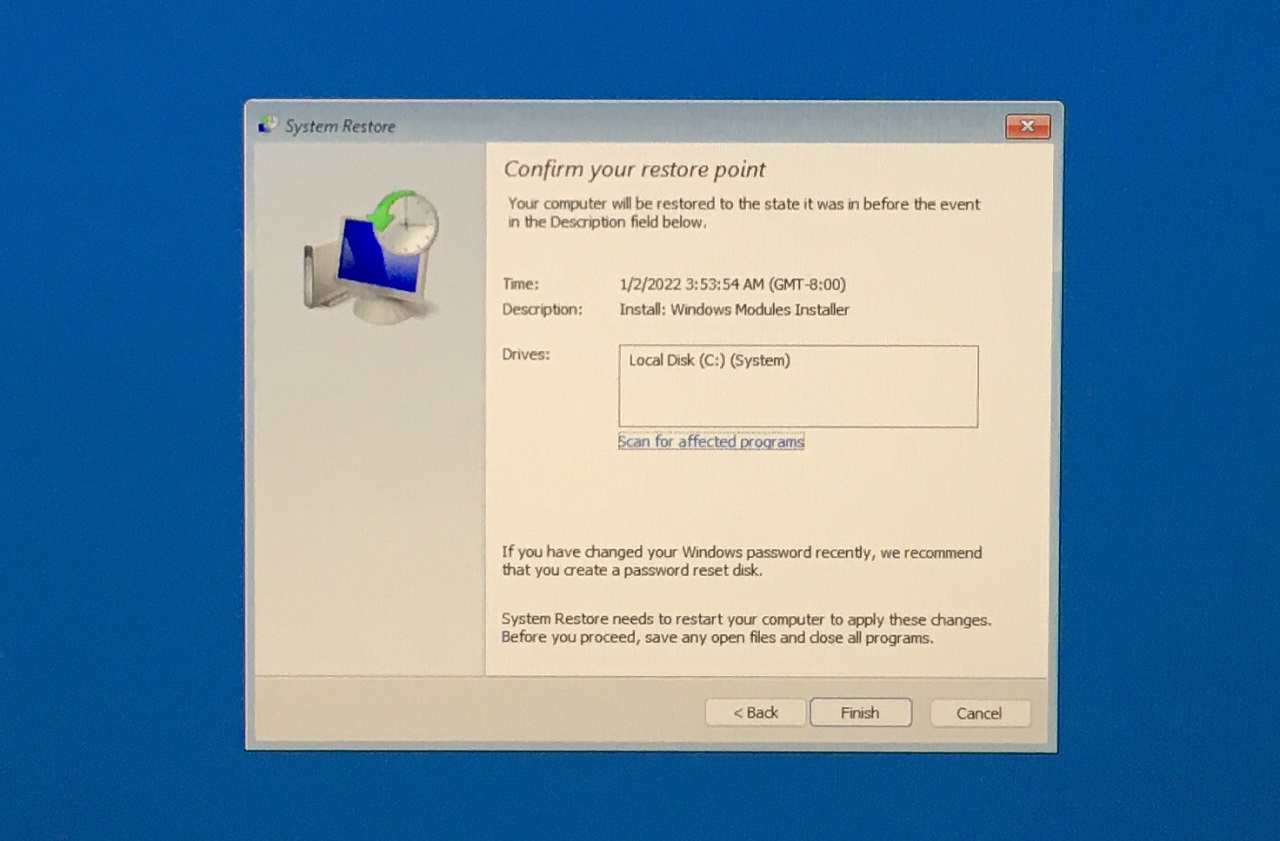
The PC restarts and it will flash “System restoring” on the monitor or internal display. You have to wait patiently, and I have performed a system restore to find out the process duration. My Core i3 11th gen machine took twenty minutes to finish the restoration process.
Bottom Line
I upgraded the Windows machine from the 10th version to the 11th version, and then I was greeted with an “IRQL Not Less or Equal” error on the screen. I solved the problem by reinstalling the software from a bootable USB drive and installing the Windows 11 compatible drivers in the machine. Let us know how you solved the 0xA: IRQL_not_less_or_equal in the comment section below.
If you've any thoughts on [Fixed] IRQL_NOT_LESS_OR_EQUAL BSOD Error in Windows 11, then feel free to drop in below comment box. Also, please subscribe to our DigitBin YouTube channel for videos tutorials. Cheers!
