Hyper-V is a technology that’s highly beneficial not only for developers and system administrators but also for students in colleges and universities.
It allows students to operate multiple operating systems and applications on one physical computer through virtual machines.
This becomes particularly advantageous for those in computer science and engineering fields who require the ability to experiment with different software environments and coding projects.
By activating Hyper-V on their Windows 11 PC, students can save both time and expenses by eliminating the need for physical hardware.
Additionally, they gain the advantage of flexibility and convenience by being able to run various operating systems and applications on a single device.
This guide will walk you through the process of enabling Hyper-V on your Windows 11 device. It covers everything from checking if your computer is compatible to configuring the Hyper-V settings.
This guide will give you a comprehensive understanding of using Hyper-V on a Windows 11-enabled device.
Let’s cut to the chase!
What Are the Uses of Hyper-V?
Hyper-V serves as an inbuilt virtualization utility enabling the operation of several operating systems virtually within your system, without any impact on your primary OS.
This eliminates the necessity for external hypervisor solutions like VirtualBox or VMware Workstation.
Hyper-V’s virtual machine applications entail:
- Testing software across various operating systems using numerous virtual machines on a single host system.
- Execution and experimentation of software designed for previous Windows versions or non-Windows operating systems.
Requirements for Enabling Hyper-V on Windows 11
Hyper-V is offered as an optional functionality within Windows 11 Pro, Enterprise, and Education editions. To determine your specific Windows edition, navigate to Settings > System > About. Within the Windows specifications area, your edition will be indicated.
For those with the Home edition, the process of installing Hyper-V on Windows 11 Home is outlined here. It involves executing a batch script designed to install Hyper-V on systems that might not initially support it.
The smooth operation of virtual machines and various applications depends on the quantity of virtual machines and their types, necessitating potentially increased resources.
Furthermore, activating Hardware Virtualization in the BIOS is essential. Although crucial for running virtual machines on your Windows system, this feature is frequently deactivated by default.
How to Install Hyper-V on Windows 11?
To activate Hyper-V on Windows 11 Home, follow these steps:
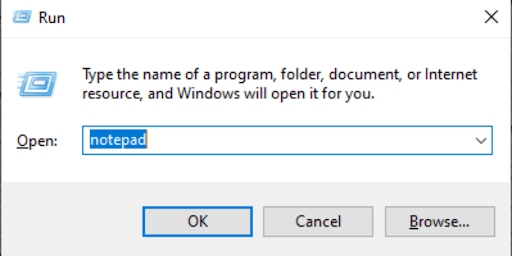
- Launch a fresh Notepad document. To accomplish this, press the Windows key + R, enter “notepad,” and then click on OK.

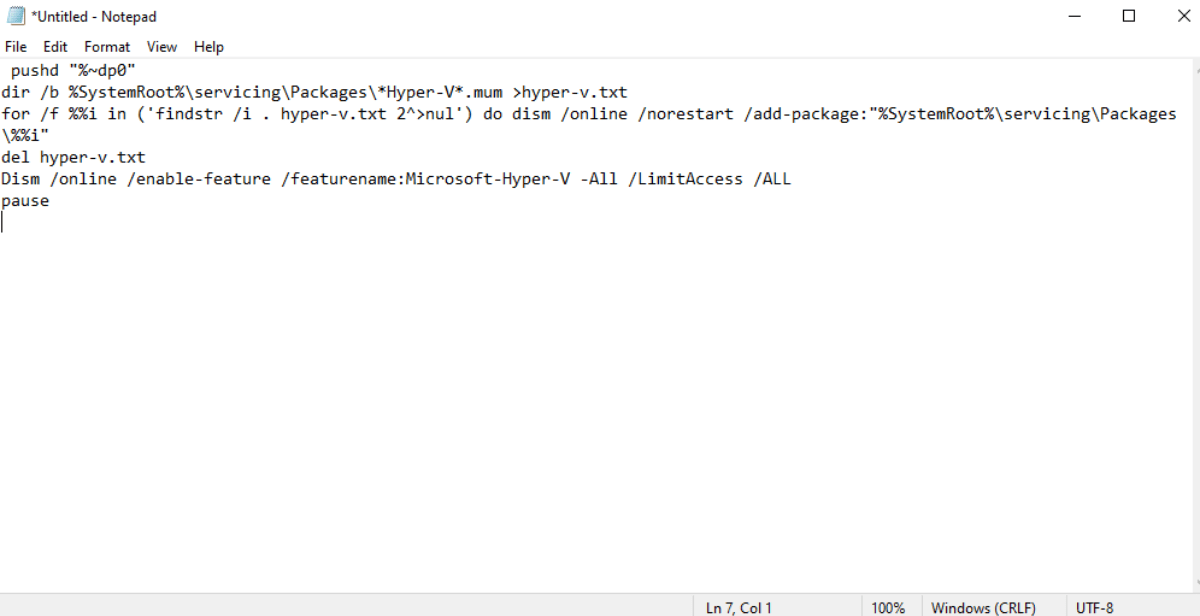
- Within the Notepad document, duplicate and insert this script:
pushd "%~dp0"

dir /b %SystemRoot%\servicing\Packages\*Hyper-V*.mum >hyper-v.txt

for /f %%i in ('findstr /i . hyper-v.txt 2^>nul') do dism /online /norestart /add-package:"%SystemRoot%\servicing\Packages\%%i"

del hyper-v.txt

Dism /online /enable-feature /featurename:Microsoft-Hyper-V -All /LimitAccess /ALL

Pause
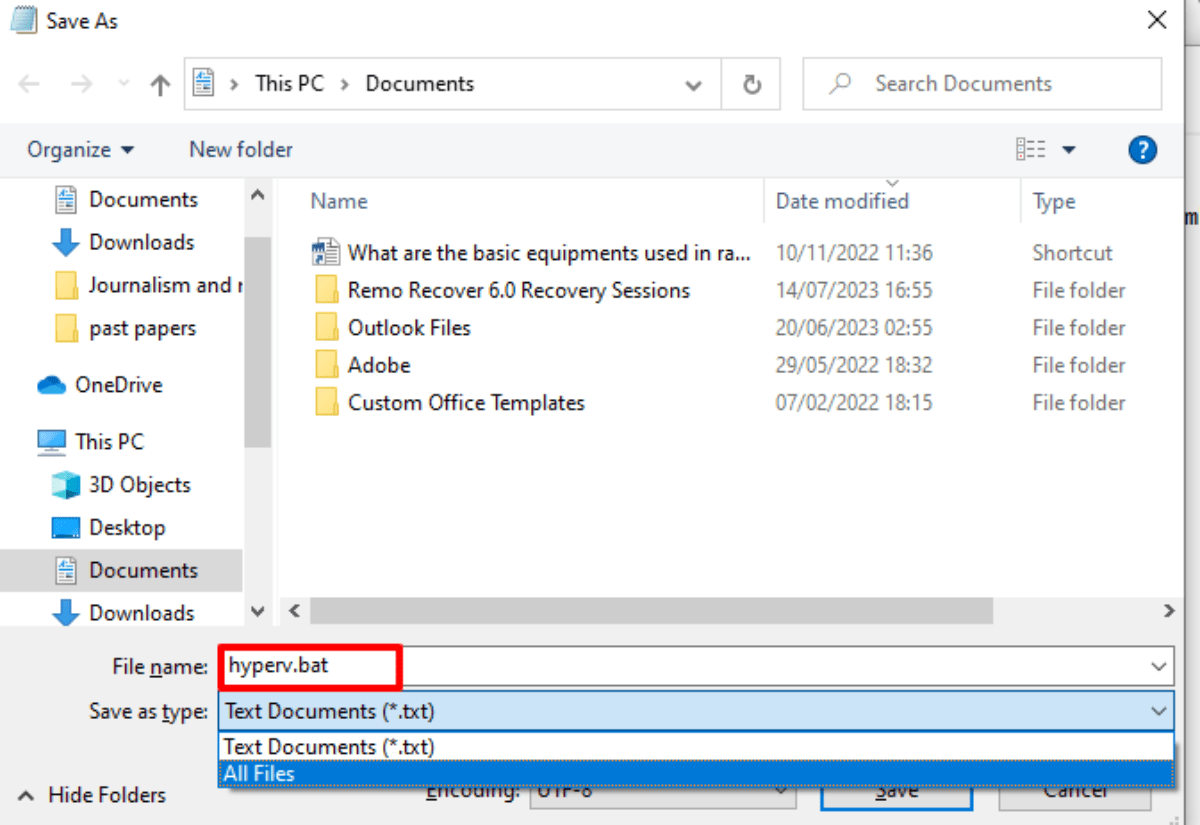
- Open the Save Dialog using Ctrl + S.
- In the field for the file name, input hyperv.bat. It’s crucial to include the .bat extension at the end of the filename for the script’s execution.

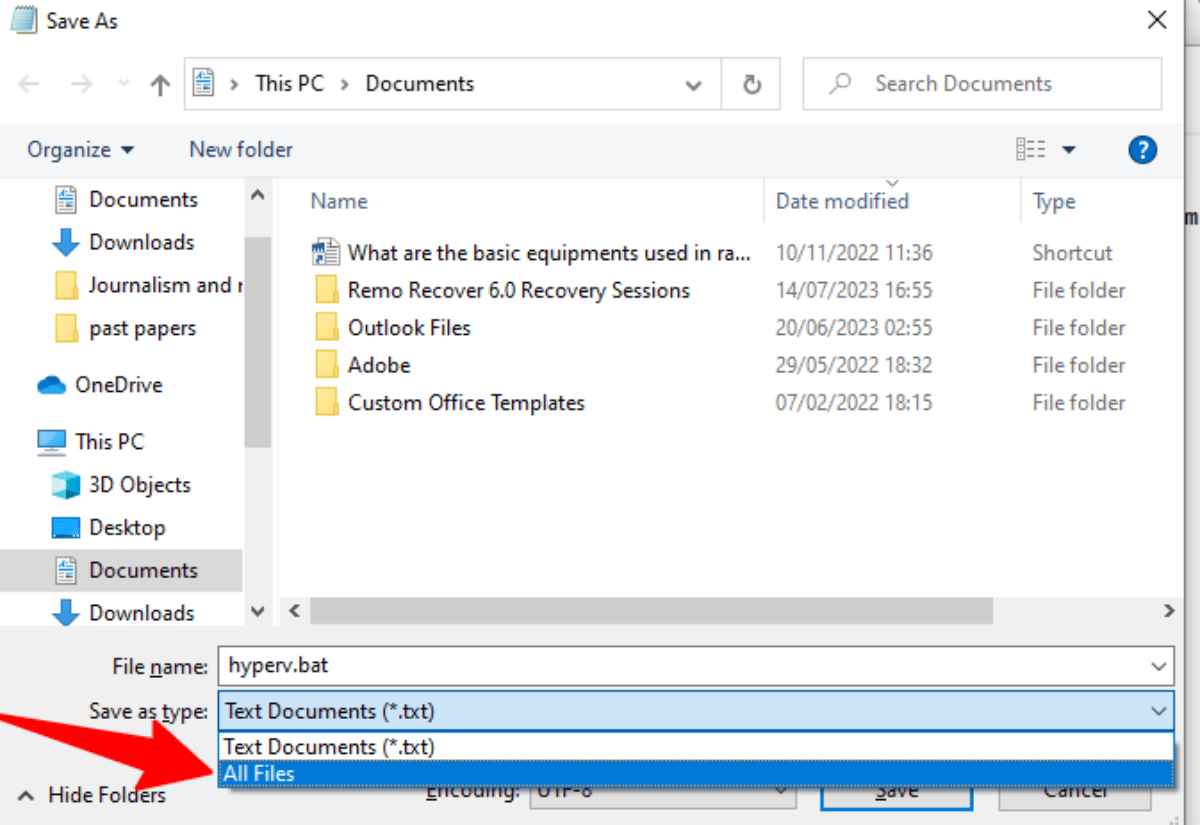
- Then, choose All Files from the dropdown menu for Save as type.

- Click the Save button to store the file.
- Afterward, right-click the hyperv.bat file and choose Run as administrator. If prompted by User Account Control, click Yes.
- The script will commence execution in the Command Prompt to install Hyper-V. This process might take some time, so be patient until it’s finished.
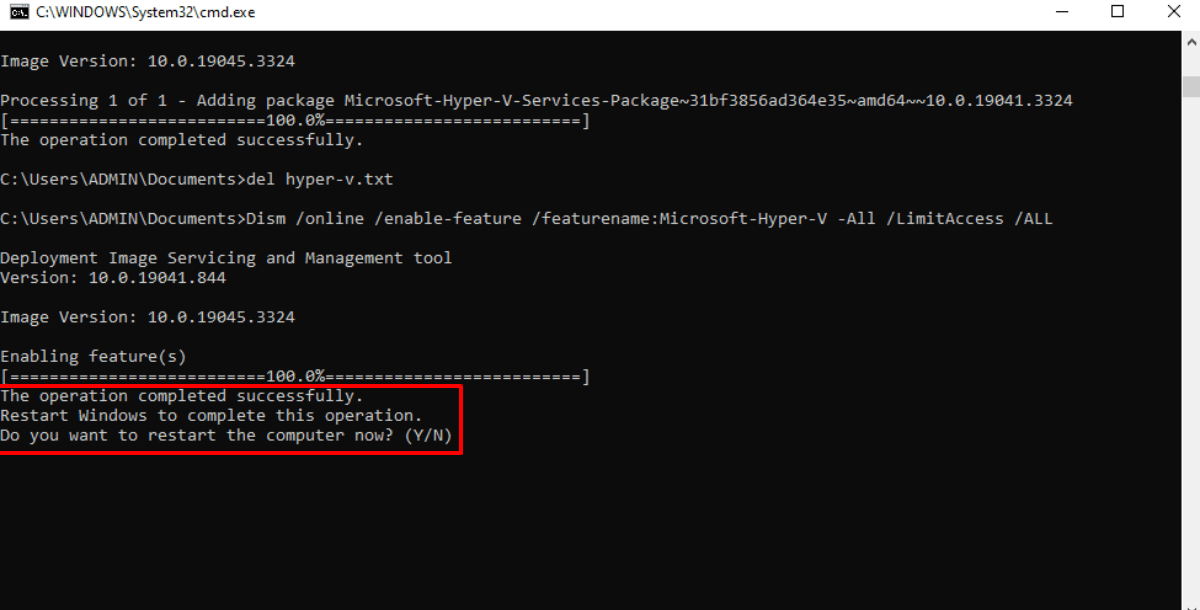
- When the process is complete, a message stating Operation completed successfully will appear.

- Type Y to confirm and initiate a PC restart. If not, input N to exit the Command Prompt.
Keep in mind that restarting your PC is necessary for the changes to take effect. Following the restart, Hyper-V should be installed on Windows 11 Home.
Type Hyper-V in the Windows search bar and click on Hyper-V Manager to establish a new virtual machine.
How to Enable Hyper-V on Windows 11
There are three methods you can use to install Hyper-V on Windows 11. Let’s take a look at each one of them.
Method 1. Enable Hyper-V Windows 11 Using Command Prompt
A straightforward technique involves utilizing the Command Prompt option.
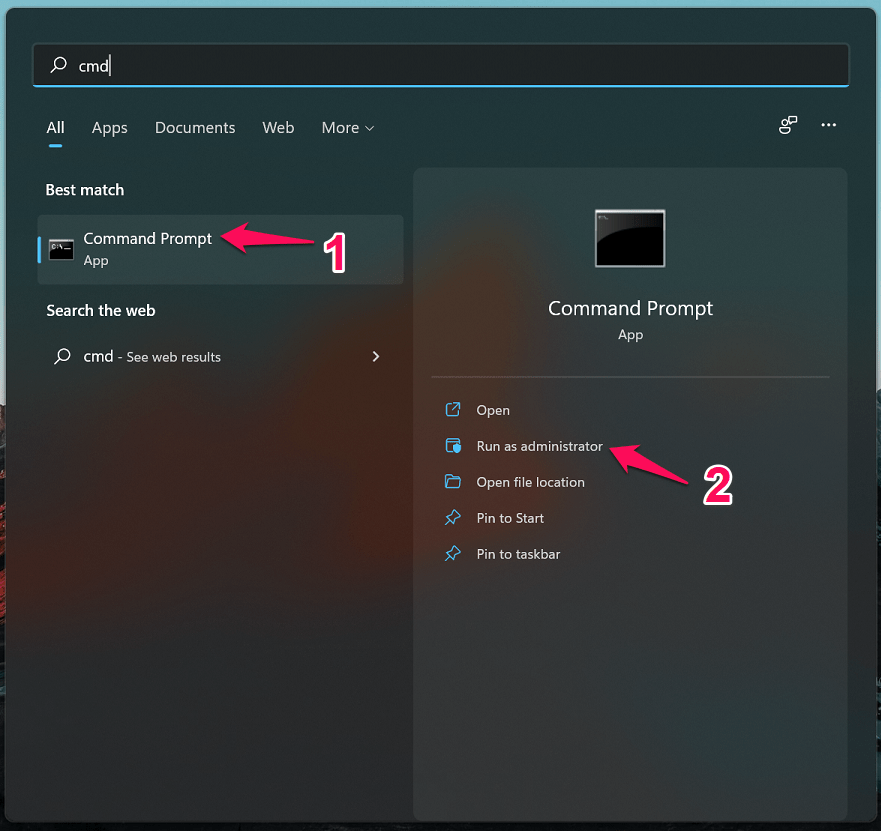
- Input “cmd” into the Search field, then right-click the Command Prompt application and opt for “Run as administrator.” Confirm with “Yes” if prompted for an elevated command prompt.

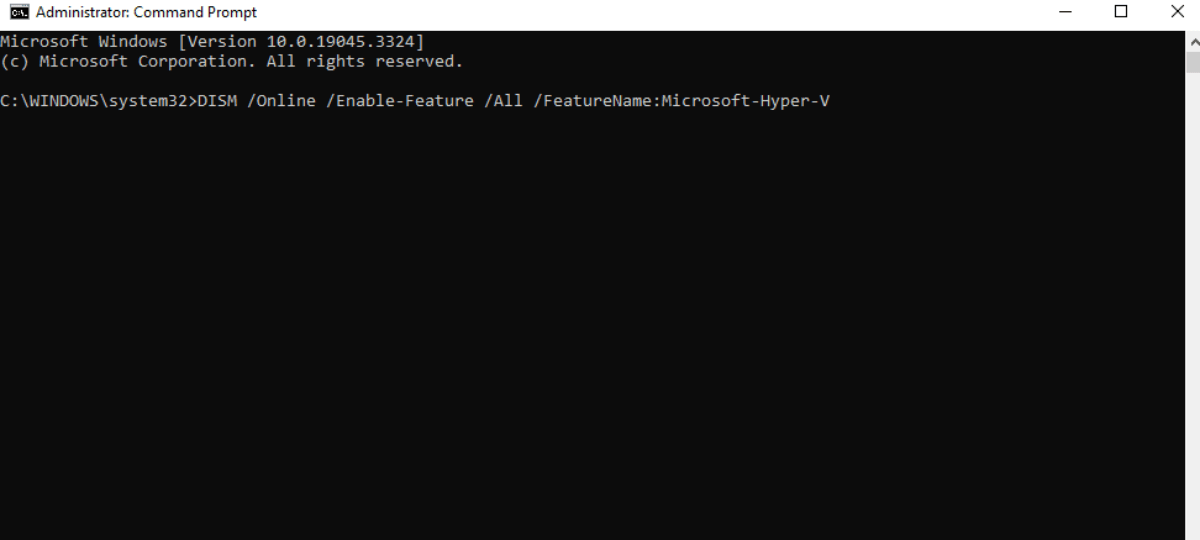
- Within the resulting window, input the subsequent command and press Enter:
DISM /Online /Enable-Feature /All /FeatureName:Microsoft-Hyper-V

- Once the procedure concludes successfully, you’ll receive a request to restart your computer. Confirm the reboot of your Windows 11 by typing “Y”.
Method 2. Enable Hyper-V Windows 11 Using Control Panel
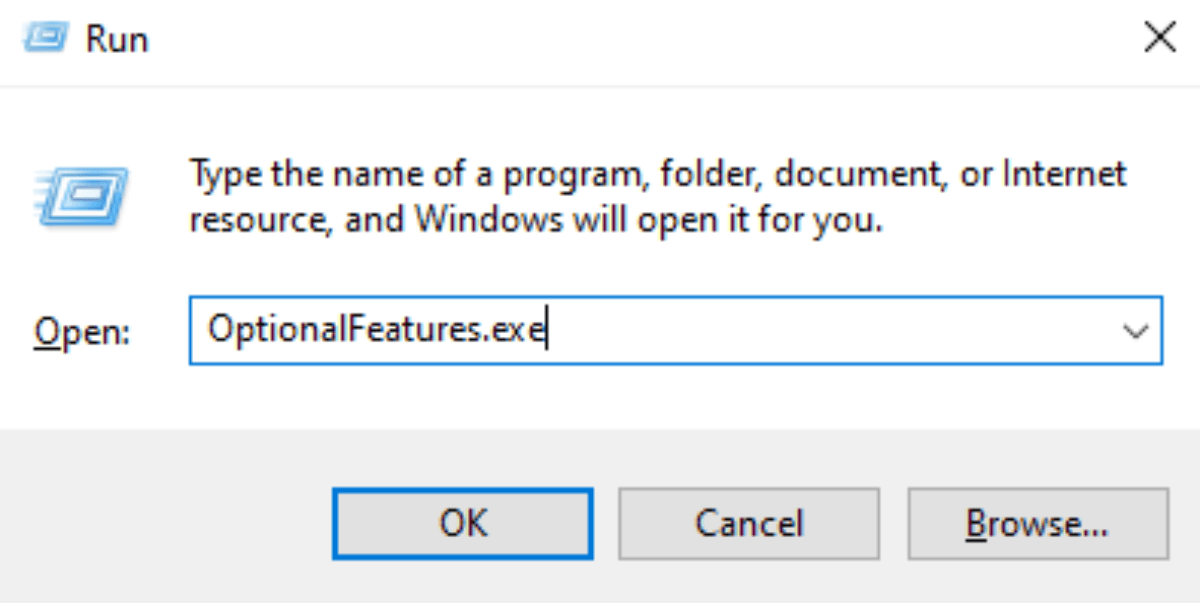
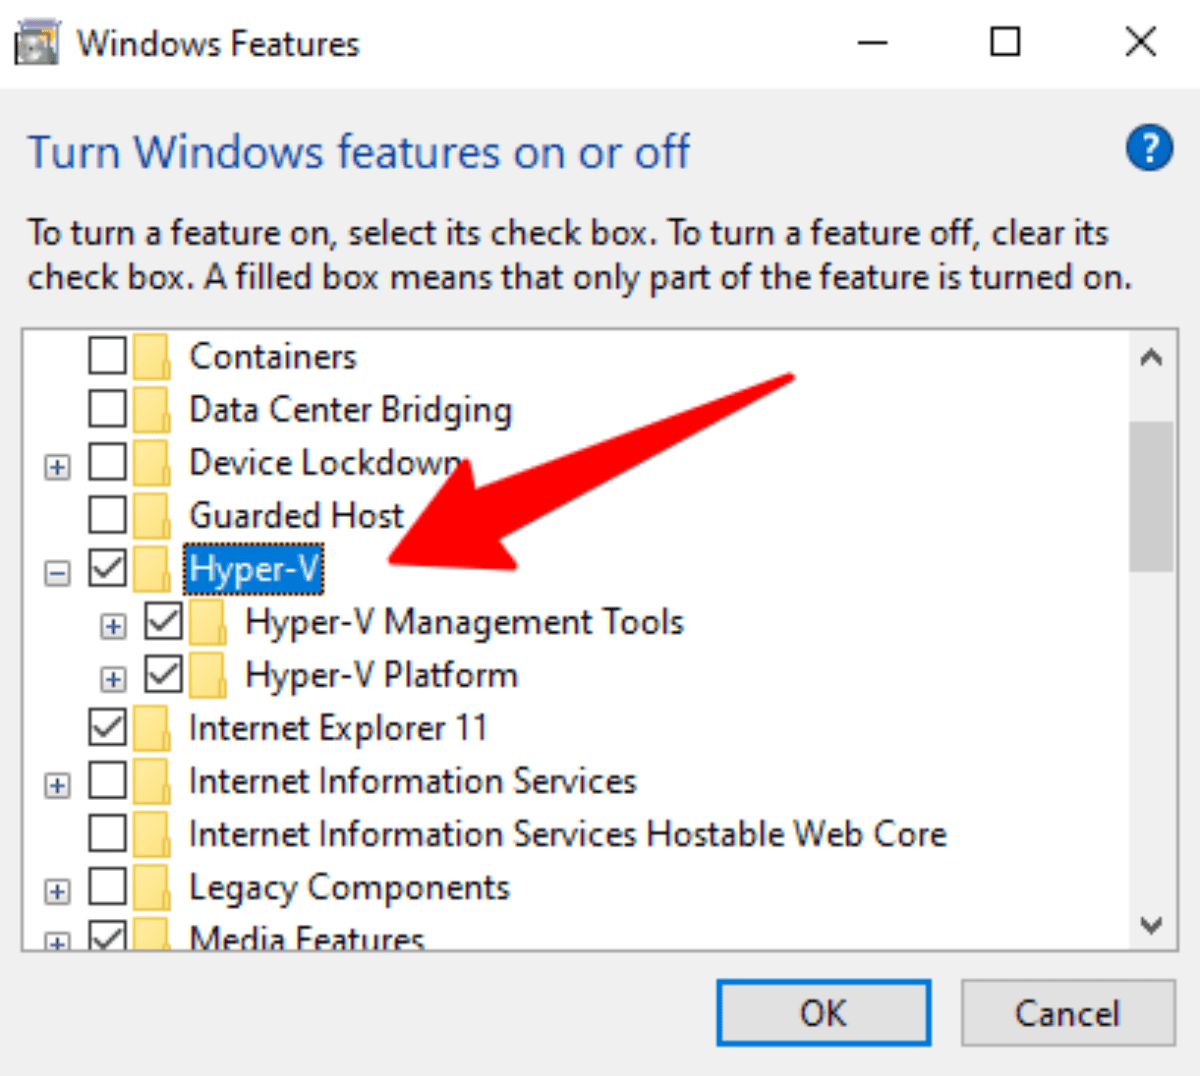
- Open the Run dialog box by pressing Win + R. Input “OptionalFeatures.exe” and hit Enter. Alternatively, you can type “Windows features” into the Search box and select “Turn Windows features on or off” from the Best Match results.

- Expand the Hyper-V category and select all checkboxes within it, which includes both Hyper-V Management Tools and Hyper-V Platform.

- Confirm the changes by clicking OK. Windows will then proceed with the implementation of these alterations, which might take some time.
- Once the process is complete, a prompt will appear, instructing you to restart your computer. Click “Start now” to finalize the installation of the necessary modifications.
Method 3. Enable Hyper-V Windows 11 Using Windows PowerShell
Utilize PowerShell, a user-friendly tool similar to Command Prompt, to activate Hyper-V on Windows 11. Here’s the procedure:
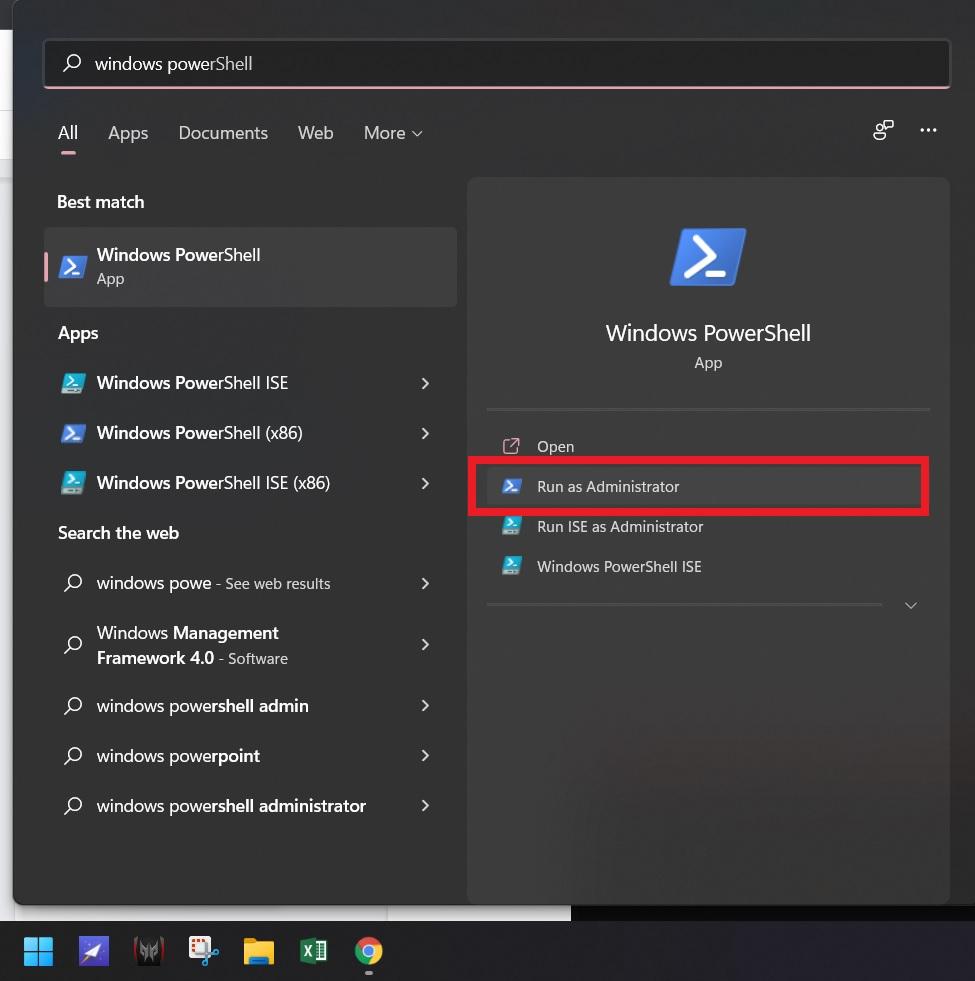
- Initiate the process by typing “PowerShell” in the Search box. Right-click on the Windows PowerShell application and choose “Run as administrator.”

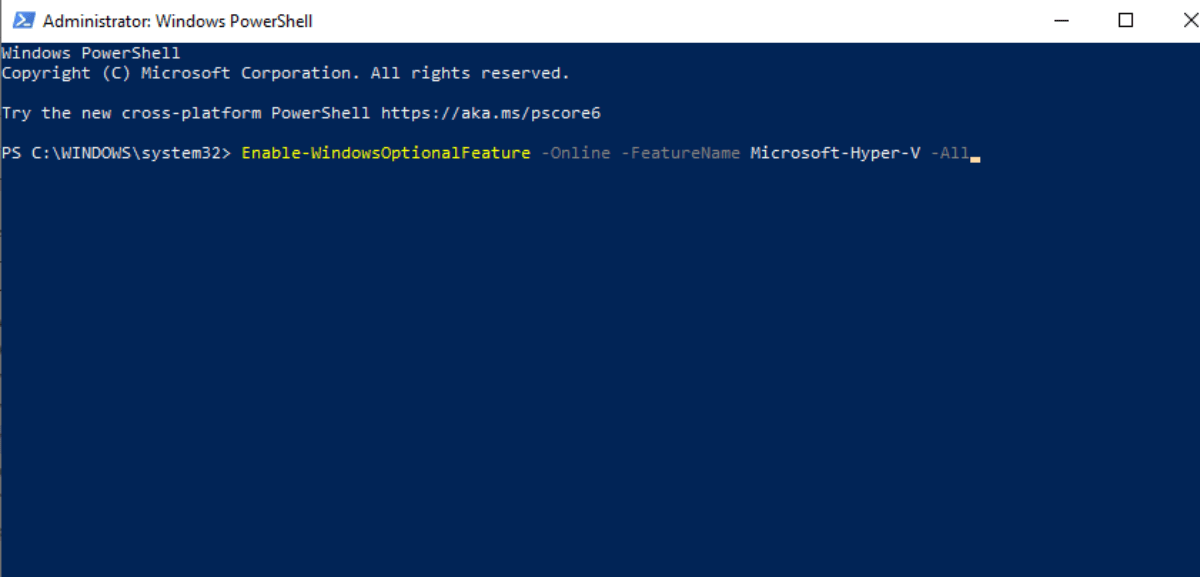
- Within the ensuing window, input the provided command and press Enter. This will prompt Windows to initiate the Hyper-V installation process on Windows 11.
Enable-WindowsOptionalFeature -Online -FeatureName Microsoft-Hyper-V –All

- During this process, a blue box will display the progression of Hyper-V activation. Once the activation is successful, press Y to reboot your system.
Disabling Hyper-V in Windows 11
Although enabling and utilizing Hyper-V is secure, you can just as easily deactivate it using PowerShell. This can be valuable if the virtualization technology clashes with your antivirus software or other applications.
To deactivate Hyper-V through PowerShell:
- Launch PowerShell with administrator privileges.
- Within the PowerShell interface, input the command below and hit the Enter key:
Disable-WindowsOptionalFeature -Online -FeatureName Microsoft-Hyper-V-All
- Wait until the confirmation message is displayed, and then close the PowerShell.
- Reboot your device to apply the modifications.
Run Hyper-V on Windows 11 Home
Microsoft has formally limited the utilization of Hyper-V to the Pro, Education, and Enterprise versions of the operating system. Yet, a minor adjustment in the BIOS and a convenient batch script can assist you in setting up Hyper-V on Windows 11 Home.
Once you successfully have Hyper-V operational, you can set up virtual machines for operating systems such as Ubuntu, Windows, and other supported ones.
What Are the Benefits of Hyper-V?
1. Security
For every virtual machine established within a physical computer, their device drivers are kept in distinct disk partitions.
This arrangement offers an additional level of protection. For an intrusion into a computer, each of the virtual machines has to be compromised individually.
This form of security is not present in alternative virtualization setups such as VMware.
2. Performance
The use of Hyper-V substantially enhances the overall efficiency of a company. In numerous organizations, the responsibility for data center management rests solely on the administrator.
This implies that a single individual is tasked with overseeing a vast amount of data across numerous servers.
With the implementation of Hyper-V virtualization technology, the process of data management becomes more streamlined, resulting in time savings.
As a result, both the administrator and other team members can allocate this saved time to tackle other essential projects and company-related tasks.
3. Redundancy
Hyper-V technology incorporates a function known as failover clustering, which is designed to safeguard virtual machines.
Failover clustering entails a collection of interconnected computers aimed at ensuring optimal availability with minimal periods of inactivity.
These cluster nodes are interlinked by means of physical connections. Typically, these cluster nodes are situated within the Hyper-V servers.
Therefore, even if a single cluster experiences a malfunction, the other nodes can sustain the service. This arrangement guarantees a reduced level of interruptions.
4. Scalability
Hyper-V provides the flexibility to incorporate additional virtual machines without the necessity of procuring new hardware components.
Furthermore, the available network bandwidth can be evenly distributed among the linked virtual machines. This attribute contributes to the widespread preference for using Hyper-V.
5. Cost
Hyper-V is acknowledged as a more budget-friendly alternative in comparison to VMware. It obviates the need for hardware expenditure by virtualizing machines, eradicating the necessity to invest in physical devices.
This virtualized infrastructure also leads to simplified administration. Moreover, in terms of licensing, Hyper-V proves to be cost-effective, as it comes bundled without additional charges with Windows server systems.
Frequently Asked Questions
What Is Hyper-V?
Hyper-V is a virtualization technology based on a hypervisor. It utilizes the Windows hypervisor, which mandates specific features in the physical processor. For detailed hardware requirements, refer to the System requirements for Hyper-V on Windows Server.
Is It Possible to Install Hyper-v on Windows 11 Home?
You can enable Hyper-V in Windows 11 as an optional built-in feature. This allows you to establish virtual machines for running guest operating systems on virtualized hardware. However, note that Hyper-V is exclusively accessible in the Pro, Education, and Enterprise editions of the OS.
What Do I Need to Run Hyper-V?
Processor: A minimum of 1 GHz (x86) or 1.4 GHz (x64) processor and higher versions. Memory: At least 512 MB of RAM. Disk Space: A minimum of 3 MB of available disk space prior to installation and less than 10 MB of disk space post-installation.
What Happens if You Enable Hyper-V?
Hyper-V empowers the execution of multiple operating systems as virtual machines within Windows. It specifically delivers hardware virtualization, ensuring that each virtual machine operates on virtual hardware.
How Long Does Hyper-v Installation Take?
The Hyper-V installation process on your server usually takes a few minutes to complete. A restart is required to finalize the installation.
Which Processors Are Compatible With Hyper-V?
To run Hyper-V technology, your computer should feature an AMD or Intel 64-bit processor with support for Second Level Address Translation (SLAT). Most modern Intel Core i3, i5, and i7 CPUs include SLAT virtualization hardware. This capability is also present in AMD’s Barcelona processor line and subsequent models.
In a Nutshell
Enabling and installing Hyper-V on your Windows 11 system introduces you to virtualization.
With the ability to run multiple operating systems seamlessly, you’re stepping into a field where versatility meets convenience.
With the knowledge of the uses of Hyper-V to its benefits, you’ll now have the full potential to use Hyper-V like a pro.
If you've any thoughts on How to Install and Enable Hyper-V on Windows 11?, then feel free to drop in below comment box. Also, please subscribe to our DigitBin YouTube channel for videos tutorials. Cheers!

