Today I will talk about a number of different ways to save battery or increase battery life on a Windows 11 Computer PC. The methods should work on any laptop running Windows 11, although the performance might differ depending on each laptop. You don’t necessarily need to follow all of the methods to save battery so feel free to skip any, but the more methods you do the longer your battery should last.
Tip. 1 Check for Power Issues
We’ll begin with a quick test to see if there are any power issues that could be causing our battery to drain quicker. To do this, we’re going to run the power troubleshooter.
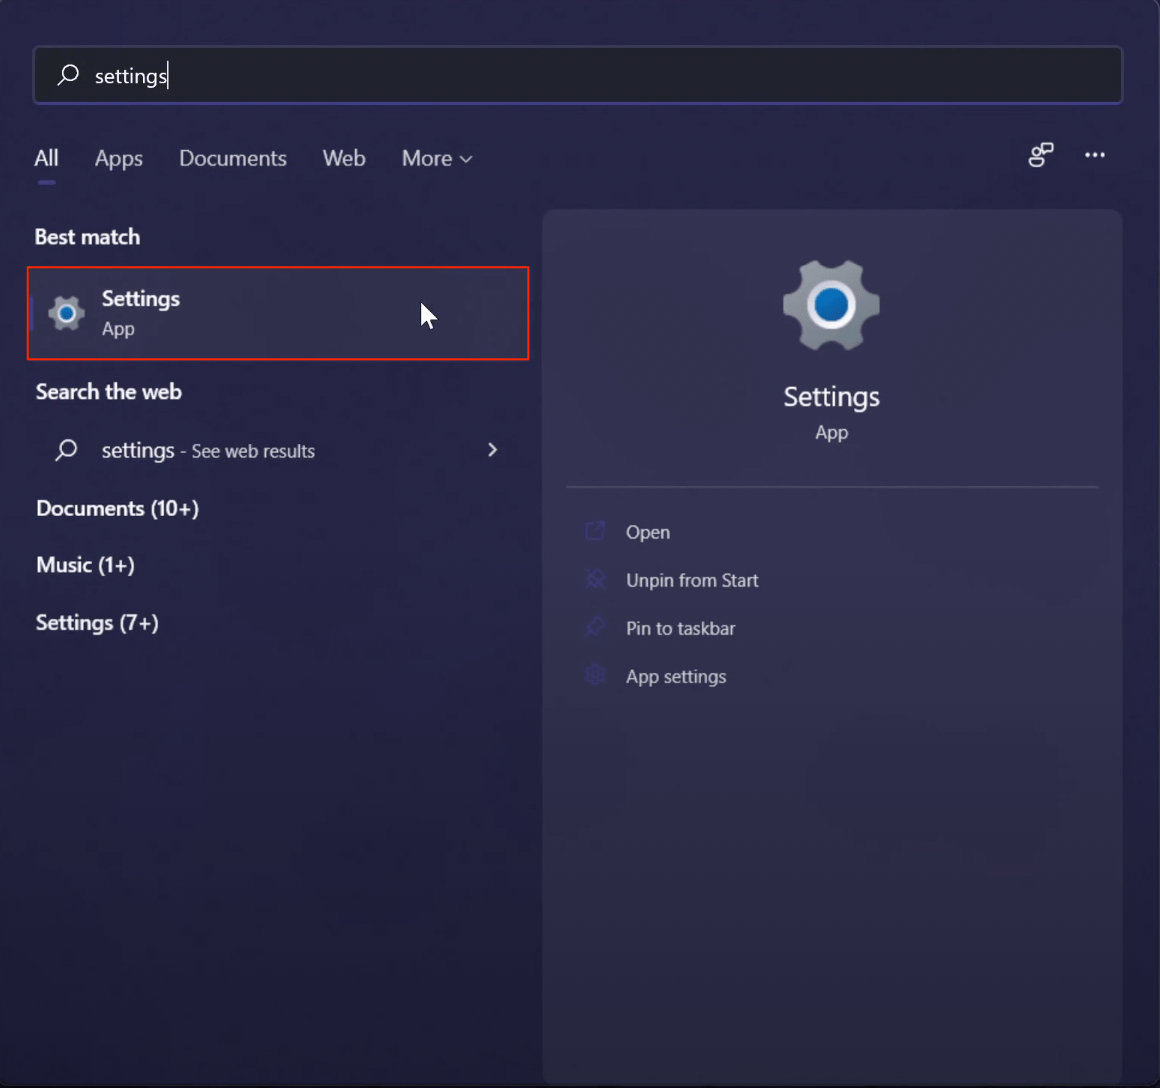
- Go to the Settings page.

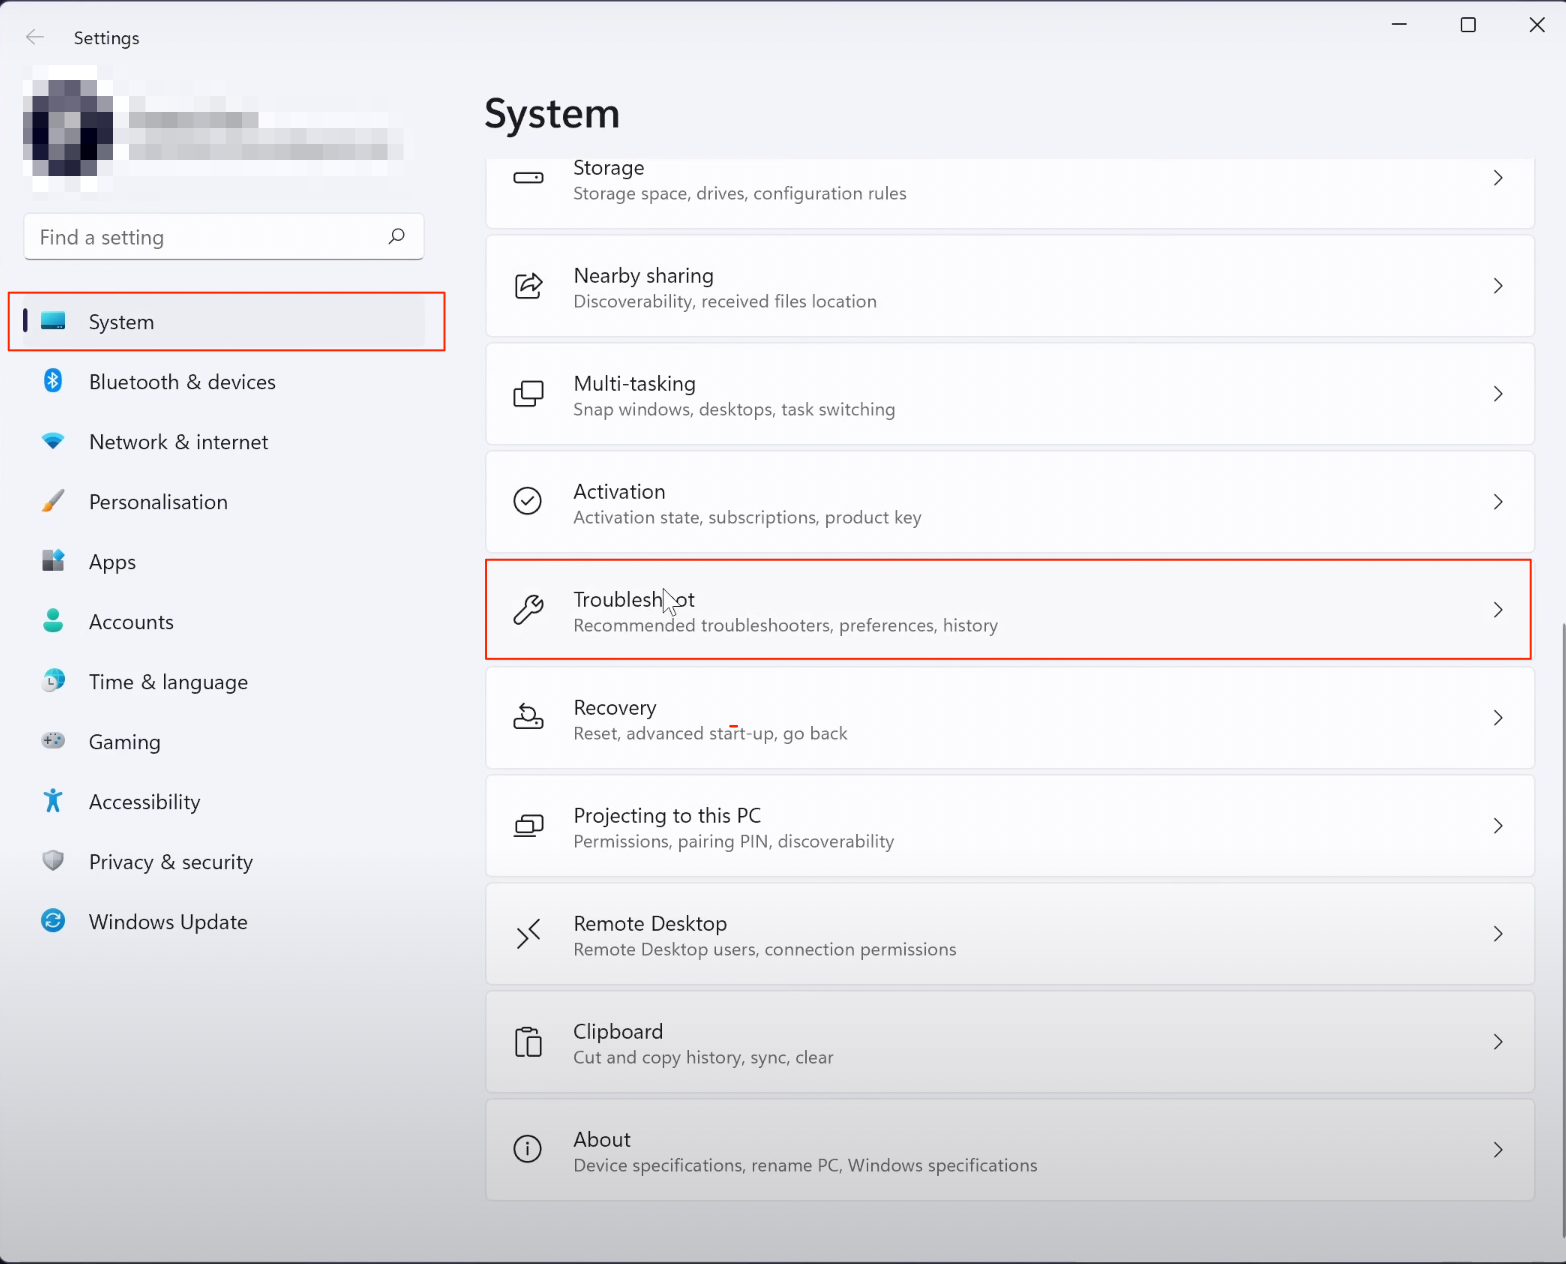
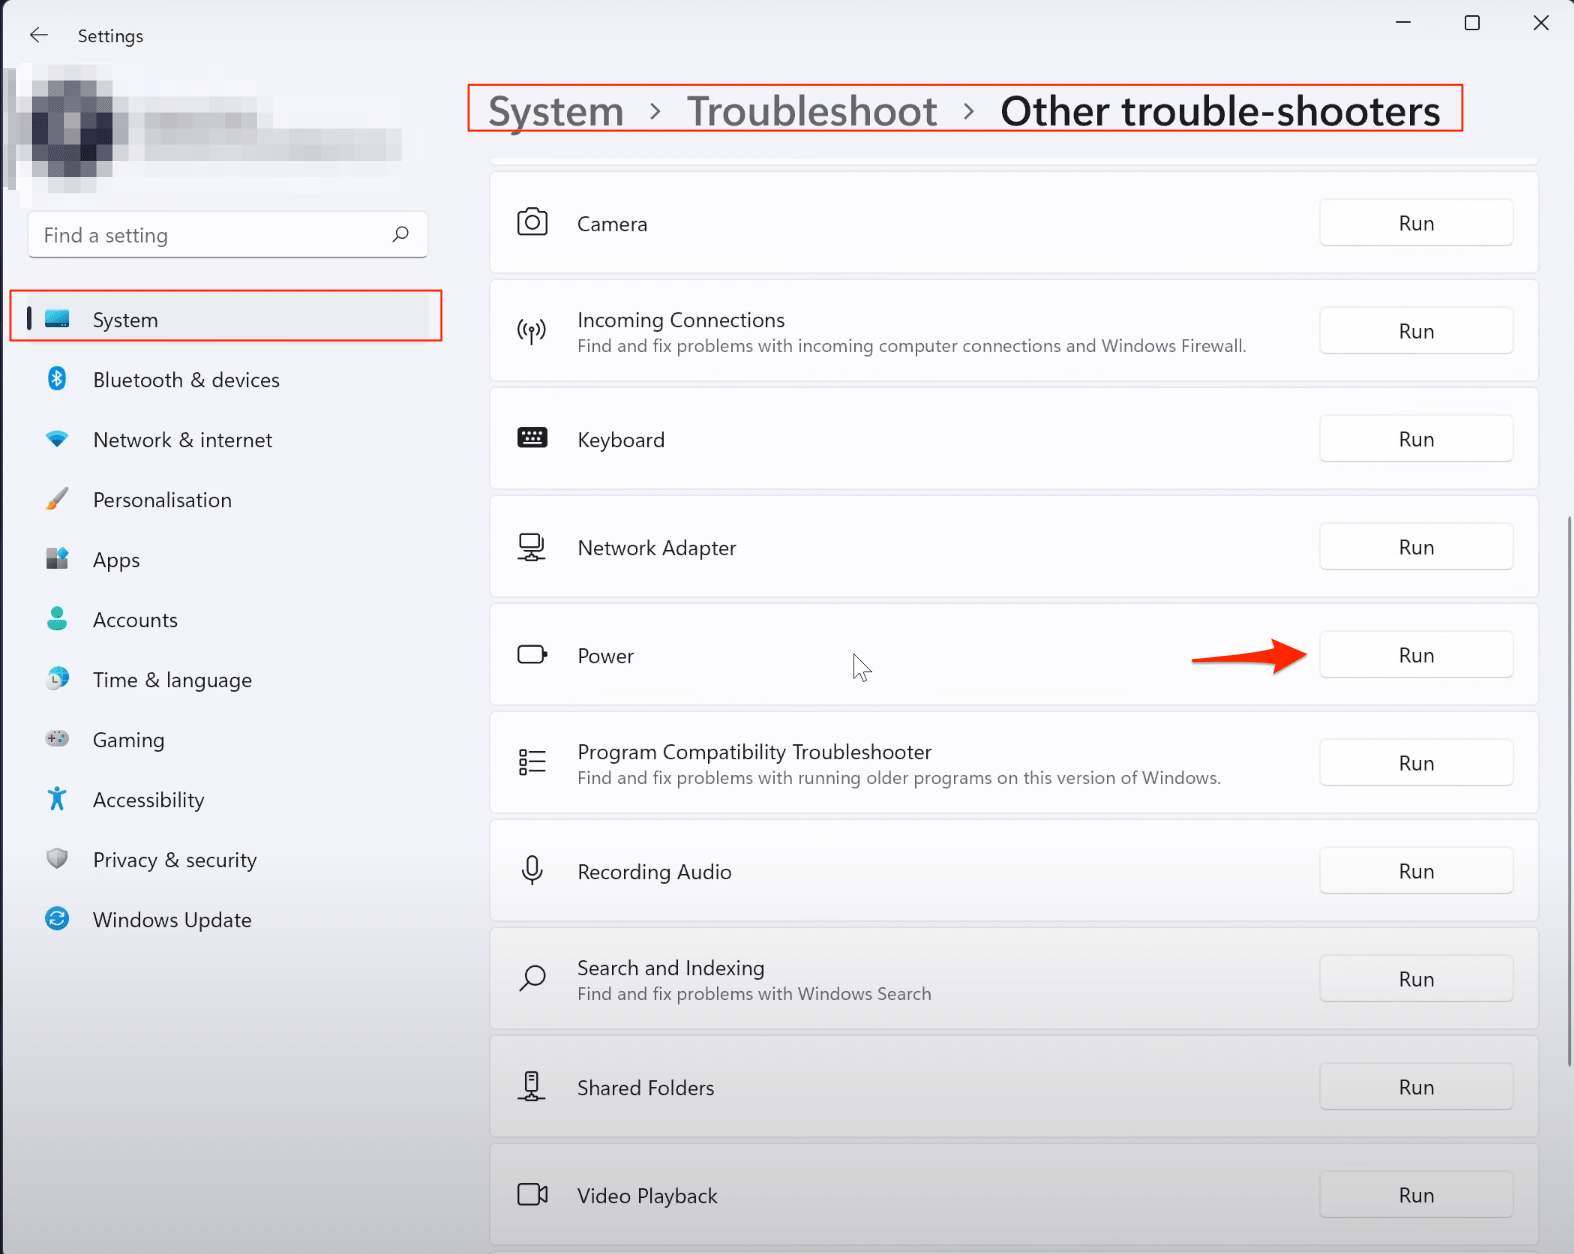
- Click on the System from the options on the left side and click on Troubleshoot.

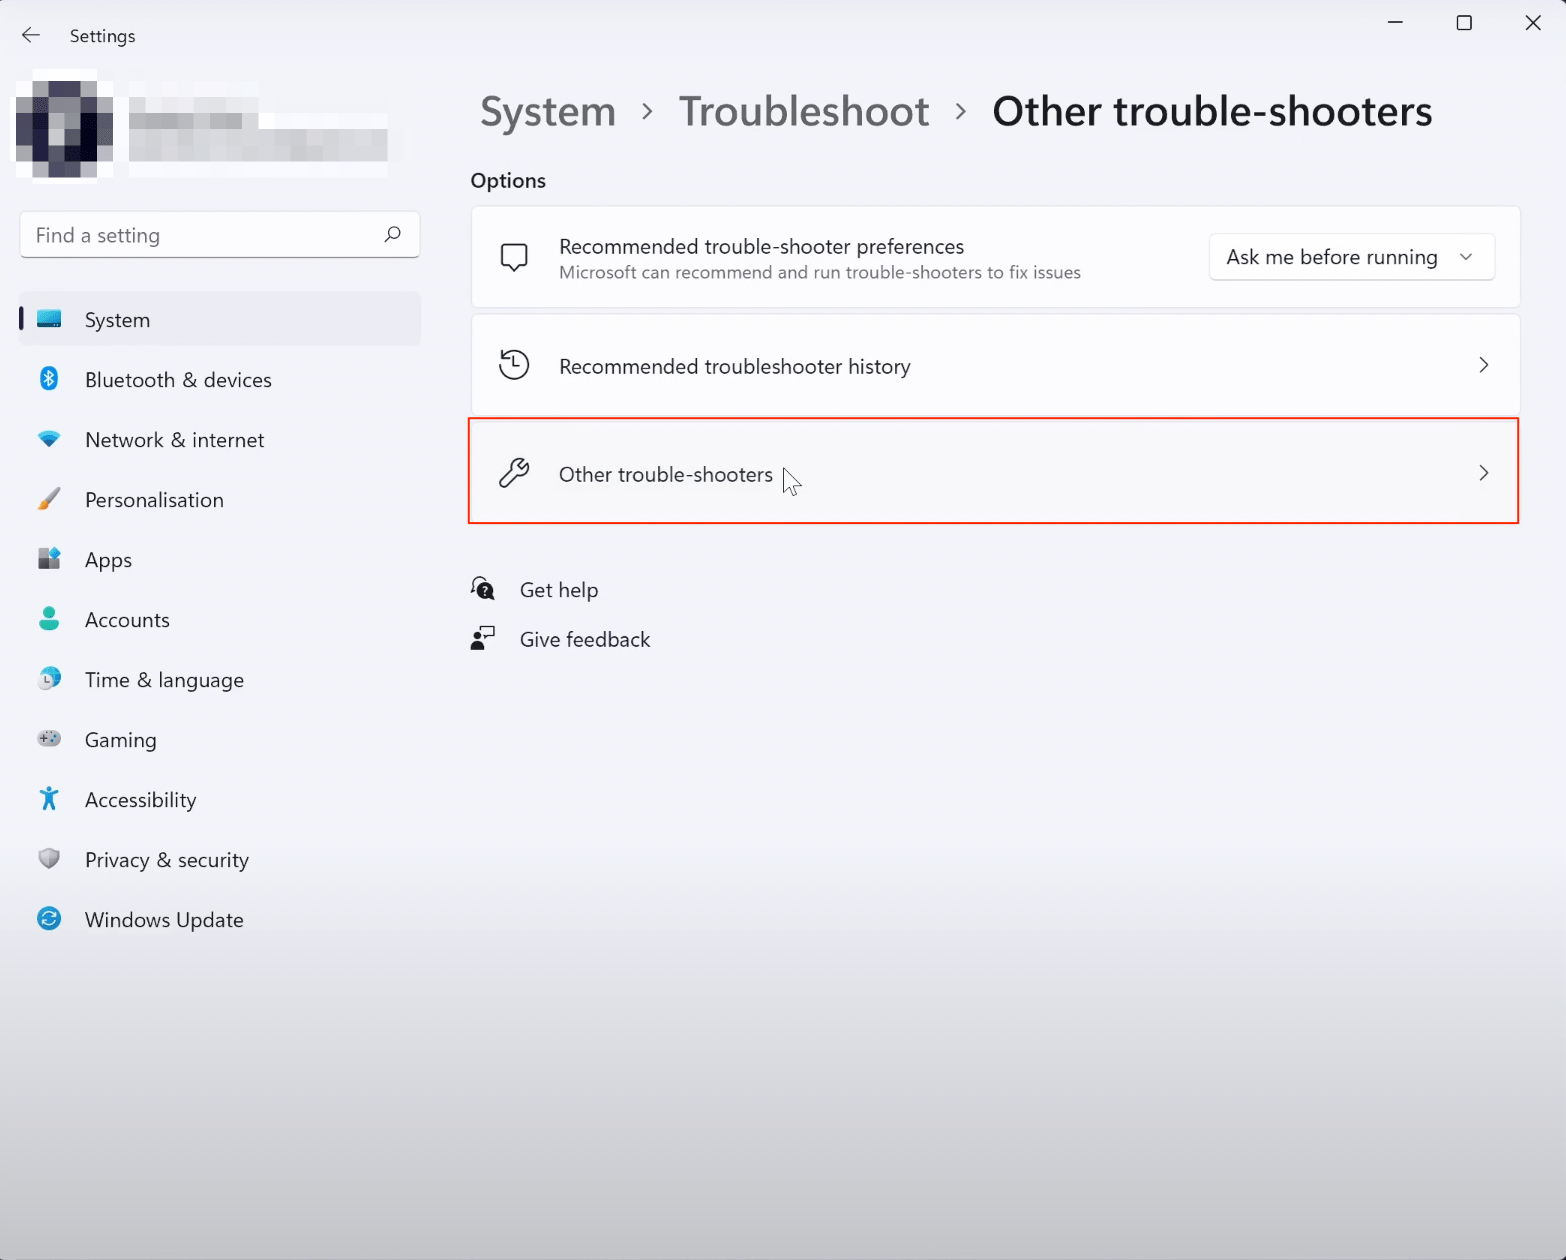
- Then choose other trouble-shooters.

- Now look down the list for the troubleshooter called Power and click on Run next to it.

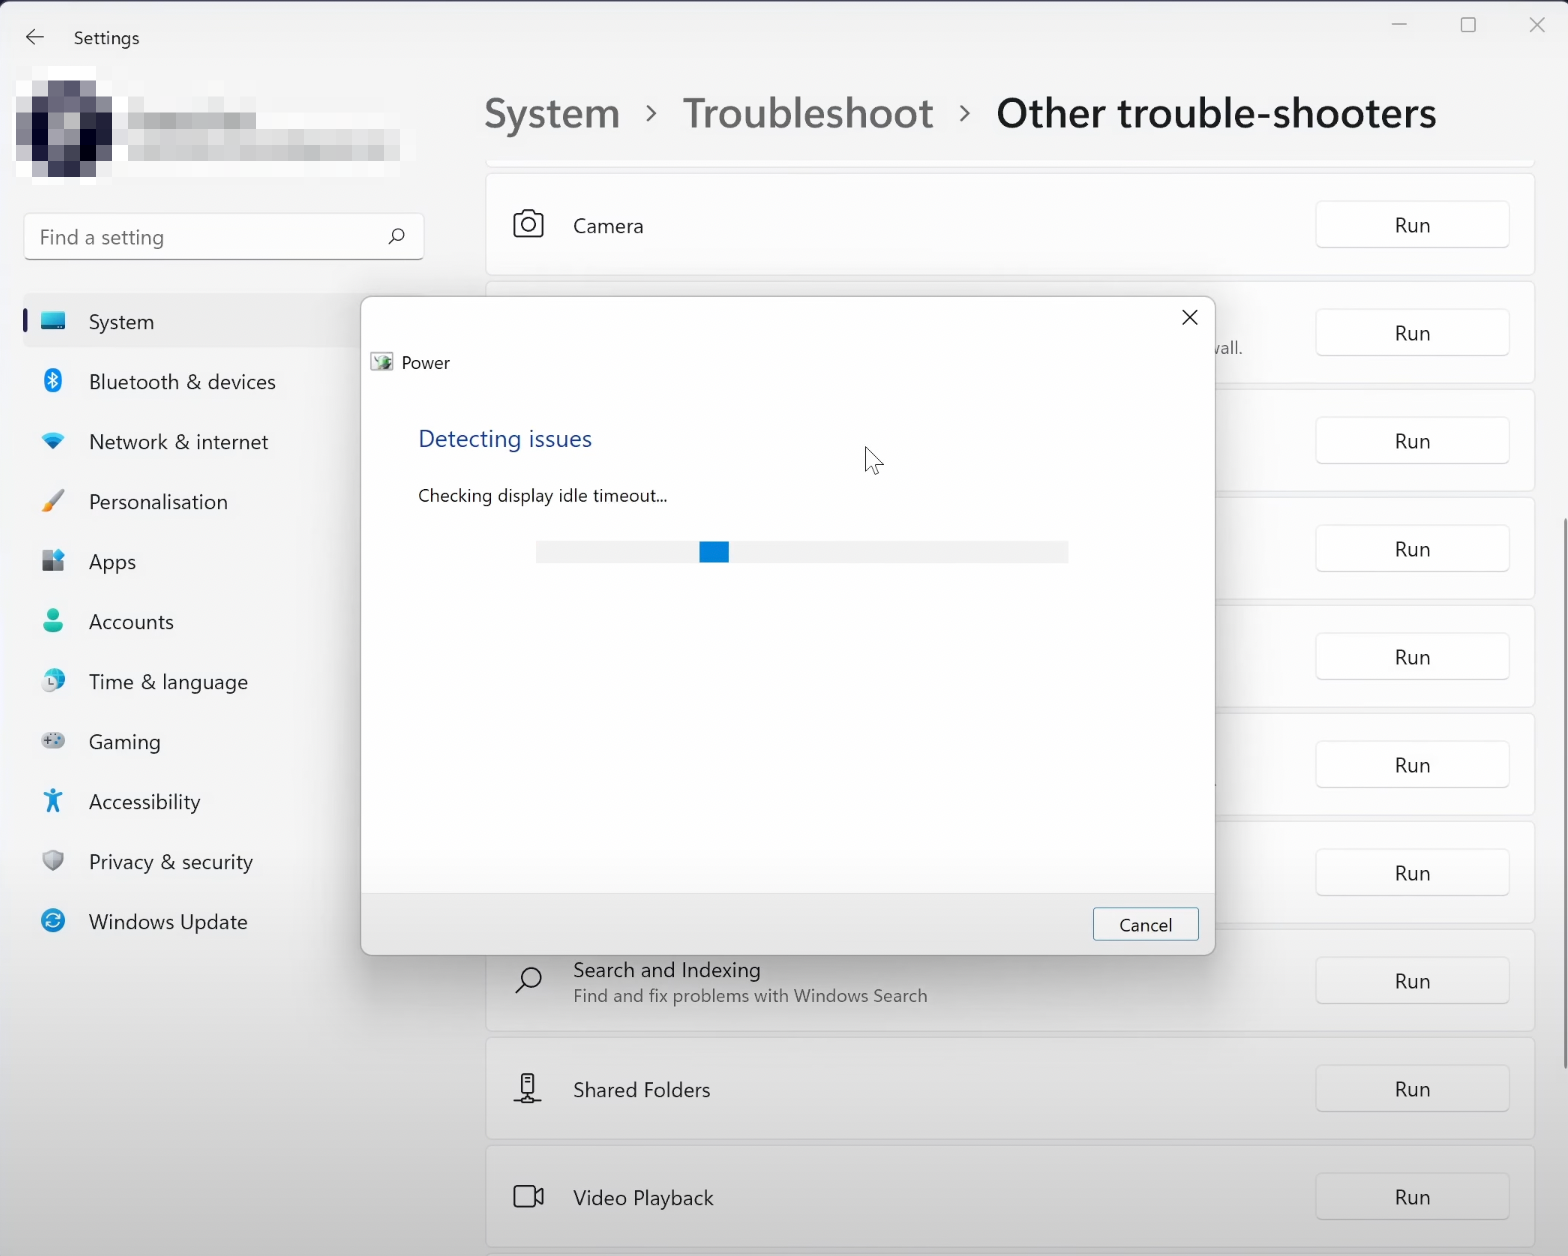
- Allow Windows to look for and suggest any possible solutions that might help.

Tip 2. Turn On Power Saver Mode
The next method is to turn on power saver mode in the power settings. This is different from battery saver mode, as it will run all of the time.
You may not notice too much of a performance difference but there should be incremental growth in your battery life as your components won’t be working as hard as they function normally. Here is a simple guide to change the power settings to power saver mode,
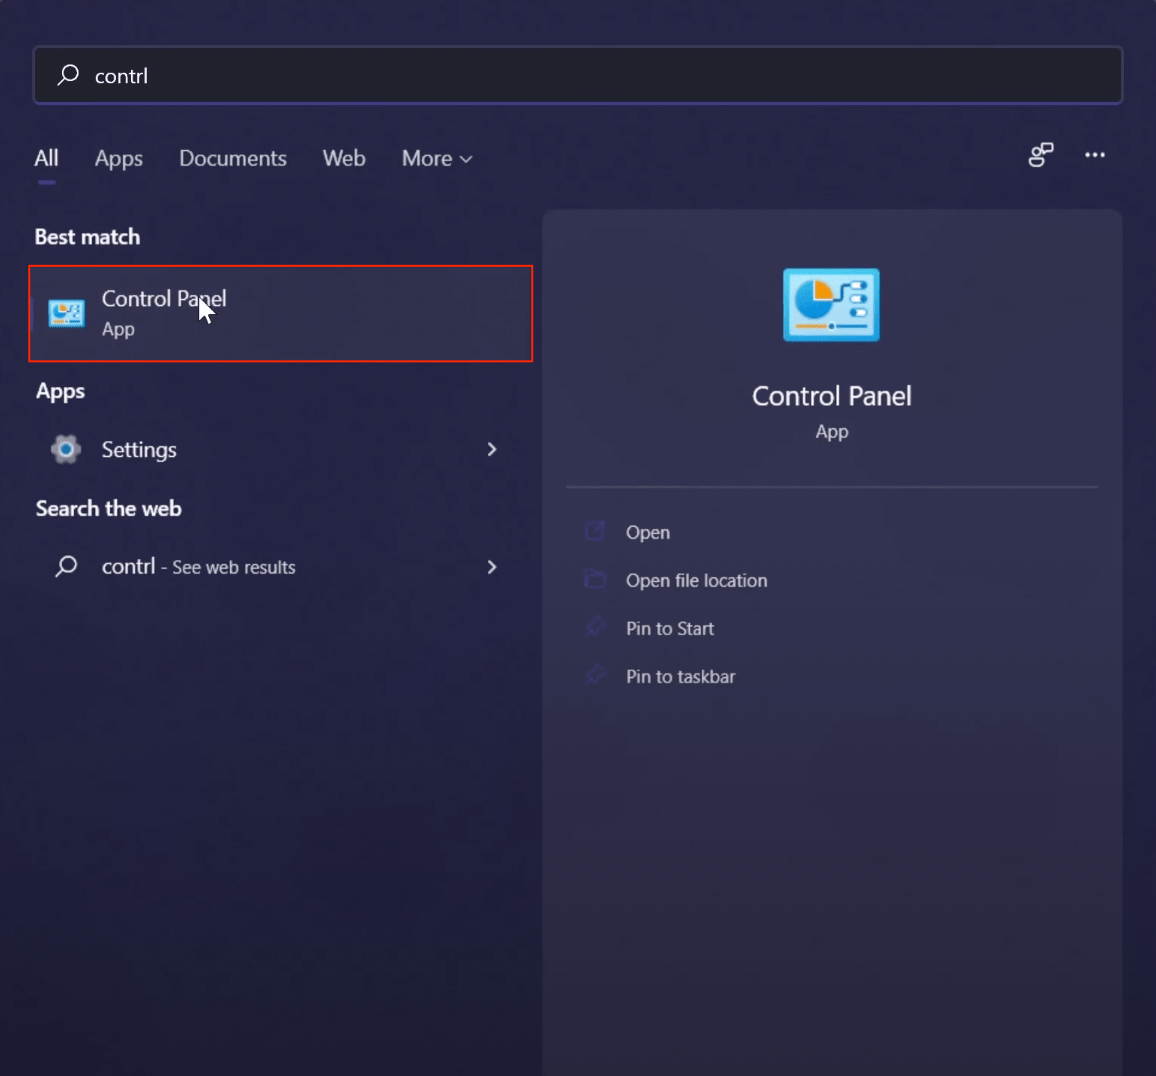
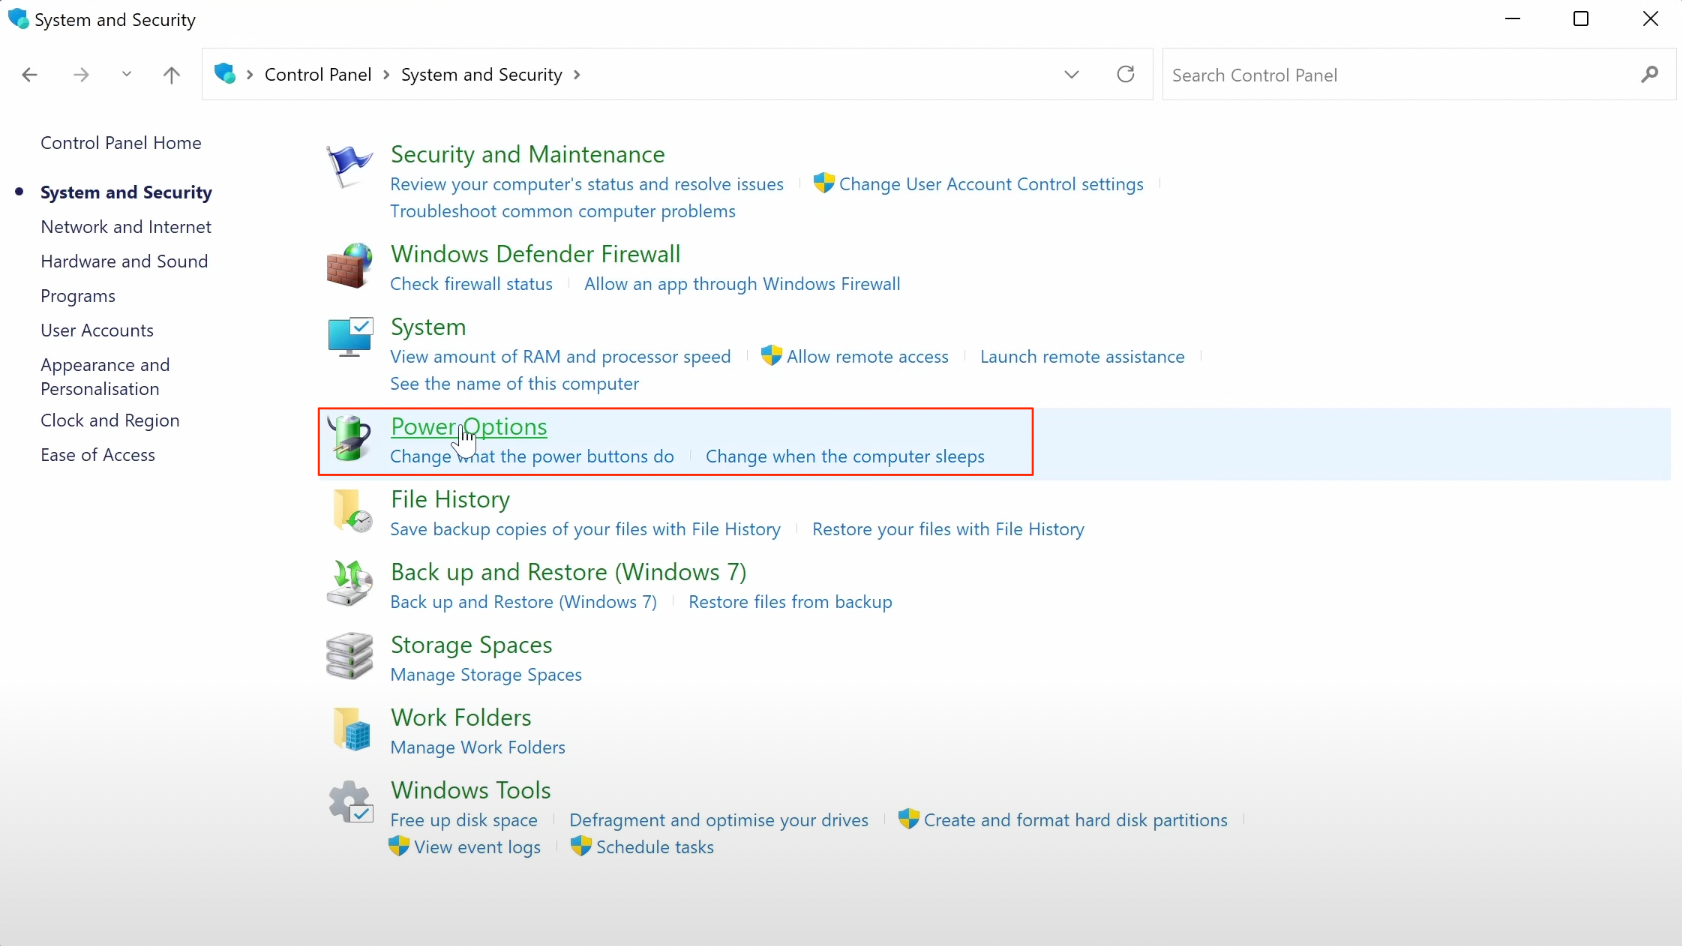
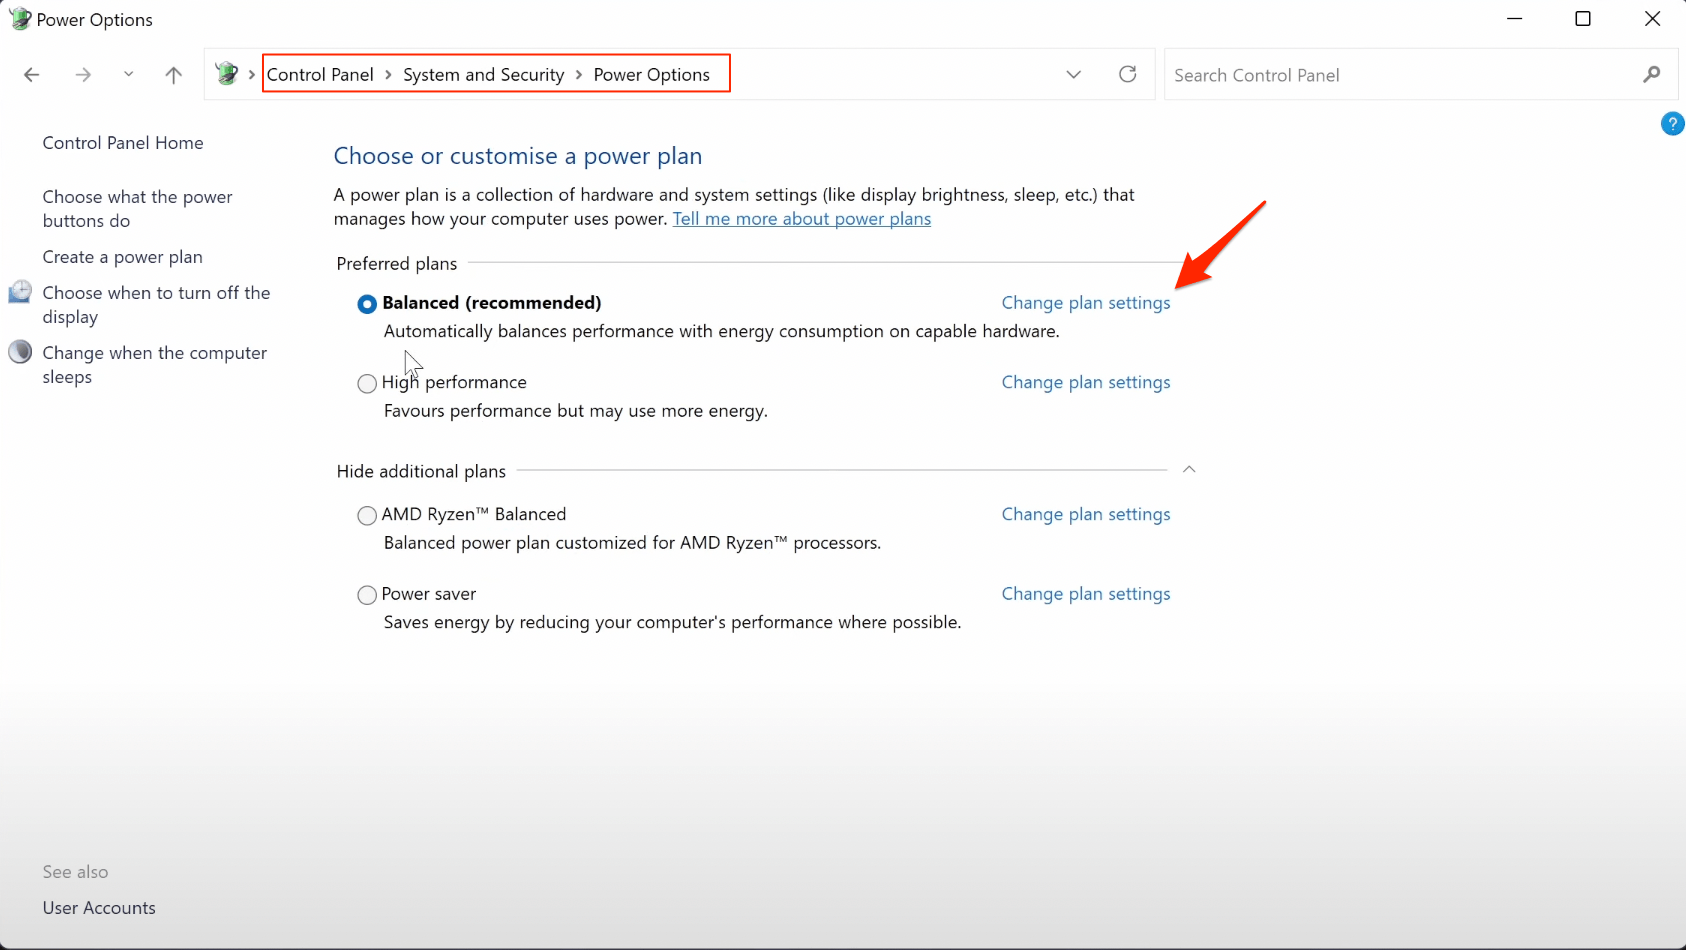
- Search for the Control panel in the search bar.

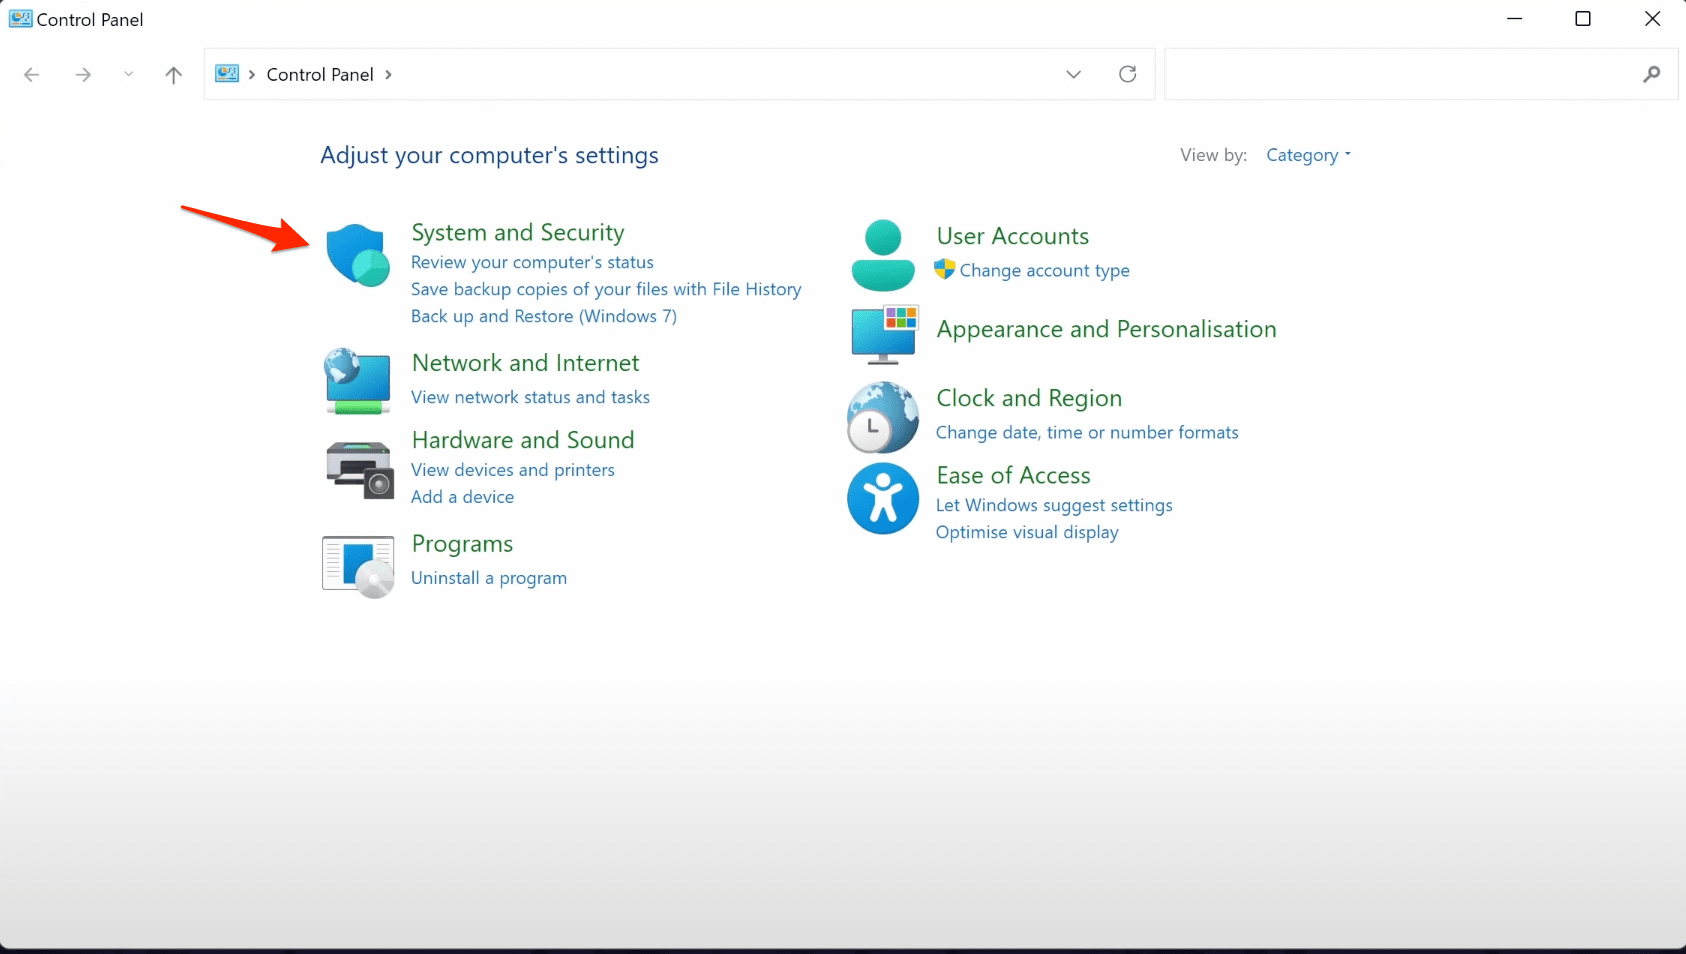
- In the control panel, click on System and Security.

- Choose Power Options from the list.

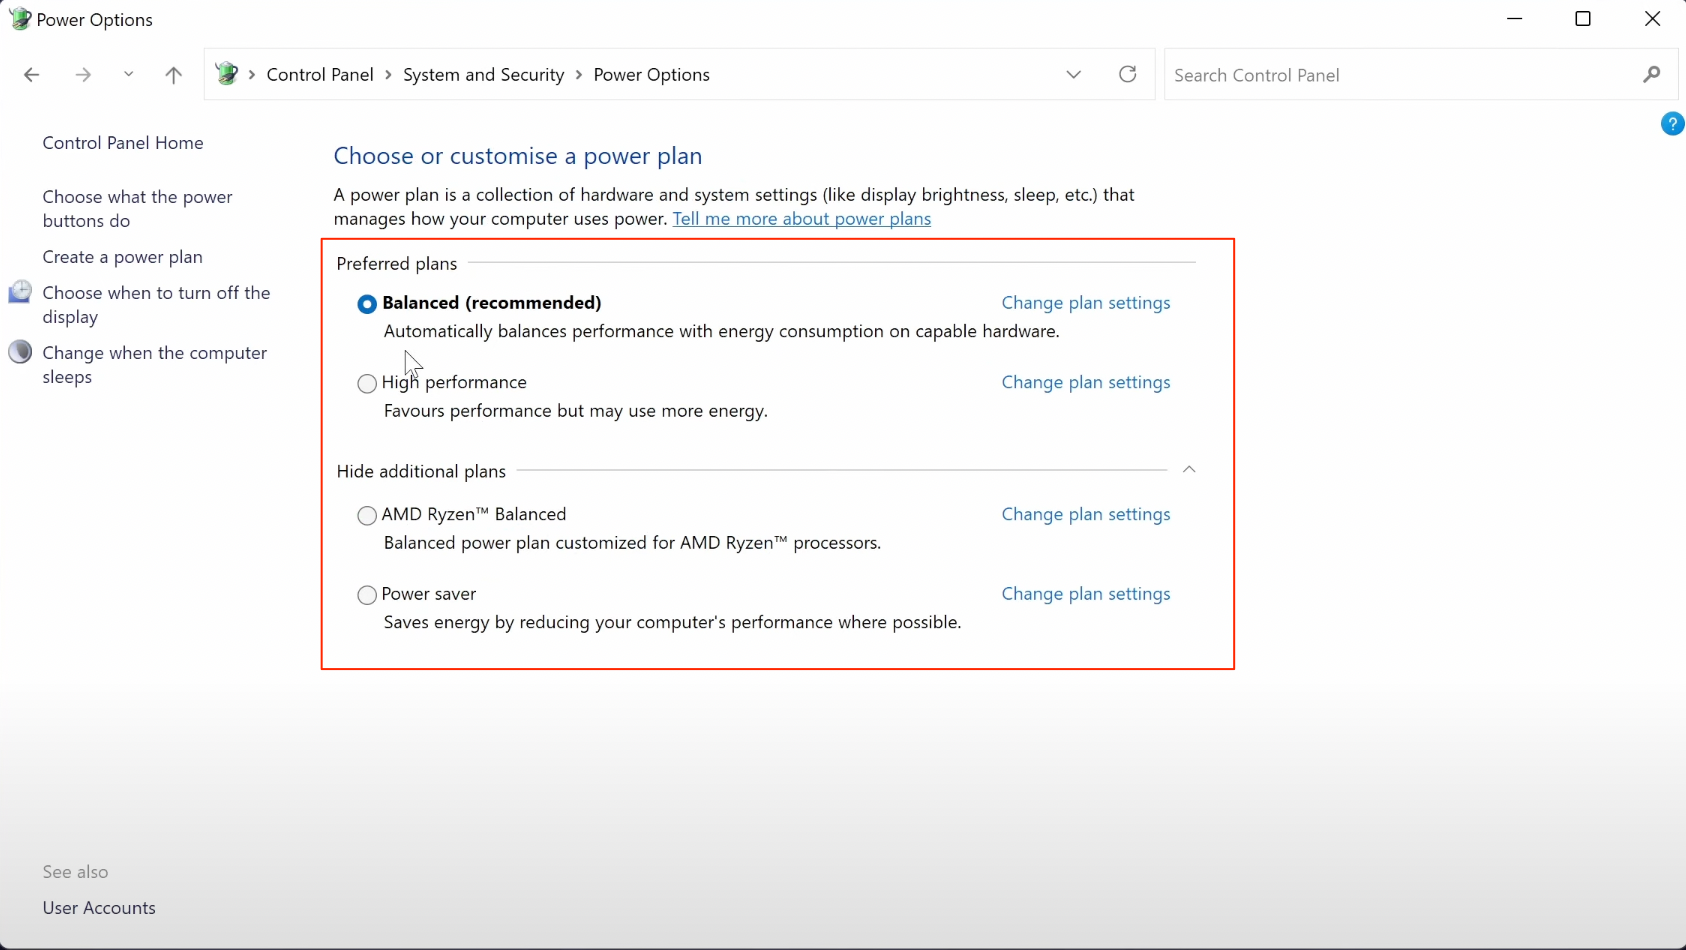
- In the power settings, click on show Additional plans to get the power saver option.

- Check the box to the left of the Power saver to turn it On.
You can always choose balanced if you were already on high performance, so you don’t lose too much performance whilst still saving battery.
If you click on Change plan settings, you can edit the time your PC will stay on.
You will be able to change the options for both when on power and when on battery.
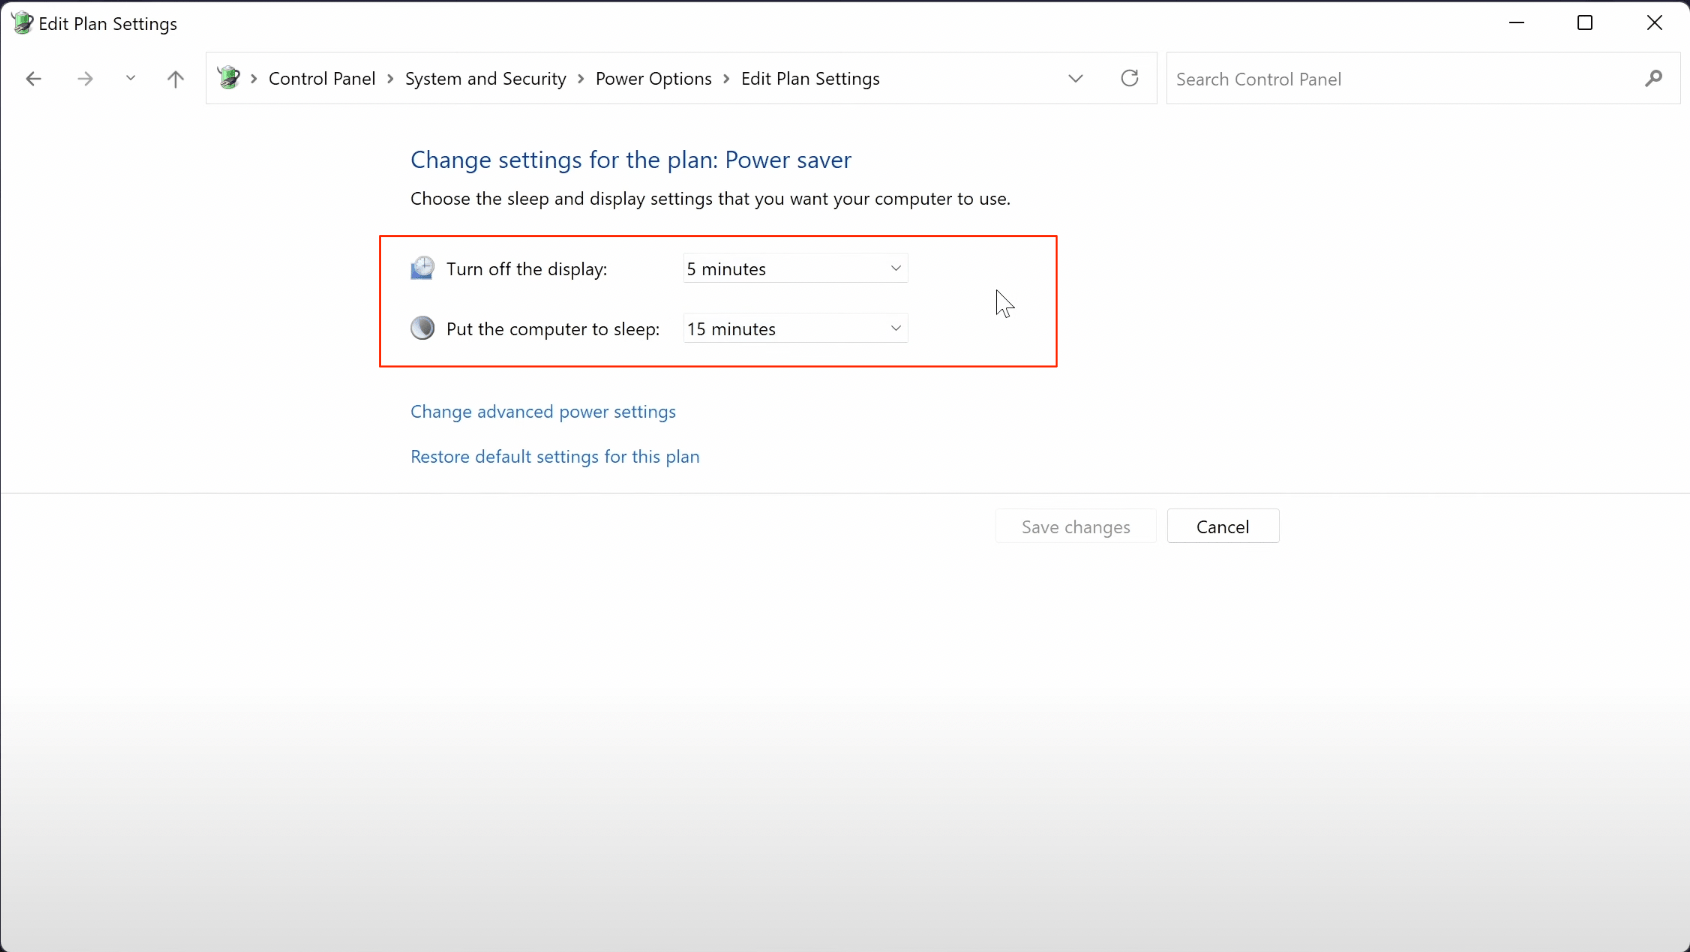
Feel free to change these, and the shorter the time is, the more you will save your battery when you are away from your laptop.
Tip 3. Lower Processor Usage
If you are still on the Edit Plan Settings page of the power saver mode we selected, then click on Change advanced power settings to open a new window.
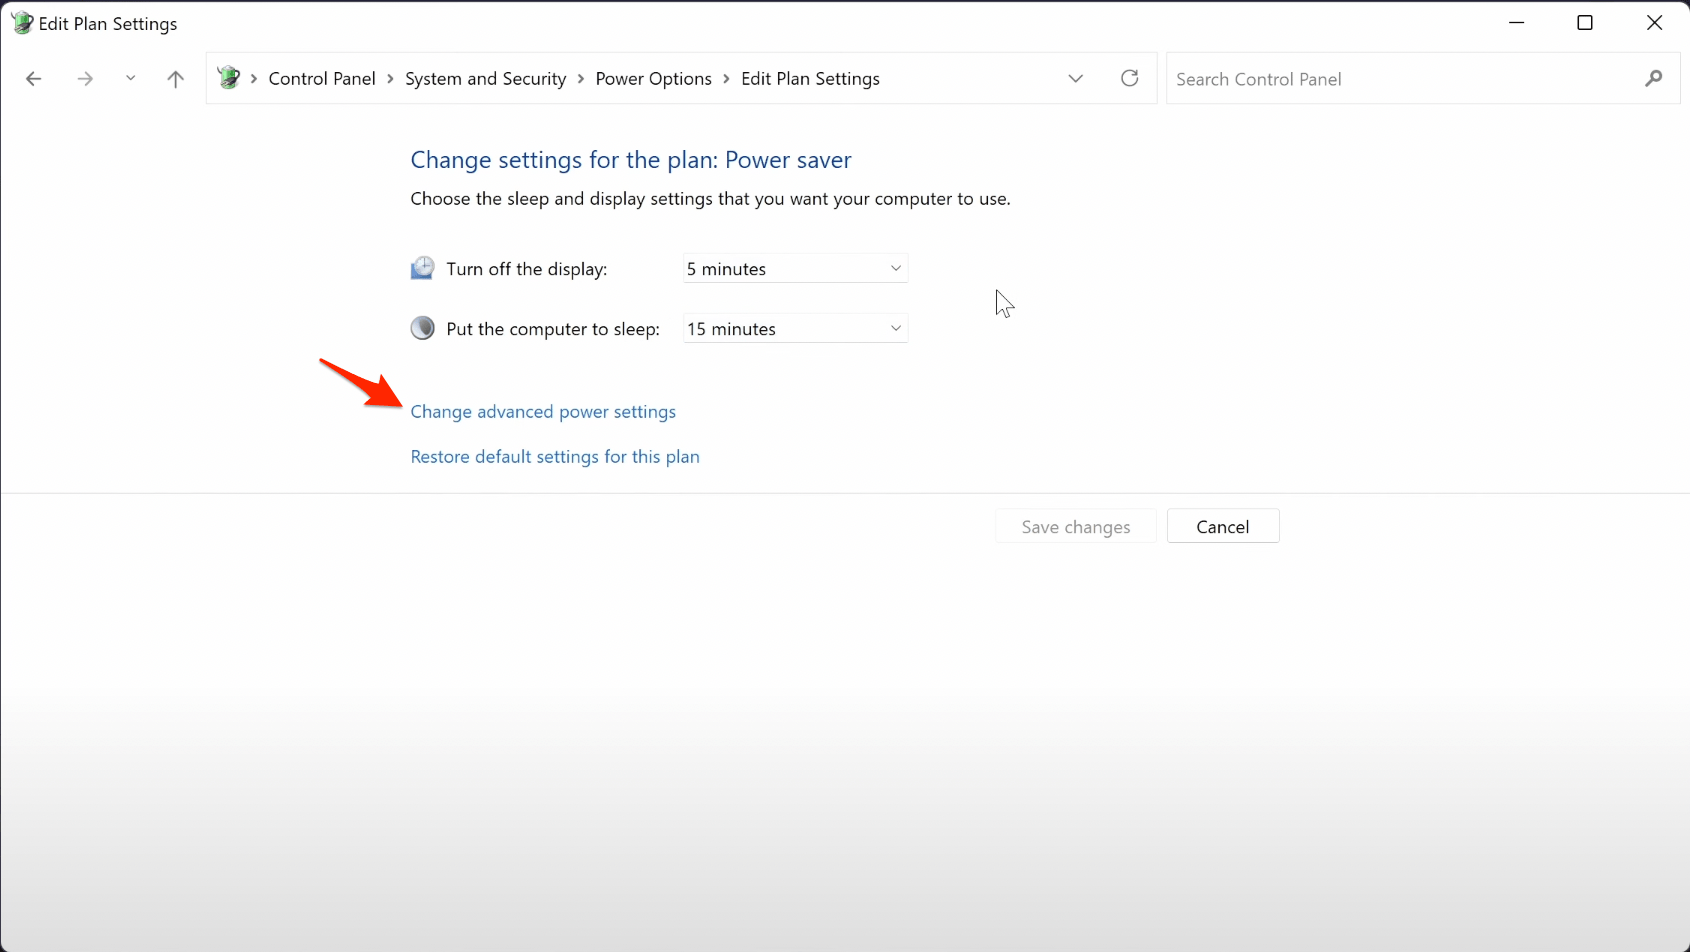
In these advanced settings, first, find the option called Sleep and click on it to expand it. There are a few more options that we can change here, such as Turning on hibernate.
Now find the option called Processor Power Management and expand it and expand the option called Maximum Processor State.
You should see two options, with one that says On battery.
Feel free to change this number to something like 80% initially on battery.
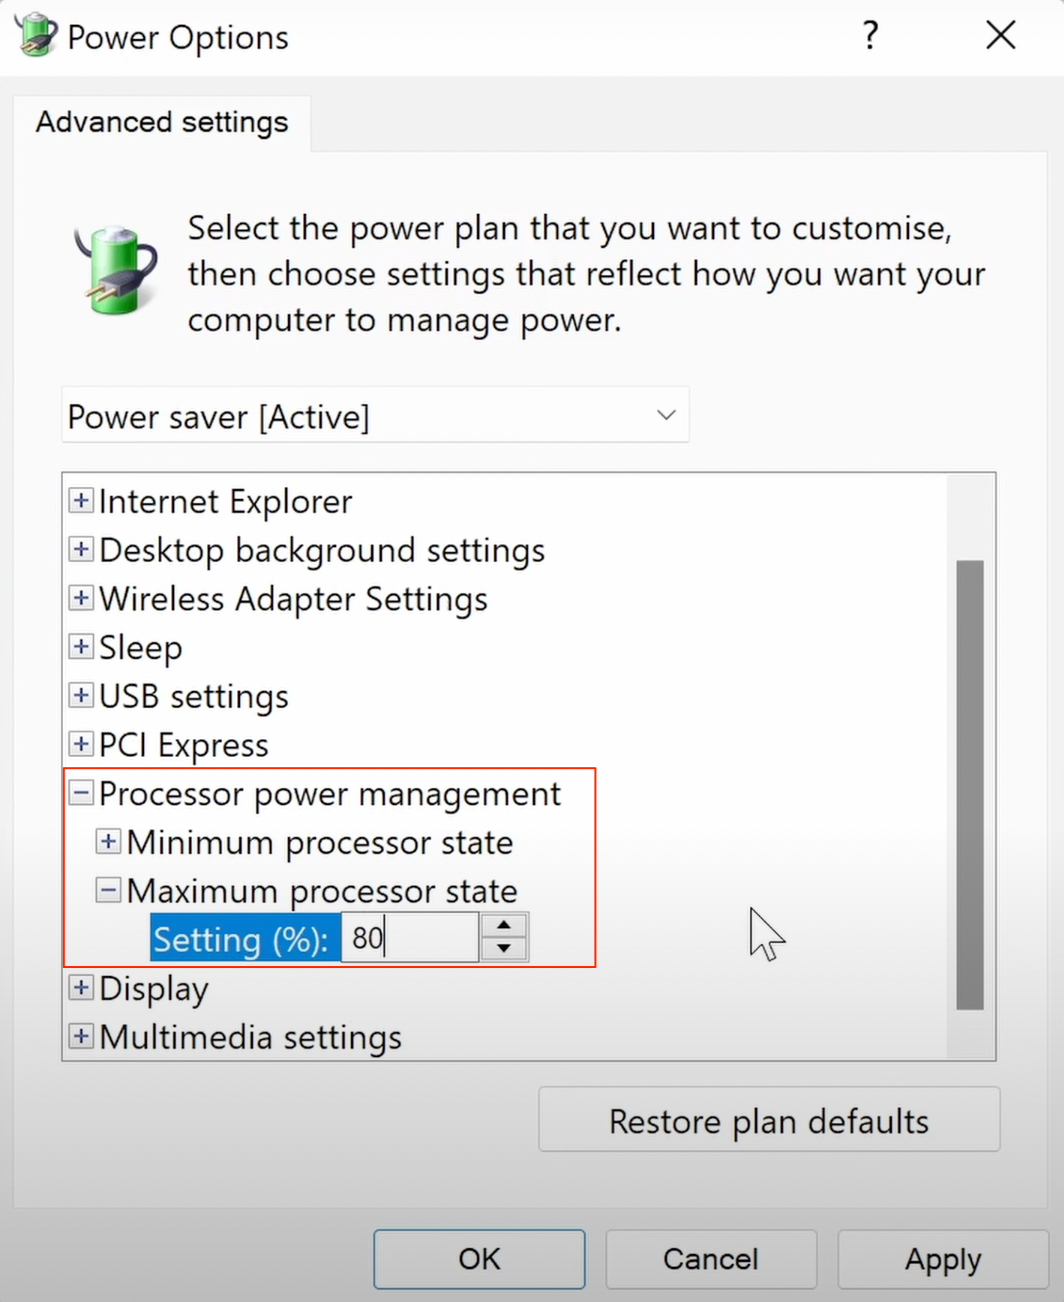
This will limit your processor to 80% and will save battery but you will lose some performance obviously, especially when running demanding programs, so if it’s not worth it then you can return to here to change it back to 100%.
If you find that 80% doesn’t make much of a difference to the performance, then you could even go lower to save more battery.
Remember to click Apply to save any changes that you’ve made.
Tip 4. Kill Resource Hogging Apps/Services
First and foremost, have a look at all the background running apps and services and then stop the ones that are consuming an enormous amount of CPU and Memory.
This is because the apps hogging unnecessary system resources also consume much of the battery juice. So it’s better to suspend them, which could be done as follows:
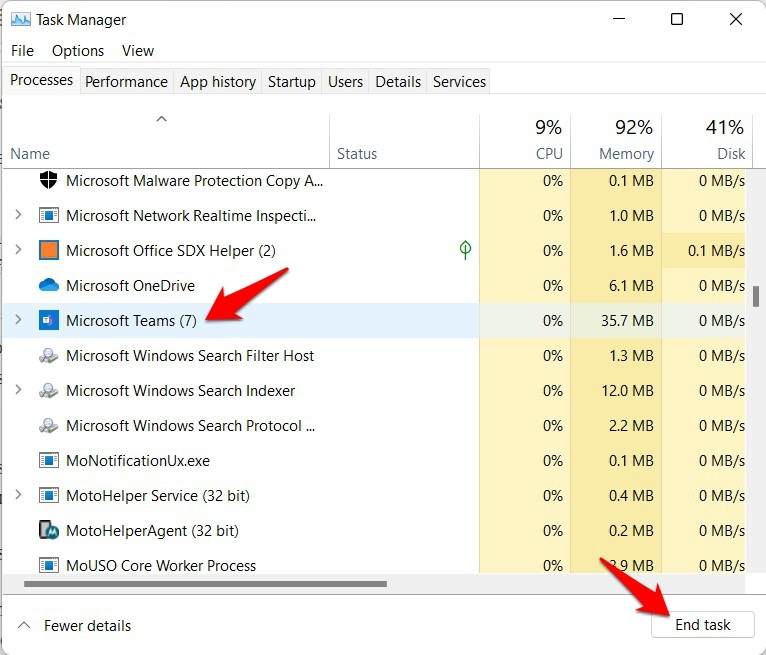
- Launch the Task Manager via Ctrl+Shfit+Esc shortcut keys.
- Then scroll to the Background Processes section.
- Select that app from the list that is taking up much of the CPU and Memory resources and click on the End Task button to end its process.

- Do so for all the apps that are consuming high resources (make sure these processes aren’t part of the system apps).
- Once done, verify if it ends up fixing the Windows 11 battery drain issues.
Tip 5. Optimize Background Apps Performance
Background apps are known to be among the most common culprits when it comes to quick battery drainage issues. Therefore, it’s recommended to set their behavior to Power optimized so that they maintain a balance between performance and battery consumption.
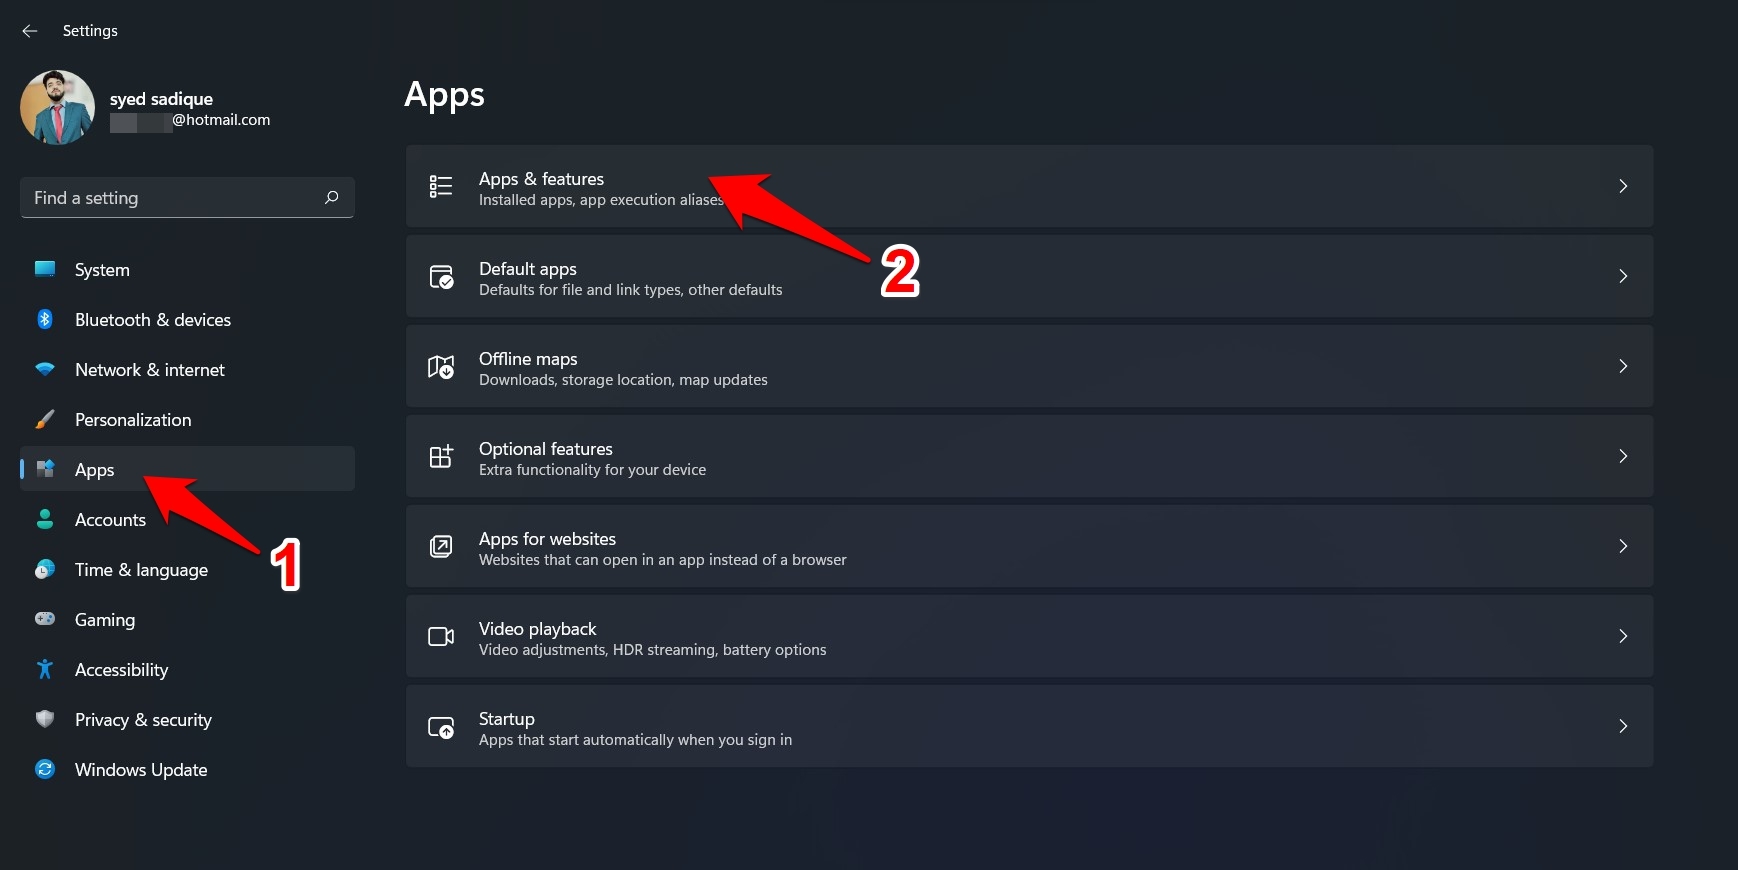
- Bring up the Settings menu via Windows+I shortcut keys
- Then select Apps from the left menu bar and go to the Apps and Features section.

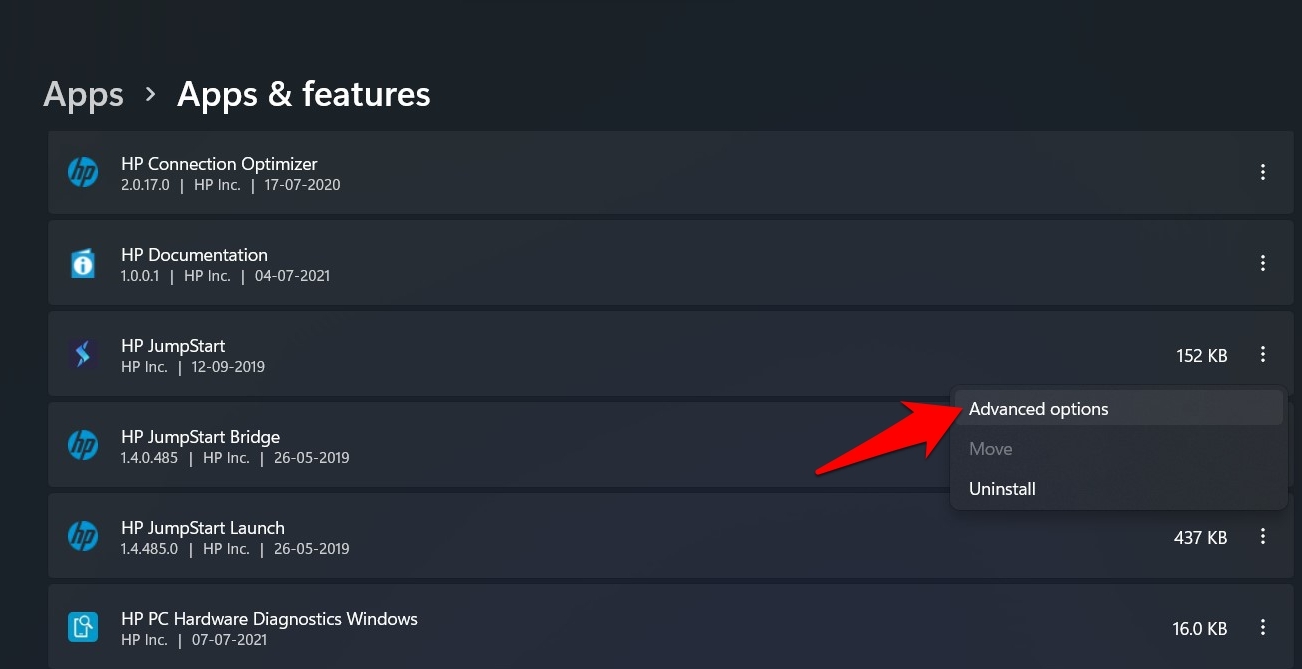
- Next up, click on the overflow icon next to the app that is currently running in the background and select Advanced options.

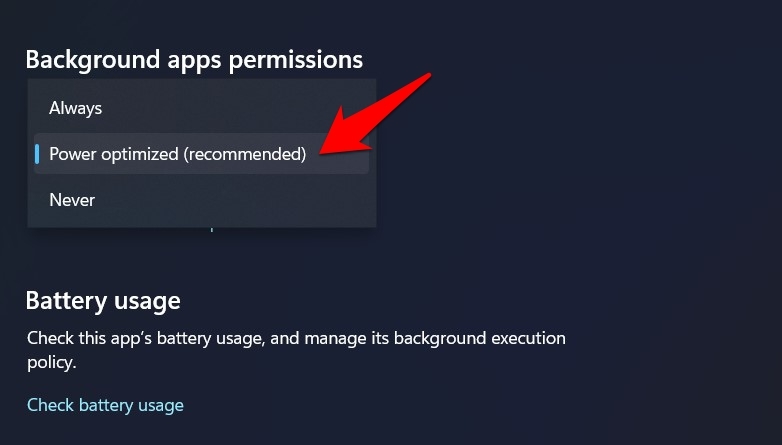
- Now select Power Optimized under the Background App Permissions section.

- If you plan to take a more restrictive measure, consider taking away its privilege to run in the background. For that, select Never from the drop-down menu.
- Check if optimizing the app’s background performance managed to fix the Windows 11 battery drain issues.
Tip 6. Disable Auto Startup Apps
The next Method to save battery on your Windows 11 laptop is to prevent certain apps from running on startup. Windows 11 comes with a lot of pre-installed applications that run on startup by default. This is to provide you with maximum comfort in order to access applications on your PC. However, more applications can lead to quick battery discharge.
Disable Auto Startup Apps to Boost Speed
Startup items are those programs that run while you start your PC or laptop. It can be beneficial in many cases if you need software to be actively available after starting your PC. However, this makes the whole boot-up process slower, and with more apps, the CPU faces more stress.
As ideal, you should only keep those apps in the startup that are of utmost importance and crucial to have. This includes an antivirus program or any software firewall. Basically, only urgent, always active, and important software must be in the startup items list.
Tip 7. Unplug any Peripheral Devices
The next method is quite simple, all you need to do is unplug any peripheral devices from your laptop if you have any when you are not using them. Any device, such as a wired mouse or USB stick might draw unnecessary power from your laptop’s battery so if you keep them unplugged when not in use you should see a slight increase in battery life.
Tip 8. Free Up Space on PC
If your device is close to capacity, it might run slower and therefore use more battery. Freeing up space could help make your laptop run more efficiently. Check out my channel or click the card on screen now as I’ll have videos that cover many ways to free up space in Windows.
A few quick ways to free up space would be to empty the recycle bin, which can be done by right-clicking on it.
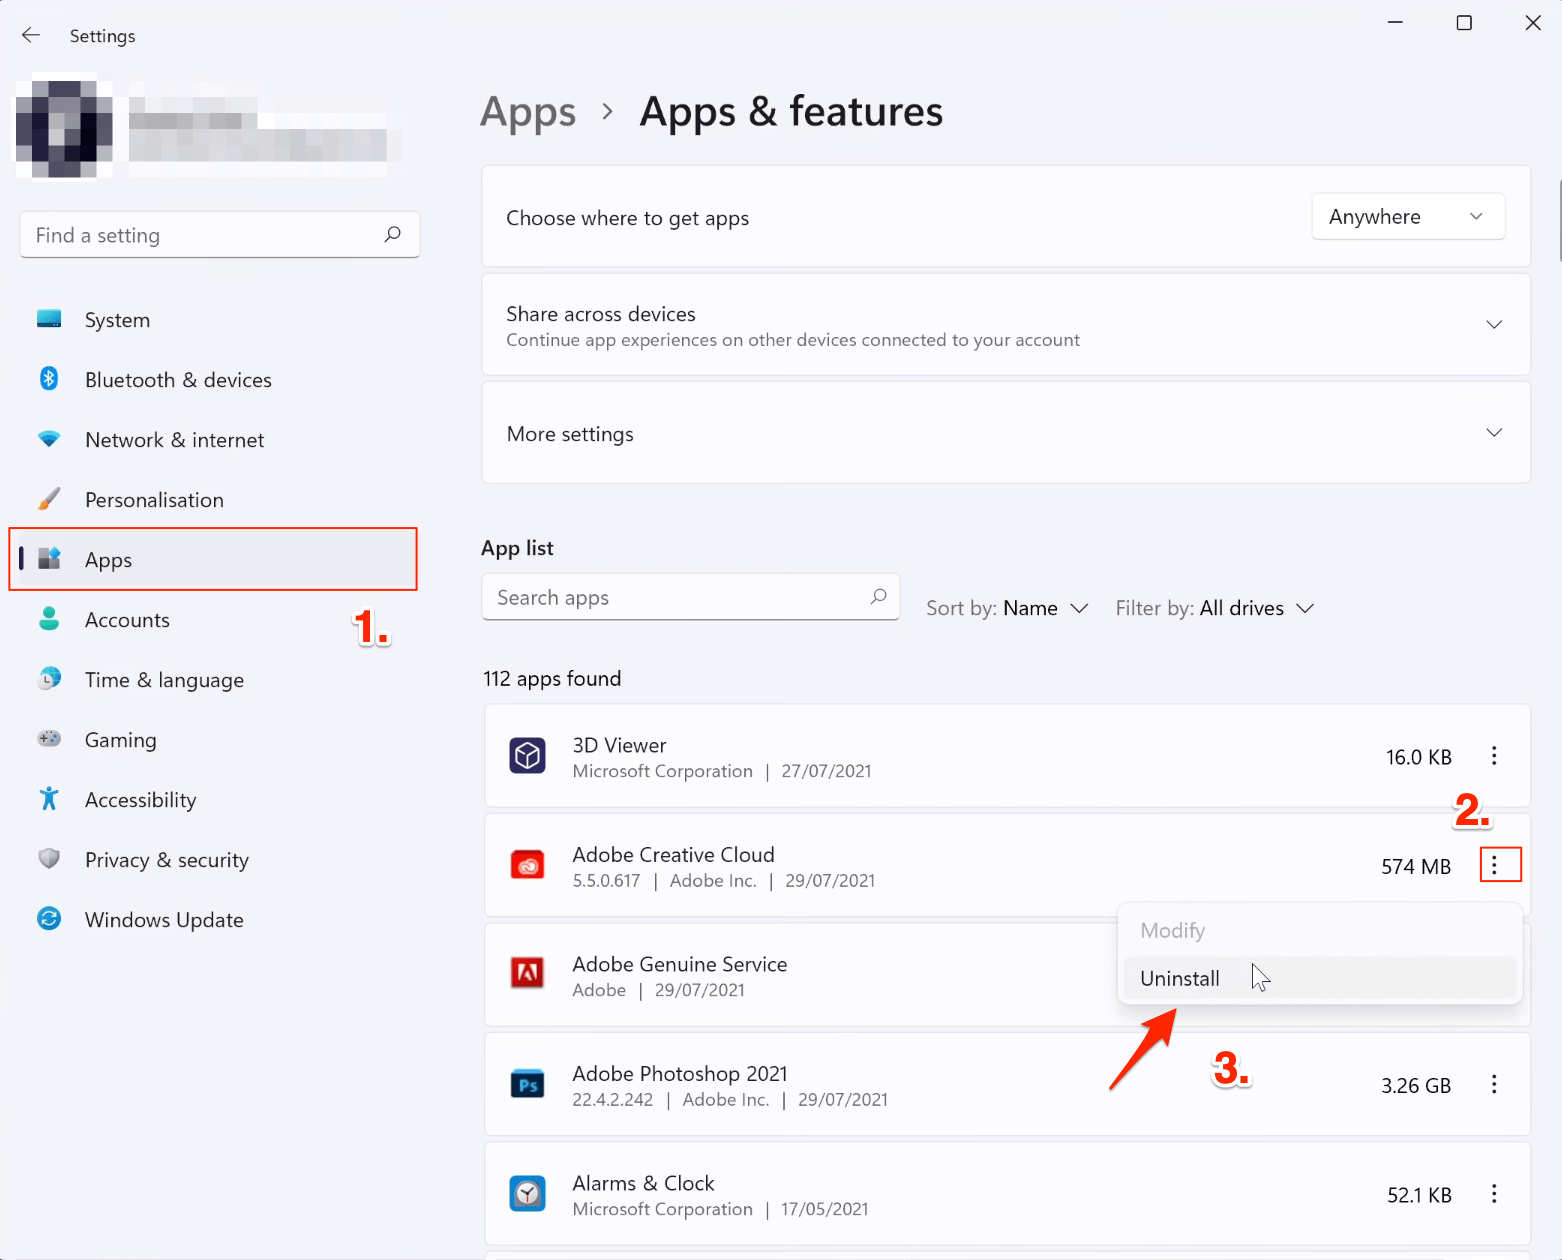
You could sort through your downloads folder, or uninstall a program you no longer use. You can uninstall a program by going to settings, then apps, then apps and features, and then finding the app you want to uninstall and then finally click on the three dots icon and choose to uninstall.
Tip 9. Tweak Display Settings
It’s no hidden secret that your display’s setting has a major role to play in determining the battery consumption rate. So to make sure that it isn’t consuming unnecessary battery, you should optimize your PC display for battery saving. Here’s how:
- Right-click on the Windows icon present on your Taskbar and select Settings.
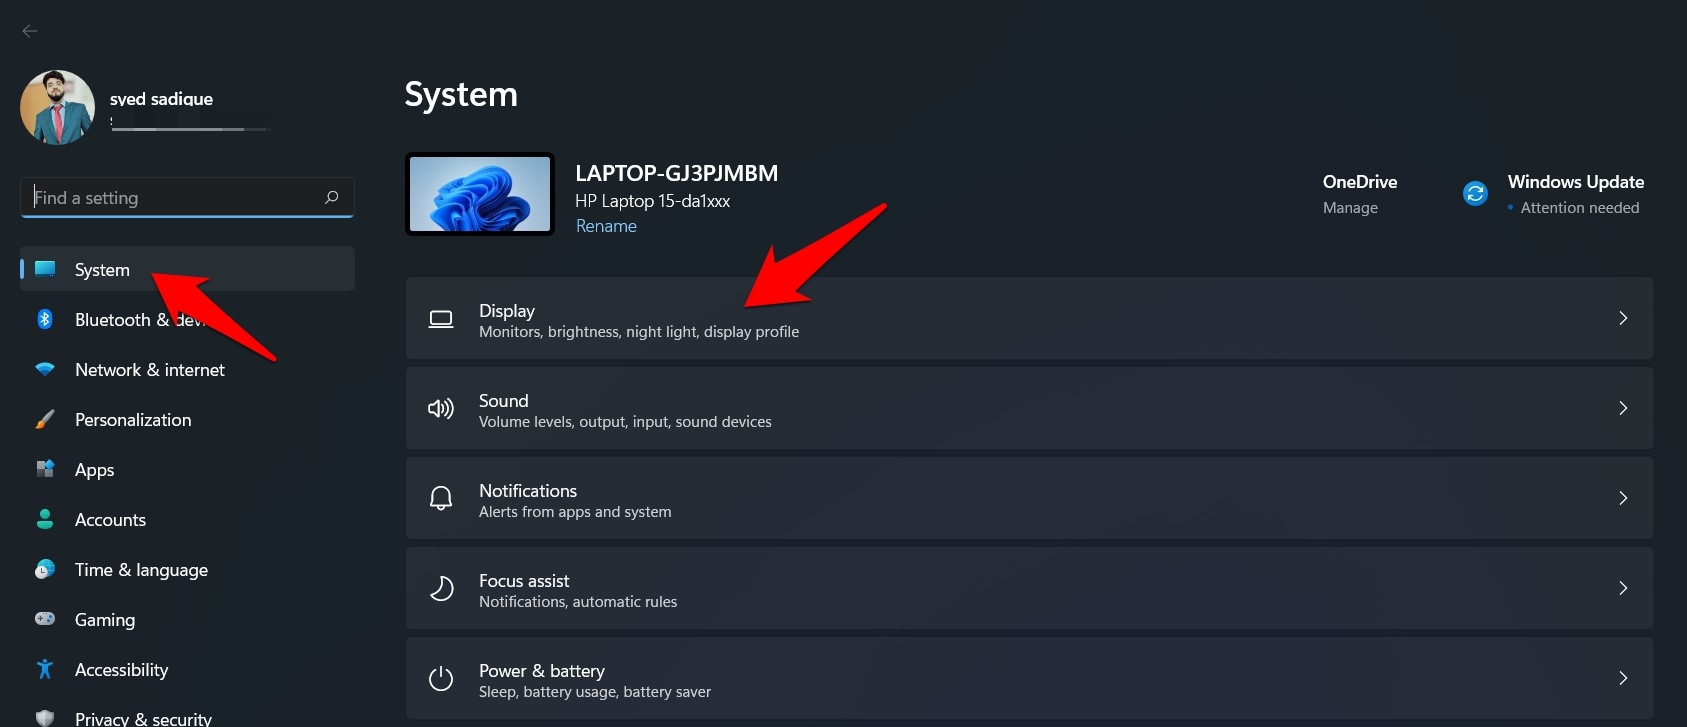
- Then select System from the left menu bar and go to the Display section.

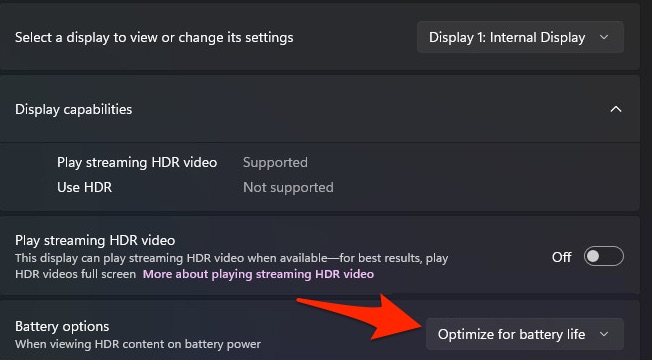
- Next up, go to HDR and head over to Battery Options.
- Now select Optimize battery life from the drop-down menu.

Moreover, since we are discussing the display, keeping the brightness at a decent level is recommended. This is because high display brightness has a direct impact on your battery life. So try out these display tweaks and then check if it fixes Windows 11 battery drain issue.
Tip 10. Physically Clean Your Laptop
The final method to save battery life is to physically clean your laptop and especially the vents. The cooler your laptop can run the less the fans will be required and the more efficient it will be, extending your battery life.
And so those are my methods to help save battery and increase battery life on a Windows 11.
If you've any thoughts on 10 Tips to Save Battery Life in Windows 11, then feel free to drop in below comment box. Also, please subscribe to our DigitBin YouTube channel for videos tutorials. Cheers!
