Ever since the split-screen feature got introduced with Windows 11, it has been immensely helpful, especially for multitaskers. From personal experience, it helps me learn and work on my practical skills at the same time side by side. This multitasking window has completely eliminated the problem of minimizing and opening windows every time you were to work on multiple applications at a time. Surely, every user would want to leverage the use of this feature. But many users still get stuck using it as they are not aware of how to enable the split-screen in Windows 11.
Well, this is a very common problem with many Windows 11 users. However, a good thing to know is the resolve to this is pretty simple. If you are among the ones having trouble split-screen on Windows 11, you have come to the right place. In this article, I will explain how to enable and use the split screen in Windows 11 machines effectively and efficiently. So, make sure to be with us throughout the end.
Methods to Split Screen in Windows 11
The splitting screen is now an in-built feature that comes with Windows 11. Fortunately, all users can use this feature to increase their productivity through a more efficient way of multitasking. Now, there are two different ways to split-screen. We will be looking into both of them in detail.
Method 1: Drag Windows
The first way to do so is by dragging the Window you want to split, to the edge of the screen. For better understanding, you can refer to the stepwise explanation below:
- Firstly, open the Window you want to split. Now, drag the Window all the way to the edge of the display.

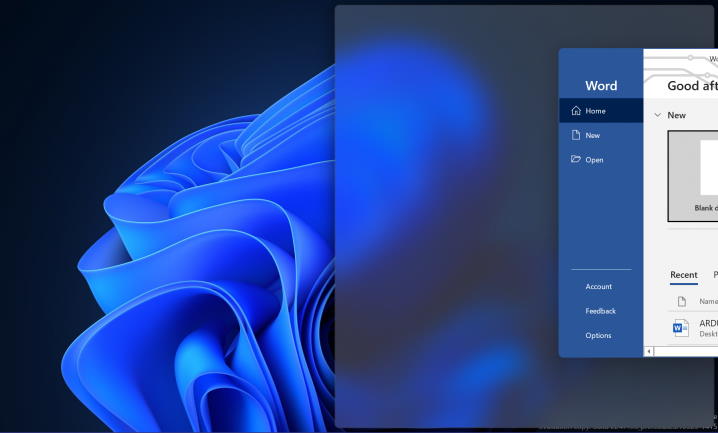
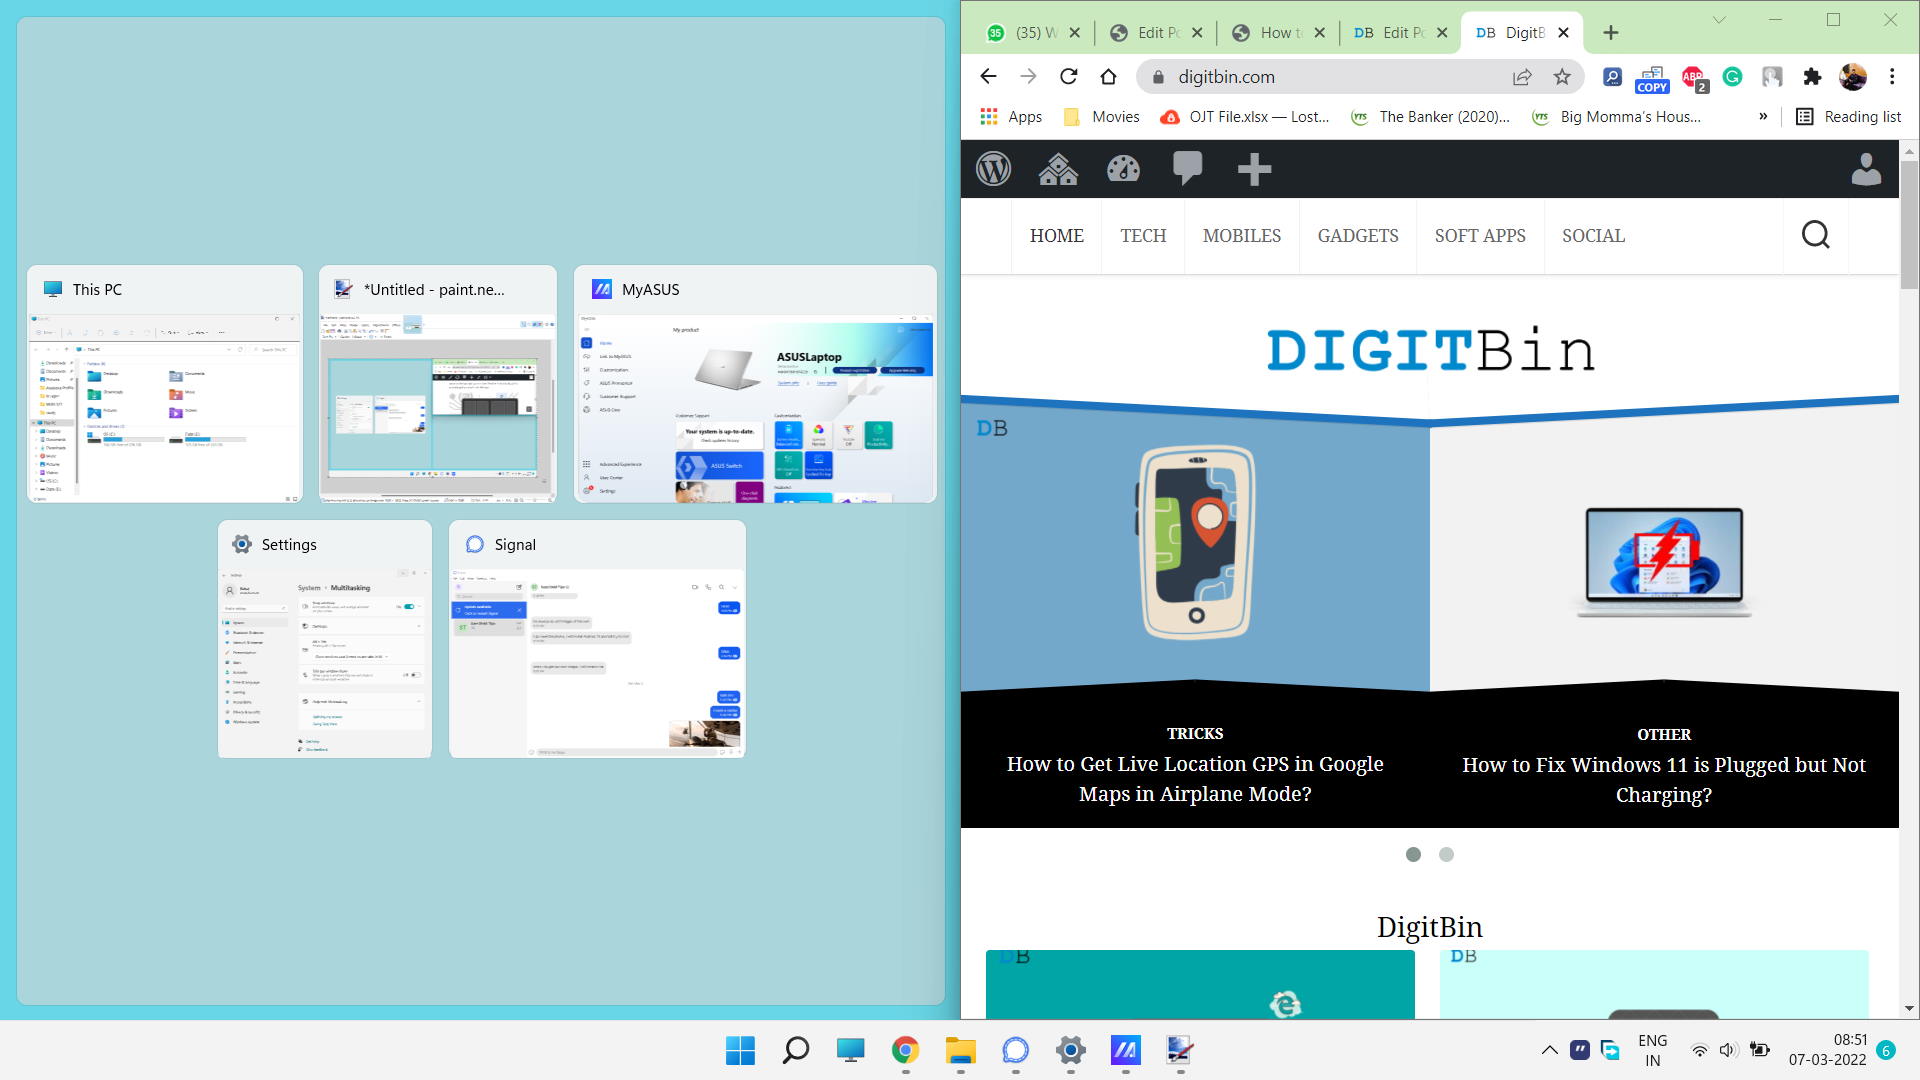
- At a point, you will see a part of your display is covered with a blur-type effect. Once you notice it, release the widow and it will occupy only the covered part of the screen.

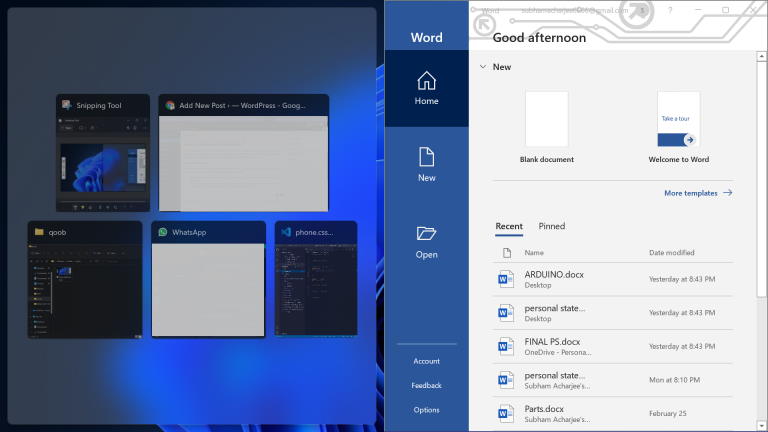
- The remaining parts of your screen will display all the active windows on your system. You can select the one you want and it will cover the other parts accordingly.
Method 2: Snap Layouts
The snap layout is a newer feature introduced in Windows 11 that helps you achieve split screen in a much easier way. But before you could use snap layout, you need to make sure you have the option enabled on your computer.
The steps to enable Snap Layout on Windows 11 are as follows:
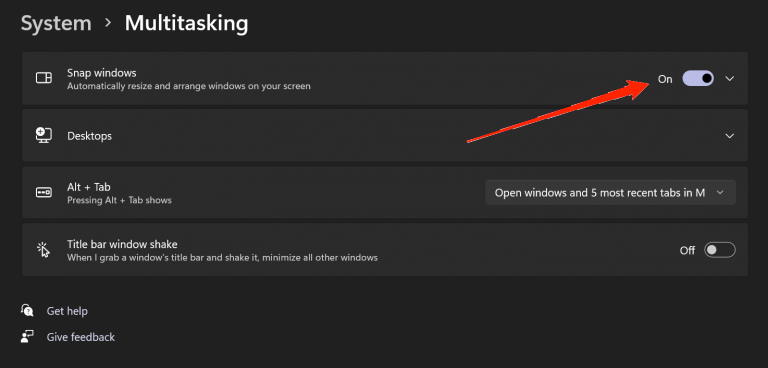
- Open the Settings menu on your computer.
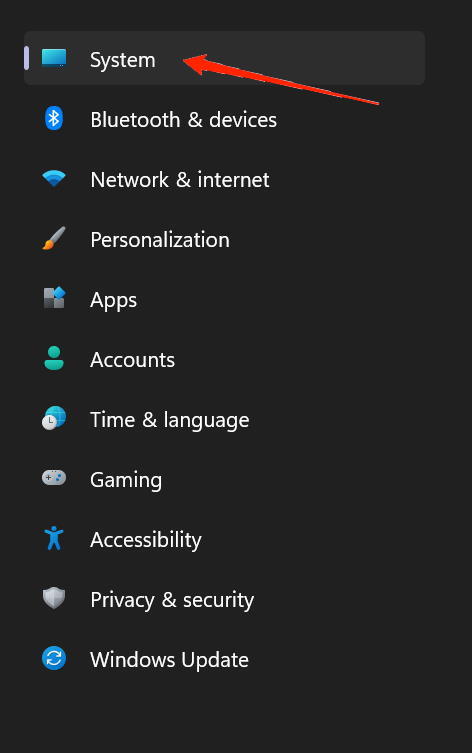
- Now go to the System category.

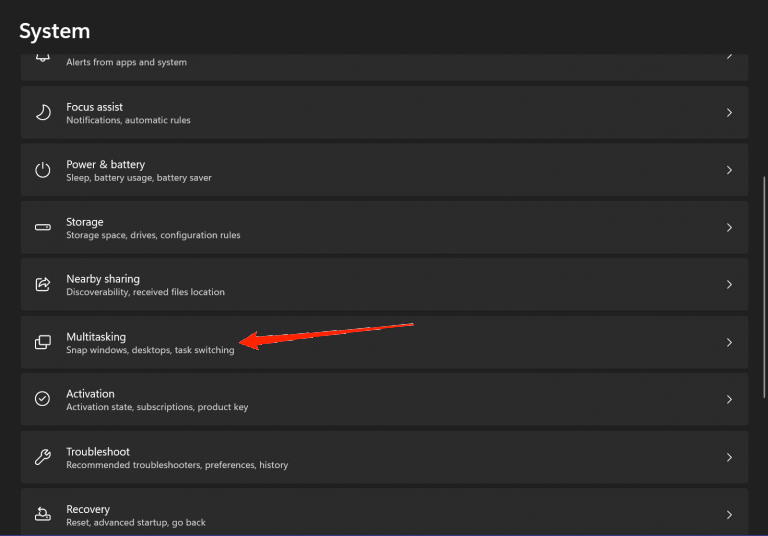
- Select the Multitasking tab from the menu.

- The first option on the Multitasking list would be Snap Layout.

- Click on the toggler to enable Snap Layout on your Windows 11 computer.
Once you have enabled the Snap Window feature, it’s time to use it to make your experience more efficient. Well, using the snap layout feature is really easy as everything is present at your fingertips.
All you need to do is open an application or Windows which you want to split-screen. Now, hover over the maximize window option at the top right corner of the Window. It will display all the available split options for the Window.
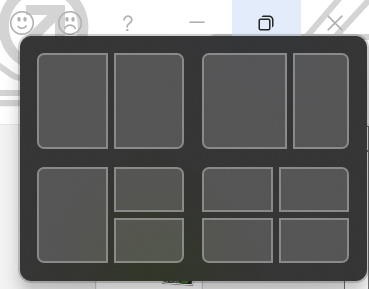
- The first option will divide your screen into two equal halves and you can operate two windows side by side.
- The second option is similar to the first. However, here the left window will occupy more space on the screen while the remaining part will be occupied by the secondary window.
- The third option divides the screen into three halves. The left side of the screen will be occupied by a single window. And the right side will be again divided into two parts. You can keep the primary window on the left side and the other two on the right side to increase your productivity.

- Finally, the last option divides the screen into four halves. You can simultaneously work on four windows at the same time and save a lot of time by avoiding minimizing and maximizing Windows again and again.
Just click on any halves from one of the options and your screen will automatically adjust accordingly. If you select say the first half of the fourth option from the snap window menu, the active menu will occupy the specific space of the screen. While the next half will display all the active windows to choose from.
Likewise, you can select different applications for all halves one by one and they will be displayed accordingly on your screen.
Final Words
The split-screen function comes in handy while multitasking. And as you have seen, splitting the screen son Windows 11 is no rocket science at all. I personally advise enabling the snap window feature as it gives much easier control to split screens compared to dragging the windows. Hopefully, all your doubts about the split-screen feature in Windows 11 are now clear. However, if you have any further queries, feel free to reach us in the comment section.
If you've any thoughts on How to Use Split-Screen in Windows 11?, then feel free to drop in below comment box. Also, please subscribe to our DigitBin YouTube channel for videos tutorials. Cheers!

