We all have been using Google Images to search for desired images. We need to enter the keyboard and tada, we have the desired result. But there’s a reverse image feature as well, using which you can get all the details of the uploaded image. So, here’s our guide on how to reverse image search on iPhone.
You can use the reverse image feature to know about the origin, similar images, or cross-check the facts about the uploaded image. There are several ways to perform a reverse image search on iPhone. Let’s check out each one of them, one by one.
Best Ways to Reverse Image Search on iPhone
Most iPhone users rely on two browsers – Safari and Google Chrome. Considering this, below is a step-by-step instruction to perform a reverse image search on iPhone using Safari and Google Chrome.
On Safari Browser
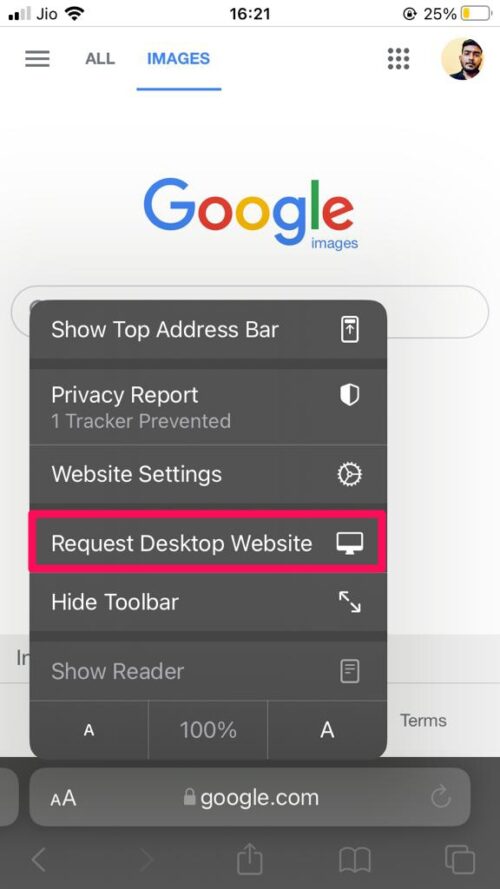
- Open Safari on your iPhone and visit images.google.com.
- Tap on the Control Centre present on the address bar, and from the context menu, choose Request Desktop Website.

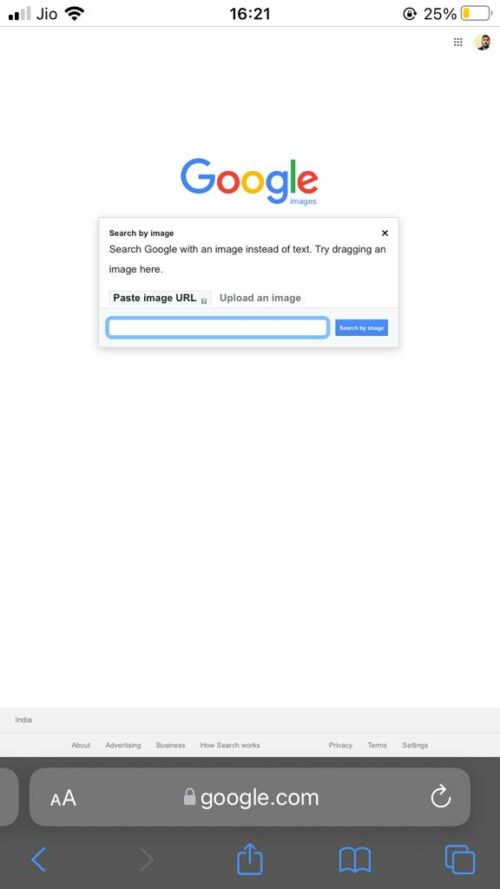
- Tap on the camera icon.
- If you have a URL of the image you want to investigate, paste it in the provided section. Whereas, if the image is saved in your gallery, choose the Upload an image option.

That’s it. You will get all the available information regarding the image in the following window.
On Google Chrome iPhone
The process is almost similar for Google Chrome; here are the steps you need to follow.
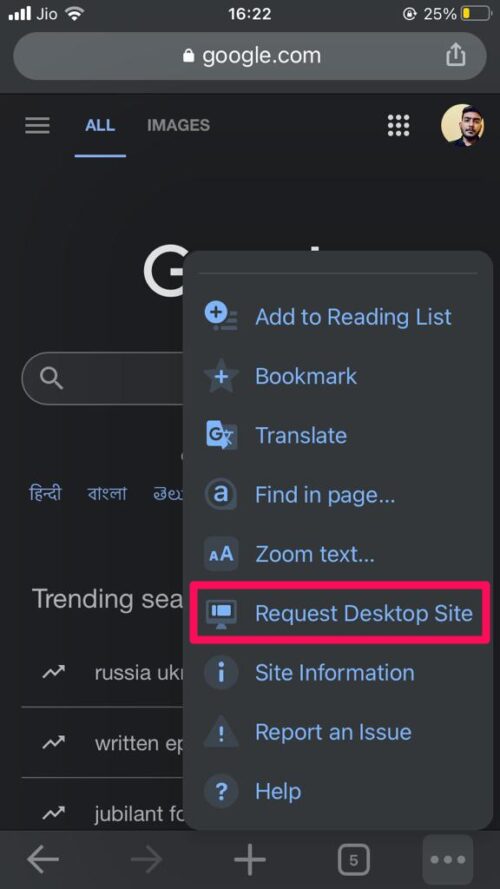
- Launch Chrome on your iPhone.
- Click on the three dots present at the bottom right corner and select Request Desktop Site.

- Now, visit images.google.com.
- Click on the camera icon to upload either the URL or the image itself.
You will see all the available information regarding the image in the following window.
That’s it for this guide. In case of any difficulty, feel free to reach us via comments.
If you've any thoughts on How to Reverse Image Search on iPhone?, then feel free to drop in below comment box. Also, please subscribe to our DigitBin YouTube channel for videos tutorials. Cheers!
