macOS updates bring several benefits, like improved security and better system performance. But in some cases, they can also make some important files disappear from your Mac.
A lot of factors can lead to this, such as an interrupted macOS update, insufficient storage, or problems with your Mac’s hard disk. But thankfully, some reliable solutions are in place to recover missing files after a Mac update.
In this guide, we’ll explore them in detail with easy steps on each. Let’s roll in.
Does Updating macOS Sonoma/Ventura/Monterey Delete Everything?

Generally speaking, no, updating macOS to a recent version like Sonoma, Ventura, or Monterey doesn’t delete everything on your Mac.
A macOS update improves your system by adding new features, fixing bugs, and improving performance. It shouldn’t affect the files saved on your Mac drive.
So why does data loss occur? Let’s explore that.
Why Updating Mac Deletes Some Files?
Usually, updating macOS doesn’t delete files, but there are some situations where data loss can happen during a Mac update:
- Interrupted macOS Update: An interrupted update process like a sudden power outage or system crash during installation can lead to system instability. This instability may corrupt files or lead to errors when rolling back the update, thus causing data loss.
- Insufficient Storage Space: If your Mac doesn’t have the required storage space for the macOS update, you’ll receive prompts to free up space manually or allow macOS to do it for you. Though macOS prioritizes removing temporary files and non-essential data, important files are sometimes vulnerable to accidental deletion during this process.
- Disk Fragmentation/Corruption: Mac hard drives with fragmentation or corruption issues can face data loss risks during updates. Errors in the update process can even worsen the condition of the disk and affect stored files.
- Poor Mac Performance: If your Mac is already experiencing performance issues or hardware problems before the update, it may not handle the update smoothly. You should try fixing those problems first and then update your macOS to avoid data loss.
- Updating Using a Guest Account: Performing a macOS update under a guest account can make it hard to retain user-specific data. Because of this, remember to always update from the primary user account to ensure data safety.
- Accidental File Movement: Sometimes, users accidentally move files to the Trash bin or other locations, thinking they’re deleting them. Such an unintentional action can result in files being lost after an update.
- Corrupted Beta Versions: Beta versions of macOS updates are not perfect, and adjustments are often required. If you use a beta version, you can face risks of data loss.
In these cases, data loss can occur during or after a macOS update, and you may be unable to locate important files on your Mac. Let’s now explore how to recover them.
Recover Lost Files from Time Machine
Time Machine is a built-in backup tool in your Mac that you can use to restore your missing files easily. The main purpose of Time Machine is to create regular backups of your Mac, allowing you to roll back to previous states in case of data loss or system changes, such as a Mac update.
This “rolling back to a previous state” is different from resetting your Mac. When resetting your PC, it returns to its factory setting (default state). But when you roll back to a previous state, your Mac goes back to the way it was at an earlier time. Your Mac doesn’t revert to its factory settings but switches to an earlier state (like a few days before the update or any changes occurred).
This way, you can recover your missing files using the Time Machine backup. But keep in mind that this method would work only if you have previously set up the tool.
So, if you turned on Time Machine backups on your Mac before updating macOS, it should have preserved a copy of the folder containing your missing files before they were removed.
Now, let’s see how you can recover missing files after a Mac update using Time Machine:
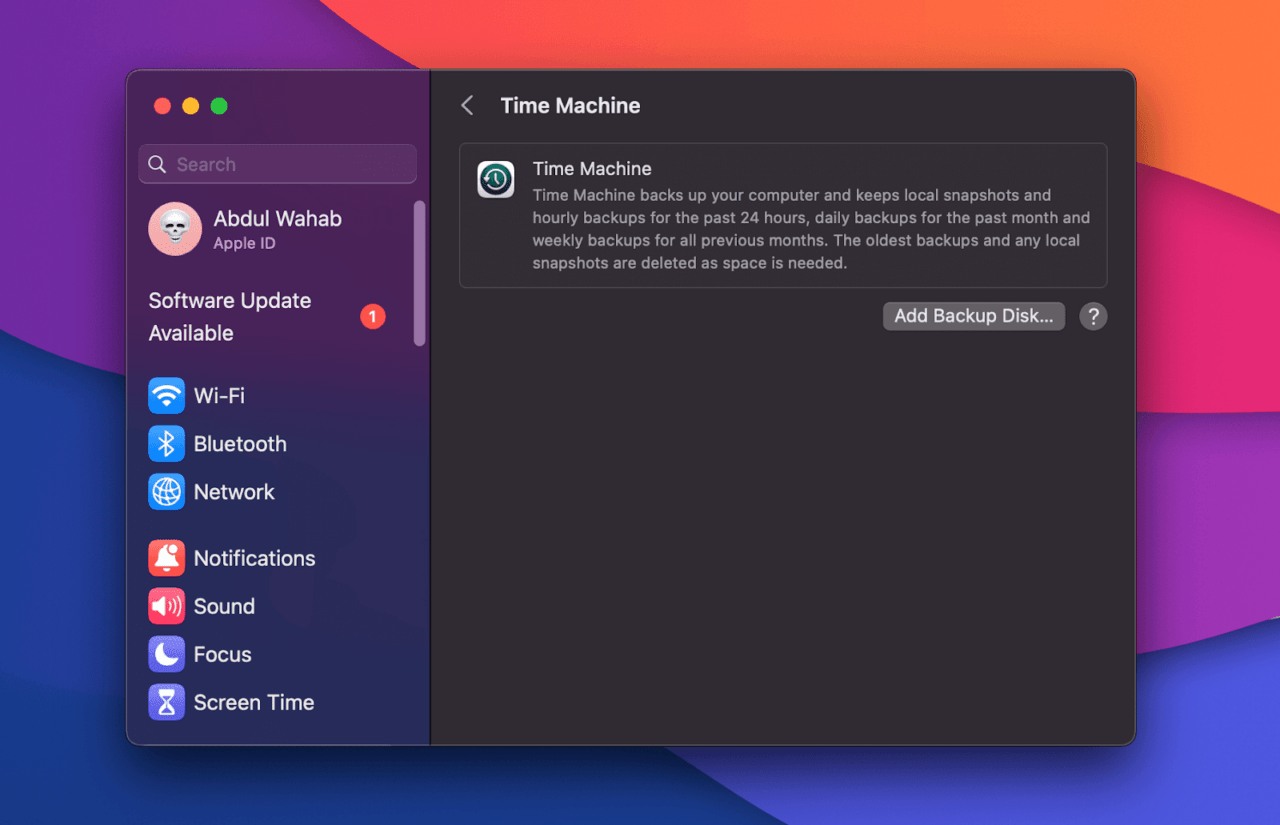
- Open Time Machine on your Mac.
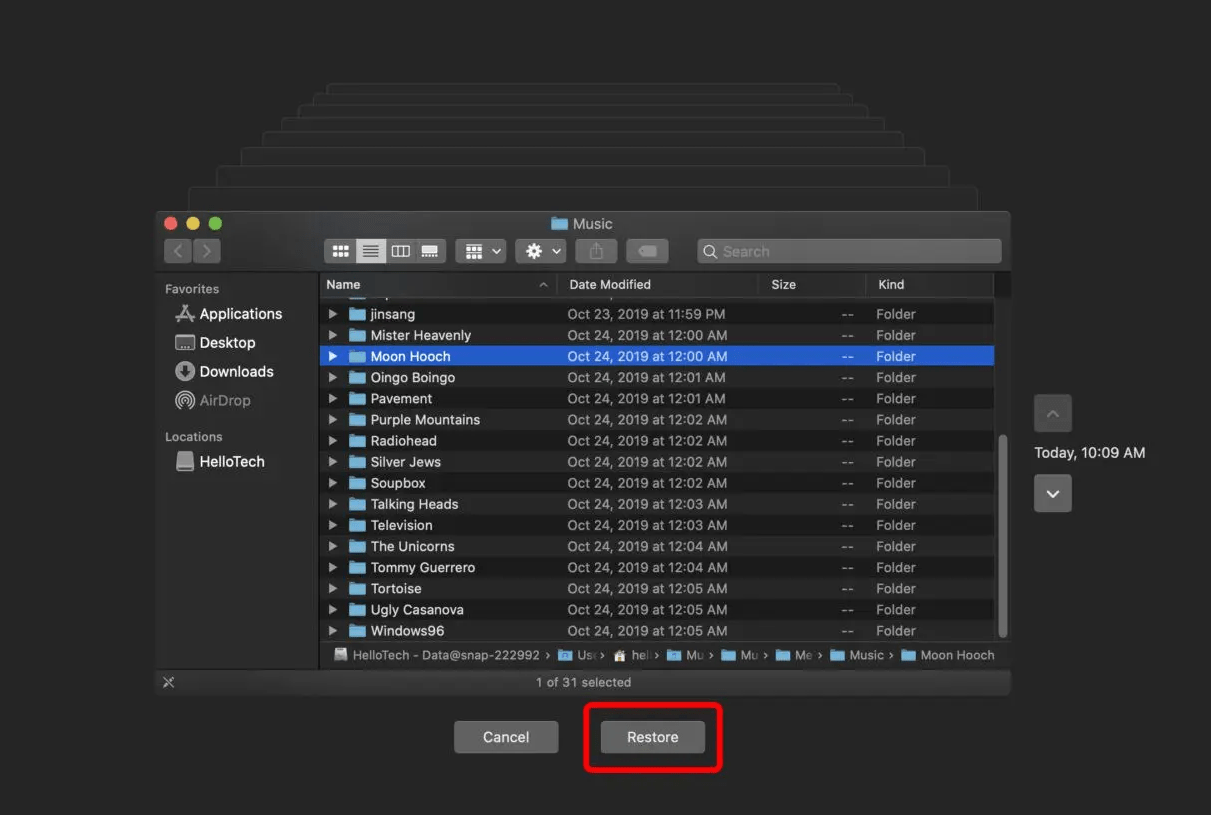
- Once the Time Machine is active, your screen will transform into a visual timeline showcasing your backups. Navigate through this timeline using the onscreen arrows to pinpoint the specific moment before the update when your files were still available.
- To ensure you’re recovering the correct files, press the SpaceBar to preview them.
- If you are sure about the files you want to recover, click “Restore” to recover them to their original locations on your Mac.

Recover Lost Files From iCloud Backup
Most Mac users have set up iCloud backup, which keeps their important files safe and easily accessible, especially in case of unexpected file loss after system updates. If you find your data missing after a Mac update, you can recover it using iCloud easily.
This is how to do that:
- Go to iCloud.com and log in with your Apple ID.
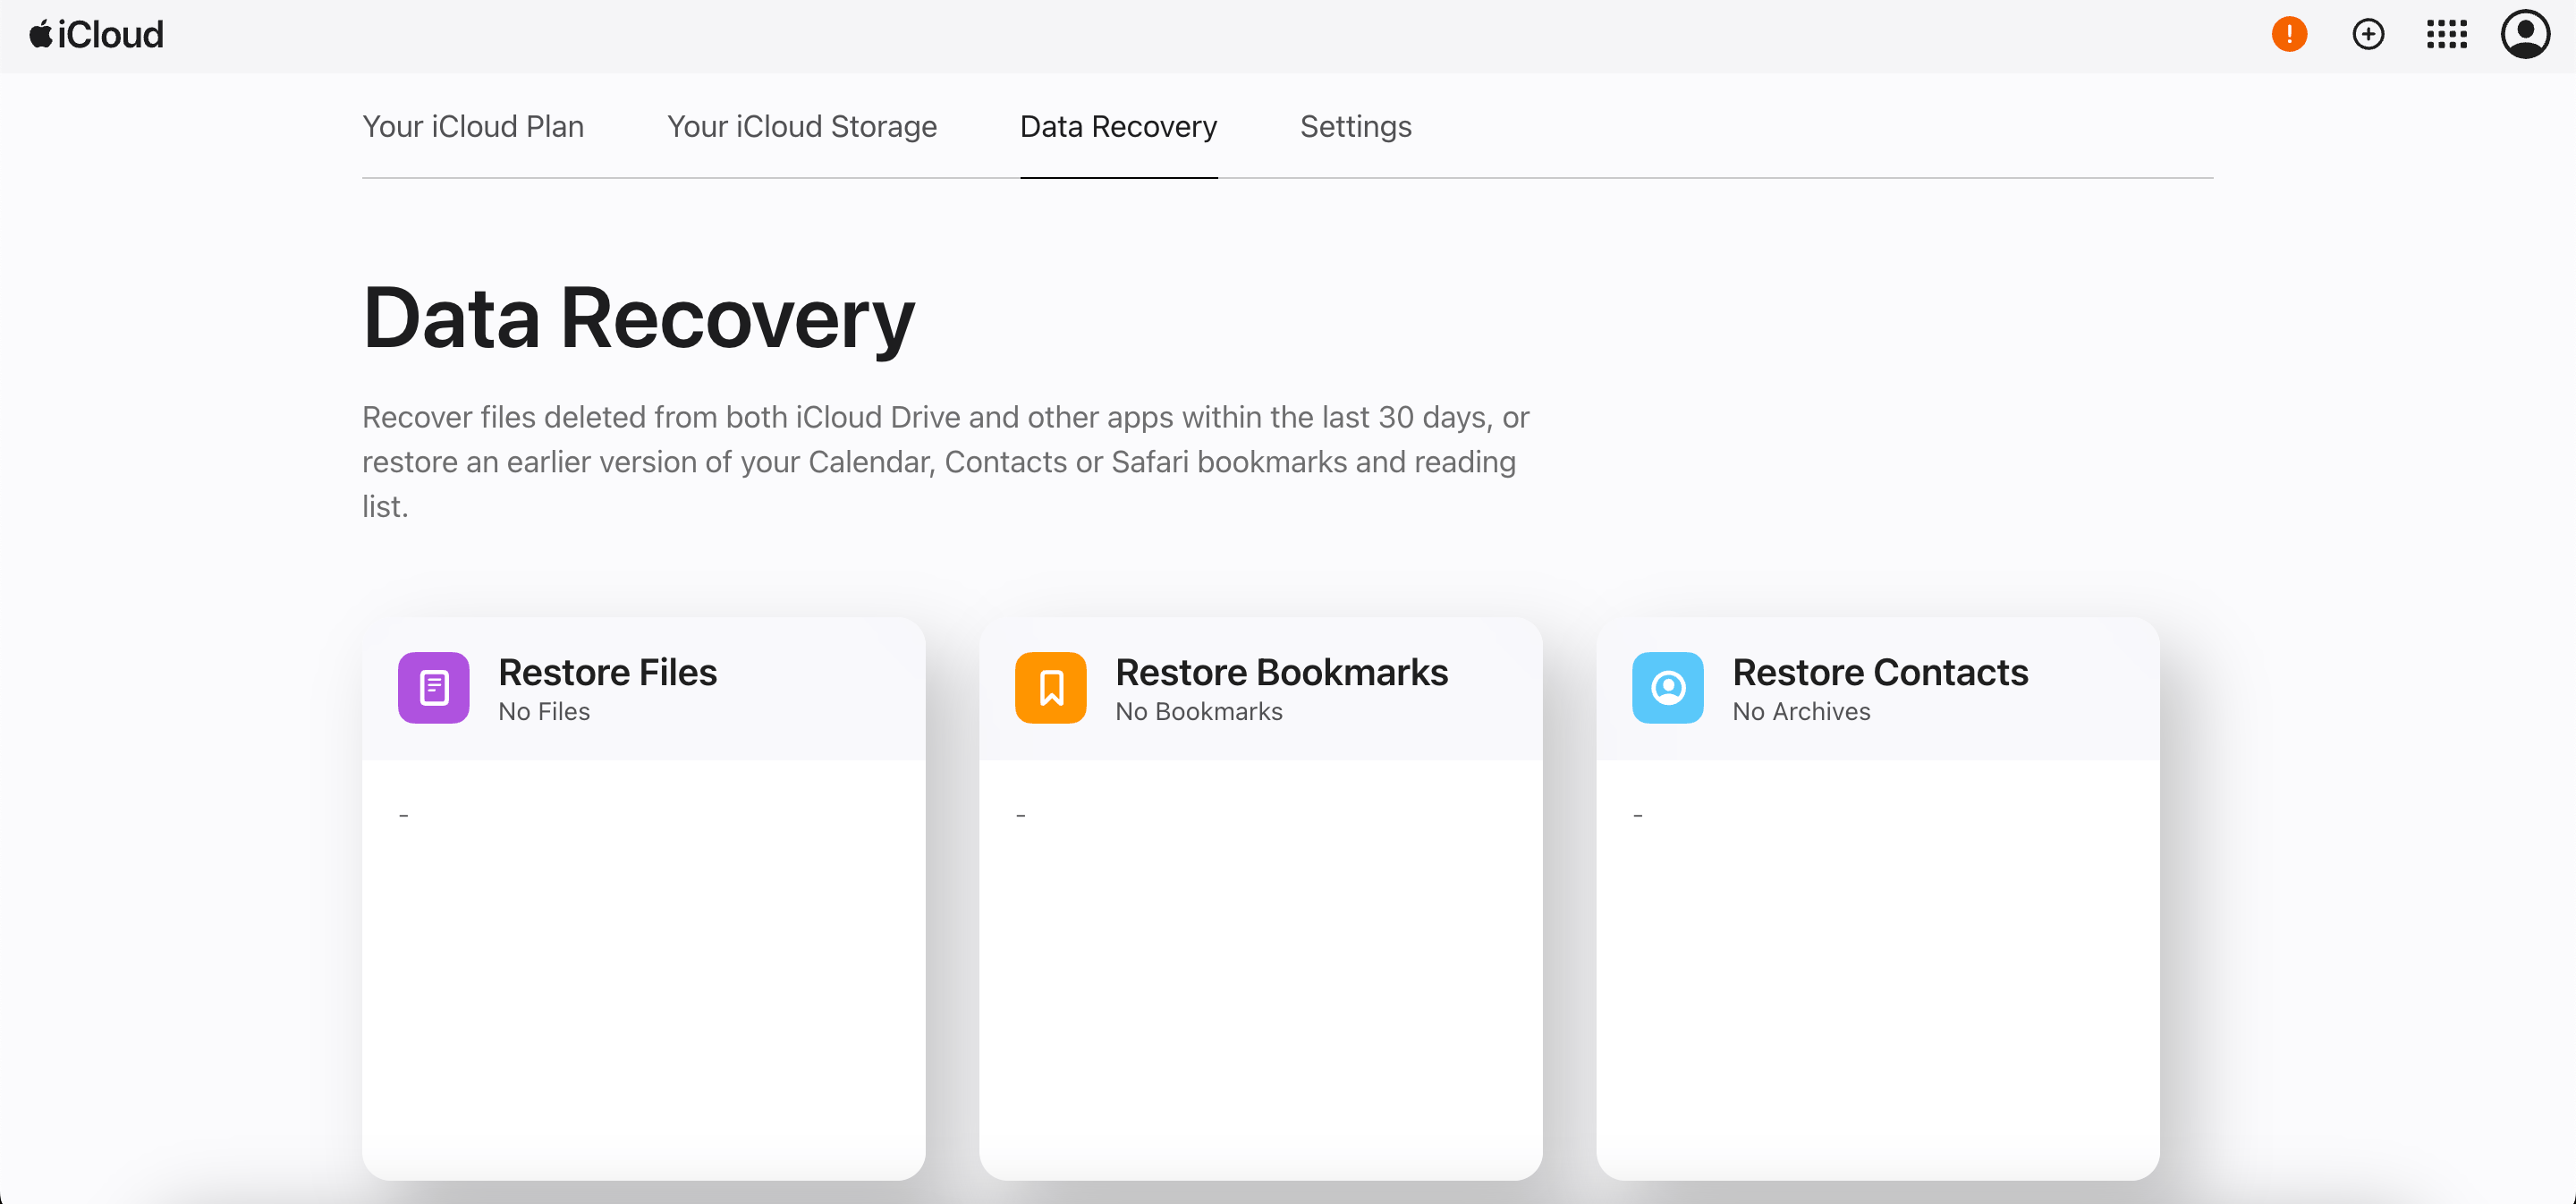
- Navigate to “Settings”> “Advanced”> “Restore Files.”
- Find and select the missing files and folders you want to recover. Check the boxes to the left of all the items to restore.

- Once done, select “Restore Files” to save them to the Downloads folder on your Mac.
Log Into a Different User Account
During a macOS update, the system might sometimes face issues with your user account, causing it to appear as if it’s gone. However, the actual files in your home folder are often still there. It’s just that the link between your profile and these files gets disrupted, leading you to a situation where you can’t access your files through your user account.
When this happens, you can recover your missing files by logging into your old user account. Simply carry out these steps:
- Click on the Apple icon in the top-left corner of your screen and select “Log out [your username].” This will take you to the login screen.

- Select your previous user account and log in. You may need to enter your login credentials.
- Once logged in, check if your missing files are now accessible. But if the files are still missing, try all registered accounts on your Mac.
In case your old user account is not available, you can manually add it back by following these steps:
- Click on the Apple icon.
- Go to “System Preferences“> Users & Groups.”

- Find and click the padlock icon, which will ask you to enter your password.
- Then, click the “+” sign to add your old user account. Once you are logged in, see if your missing files have reappeared.
Turn off Saving Files on iCloud Drive
When you have iCloud Drive turned on, macOS can automatically store your Desktop and Documents folders in your iCloud account after an update. Good thing these files are safe in your iCloud Drive, and you just need to turn off this feature to recover your data temporarily.
Here’s how to do that:
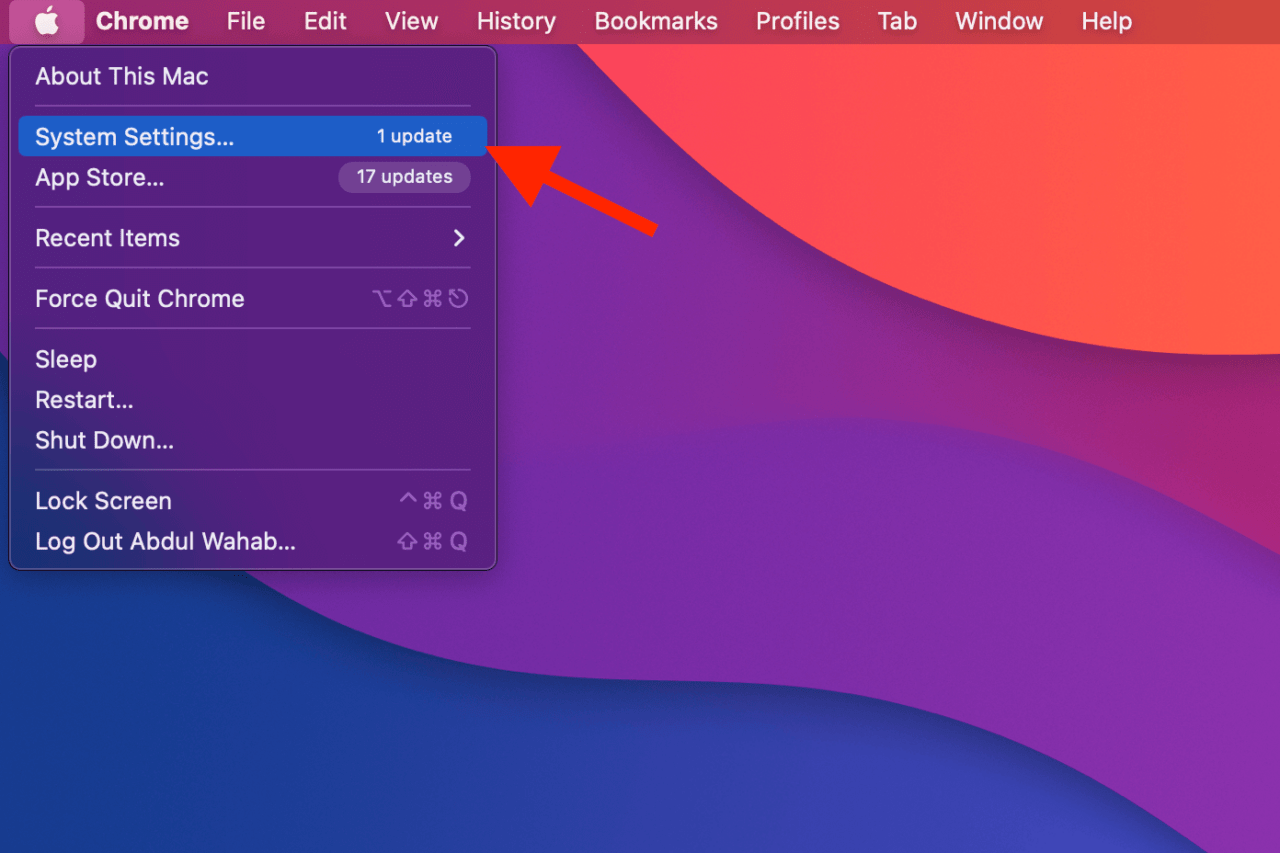
- Click on the Apple icon in the top-left corner of your screen and select “System Preferences.” (“System Settings” on newer Mac versions.)
- Select “iCloud” from the new window.
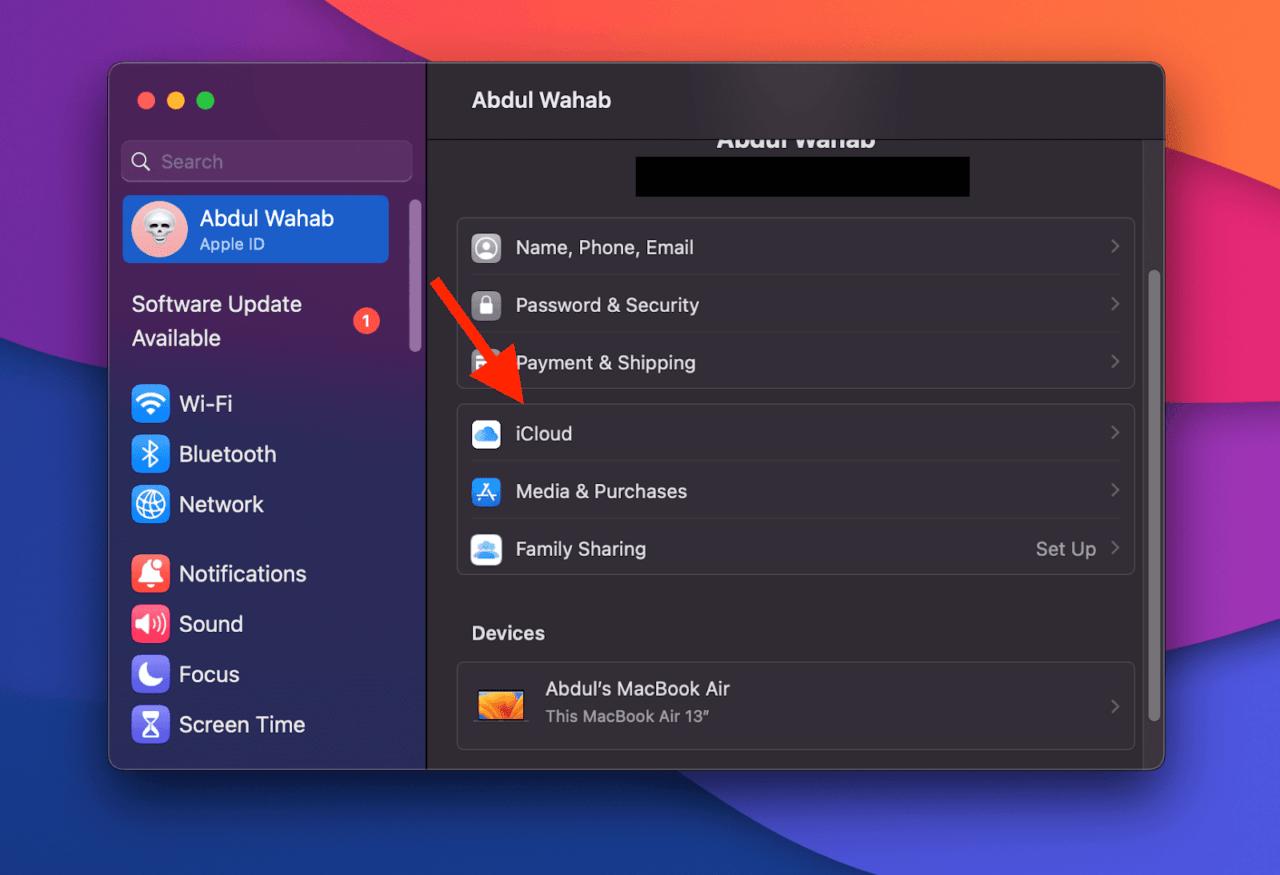
- Click “Options” next to iCloud Drive.
- Ensure that the box in front of “Desktop & Document Folders” is unchecked. Click “Done.”
- Next, log in to your iCloud and download the files from your iCloud Drive to your Mac.
If the “Desktop & Document Folders” box was already unchecked, your missing files might be in your iCloud backup. In this case, visit the iCloud website, select the files you need, and click the Download icon to recover all the missing files to your Mac.
Downgrade to a Previous Version
Sometimes, upgrading to a newer macOS version can lead to unexpected file loss that disrupts the smooth functioning of your Mac. In such cases, downgrading to a previous macOS version can help you recover your missing files.
Let’s see how to do that:
- Visit the Apple website and download the installer for the macOS version you want to revert to. Save it to a formatted USB drive connected to your Mac.
- Restart your Mac and press and hold the Power button until you see the loading startup options.
- Select the USB installer from the startup options and click “Continue.”
- In the installer, choose the previous macOS version you wish to install and click “Quit install macOS.”
- Then, select “Disk Utility“> “Continue.” Select your Macintosh HD and choose “Erase.”
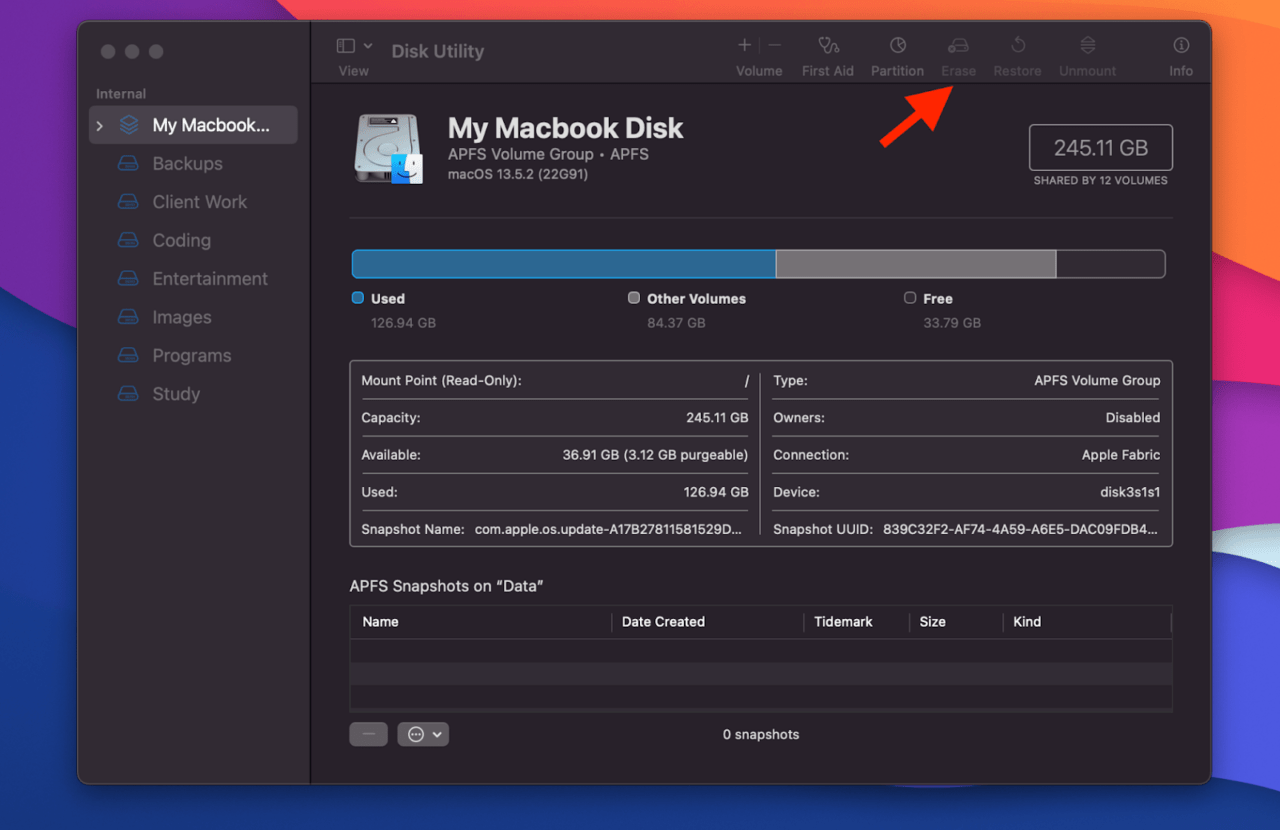
- Click “Done” when the process is complete.
- After erasing the hard drive, select “Quit Disk Utility” and click “Exit to Recovery.”
- Select “Macintosh HD” and then “Continue.”
- Navigate to “Startup Disk” and choose “Restart.”
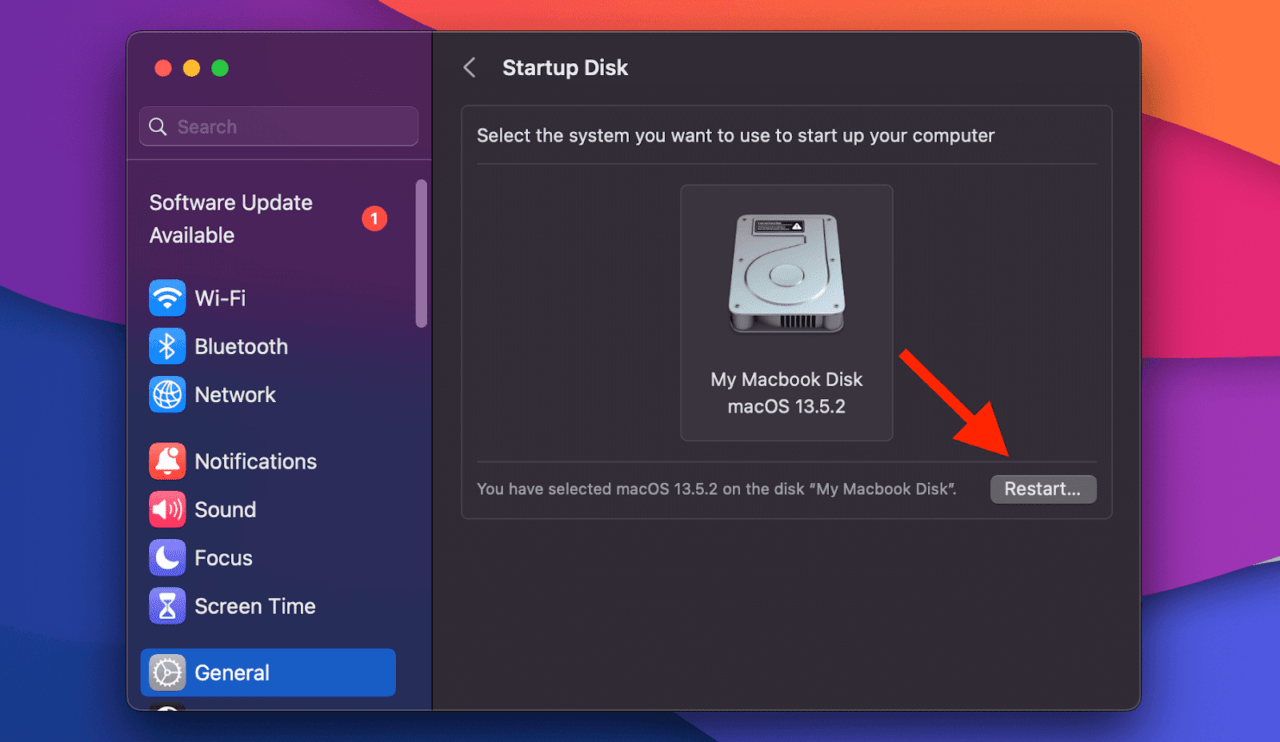
- Follow the install wizard to downgrade your Mac to the previous macOS version you selected.
Note that downgrading to a previous version will also remove all the changes made to your Mac before the update. So, make sure to back up all the important data before you downgrade.
Check macOS Trash to Recover Missing Files
When macOS deletes files to free up space or for any other reason, it follows the standard file deletion process, which involves moving the files to the Trash folder. Files stay in Trash for up to 30 days, after which they are permanently deleted.
So, before 30 days, you can recover your missing files from Trash by following these steps:
- Open Trash.

- Right-click the missing files and select “Put Back” from the context menu.

This will restore the selected files to their original locations on your Mac.
Use Third-Party Software
When built-in tools like Time Machine or iCloud do not help in recovering files, third-party tools offer seamless data recovery after Mac updates. The following tools can bypass the macOS and directly access your file system, offering quick file recovery for users who lack a Time Machine or iCloud backup and have emptied their Trash already.
Let’s quickly review both options below:
Disk Drill – Available for macOS 10.15.7–14.x

Disk Drill is a paid yet user-friendly tool to recover deleted, lost, or damaged data after Mac updates. It is simple and easy to use and lets you restore over 400 file types with its multiple recovery methods. Since it’s capable of reading failing, unrecognized, unreadable, or partition-lost devices, you can easily find missing files and retrieve them after a Mac update.
Cisdem Data Recovery – Available for macOS 10.9 or Later

Cisdem Data Recovery is free to download software that can recover missing or lost files due to macOS updates, accidental deletions, system crashes, and more. It can find and repair damaged videos, images, Word, Excel, and PowerPoint files and offers filters for file search by keywords, file size, date created, or modified. You can also preview the files before recovering them to local hard drives or Cloud platforms.
Frequently Asked Questions
Why did my Mac update and delete everything?
Mac doesn’t update and delete everything, but some data could get lost during the process. This can be due to interruptions during the update, limited storage space, or another factor.
Why did files disappear from my Mac?
Files may disappear from your Mac due to accidental deletion, macOS updates, or issues with storage. If that happens, you can use various recovery methods like Time Machine, iCloud, or third-party software to retrieve them.
Is it possible to recover deleted files on macOS Ventura?
Yes, you can recover deleted files on macOS Ventura using Time Machine backups or third-party data recovery software. You can also roll back or downgrade your macOS to a previous version to retrieve files.
Final Words
When you find your files missing after a Mac update, start by checking the Trash. If you’ve set up built-in features like Time Machine or iCloud, you can easily retrieve your files from the backup. In case nothing works, using third-party software like Disk Drill or Cisdem Data Recovery can be quite effective.
Though these methods can save you time and frustration, it’s worth being cautious during Mac updates to prevent future file losses. Make sure your Mac has sufficient space and doesn’t get interrupted while updating. Also, fix any issue with your Mac before updating it to avoid losing files later!
If you've any thoughts on How to Recover Missing Files After Mac Update?, then feel free to drop in below comment box. Also, please subscribe to our DigitBin YouTube channel for videos tutorials. Cheers!

