In this online world, privacy has become a myth. No one is safe in this online era. Every step you perform online, whether it is a social media post, any email, or any online purchase can be tracked. Many organizations including our government, keep an eye on us and trace all of our data, keep a complete record of what we are searching for, and where are we visiting over the internet. (ISP track our search)
To protect this information from leaking, the first step is to buy and use a trusted VPN. VPN provides almost 100% privacy, even your data is hidden from your ISP if you are using a trusted VPN.
What is a VPN or Virtual Private Network?

A Virtual Private Network (VPN) is one of the foremost popular ways to cover your IP address. The VPN does this by tunneling all of your data traffic through their private servers. They also encrypt the incoming and the outgoing traffic, ensuring that your ISP can’t monitor and trace it.
The VPN then masks your IP address with the address of the server you’re connected to. This way, if you’re within the US, but you hook up with a server in Spain, your IP address will read that you’re in Spain.
How a VPN Works?
The VPN service changes your IP address with the server (IP address of another country, where the server is located), so once you visit any site using VPN, your changed IP address is being received by that site, and which suggests you’re in some other country but in actual you’re not. For example:- If you’re in Russia and employing a VPN service of the USA, so if you visit any site your IP address will tell your location somewhere in the USA.
VPN (Virtual Private Network) is important to secure your online privacy. Isn’t it awkward if you come to know that somebody is spying on you, whatever you are doing over the web is being tracked and recorded by someone? But many of the leading organizations even our government, our ISPs keep an eye fixed on us always. Nothing is secret within the world of the web.
If you would like to guard your privacy, so you ought to use a VPN service. How cheap it’ll be once you are using some platform over the web to consult a doctor, you would like to guard your privacy that’s why you used the web, but here also everything is been recorded. Similarly, we’ve various doubts which can’t be asked to anyone and that we search them on the web but here people are spying on us, that’s why you would like a VPN.
Manually add a VPN Profile on Android
Although these days most the VPN services provide their dedicated app to connect to their server and that method is often recommended too but nevertheless you don’t want to the app instead you want to manually add the VPN profile to your Android device then follow the below steps:
All the steps are performed in a device with Stock Android (Pixel), you can follow similar steps with your device too.
- Open the Settings app from the app drawer.
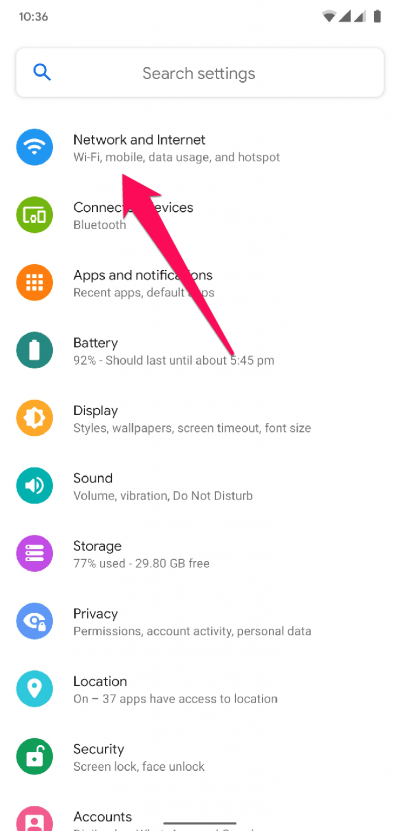
- Now, navigate to the Network and Internet settings.
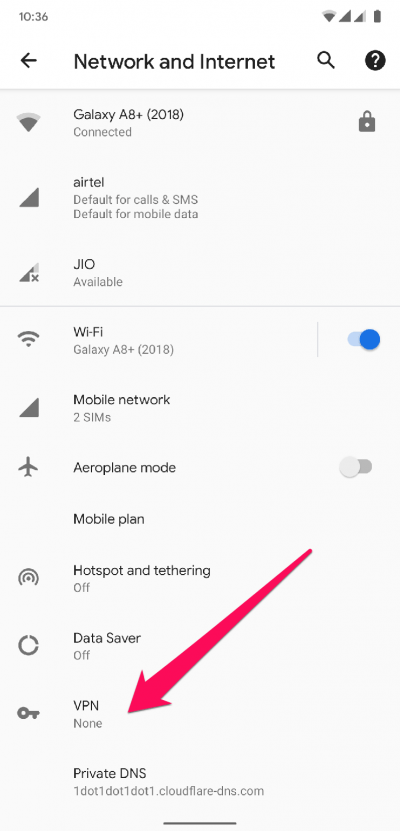
- After opening it, scroll down and search for VPN settings.
- Now, open the VPN settings.
- You will see the list of all previously used VPNs. To manually add a VPN profile, tap on the + icon from the right-top corner.
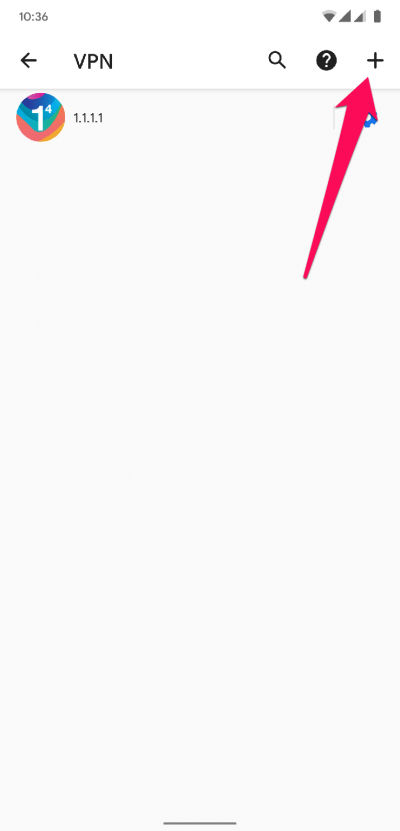
- Finally, enter all the details provided to you by the VPN service provider and tap on Save.
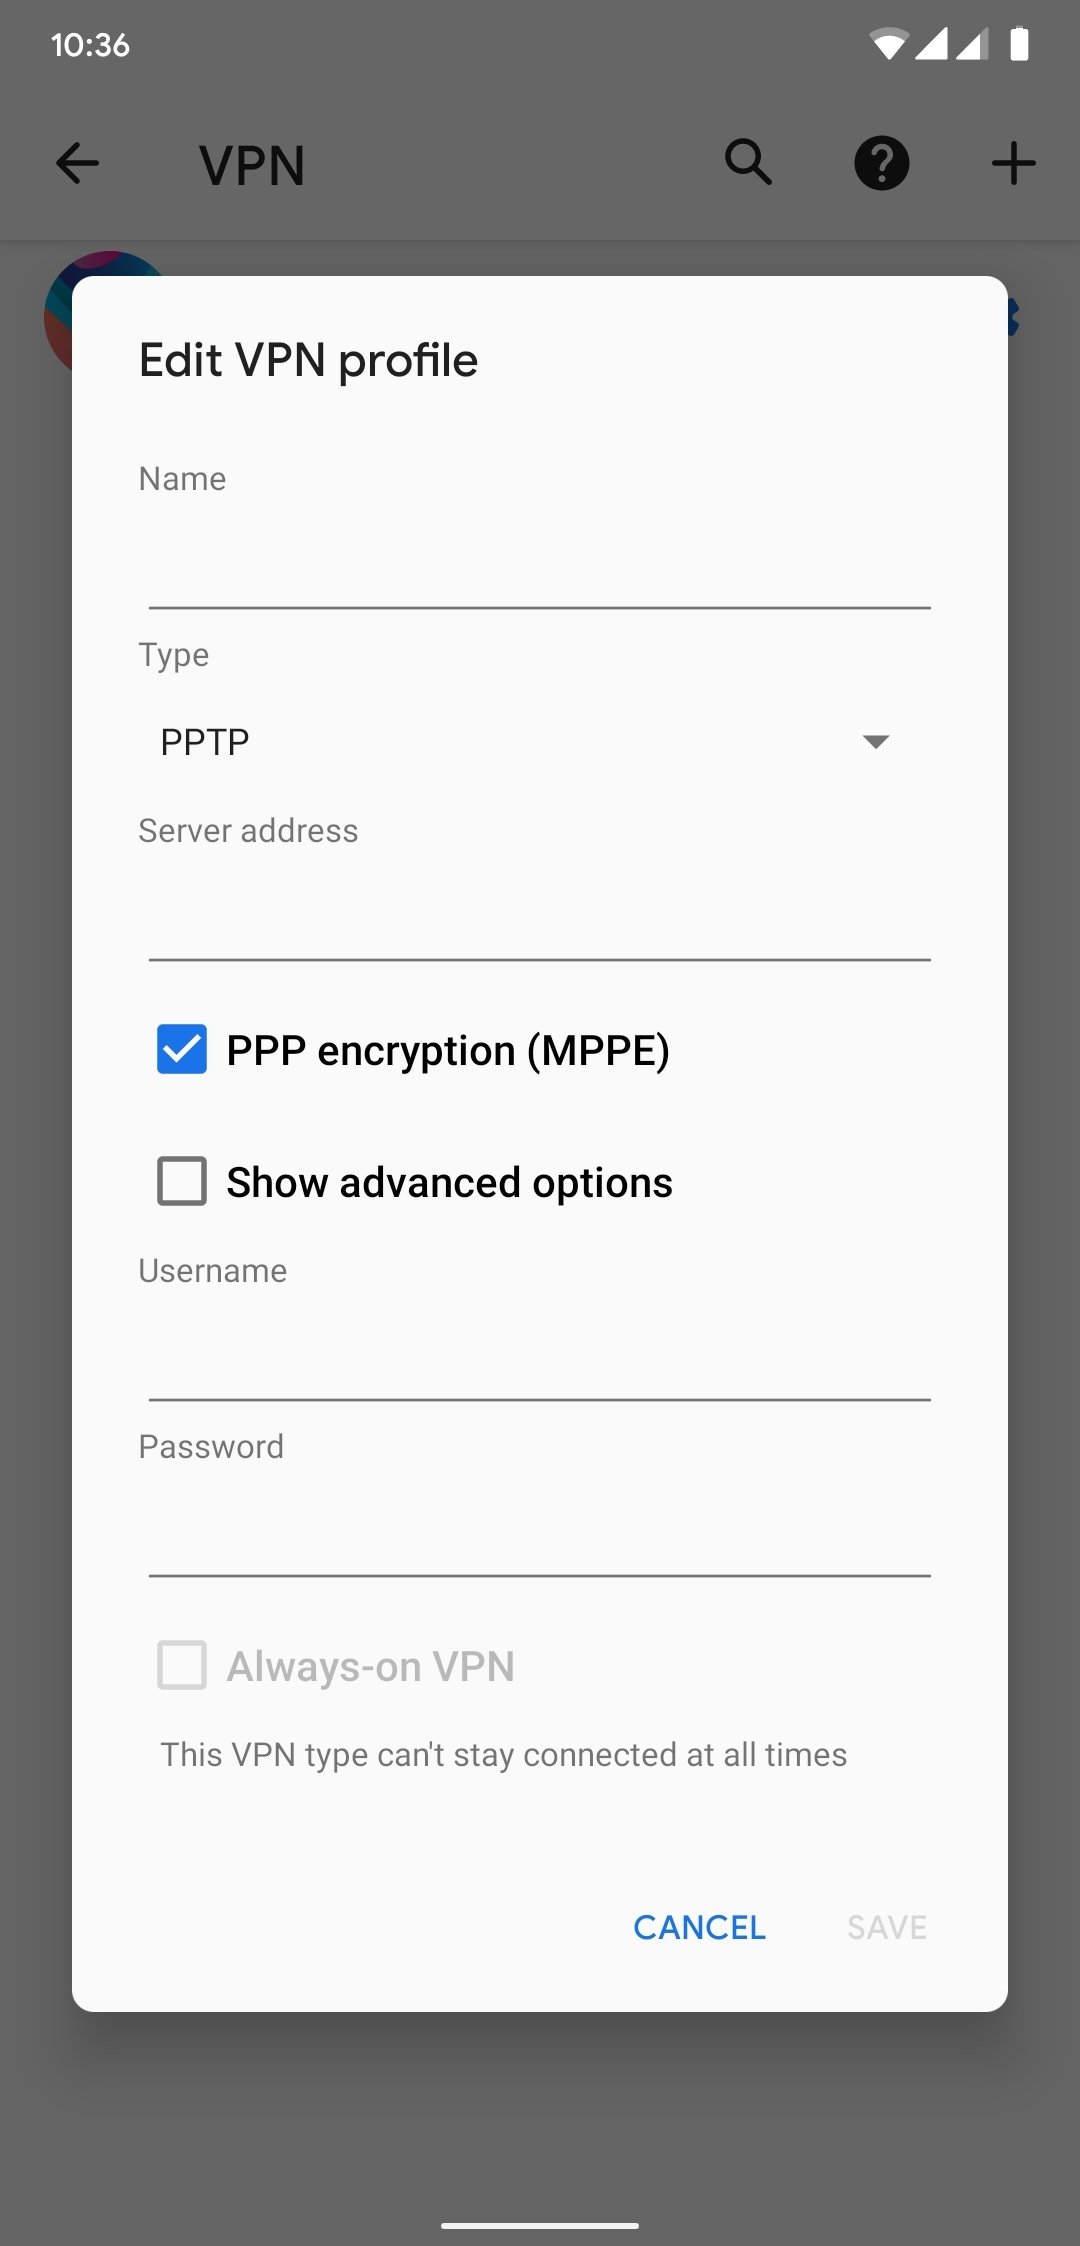
Demonstration
For demonstration purposes, we are going to use NameCheap VPN.
Step 1: Open your VPN provider’s dashboard.
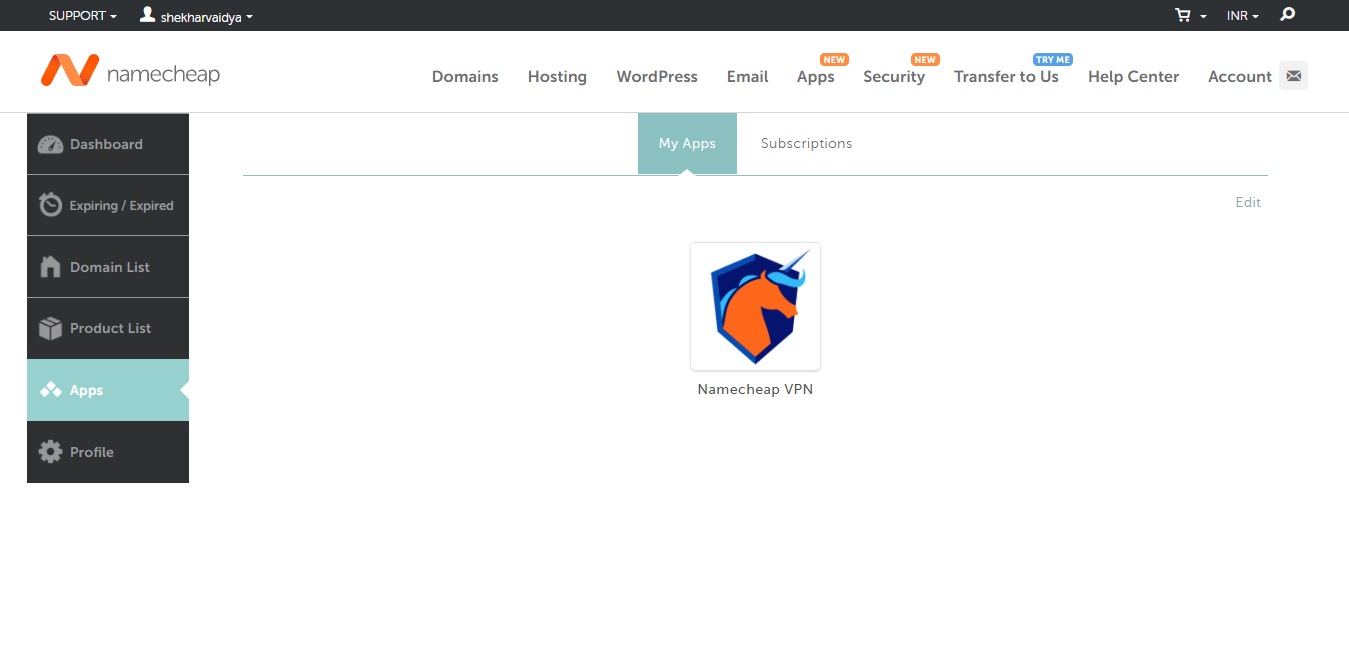
Step 2: Open VPN settings.
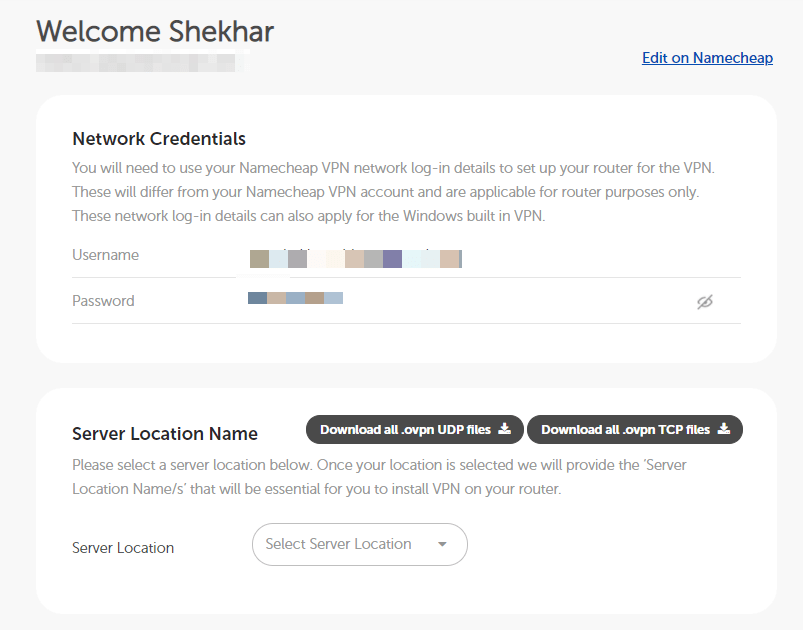
Step 3: And then select your preferred server for VPN and note down the server details.
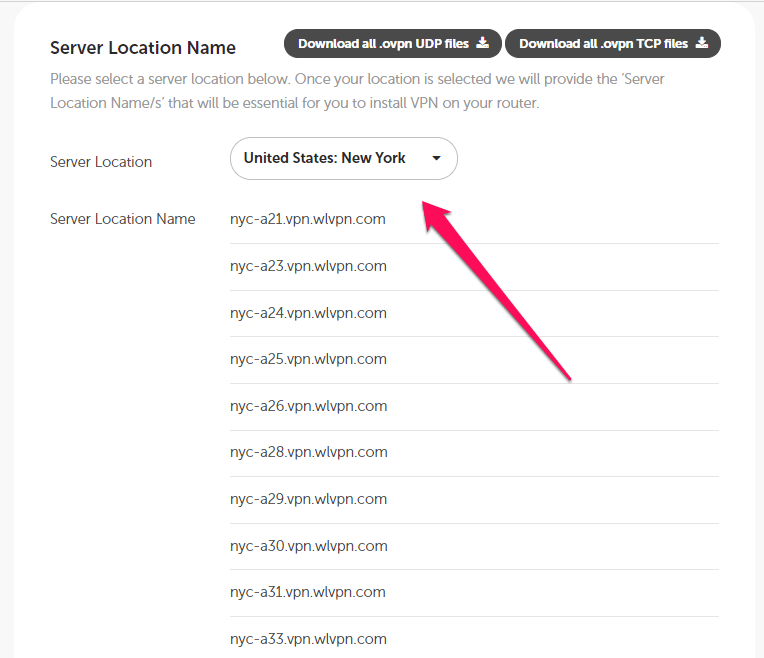
Step 4: Now, go back to your Android VPN, as mentioned in the above steps.
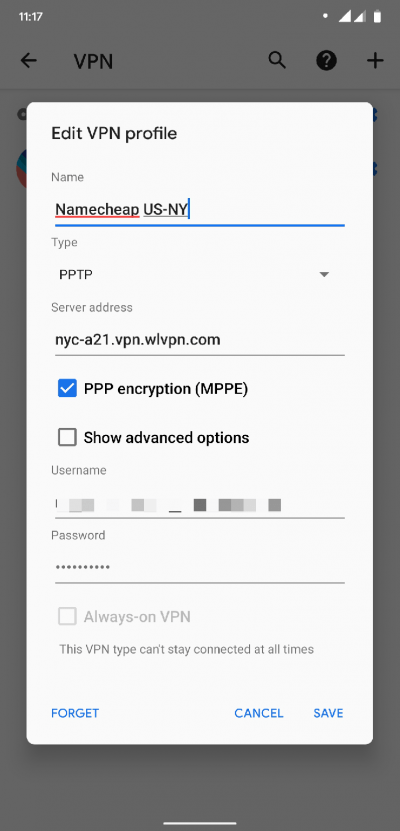
Step 5: Enter all the details provided by the VPN service provider. And then hit the Save button.
- Name Anything You Prefer
- Type: PPTP
- Server Address: We already have it from VPN settings.
- Username: Provided by VPN Company
- Password: Provided by VPN Company
Step 6: You will see the list of all added profiles.
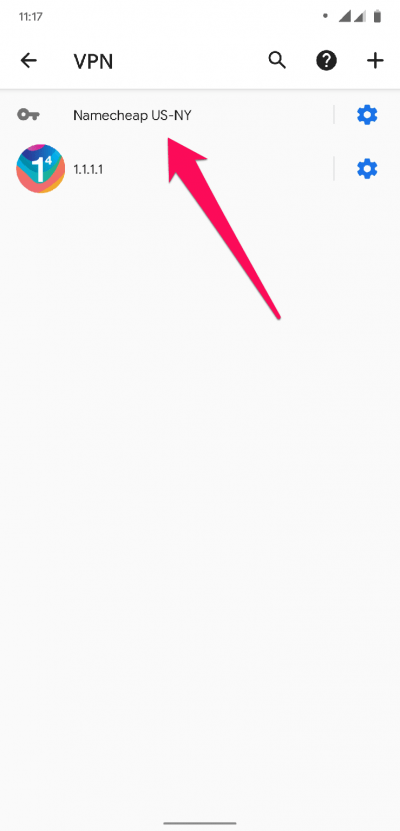
Step 7: Tap on the profile, which you want to connect.
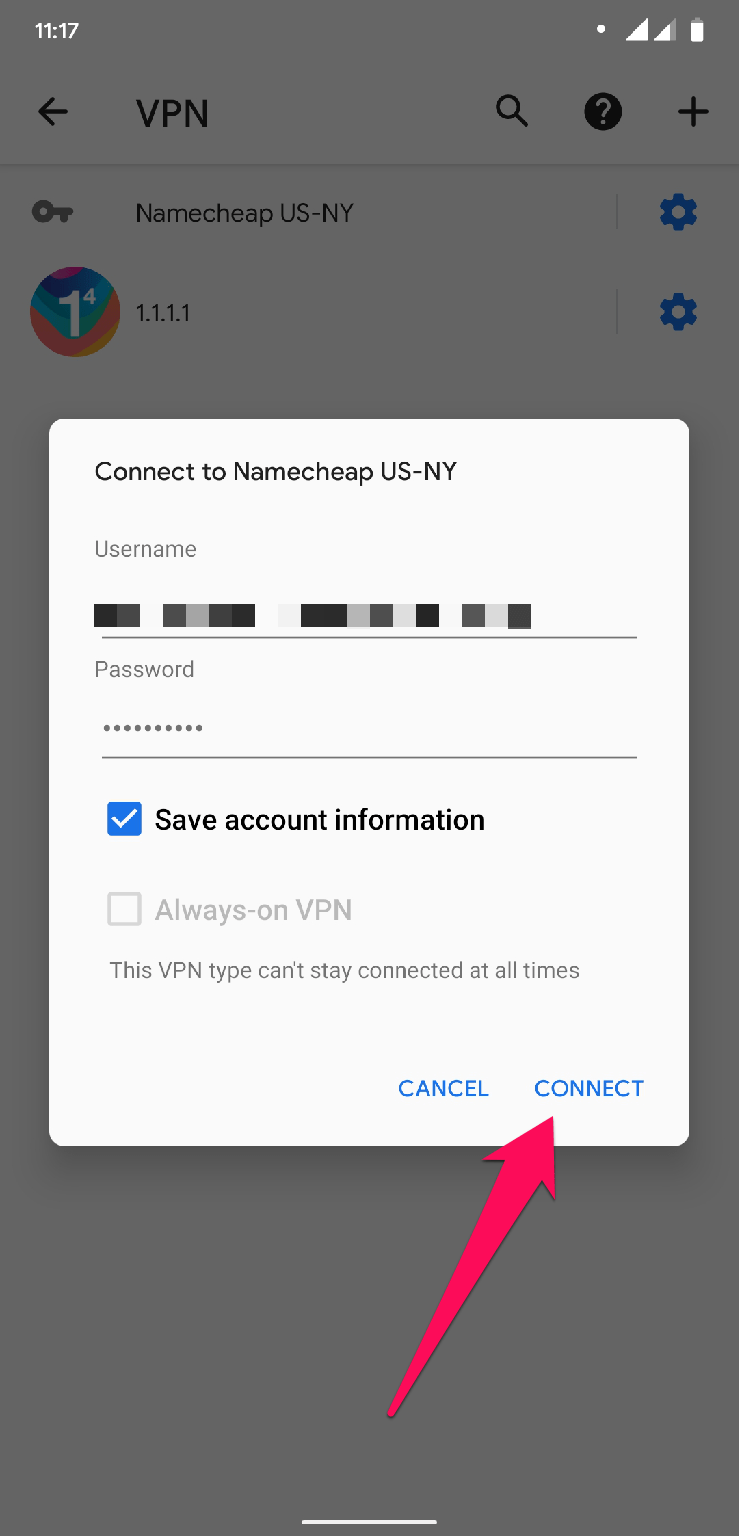
Step 8: And the final tap on the Connect button.
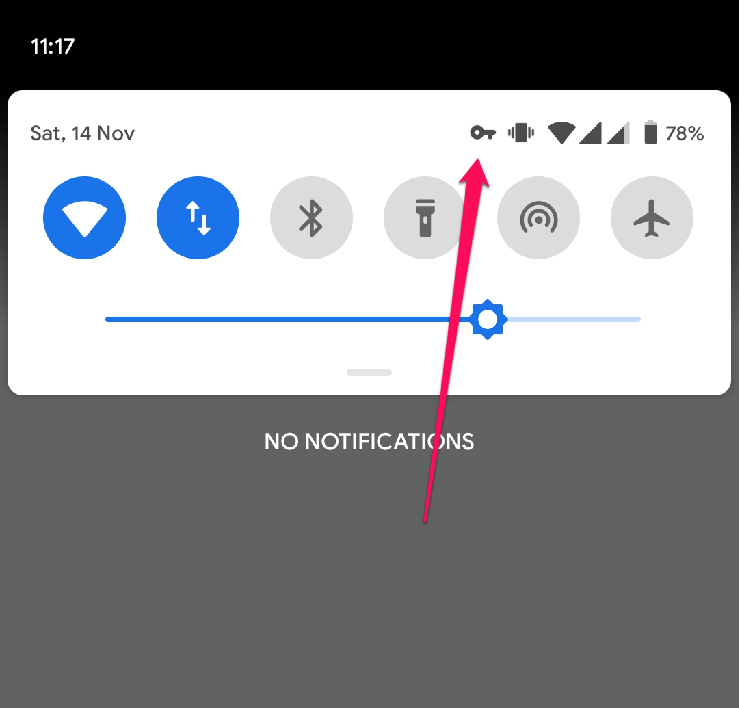
You can verify whether the VPN is connected or not. If you see a key icon in the status bar of your smartphone, that means VPN is successfully connected.
If you've any thoughts on How to manually add a VPN Profile on Android Phone?, then feel free to drop in below comment box. Also, please subscribe to our DigitBin YouTube channel for videos tutorials. Cheers!
