This guide will make you aware of the steps to install RSAT Tools in Windows 11. Remote Server Administration Tools are a bunch of software packages that allow the IT and network administrators to manage roles and take control of the various functionalities of the Windows Server- all remotely from another PC.
RSAT Packages includes the likes of Microsoft Management Console, Server Manager, Windows PowerShell applets, and some command-line tools for managing roles on the Windows Server.
While none of these tools are installed on your PC by default, but with the latest iteration of the OS, Microsoft has completely streamlined the process to get hold of these packages. So without further ado, let’s check out the steps to install RSAT Tools in Windows 11.
How to Install RSAT Tools in Windows 11?
There are two different methods to carry out the aforementioned task- via the Windows Settings page and through the PowerShell window. While the first method is quite easy to execute, it offers a limited set of features.
On the other hand, the second approach gives you more granular control over this process, though it might prove to be a little bit complicated for some. Anyways, we have listed both these methods below; you may refer to the one that is in sync with your requirements.
Method 1: Install RSAT via Settings Menu
- Use the Windows+I shortcut keys to open the Settings menu.
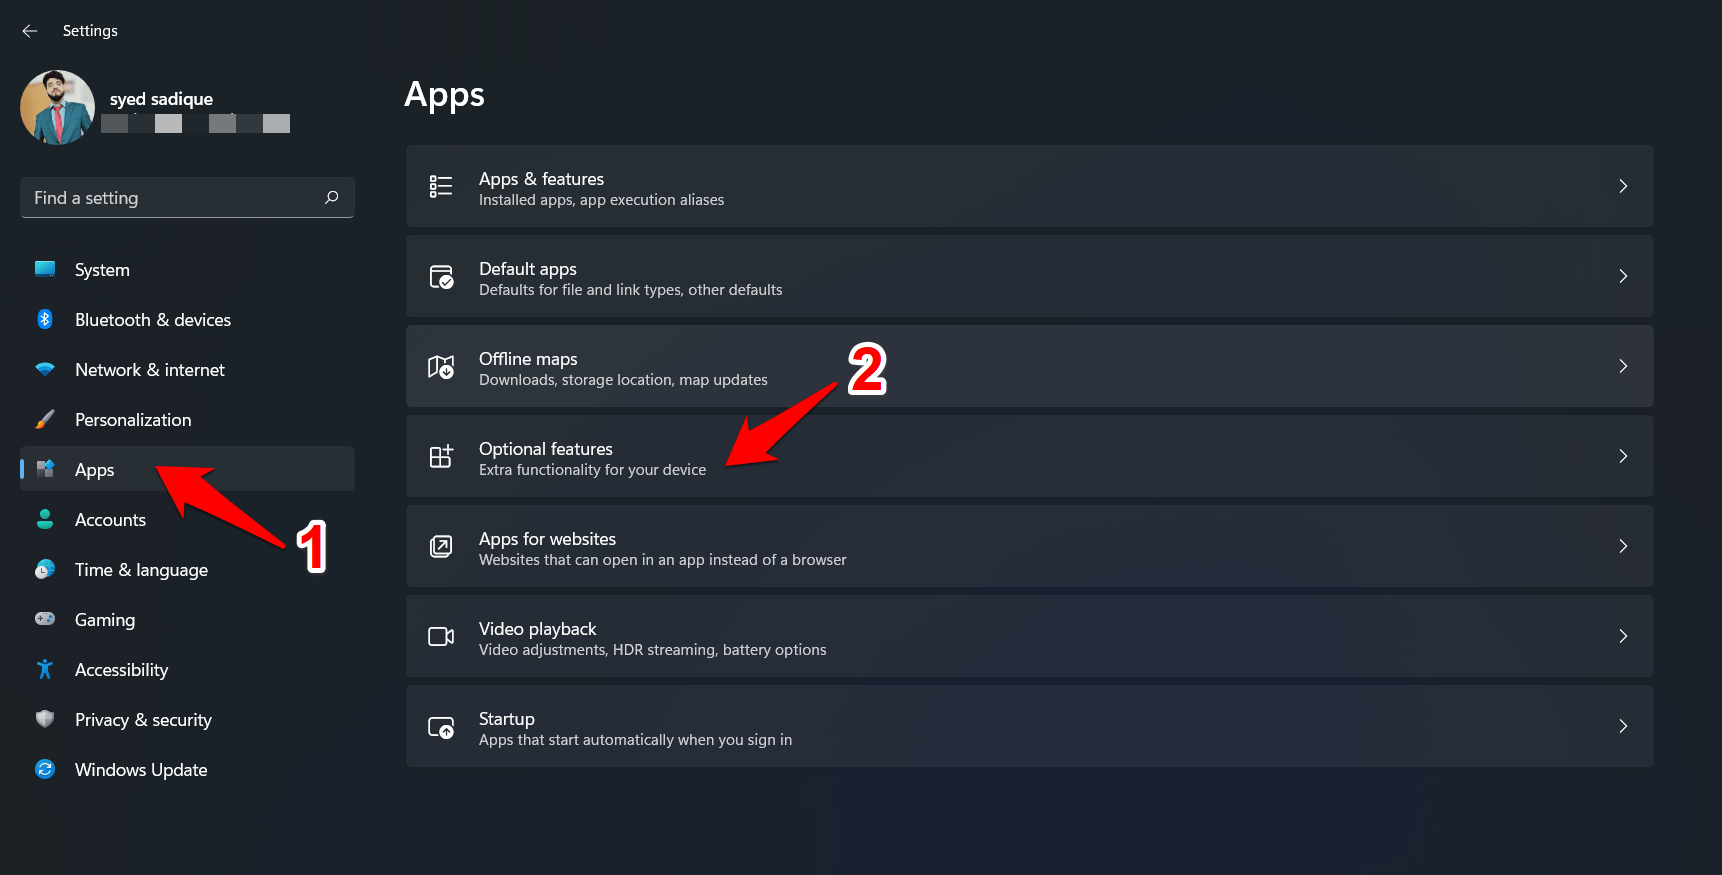
- Then go to the Apps section from the left menu bar and select Optional Features.

- Now click on the View Features button next to Add an Optional Feature.

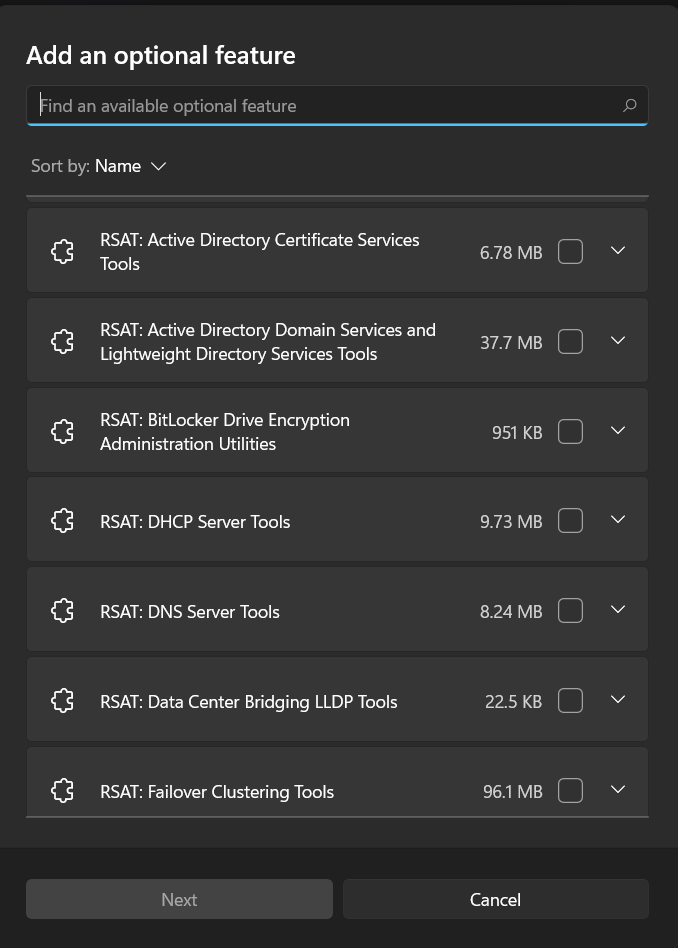
- Select the desired RSAT Tool from the list and hit Next.

- That’s it. The selected tools will now be installed onto your PC.
So this was the first method to install RSAT Tools in Windows 11. Let’s now make you aware of the next one.
Method 2: Install RSAT via PowerShell
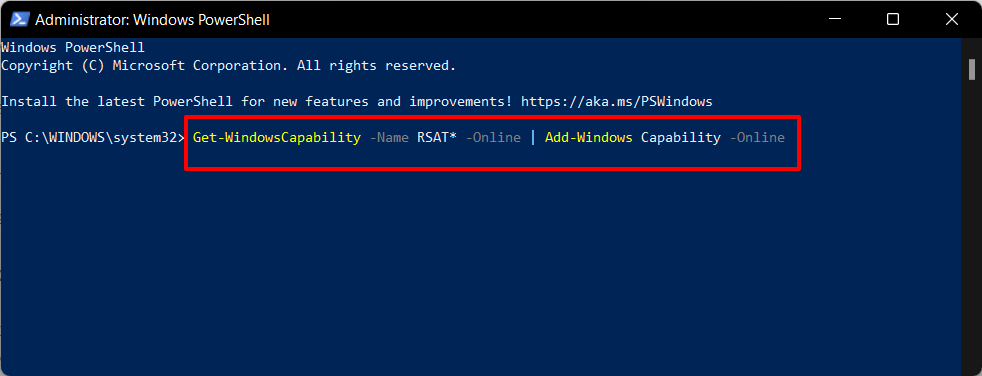
- To begin with, head over to the Start Menu, search Powershell and launch it as an administrator.
- Now, if you want to install all the RSAT Packages at once, then copy-paste the below command in the PowerShell and hit Enter:
Get-WindowsCapability -Name RSAT* -Online | Add-Windows Capability -Online

- All the RSAT packages will now be downloaded and installed onto your PC (the process might take a few minutes).
- On the other hand, if you wish to manually install a package of your choice, then you should use the below command syntax:
Add-WindowsCapability -Online -Name "ToolName"

- Make sure to replace the ToolName keyword with the desired RSAT package that you want to install (always keep the name within double inverted commas).
The list of all the packages and their tool names have been provided in the next section; you may make use of the same.
List of RSAT Tools Name
| Remote Server Administration Tools Packages | Tool Name |
| Active Directory Domain Services and Lightweight Directory Services Tools | Rsat.ActiveDirectory.DS-LDS.Tools |
| BitLocker Drive Encryption Administration Utilities | Rsat.BitLocker.Recovery.Tools |
| Active Directory Certificate Services | Rsat.CertificateServices.Tools |
| DHCP Server Tools | Rsat.DHCP.Tools |
| DNS Server Tools | Rsat.Dns.Tools |
| Failover Clustering Tools | Rsat.Failover.Cluster.Management.Tools |
| File Services Tools | Rsat.FileServices.Tools |
| Group Policy Management Tools | Rsat.GroupPolicy.Management.Tools |
| IP Address Management (IPAM) Client | Rsat.IPAM.Client.Tools |
| Data Center Bridging LLDP Tools | Rsat.LLDP.Tools |
| Network Controller Management Tools | Rsat.NetworkController.Tools |
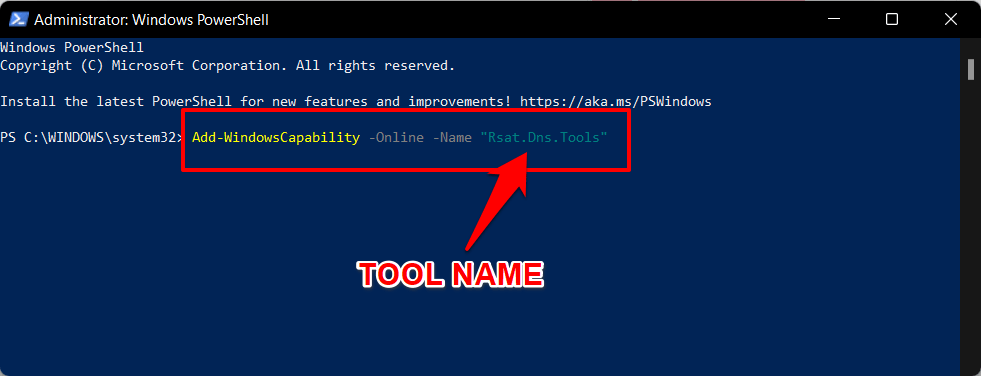
Let’s try to understand the steps to install RSAT Tools in Windows 11 via Powershell with the help of an example. Suppose, we want to install the DNS Server Tools having Rsat.Dns.Tools as its Tool Name, so the command will be:
Add-WindowsCapability -Online -Name "Rsat.Dns.Tools"
How to Check the Installed RSAT Packages?
If you want to get hold of all the RSAT Packages that you have installed on your Windows 11 PC, then launch the PowerShell window as an administrator and execute the below command:
Get-WindowsCapability -Name RSAT* -Online | Select-Object -Property DisplayName, State
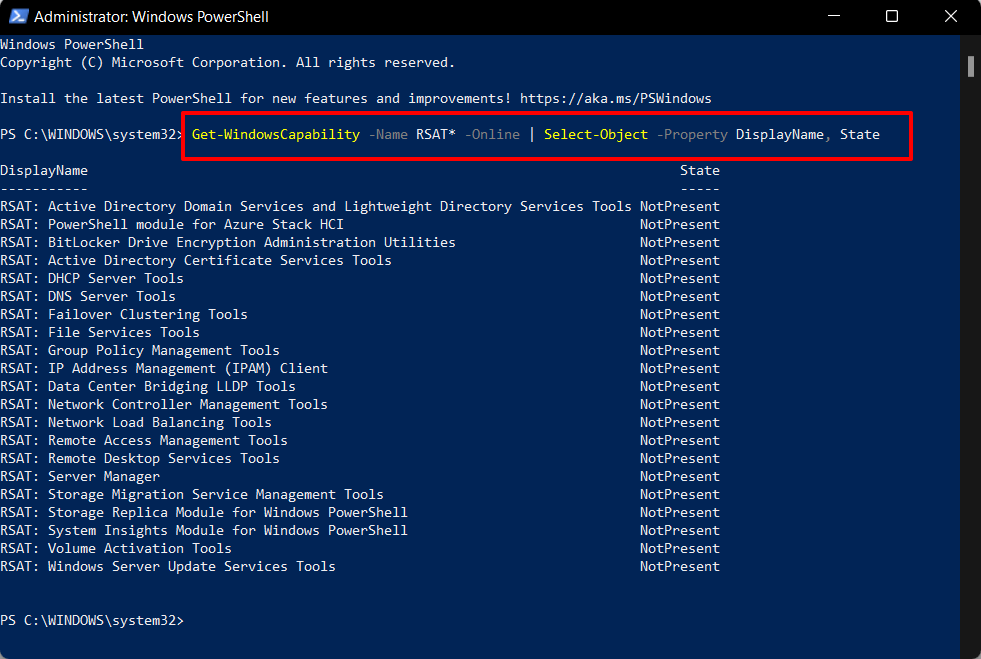
Now refer to the State column. All the installed packages will have the Present keyword, while the ones yet to be installed will display ‘NotPresent’.
How to Run RSAT Tool?
Now that you have successfully installed the RSAT packages on your PC, it’s time to put it to the test. Here’s how:
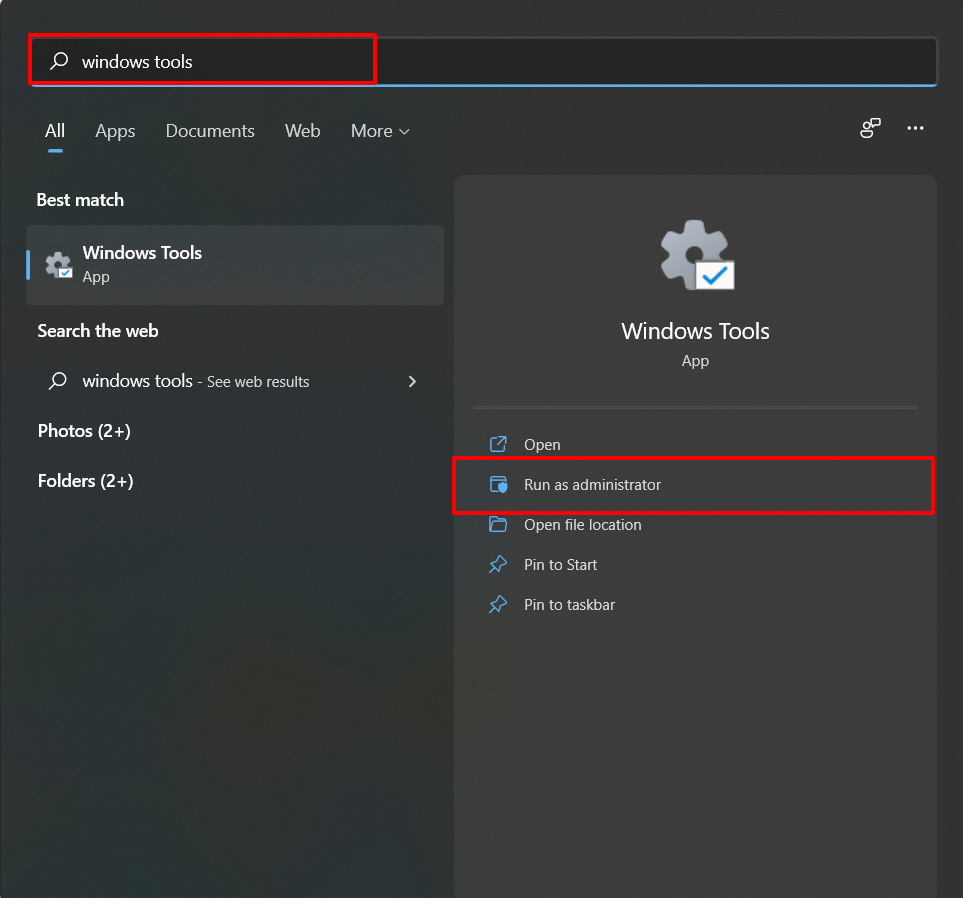
- Head over to the Start Menu, search Windows Tools, and open it as an admin.

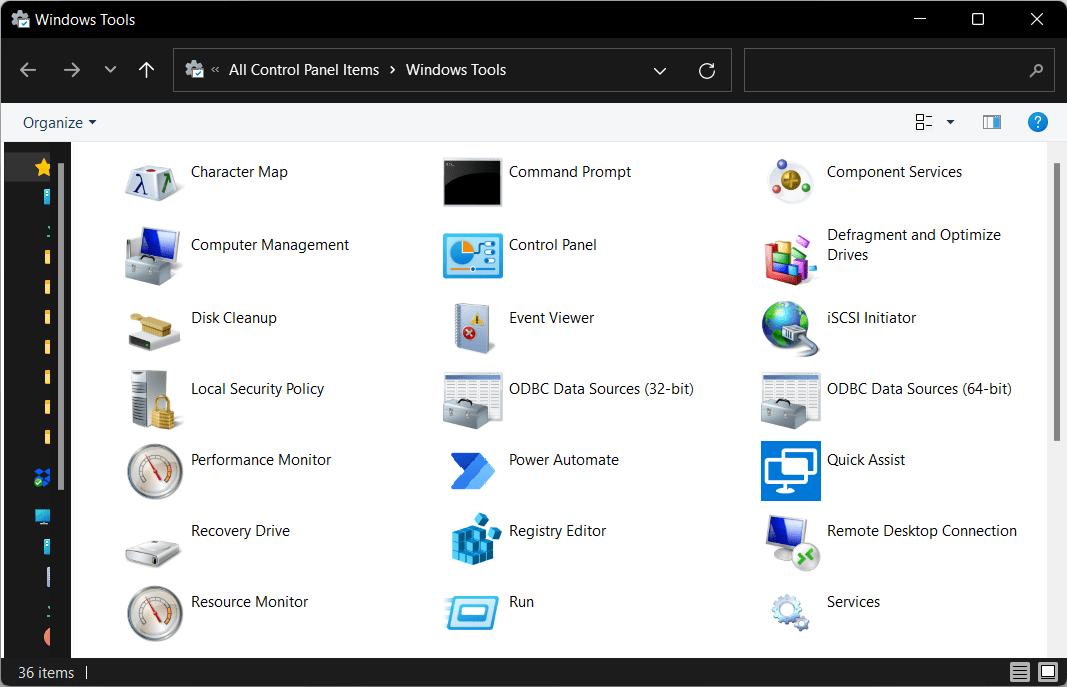
- It shall take you to the list of all the installed RSAT packages.

- Just double-click on the desired one to run it.
Conclusion
So with this, we round off the guide on how to install RSAT tools in Windows 11. We have shared two different methods for the same. Likewise, we have also listed out the RSAT package’s Tool Name that shall come in handy while trying to install a package via PowerShell.
The steps to check the installed packages and then run them have also been given to round it off. If you have any queries concerning these instructions, do let us know in the comments section below.
If you've any thoughts on How to Install RSAT Tools in Windows 11?, then feel free to drop in below comment box. Also, please subscribe to our DigitBin YouTube channel for videos tutorials. Cheers!
