BlueStacks is a well-known Android emulator that allows users to operate Android applications and games on their Windows 11 devices, bridging the gap between mobile and desktop settings. Learning to install and use BlueStacks on Windows 11 is helpful whether you’re a serious mobile gamer, a developer testing apps, or someone looking to analyze the vast galaxy of Android apps on a bigger screen.
To assist you in fully utilizing Android applications on Windows 11, this post walks you through every step of the installation process and optimization of your BlueStacks.
What is BlueStacks?
BlueStacks is a popular Android emulator for desktop platforms such as Windows and Mac. With a particular emphasis on Windows 11, this emulator skillfully handles all applications and games consistent with your Android smartphone.
This emulator forms a virtual representation of an Android smartphone that is wholly merged into your Windows 11 environment, acting as a gateway between Android apps and your PC. The perfect functioning of resource-intensive Android games is a notable example of how well it functions beyond conventional Android apps.
The most recent iteration of BlueStacks, tailored for PCs, boasts an impressive ability to run about 97% of the diverse exhibition of apps and games available through the Google Play Store. This compelling feature allows users to download and utilize the emulator without invasive advertisements.
BlueStacks Features
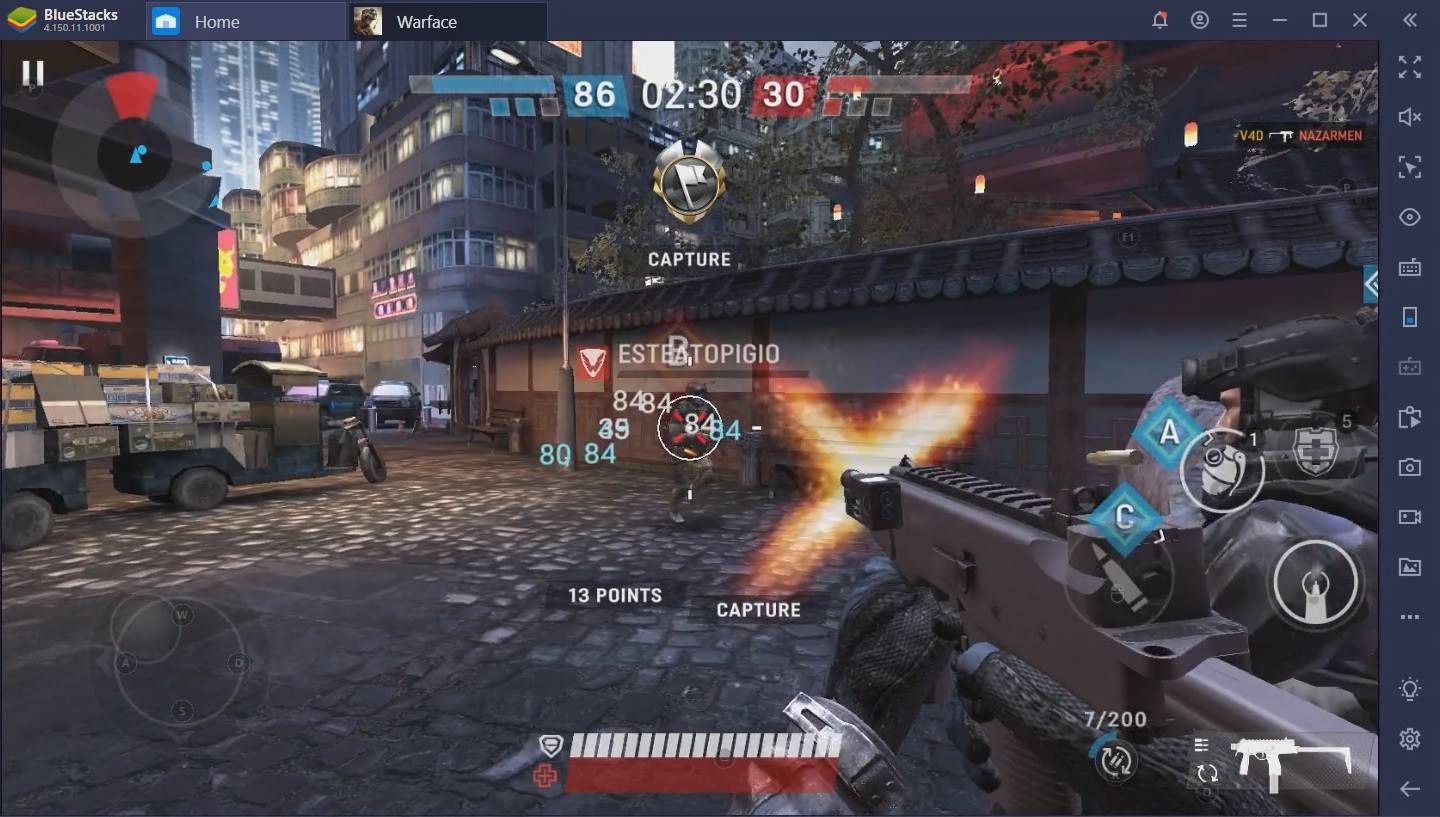
BlueStacks is a top pick for PC gaming, mainly for Android gaming on Windows 11. The emulator boasts a willful focus on enriching Android gaming experiences on PC, offering a range of features that advance your gameplay.
Advanced Shooting Mode:
The Shooting Mode revolutionizes your interaction with games, letting the keyboard function as your aiming tool while the mouse operates shooting.
Multi-Instance Capability:
BlueStacks provides multi-instance support on Windows 11 PC. This functionality empowers you to engage with the same game from distinct accounts or even partake in multiple games concurrently via the emulator. The power to switch between instances significantly expands your gaming horizons.
Customized Preset Controls:
BlueStacks allows you to enjoy your preferred Android games on your PC platform. Whether you opt for a keyboard, mouse, or gamepad, the flexibility to personalize preset controls is at your fingertips. This adaptability ensures a gaming experience that aligns with your preferences.
Macros:
Crafting Macros opens doors to automating in-game actions. A prime feature in strategy games like Clash of Clans is simplifying repetitive tasks and enabling real-time replication.
Eco Mode Efficiency:
Eco Mode is a standout feature that takes center stage as an energy-conservation mode. Eco Mode optimizes PC resource utilization when operating multiple instances of the same game through the emulator. This brilliant feature allows you to multitask on your Windows 11 system without concern for lagging performance.
System Requirements for Installing BlueStacks
As per data provided on Microsoft’s official website, people intending to install BlueStacks on Windows 11 must ensure their hardware meets the following conditions:
Processor (CPU): A 64-bit processor, clocked at a minimum of 1 GHz, operating on two or more cores.
Random Access Memory (RAM): A minimum of 4 GB.
Storage: At least 64 GB of available space on any storage device.
Firmware Requirements: Capable of Secure Boot and utilizing Unified Extensible Firmware Interface (UEFI).
Graphics Processing Unit (GPU): Dedicated graphics chip compatible with DirectX 12.
Display: A screen of 9 inches or larger with a resolution of at least 720p.
Internet: Installing Windows 11 Home mandates an active internet connection and a Microsoft account.
Steps to Install BlueStacks on Windows 11
1. Enable Hyper-V
BlueStacks may undergo a problem enabling Hyper-V in certain exceptional situations and display a warning upon launch. To avoid facing the issue, you must manually activate Hyper-V on your computer. Here is the detailed procedure for enabling Hyper-V on your Windows 11 PC.
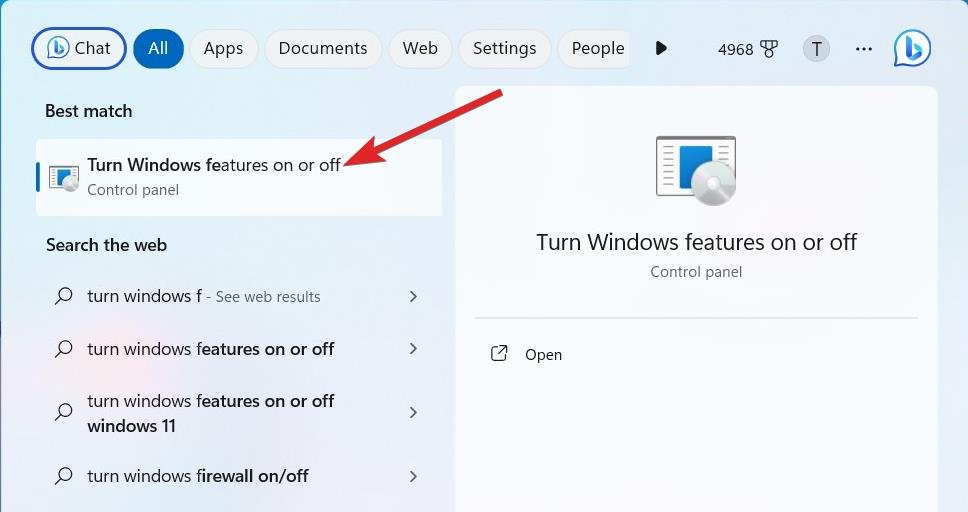
- To initiate a search, begin by accessing the Start menu and entering Turn Windows features on or off in the search bar. Next, click the Turn Windows Features On or Off option from the search results presented below. This action will prompt an overlay window to appear on your screen.

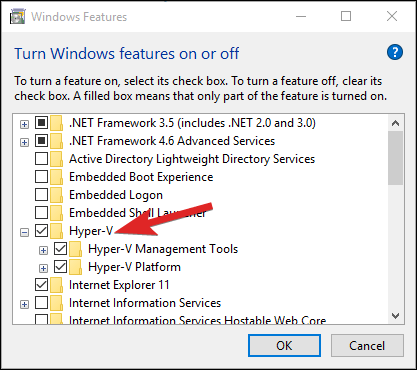
- Within the Windows Features window, scroll down to locate the Hyper-V option and select the checkbox beside it.

- Similarly, select the options for Windows Sandbox, Windows Hypervisor Platform, Virtual Machine Platform, and Windows Subsystem for Linux and click the checkboxes next to each selection.
- To proceed, click the OK button at the window’s bottom.
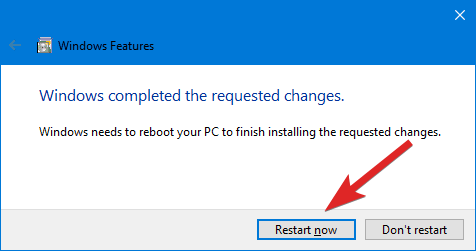
- Windows may suggest that a system restart is essential to implement the changes. If you wish to restart immediately, click the Restart Now button. Alternatively, you can choose the Don’t Restart option to restart your computer conveniently.

After your computer restarts, launch BlueStacks as instructed later in this guide. This time, the application should run smoothly without any issues.
2. Download and install BlueStacks
Now that Hyper-V is enabled on your Windows 11 PC, you should follow the procedure described below to install BlueStacks:
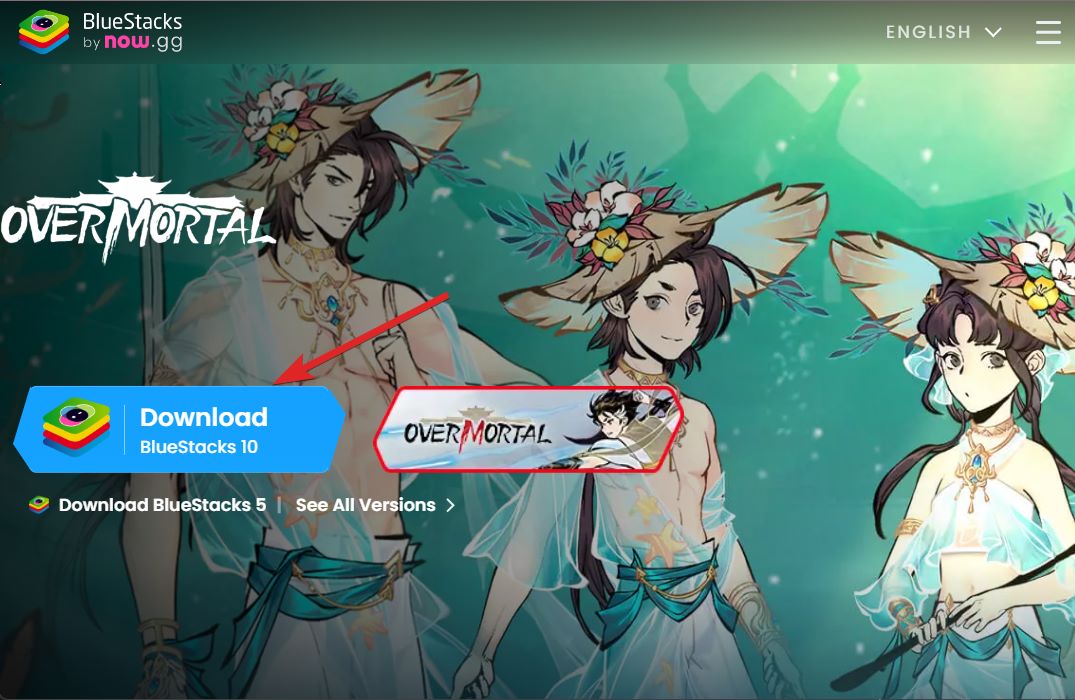
- Head to the official BlueStacks website and then download the BlueStacks 5 exe file by pressing the Download button.

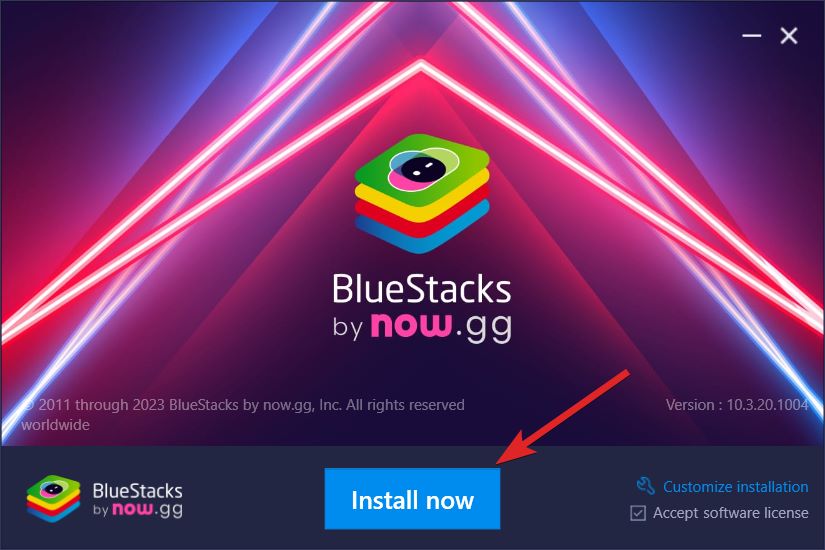
- Once the download is complete, double-click to launch the executable file.
- Within the executable, locate the Install Now option and click on it. This will cause the installation of the BlueStacks emulator onto your Windows 11 system.

- At this point, the emulator will begin retrieving critical files from its specified server. Allow a few minutes for the download process to finalize.
- With the download finished, the BlueStacks emulator will be successfully installed on your device. Now you can activate the Android emulator and begin enjoying gaming on your PC.
How to Use BlueStacks in Windows 11?
1. How to sign in to BlueStacks Player on Windows 11?
After successfully installing BlueStacks on your computer, it’s time to connect your Google account and start downloading Android apps onto your Windows PC.
- Launch the BlueStacks app, which you can do through the Desktop shortcut or by searching for it in the Start menu.
- Find the Play Store icon on the BlueStacks home screen and click it to continue. An overlay window will occur on your screen once you take this action.

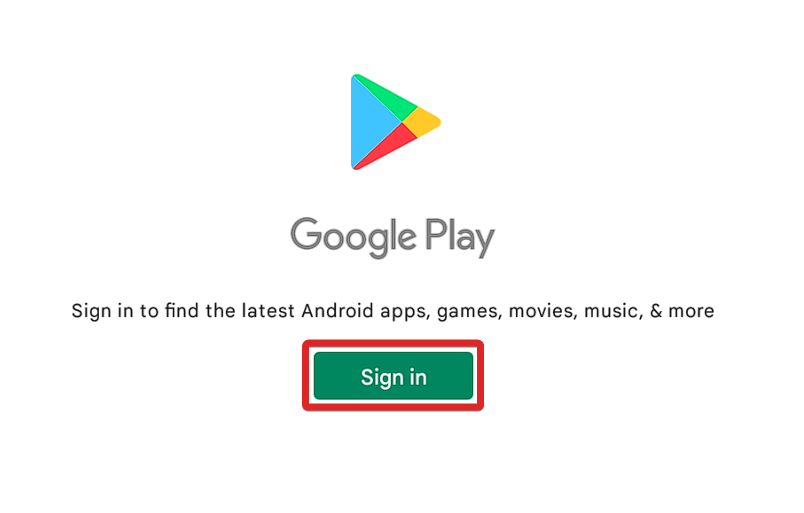
- Click the Sign-in button from this overlay screen to move forward. Input your Google account credentials, which you intend to use for downloading apps.

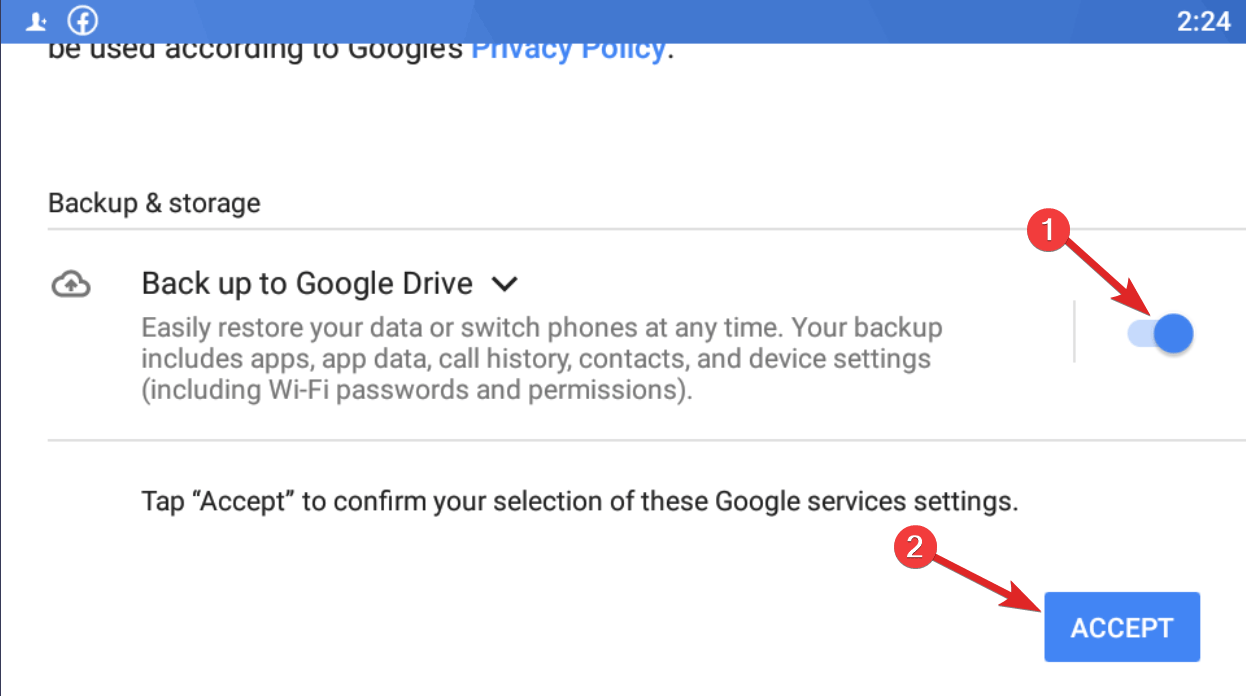
- On the subsequent setup screen, you’ll be prompted about whether you want to back up your app data to Google Drive. By default, this option is turned on. If you prefer not to have a backup, switch off the toggle for Google Drive that’s visible on the screen. Then, click Accept to proceed.

- Once you’re signed in, the Play Store home screen will be visible. You can now explore apps by category through the tabs beneath the search bar.
2. How to Download and Install games using BlueStack player?
Now that you are currently signed in to the BlueStacks player. Let’s install games on your Windows 11 computer using BlueStacks:
- From the BlueStacks player’s home screen, launch the Play Store app.
- Now, type the name of the game you wish to install into the search box at the top of the screen. Once you’ve identified the game you want to download, click to expand its details.
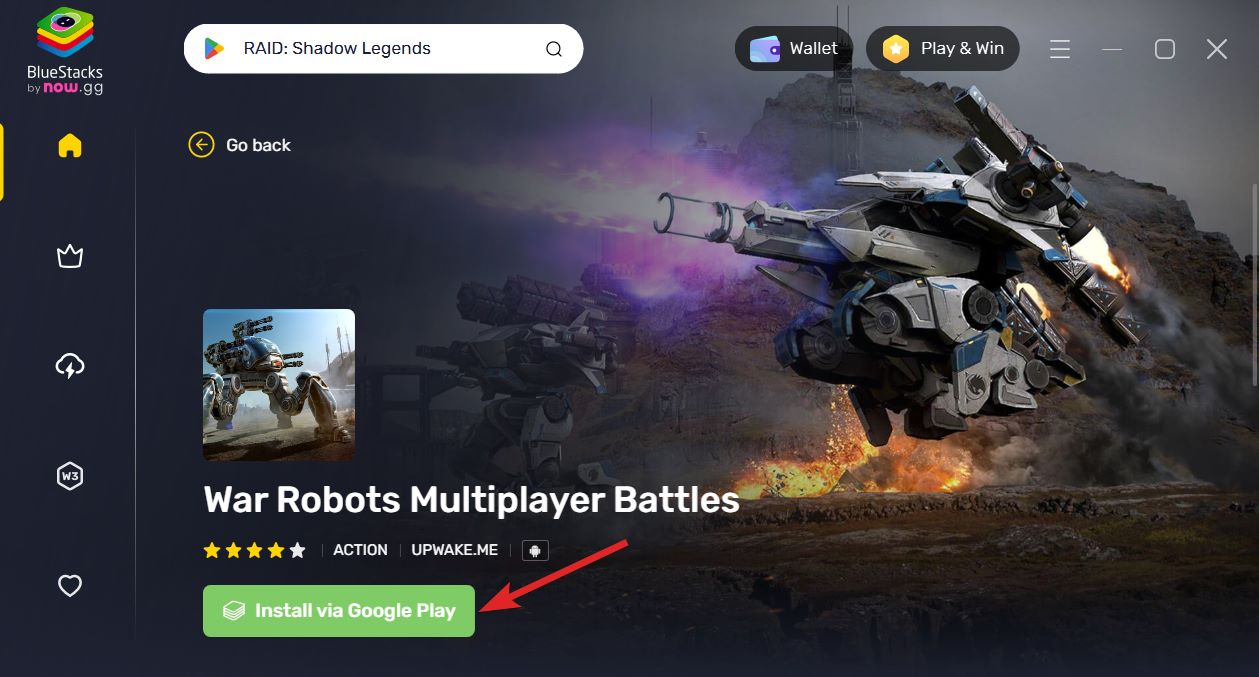
- In the expanded view, locate the Install via Google Play button on the right side of the screen. Click it to initiate the download and installation of the game.

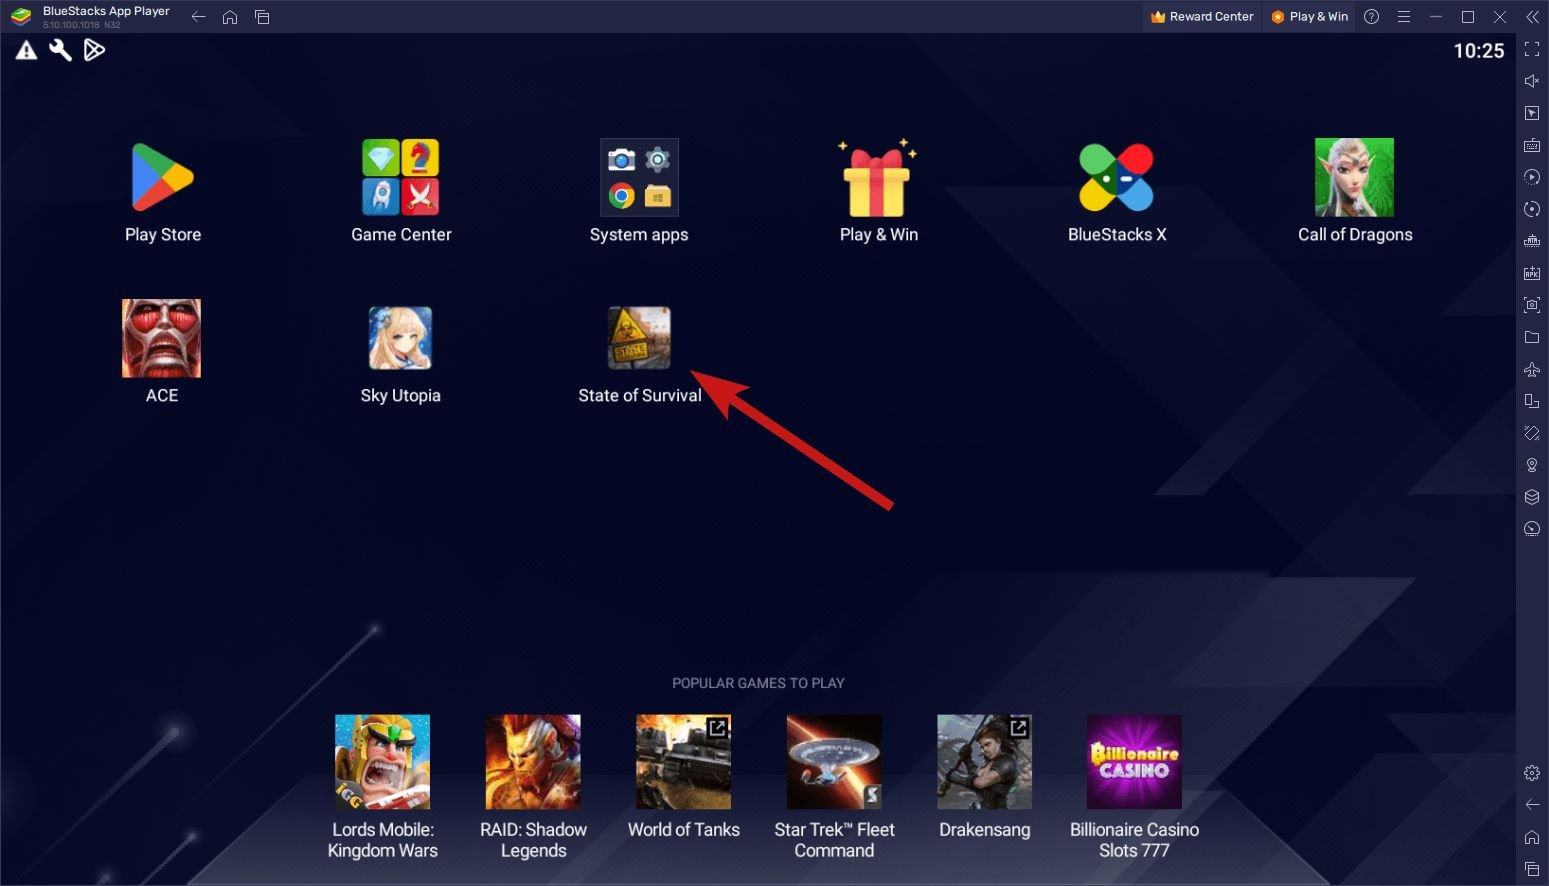
- After successful installation, you’ll find the game on the BlueStacks Player app’s home screen. Click the app to launch the application.
3. How to install APK Files using BlueStacks Player on Windows 11?
BlueStacks player also allows you to install APK files on Windows 11. The steps to do so are explained below:
- Bring up the BlueStacks emulator by double-clicking its desktop icon. You can also search for it in the Start menu.
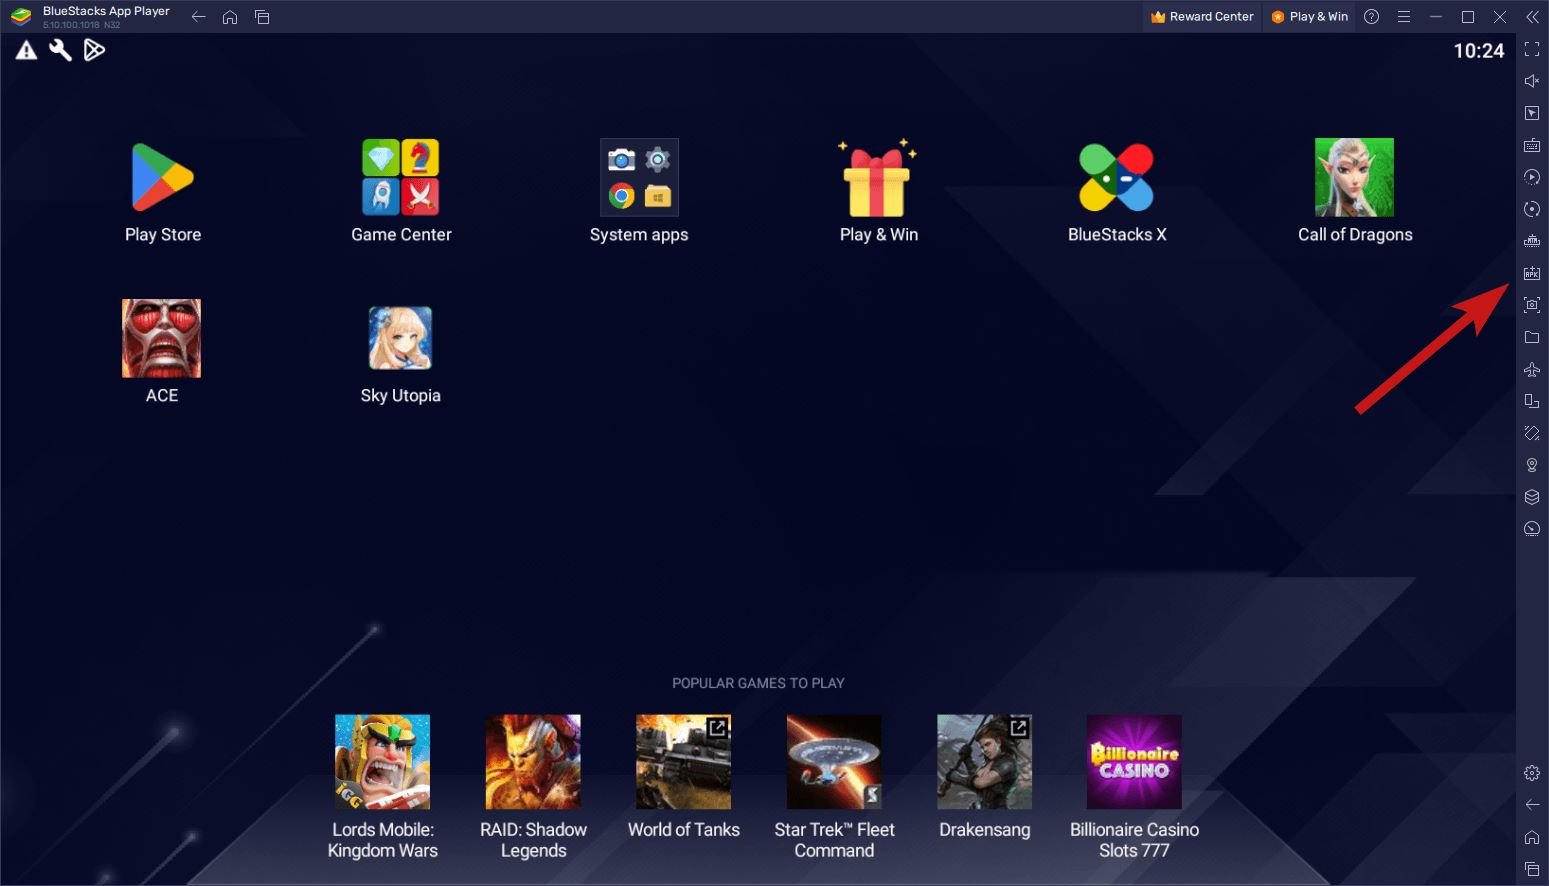
- After the emulator has fully loaded, locate and click on the Install APK file button found on the right-hand sidebar.

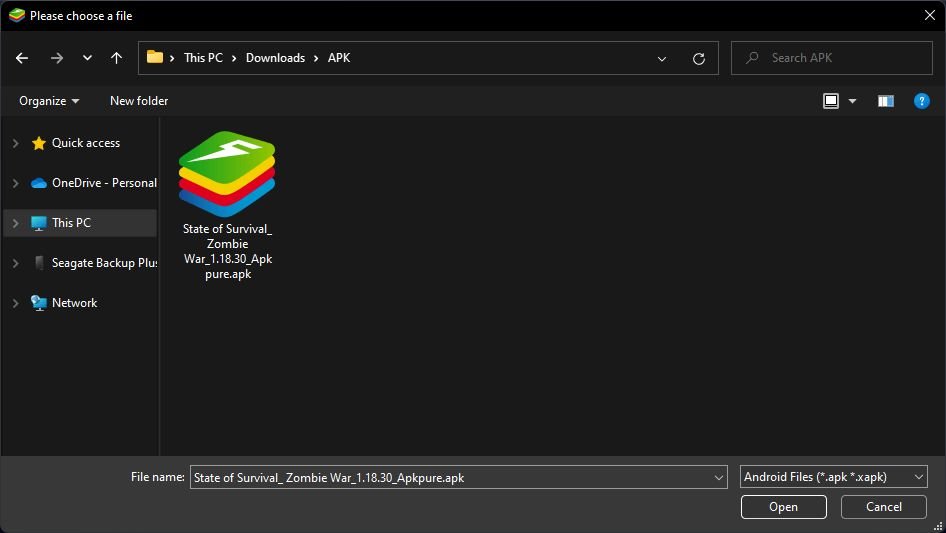
- Navigate to the directory containing your APK file to continue. Select the required APK file next, and then follow the on-screen instructions.

- This will lead you through the installation process for the specific app or game.
4. How to Run Multiple Games Simultaneously on Windows 11 using BlueStacks?
To run multiple games or applications side by side using the BlueStacks emulator, follow these steps:
- Launch the BlueStacks player and select the game you want to start with.

- Next, press the Home button and click on the icon of the other game you wish to run alongside the first one.

- By clicking the screens icon, you can view a stack of the various games. From here, you can choose any games you want to switch to while keeping the other applications running in the background.
5. How to configure BlueStacks on Windows 11?
1. BlueStacks Performance Settings
In the BlueStacks emulator, you can customize the performance resources as per your need. Follow the steps below to do so:
- Launch the BlueStacks emulator and access its Settings menu.

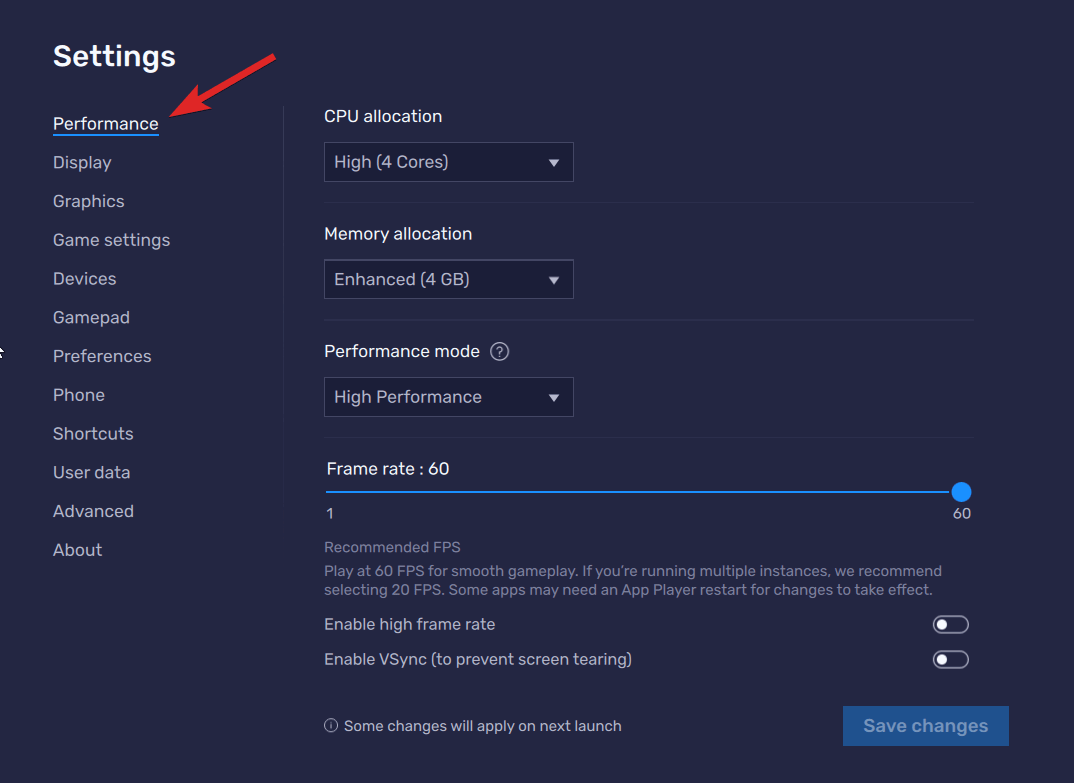
- Next, switch to the Performance tab from the left navigation pane.

- Within this section, several dropdown menus allow you to configure CPU cores, memory, performance mode, and frame rate.
- You can specify whether the CPU utilizes one, two, or four cores. Similarly, you can configure the memory allocation settings to allow BlueStacks users to use one of the different settings, such as primary (1GB), standard (2GB), advanced (4GB), or even a custom option according to your preferences.
- Apart from this, there are different settings options such as low memory usage, high performance, and balanced settings. Additionally, you can fine-tune the frame rate, ranging from a maximum of 60fps down for a smooth gaming experience. 20 fps is recommended if multiple games are running in the background.
2. BlueStacks Display Settings
Various customization options are available in BlueStacks on Windows 11 to let you personalize your viewing experience. By following these steps, you can quickly set up the display settings in BlueStacks on your Windows 11 PC.
- Open the BlueStacks app, then go to the home page.
- Click the Gear icon on the right of the window to reach the Settings menu.

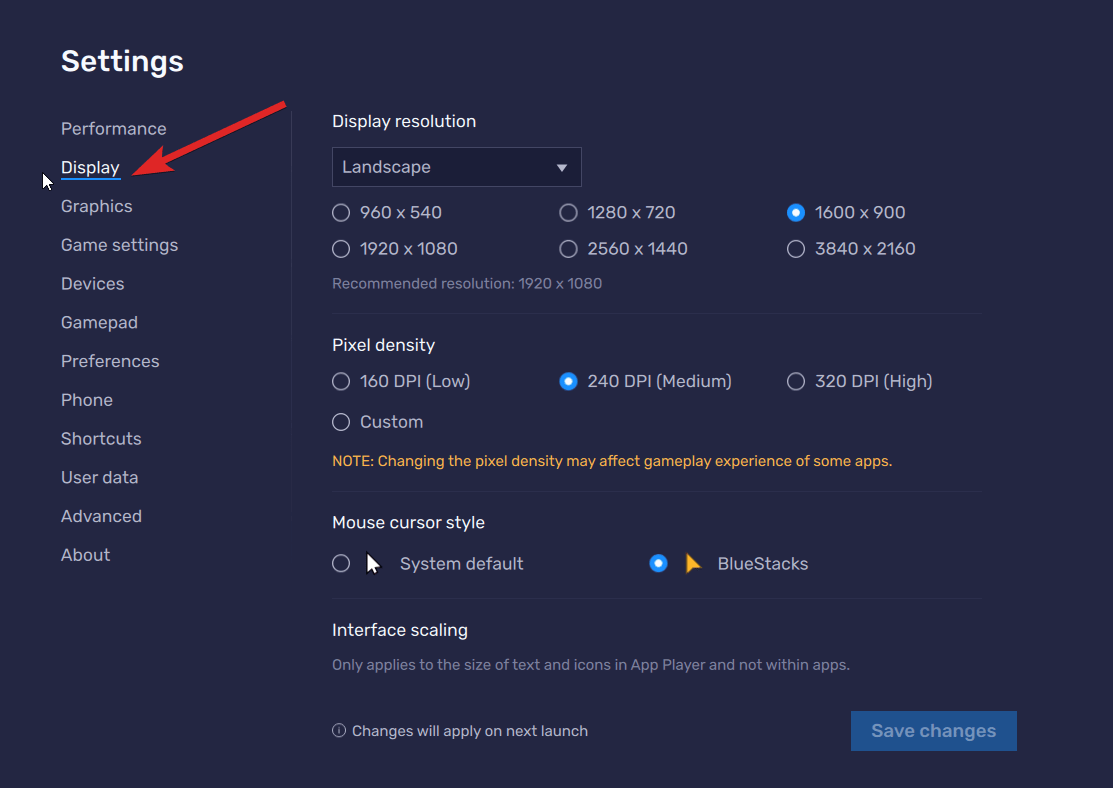
- Within the Settings menu, locate and click on the Display tab in the left-hand navigation pane.

- To alter the screen layout, click on the dropdown menu placed at the top of the screen. This menu presents four options: landscape, portrait, ultrawide, and custom.
- Additionally, you’ll find options related to display resolution, pixel density, and mouse cursor style on the same screen.
3. BlueStacks Game Settings
Within the BlueStacks Android emulator on Windows 11, you may modify the game parameters in addition to changing the display and improving performance. This also allows you to set up particular games to launch in full-screen mode, creating a more pleasing gaming environment. To tweak the game settings of the BlueStacks Android emulator, perform the following steps:
- Launch the BlueStacks Android emulator by clicking the desktop icon.
- Click the Gear icon on the right side of the BlueStacks window.

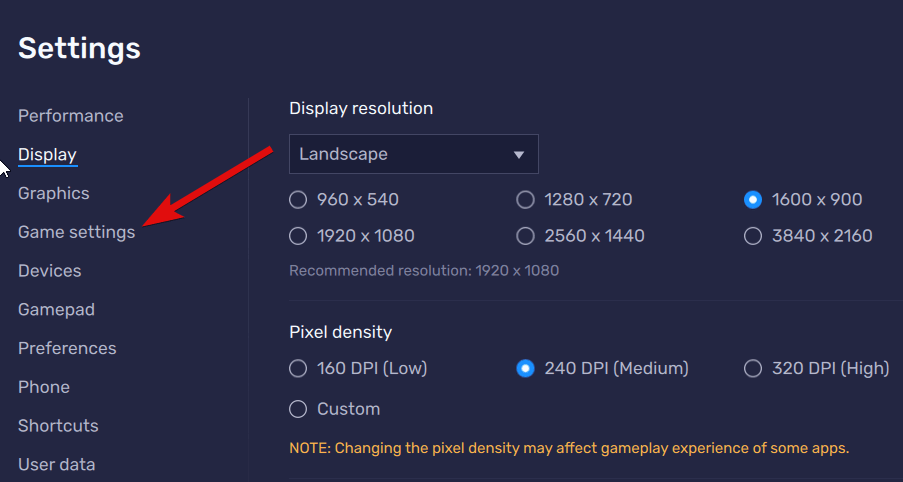
- Choose the Game settings option from the left sidebar.

- To make a particular game or app automatically run in full-screen mode, simply toggle on the switch next to that app or game.
6. How to Update BlueStacks in Windows 11?
You can be required to install all the available BlueStacks updates to avoid encountering performance issues. Here’s how you can update the BlueStacks app on Windows 11:
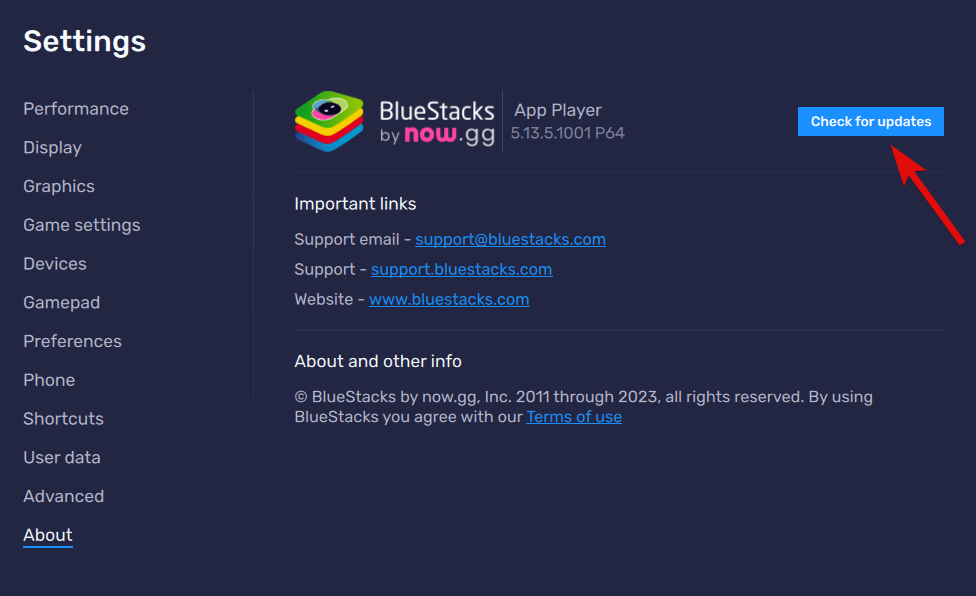
- Open BlueStacks and locate the Gear icon on the right side of the BlueStacks window. Click it to access the related settings.

- Switch to the About section from the left navigation panel by clicking on it.
- Inside the About section, click the Check for updates option located at the top right corner.

- If there are any general updates, BlueStacks will automatically download and install them. If no updates are available, the screen will display that you are already operating the latest version of the software.
7. How to Uninstall an Android app using BlueStacks on a Windows 11 PC?
You can easily uninstall the Android app or game you do not need anymore. Here is the straightforward way to do so:
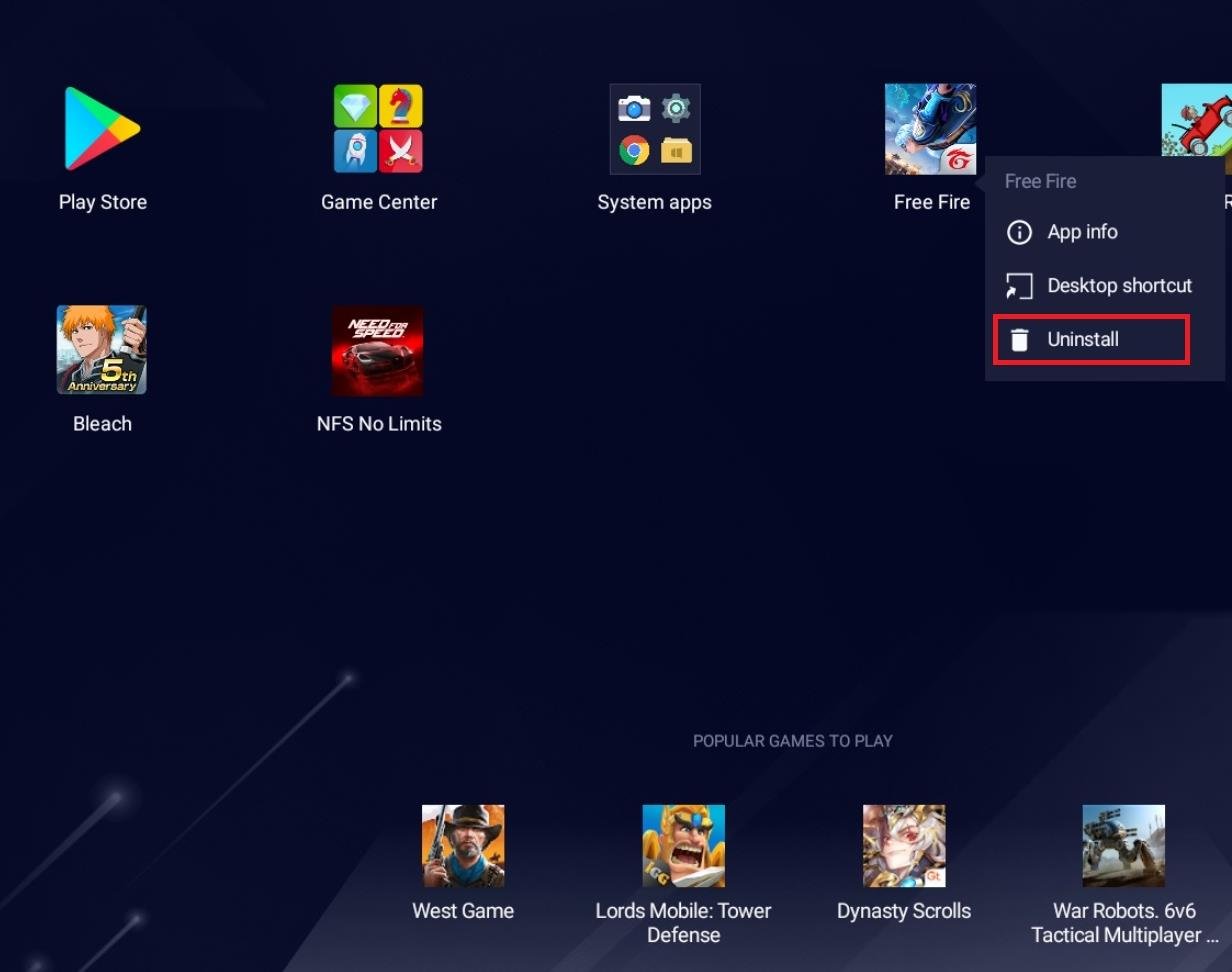
- Go to the BlueStacks home screen to view the lists of Android apps currently installed.
- Right click the Android app you wish to uninstall to access its context menu. Now select the Uninstall option from the list.

- A confirmation window will appear. Click the OK button on the overlay box on your screen to start the uninstall process.

Conclusion
So this is it! This guide will teach you how to install the BlueStacks app on your Windows 11 PC so that you can access all the Android apps. Apart from this, we will also explain how to use the BlueStacks apps to download and play Android games such that your gaming venture is enhanced. What do you think about the BlueStacks Android emulator for Windows 11? Do let us know in the comments section.
If you've any thoughts on How to Install and Use BlueStacks on Windows 11?, then feel free to drop in below comment box. Also, please subscribe to our DigitBin YouTube channel for videos tutorials. Cheers!
