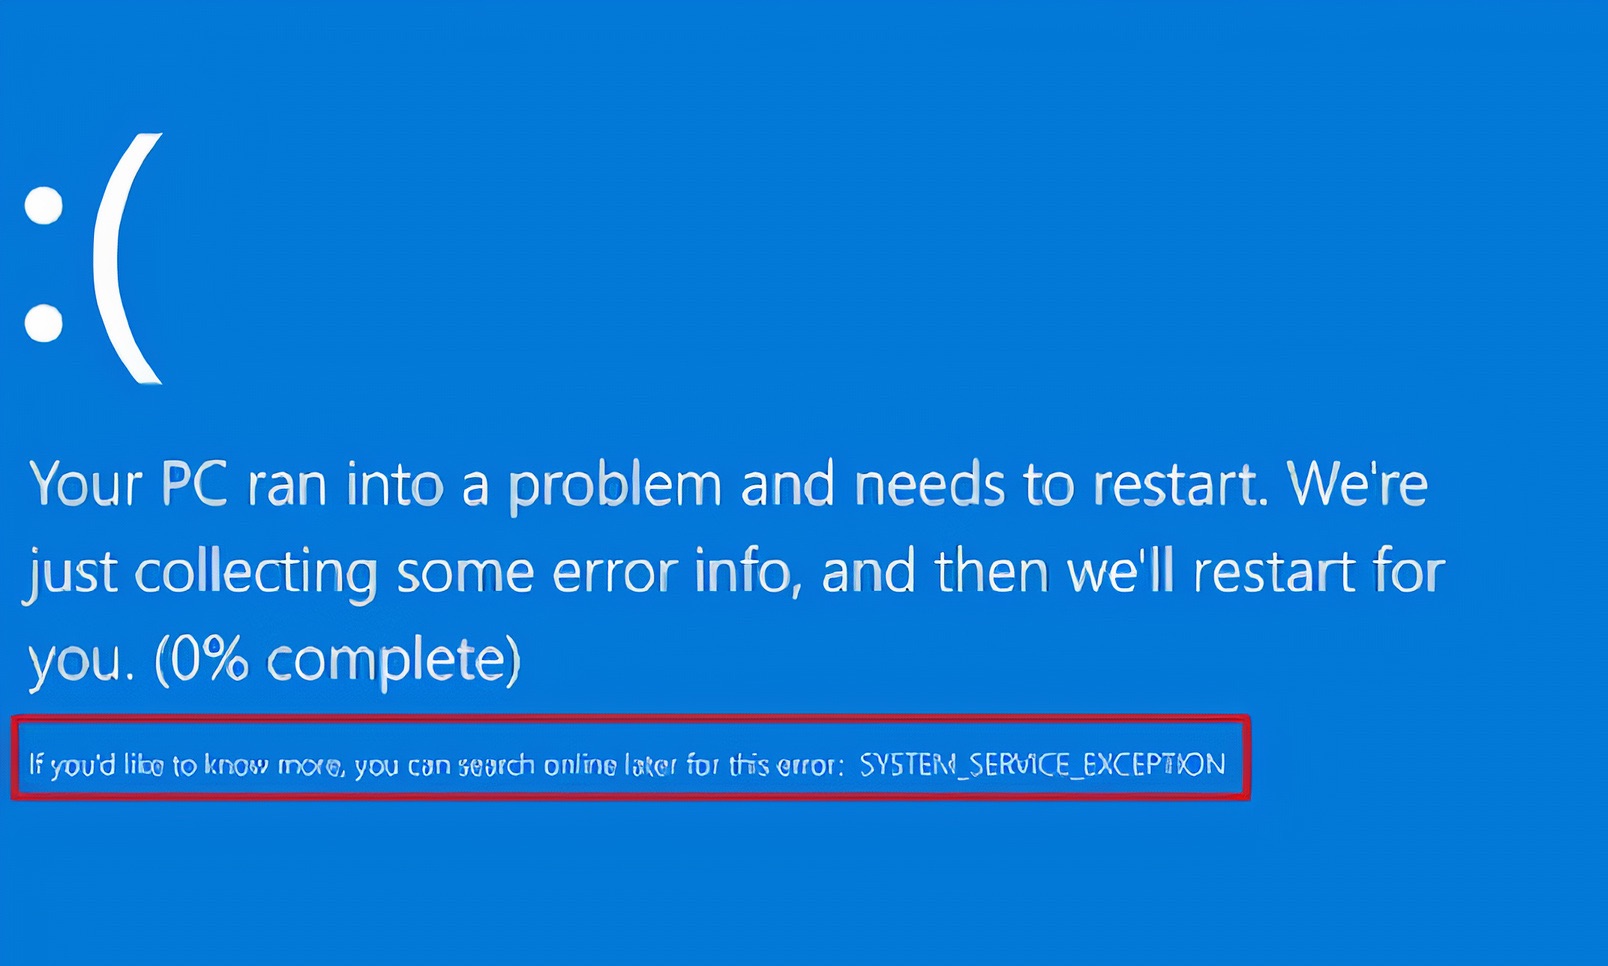
My PC crashed randomly, and the “SYSTEM_SERVICE_EXCEPTION” error was on the screen. Windows 11 is the new software from Microsoft, and it has bugs, glitches, and known problems that take several months to release patches in the form of updates. We have to consider many aspects while solving the BSOD (Blue Screen of Death) problem in the Windows machine.
What Causes SYSTEM_SERVICE_EXCEPTION Error in Windows 11?
We cannot pin the blame on one component or the software because a desktop or laptop is a combination of multiple hardware components. I have mentioned the possible reasons why Windows 11 crashed with a system service exception error on the screen.
- Windows 11 software shortcomings
- Outdated drivers
- Unstable drivers
- Software corruption
- Graphic user interface errors
- Malware
Millions of new malware pieces were developed for Windows in 2020 alone, and you can imagine how vulnerable your system is. Microsoft strengthened the security in the operating system, and whenever a notorious malware tries to access the protected code, then the system crashes. You have to take software corruption in the account since it crashes the machine to save it from hardware-level damages.
1. Scan System Files
I wanted to know system files integrity and find out whether the operating system has corrupted files or not. We should learn about the Windows system files’ health, which indicates the overall health of the software.
Step 1. Press the Start key.
Step 2. Search Command Prompt and open it as administrator.
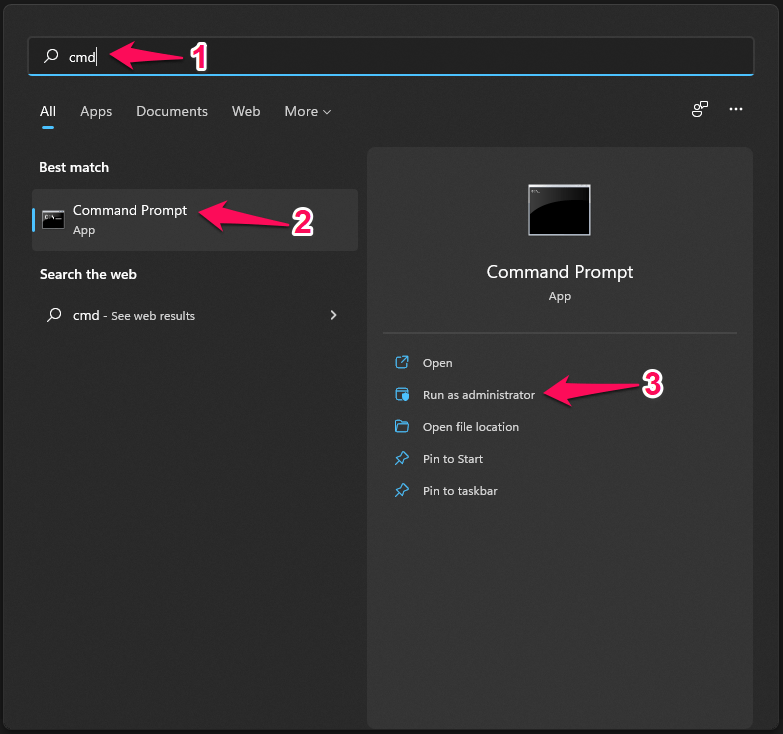
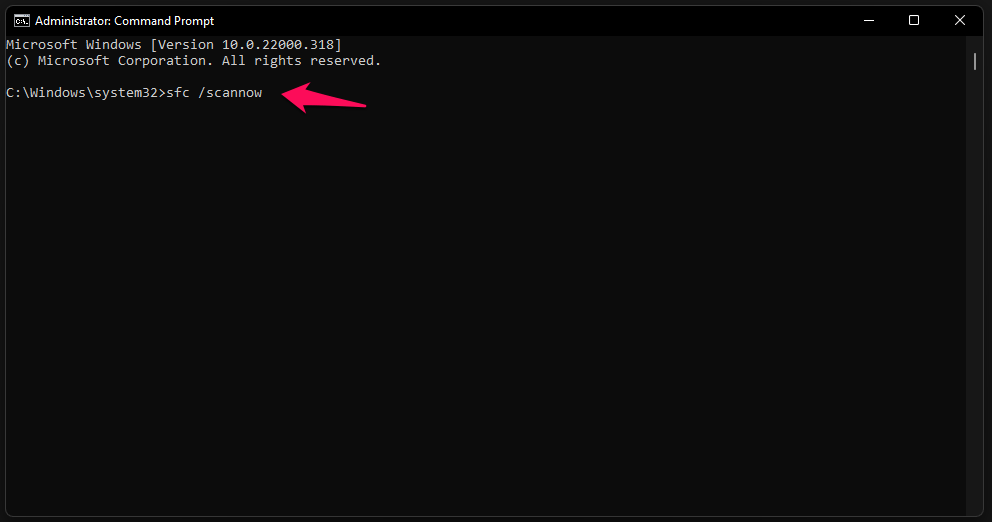
Step 3. Copy and paste SFC /scannow the command and press the “Enter” key.
Step 4. Let the Command Prompt run the scan and finish the process.
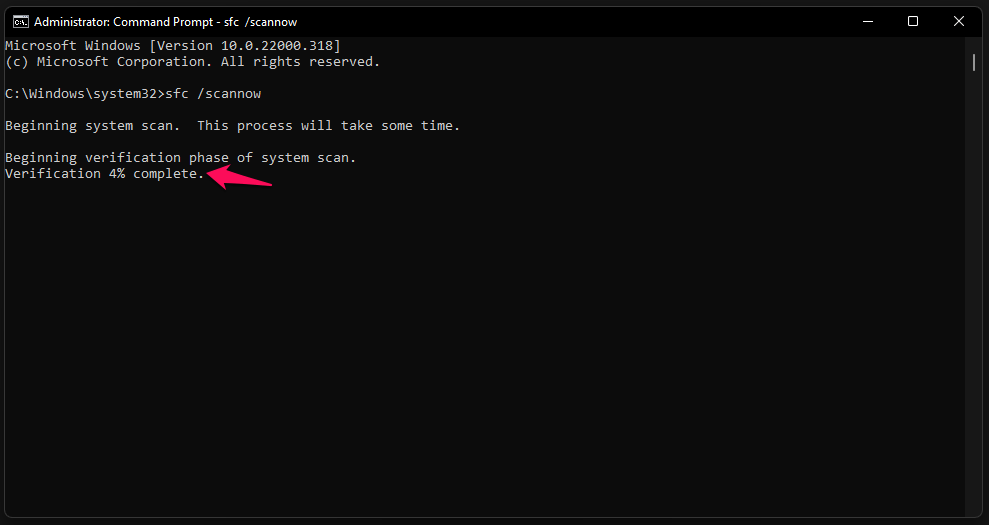
Note: Do not work in the background.
Step 5. Fortunately, my Windows 11 copy doesn’t have any corrupted files in it.
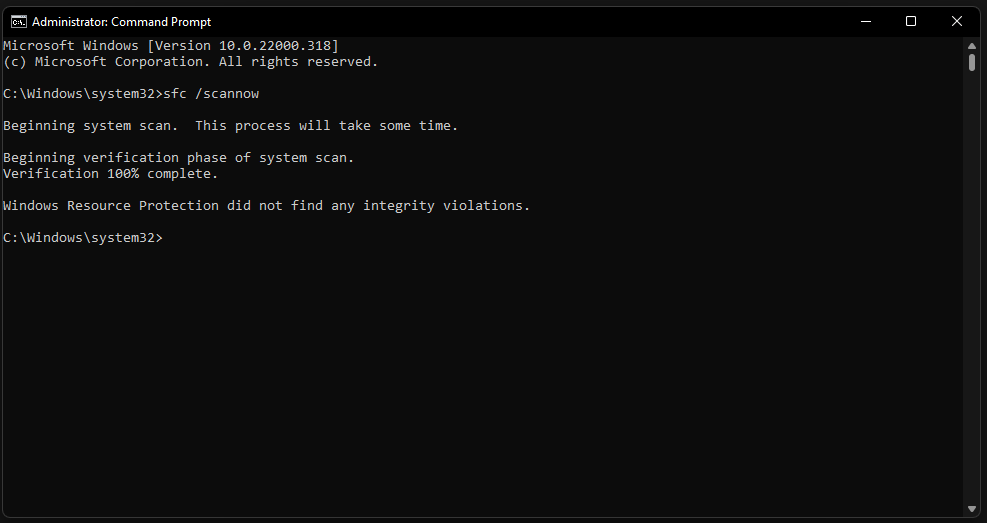
Restart the machine and run the scan again, if it found any corrupted files and fix it automatically. I implore the readers to re-install the Windows 11 OS if the system files are fixed automatically by the inbuilt tool.
2. Roll Back GPU Drivers
Almost every expert in the industry asks you to update the drivers via Windows Update, but I would suggest against it. You shouldn’t rely on Microsoft for every single software update because it can mess up the system instead. I’ve got historical data to prove my point, and you should take the matter into your hands to roll back the graphics drivers.
Step 1. Press the Start key.
Step 2. Start looking for “Device Manager” and open it.
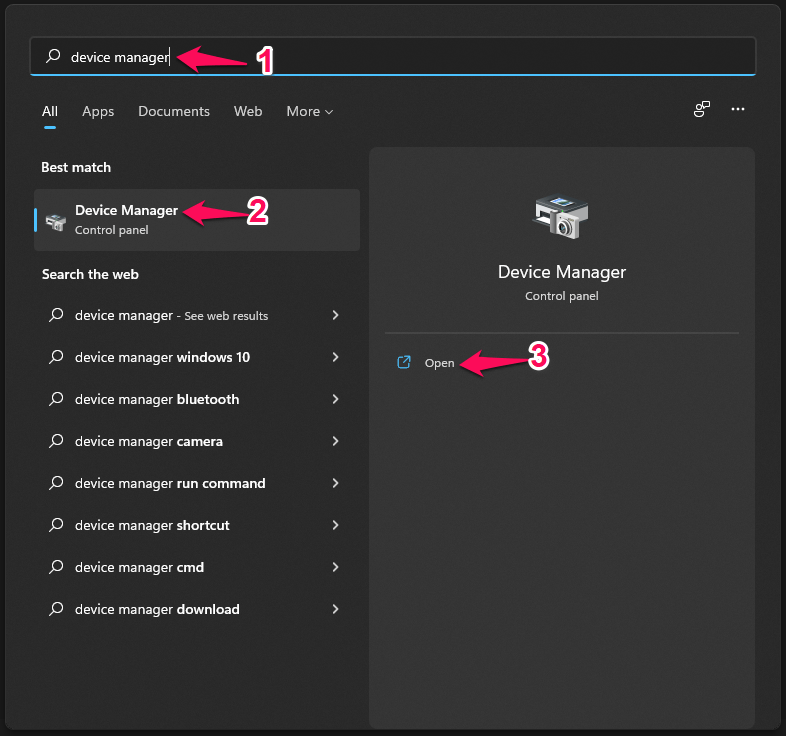
Step 3. Click to reveal the options under “Display Adapters” to view the discrete card or integrated graphics driver.
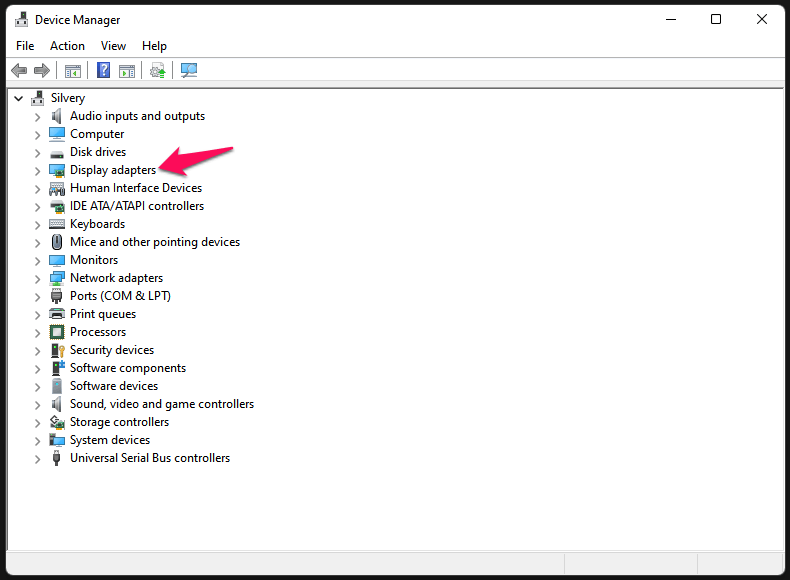
Step 4. Select the GPU, then right-click the mouse to select “Properties”.
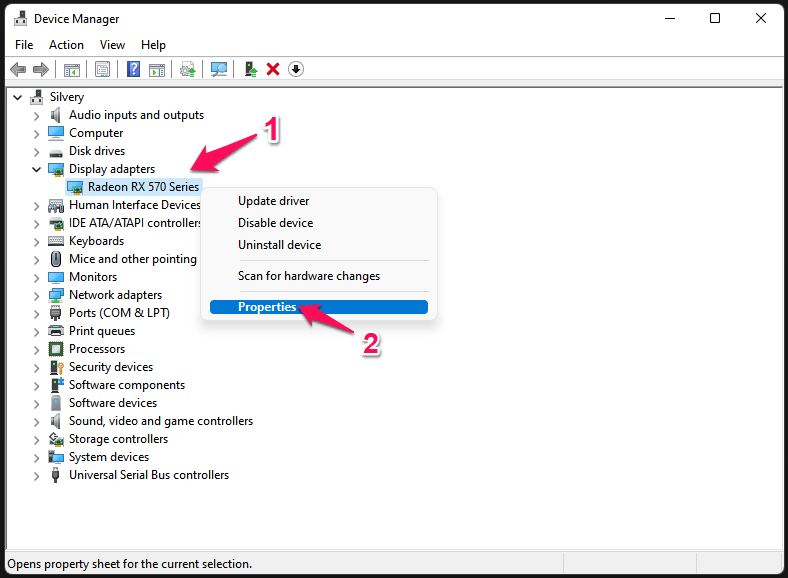
Step 5. A new window shows up on the screen, and select “Driver” from the top menu.
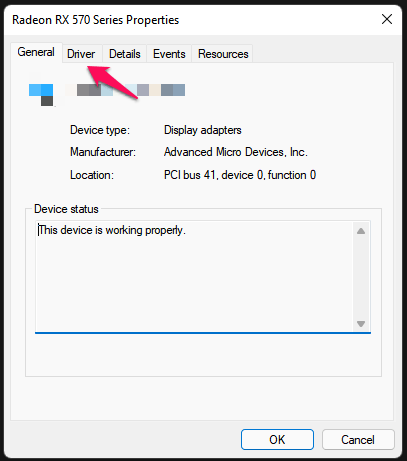
Step 6. Click on “Roll Back Driver” to commence the process.
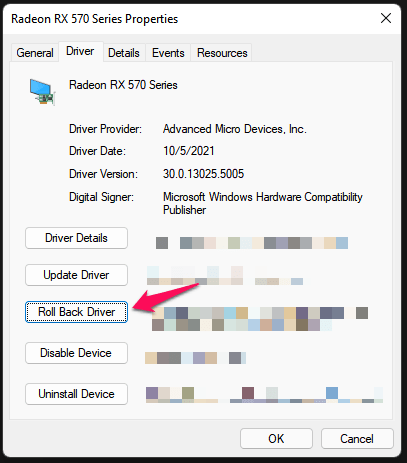
Step 7. Choose a valid reason, then click on “Yes” to roll back the driver.
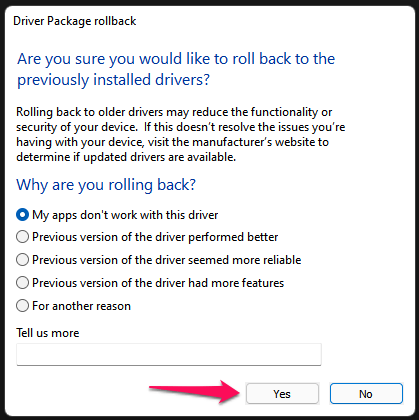
Now sit back and wait patiently to watch Windows uninstall the latest drivers and revert to the previous version. The Windows machine will restart multiple times, and the display may flicker during the reverting process, so do not panic.
3. Reinstall Graphics Driver
Windows 11 is the new edition, and it has inherited most of the features from its predecessor. However, you need the latest GPU, Audio, and other drivers specifically designed for the latest operating system.
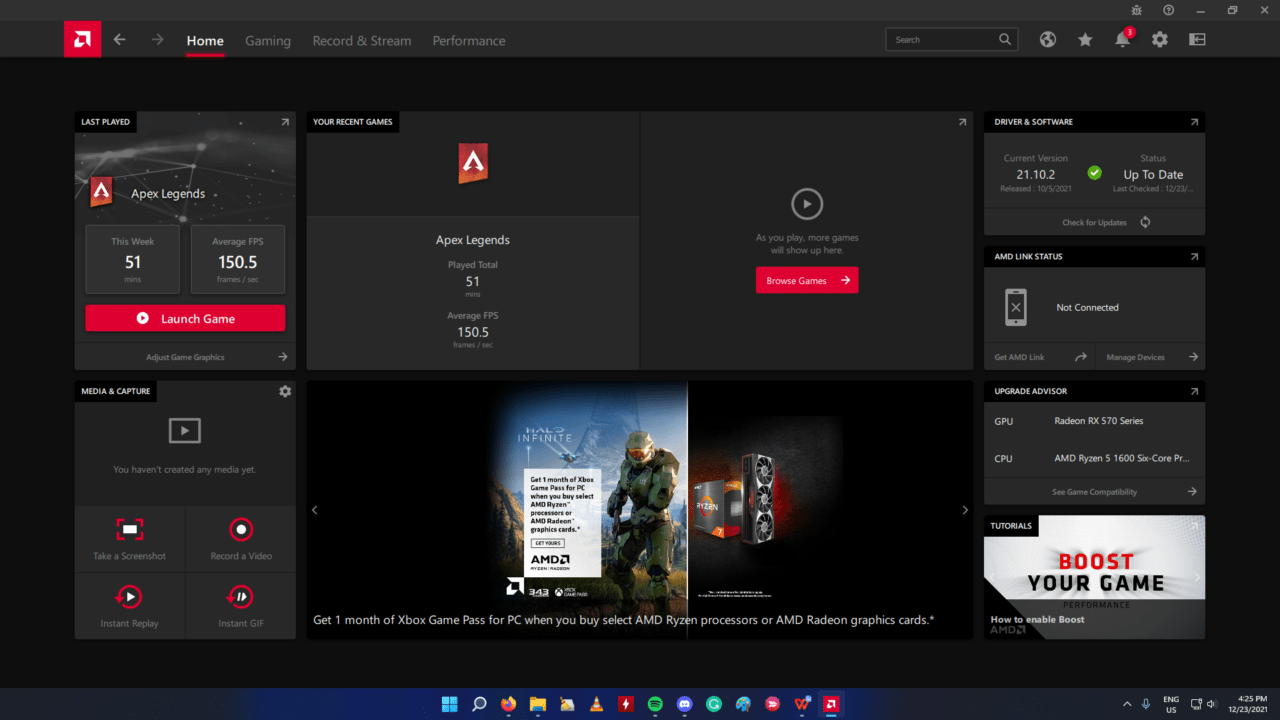
I have covered a tutorial to reinstall AMD GPU drivers in Windows 11, and you should go through it. It doesn’t matter if you have an Nvidia, Intel, or AMD GPU in the machine because I have shown you how to completely remove the drivers from the system. Do not miss a single paragraph shown in the tutorial, and it is coming from someone with one decade of experience with Windows components.
4. Update Windows Drivers
Windows Update is the most suggested solution, but I have a different take on it. The laptop manufacturers have released stable drivers on the official website, and you should download the new drivers from the manufacturer site. I have an assembled desktop then I will download the drivers from the motherboard manufacturer site.
1. Enter your laptop model number and add drivers at the end in the Search Engine.
2. Choose your laptop listing and make sure the web page ends with “Support” or “Drivers”.
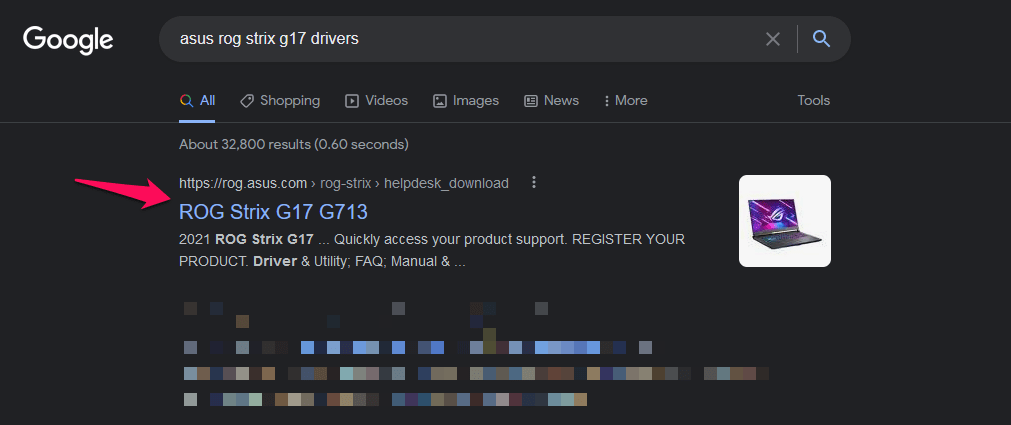
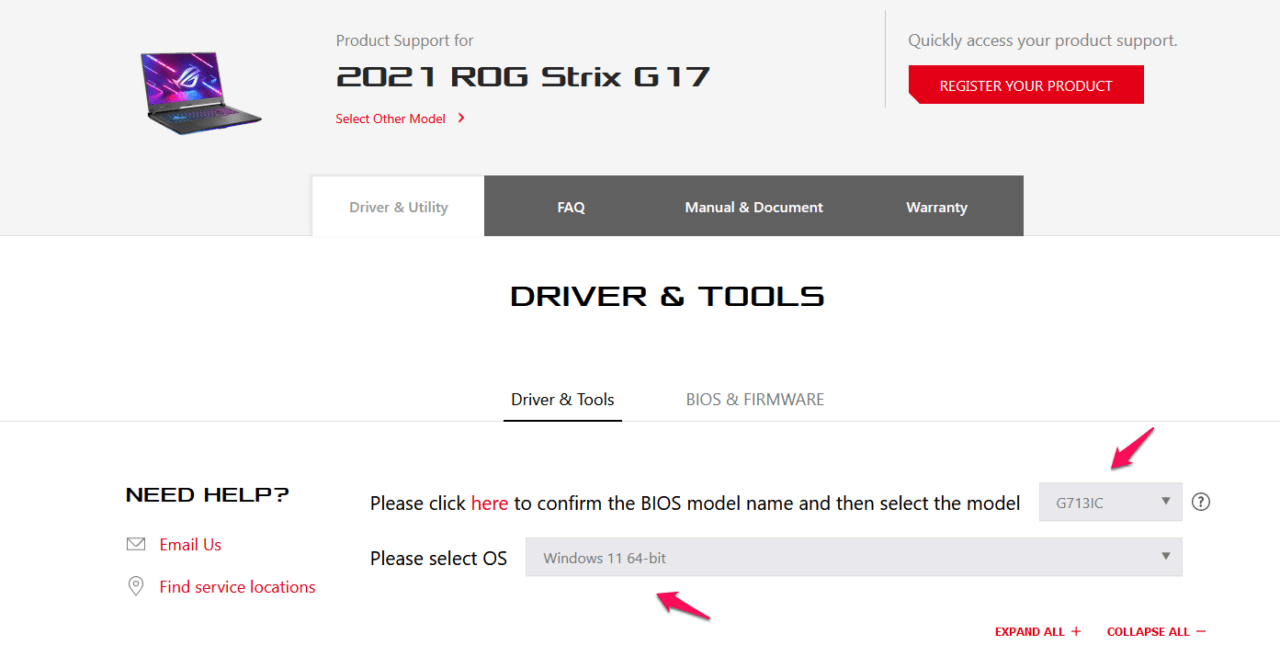
3. Choose the BIOS model name and operating system.
4. Now, you can download desktop/laptop drivers from the web page.
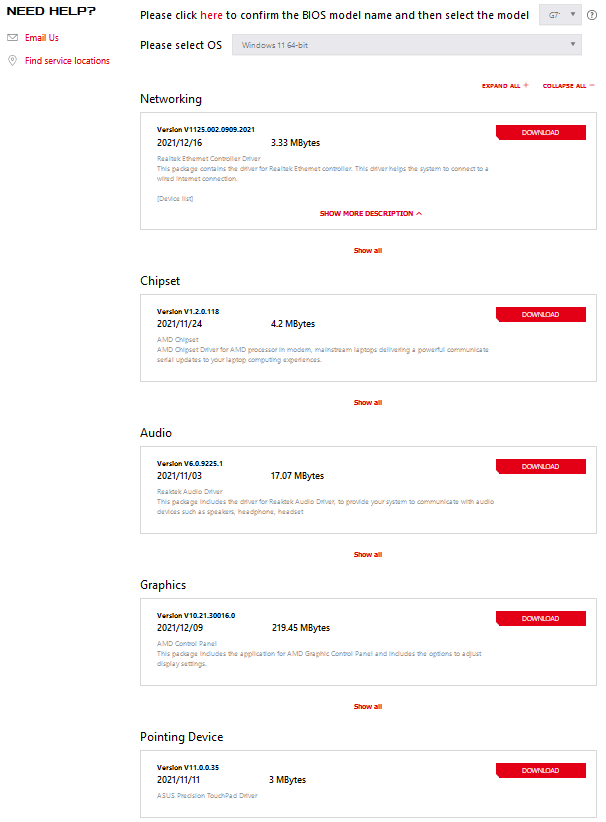
Uninstall the existing drivers from the machine, then install the latest drivers saved from the official site. I’m aware of the manual work and the time that goes into it, but it’s worth it.
5. Check Disk Health
Windows 11 is a heavy package and the system requirements say a lot about the operating system capabilities. I recommend the old machine owners upgrade the storage drive and go for an SSD drive. Many mechanical hard drives (7500rpm) struggle to offer a butter smooth experience and you should confirm HDD health.
1. Open Command Prompt as administrator.
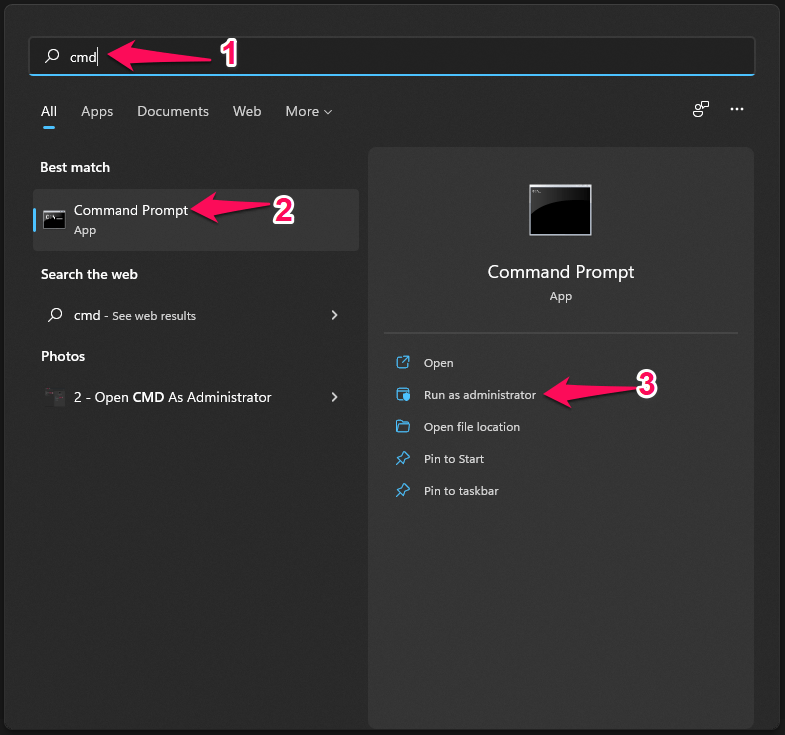
2. Copy and paste the chkdsk /r command.
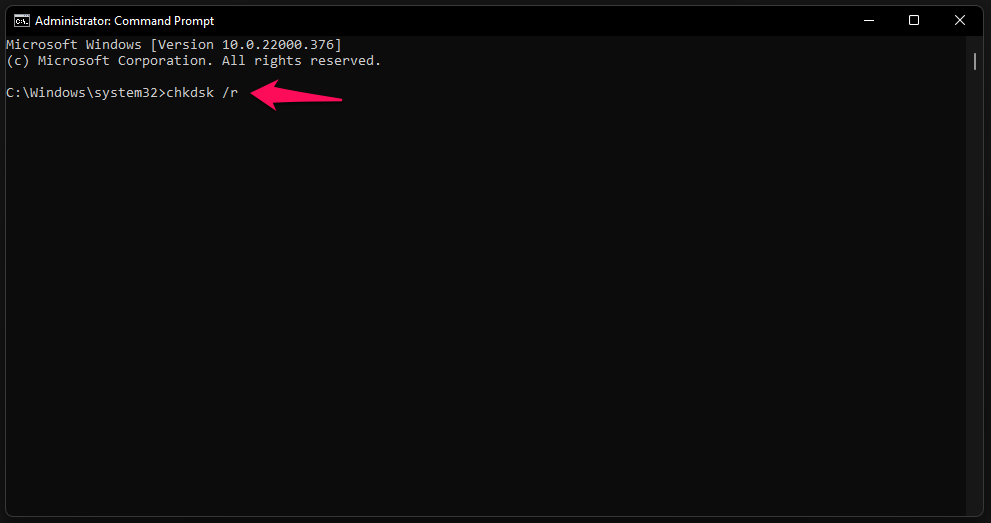
3. Type the “Y” key and press the “Enter” key to confirm.
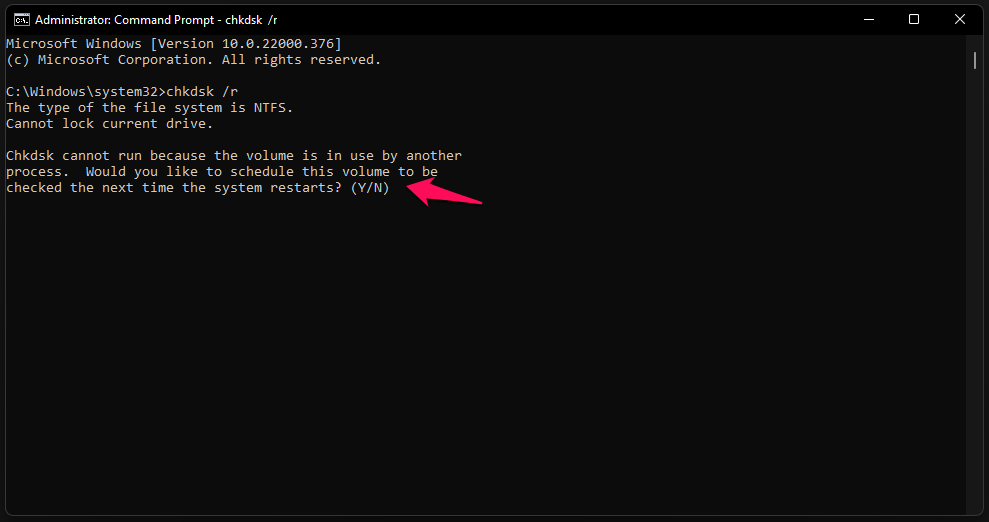
4. Save all unsaved work and restart the machine.
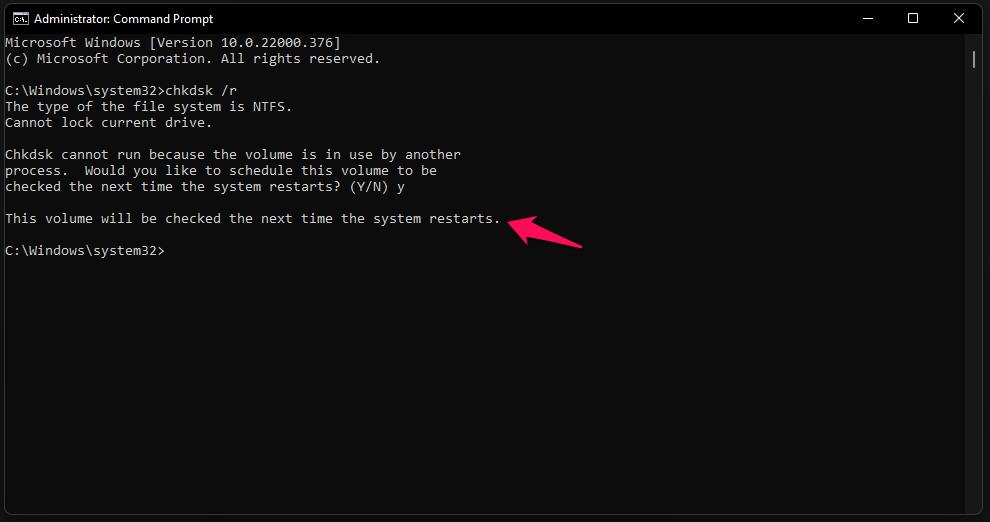
“This volume will be checked the next time the system restarts.”
5. Restart the Windows machine after saving the background work.
6. CHKDSK will scan and fix the Windows installed drive.
The mechanical hard drive or SSD drive will go through a series of tests. Do not interrupt the process and it will take fifteen minutes to complete the process.
7. The Lock Screen will show up on the screen after the scanning is finished.
Be patient and it will take a minimum of ten minutes, so do not force shut down the machine. The CHKDSK will verify the system files and it will fix the bad sectors during the scanning process, so you should sit tight.
6. Turn Off Startup Programs
Windows 11 was released on 5th October 2021, and thousands of programs are not optimized for the newer operating system. You should disable the startup programs and they might be causing the issue and it includes Google programs.
1. Press Windows Key + X and Open “Task Manager” from it.
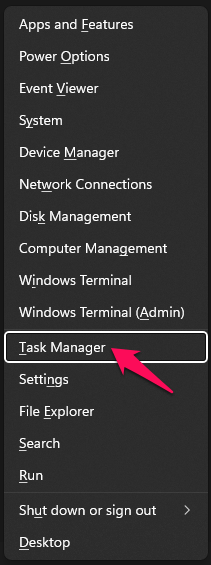
2. Click on “Startup” from the main menu.
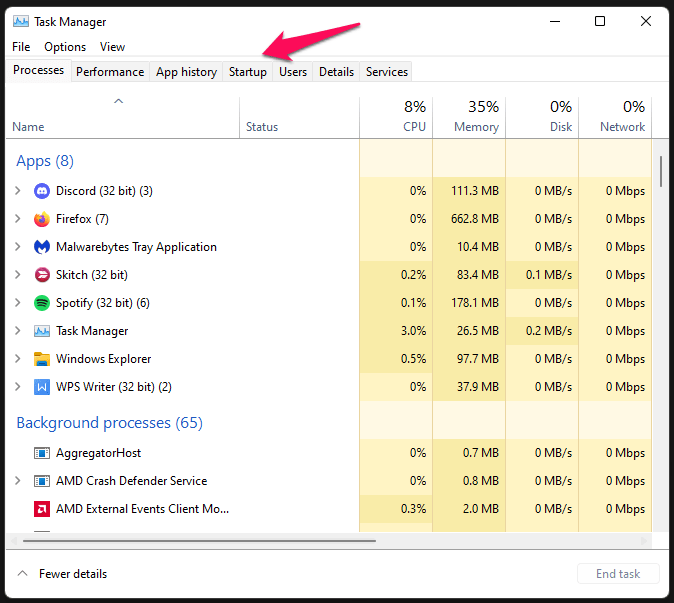
3. Select a program, then click on the “Disable” button located at the bottom left corner.
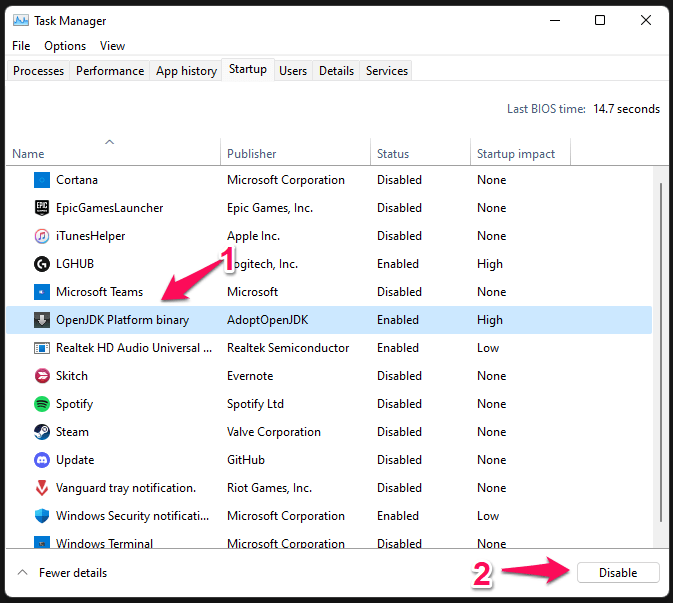
I have disabled all programs except Realtek HD Audio and Windows Security. You shouldn’t allow third-party programs to boot up along with the operating system unless it is a must-have program. You are disallowing the programs from running during booting the operating system, and it will conserve RAM, CPU, and storage.
7. Verify Installed Drivers
You can verify the installed driver’s integrity and stability.
1. Press the Start key.
2. Open “Verifier.exe” from the search bar.
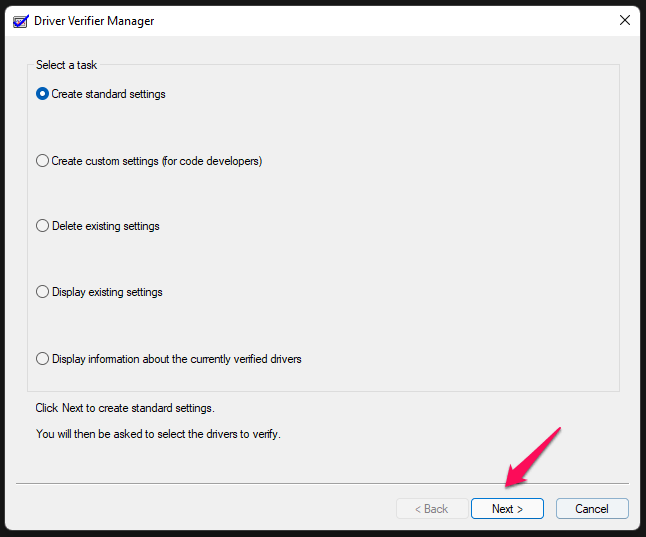
3. Choose the “Create standard-setting” and click on the “Next” button.
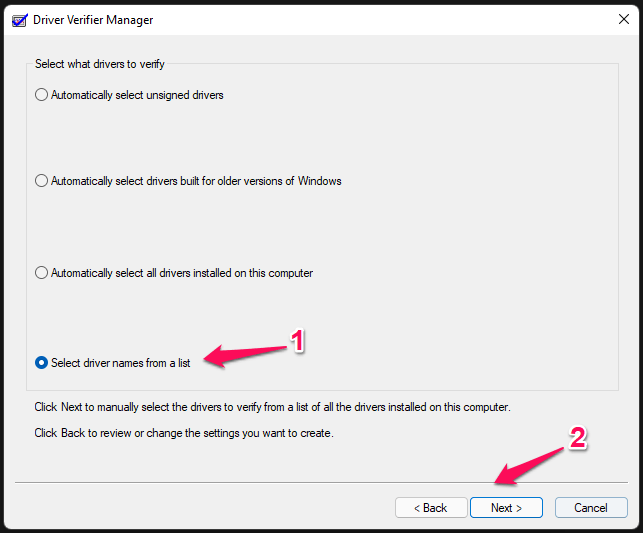
4. Click on “Select driver names from a list” to continue.
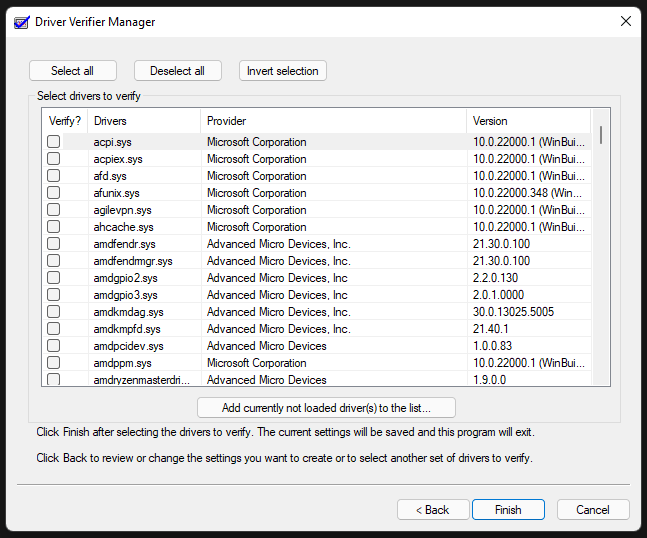
5. You will find all drivers here and find the problematic driver.
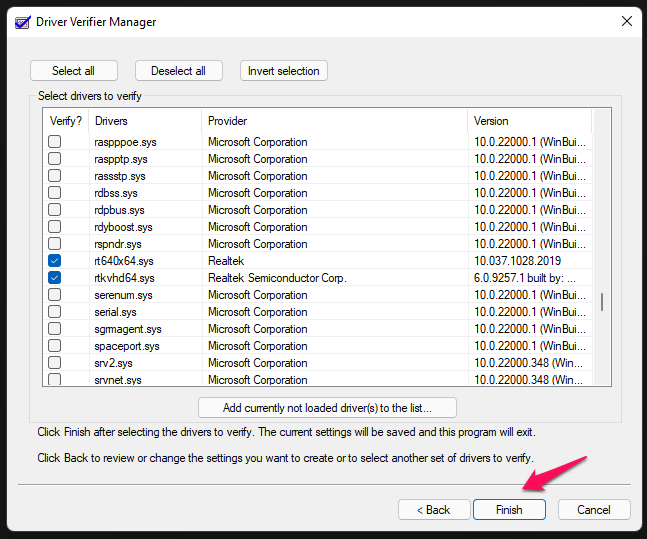
Read the driver names and select one or multiple accordingly.
6. I selected Realtek Audio Console and driver, then click on “Finish” to complete it.
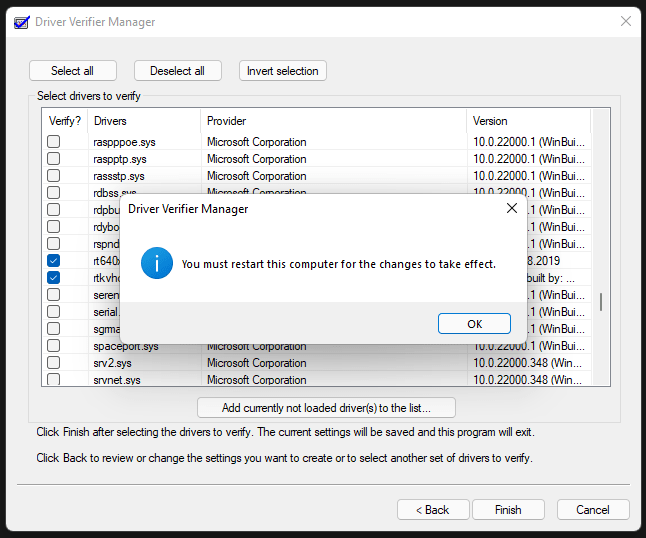
7. Click on “OK” to confirm it.
Your Windows 11 machine won’t restart automatically, and the process will begin in the next restart. The drivers will be verified in the next session, so make sure to save unsaved work then restart the computer. You won’t see any difference while booting up the software but the driver verifier tool is working in the background.
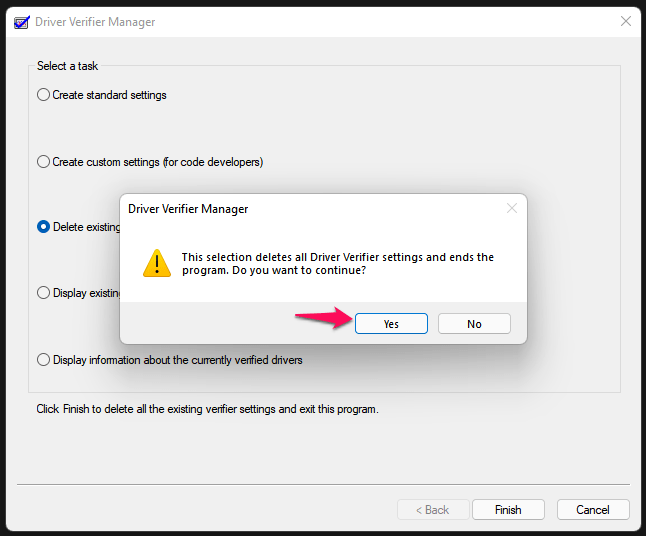
8. Open Driver “Verifier.exe” from the search bar.
9. Select the “Delete existing settings” option, then click on “Finish”.
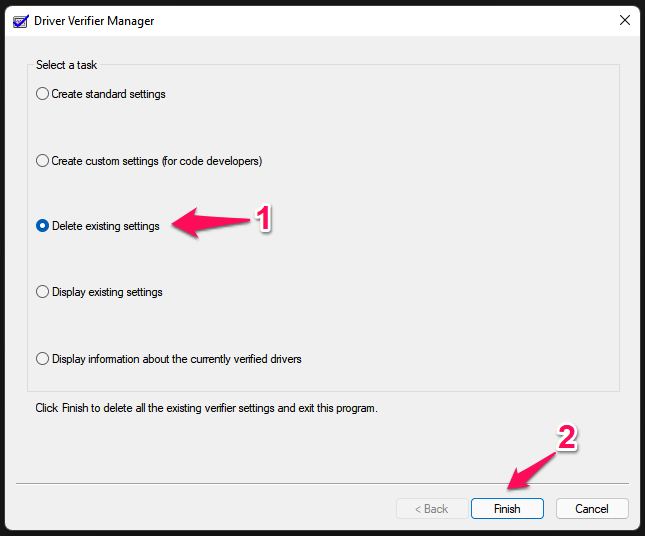
10. Click on “Yes” to confirm it.
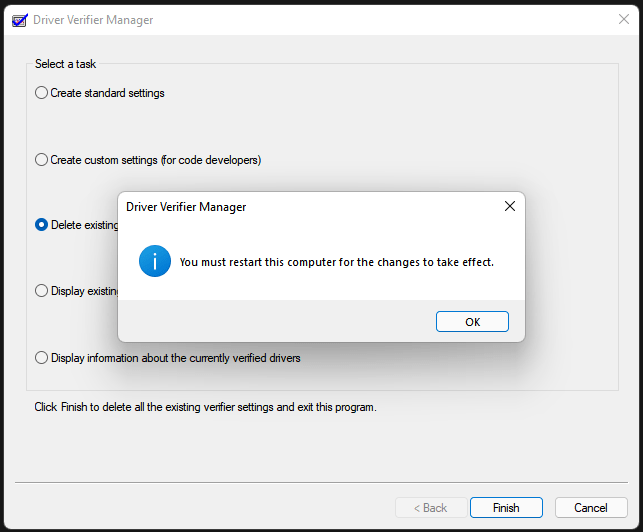
11. Click on “OK” to confirm the changes.
Restart the Windows machine.
8. Unsupported Hardware
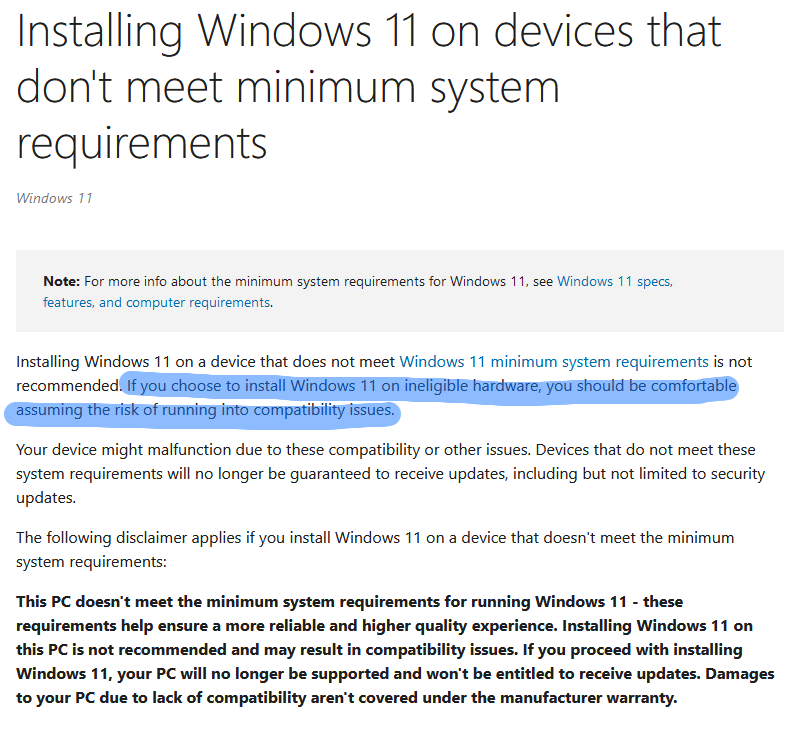
Unfortunately, there are comprehensive guides out there that promise to install Windows 11 on unsupported hardware. But nobody can vouch for 100% OS compatibility and stability, which is a deal-breaker for most of us.
I’m running Windows 11 on Ryzen 5 1600, which is an unsupported processor. However, I don’t think that the “SYSTEM_SERVICE_EXCEPTION” error is persisting due to the unsupported hardware. It will take a year for the manufacturers, Microsoft, and companies to release a stable driver for the latest 11th operating system.
Bottom Line
The “SYSTEM_SERVICE_EXCEPTION” error is a faulty driver or component in the machine. You should seek assistance from the authorized engineer for further investigation, and I don’t recommend you to conduct hardware-level inspections. I have suggested to my peers and acquaintance to go back to Windows 10, which has software support left on the paper by 2025. Let us know which solution has helped you to resolve the “SYSTEM_SERVICE_EXCEPTION” Blue Screen of Death error in the comment section below.
If you've any thoughts on How To Fix System Service Exception BSOD Error in Windows 11?, then feel free to drop in below comment box. Also, please subscribe to our DigitBin YouTube channel for videos tutorials. Cheers!
![[4 Methods] Fix Origin Not Opening Error in Windows 11 1](https://cdn.digitbin.com/wp-content/uploads/fix-origin-wont-open-in-Windows-11-520x292.png)


