Windows 11 brings a lot of new features for users. Apart from some redesigned UI elements and streamlined setting options, the Windows 11 OS also adds extra functionalities to its Clipboard history. Microsoft has now provided an interface that keeps a record of all the things that you can copy, be it text or images. The best part is that you can sync this clipboard history across all your Windows devices.
However, you need to be logged in with the same Microsoft account on other Windows devices in order to access your clipboard history across devices. The only caveat to this new clipboard history tool in Windows 11 is that it is an optional feature. To use it, you must first enable and configure it manually.
Fortunately, this guide comes to the rescue. If you have just installed Windows 11 or are already running it for a while, but do not know how to access the clipboard history, then you are in the right place. Because here, we will explain to you the process of how to check clipboard history on Windows 11. With that said, let us jump right in.
Steps to enable Windows 11 Clipboard history
There are two ways via which you can enable Windows 11 clipboard history. The first method is from the Settings app, and the second option is to enable it from the emoji panel.
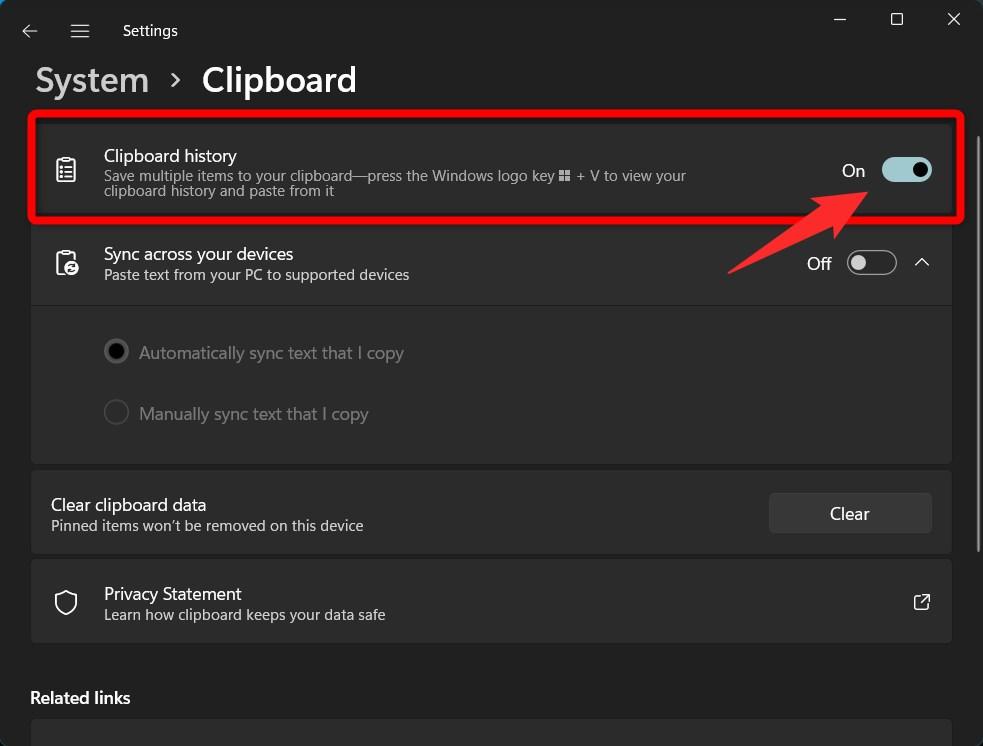
Enable through the Settings app
- Open the Start menu and search for Clipboard settings. Open it.
- Turn on the Clipboard history toggle.

- That’s it!
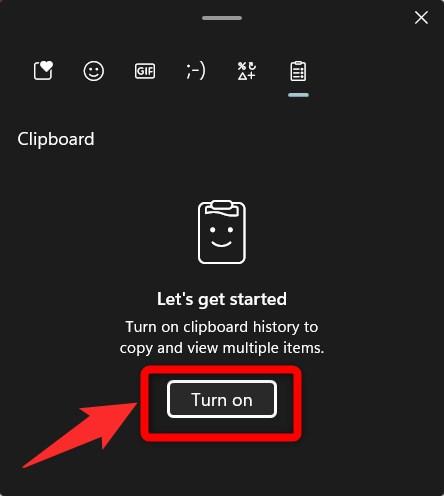
Enable from the emoji panel
- Press the Windows + V keys together on your keyboard.
- In the new menu that pops up, click the “Turn on” button.

- Now, you can access the clipboard history panel by pressing the “Windows key +V” as well.
Now anything that you copy will show up on this clipboard history panel. In order to access it, simply press the Win+V. Buttons together on your keyboard. If you want to manage the clipboard history items, you can do so by tapping on the pin icon on the content.
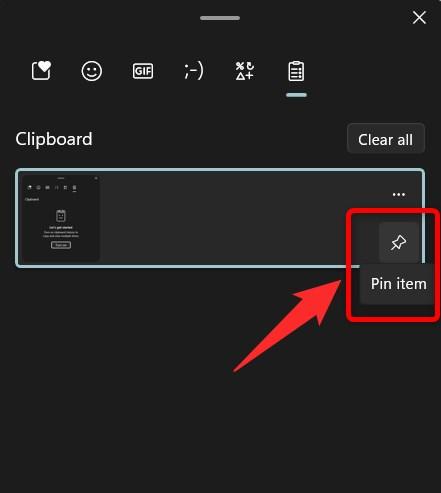
To wipe out all the history items, simply press the “Clear all” button at the top. This will remove all of your clipboard histories from the panel.
Importantly, if you enable clipboard history, then make sure that everything or anything that you copy will be stored in the history panel. Anyone having access to your PC could get hold of the content that you have copied. This could be your credit card or debit card number, your social security number, or any other personally sensitive information.
So, a piece of advice is to turn off the clipboard history when you are dealing with sensitive information or manually clear the clipboard history to avoid personal information loss.
If you've any thoughts on How to Check Clipboard History on Windows 11?, then feel free to drop in below comment box. Also, please subscribe to our DigitBin YouTube channel for videos tutorials. Cheers!
