When you need to lend someone your PC, guest accounts are ideal. You won’t have to keep an eye on them to ensure they don’t spy around or do anything improper using your user account.
In the past, setting up a guest account on Windows was a simple task that anyone could complete with a few clicks. That is no longer the case, although you can still make a guest account in more recent Windows versions—like Windows 11.
If you are a novice Windows user and cannot guide yourself to create a guest account in Windows 11, do not fret! In this guide, we have explained the complete step-by-step procedure of creating a guest account on Windows 11 using different methods.
So, without wasting any time, let’s get started right away.
What is a Guest Account on Windows 11
Using Windows to protect your data can be difficult. While Windows does let you hide files and folders, having a guest account is the best way to host visitors on your computer.
One kind of user account that gives you limited, transient access to your computer is a guest account. Users using the guest account cannot install new apps, access your files, or change the device’s configuration. When the user shuts down the computer, all the information in the account created during the guest mode session is automatically erased.
Windows 7 and Windows 8 introduced the Guest mode. Nevertheless, Microsoft removed this capability from Windows 10, so Windows 11 also lacks it.
Alternatively, Windows 11 allows you to set up a local guest account with the same functionality. The Command Prompt, Windows Settings, and Windows Powershell (Admin) can all be used for creating the local guest account. These techniques are covered in-depth below. Select the one that best suits your needs and proceed accordingly.
Ways to Create Guest Account on Windows 11
Here are the Best Possible Ways to Create a Guest Account on a Windows PC to Keep your Account and Privacy Safe.
1. Using Settings App
Although there are several ways of creating a local guest account on Windows 11, using the Windows Settings app to do so is the simplest one.
- First of all, you need to access the Windows Settings app using the Windows + I shortcut combination.
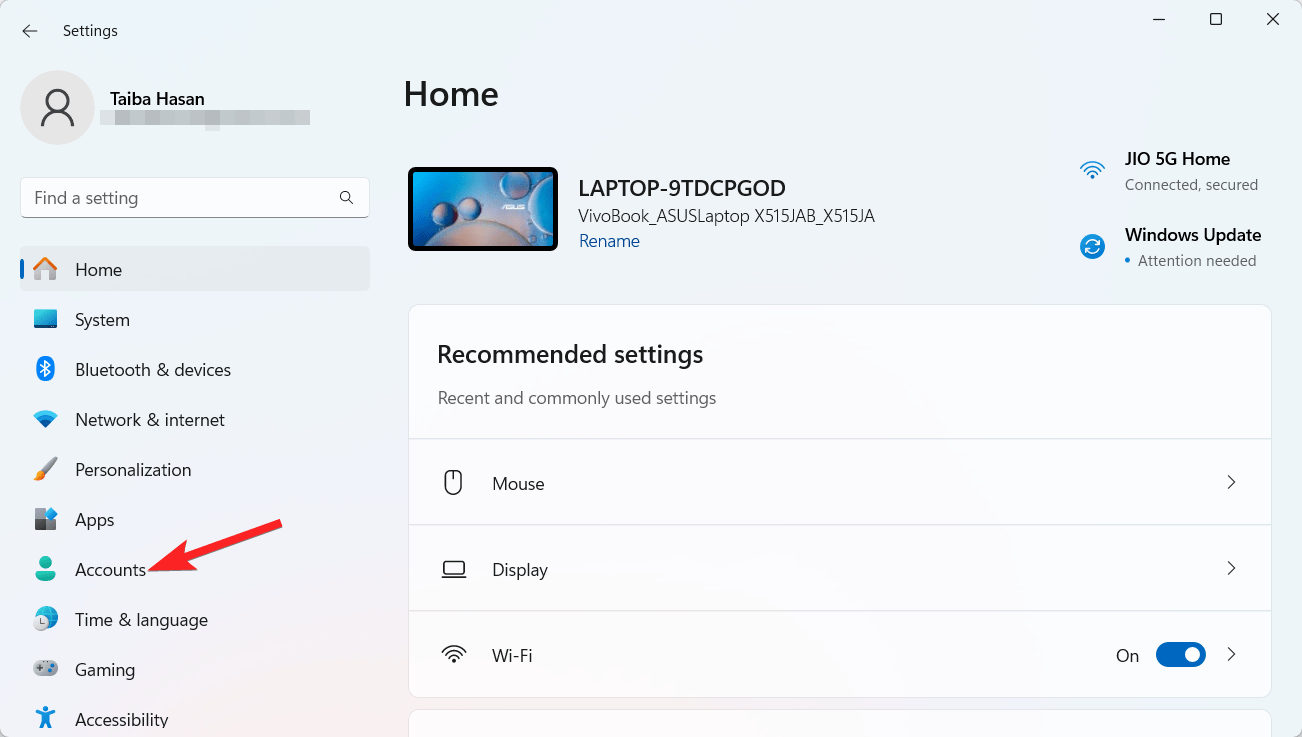
- Choose Accounts from the left navigation pane.

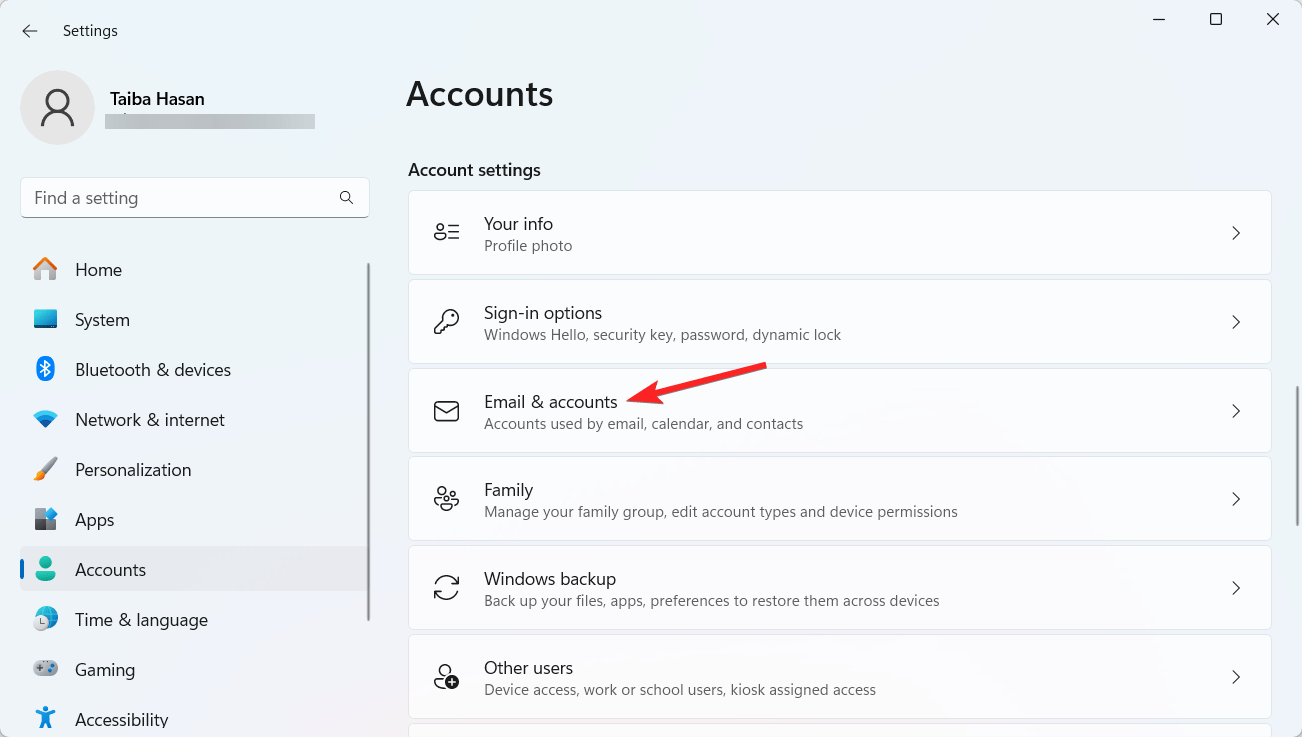
- Choose Email & accounts from the right section of the settings window.

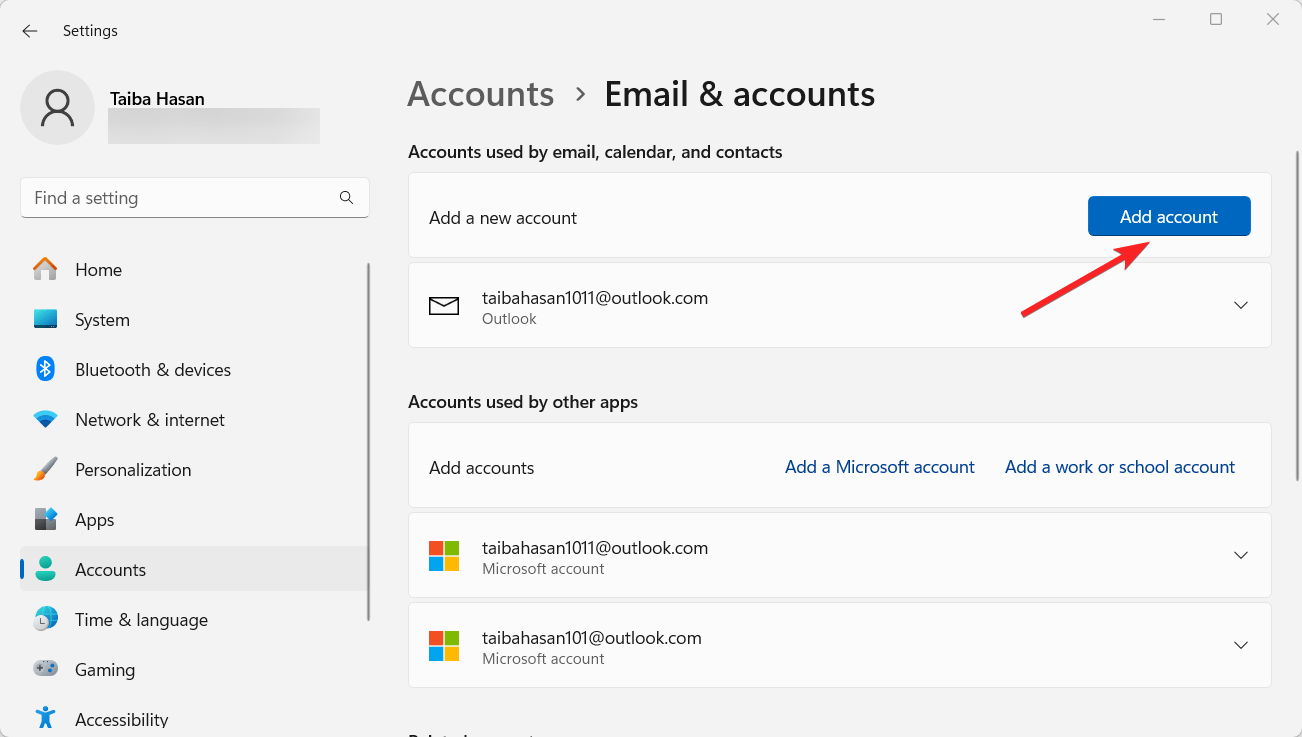
- Click the Add Account button located next to the Add a new account option.

- You will be asked to provide your phone number or email address after a brief while. Instead, select the I don’t have the person’s sign-in information link beneath the Windows 11 guest account field.
- Currently, the Create account screen presents you with three possibilities. Select the Windows 11 guest account option labeled Add a user without a Microsoft account.
- Next, give the account you want to create a name. Since you still can’t use the Guest name here, any relevant name such as Visitor will do.
- After selecting your password twice, complete the three security questions for the Windows 11 guest account.
- To finish this process, click Next.
You can now find the just-created account under Other users. Just log out of your existing account and log in to the new one to use it. Most features are still available as this guest account is just a standard account that does not impose any limitations on the user account. If you want to restrict the capabilities of the guest accounts and impose restrictions on the activities of the users logging in using the guest account you can do that easily using the Local Users and Groups feature located in the Computer Management settings.
For some reason, the Local Users and Groups feature is not accessible via the Computer Management settings. If so, you can easily edit the User settings using the Lusrmgr tool.
- Visit the Lusrmgr download webpage using your preferred web browser. Now click to download the executable file.
- Double-click lusrmgr.exe to access the Local Users and Groups window.
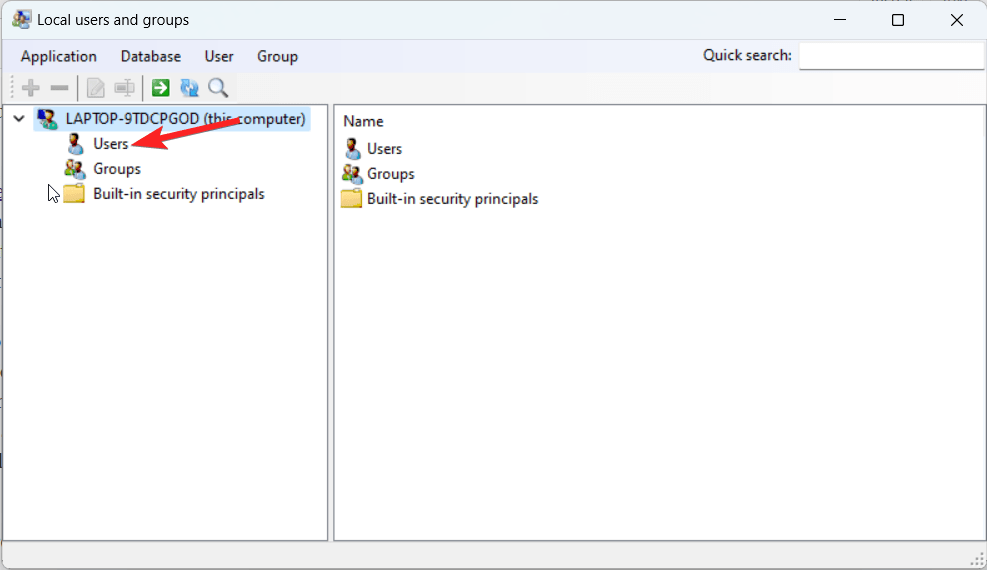
- Click Users located on the left navigation pane to expand it.

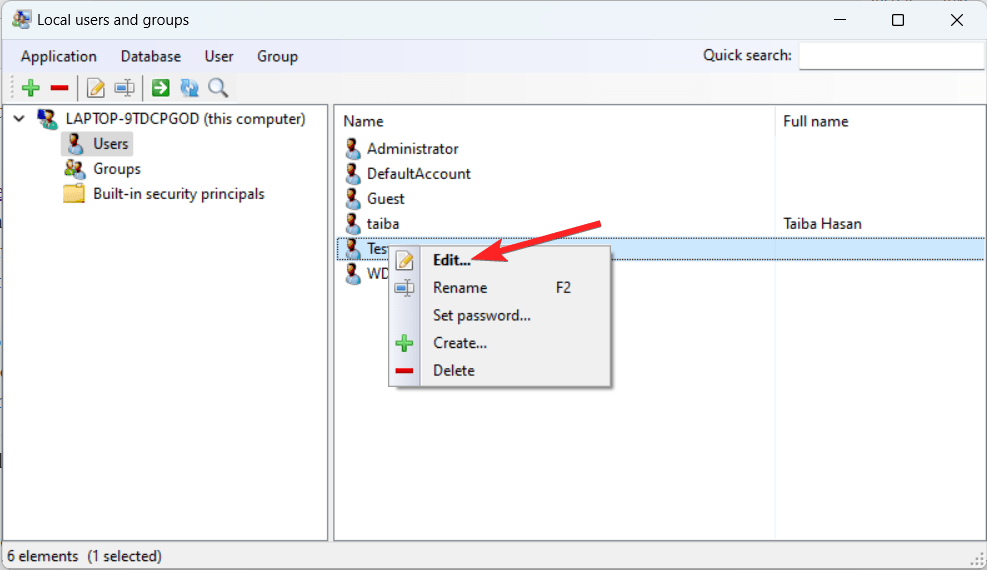
- Next, look for the local guest account you just created on the right side of the Local Users and Groups tool. Right-click it and choose Edit from the context menu.

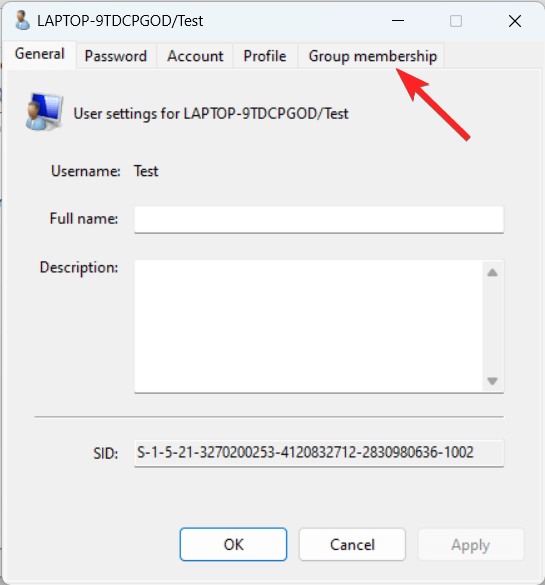
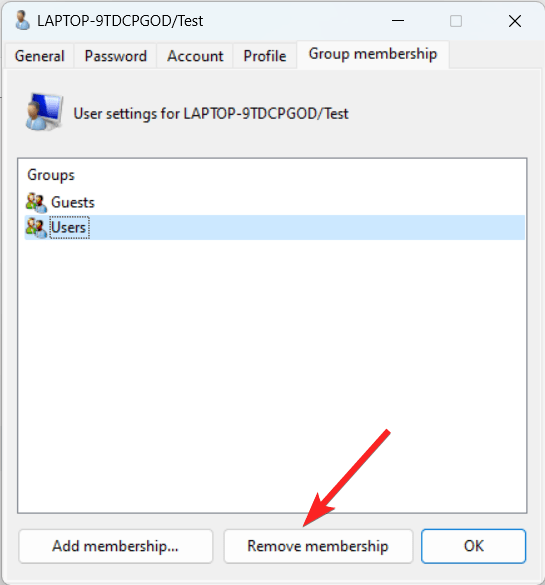
- Switch to the Group membership tab of the Local Users and Groups window.

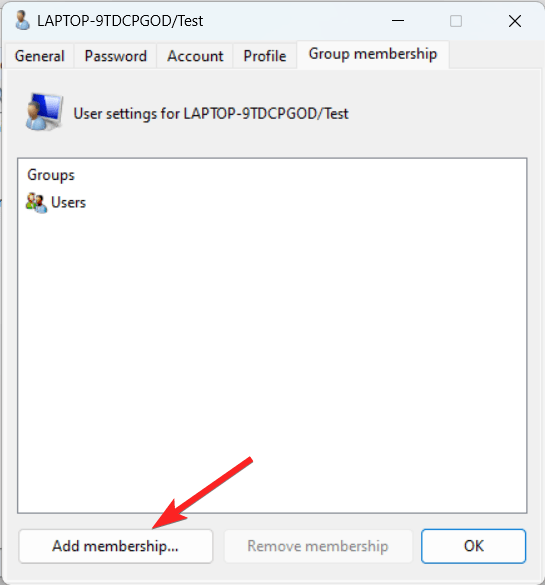
- Press the Add Membership button located on the bottom left.

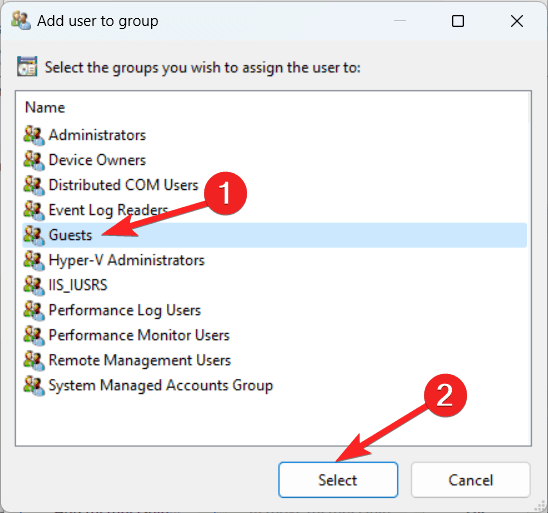
- Choose Guest from the Add user to the group window that pops up and press the Select button.

- Next, select Users from the list and click the Remove Membership button located at the bottom.

- Finally, click Apply and then OK.
You will see that the account becomes more restrictive once you are done.
2. Using Command Prompt
If you prefer the Command User Interface or CUI over the graphical user interface, you will be glad to know that Windows 11 allows you to use the Command Prompt, also known as cmd.exe to create a local guest account on your Windows 11 PC. Below is the step-by-step procedure for the same:
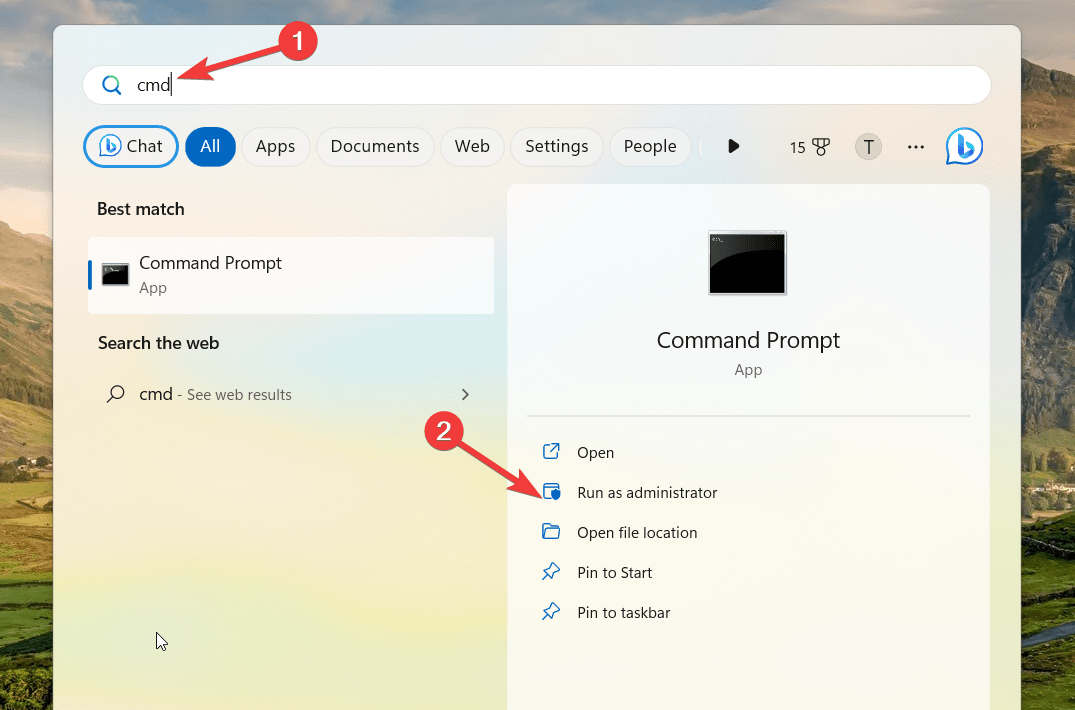
- Press the Windows key to launch the Start menu. Type cmd in the search bar on top and choose the Run as administrator option from the search results.

- Click the Yes on the User Action Control prompt to launch Command Prompt with administrative privileges.
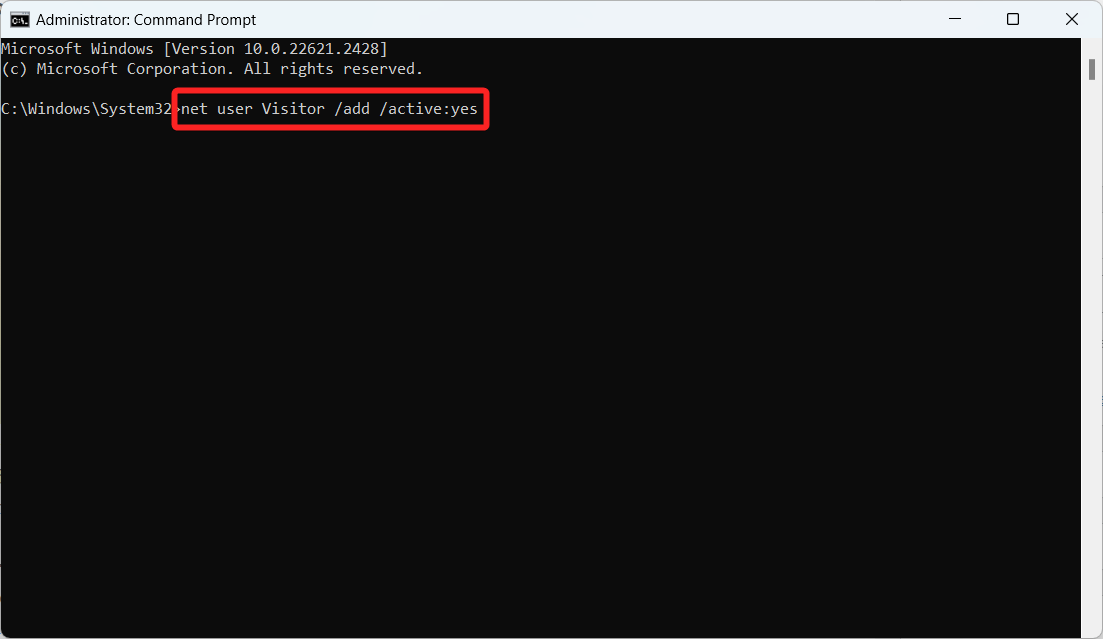
- Enter the subsequent command in the Command Prompt window and hit Enter to create the guest account: net user Visitor /add /active:yes

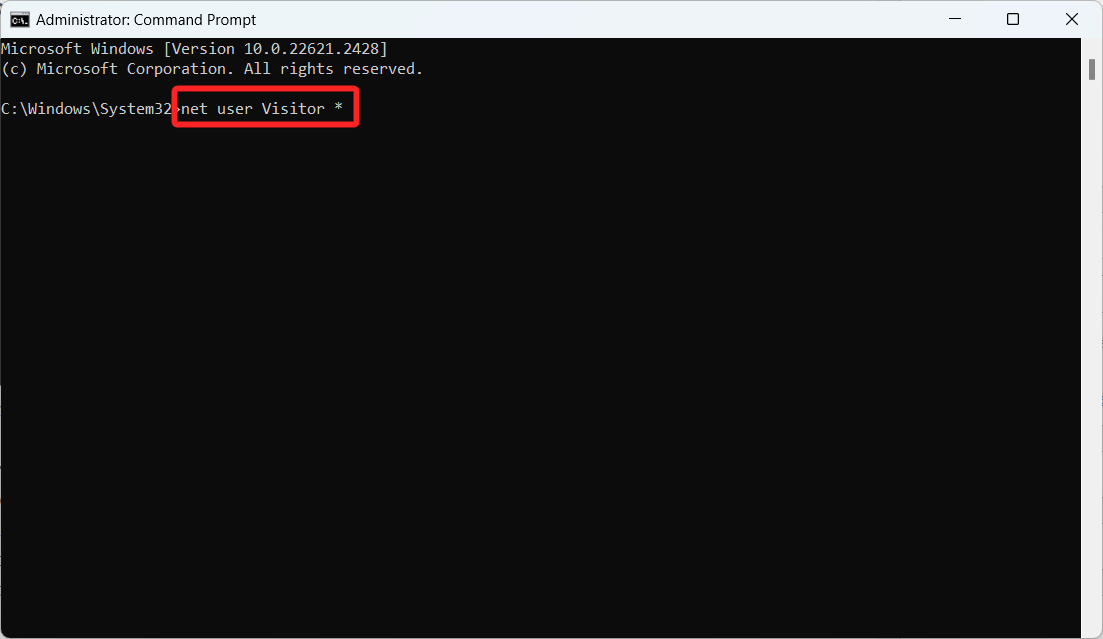
- You could give the guest account a password to increase security. To do so, in the same Command Prompt window, run the following command and press the Enter key. net user Visitor *

- Enter and confirm the desired password when prompted.
- Now close the Command Prompt window and use the Windows + I shortcut to launch the Windows settings.
- Go to the Accounts settings from the left navigation pane.
- Choose Email & accounts from the right section of the Settings window.
- Navigate to the Other Users section, and you should find the guest account listed there. The account will also be visible on the sign-in screen of the Windows 11 PC.
3. Using Windows Powershell
Similar to the Command Prompt, you can also create a Windows 11 guest account using the Windows PowerShell tool. Here is how to proceed.
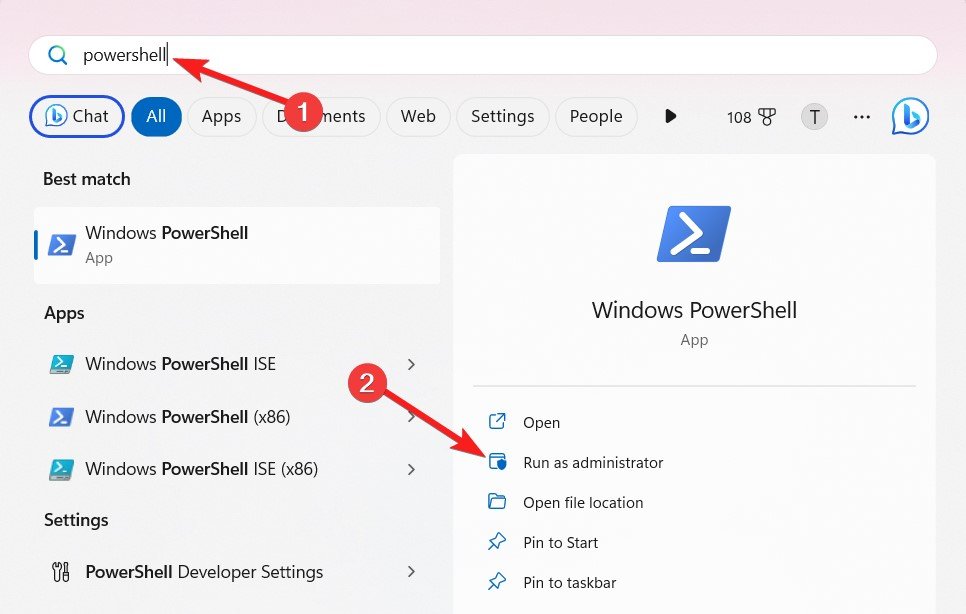
- Press the Windows key to launch the Start menu. Type PowerShell in the search bar and click Run as administrator to launch PowerShell with administrative privileges.

- Press Yes on the User Action Control prompt to proceed.
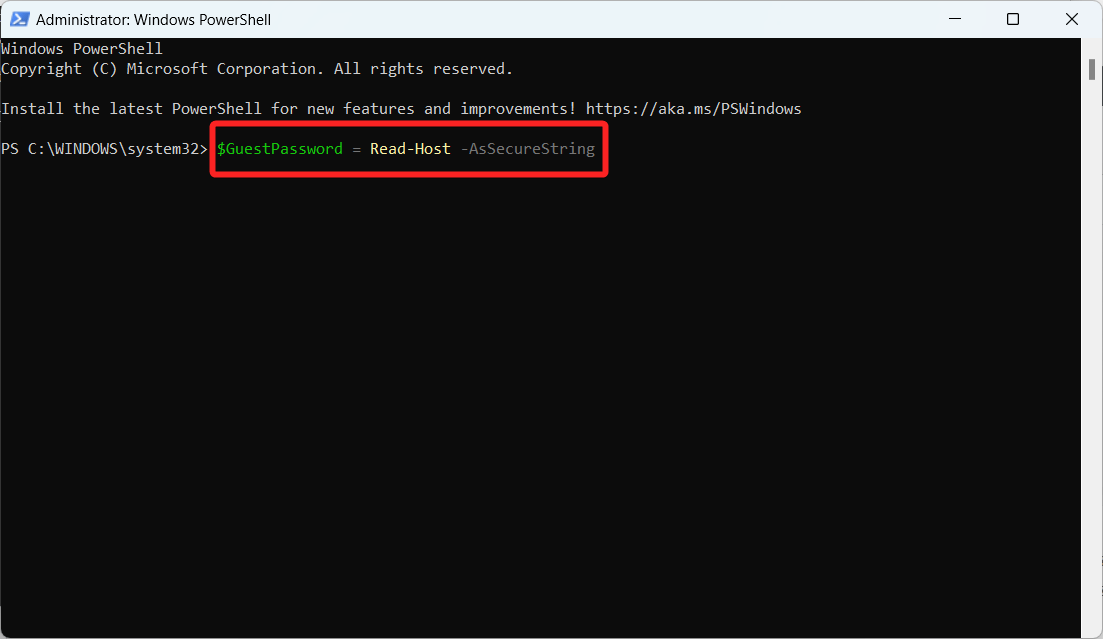
- Now type the following command to create a password for your guest account. $GuestPassword = Read-Host -AsSecureString

- Subsequently, assign a name to the guest account by executing the following command: New-LocalUser “TheGuest” -Password $GuestPassword
- Finally, you need to add the user account to the guest user group by executing the following command. Add-LocalGroupMember -Group “Guests” -Member “TheGuest”
Conclusion
That concludes the three methods for creating a guest account in Windows 11. Setting up a guest account would be helpful, particularly if you frequently share your computer with friends or colleagues. To create a local account in Windows 11 and deactivate your Microsoft account, follow the instructions in the links below if you would rather have an offline account that isn’t connected to your Microsoft account.
If you've any thoughts on How to Add a Guest Account in Windows 11, then feel free to drop in below comment box. Also, please subscribe to our DigitBin YouTube channel for videos tutorials. Cheers!

