Imagine you’re working on a school project and you need to research some information while typing your notes. Or perhaps you’re in a virtual meeting and want to follow along with a presentation while chatting with your team. In moments like these, switching back and forth between active apps can be frustrating and slow. Thankfully, Chrome OS offers a solution to this problem with its split-screen feature.
Chrome OS is a lightweight operating system developed by Google. It powers Chromebooks, which have become popular for their simplicity, speed, and integration with Google services. The split screen is a handy feature that can improve productivity on Chrome OS. This feature allows you to view two apps or browser windows side by side, making it easier to multitask. Today, in this article, we will guide you through activating the split screen feature on your Chromebook.
Get the Split Screen Feature In Chrome OS
Whether you want to take notes while watching a lecture, compare documents, or chat with friends while browsing the web, the split screen helps you do it all without switching between tabs. The best part is that enabling a split screen on Chrome OS is quick and easy, and there are several ways to do it.
Method 1: Enable Split Screen on a Chromebook Using Touchpad Gestures
Chrome OS is widely popular for its gesture controls as it is highly optimized for touchscreen devices. So if you wish to enjoy the ability to multitask using split screen, you can use the inbuilt gesture controls to split the screen to have a dual view of running apps. Here is a step-by-step tutorial on enabling split screen using Chrome OS gestures.
- If you’ve got several windows open on your Chromebook, just swipe up with three fingers on the touchpad; This will bring up the overview menu, showing all your open windows.
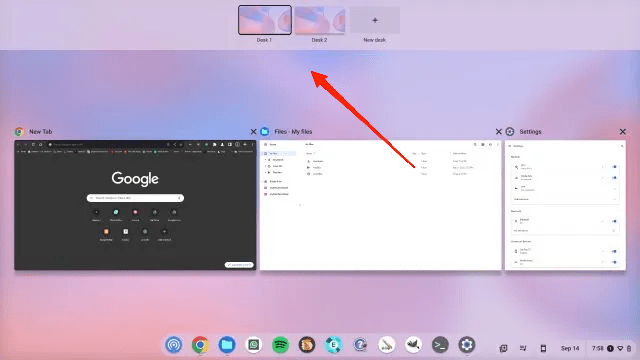
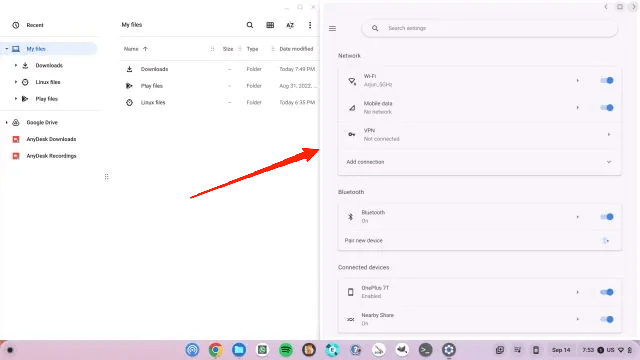
- Next, click and hold the window you want to move, then drag it over to either the left or right side of the screen. It’ll snap right into place instantly.
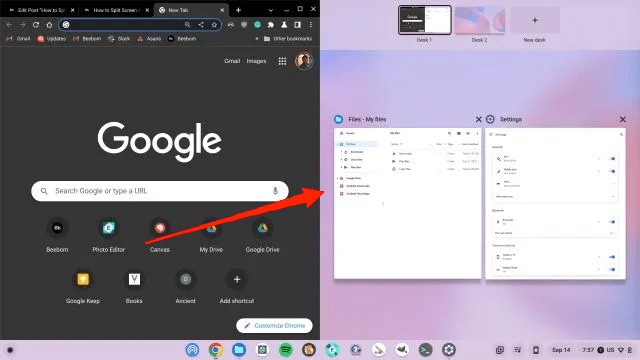
- Finally, pick another window from the overview to fill the other side, creating a split-screen setup.
Method 2: Enable Split Screen on a Chromebook with Snap Layouts
If using the maximizing button seems a bit confusing and difficult, then you can use the default snap layouts option on Chromebook. Chrome OS comes with snap layouts where you can snap your working window in pre-defined aspect ratios. Here is by step-by-step procedure for using split layouts in Chrome OS.
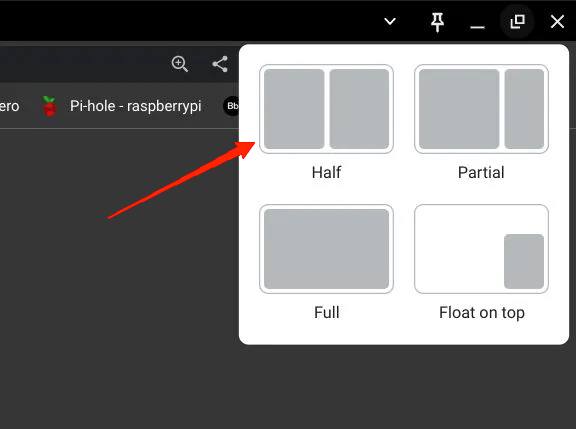
- Click on the “Maximize” button. You will see some pre-defined layouts.
- You can choose to split the screen into half, partial, or full-screen modes.
Method 3: Enable Split Screen on a Chromebook with the Maximize Button
There is another simple and effective way of enabling split screen on your Chrome so it will work just like those works in any Windows computer. Below are the steps to enable Split Screen on a Chromebook using the maximize button.
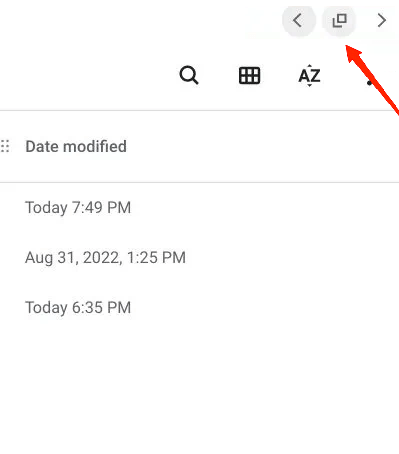
- Hover your mouse over the “Maximize” button.
- You will note arrow signs on the left and right side of the button.
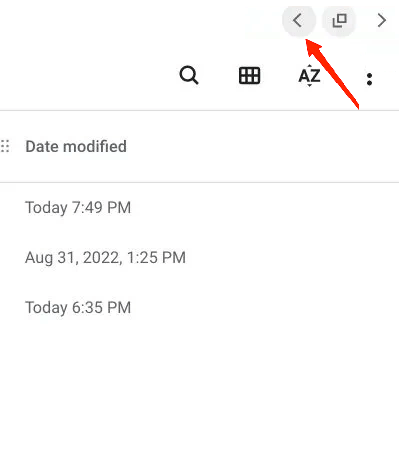
- From there, you can choose to split the screen to go either in the left pane or right pane.
Method 4: Enable Split Screen on a Chromebook Using Keyboard Shortcuts
If you are not a fan of using the mouse or the gesture controls, you can still use keyboard combinations to trigger the split-screen feature. This is especially useful when you want to access multiple screens and quickly want to switch between multiple apps using the keyboard.
- To snap a window to the left side of your Chromebook screen, just press Shift + [ while the window is active.
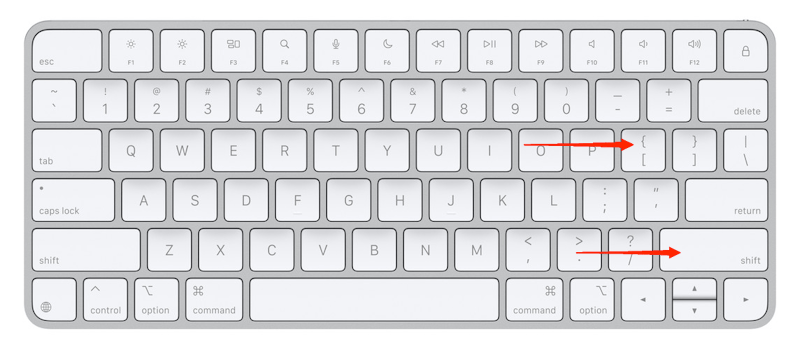
- If you want to snap another window to the right, click on that window to make it active and press “Shift + ]“.
![If you want to snap another window to the right, click on that window to make it active and press Shift + ].](https://cdn.digitbin.com/wp-content/uploads/If-you-want-to-snap-another-window-to-the-right-click-on-that-window-to-make-it-active-and-press-Shift-.png)
- You may also re-adjust the window size as per your requirement. To do so, hover the mouse cursor in the center and drag the slider as per your requirement.
Conclusion
This brings us to the end of this guide on How To Get Split Screen Feature on Chrome OS. It’s great to know that the split screen feature in Chrome OS is a simple yet powerful tool that boosts productivity.
By following the above methods, you can enable the split-screen feature and manage multiple tasks effortlessly. Whether you’re working, studying, or just browsing. Once you get the hang of it, you’ll find yourself using it all the time to stay organized and efficient.
If you've any thoughts on How to Get Split Screen Feature in Chrome OS?, then feel free to drop in below comment box. Also, please subscribe to our DigitBin YouTube channel for videos tutorials. Cheers!