Want to get help with File Explorer in Windows 11? Here is a detailed guide that will serve as a walkthrough to use and make the most of File Explorer. If you did not know beforehand, there are multiple ways to access File Explorer. The guide will also show you how to customize File Explorer and manage various tasks on it.
File Explorer has been an integral part of the Windows OS for a long time now. For those who may not know, File Explorer marked its debut way back in 1995 and continues its stint on Windows till today. With each new version of Windows that gets released, we see File Explorer improving significantly.
Now, not everyone that uses a Windows computer is a pro at knowing every aspect of the OS to the last detail. This is where this comprehensive guide regarding File Explorer will come in handy.
Get Help with File Explorer in Windows 11
Let us check out the various methods to accomplish several tasks within File Explorer.
How to Open File Explorer on Windows 11?
There are four ways to access File Explorer. You may know these methods if you are a regular Windows OS user. Nevertheless, let us know all those methods now.
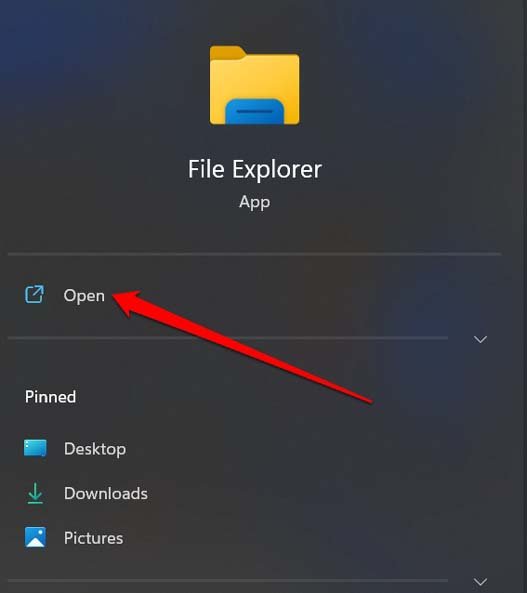
Use Windows Search
- Press the Windows key.
- When the Windows Search console appears, type File Explorer.
- When the File Explorer icon shows up, click on Open.

Keyboard Shortcut to Open File Explorer
If you are too lazy to click around a lot, simply press Windows + E hotkeys to access File Explorer.
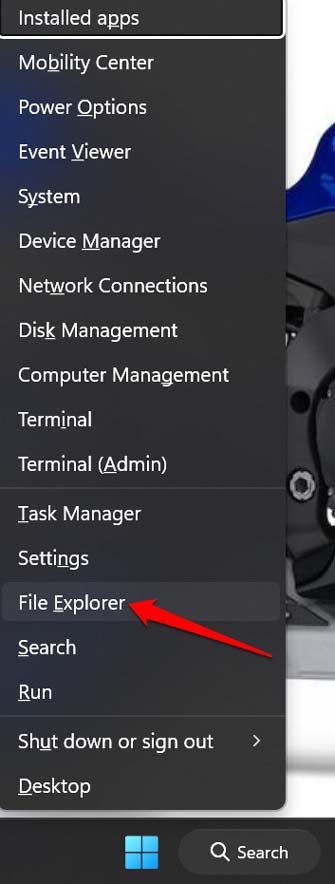
Open File Explorer from Power Users Menu
- Press Windows + X to launch the power users’ menu.
- From the menu, click on File Explorer to open it.

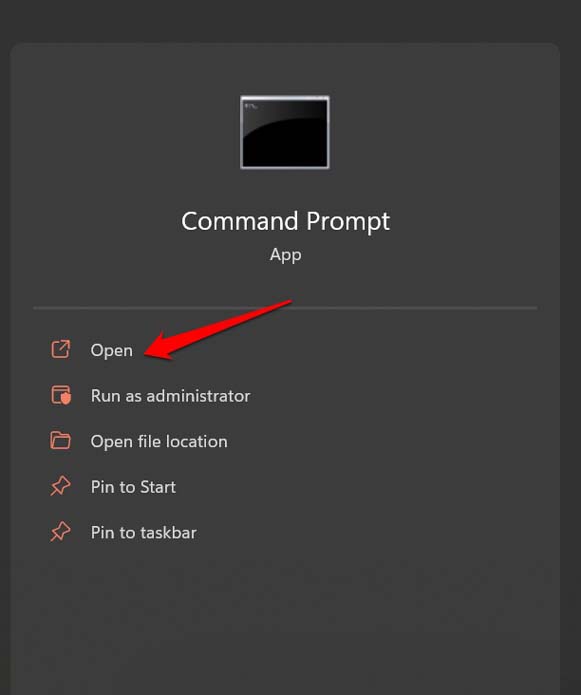
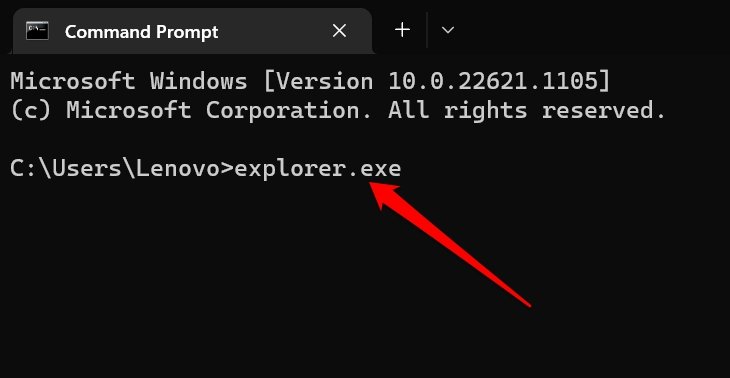
Use Command Prompt to Launch File Explorer
Yes, you can open File Explorer by using Command Prompt.
- Launch the command prompt.

- Type explorer.exe and press enter.

- You will find yourself in File Explorer of Windows 11. Simple as that.
Keyboard Shortcuts for Windows 11 File Explorer
Instead of navigating and clicking around, accessing anything using keyboard shortcuts is always easy. Here are a bunch of keyboard shortcuts you can use within File Explorer to execute various actions.
| Keyboard shortcuts | Actions They Perform |
| Ctrl + mouse scroll wheel | Change the size of the file and folder icons |
| Ctrl + Shift + E | Display all folders above the selected folder |
| Ctrl + Shift + N | Create a new folder |
| Alt + P | Navigate to the preview panel of File Explorer |
| Alt + Up Arrow | View the folder that the current folder was in |
| Alt + Left Arrow | View the previous folder |
| Alt + Right Arrow | Go to the next folder |
| Alt + Enter | Open the Properties dialog box |
| Left Arrow | Use this within a folder or between folders to navigate from one file/folder to another. [move leftwards] |
| Right Arrow | Use this within a folder or between folders to navigate from one file/folder to another. [move rightwards] |
| Backspace | Go to the previous folder in File Explorer |
| F11 | Maximize or minimize the open window |
| Home Key | Display the top of the open window. |
| End Key | Display the bottom of the open window. |
| Alt + D | Select the address bar of the file explorer |
| Ctrl + N | Open a new window |
| Ctrl + E | Go to the File Explorer search |
| Ctrl + F | Select the File Explorer search box. Same as Ctrl + E |
| Ctrl +N | Open a new Windows in Explorer |
| Ctrl + W | Close the active window |
Understanding the File Explorer Menu Items
This means we will take a look at the icons we see in the menu bar of File explorer and what they are used for.
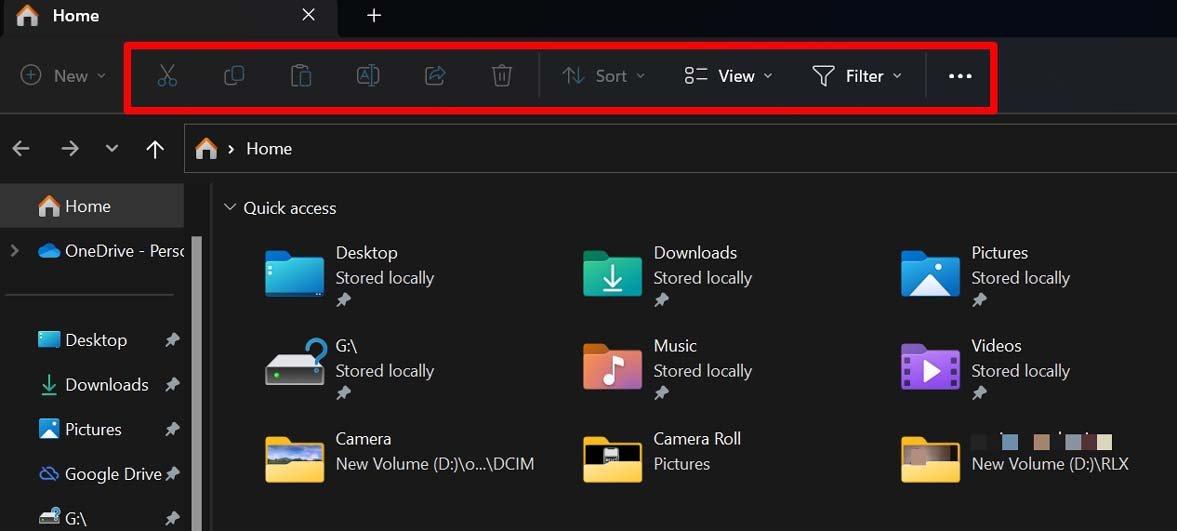
| Menu Items | What are they used for? |
| Cut | Cut selected files or folders |
| Copy | Copy a selected file or folder |
| Paste | Paste a cut or copied File or folder in the same or different location in File Explorer |
| Rename | Rename a file or folder in File Explorer |
| Share | Sharing a selected file via email. |
| Delete | Delete a file or folder in File Explorer |
| Sort | Use the Sort drop-down to you can manage folders or files by name, type, date modified, |
The View Menu Within File Explorer Main Menu
Right in the main menu, you will see the View menu. Click on the View menu to see various options to present the folder or files within them. Whether you want a large, small, or extra-large icon, or detailed info about the files and folders, you can select all that from the View menu.
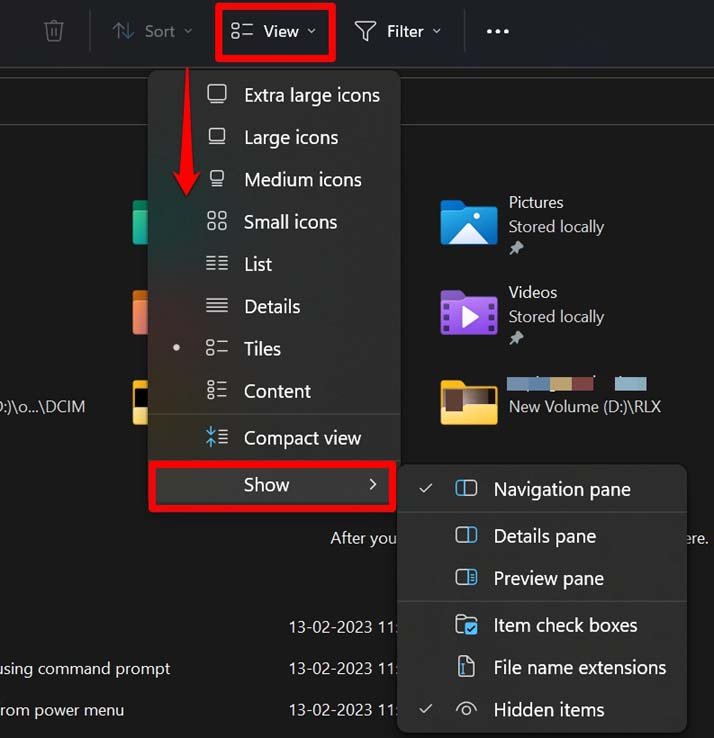
The View menu also has an option Show, allowing you to select various options. I have listed them below.
- Preview Pane to preview images on the right-hand side.
- Details Pane that mentions the file information.
- Checkboxes on files or folders for easy selection.
- View hidden items within a folder.
- Mention file name extensions.
See More Menu in File Explorer
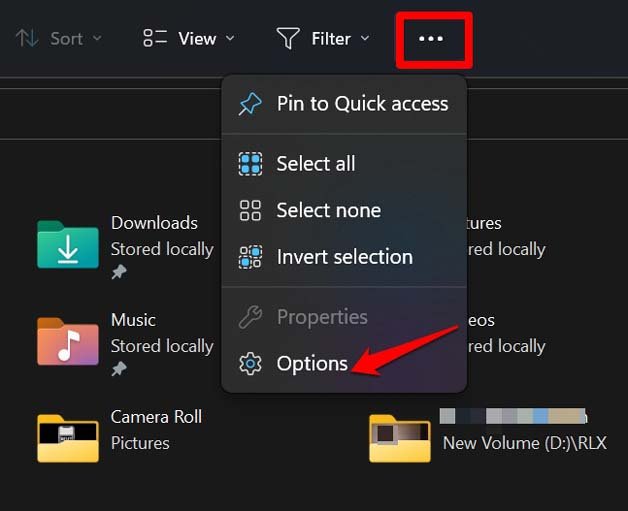
The main menu has a 3-dot icon at the far right end of it. This is the See More menu. It expands the menu to show some more functions.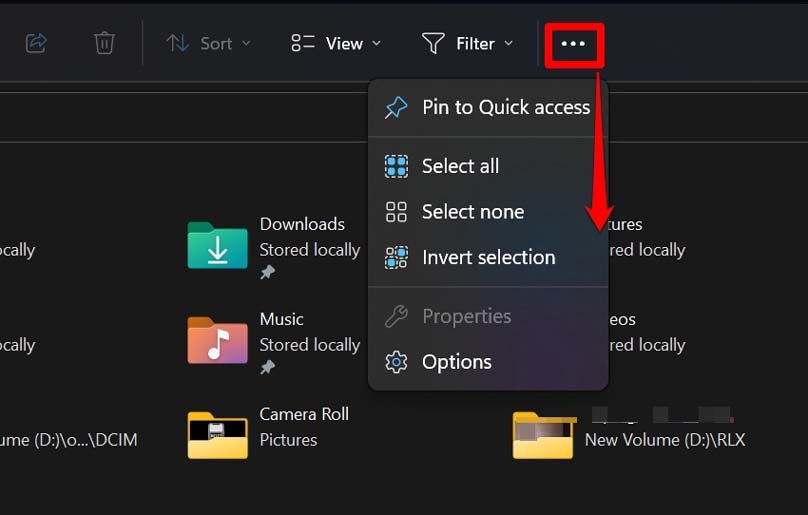
| See More Menu Items | What Are They For? |
| Undo | Undoing an action such as copy-paste, or cutting a file. |
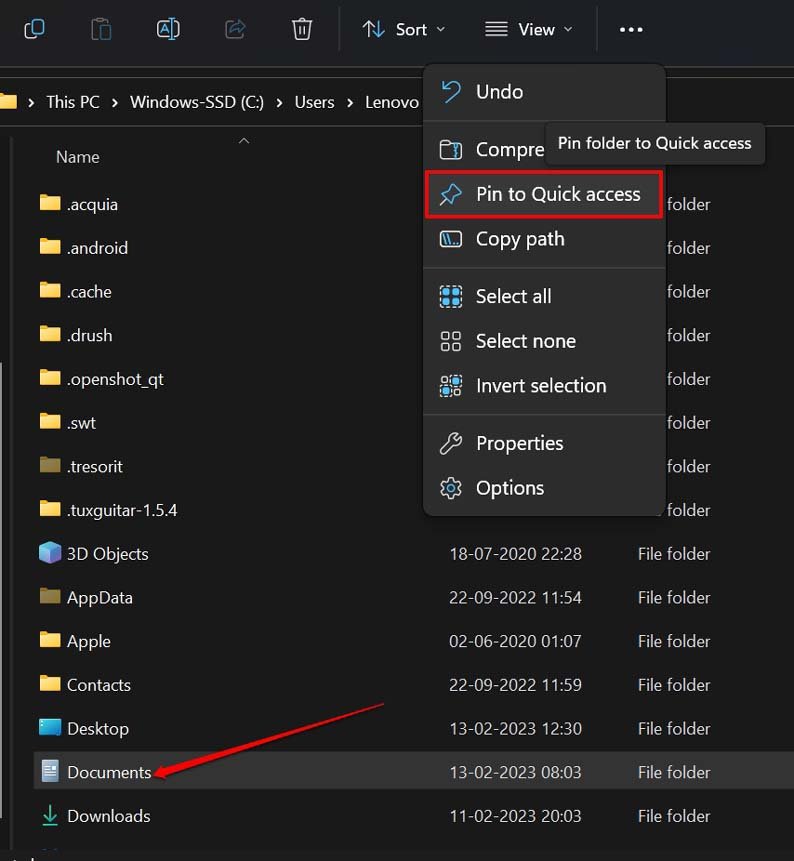
| Pin to Quick Access | pin a selected folder to Quick Access in Windows 11 File Explorer |
| Select All | Select All items within an open folder |
| Invert Selection | If you have not selected any items within a folder, clicking this option will select all the items. If you have selected two items at the left end, clicking this will select three items from the right end instead while deselecting the previous files. |
| Select None | Deselects all the items that you have selected |
| Properties | Open the properties of the File and folder |
| Options | Launch the File Explorers options |
How to Pin/Unpin File Explorer Item from Quick Access?
By default, the frequently accessed items such as Documents, Pictures, Videos, Downloads, This PC, Desktop, Disk drives, etc are pinned to the Quick Access panel on the left side of the File Explorer.
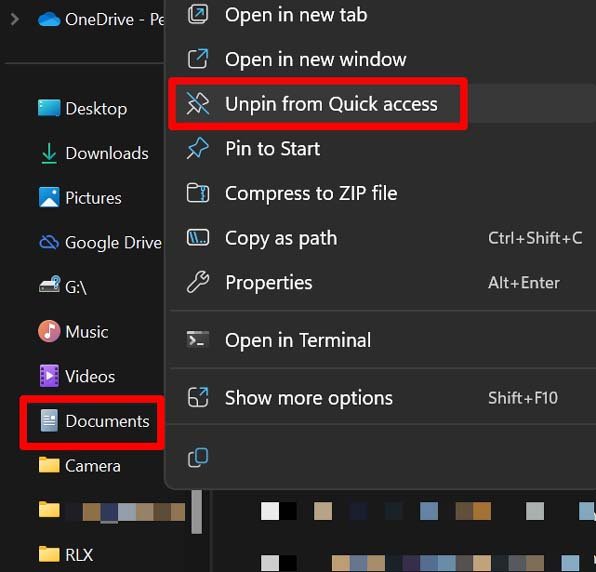
To Unpin or Pin back any of the items from the Quick Access of File Explorer, you have to follow the steps mentioned below. I have shown the steps for the item Documents. The process is the same for any other items you can find with the primary drive of the PC.
- Navigate to the left-hand panel.
- Right-click on Documents and select the option Unpin from Quick Access.

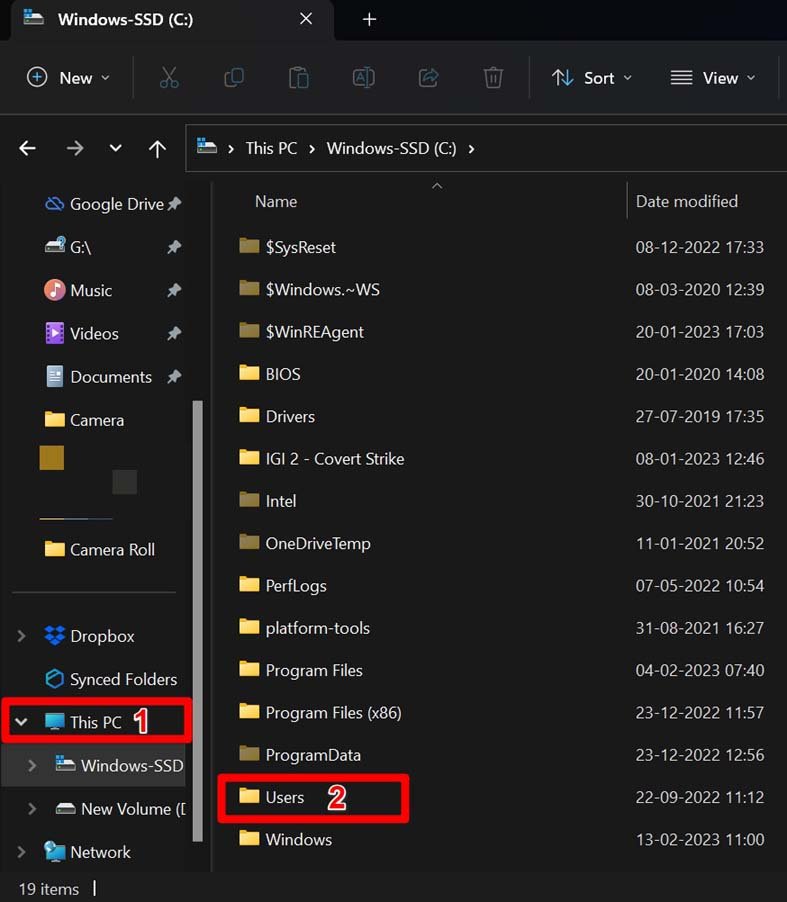
- Now, scroll to This PC on the left-hand panel of Quick Access and click on it.
- Click on the Primary driver which in my case[most cases for that matter] in the C drive.
- Under that, navigate to Users and double-click on it.

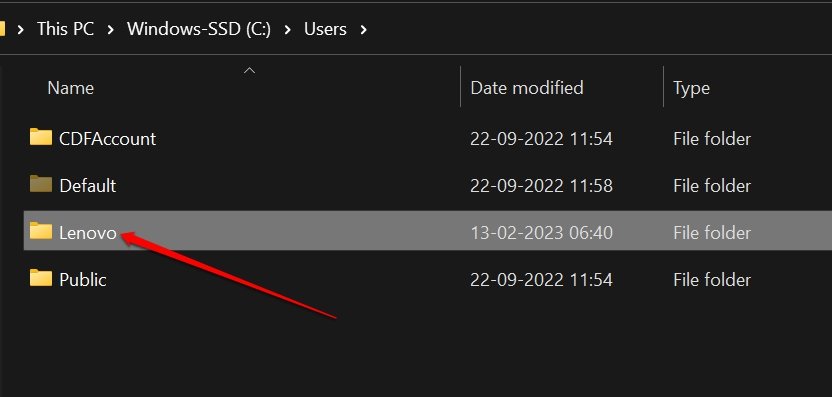
- Now, go to the folder that usually has your PC name/username that you have set—Double-click on it.

- Scroll to Documents > right-click on it and select Pin to Quick Access.

How to Remove Recently Accessed Files from File Explorer Quick Access?
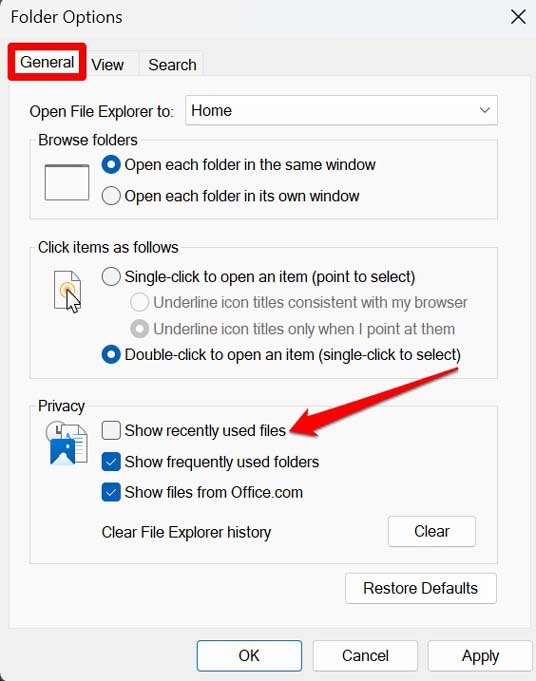
When you open File Explorer, you will see the section Recent Files. As the name suggests, it lists the files you frequently Access when accessing your computer. You can remove this from File Explorer in case you prefer a clutter-free view when accessing File Explorer.
Here is how to remove Recent Files from File Explorer.
- Press Windows + E to launch Windows Explorer.
- Now, click on the See More icon[3-dot icon]
- Select the item Options.

- Under the General tab > navigate to Privacy, click to uncheck the checkbox beside Show Recently Used File.
- Click Apply and click on OK.

Some Common Functions of File Explorer to Manage Items Within it
Here is a brief overview of everyday tasks that users carry out with files present on File Explorer.
Saving a File to Explorer
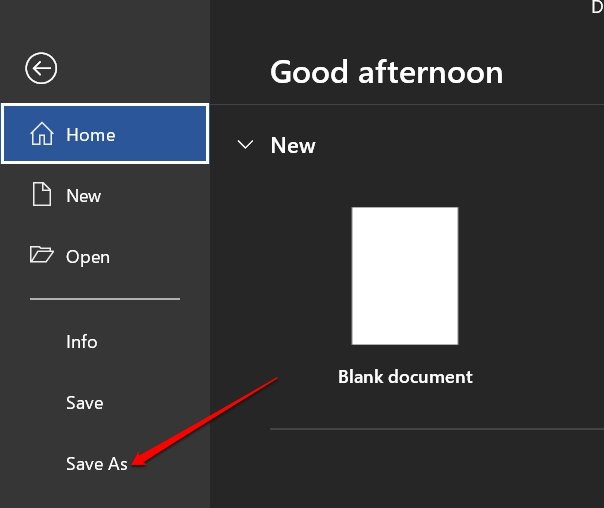
Let us assume you want to save an MS Word file to File Explorer. Here is how you should do it.
- Create your document file.
- Then click on File> Save As.

- Name the File and click Save.
It will be saved on File Explorer. You can use the same steps to save the Notepad file.
Deleting Files from Explorer
- Simply click on the File present in File Explorer.
- Then press the delete key.
- To permanently delete the File, press Shift + Delete after selecting it.
- If you want to delete multiple files within File Explorer, press the Ctrl key and then click the files you want to delete to select them.
- Once you finished selecting the files, click the key Delete or Shift +Delete keys.
Print Files in Explorer
It is straightforward to print one or more files present on File Explorer.
- Scroll to the File in Explorer.
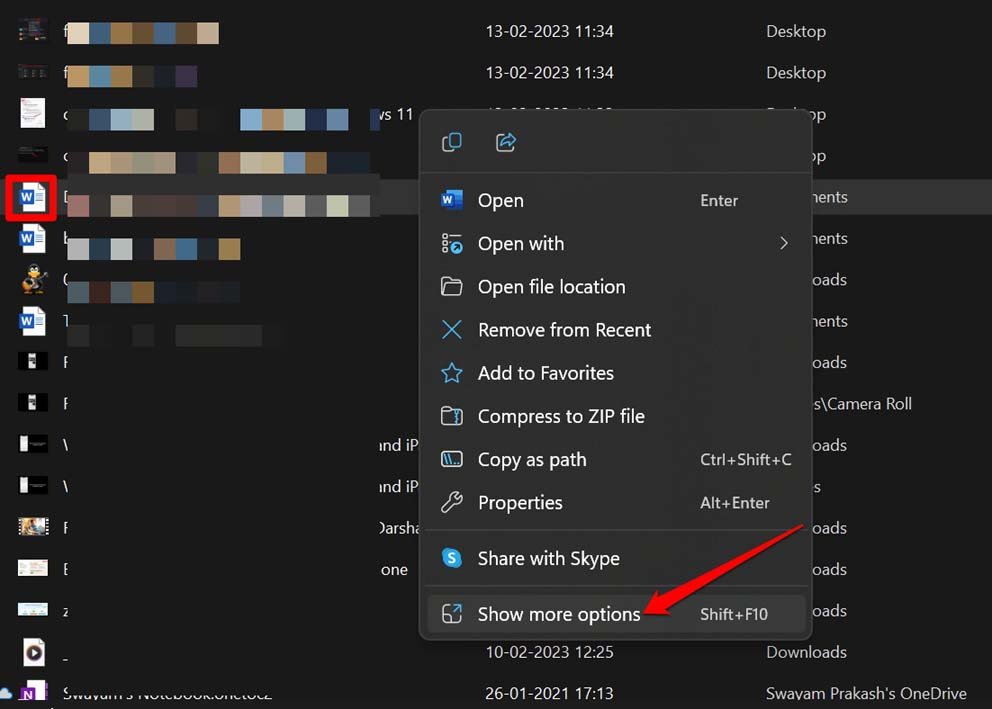
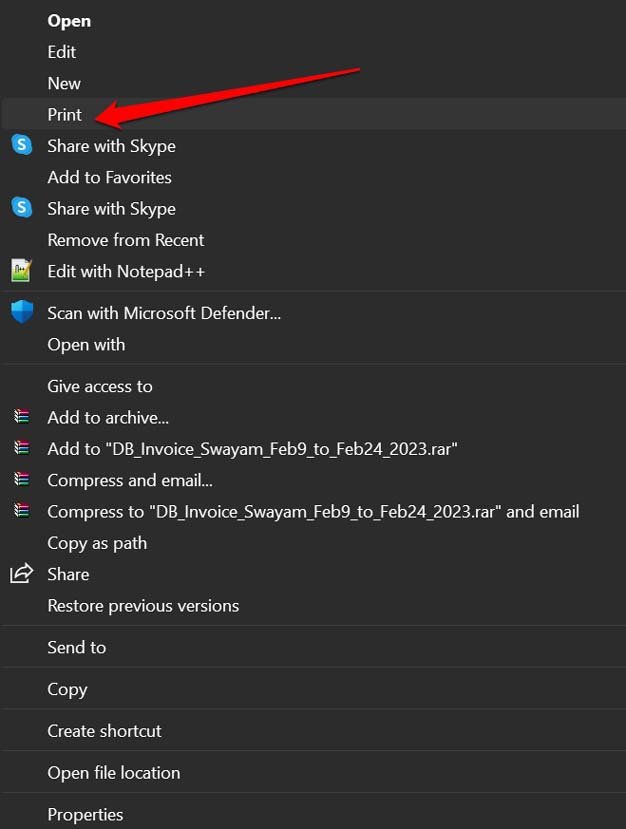
- Right-click on it > select Show More Options.

- From the expanded menu. Click on Print.

For printing multiple files,
- Use the Ctrl key to select multiple document files/image files that you want to print.
- Right-click on the selection.
- Select Show More Options.
- Then from the more extensive menu. select Print.
Manage the printing options and proceed with printing.
Increase the Text Size of File Explorer
If you want better visibility and to increase the text size of the File Explorer items, here is how to change it.
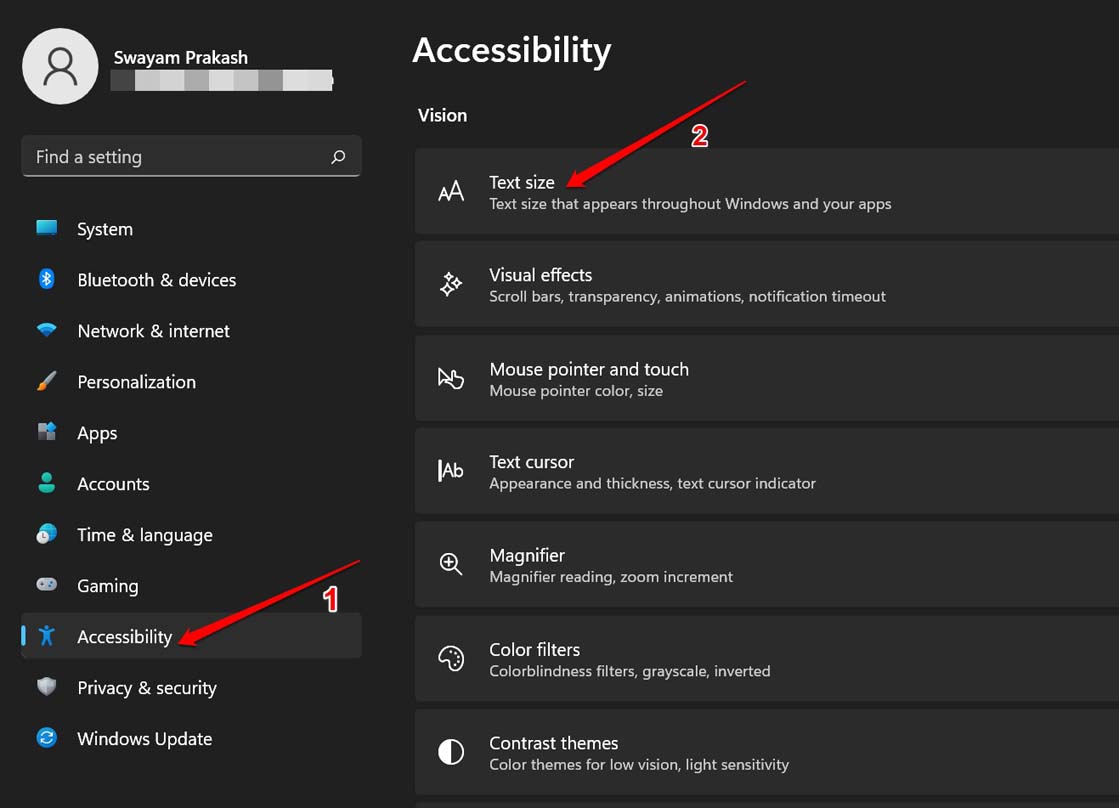
- Press Windows + I to go to the Windows settings.
- On the left-hand panel, click on Accessibility.
- Next, click on Text Size.

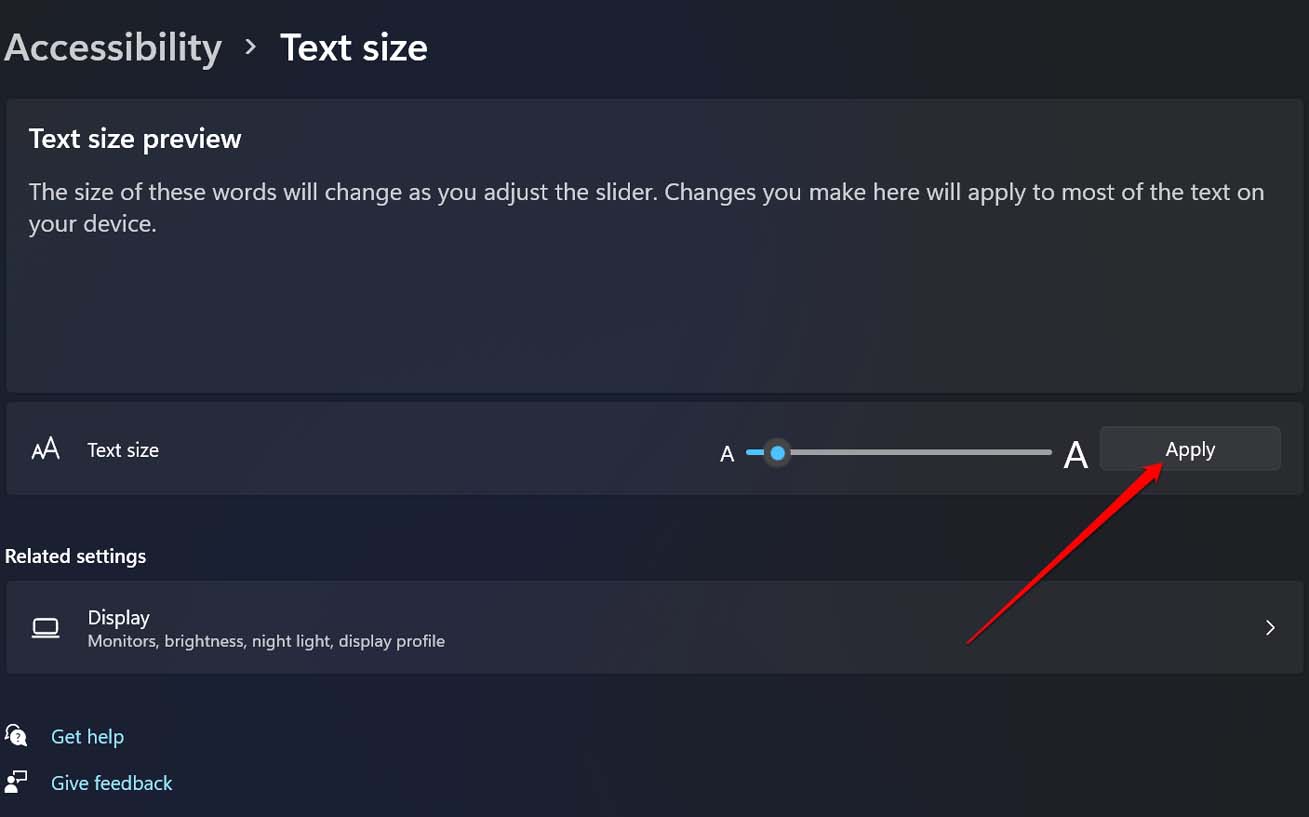
- Drag the slider beside the tab Text size to set the appropriate text size; You can preview it above.
- Once done, click on Apply to set the new text size.

Conclusion
Let us now wrap up this article Get Help with File Explorer in Windows 11. File Explorer is an integral part of Windows. If you did not know about the various options and settings it has to offer to manage the files and folder, I hope this guide will help you in knowing them all.
If you've any thoughts on Get Help with File Explorer in Windows 11 [Guide], then feel free to drop in below comment box. Also, please subscribe to our DigitBin YouTube channel for videos tutorials. Cheers!
![Get Help with File Explorer in Windows 11 [Guide] 1](https://cdn.digitbin.com/wp-content/uploads/Get-Help-with-File-Explorer-in-Windows-11-740x493.png)
