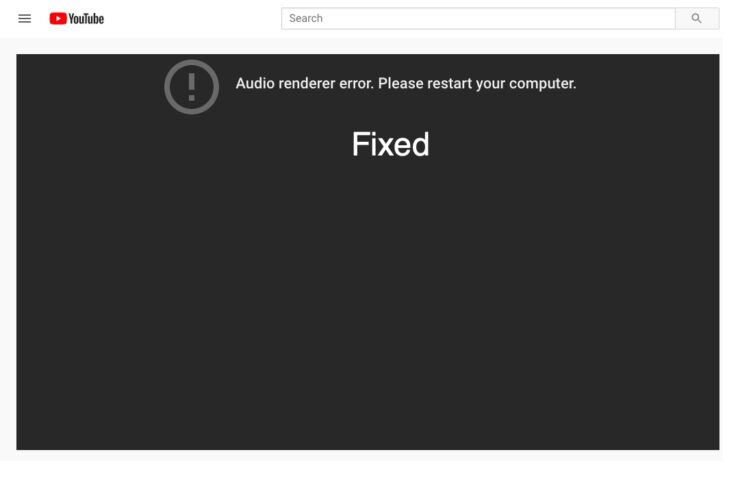
YouTube is the best platform to stream online videos. However, it has its own shares of problems, and in this post, we are going to talk about one of the most common issues users face while watching your favorite YouTuber video – Audio renderer error. The problem mainly occurs while streaming YouTube via different web browsers including Google Chrome, Mozilla Firefox, and Microsoft Edge.
If you are also dealing with the same problem, then we are here with a list of all the effective workarounds. So, let’s begin.
Best Ways to Fix YouTube Audio Renderer Error on Windows 11
From the faulty audio driver to a glitched web browser, there can be different reasons causing the issue. But thankfully, it’s very easy to get rid of all of them. Here are all the effective solutions.
1. Re-Plug Headphones
Doesn’t matter how simple it may sound, but the audio render error can be fixed by re-plugging the headphones. This method will work for both wireless and wired headphones.
Re-Plug the headphones and check if it makes any difference. If not, you can plug out the headphones, restart the system, and plug back the headphones to fix the error.
2. Try Audio Troubleshoot
Windows OS comes with a built-in troubleshooter program. You can use it to get rid of any minor problem that occurs in the system including the audio renderer error. Here are the steps you need to follow to run the audio troubleshooter on Windows 11.
Note: Make sure you are connected to the internet to use the troubleshoot program.
- Open the Settings menu by pressing Windows + I shortcut key.
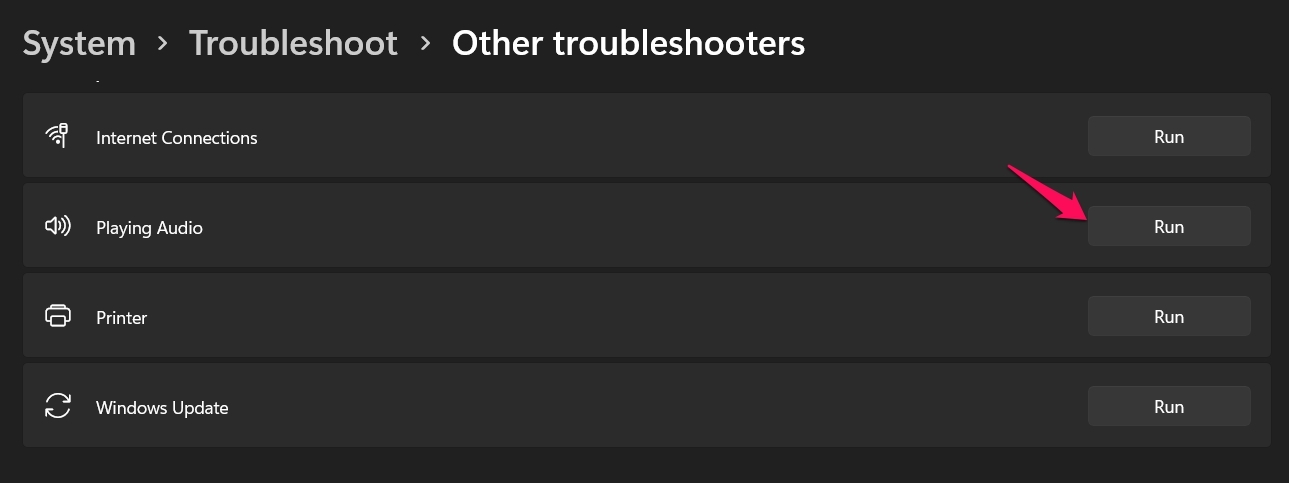
- Navigate to System > Troubleshoot > Other Troubleshooters.
- Click on Run present next to Playing Audio.

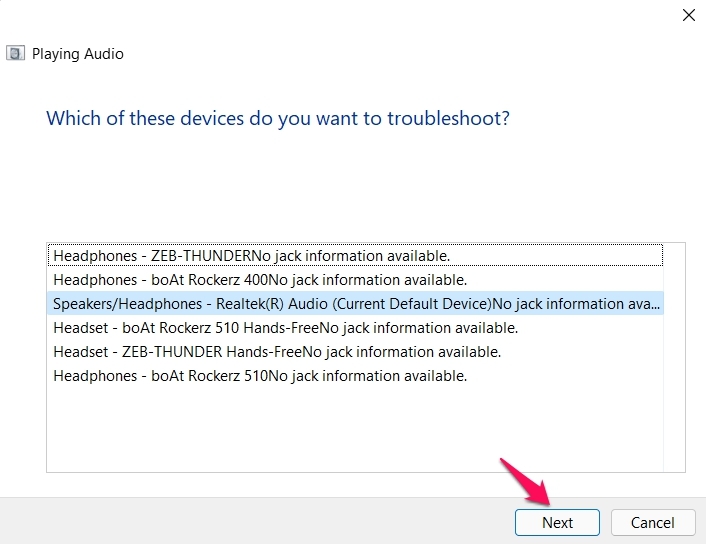
- Choose the audio device that you want to troubleshoot, and click Next.

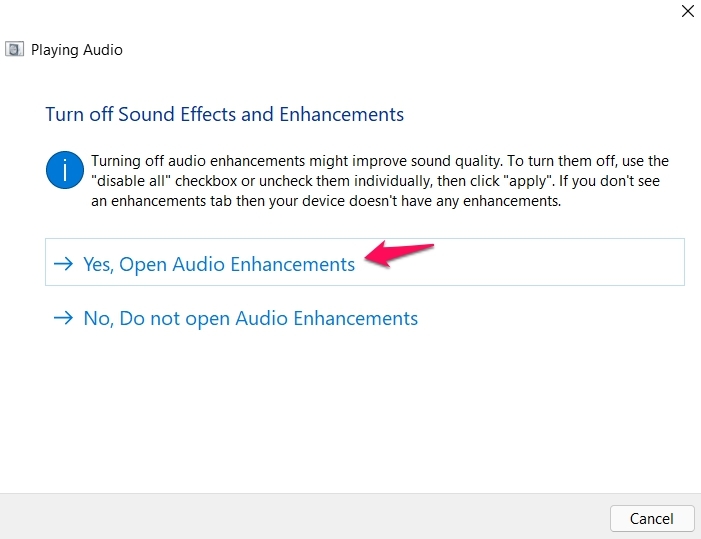
- Click on Yes, Open Audio Enhancements.

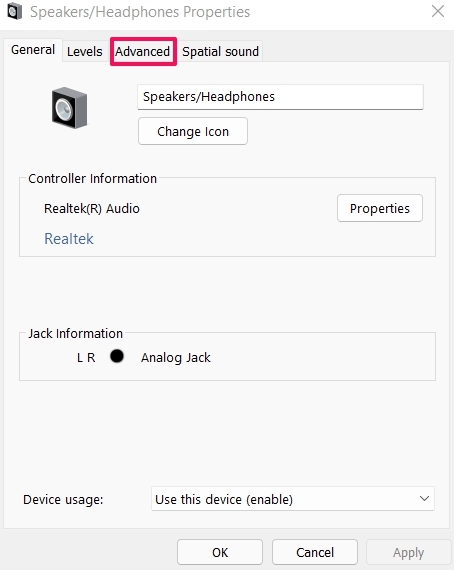
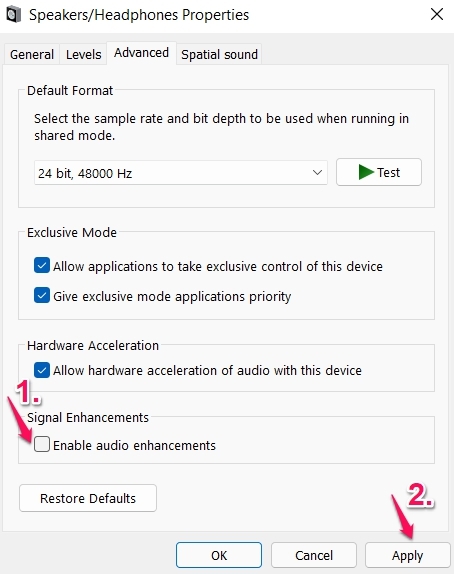
- On the Speaker/ Headphones Properties window, click on the Advanced option.

- Uncheck Enable audio enhancements, and click on Apply.

3. Re-enable Audio Driver
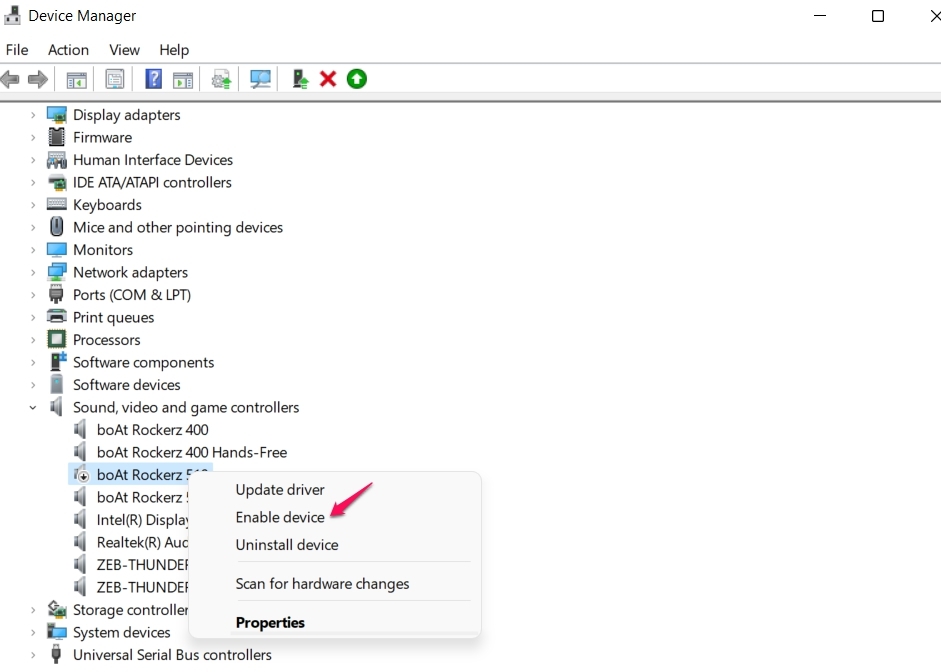
Re-enabling the audio driver is another effective workaround that you can try in the situation. This method is useful in solving any audio-related issue on a Windows PC. Here are the steps you need to follow to re-enable the audio driver.
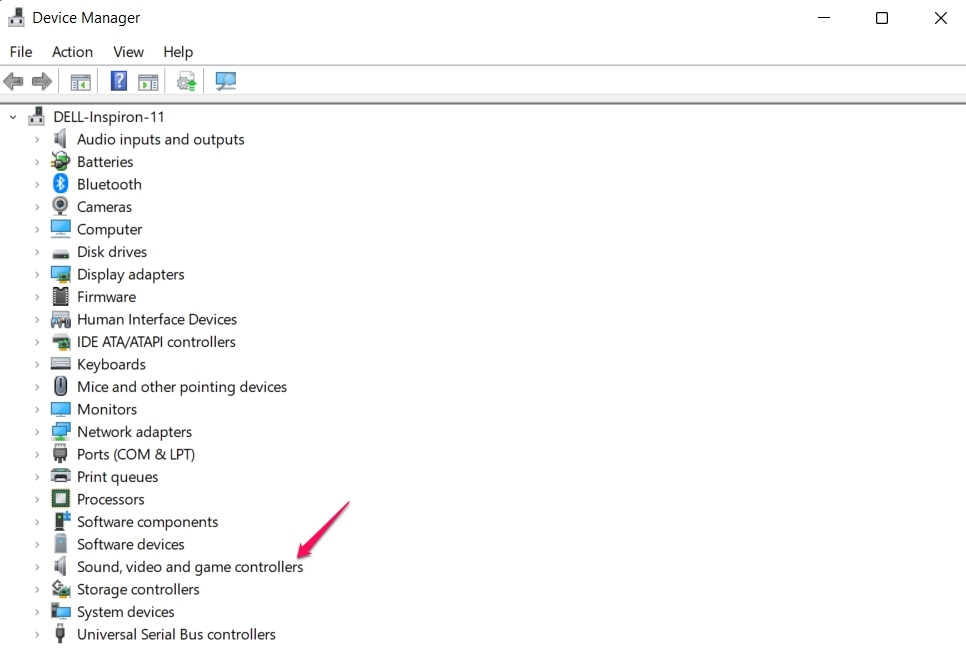
- Press Windows + X shortcut key and choose Device Manager.
- Double-click on Sound, video, and game controllers to expand the option.

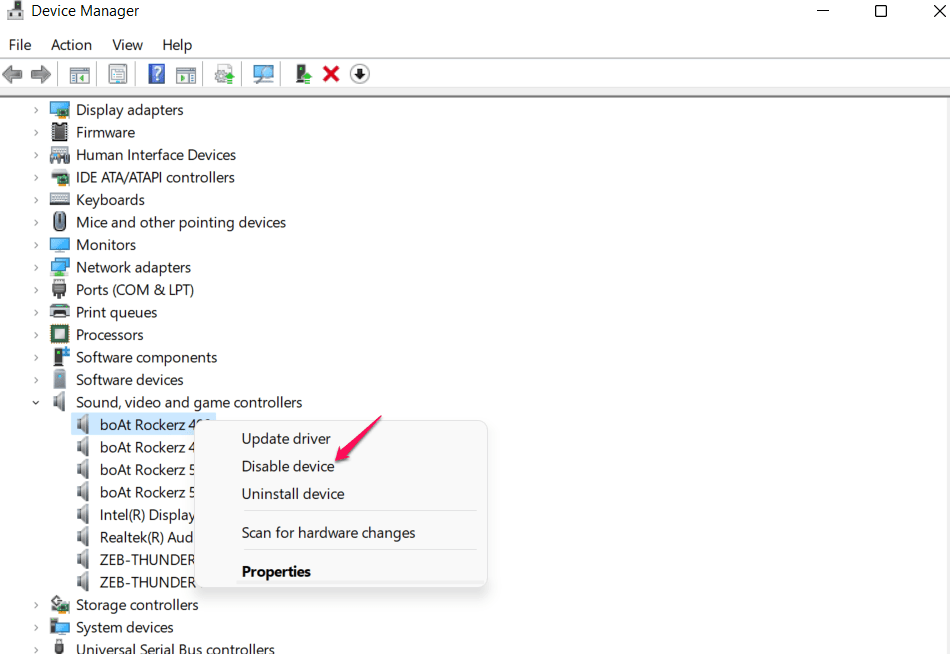
- Right-click on all the drivers and choose Disable device.

- Once you have disabled all the drivers, right-click on each of them one by one, and choose the Enable device option.

4. Re-install Browser
Sometimes the browser you are using to stream YouTube can be the main culprit causing the issue. In such a case, you can either try a different browser or re-install the current browser. For re-installing, first, uninstall the browsers via navigating to the control panel. After that, download it again via its official website. Below are the direct download links to the best web browsers for Windows 11.
What if the YouTube Audio Renderer Error Continuous?
If you are still facing the audio render issue the probability is high that there is some major issue with the system. In this case, contact the system customer support, and ask them to fix the issue. If you are having a Dell system, you can try updating the BIOS as well, and check if it makes any difference.
If you've any thoughts on Fix: YouTube Audio Renderer Error on Windows 11, then feel free to drop in below comment box. Also, please subscribe to our DigitBin YouTube channel for videos tutorials. Cheers!
