Is the Windows Update troubleshooter stuck in a loop trying to fix a failed software update? I have compiled a few troubleshooting tips in this guide that will help you resolve this issue. First, let us briefly explain what a Windows Update Troubleshooter is and how it works.
The Windows Update troubleshooter is a built-in tool in the Windows operating system that can automatically diagnose and fix common issues that prevent Windows updates from installing or downloading properly.
When you run the Windows Update troubleshooter, it will scan your system for issues related to Windows Update and attempt to fix them. Also, it can reset Windows Update components to their default settings and clear the Windows Update cache.
Sometimes, the Windows Update troubleshooter itself faces some issues and becomes unresponsive. When I say stuck in a loop, it means the process of checking for errors becomes a never-ending phenomenon. Of course, it causes a loss of time, and your PC misses out on installing essential software updates.
Reasons Why Windows Update Troubleshooter is Stuck in a Loop
Now, let us understand why the Windows Update troubleshooter gets stuck and doesn’t complete its function as it is supposed to.
Your PC may be filled with junk files that consume the system’s resources. This, in turn, hinders the Windows Update troubleshooter from running properly. Also, when there are some corrupt system files present on the Windows OS, they will cause the other services to malfunction.
If the cryptographic services have been stopped due to some technical issue, that may affect the working of the Windows update troubleshooter to authenticate the available updates. When other resource-intensive apps are open, that will cause the system resources to focus on these apps instead of Windows update troubleshooter. Hence, the latter stops working or becomes unresponsive and is stuck in a loop.
Top Ways to Fix Windows Update Troubleshooter Error
Here are the important troubleshooting tips that you can follow to manage the issues with the Windows update troubleshooter and resume your update installation.
1. Close Other Tasks while Windows Update Troubleshooter is Working
It is important to free up the system resources and allocate them to Windows Update troubleshooter. Then it can work efficiently in fixing the problem with failed software updates. This is necessary when you have a computer that has fewer resources or low-end specs. So, necessary tasks should be prioritized, and in this case, it is the Windows Update troubleshooter.
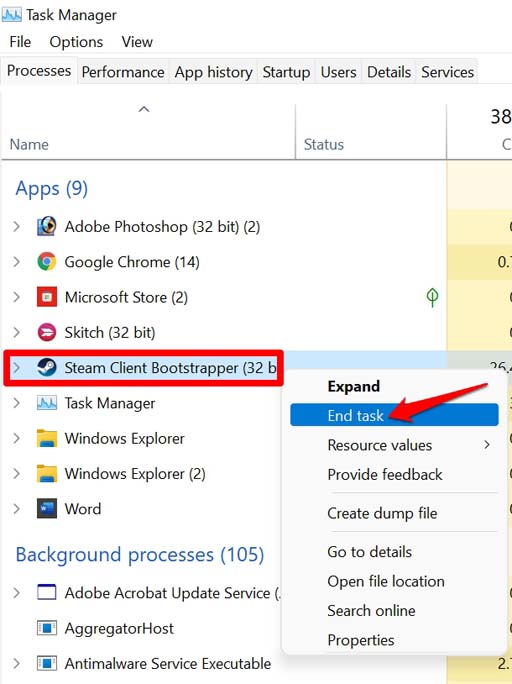
To close the other tasks, you can use Task Manager.
- Launch the Task Manager by pressing Ctrl + Alt + Delete.
- Right-click on any app that you want to close.
- From the menu, click on End Task.

- Repeat the above steps for other apps that you want to close.
2. Perform a Disk Cleanup
Disk Cleanup is a utility tool that comes built-in with Windows operating system. It helps free up space on your computer’s hard drive by deleting temporary files, system error memory dump files, recycle bin files, etc. These files take up valuable disk space, and deleting them can help improve the performance of your computer.
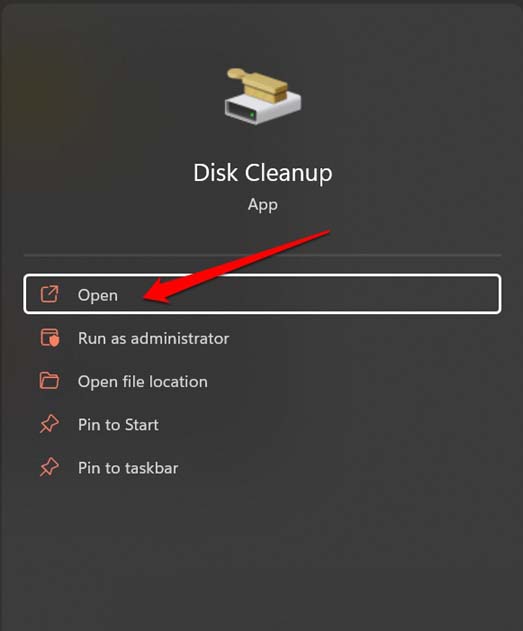
- Press the Windows key to bring up the search console.
- Type Disk Cleanup and click Open when it appears in the search result.

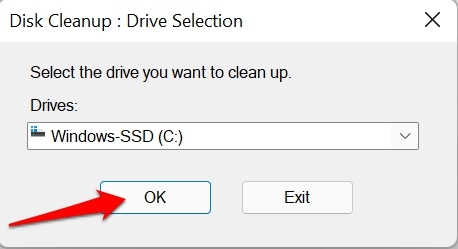
- Select the drive you want to clean up (usually the C: drive).
- Click on OK to let the app scan the drive for files that can be safely deleted.

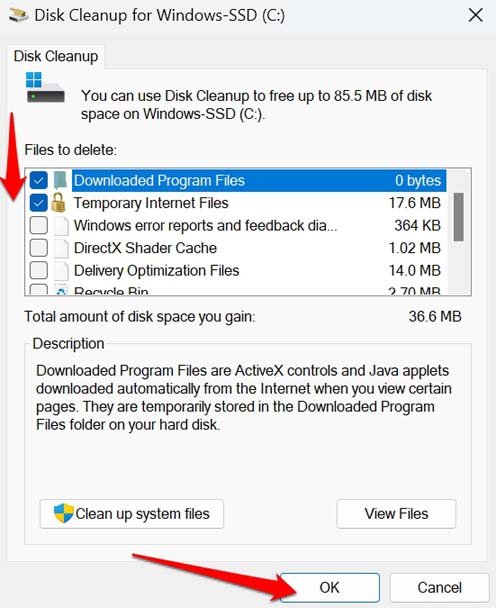
- Check the boxes next to the file types you want to delete (e.g. temporary files, thumbnails, files in recycle bin, etc.).
- Click on OK to start the disk cleanup.

The process may take a few minutes to complete depending on the amount of data to be deleted. When the process is finished, a summary of the cleanup will be displayed. Once the disk cleanup is finished, restart the PC and try to install the Windows update.
Otherwise, if the update fails to install, run the Windows Update troubleshooter. It should run without any issues and fix the problem regarding downloading/installing the Windows software update.
3. Find and Fix Corrupt System Files
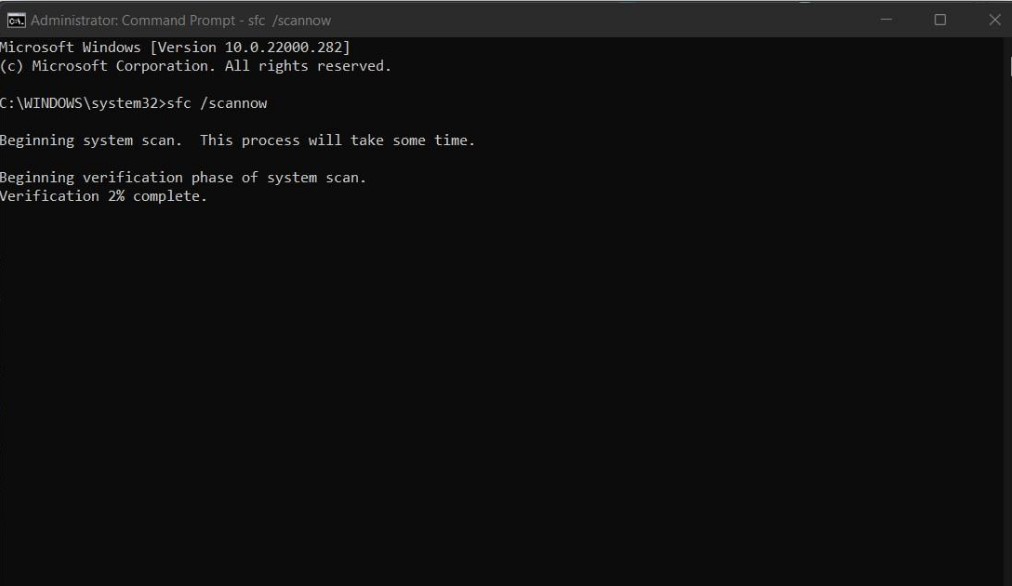
You can perform a scan to find out possible corrupt system files and fix them. The best tool for that would b the command prompt.
- Press Windows + S hotkeys to get the search box to appear.
- Type cmd, and click on Open when the command prompt appears in the result.
- Now, provide the command
sfc/scannow

- Press enter.
This will now start searching for possible issues with system files and fixing them. Do not interrupt the process while it is active.
4. Restart the PC and Resume Downloading Software Update
Instead of losing your mind over the stuck Windows Update troubleshooter, you can close every active app and restart the computer. Then connect to the network and resume downloading the software update.
It may have been some issue with a bad network that caused the previous update installation attempt to fail. Due to some other unknown issues, the update troubleshooter also doesn’t work properly.
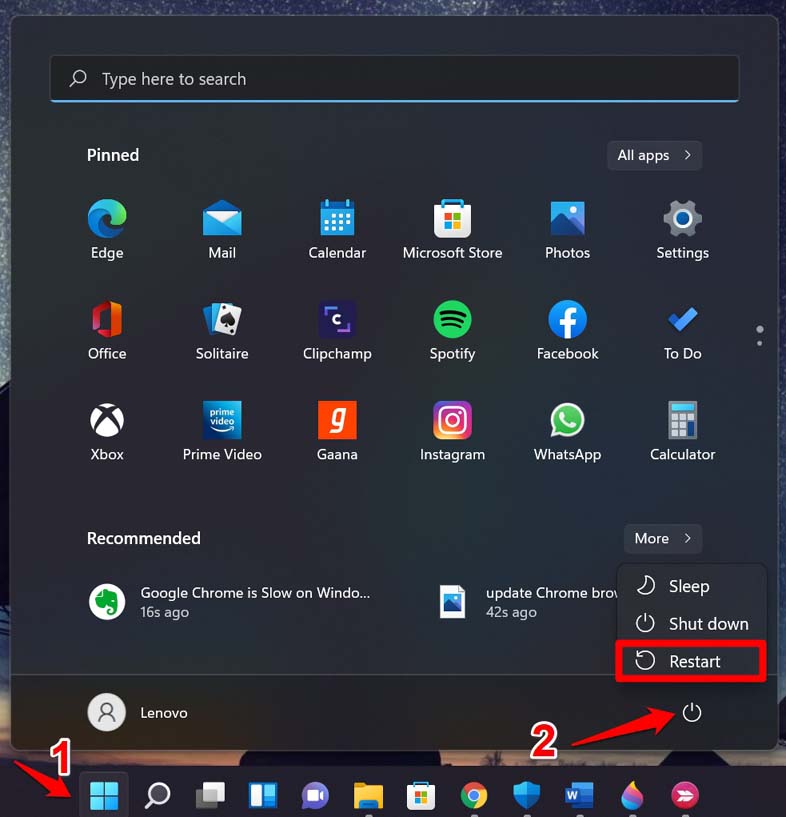
- Press the Windows key to bring up the search console.
- Click the Power icon and select Restart from the menu.

- Connect your PC to the WiFi.
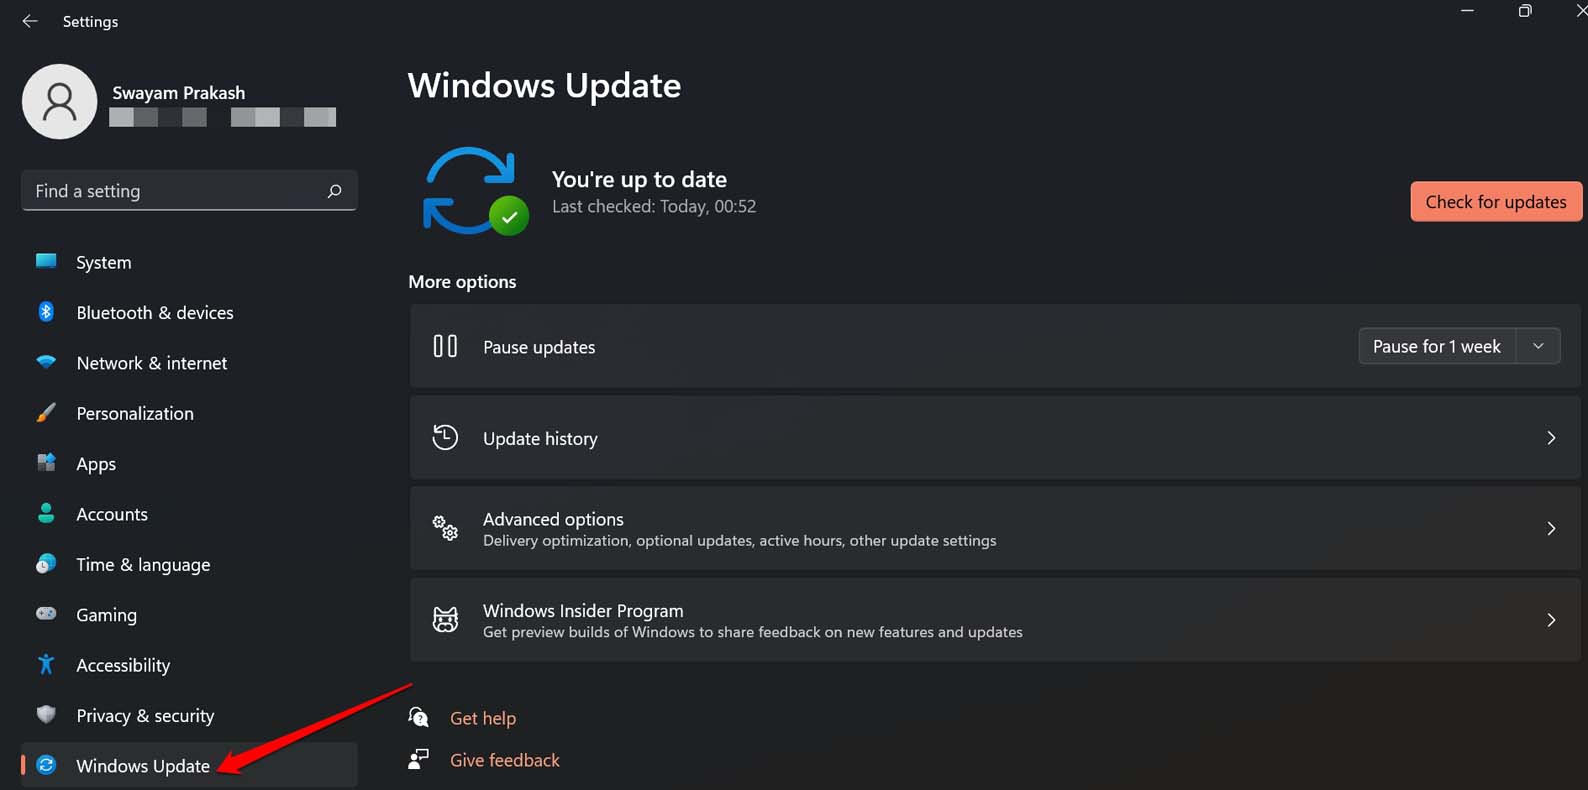
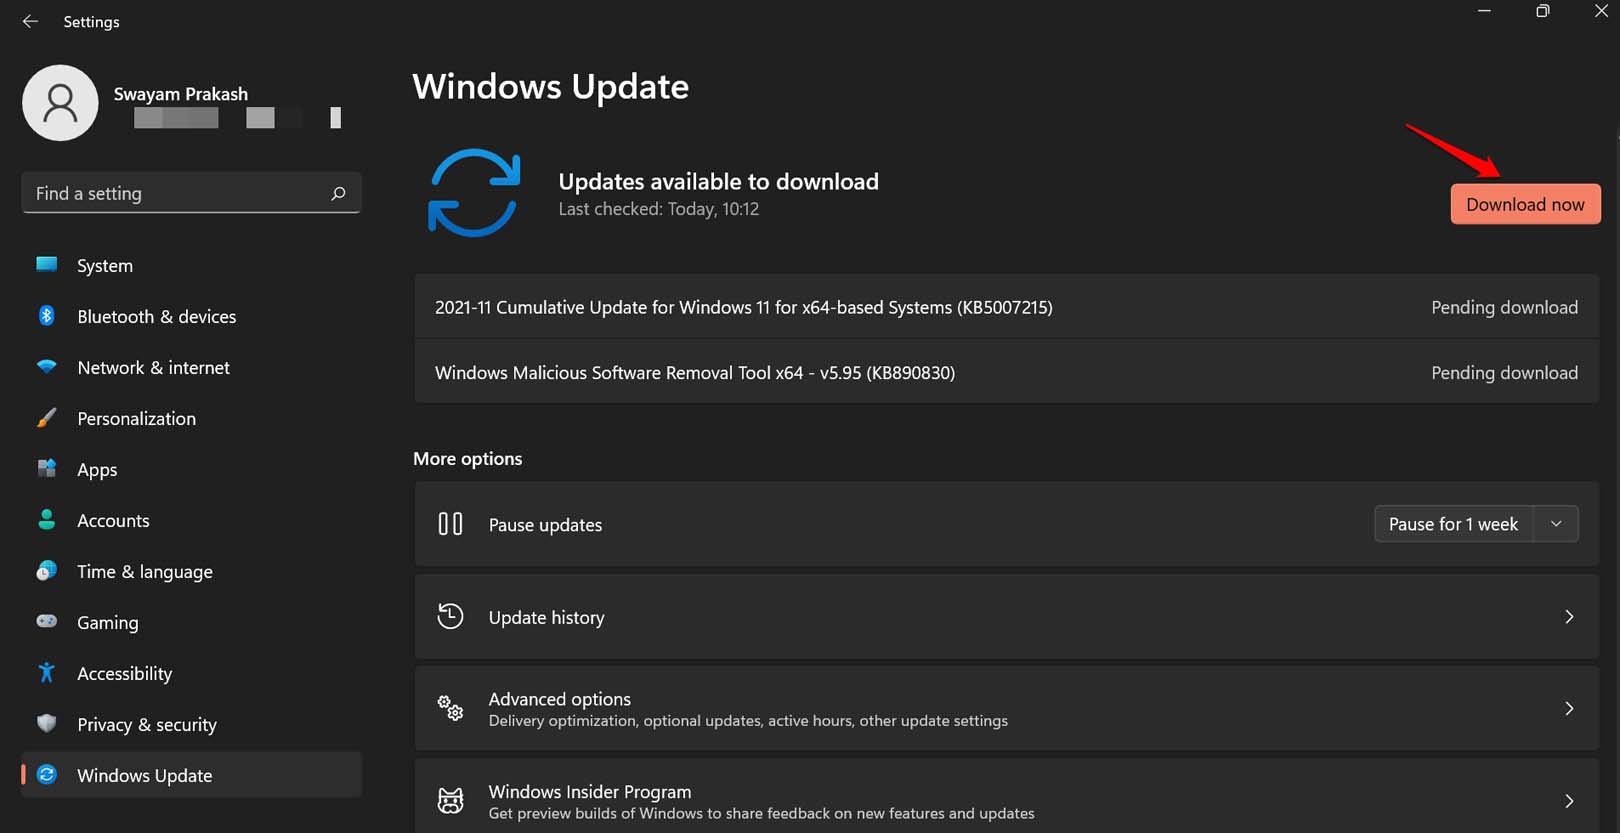
- Press Windows + I to go to the Windows settings.
- On the left-hand panel, click on Windows Update.

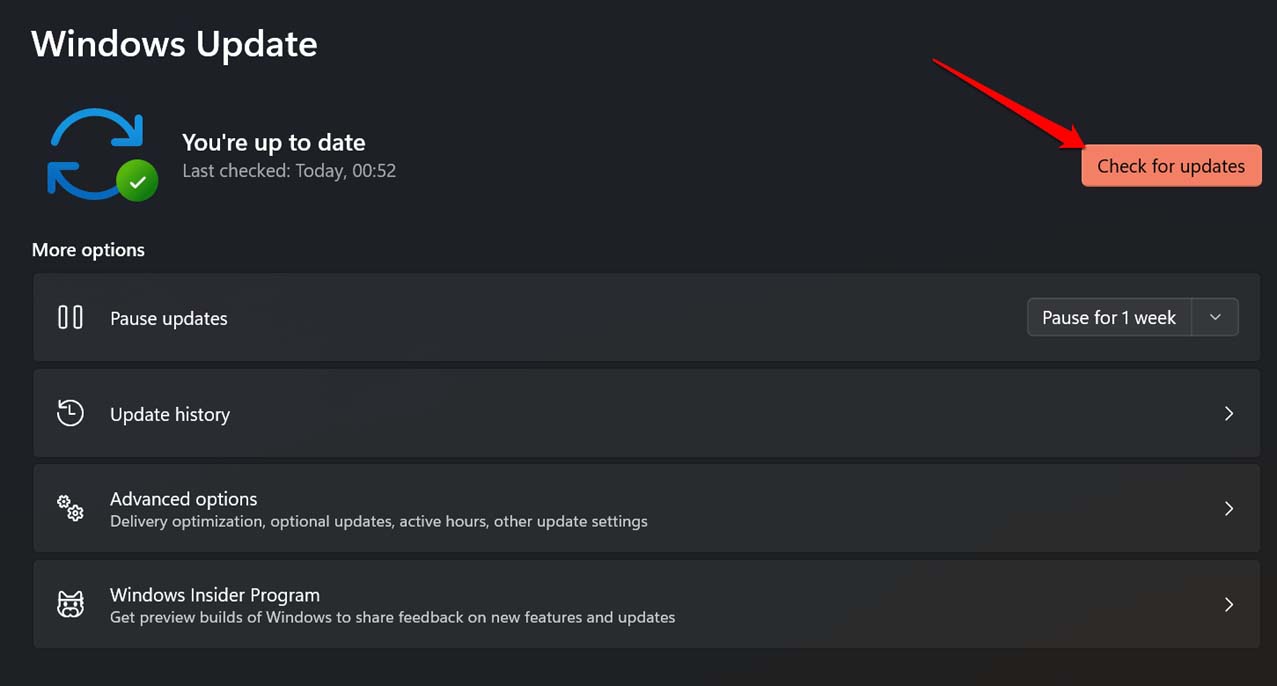
- Now, click on Check for Updates.

- The available Windows build will show up. Click on Download Now.

If the network is stable enough, the update should download and install in no time.
5. Start the Cryptographic Service
The Cryptographic Service is an essential component of the Windows operating system. It is responsible for providing a secure way to store and manage cryptographic keys, certificates, software updates, and other sensitive information. This Service is very important for Windows OS to function smoothly.
Here is how to quickly toggle between disabling and enabling the cryptographic Service.
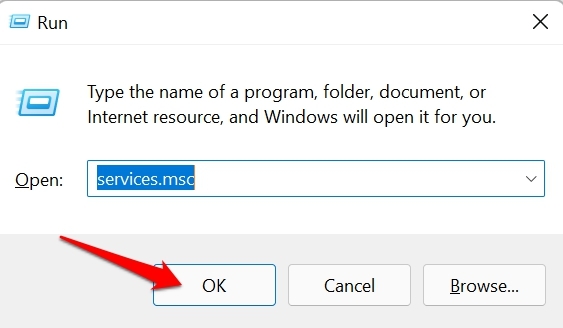
- Press Windows + R to bring up the Run box.
- Type services.msc and press enter.

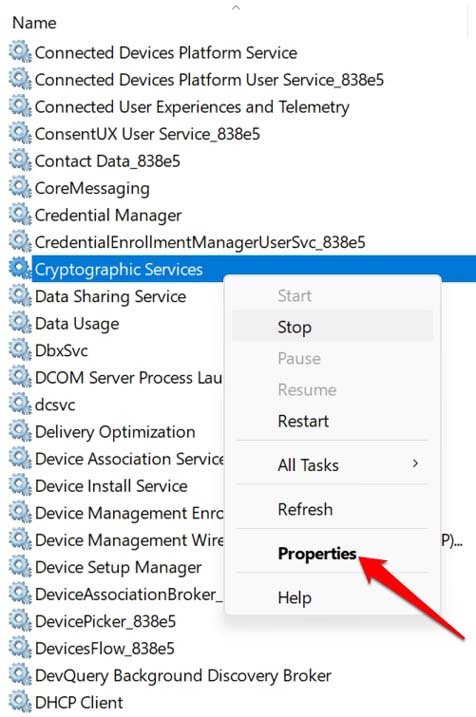
- Now, scroll to Cryptographic Services and right-click on it.
- Select Properties from the menu.

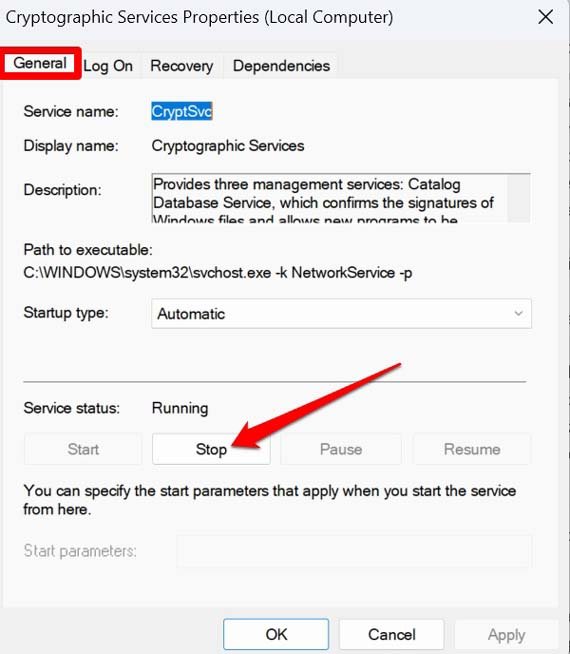
- Under the General tab, navigate to Stop and click on it.

- Then immediately click on Start to resume the Cryptographic services.
Now, the Windows Update troubleshooter should work just fine.
6. Enable Scripted Diagnostics Under Group Policy Editor
Scripted Diagnostics makes use of custom scripts to execute various functions on the Windows OS. This includes managing and troubleshooting software updates. You can enable them in the group policy editor.
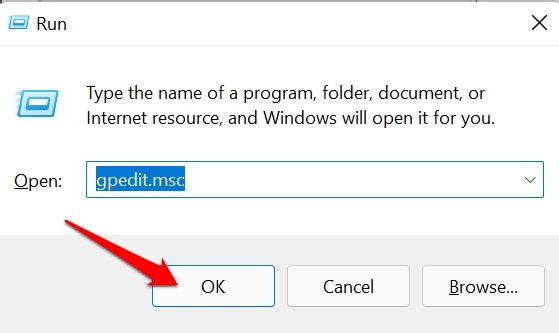
- Press Windows + R. This will invoke the Run dialog box.
- Now, type the term gpedit.msc and press enter.

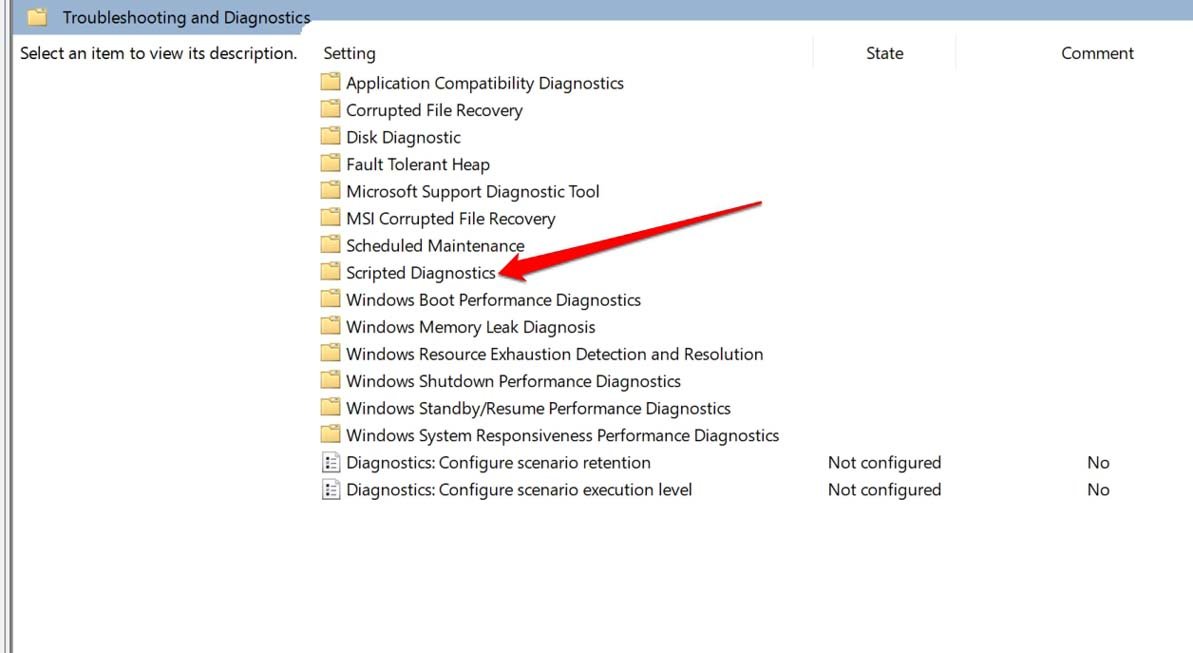
- Follow this sequence of paths that I have mentioned.
Computer Configuration > Administrative Templates> System > Troubleshooting and Diagnostics > Scripted Diagnostics

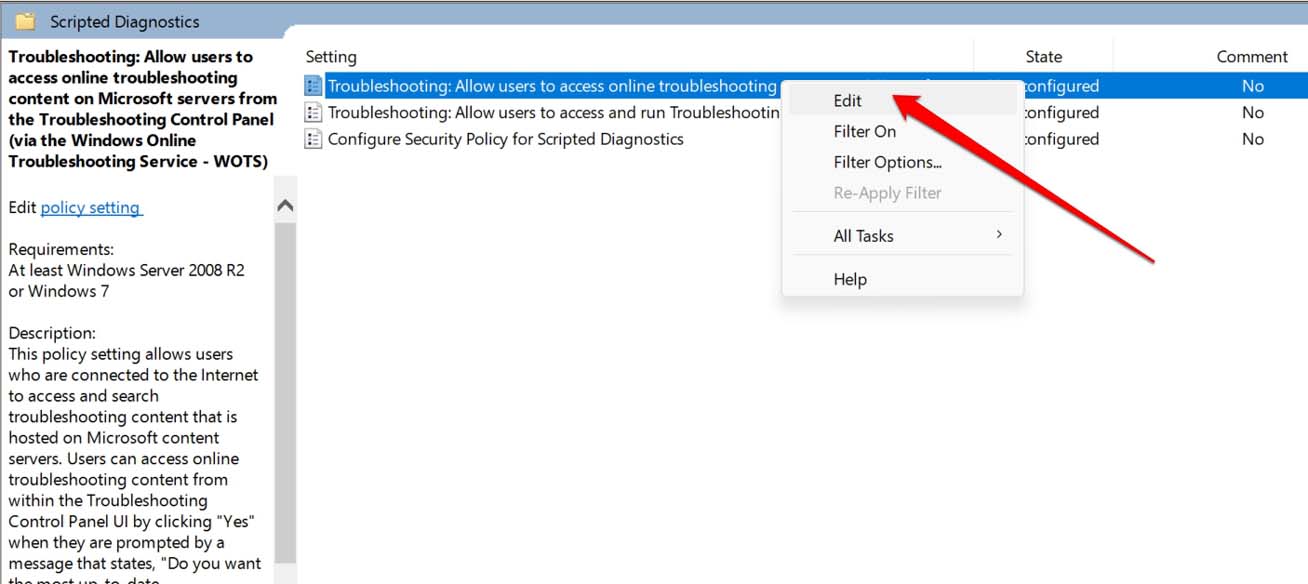
- Once within Scripted Diagnostics, right-click on the first element. Select Edit.

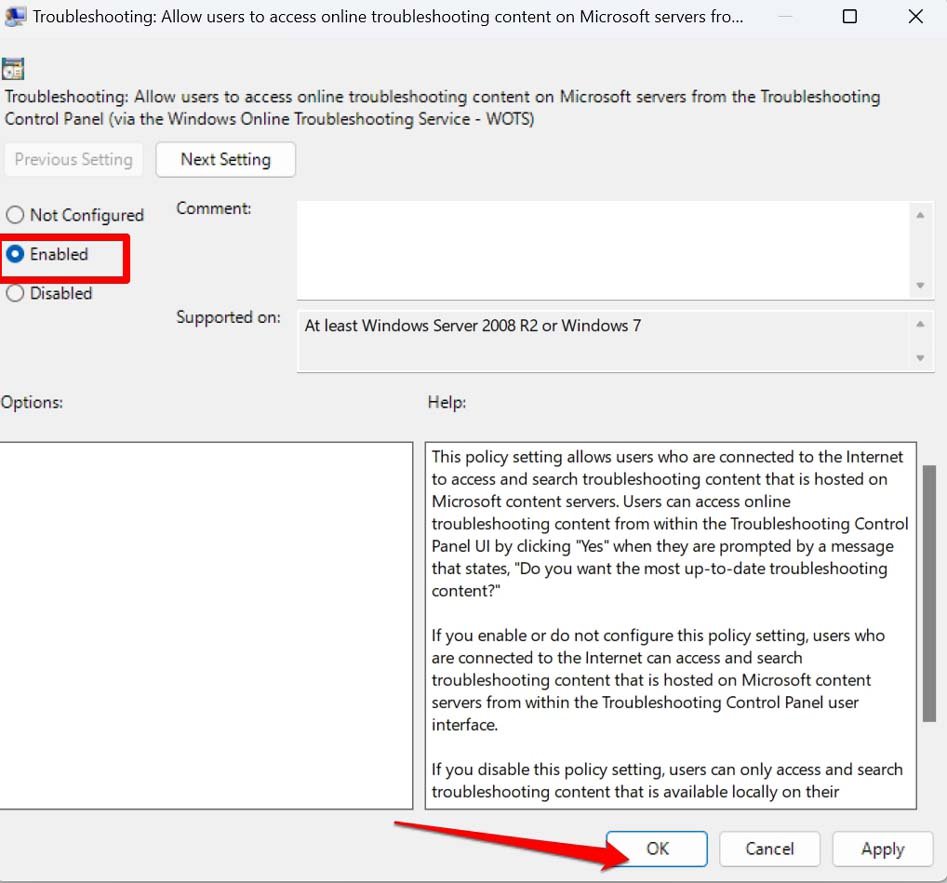
- Set it to Enabled and click on Apply > OK.

- Successively repeat steps 4 and 5 for the other two entries under Scripted Diagnostics.
Conclusion
I hope all these troubleshooting tips will help you to fix the Windows Update troubleshooter stuck in a loop. It is not wise to miss the installation of software updates as they are vital in fortifying your PC’s security and improving the operating system’s performance. So, the update troubleshooter must be swift enough to fix the issues regarding the latest updates so you can install them easily.
If you've any thoughts on How to Fix Windows Update Troubleshooter Stuck in a Loop?, then feel free to drop in below comment box. Also, please subscribe to our DigitBin YouTube channel for videos tutorials. Cheers!
