If your Windows PC is shutting down automatically without a warning message or any specific reason, then there’s something troubleshooting that needs to be done. Don’t worry; you are in the right place. There are several troubleshooting steps that you can try.
In this comprehensive guide, we’ll go through various potential fixes, including checking Task Scheduler, disabling Fast Startup, installing pending Windows updates, updating drivers, and more. So, without any further ado, let’s get started.
Note: If you are unable to stay into the system for more than 10 minutes, it’s recommended to enter safe mode. This will allow you to better troubleshoot the issue without any interruptions. Check this guide for more details: How to Boot into Safe Mode in Windows 11?
Fix 1: Check Task Scheduler
If you had borrowed your laptop from someone with access to everything on it, there are chances that they might have set a shutdown scheduled task that automatically shuts down your PC at a specific time of the day. This can also be done by a malicious app installed on your computer. Follow the steps below to fix this issue:
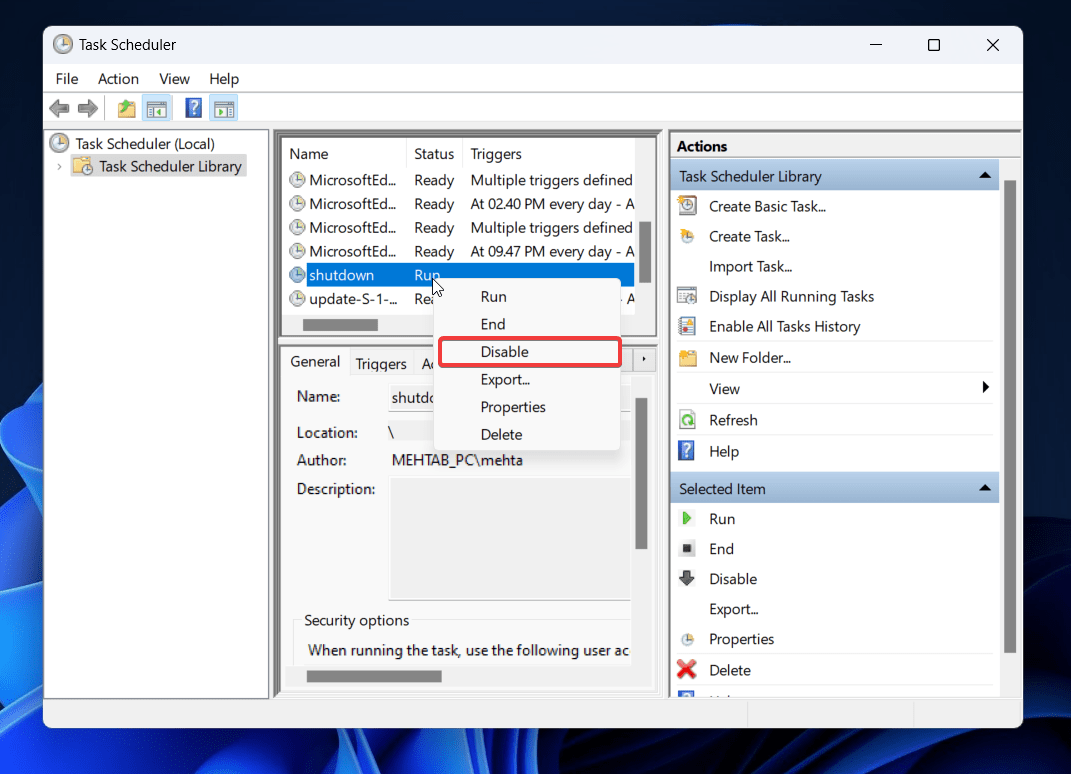
- Press the Windows key + Q and search for Task Scheduler.
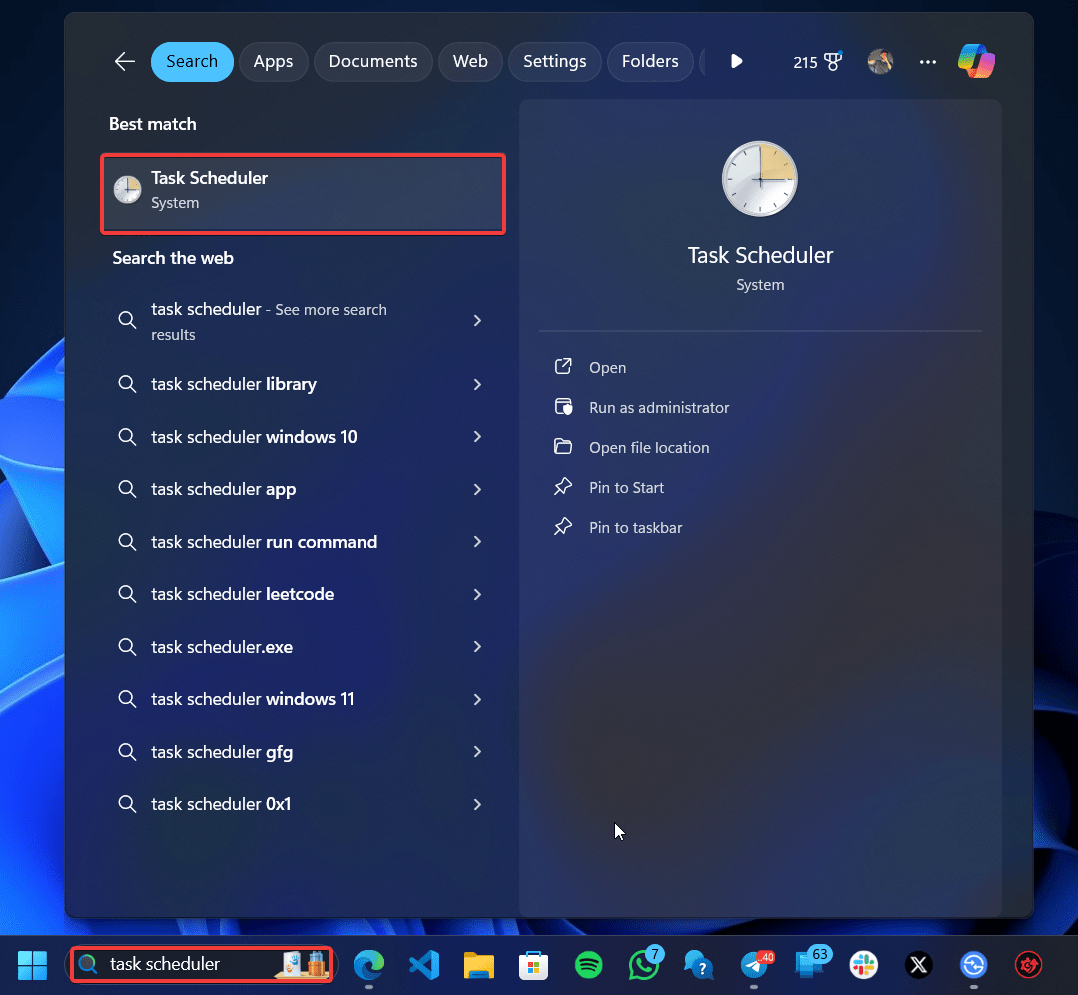

- Open the Task Scheduler and click on the Task Scheduler Library.
- Find any tasks that could be forcing your laptop to shutdown automatically, right-click on them, and select Disable or Delete.

Fix 2: Disable Fast Startup
Fast startup is used to boot your PC faster after a shutdown. To achieve this, it has to hibernate the kernel, which can lead to issues such as this one. Follow the steps below to disable fast startup.
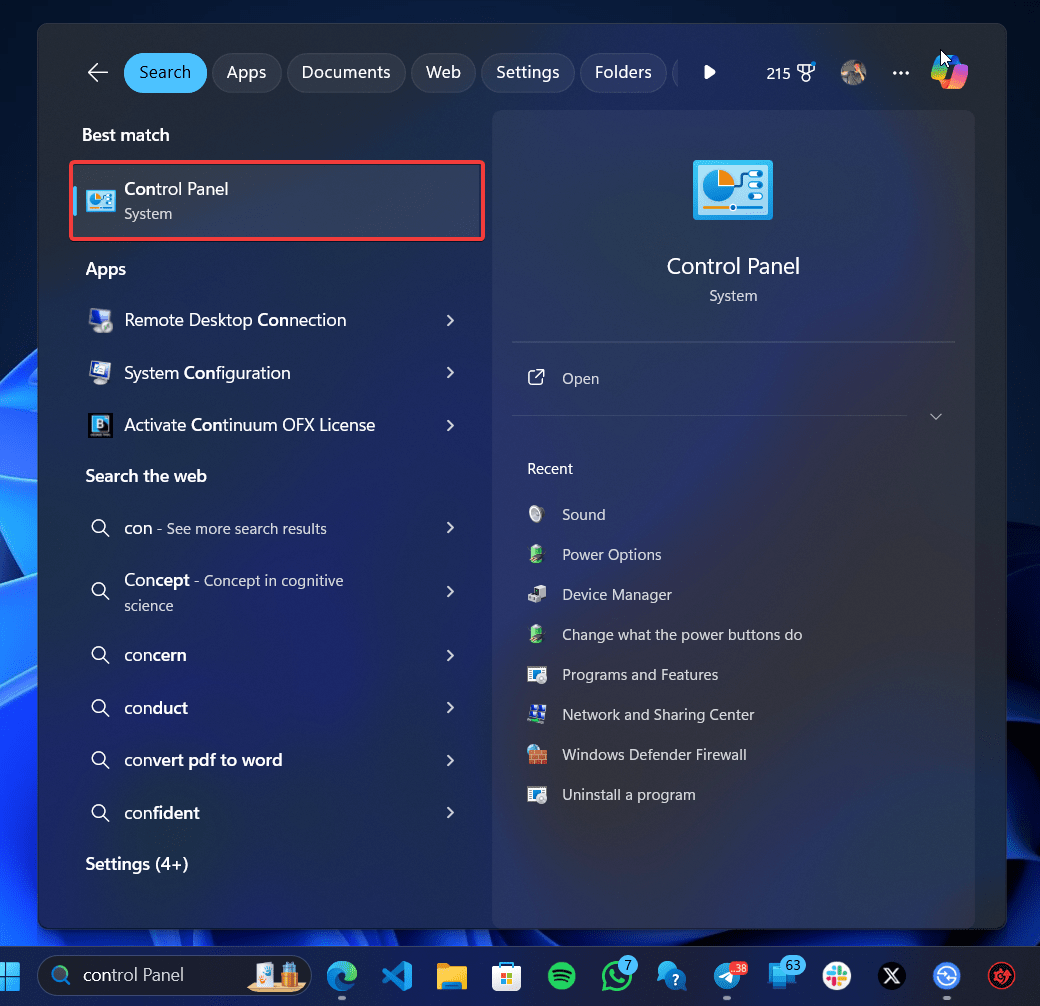
- Press the Windows key + Q and search for Control Panel.

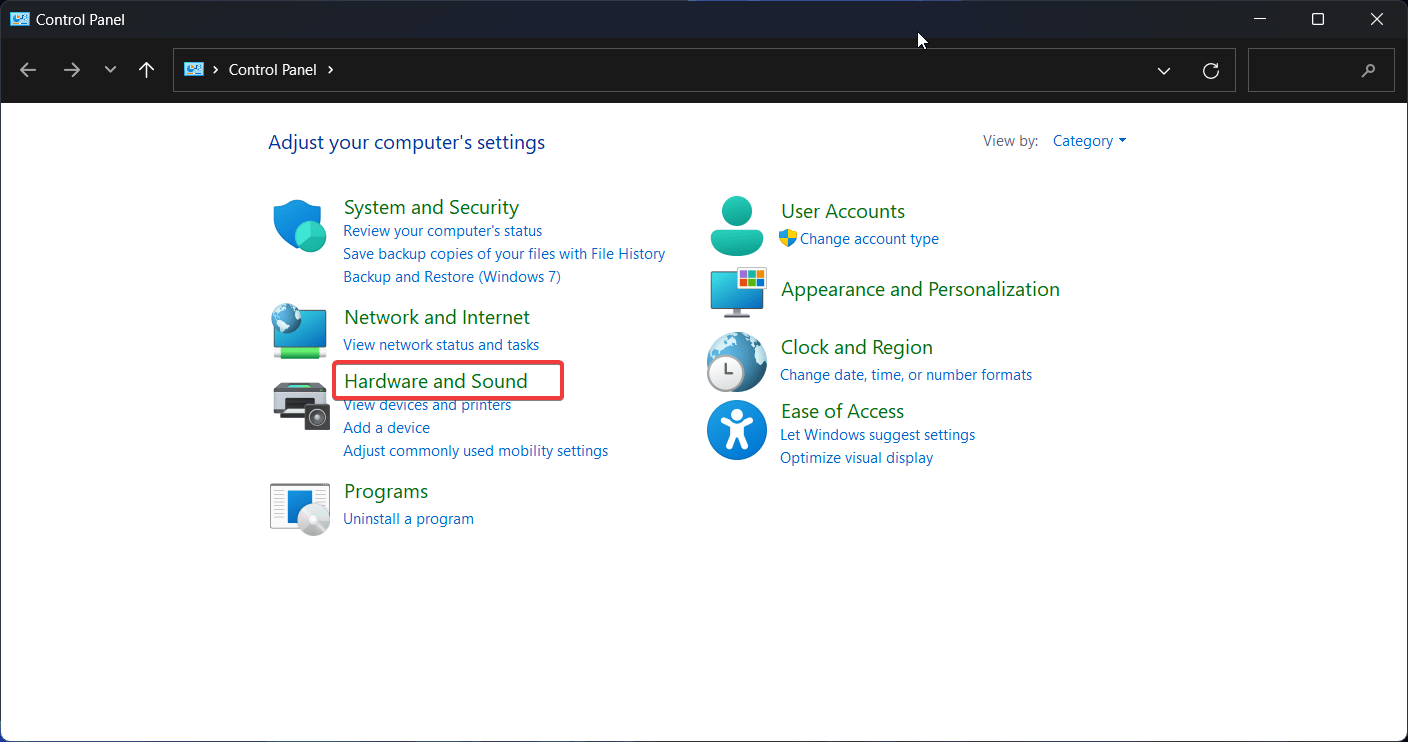
- Open the Control Panel and click on Hardware and Sound.

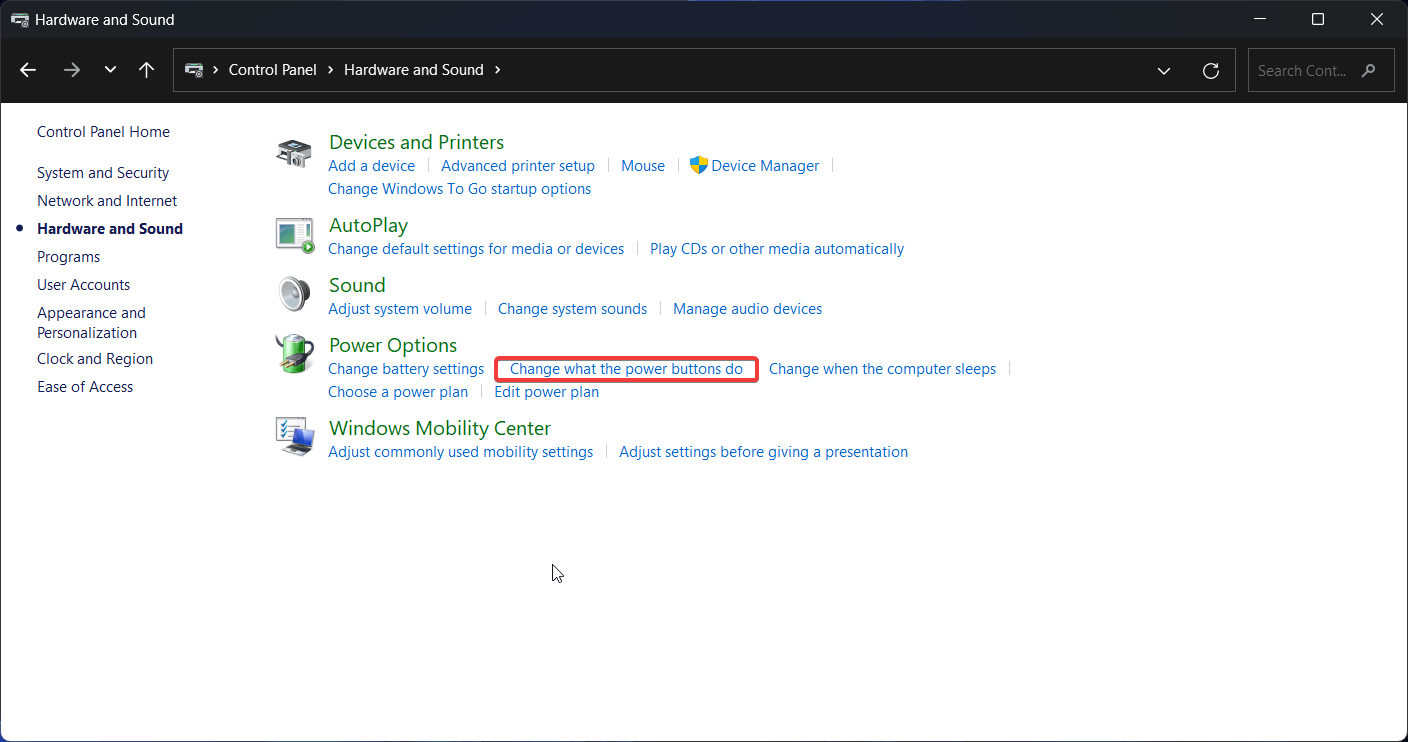
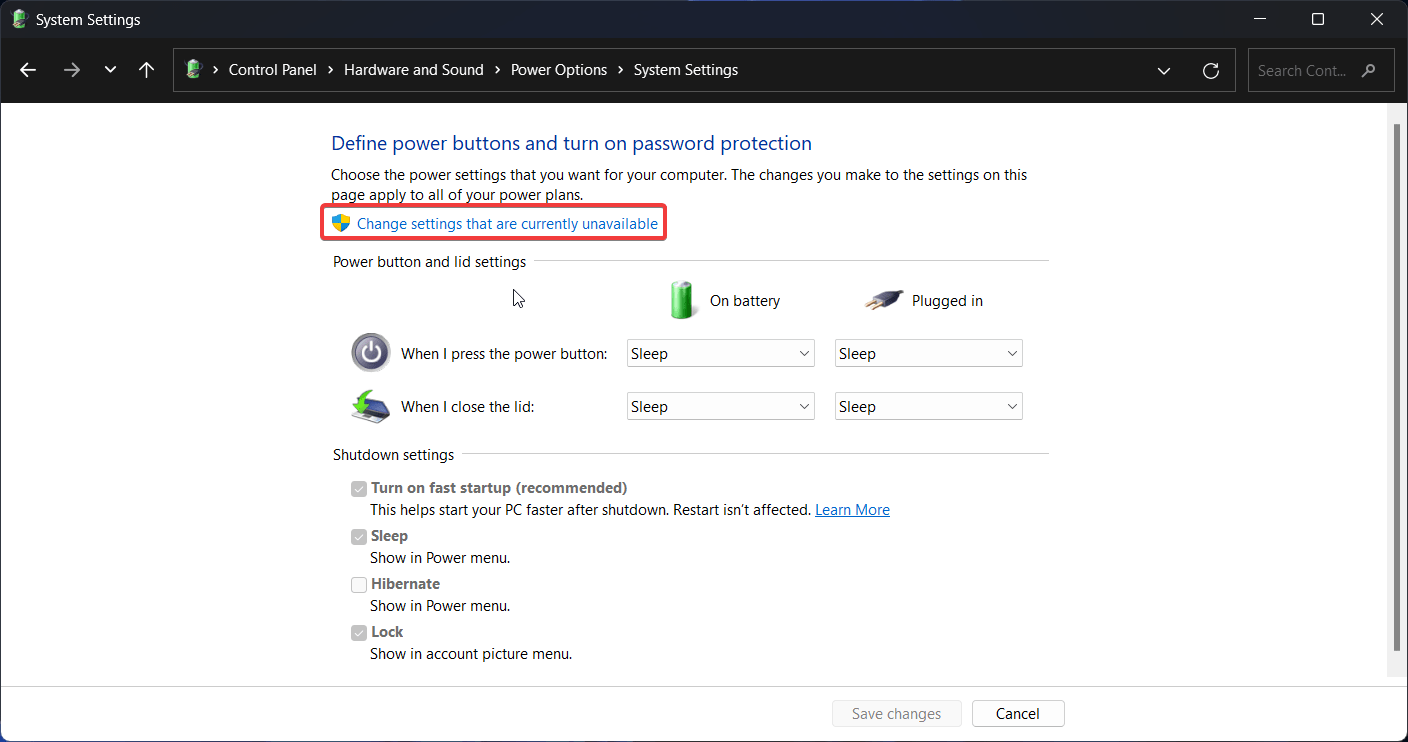
- Then, click on “Change what the power buttons do” under Power Options.
- At the top, click on “Change settings that are currently unavailable.”
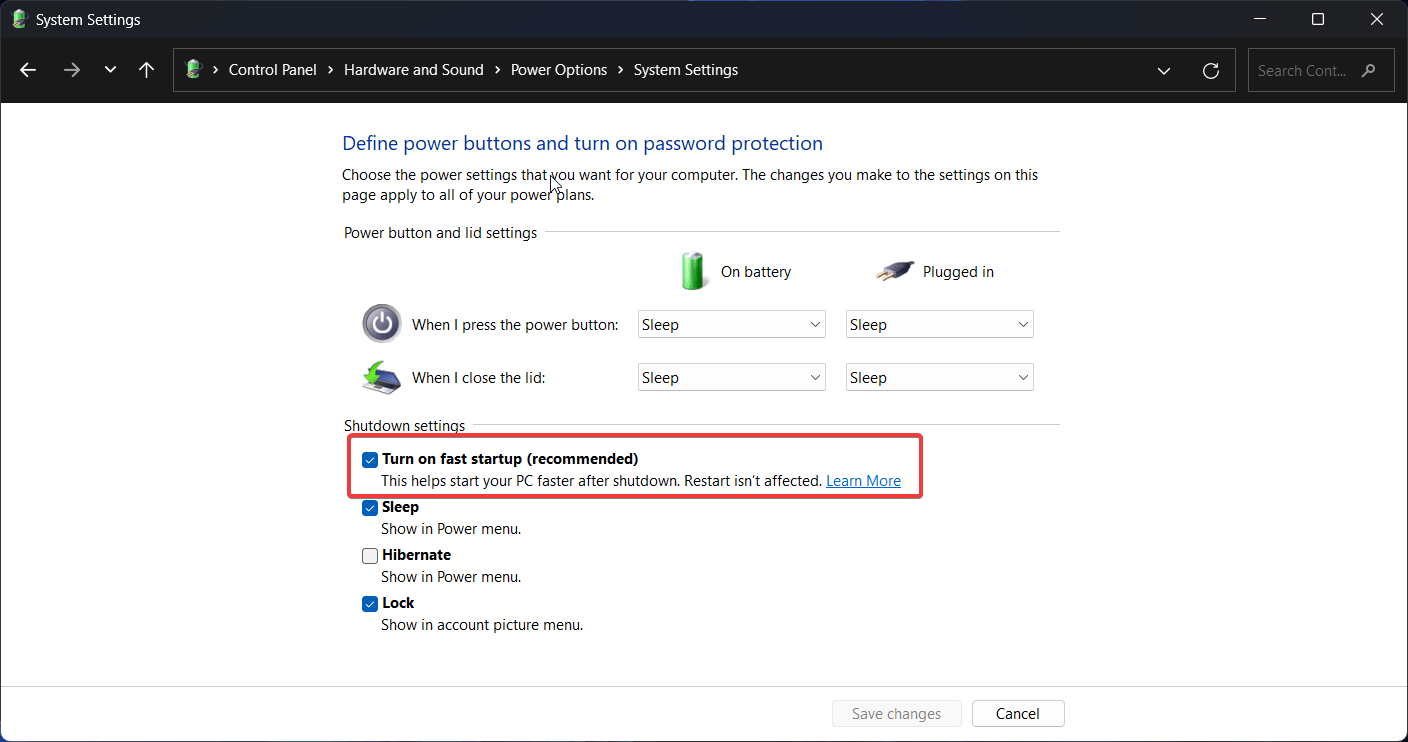
- Uncheck the box next to “Turn on fast startup.” Note that this can slow down your PC startup time.
Fix 3: Install Pending Windows Updates
Windows updates, once downloaded, need to be installed by restarting your PC. If you are someone who tends to avoid a restart, this could be the system giving you hints to restart your PC. If that’s not the case, it could simply be a bug in the current build of Windows. Install the latest one to resolve all the issues.
- Press the Windows key + I to open the Settings app.
- Now, click on Windows Update from the left menu.
- Click on Check for updates.
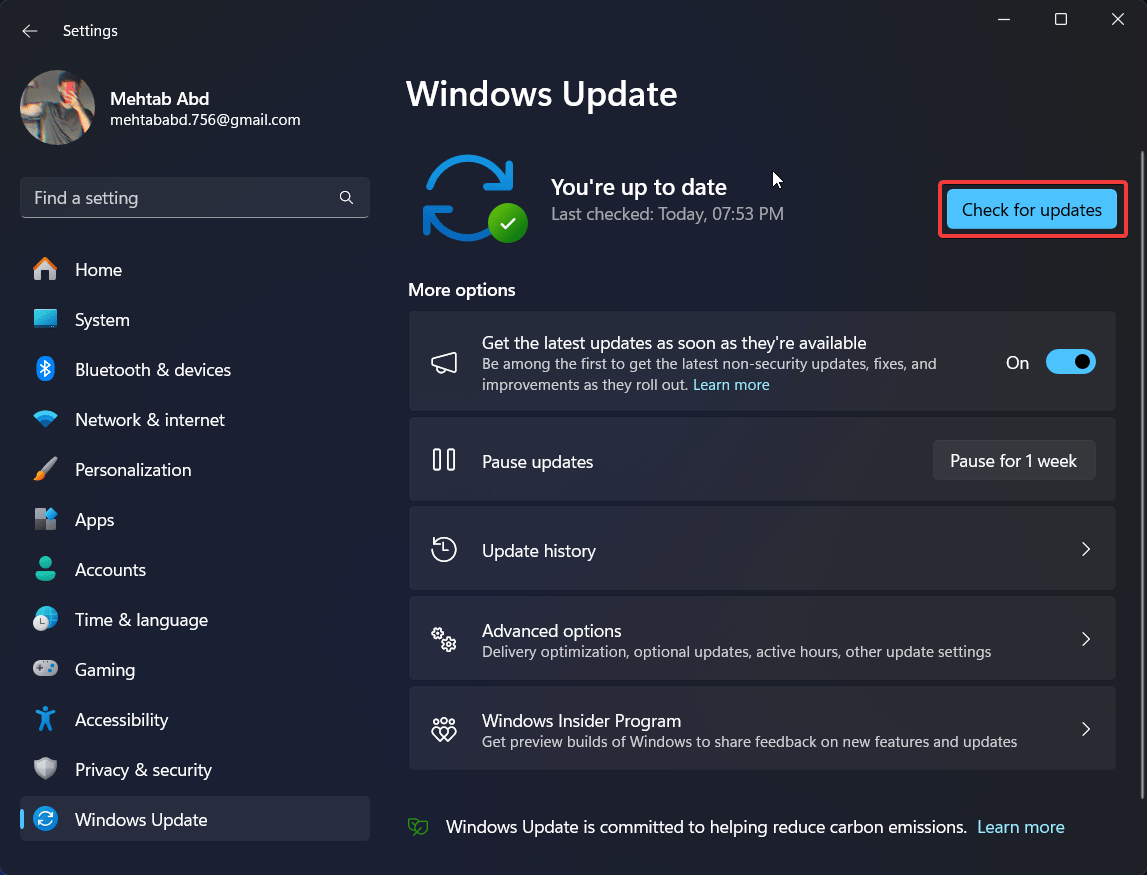

- If an update is available, click on Download and install.
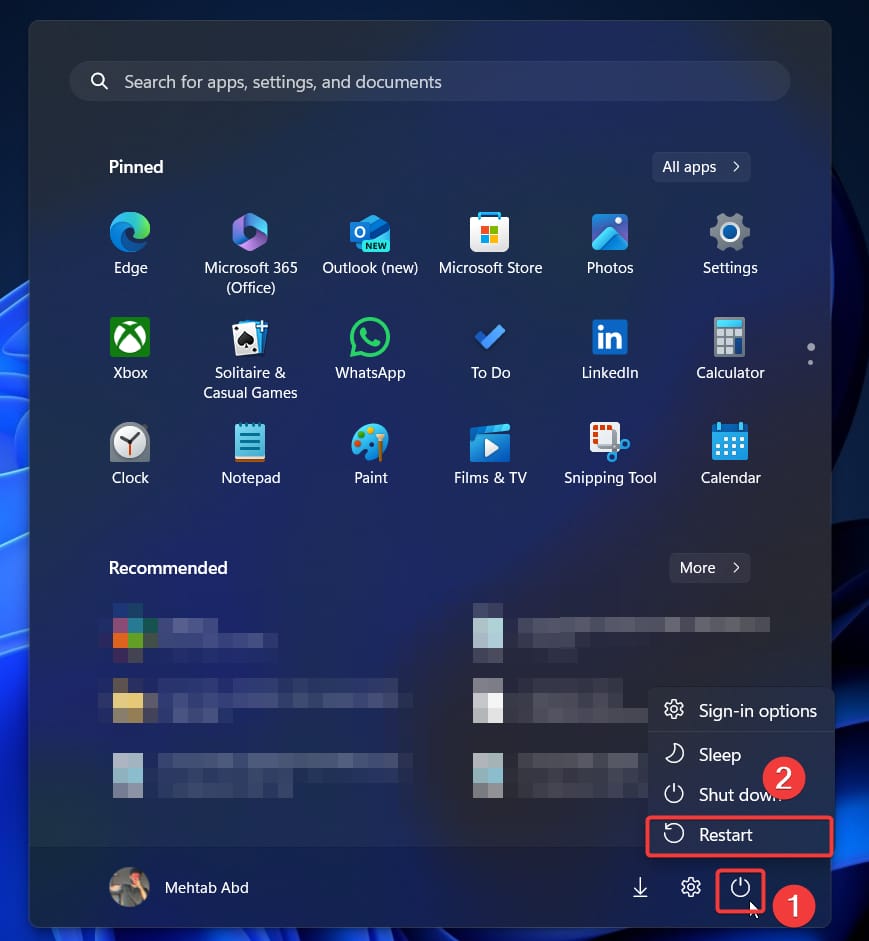
- Once the updates are installed, restart your PC for the changes to take effect.

Fix 4: Update Graphics Drivers
The graphics drivers manage what’s displayed on your screen. If these are corrupt or outdated, you will run into issues where the display goes blank, making you think the system has shut down. Here’s how to fix your graphics drivers:
- Press the Windows key + X to open the Power User menu.
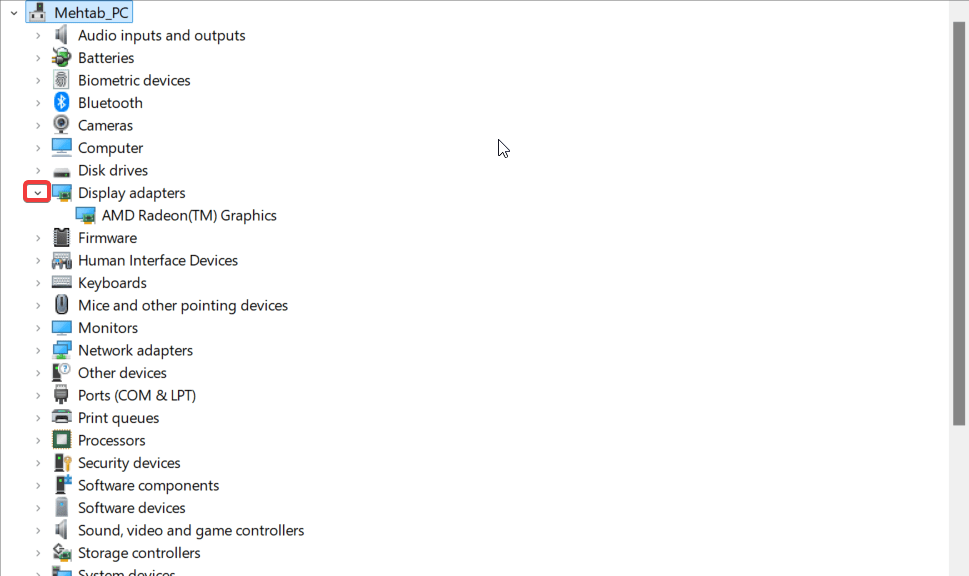
- Click on Device Manager.


- Now, click on the arrow next to Display Adapters to expand that section.

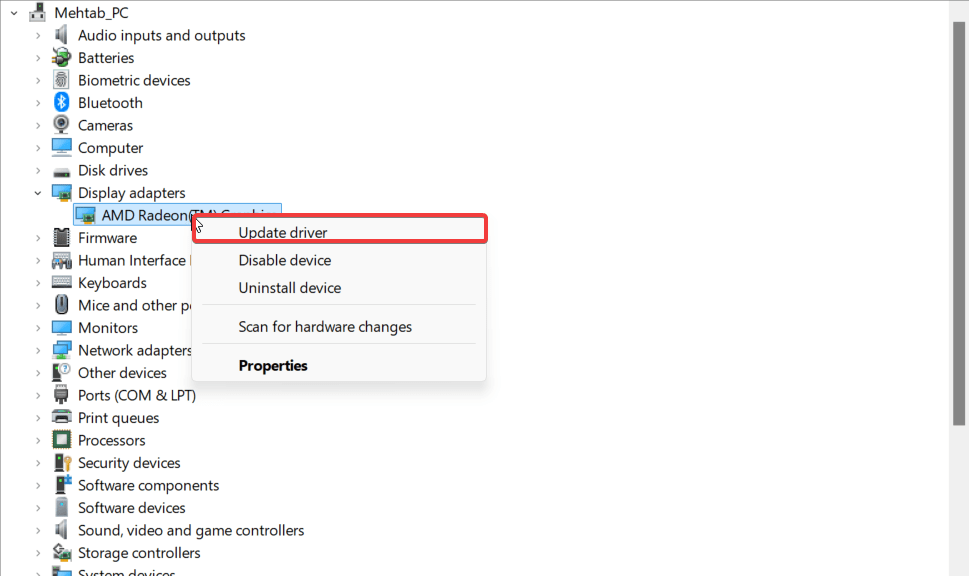
- Right-click on your graphics card (if you have two graphics cards, choose the integrated one) and select “Update driver.”
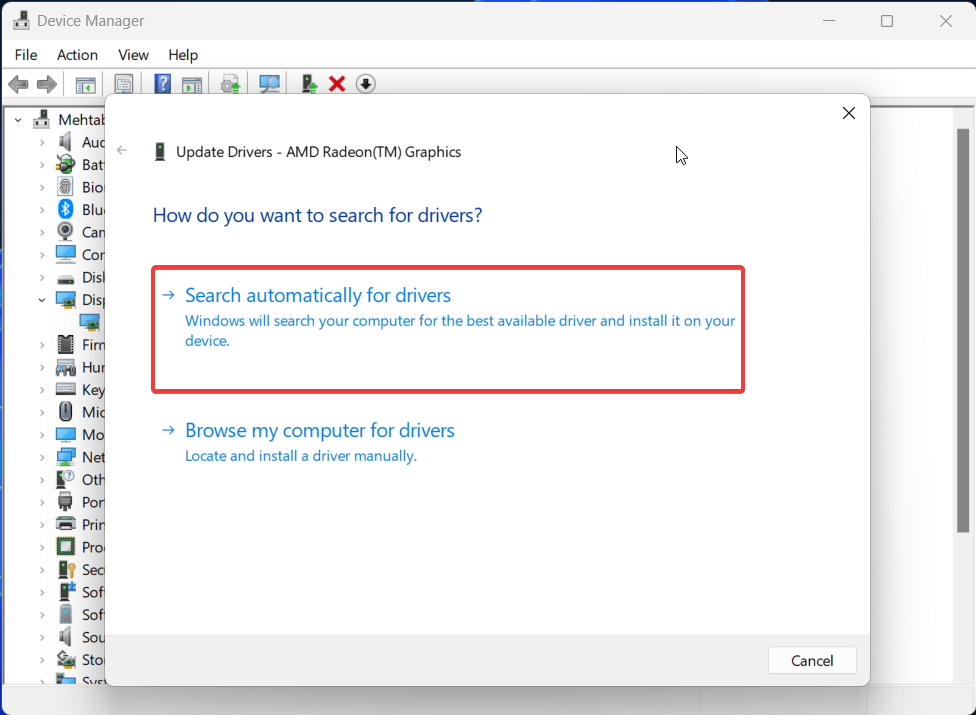
- Click on Search automatically for drivers. Windows will automatically search the latest drivers for your graphics card and install them on your PC.

- Simply restart your PC once the drivers have been installed.
Fix 5: Scan for Viruses
Viruses can cause all kinds of issues, including frequent PC shutdowns. Check your system for any viruses or malware to stay secure and also protect your device.
- Press the Windows key + I to open the Settings app.
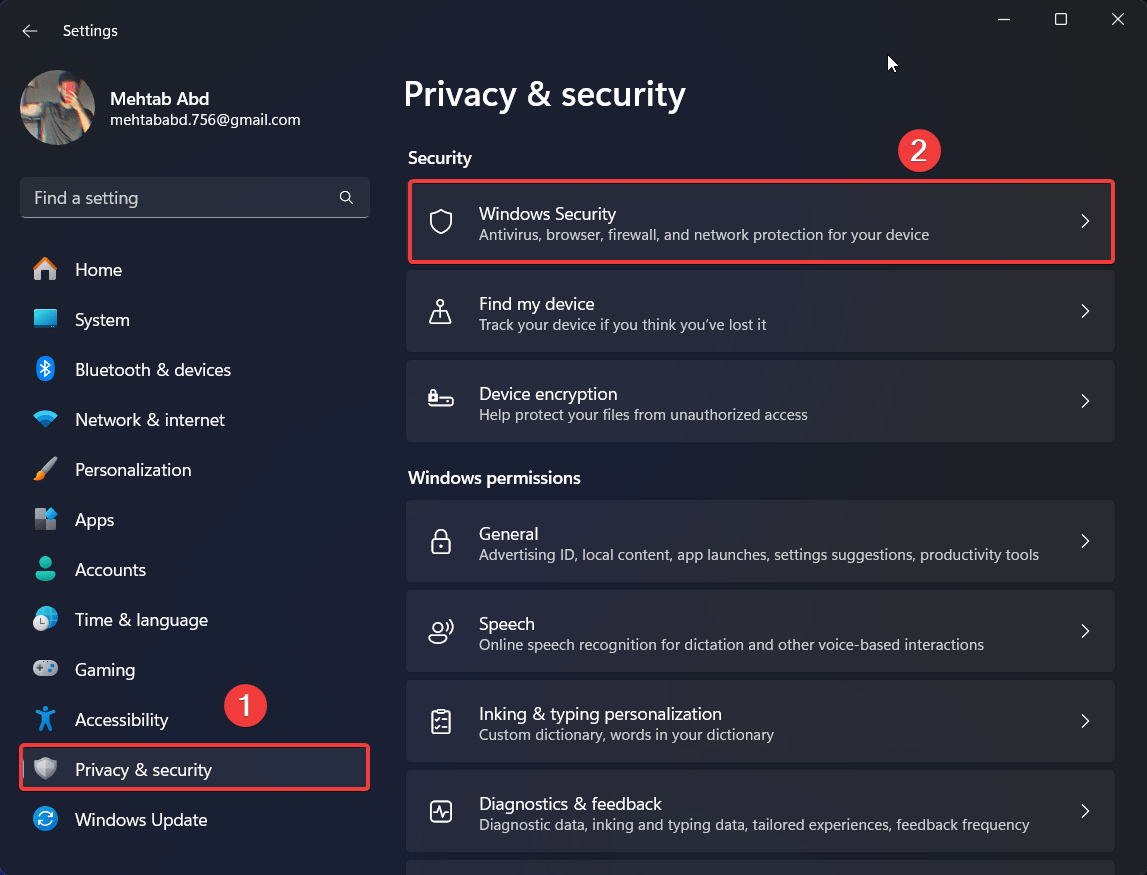
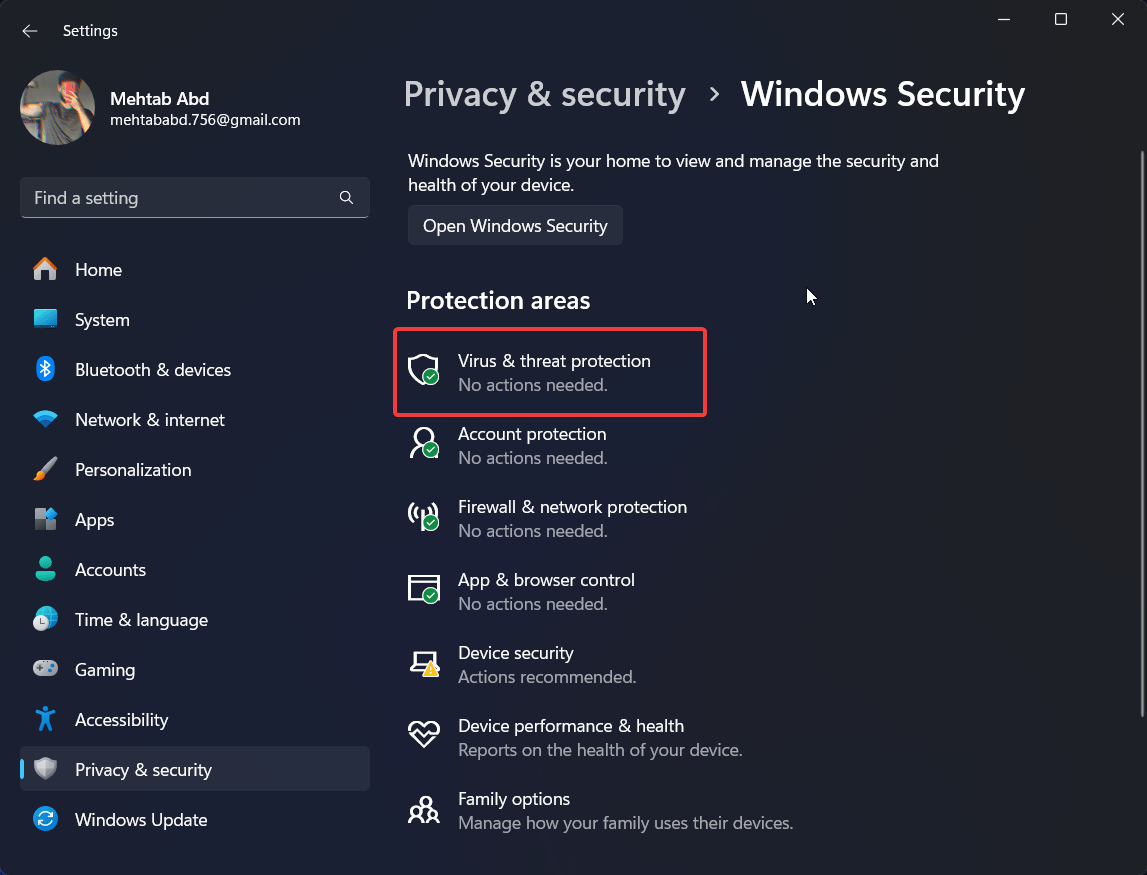
- Now, click on Privacy & Security from the left menu.
- Click on Windows Security.
- Under Protection areas, click on Virus and threat protection.
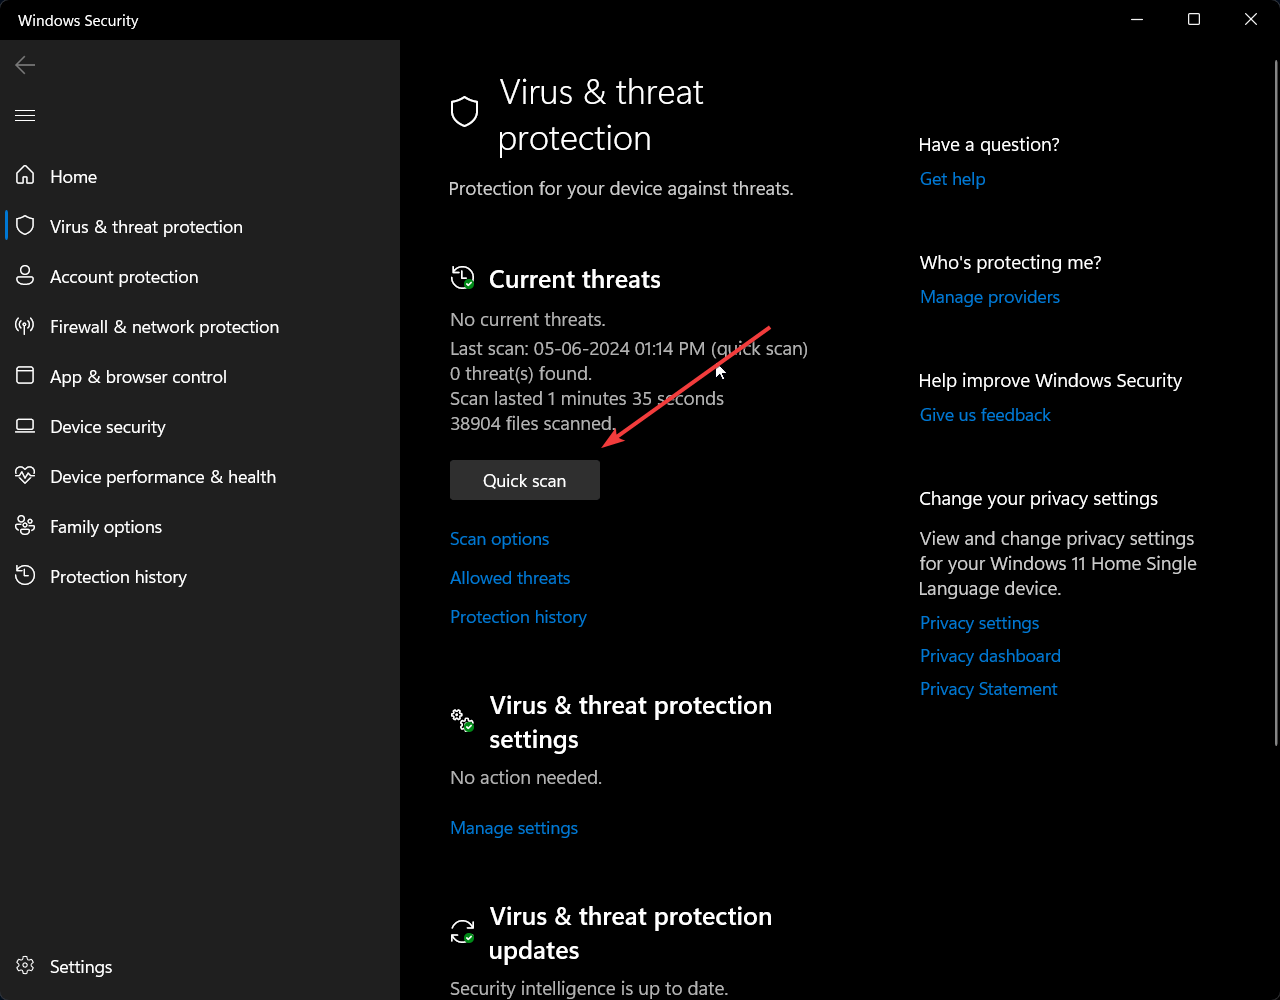
- Scan for any viruses by clicking on “Quick scan.”

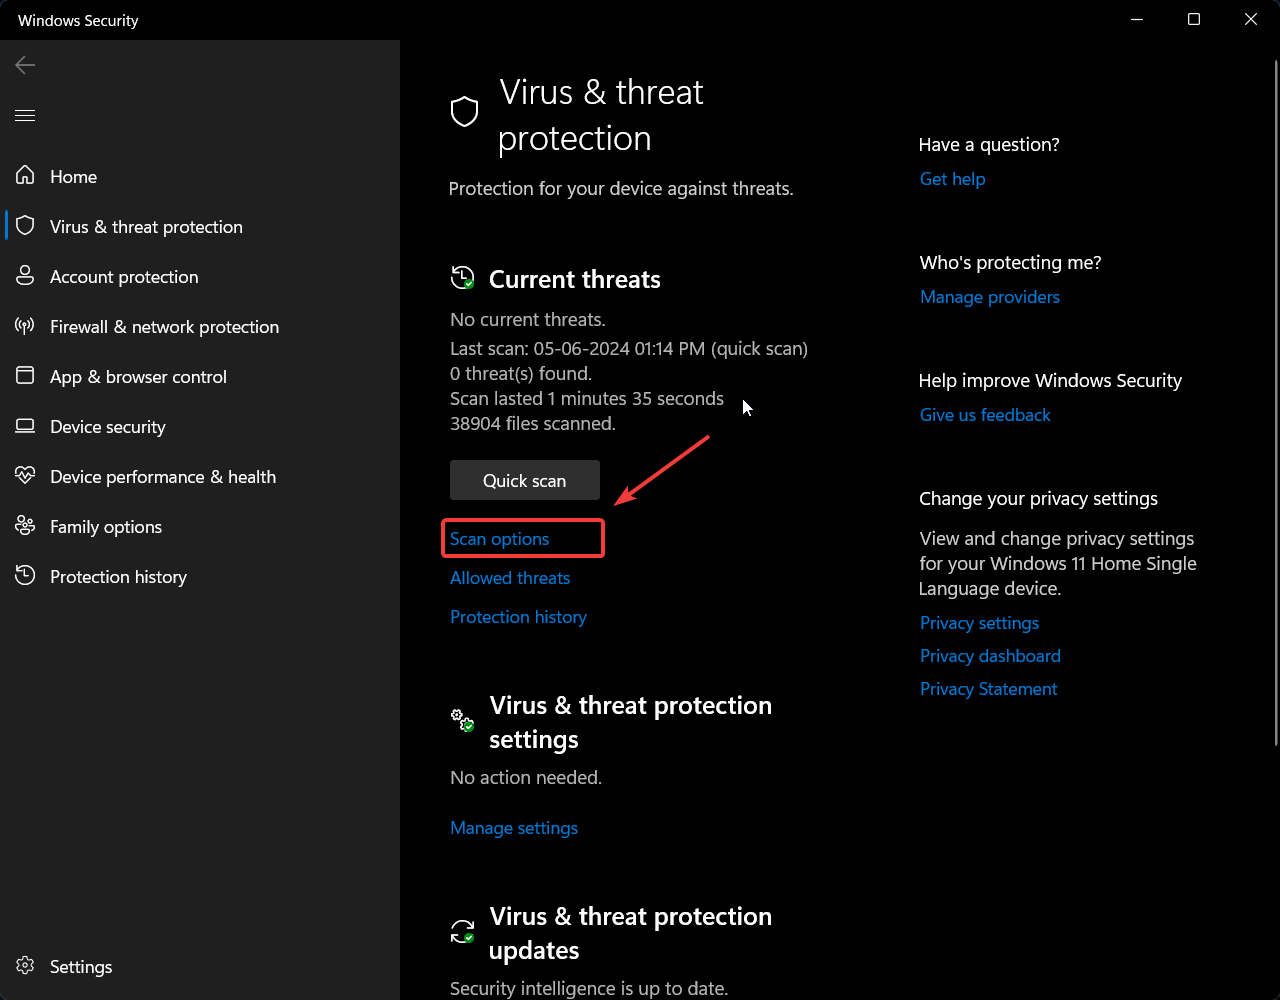
- If you want to run a deeper scan, click on Scan options and choose “Full scan” or “Microsoft Defender Antivirus (offline scan).”
Fix 6: Run SFC and DISM Commands
Corrupted system files can also cause the system to shut down randomly. You can check and fix the integrity of those fixes by running an SFC and/or a DISM scan. Follow the steps below.
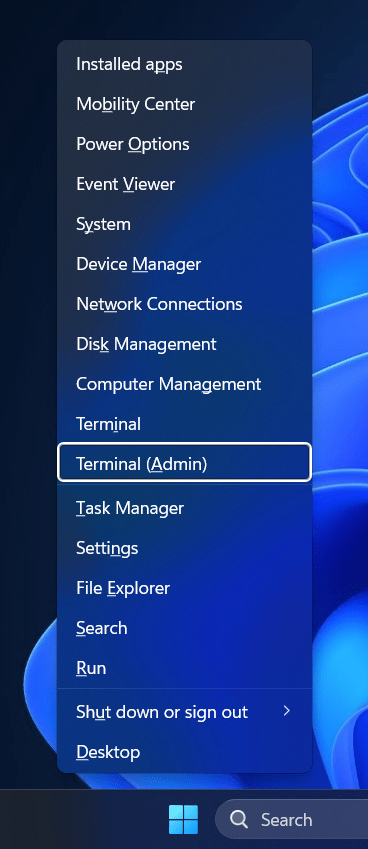
- Press the Windows key + X to open the Power User menu.
- Click on Terminal (Admin) or Command Prompt (Admin).

- Click Yes on the UAC prompt.
- In the terminal window, type in the following command and press Enter. This will run an SFC scan.
sfc /scannow
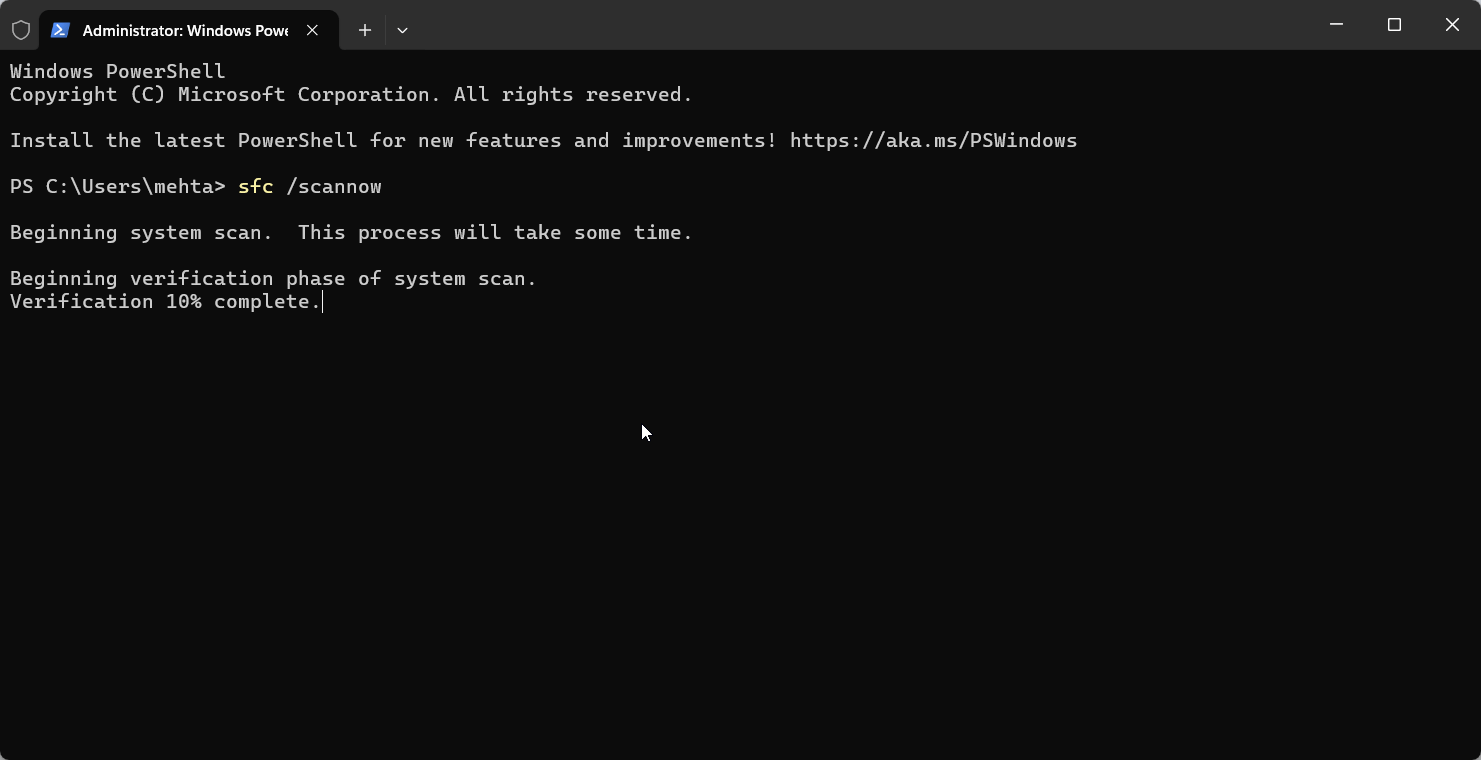
- Once the scan is finished, restart your PC and follow steps 1–3 again. Note that restarting your PC will get you out of safe mode if you’re using it.
- In the terminal window, type in the following command and press Enter. This will run a DISM scan.
DISM /Online /Cleanup-Image /RestoreHealth
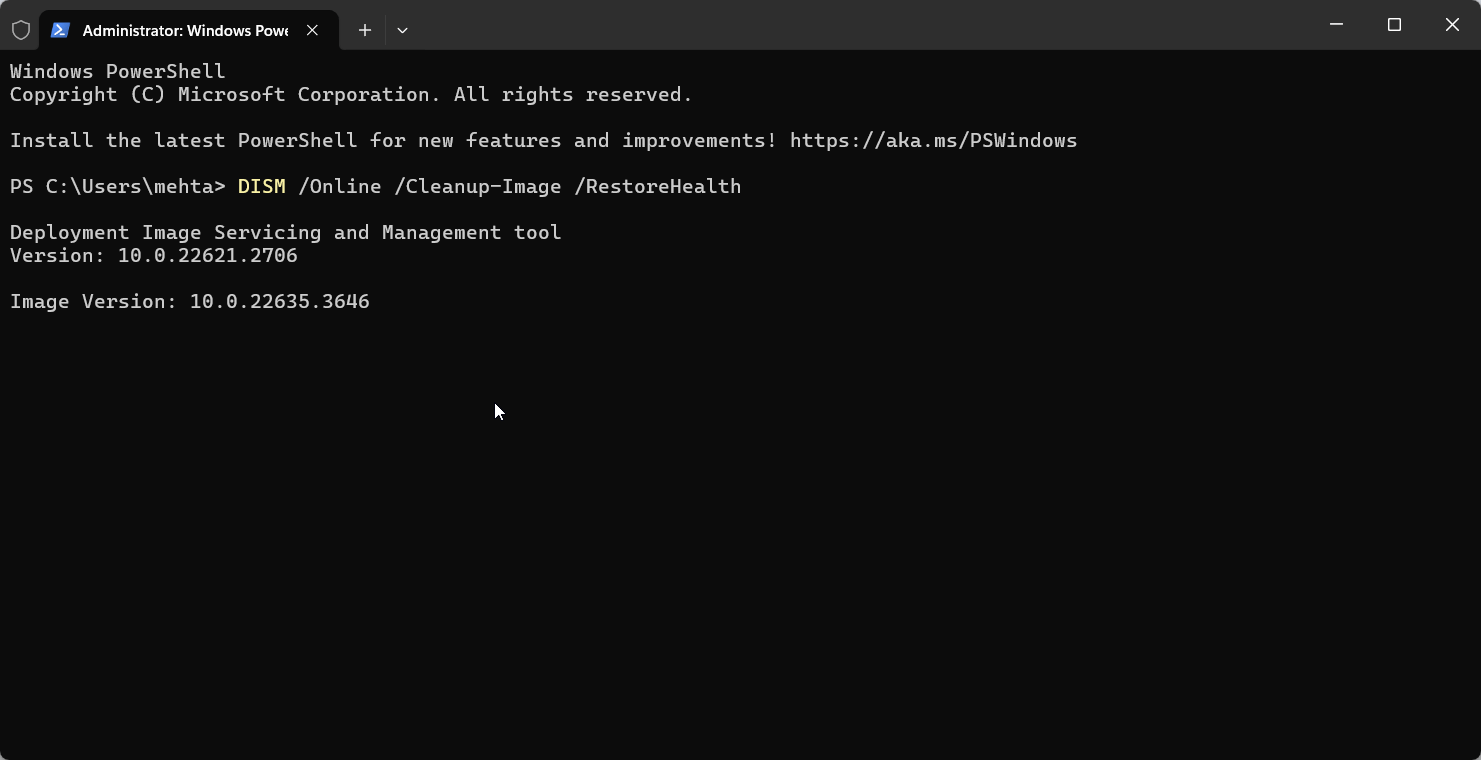
 Once the scan is finished, restart your PC and check if the issue is resolved.
Fix 7: Inspect the Power Supply
A faulty power supply can cause shutdowns. Check connections or try a different power supply if possible. Make sure the power cable is inserted firmly into the port. Opt for the highest power supply that your machine supports.
Fix 8: Reset BIOS Settings
Incorrect BIOS settings can cause instability, leading to automatic shutdowns. Restart your PC and enter the BIOS setup to reset to default settings. Follow the steps below
Note: All your BIOS settings will be reset to default. If you’re using virtualization, you will have to come back to the BIOS settings and re-enable it.
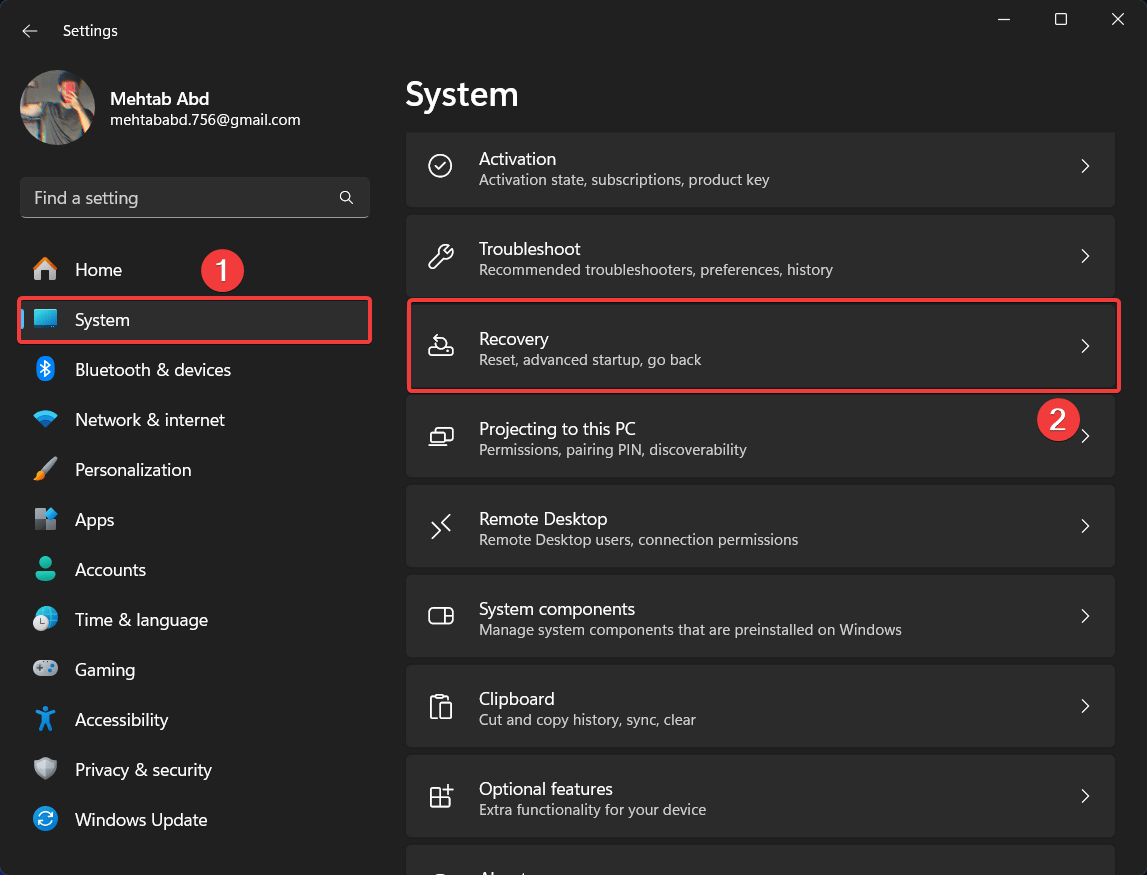
- Press the Windows key + I to open the Settings app.
- Now, click on System from the left menu.
- Scroll down and click on Recovery.
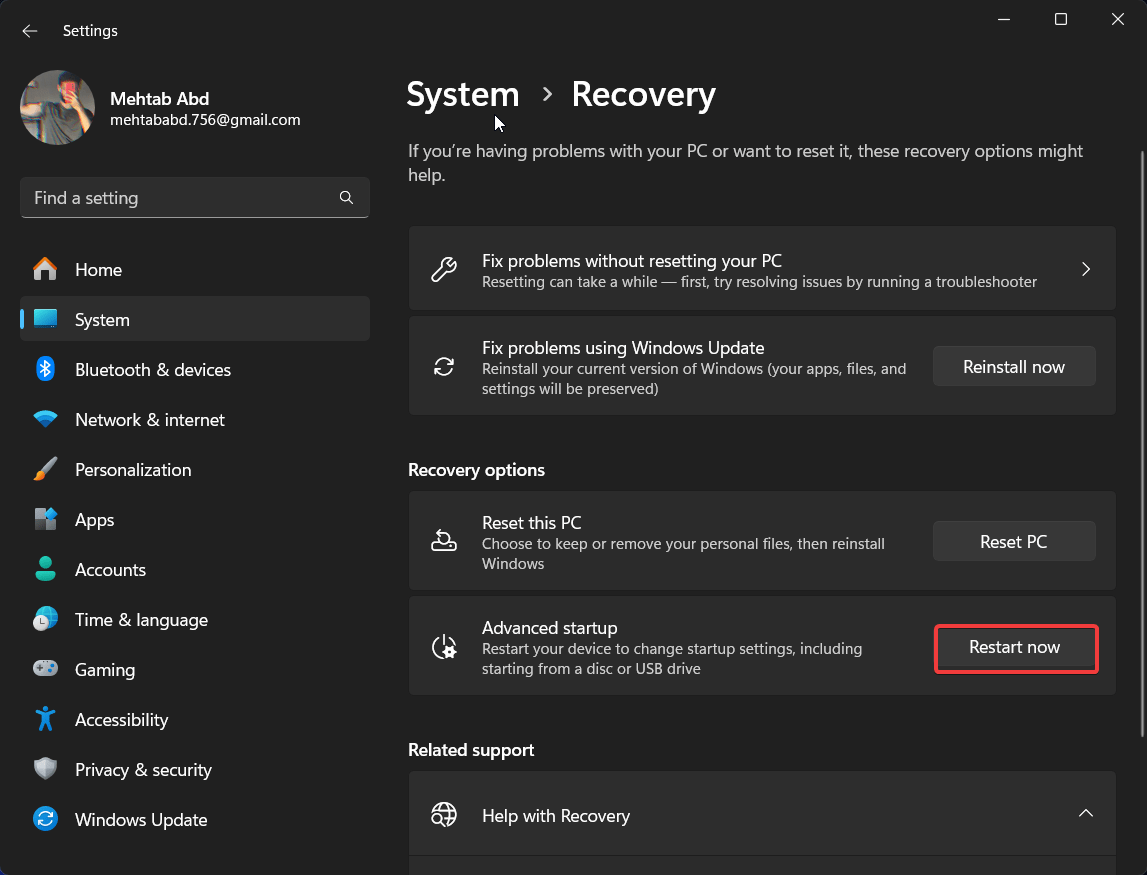
- Click on the Restart Now button to enter the Advanced startup menu.
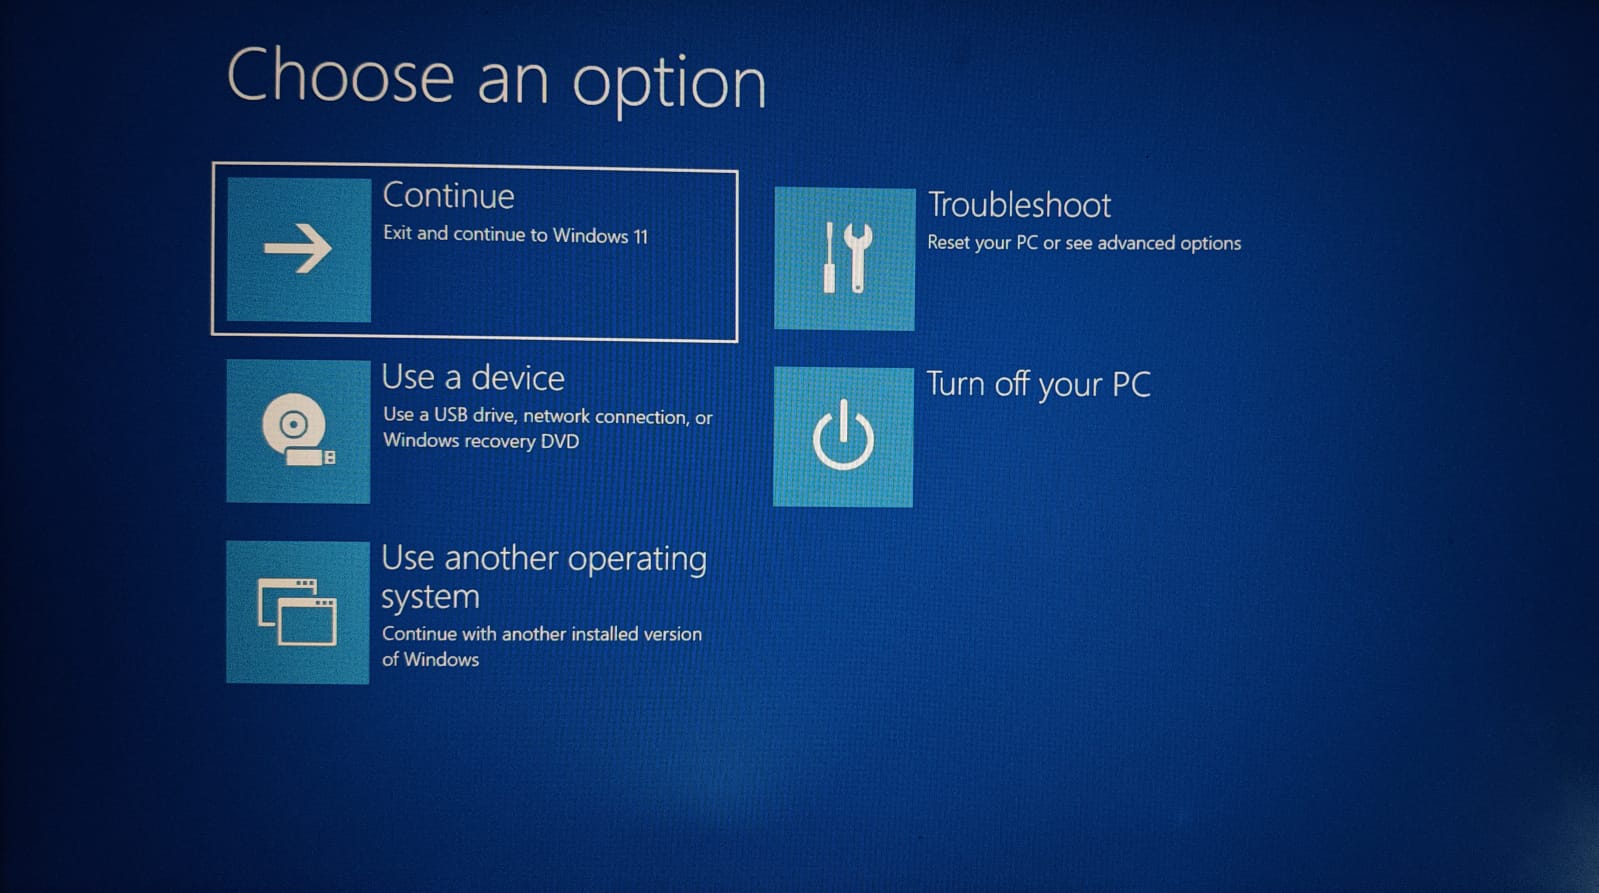
- In the Advanced Startup menu, click on Troubleshoot.

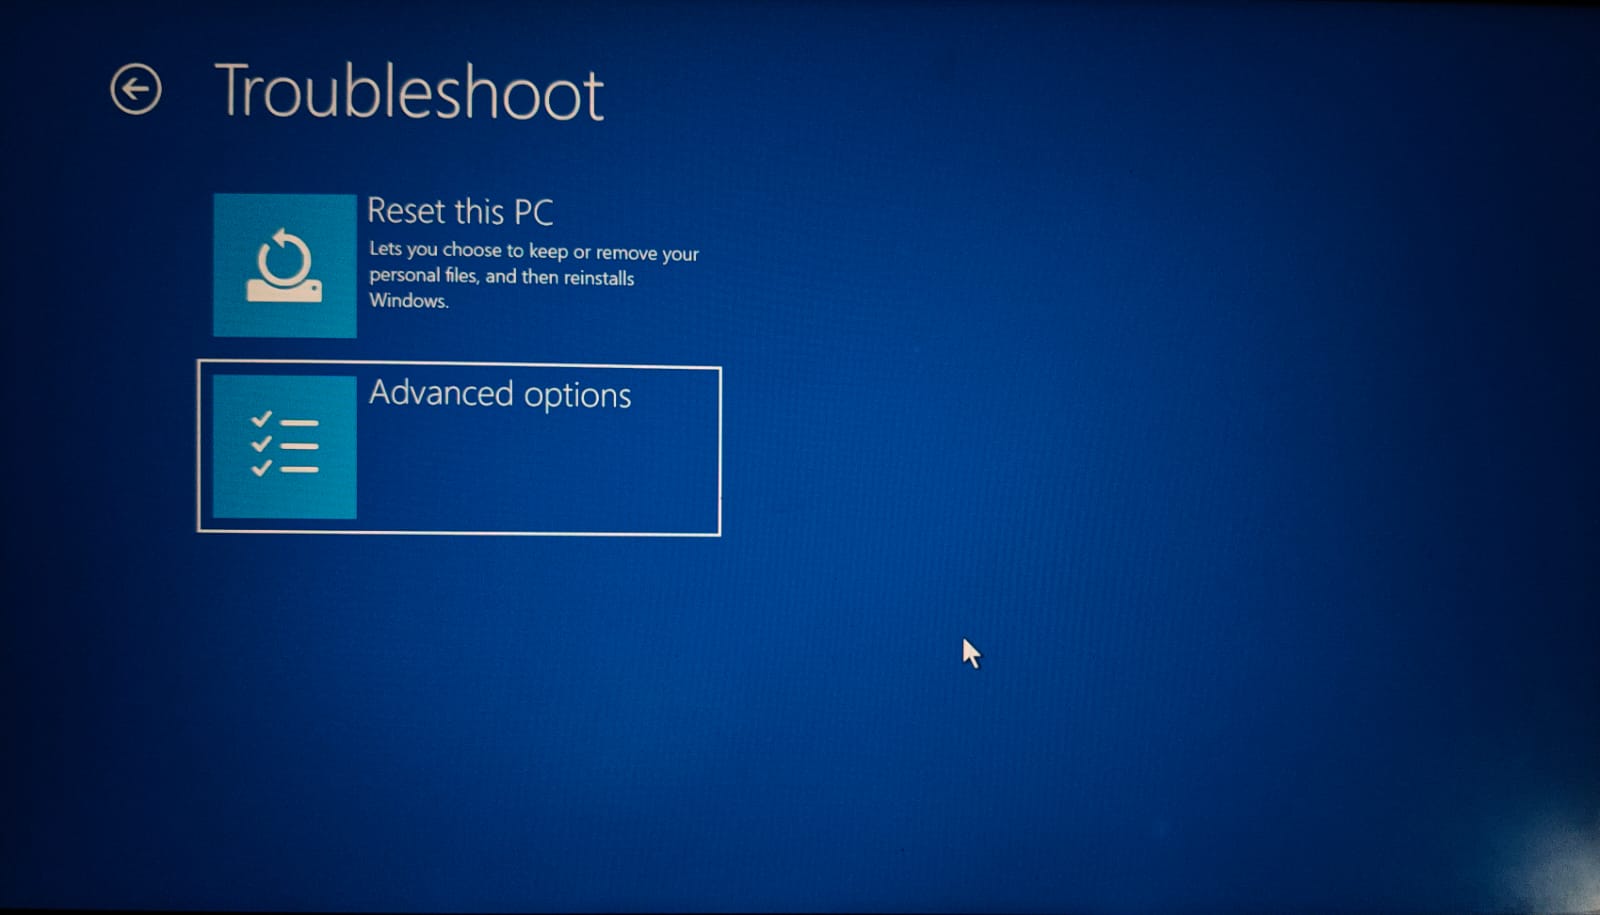
- Then, click on Advanced options.

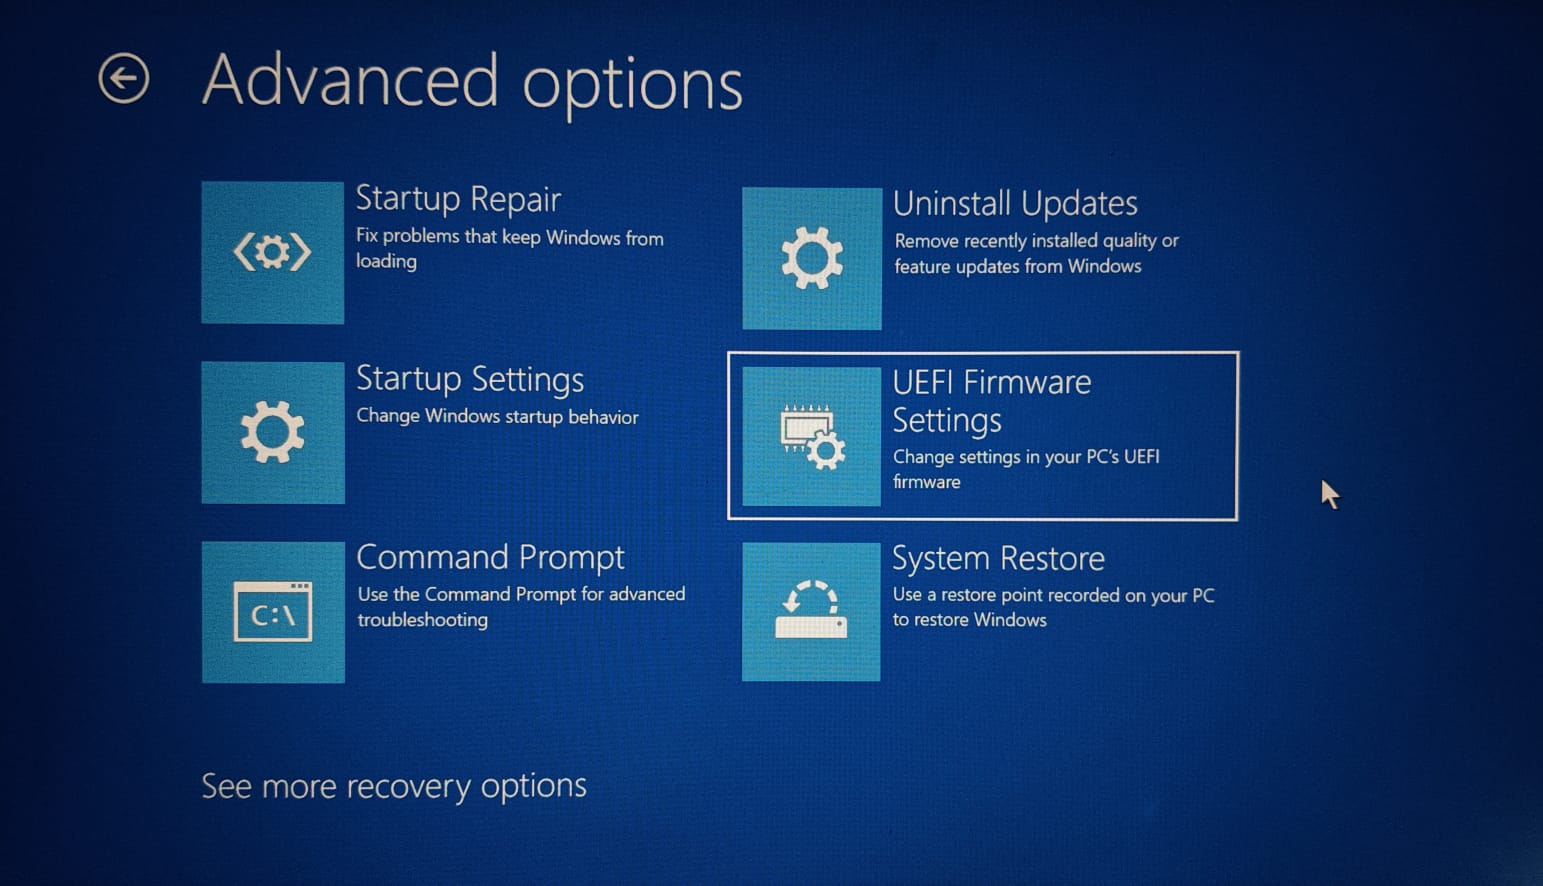
- Under Advanced options, select UEFI Firmware Settings.

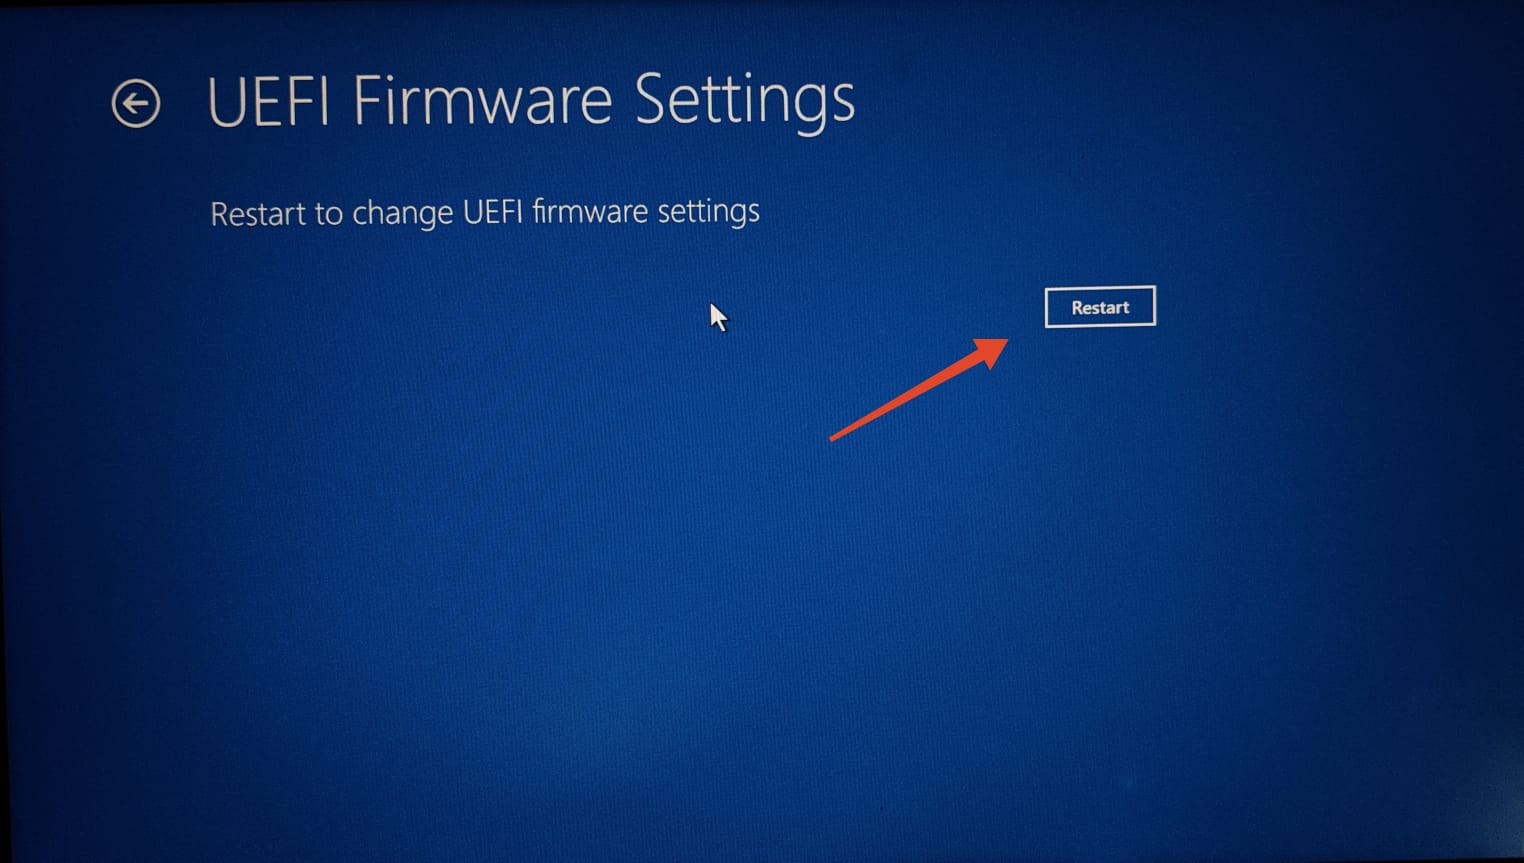
- Click on Restart to enter the BIOS settings.

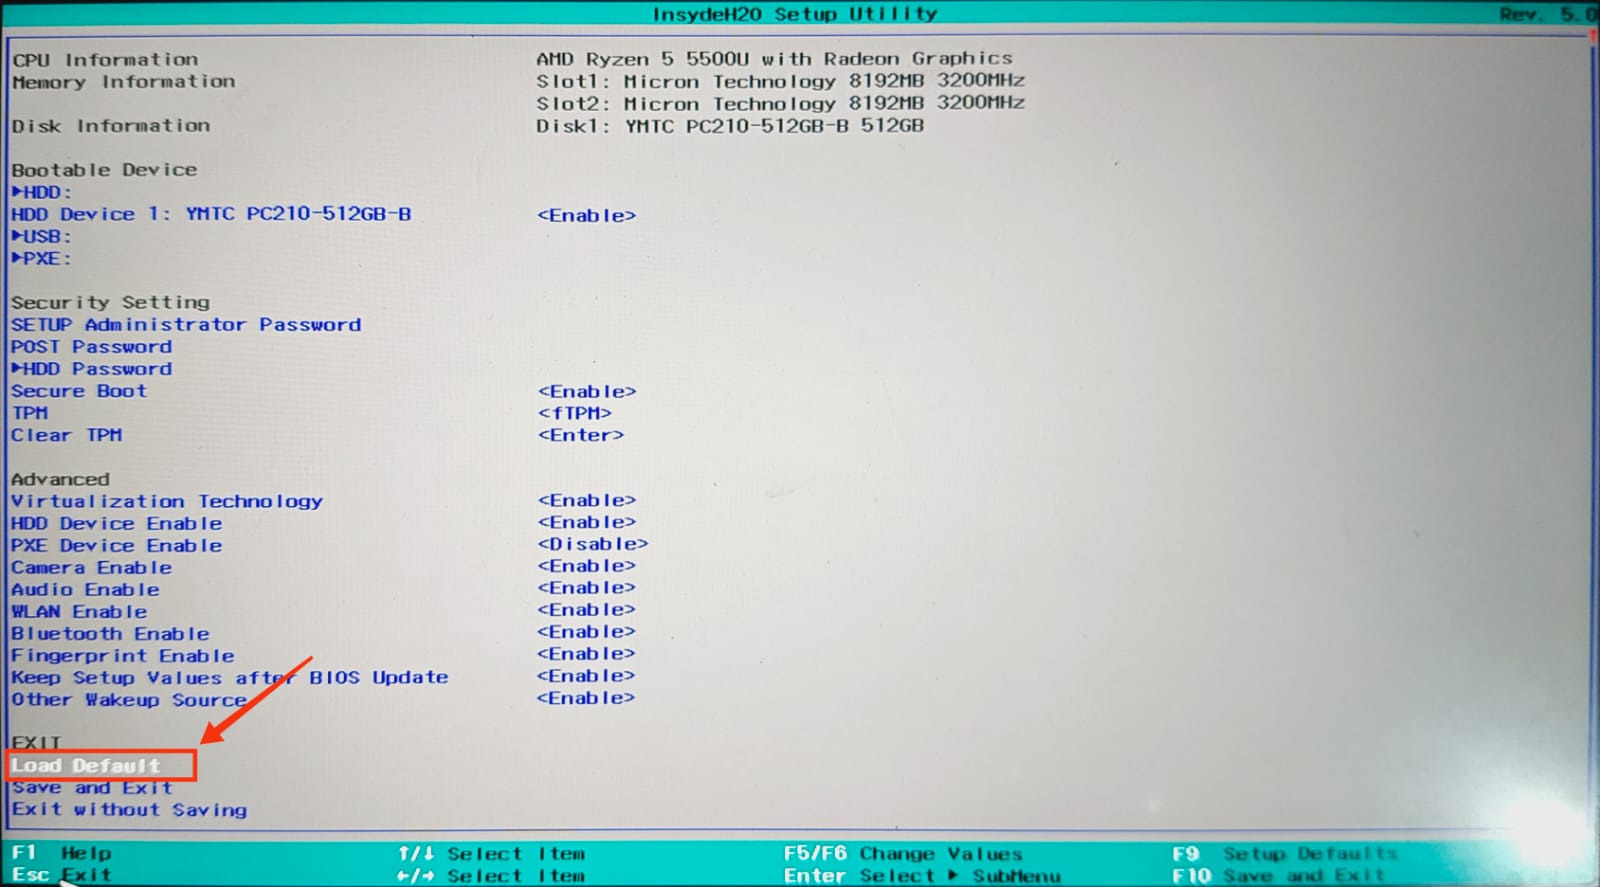
- Navigate to the Exit section of the BIOS menu using the arrow keys, select “Load default” or a similar option, and press Enter. The BIOS menu on your computer may be different.

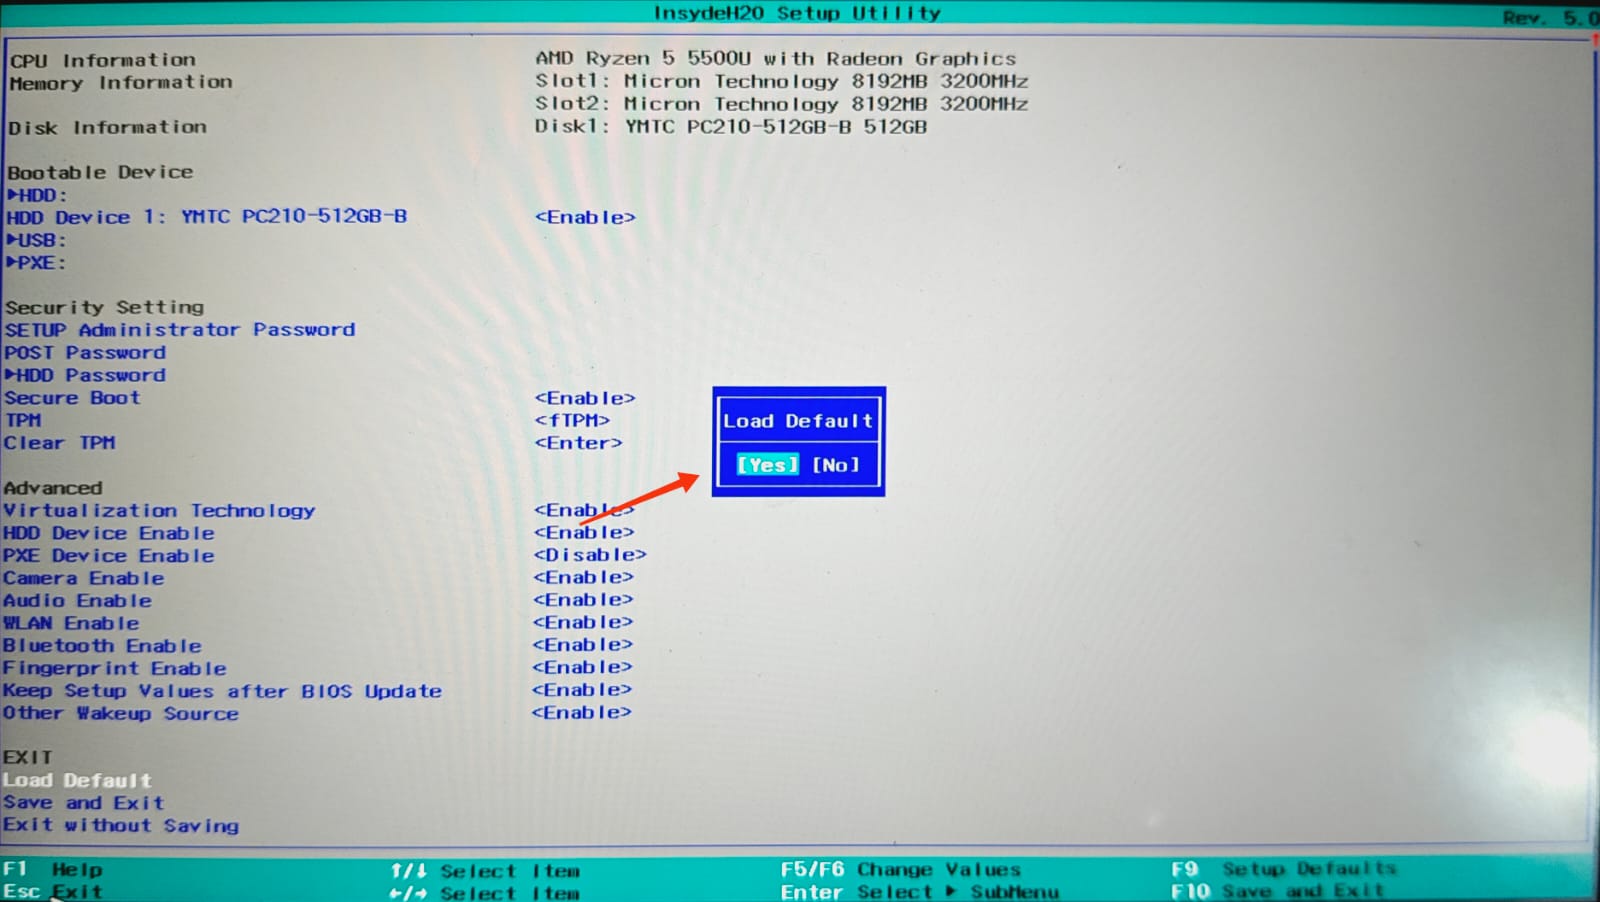
- Select Yes when prompted.

- Finally, find the option to Save and Exit the BIOS. In my case, it’s the F10 hotkey. Press the hotkey and select Yes to confirm.
Fix 9: Reset Windows
As a last resort, resetting Windows can fix persistent issues that other methods do not resolve with regular troubleshooting. It is recommended to perform a clean reset to make sure there are no traces of the issue left. Follow the steps below.
Note: If you’re using a PC with custom drivers, make sure to backup to those drivers before resetting the PC.
- Press the Windows key + I to open the Settings app.
- Now, click on System from the left menu.
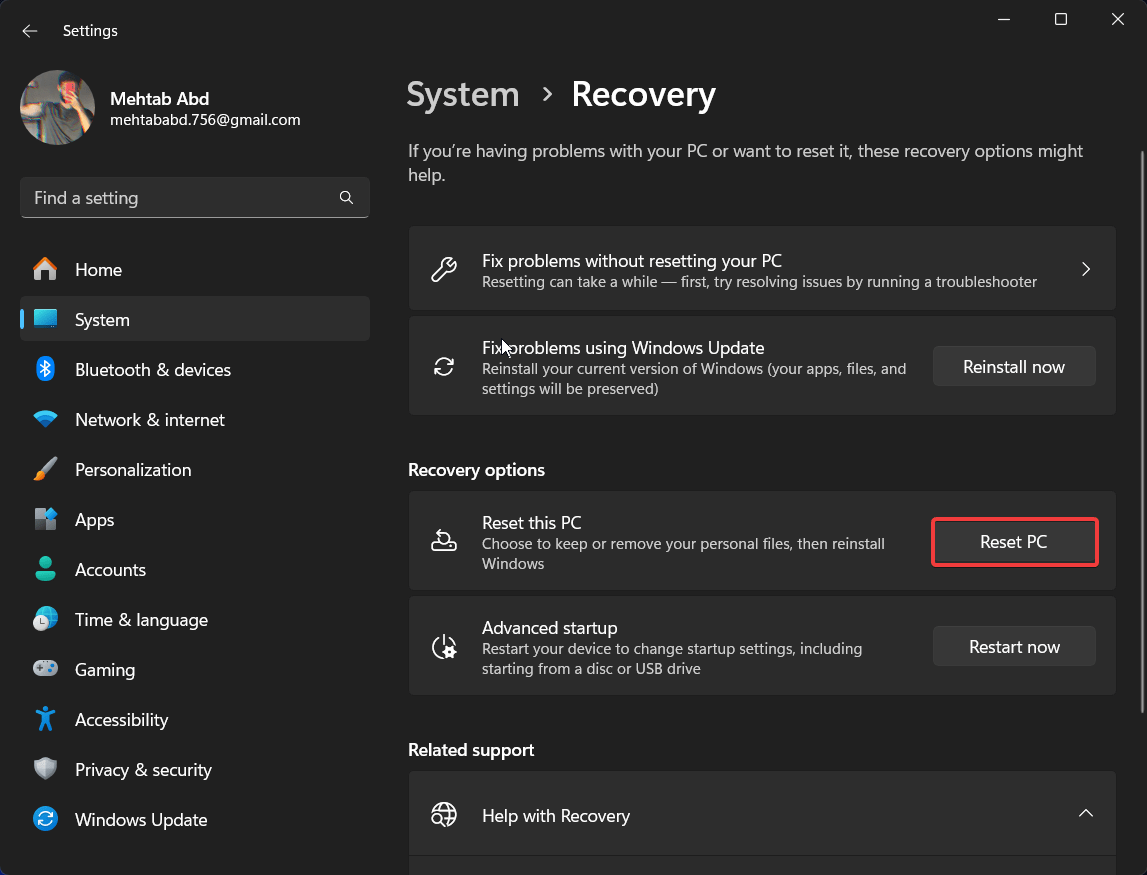
- Scroll down and click on Recovery.
- Click on the Reset PC button.
- Select Remove Everything. This will remove everything on your computer, including personal files, apps, and settings.

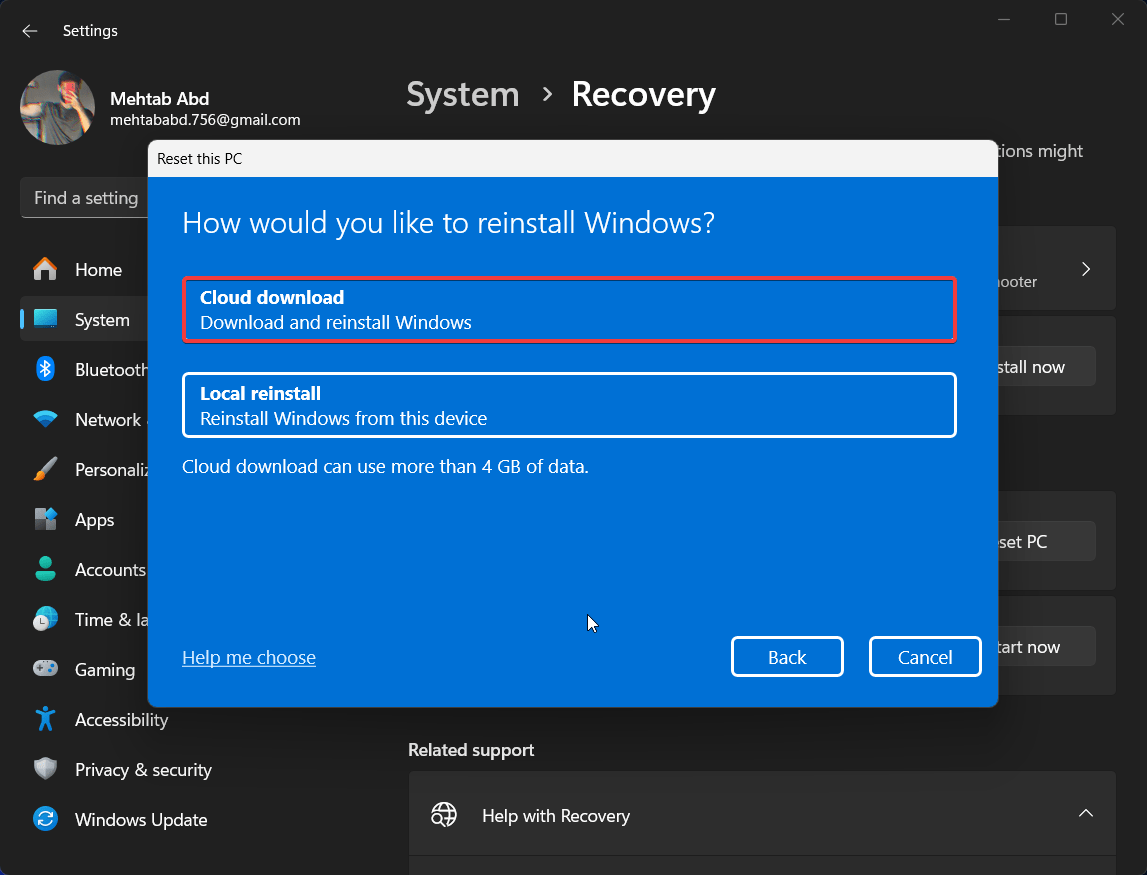
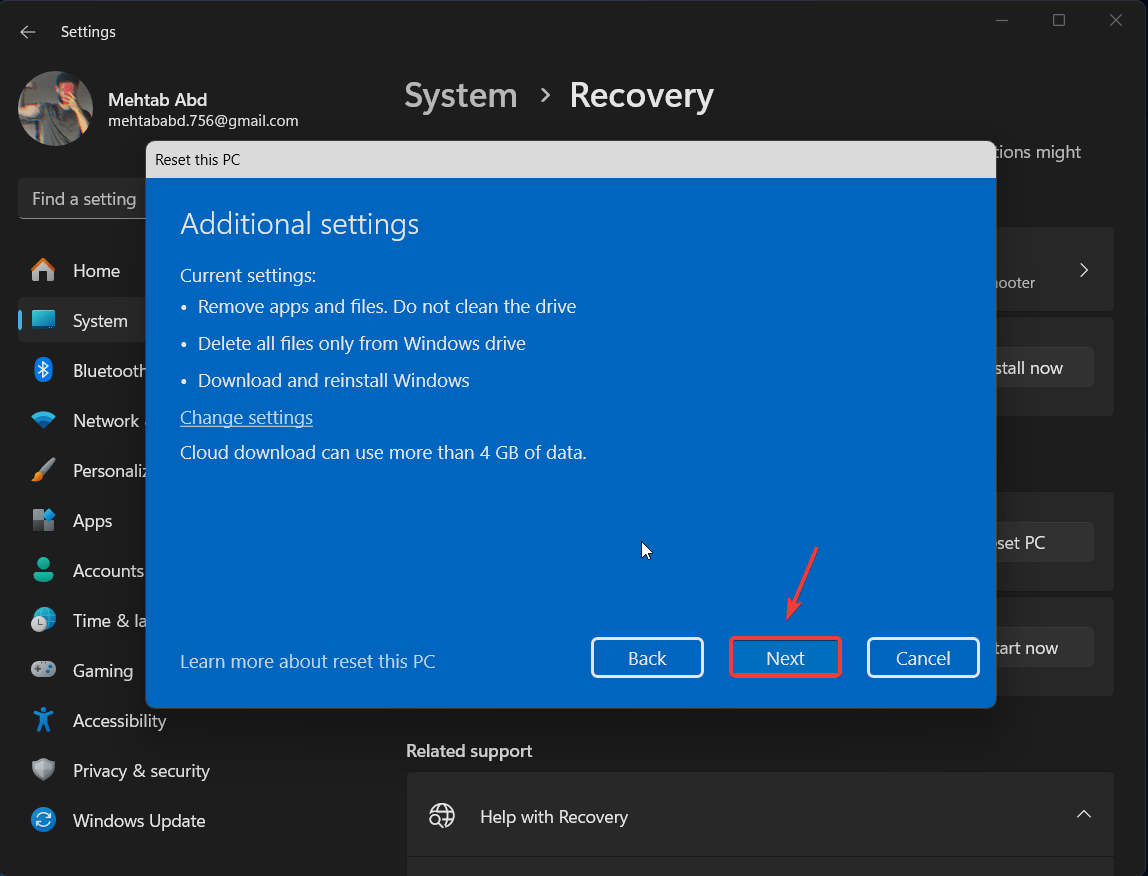
- Choose Cloud download and select Next. Make sure you have a stable internet connection.
- Now, connect your PC to the power source and follow the on-screen instructions.

- Resetting your PC can take anywhere from 10 minutes to 1 hour, depending on your computer’s hardware and the internet speed.
Fix 10: Seek Professional Help
If you’re still facing the same issue after trying everything mentioned in this article, your PC likely has a hardware issue that needs to be addressed by a professional. This can be your nearest repair shop or your PC/laptop manufacturer.
Final Words
We hope that this article has helped you recover from the automatic shutdown issue on your Windows 11 computer. Make sure that your computer is on the latest BIOS, Windows, and driver updates, running at optimal temperatures, and is free of any malware to prevent this from happening again.
Finally, keep your system files secure by running an SFC scan regularly. If you have any further questions or if you want to let us know of a fix that we missed here, let us know in the comments section below.
If you've any thoughts on What to do if your PC Randomly Shutting Down, then feel free to drop in below comment box. Also, please subscribe to our DigitBin YouTube channel for videos tutorials. Cheers!