This guide explains various useful troubleshooting methods to fix the Windows Media Player on a Windows 11 machine. While playing an audio or video file on the popular native media player from Windows, you may get the ‘Windows Media Player Has Stopped Working’ error.
For long-time Windows users, Windows Media Player is one of the essential apps in the Windows ecosystem. It supports a wide variety of audio and video files. Over the various generations of MS Windows, the Windows Media Player has undergone a significant transformation, aesthetic and feature-wise.
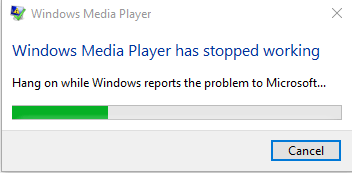
Reasons for Windows Media Player Has Stopped Working Issue
Here are some of the reasons why Windows Media Player has become unresponsive.
- Bug on the current version of Windows Media Player installed on the PC.
- Technical issue in the current system version running on the computer.
- You are playing a file on Windows Media Player that is corrupt.
- The file you are trying to play is in an unsupported format.
- One or more system files on the PC have become corrupt, causing the Windows Media Player to become dysfunctional.
Tips to Fix Windows Media Player Not Working on Windows 11
Implement these troubleshooting tips to fix the Windows Media Player in Windows 11.
1. Force Close and Relaunch Windows Media Player
Start the troubleshooting with force closing the Media Player from Task Manager. Then launch it. Often, this simple trick can fix random glitches in the application.
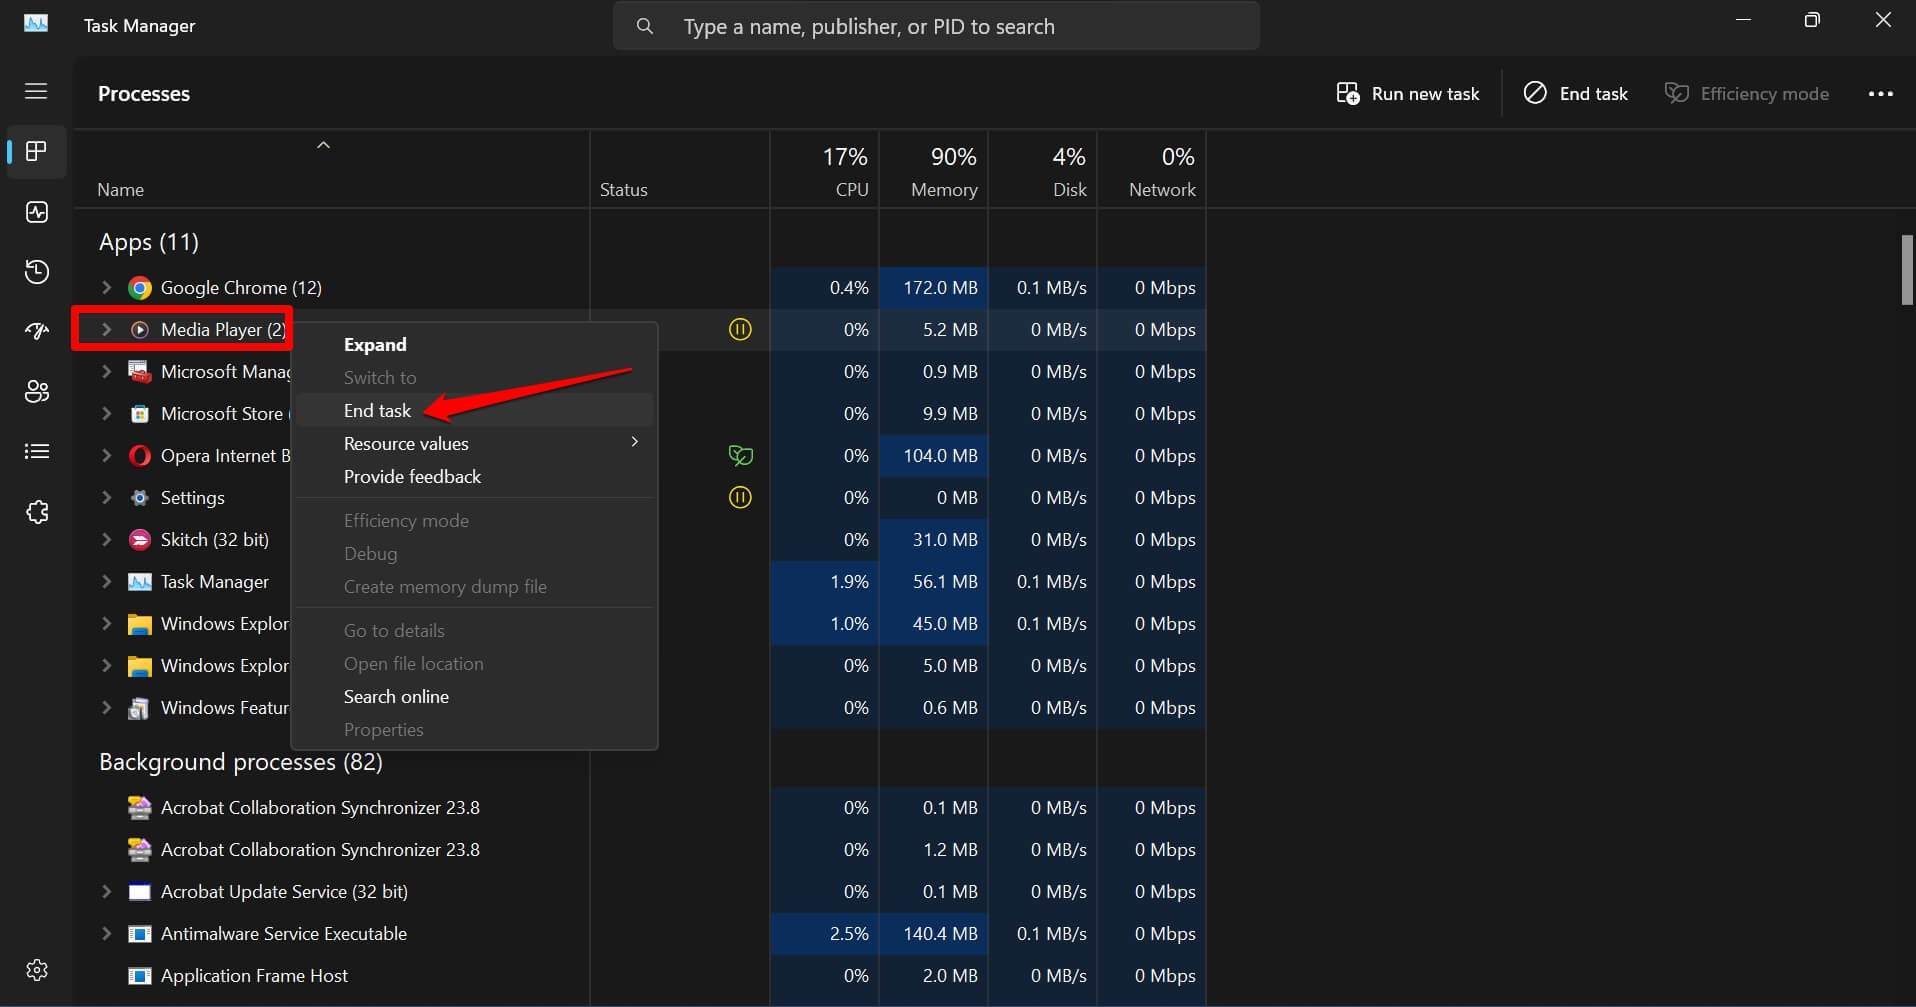
- Press Ctrl + Shift + Esc to launch the Task Manager.
- Go to Media Player, and right-click on it.
- Select End Task.

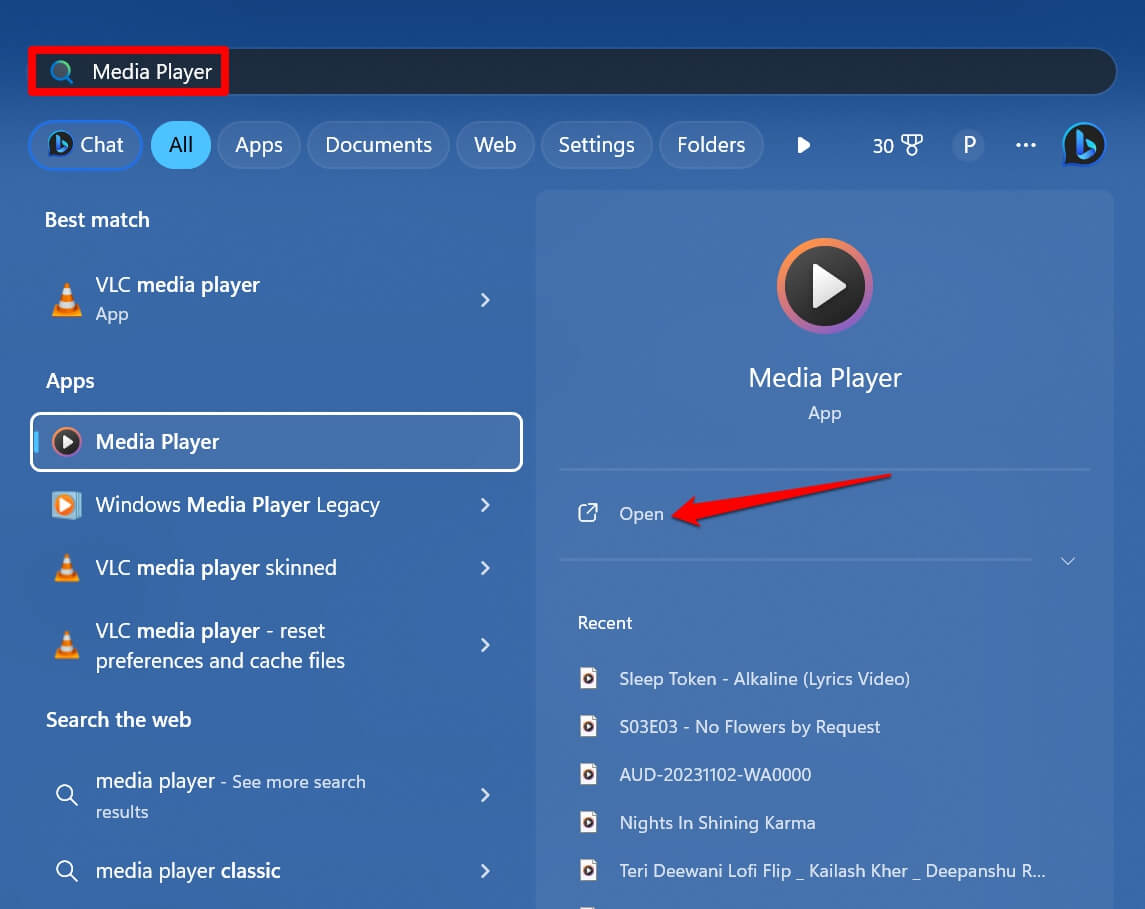
- Press the Windows key to launch the search panel.
- Type Media Player and click Open.

2. Disable and Re-enable Windows Media Player
You can disable the Media Player and re-enable it on Windows 11. This can often fix bugs in the application.
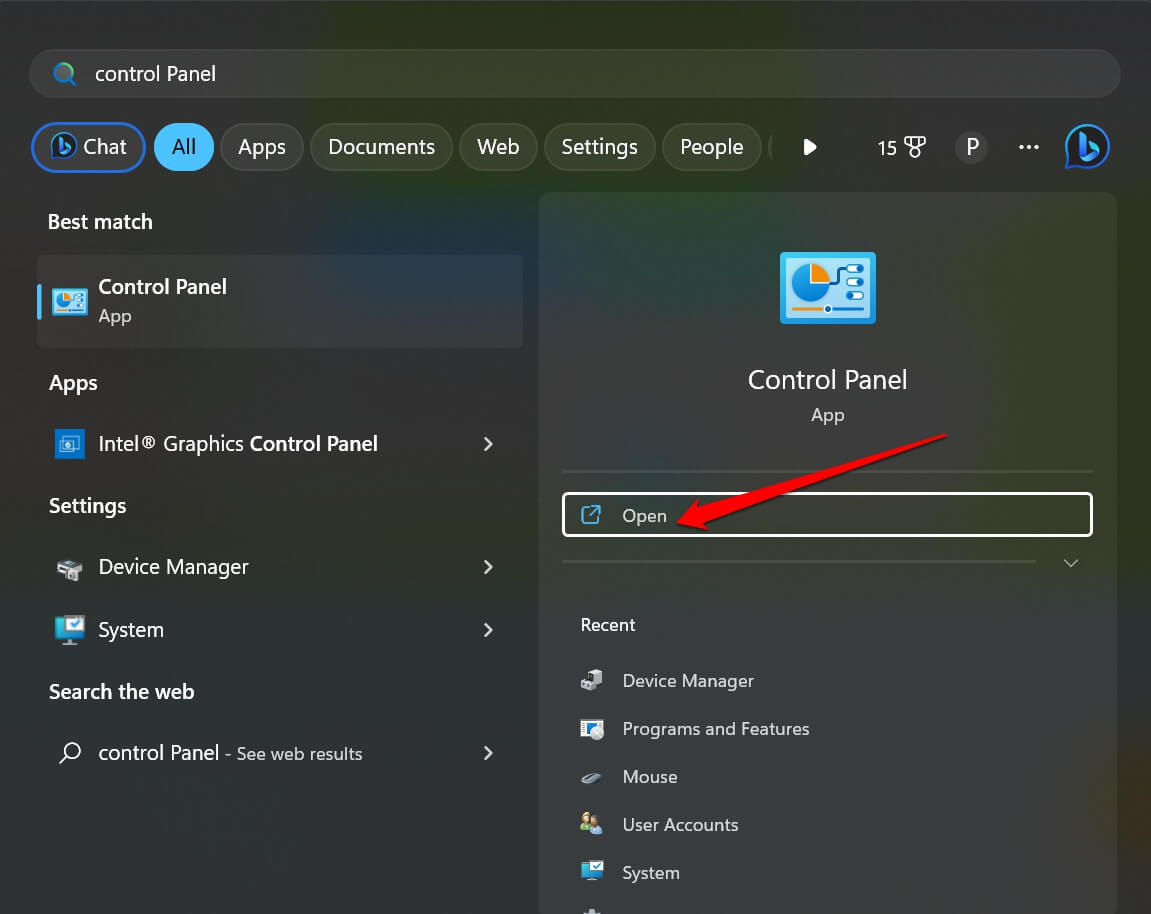
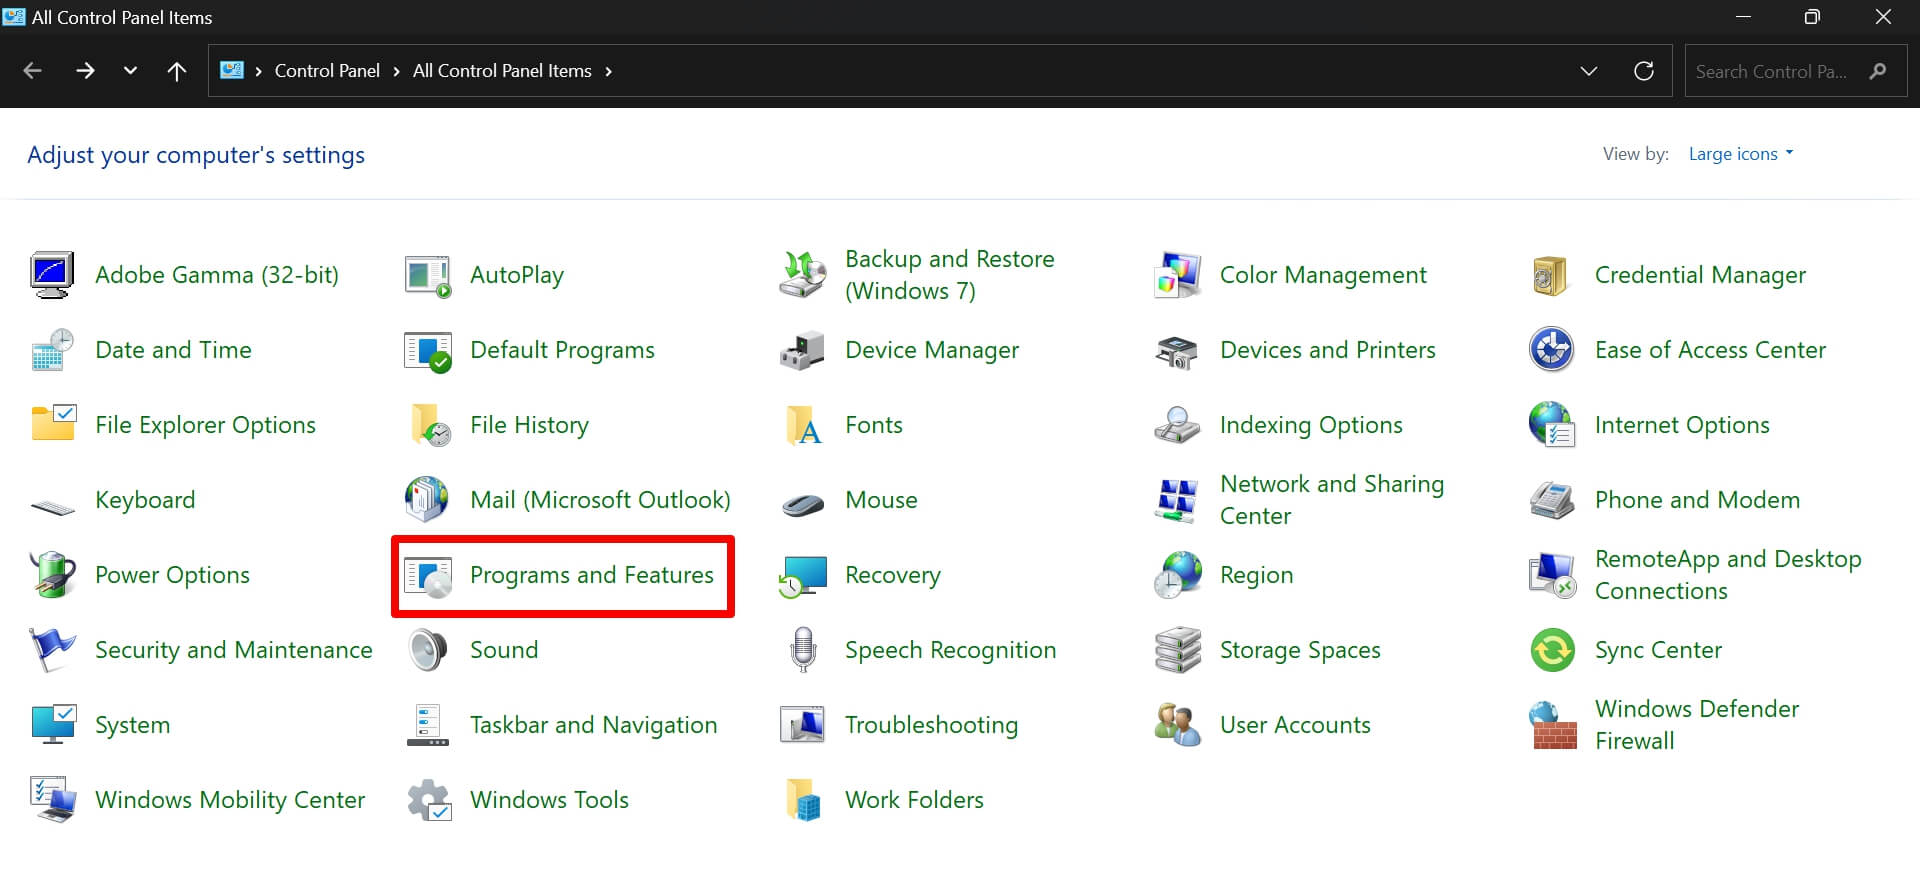
- Launch Control Panel using Windows Search.

- Go to Programs and Features.

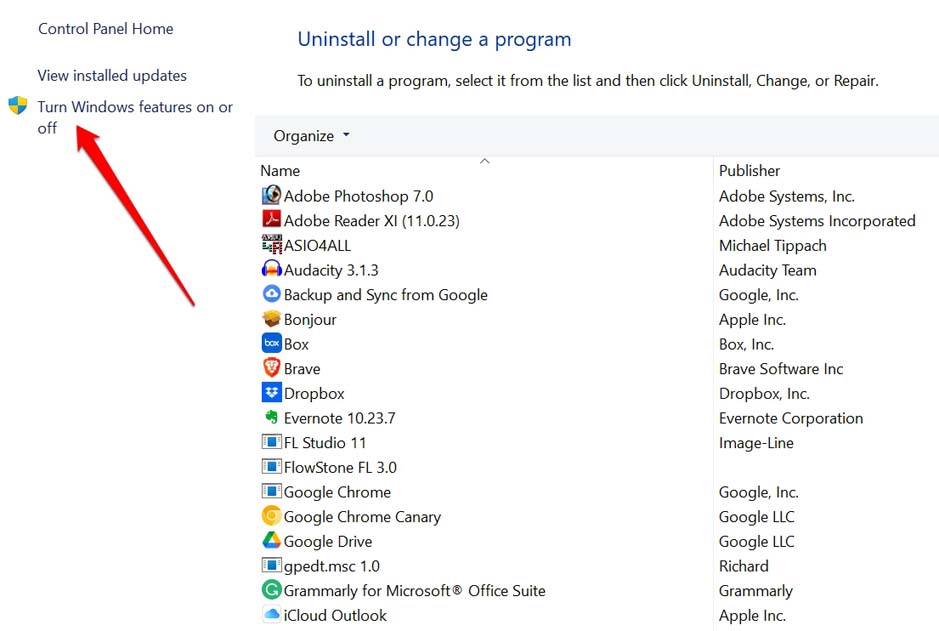
- On the upper-left corner, click the option Turn Windows feature on or off.

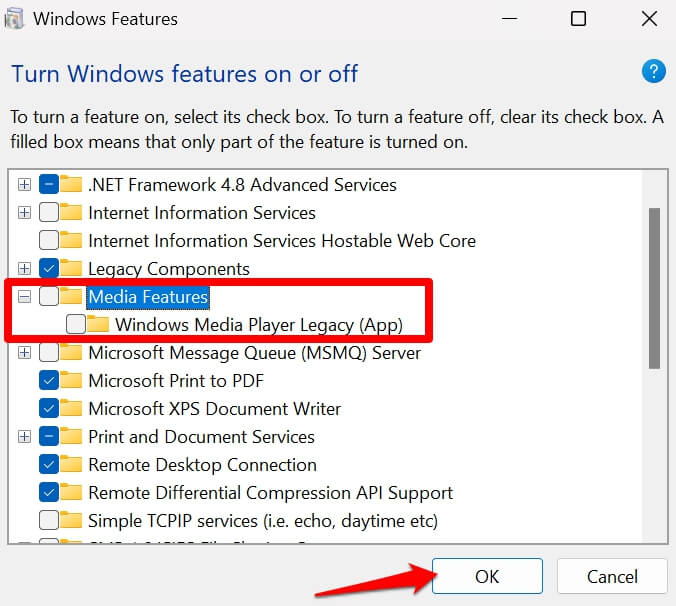
- On the dialog box, uncheck Media Features and Windows Media Player Legacy.

- Now, restart the PC and follow the Steps 1 to 3.
- Check the box next to Media Features and Windows Media Player Legacy.
Launch the Media Player and start playing audio or video files on it.
3. Use the Windows Media Player Troubleshooter
Use the dedicated in-built troubleshooter for Windows Media Player and fix any issues with the app.
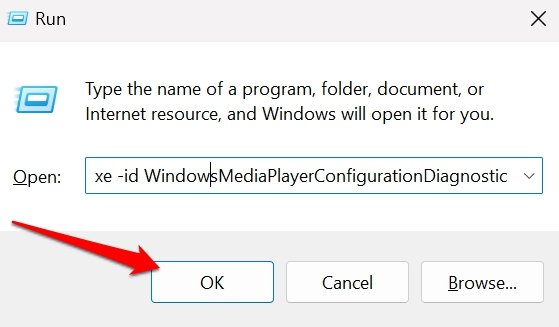
- Press Windows + R to launch the Run box.
- Type msdt.exe -id WindowsMediaPlayerConfigurationDiagnostic
- Press enter.

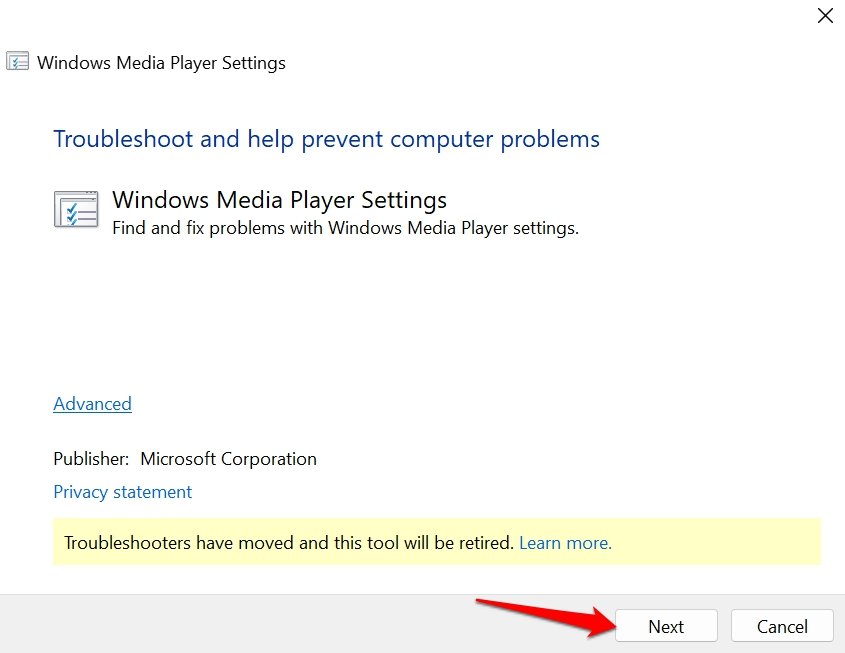
- Click Next on the troubleshooter dialog box.

Follow the instructions to continue and complete the troubleshooting process. After the troubleshooting, launch Media Player and check if it is working.
4. Update Windows Media Player
You can install version updates for Windows Media Player from the Microsoft Store. That will fix the bugs on the current build of the application that your PC is running.
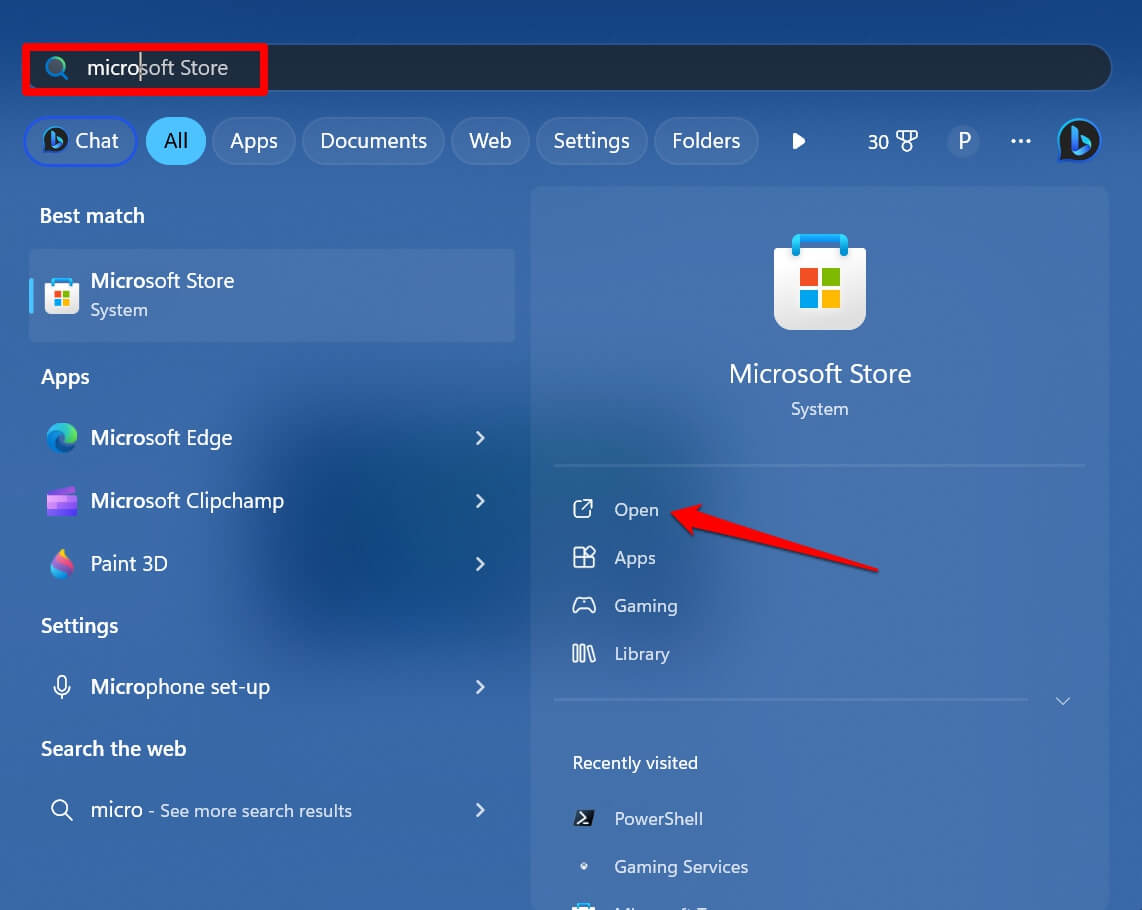
- Press the Windows key.
- In the search panel, type Microsoft Store.

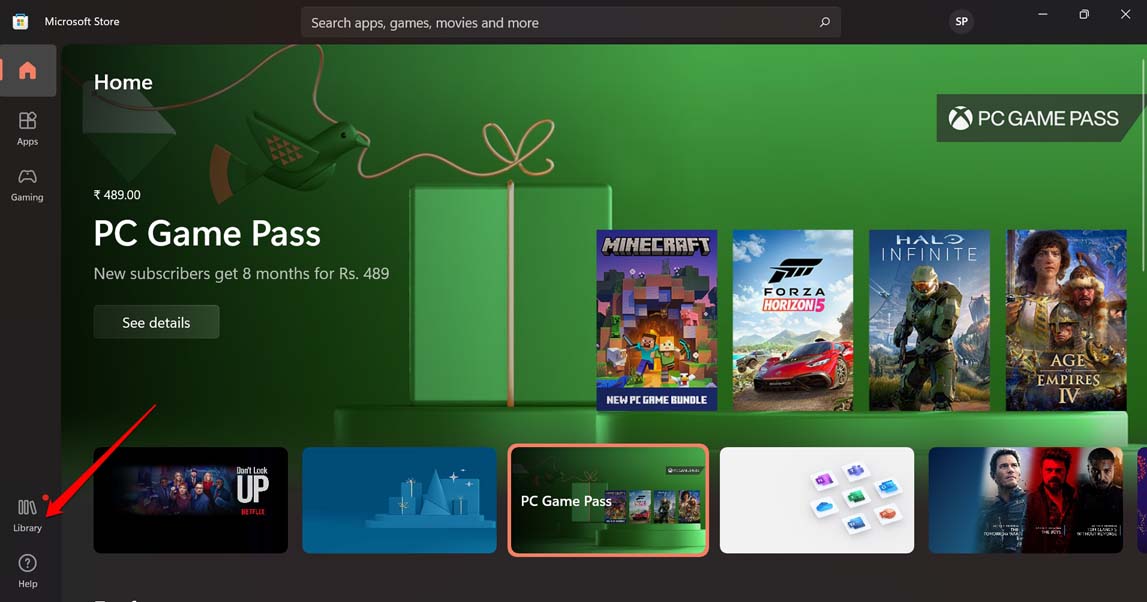
- Click on Library.

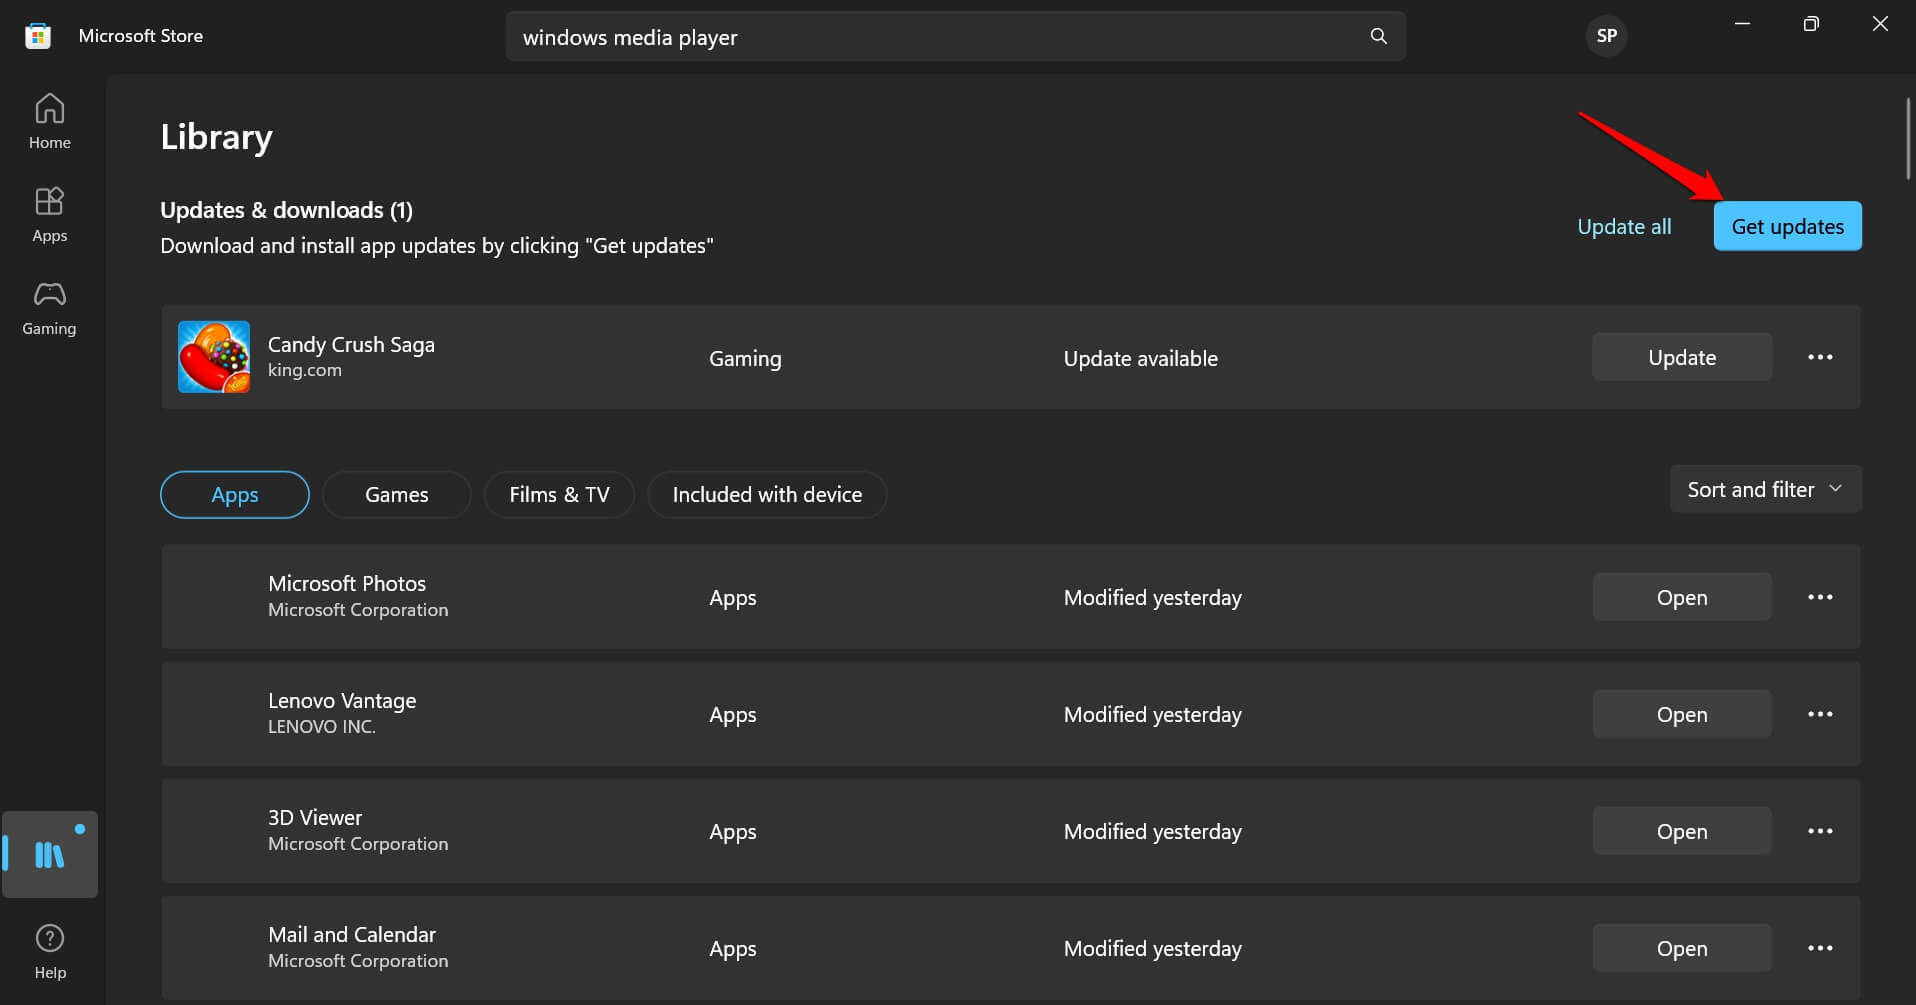
- Next, click on Get All Updates.

- If a new update for the Media Player is available, it will automatically install.
- Relaunch Windows Media Player after the update process is complete.
NOTE: The updates will be fetched only when the computer is connected to a WiFi.
5. Repair Windows Media Player
Often, repairing an application on a Windows app can fix the bugs. Here are the steps to repair the Media Player app on Windows 11.
- Press Windows + I hotkeys to launch the settings.
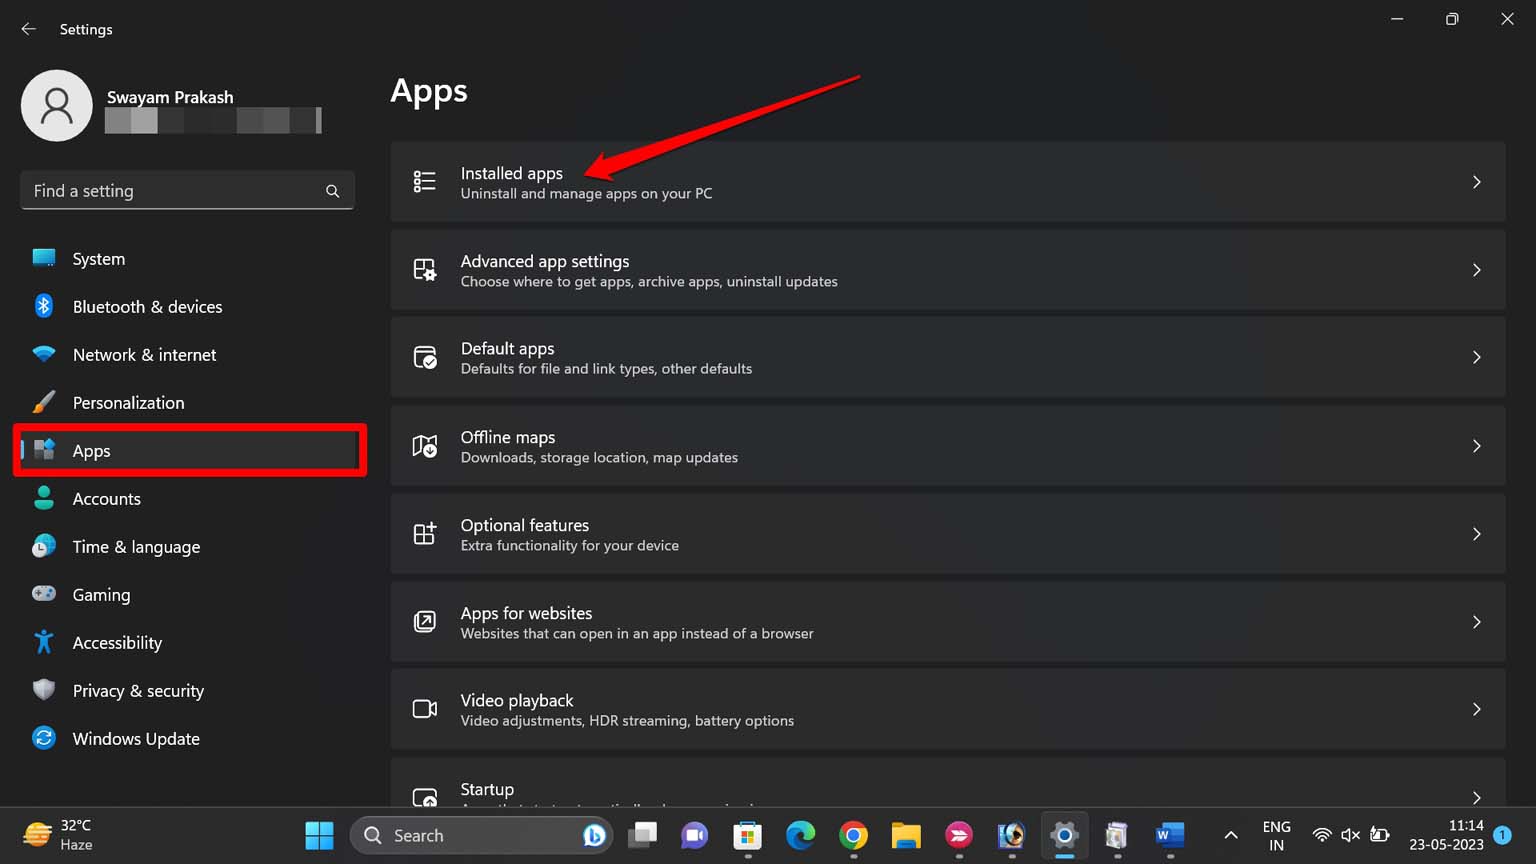
- On the left side, click on Apps.
- Go to Installed Apps.

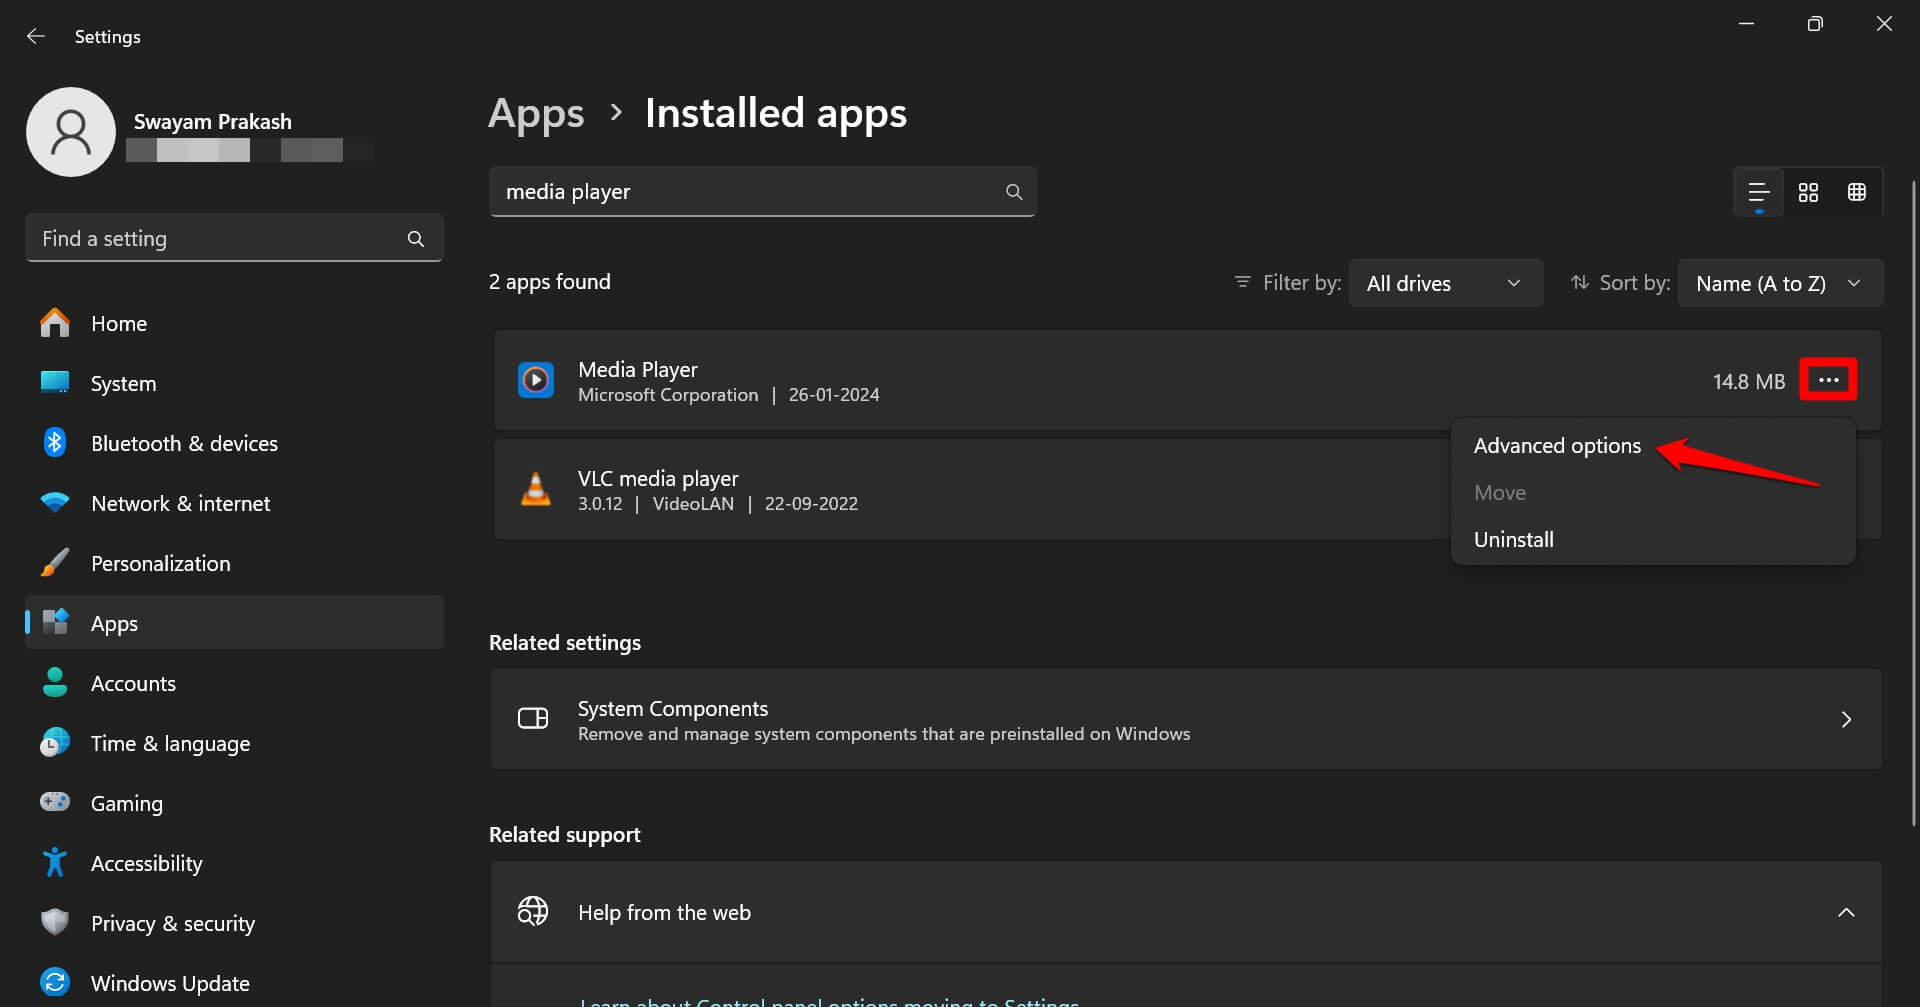
- In the search field, type Media Player.
- Click the 3-dot menu icon next to Media Player.
- Select Advanced Options.

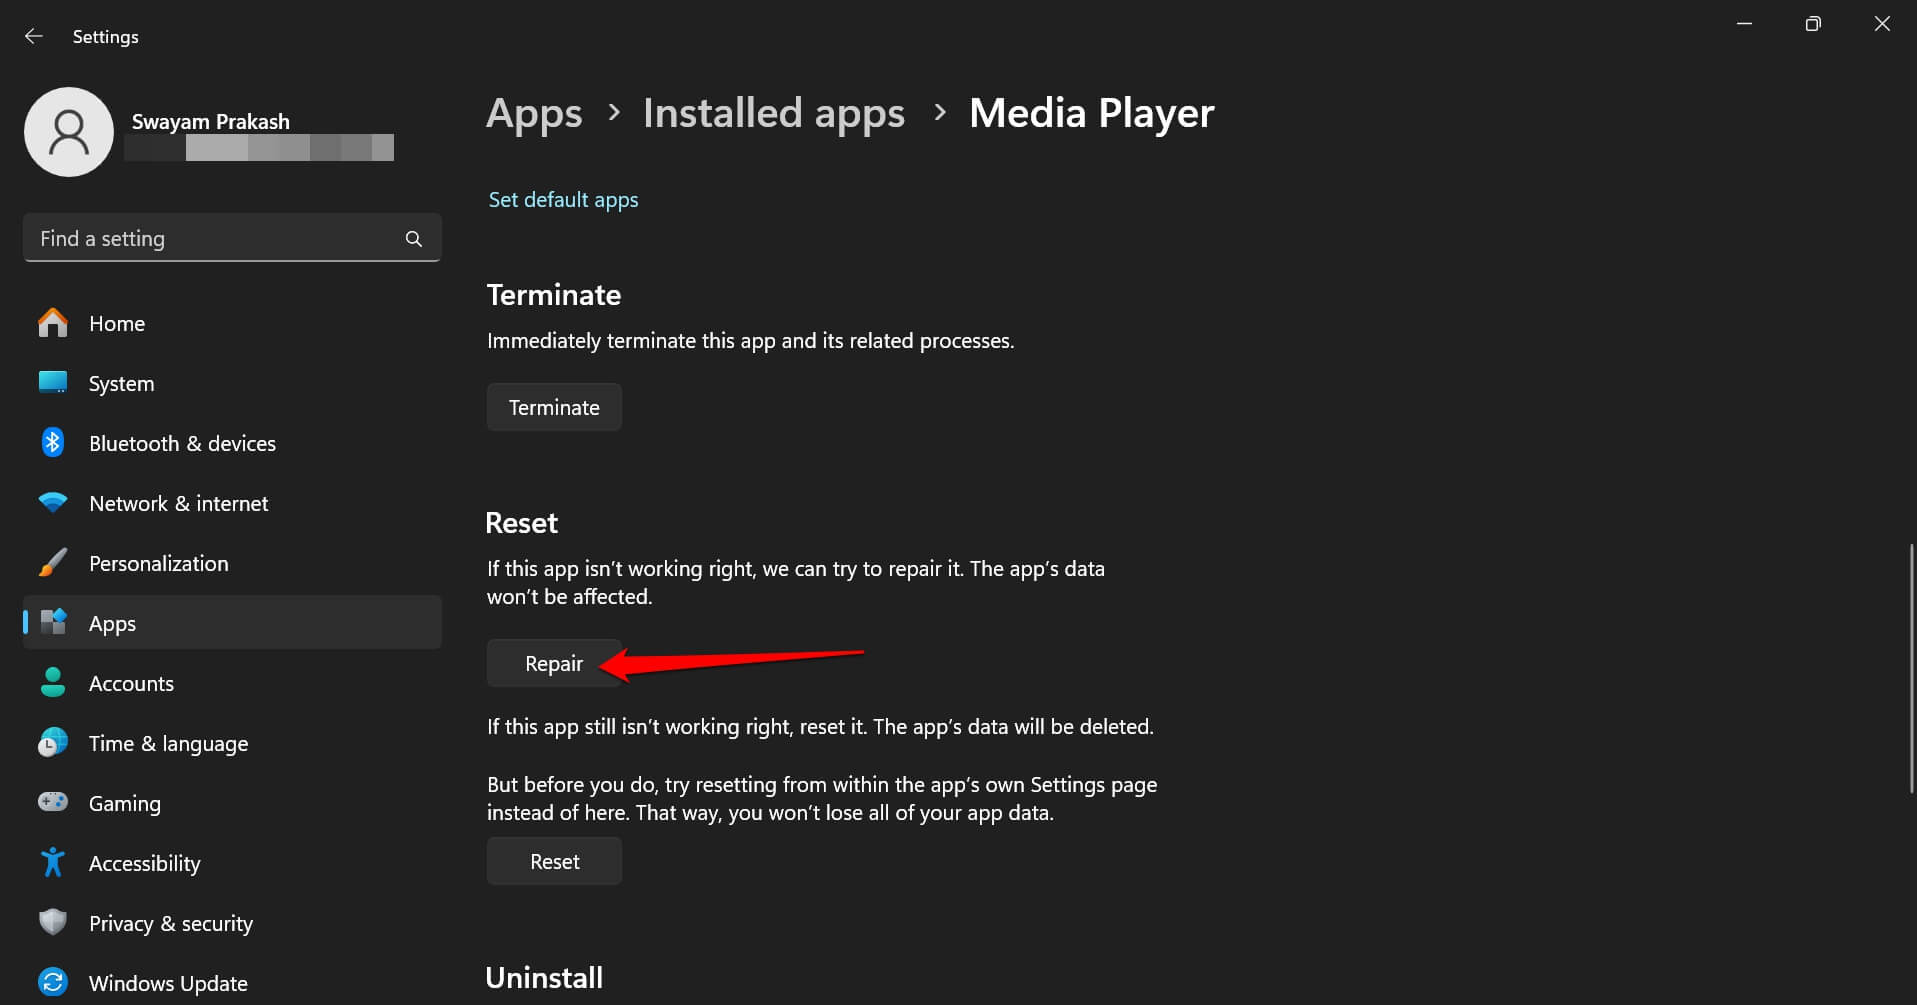
- Scroll to the Repair button. Click on it.

Follow the instructions to complete the repair process. Once the repair is over, relaunch the Media Player and check if it plays the audio and video files without any errors.
TIP: You may also follow the above steps and Reset the app. A reset will change the settings within the app to default parameters and delete the app data.
6. Update the Audio Driver
If the Windows Media Player cannot play audio files, update the audio driver. Here are the steps to update the audio driver on Windows 11.
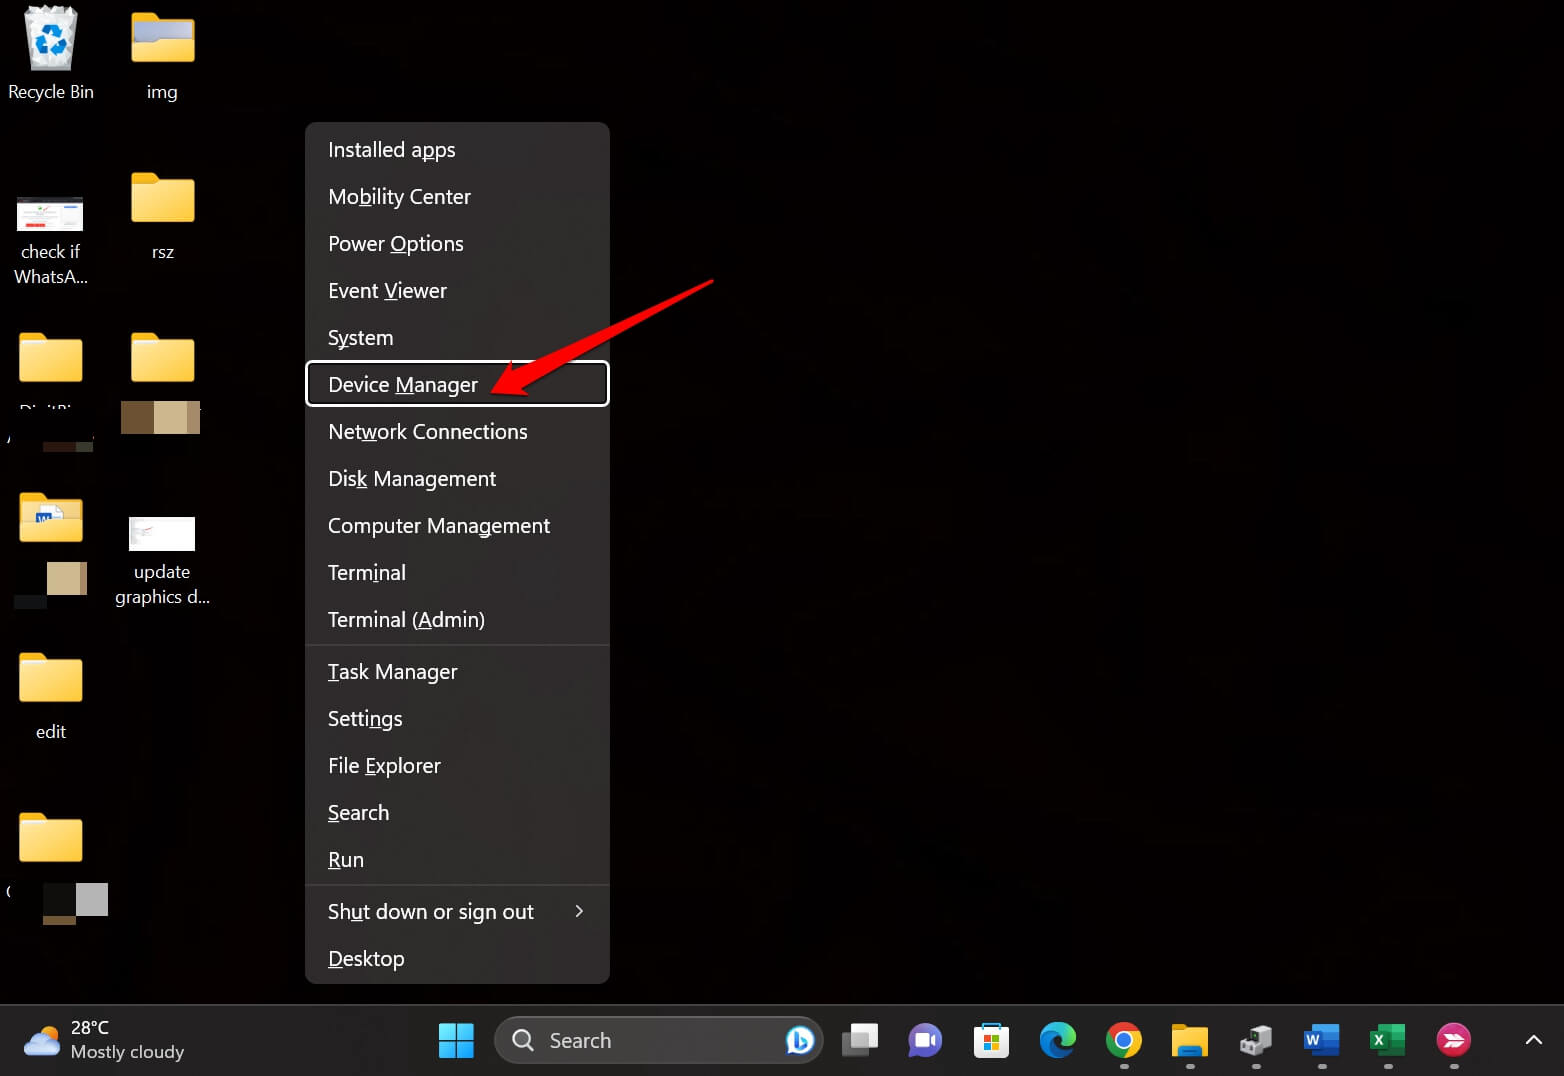
- Press Windows + X hotkeys.
- Select Device Manager from the menu.

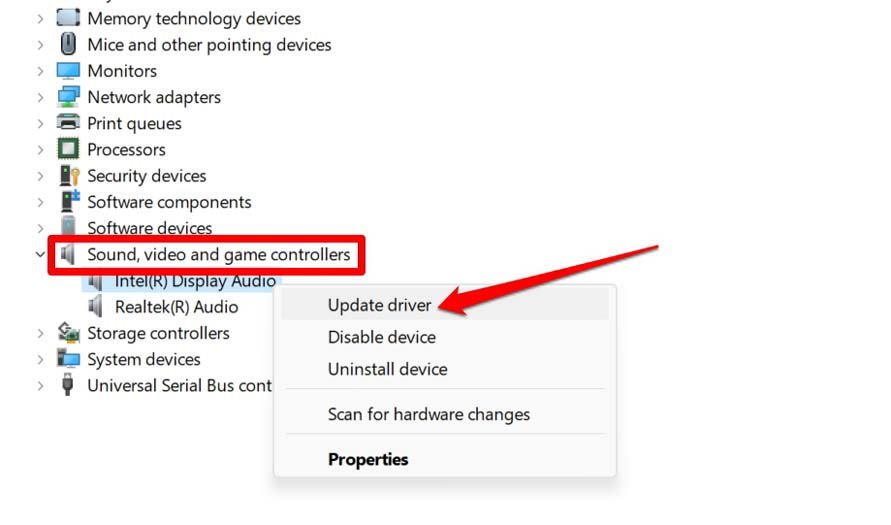
- Scroll to Sound, Video, and Game Controllers and expand it.
- Within that, right-click on the Audio driver and select Update Driver.

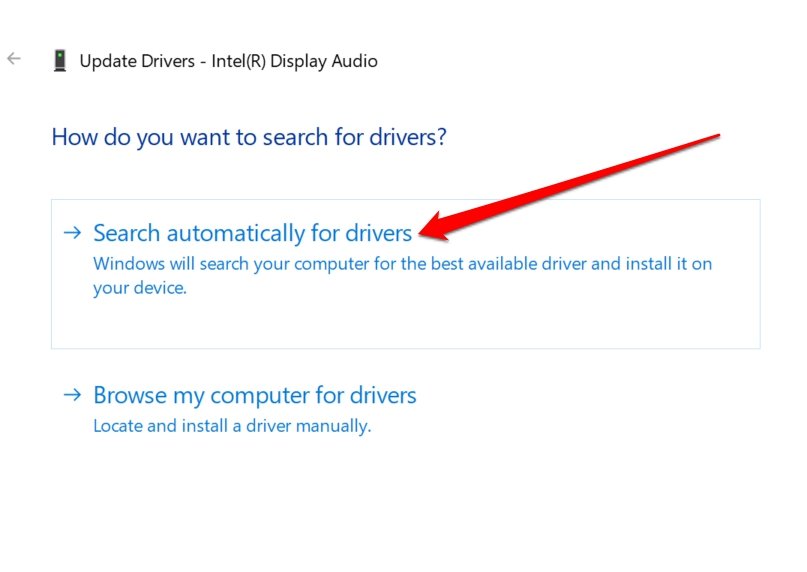
- Select Search Automatically for Drivers.

The system will start searching for the latest drivers and install them. Make sure your PC is connected to the WiFi.
7. Update the Graphics Driver
If you cannot play video files on Windows Media Player, update the graphics driver of the PC.
- Press Windows + X to launch the power user menu.
- Select Device Manager.

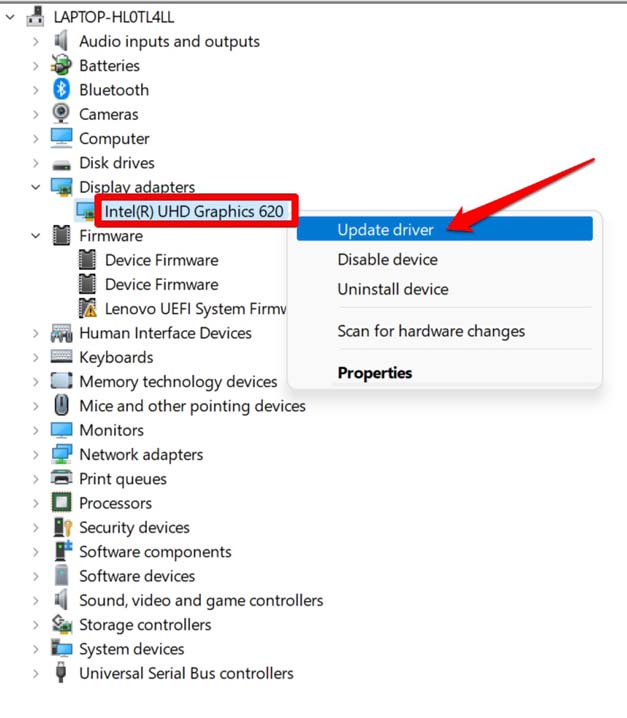
- Scroll to Display Adapter and expand it.
- Right-click on the graphics unit and select Update Driver.

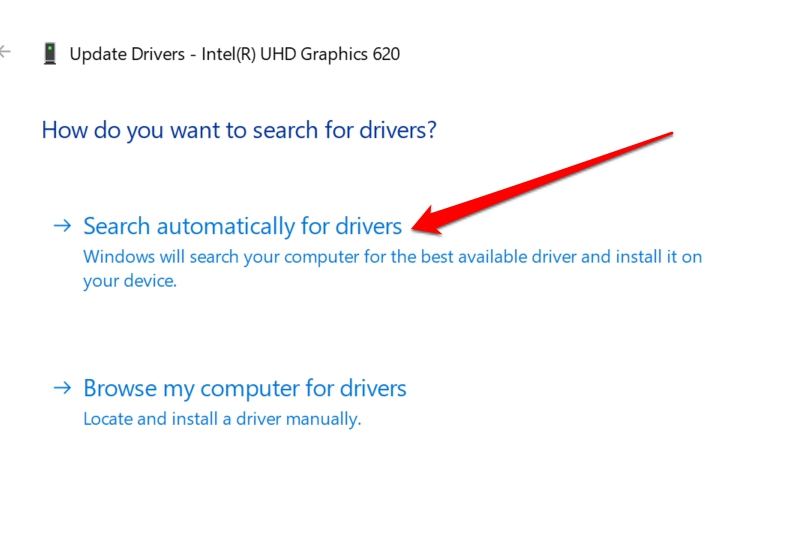
- Click on Search Automatically for Drivers.

Launch Media Player after the graphics driver is updated. Play a video and check if it runs without any error message.
8. Delete the Windows Media Player Library
This troubleshooting method will clear the junk data in the Windows Media Library. You can then run Media Player on Windows 11 without any errors.
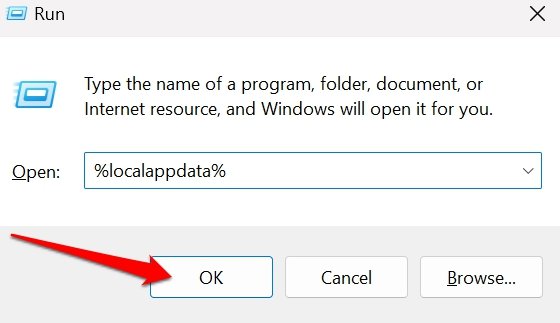
- Press Windows + R to access the Run box.
- Type %localappdata% and press enter.

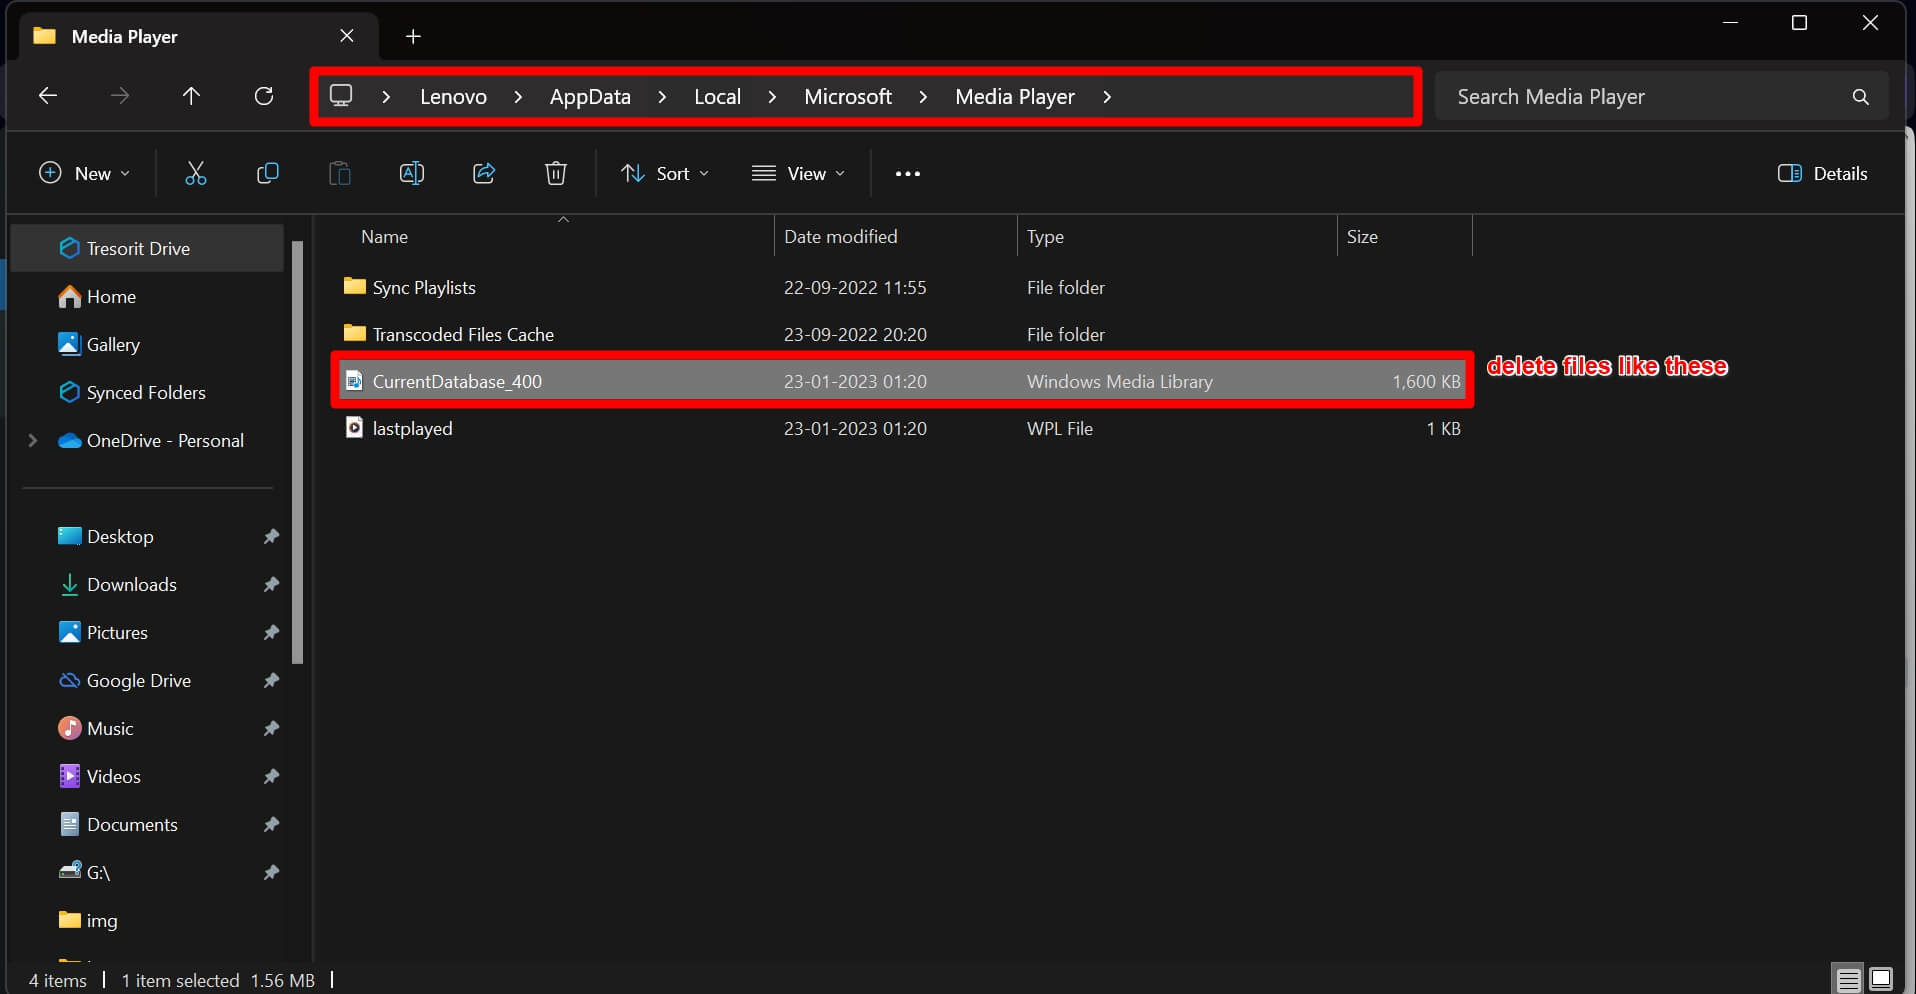
- Go to the folders Microsoft > Media Player.
- Select the files with the Type mentioned as Windows Media Library.
- Then press Shift + Delete to remove the selected files.

- Now, launch the Media Player.
The Windows Media Player should run without any problems.
9. Uninstall and Reinstall Media Player
If other tips and tricks do not fix the “Windows Media Player Has Stopped Working” error, you can uninstall the app temporarily. Following that, reinstall it from the Microsoft Store.
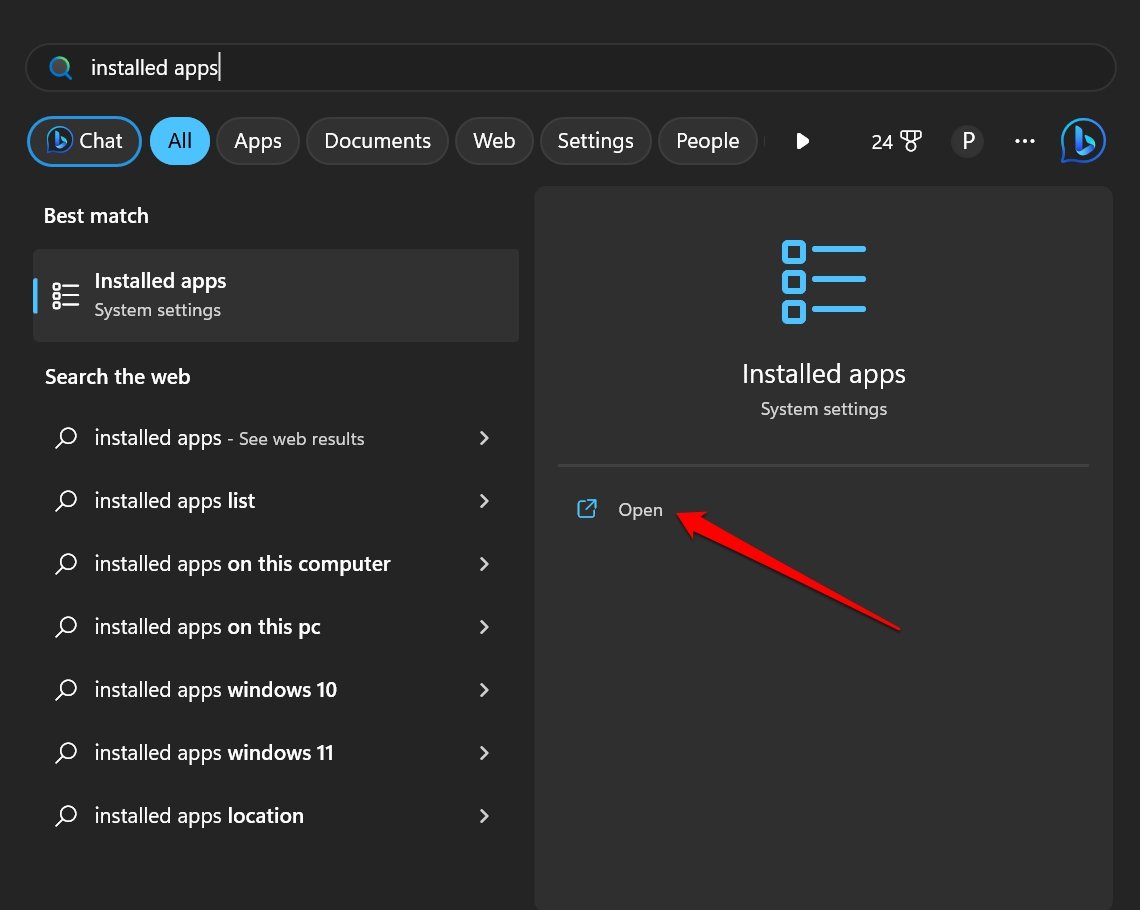
- Press Windows + S hotkeys to bring up the search.
- Type Installed Apps and click Open.

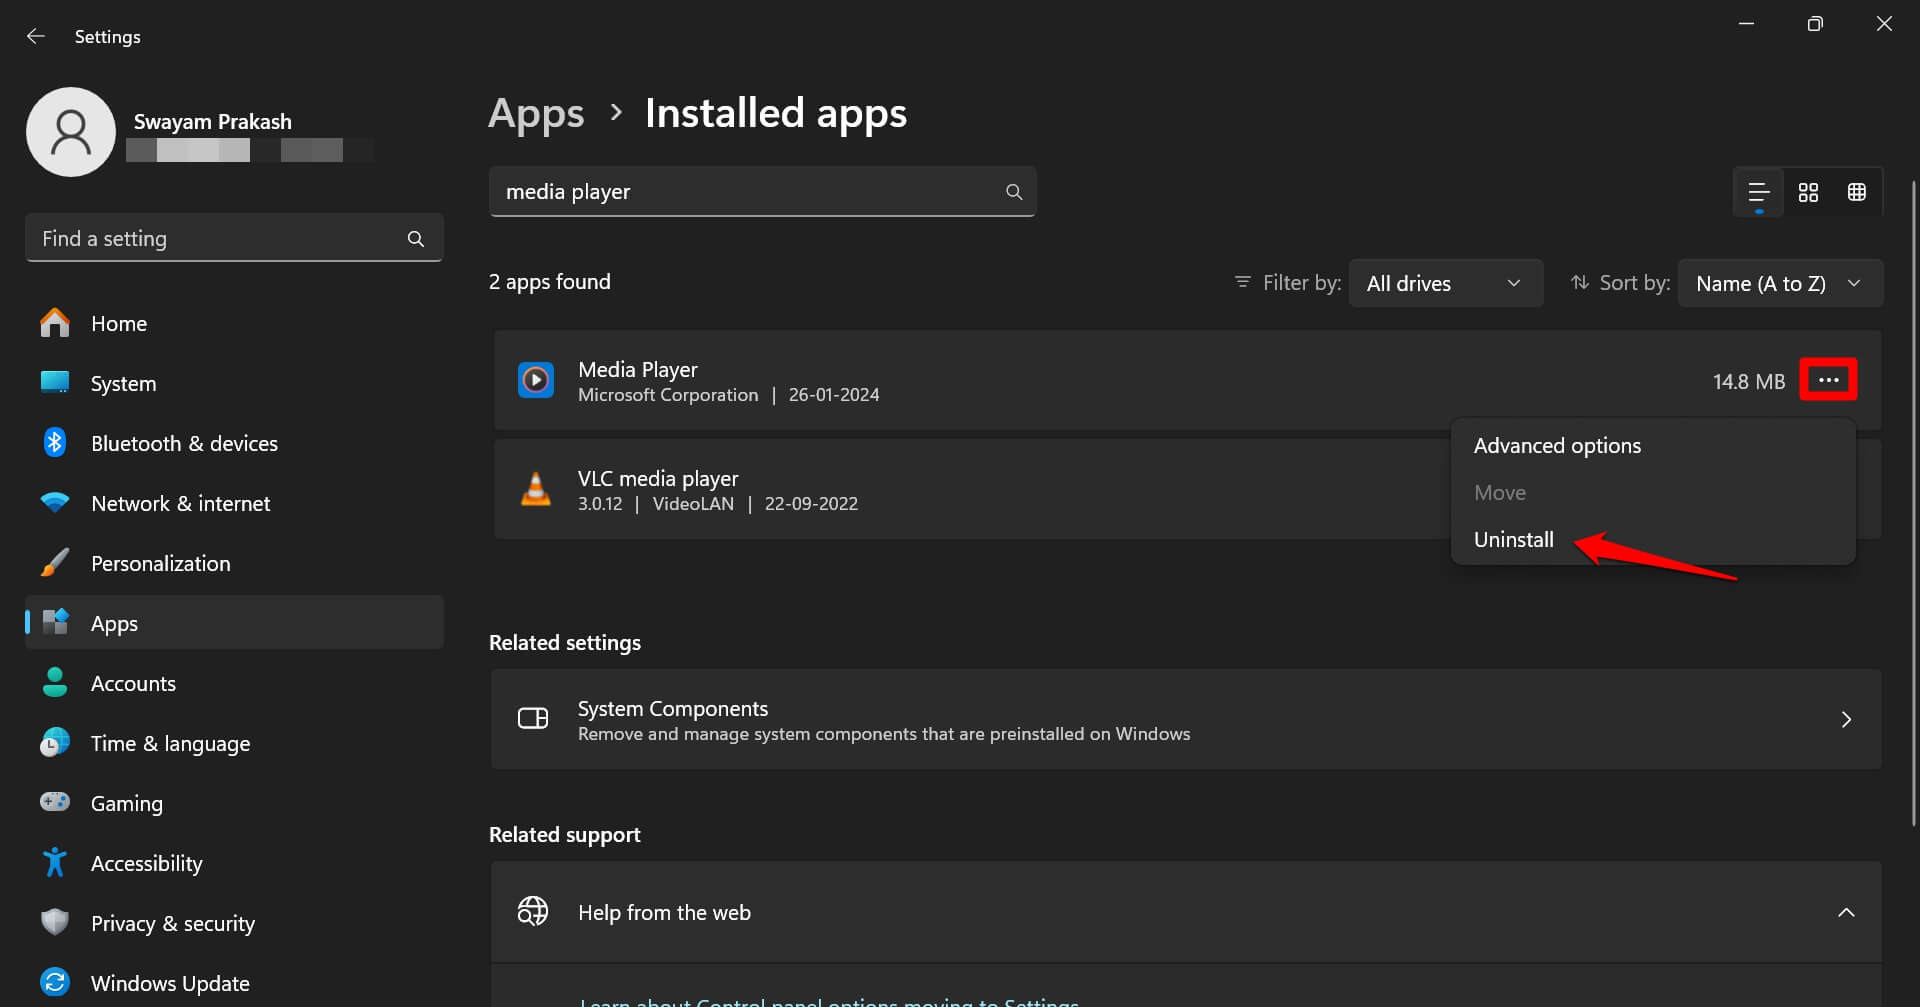
- In the installed apps search field, search for Media Player.
- Click the menu icon beside Media Player and select Uninstall.

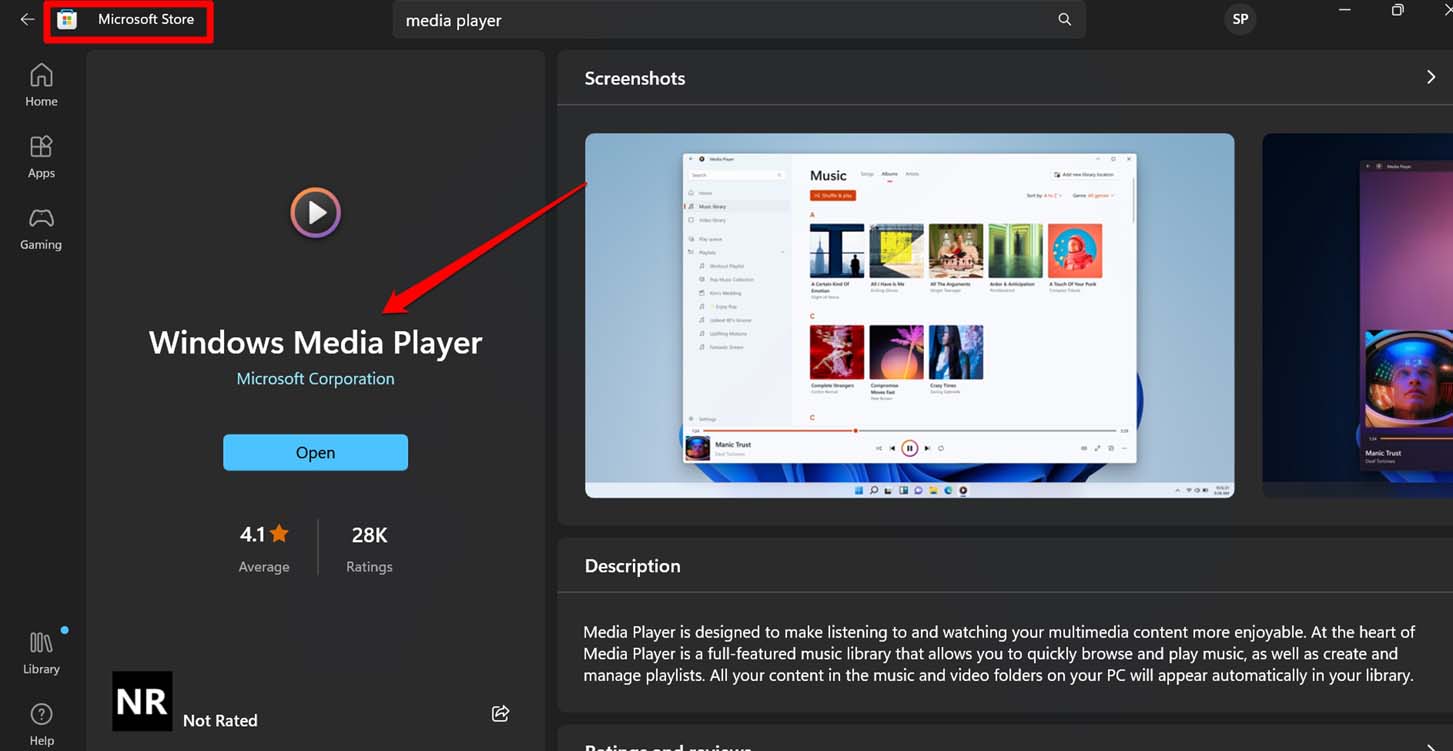
- Launch the Microsoft Store app.

- Search for Windows Media Player.
- Click on Get to install the app back on your PC.

10. Install Latest Windows Update
Fix any existing bugs in the system version of your PC by upgrading it to the latest Windows version.
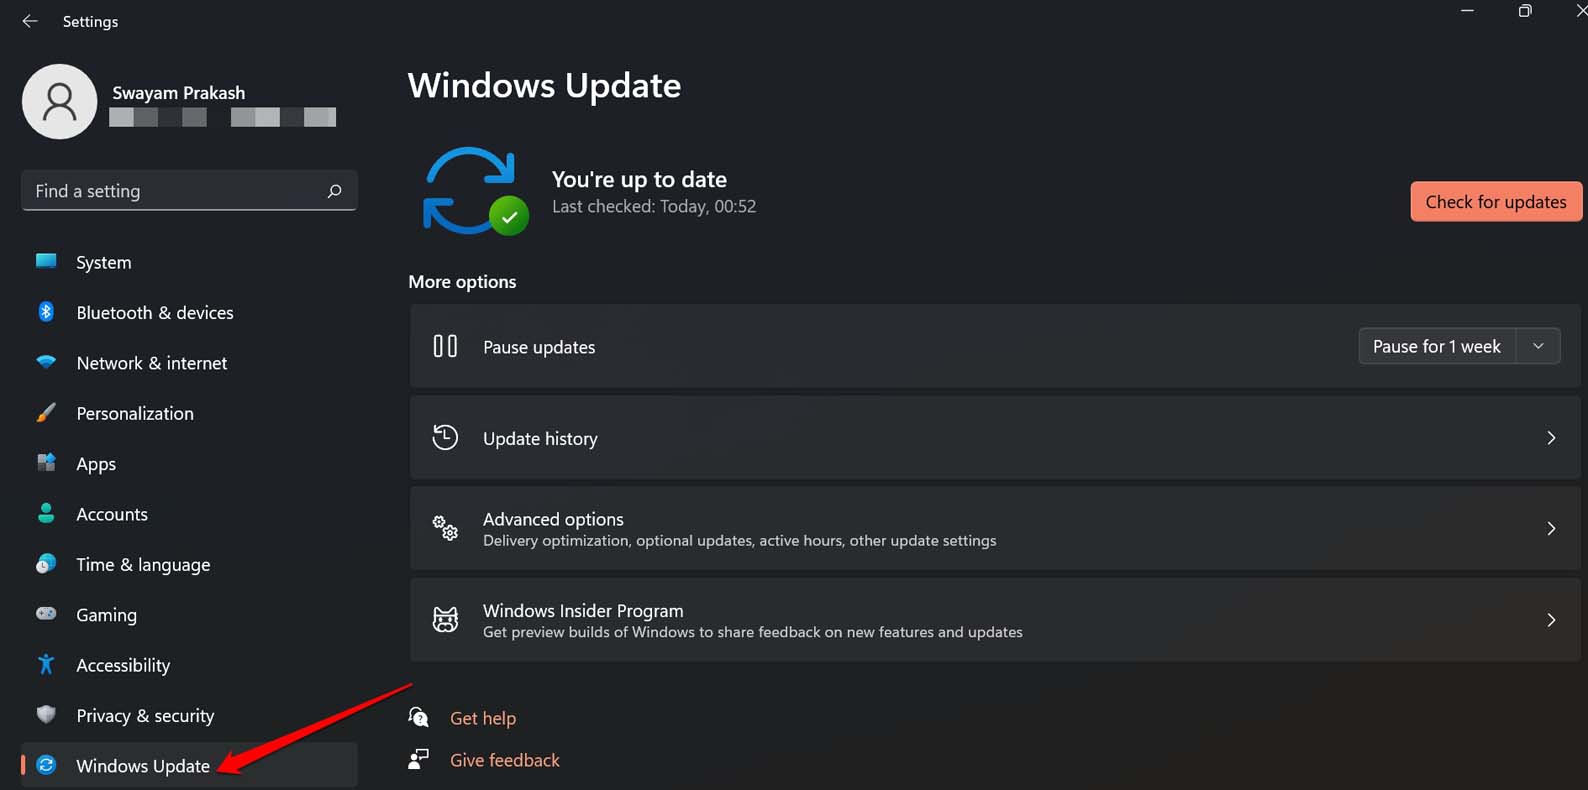
- Press Windows + I to go to the settings.
- Click on Windows Update.

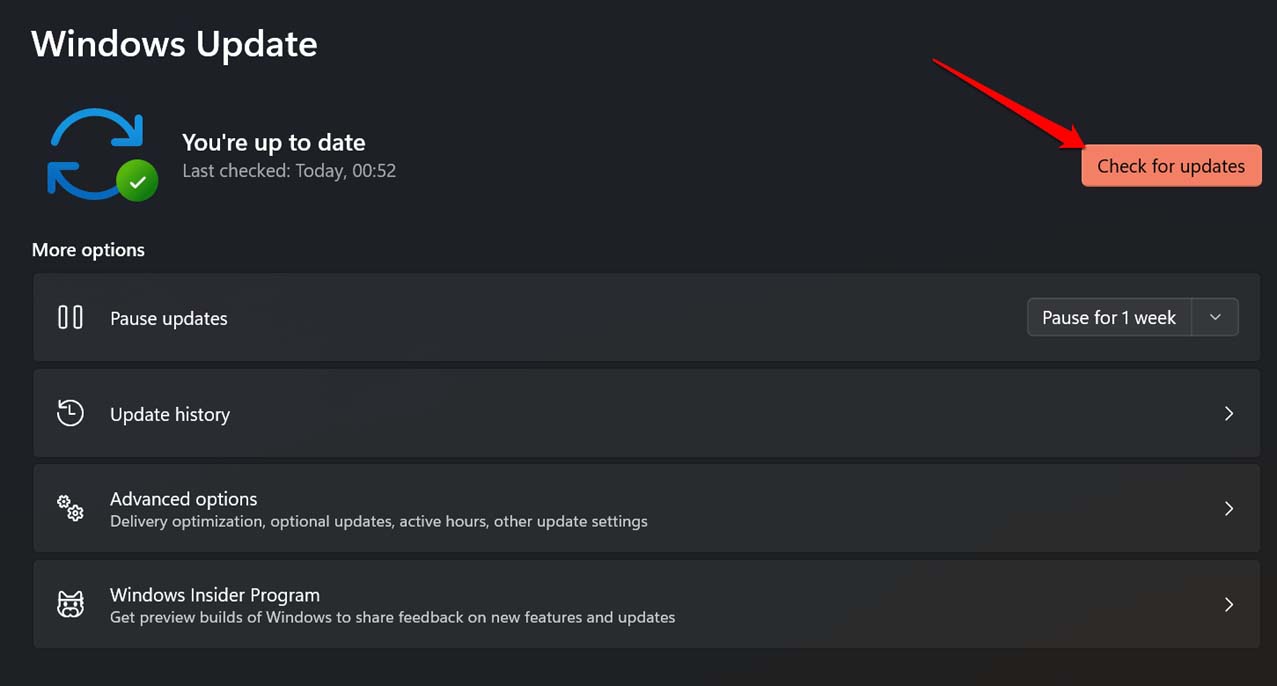
- Next, click on Check for Updates.

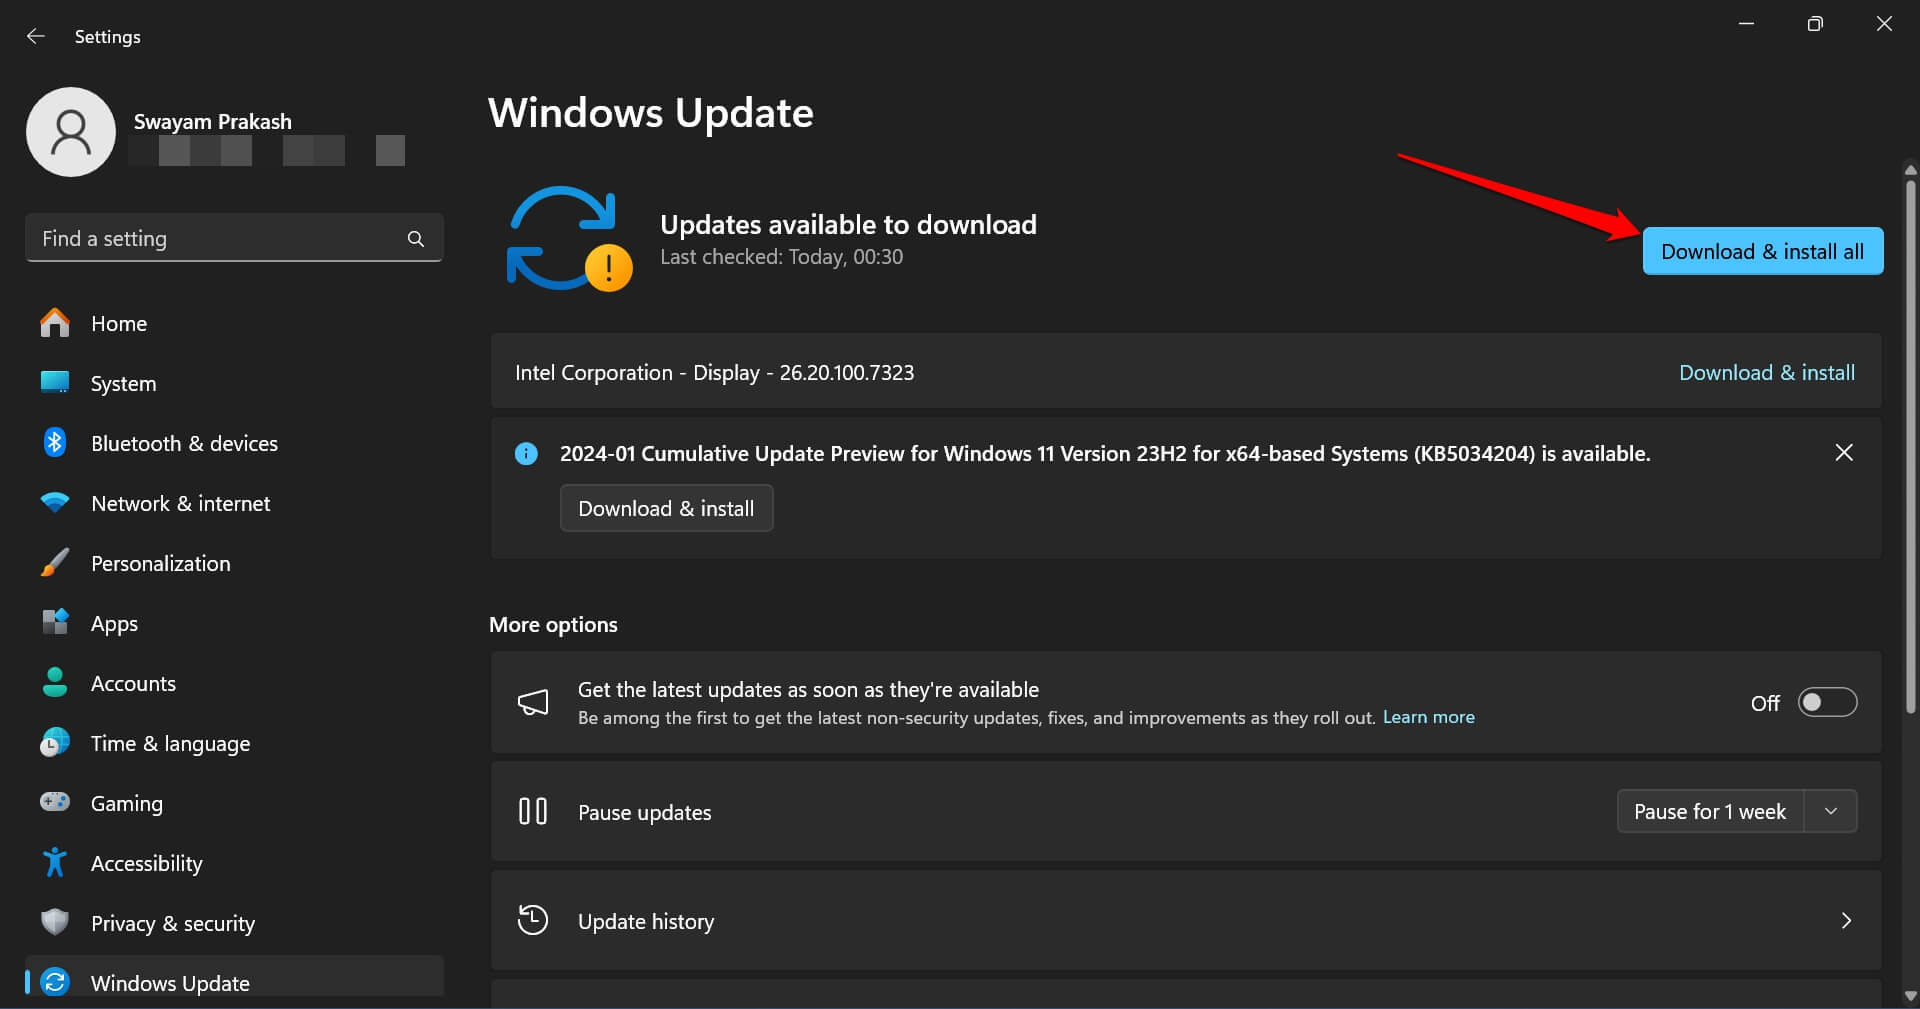
- If a new software update is available, click on Download and Install All.

The computer will restart after installing the system update. After that, launch Windows Media Player and check if it is working.
11. Use Another Media Player
After using all the above troubleshooting tips, if Windows Media Player is still not working, use another media player. There is the acclaimed VLC Media Player, which is a free-to-use application. You may also consider using the KM Player, a notable media player supporting a wide range of audio and video formats.
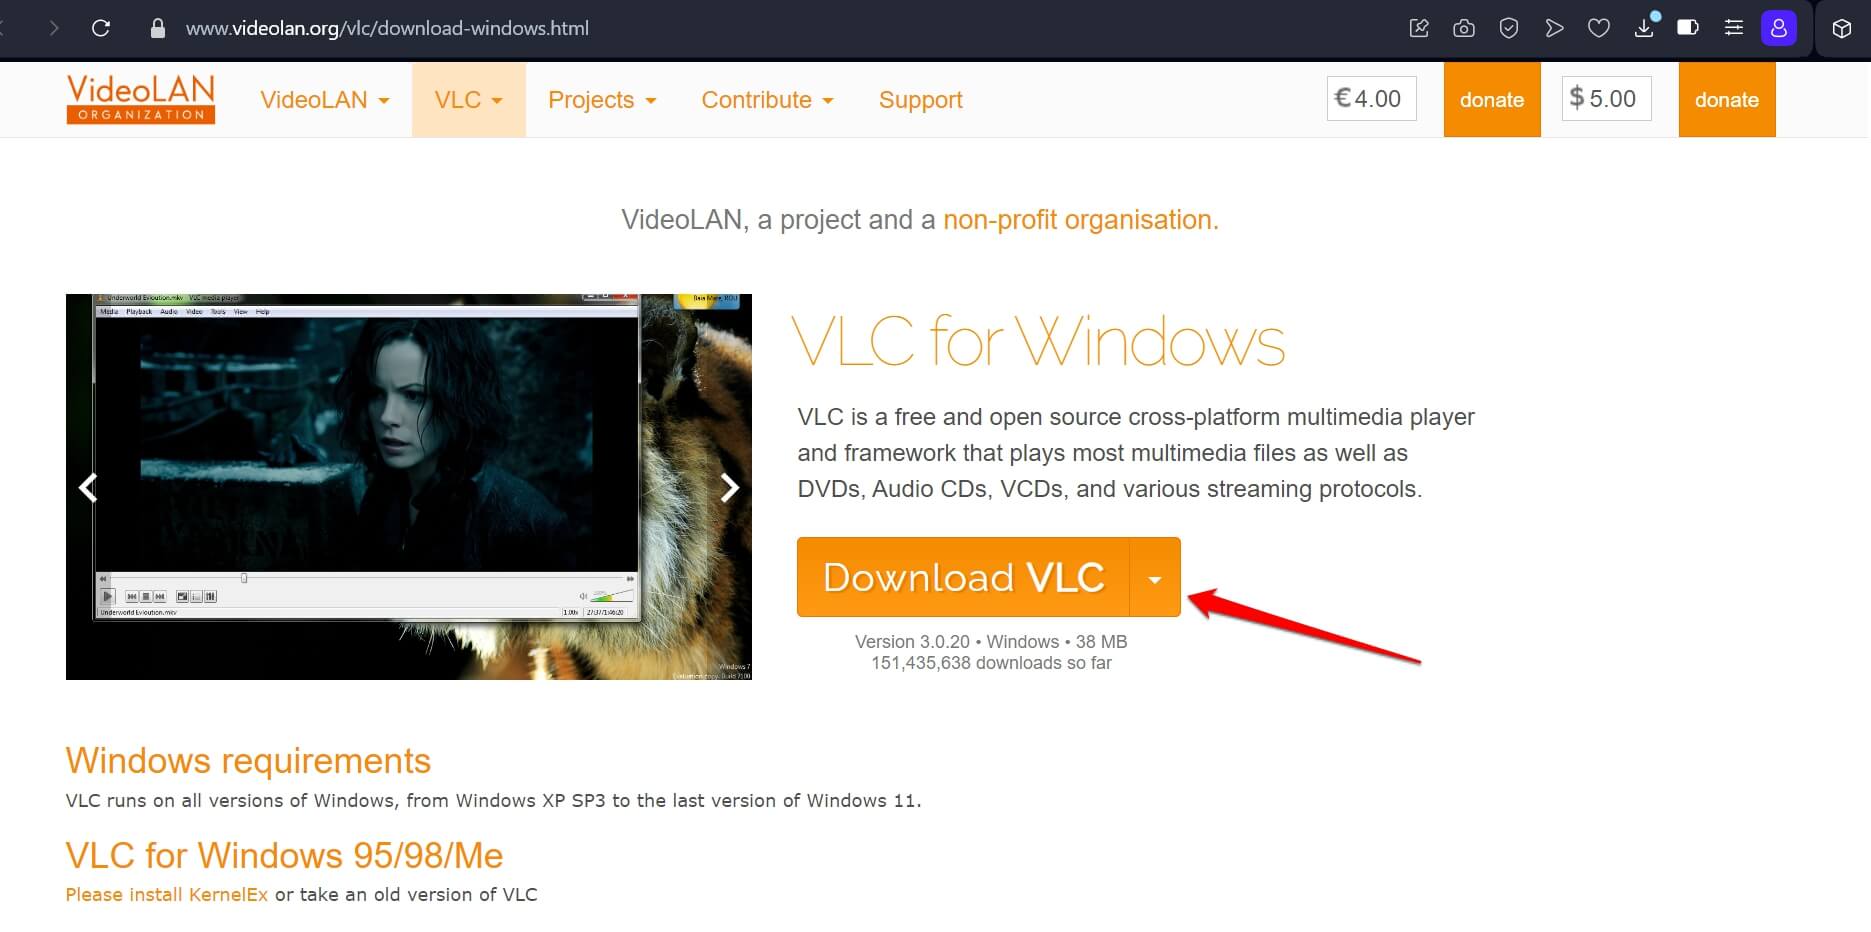
Download VLC Media Player for Windows
Bottom Line
Most likely, repairing or updating the app, and clearing the Windows Media library should resolve the “Windows Media Player Has Stopped Working” error. If not, you can try various other Media Players for Windows 11. Keep visiting DigitBin for more useful troubleshooting guides.
If you've any thoughts on How to Fix ‘Windows Media Player Has Stopped Working’ Error on Windows 11, then feel free to drop in below comment box. Also, please subscribe to our DigitBin YouTube channel for videos tutorials. Cheers!
