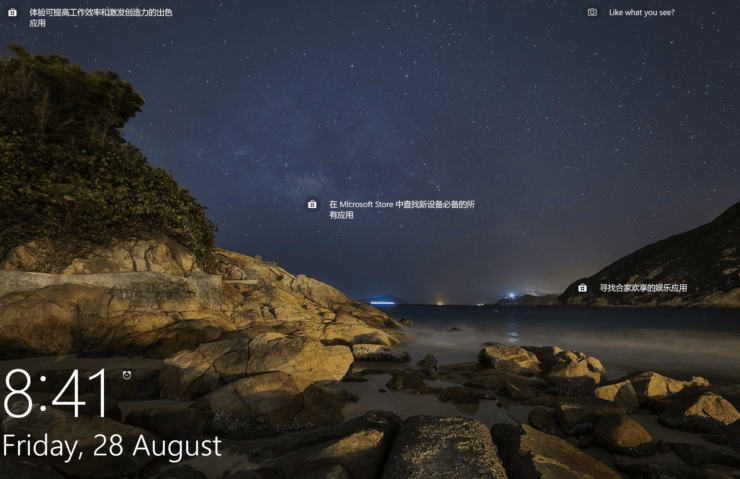
The Windows lock screen appears when you power on your PC, or the PC remains idle for quite some time. Of course, the language on this screen should be the default language on your computer. Still, occasionally, users have reported that Windows displays a different language on the lock screen.
For many users, this issue may arise following a Windows update, or they have multiple language packs installed on their device; for others, it might be a straightforward setting issue.
If you are also struggling with the incorrect language problem on the Windows 11 lock screen, this post will provide the most relevant solutions. So, without wasting any time, let’s dive straight in.
How to Change Language on the Lock screen on the PC
As mentioned, this problem typically occurs when several languages are installed on your computer. Sometimes, they become muddled up if you have switched between the two when you may have inadvertently introduced an additional language to your system. If so, the methods listed below will help you resolve the issue.
1. Select your Preferred Language Using the Control Panel
Choosing the preferred language from the control panel will reset the language preferences for the lock screen of your Windows 11 PC. Here is how you need to proceed.
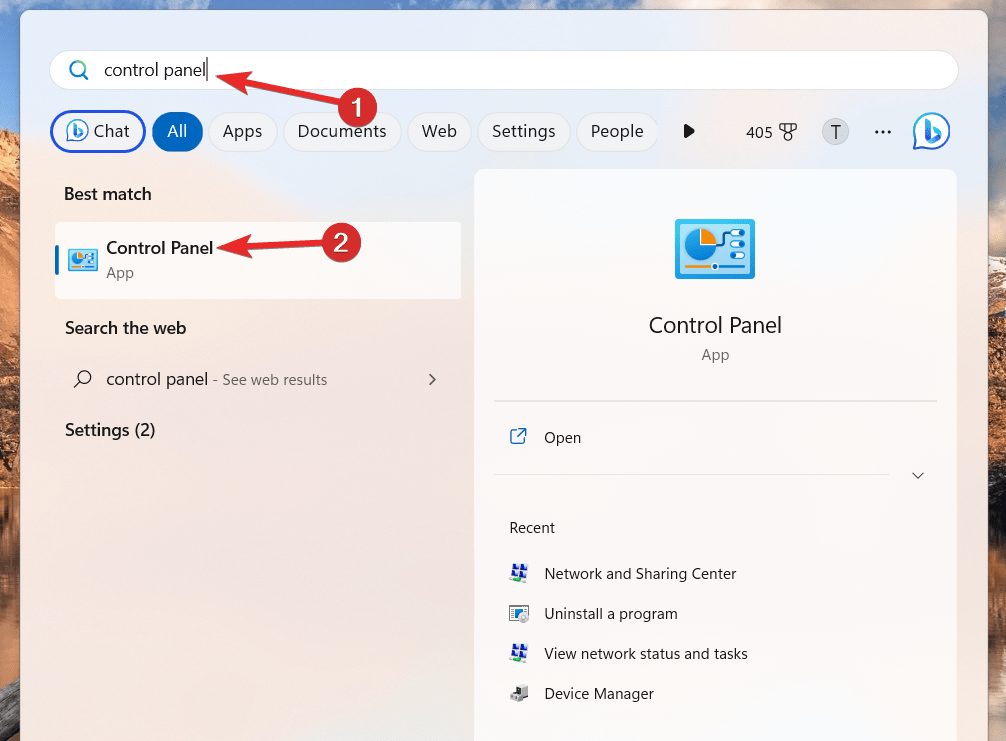
- Click the Start icon on the Windows taskbar, type Control Panel into the search bar, and then choose the appropriate result by clicking on the related search result.

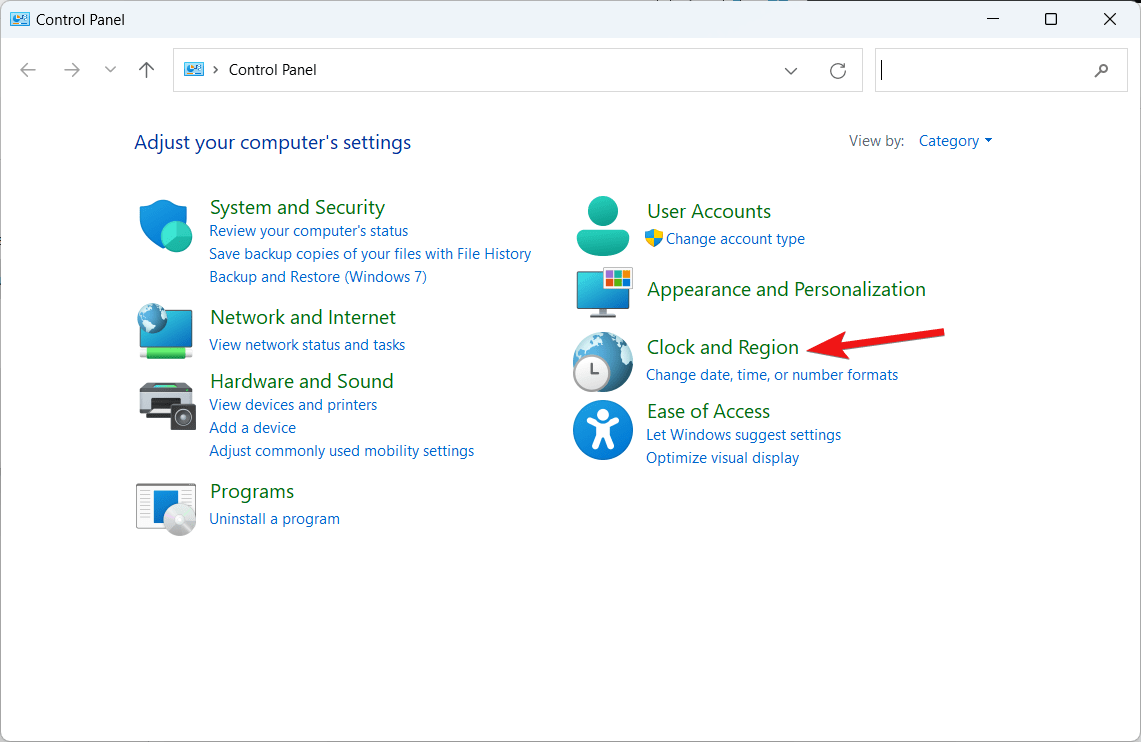
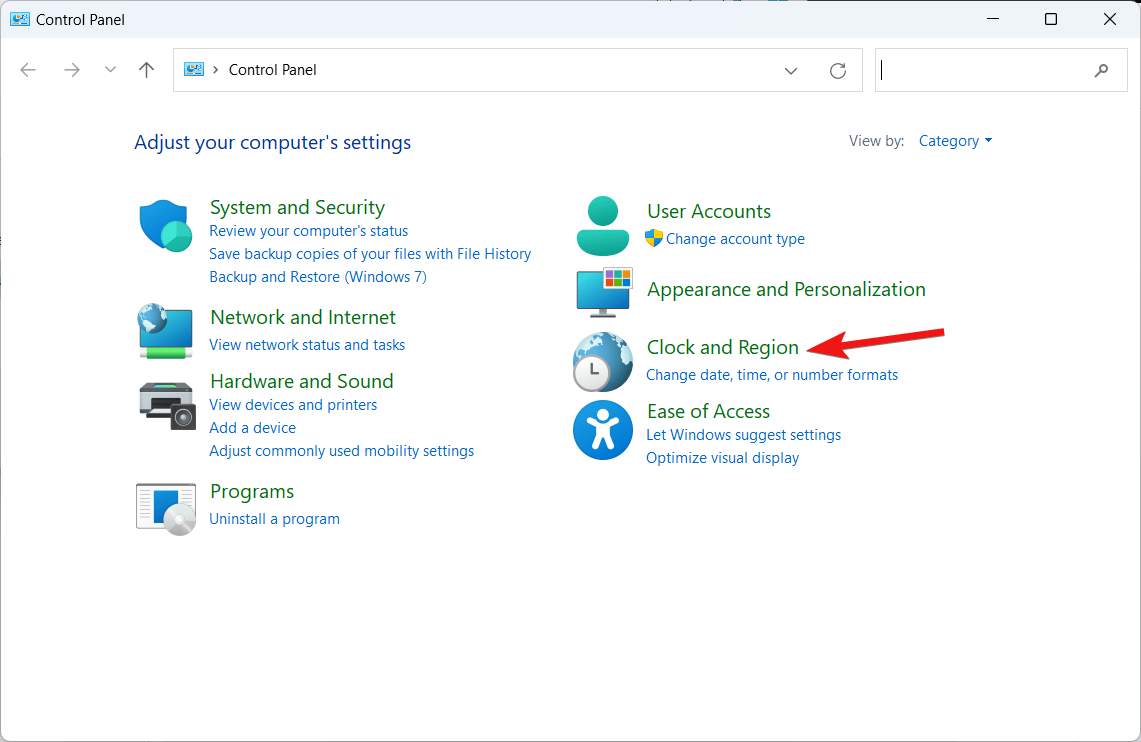
- Set Category in the View by dropdown and click the Clock and Region option.

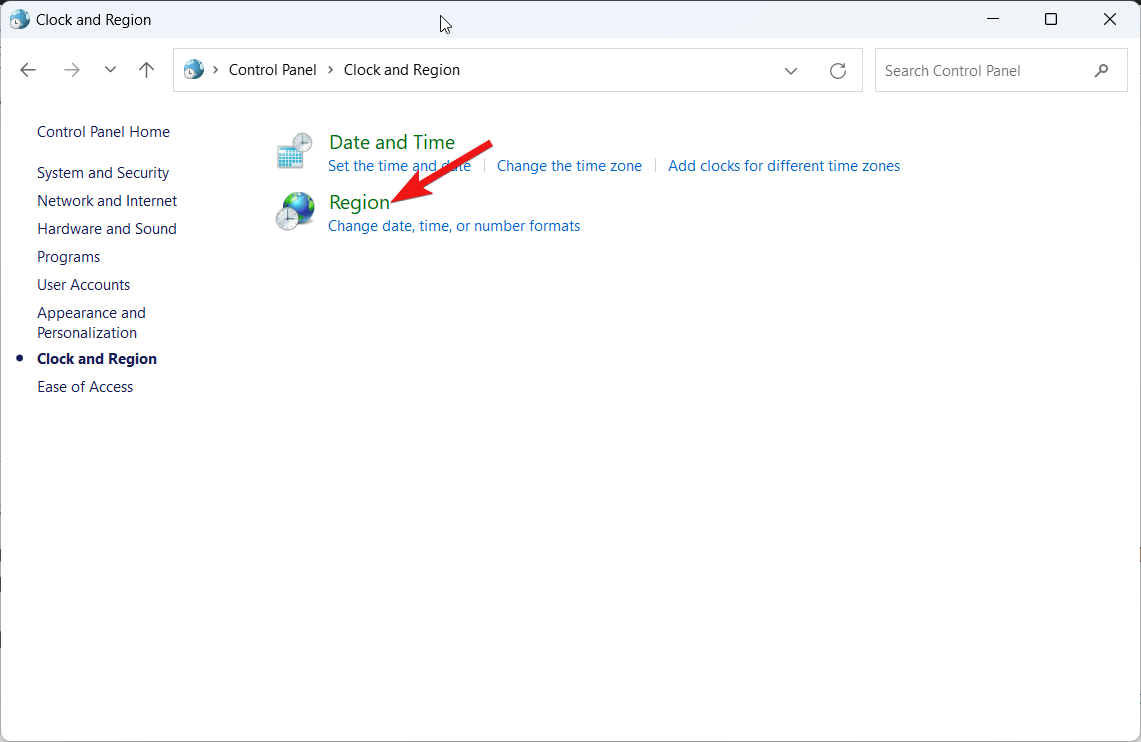
- Next, go for the Region option.

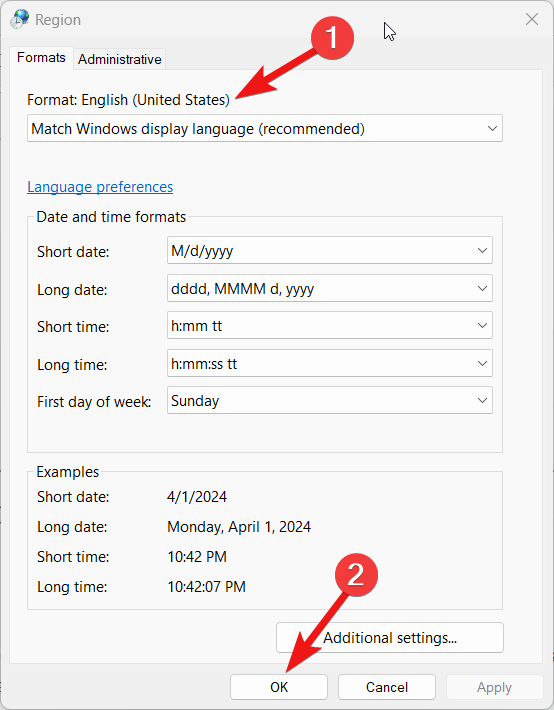
- Once the Region dialog box pops up, choose English (United States) or your preferred language from the Format dropdown menu and then press OK to save the changes.

2. Apply Language Settings to the Welcome screen
Your language preferences on Windows 11 can be copied and applied to all user accounts and the Welcome and Lock displays. This trick can work for you if the Windows lock screen displays a different language. Here are the instructions below.
- To access the Control Panel on your Windows 11 PC, press the Windows key, type Control Panel in the search bar, and choose the related search result.
- Choose Category in View by dropdown and then select Clock and Region.

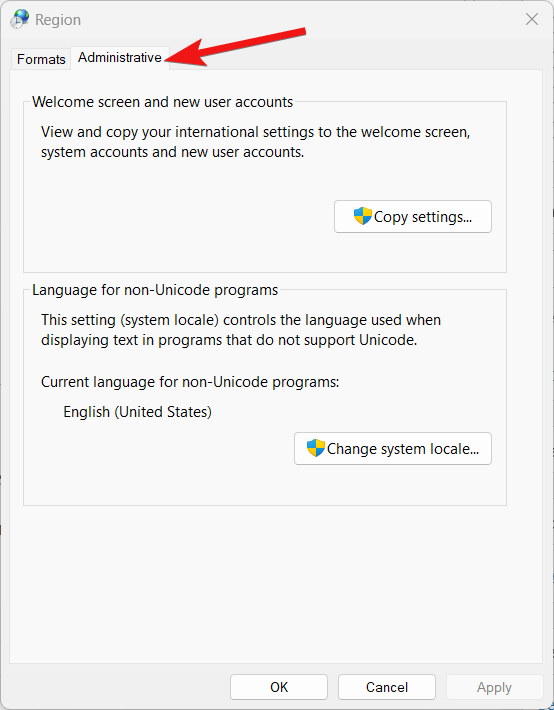
- In the Region dialog box that appears, switch to the Administrative tab.

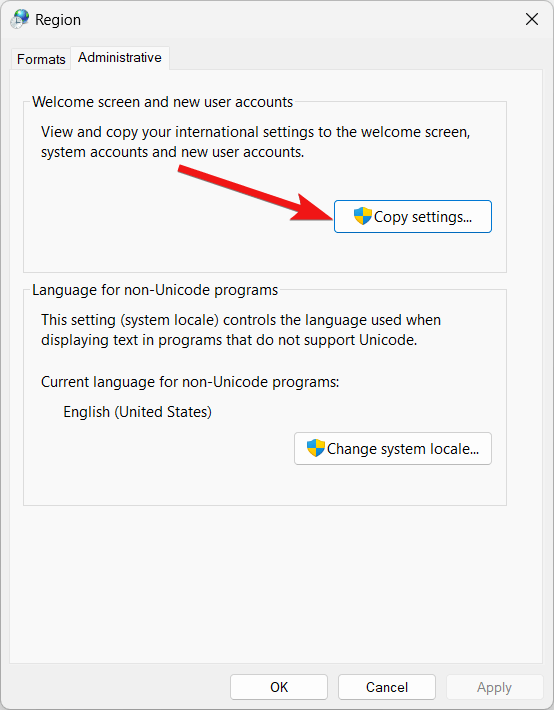
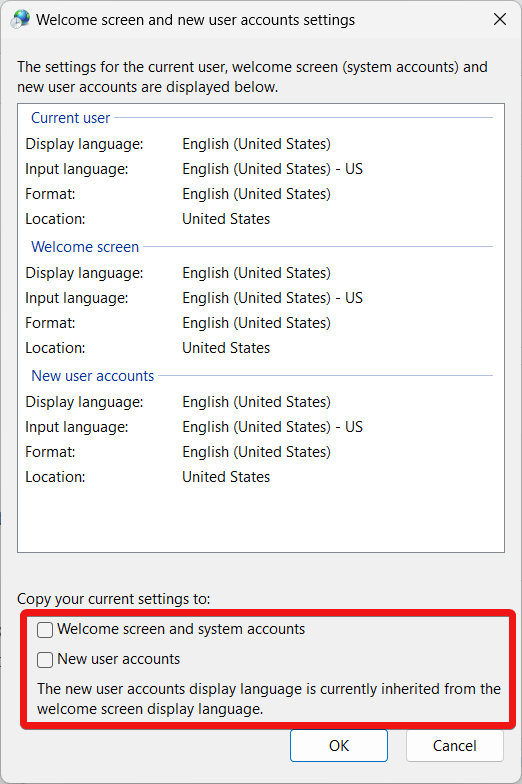
- Now press the Copy Settings button located under the Welcome screen and new user accounts section.

- In the bottom left corner, select the checkboxes for the system, new user accounts, and welcome screen, and then hit the OK button.

3. Re-enable the Windows Spotlight feature
A temporary glitch in the Windows spotlight feature can be responsible for the multilingual lock screen on Windows 11. If none of this works, you can always turn off Windows Spotlight and use Picture instead, at least until Microsoft fixes the glitch.
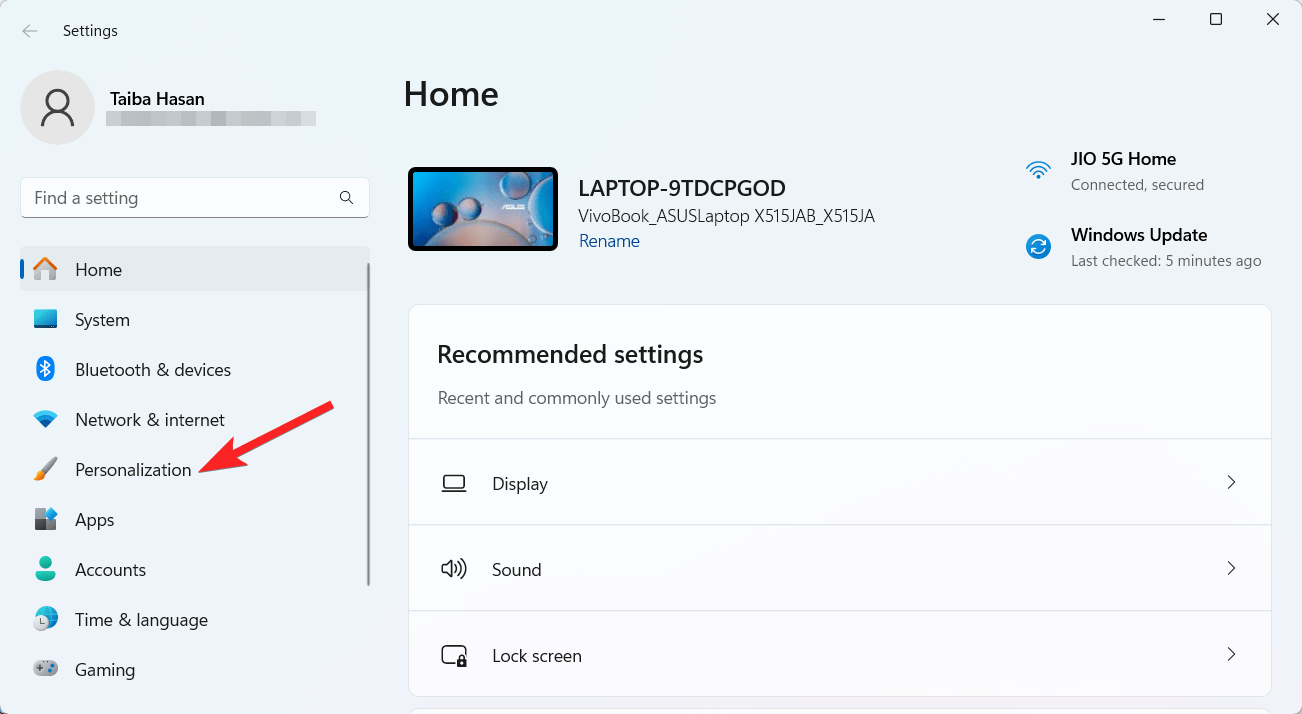
- Launch the Settings app using the Windows + I shortcut combination.
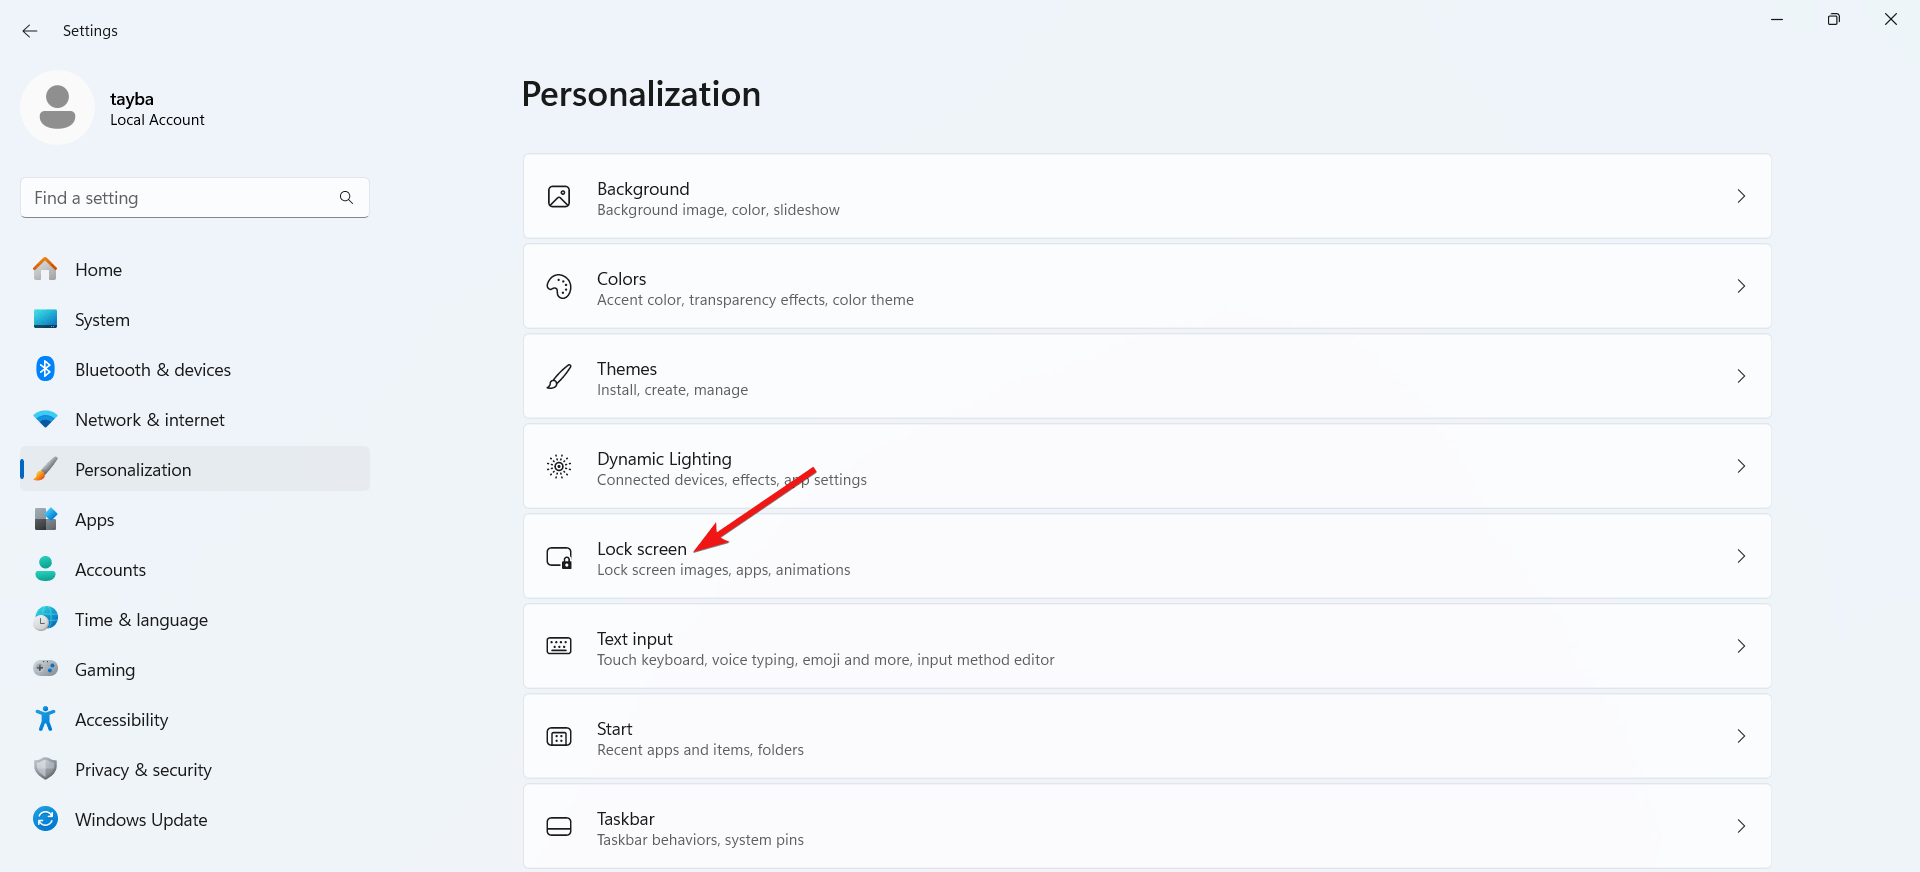
- Choose the Personalization option from the left navigation pane.

- Select the Lock screen from the right section.

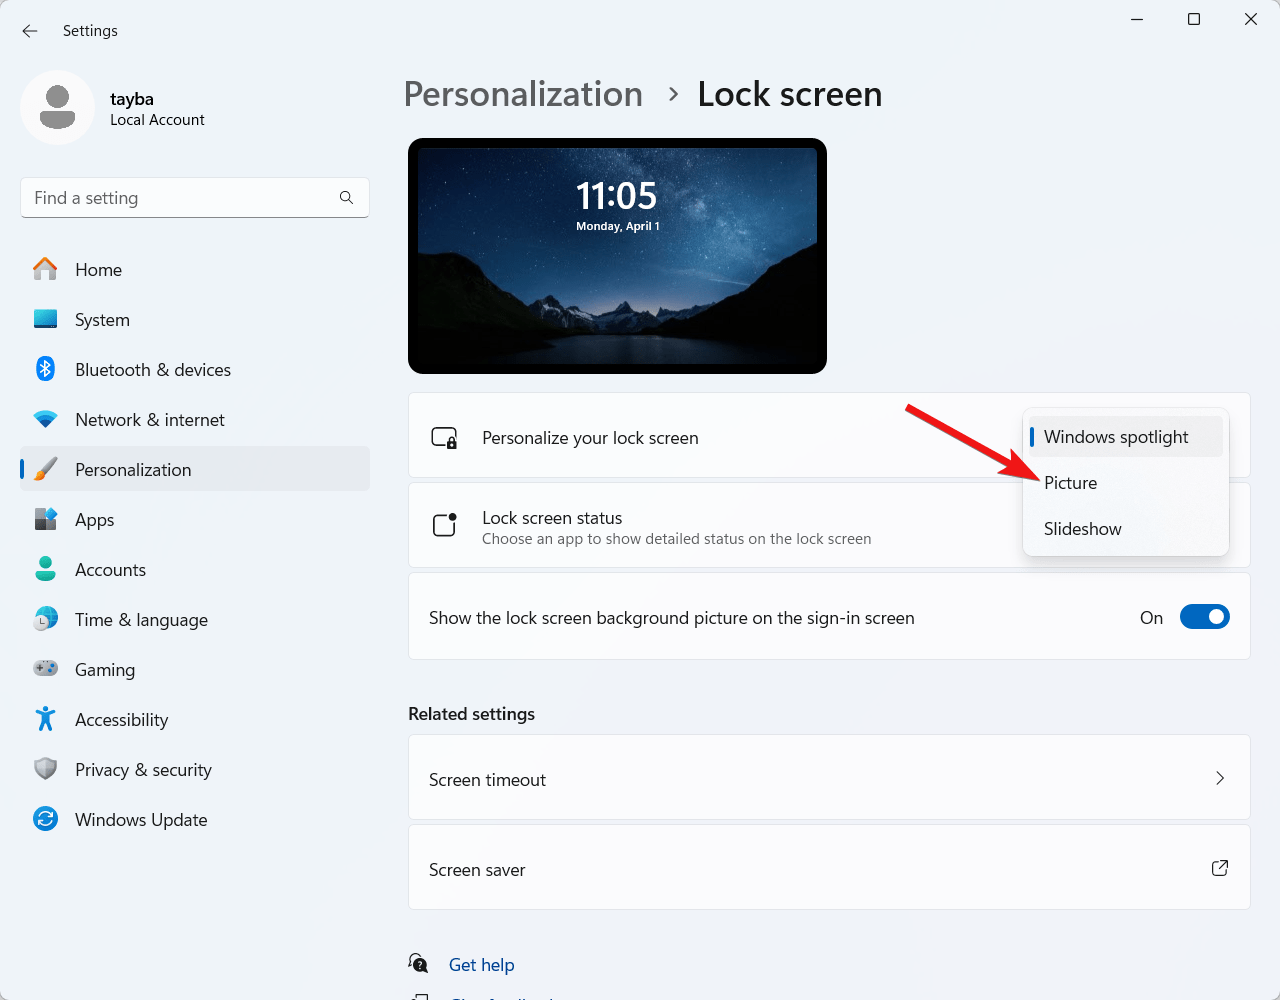
- Choose Picture from the Personalize your lock screen selection menu and then choose a relevant picture for the lock screen.

- After the computer has been restarted, the selected image will appear on the lock screen instead of Windows Spotlight.
- Log back into the Lock screen and then again choose Windows Spotlight from the dropdown box.
- Try restarting the computer and notice if the issue with the language of the lock screen is resolved.
4. Uninstall recent Windows Updates
If you see another language on your Windows lock screen, especially after recently installing additional Windows updates, you should consider uninstalling those Windows Updates until the offending one is identified. Also, it is recommended to turn off Windows updates temporarily until the multi-language issue is fixed.
- To open the Settings menu, use Windows + I.
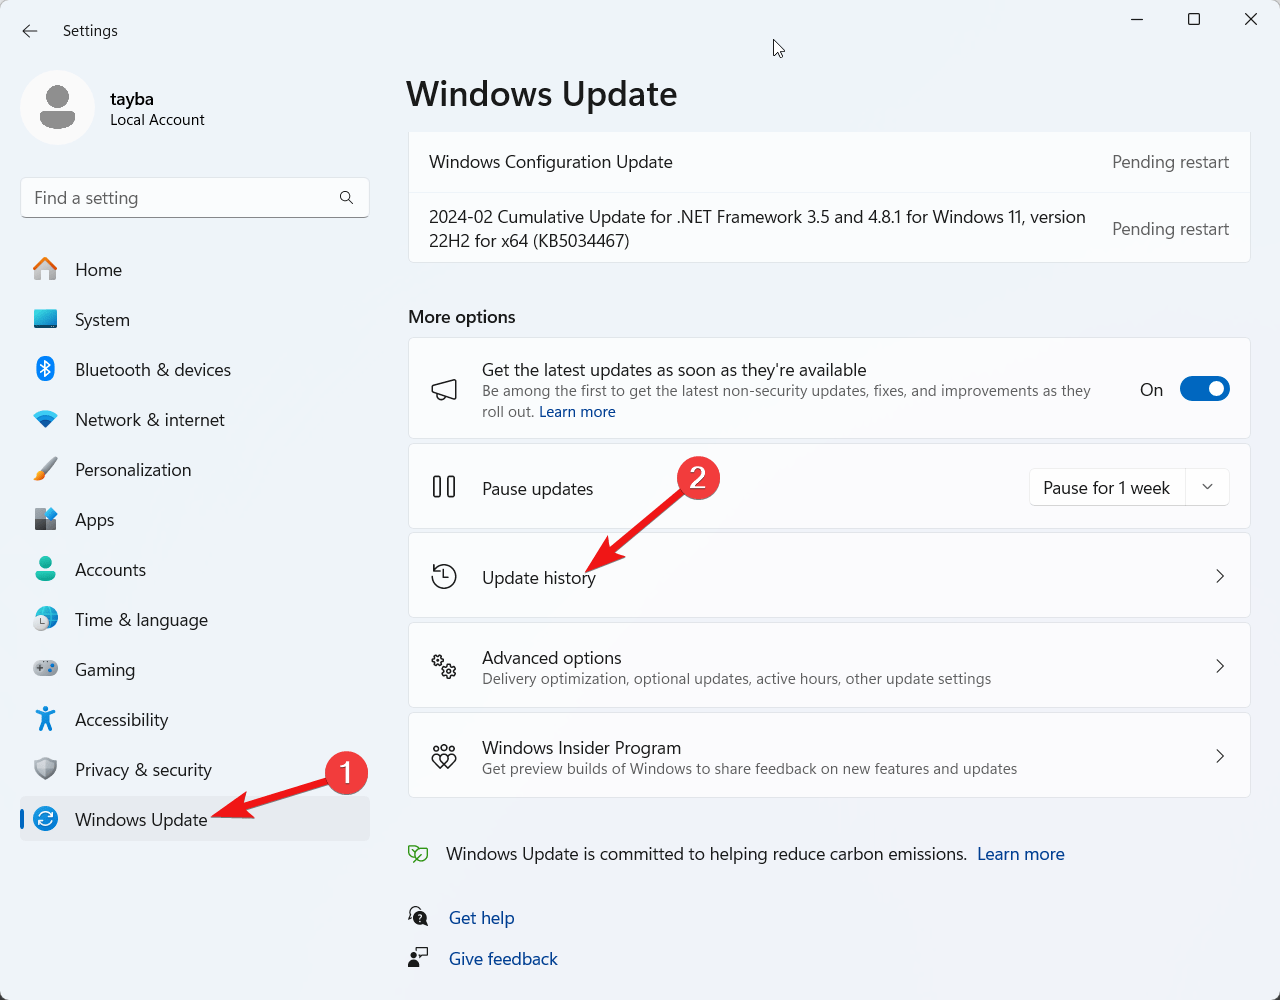
- Next, select the Windows Update from the left menu bar and then choose Update History from the right section.

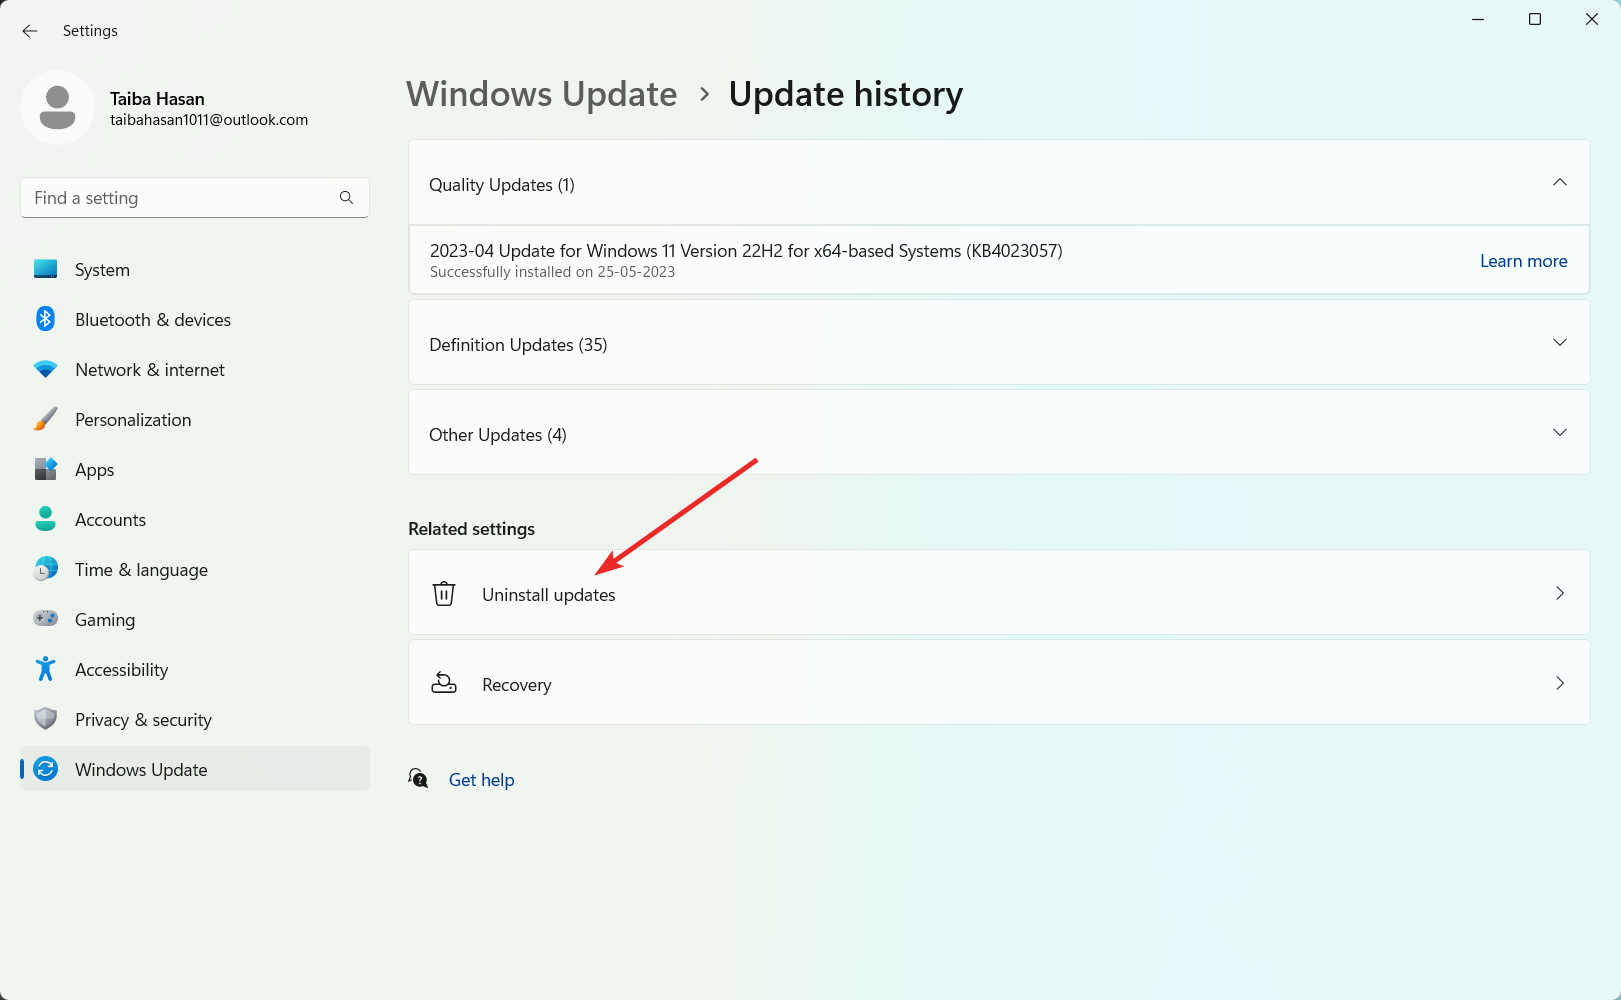
- Now scroll down to the bottom of the window and select Uninstall Updates.

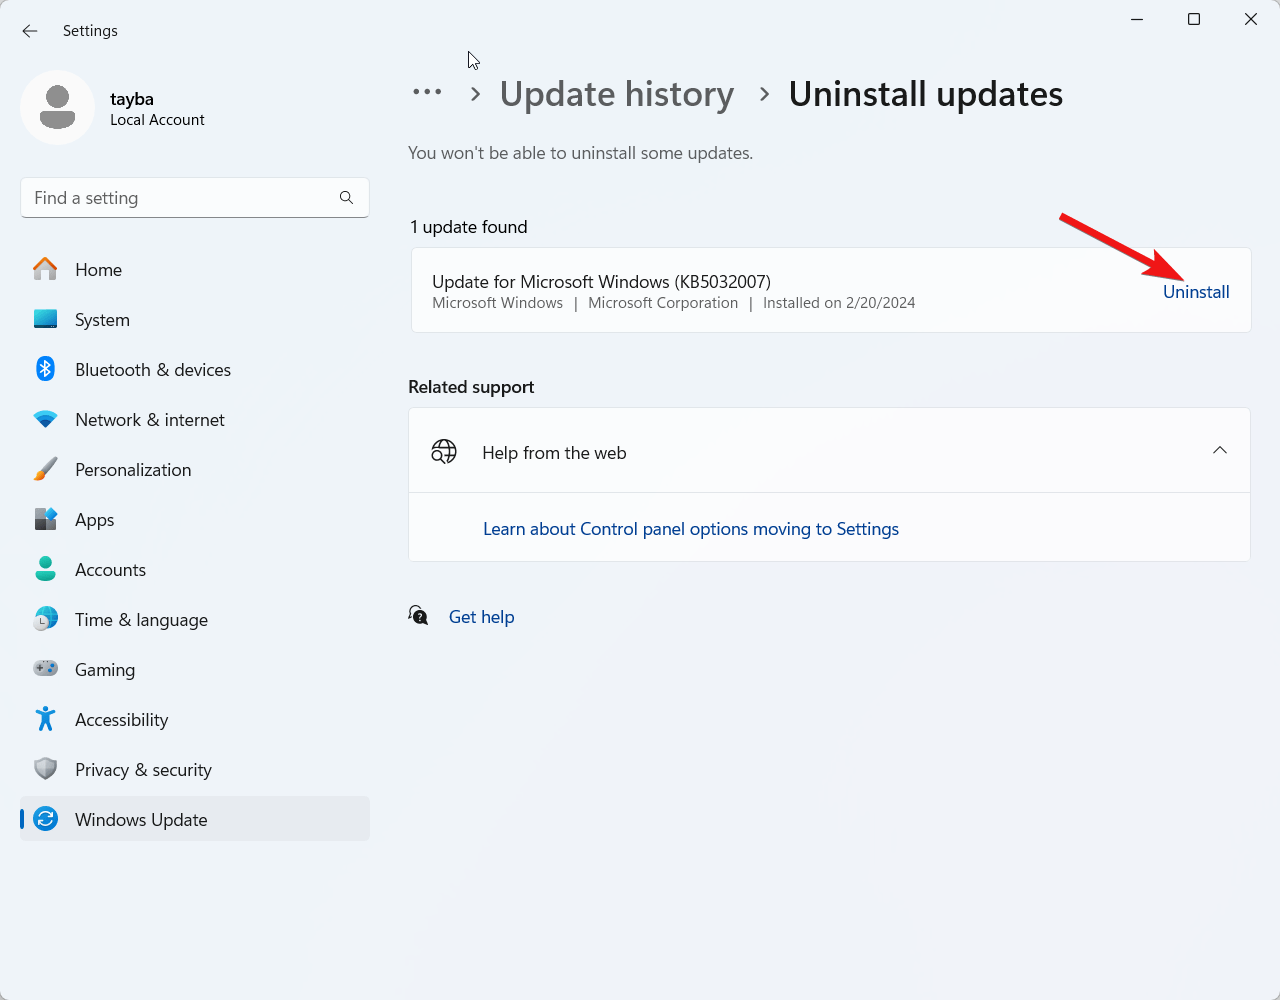
- Find the updates installed around the same time the problem started, then select Uninstall.

- Select Uninstall once more from the confirmation screen, and then reboot your PC to see if things work better.
5. Perform System Restore
If the problem persists, you should perform a system restore to roll back the recent changes made to your computer that may be affecting the language settings. Remember you can only roll back the recent changes if a restore point exists on your system. Keeping that in mind, perform the following steps:
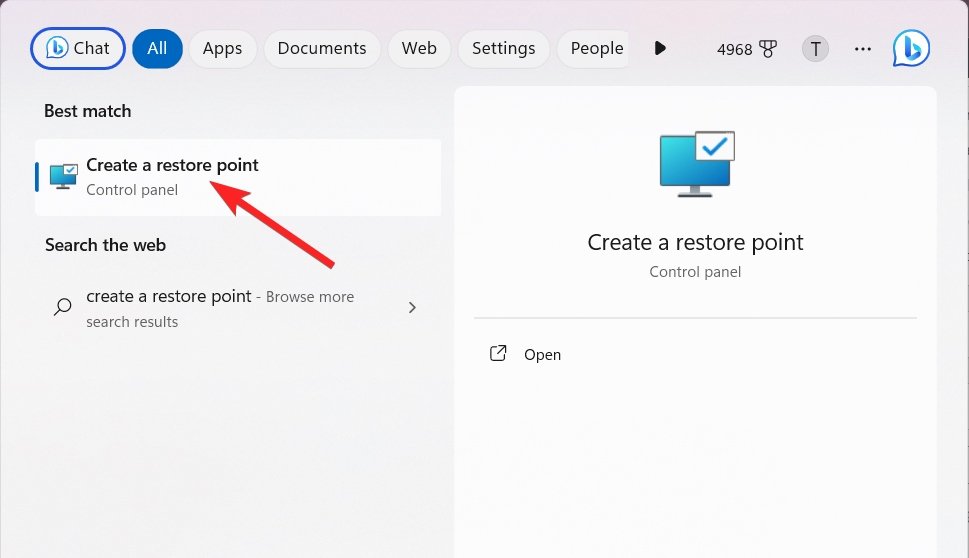
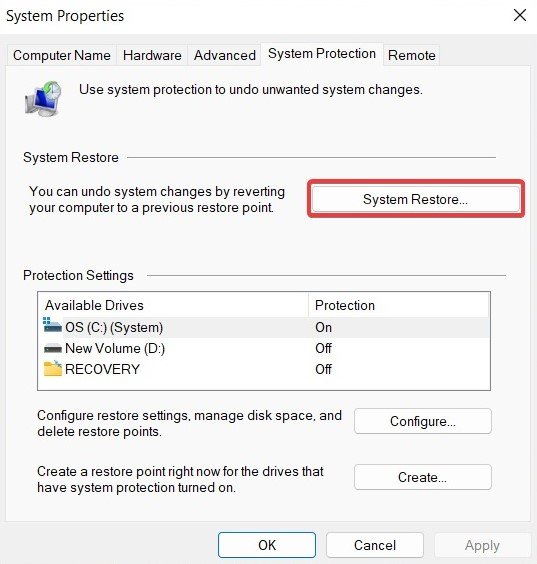
- Press the Windows key, type create a restore point in the search bar, and then select the relevant search result to access the System Properties page.

- Switch to the System Protection tab and press the System Restore button.

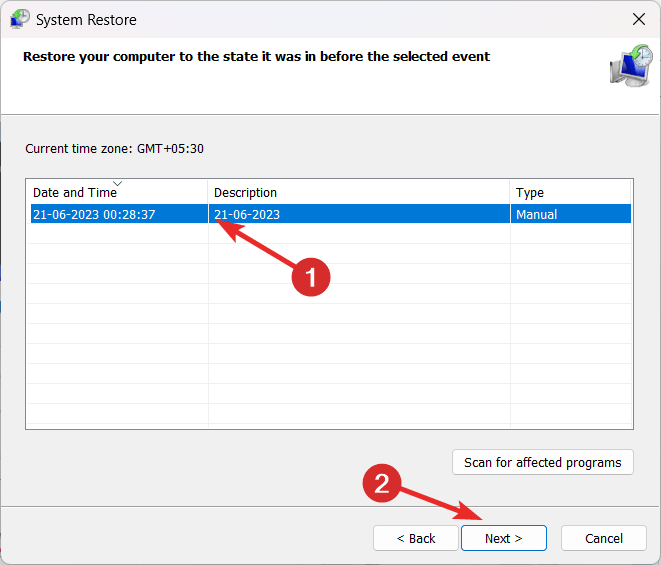
- Once the System Restore dialog box opens, press the Next button.
- Choose the System restore point you wish to apply and press the Next button located underneath.

- Finally press the Finish button to begin performing the system restore for your Windows 11 PC.
6. Make Sure the System is Up to Date
In many instances, it has been observed that the language of the lock screen appears in a different language if the system has not been updated for a long time. To rule out this cause of the problem, you must always keep your system up to date. Here is how you need to proceed.
- Launch the Settings app using the Windows + I shortcut key.
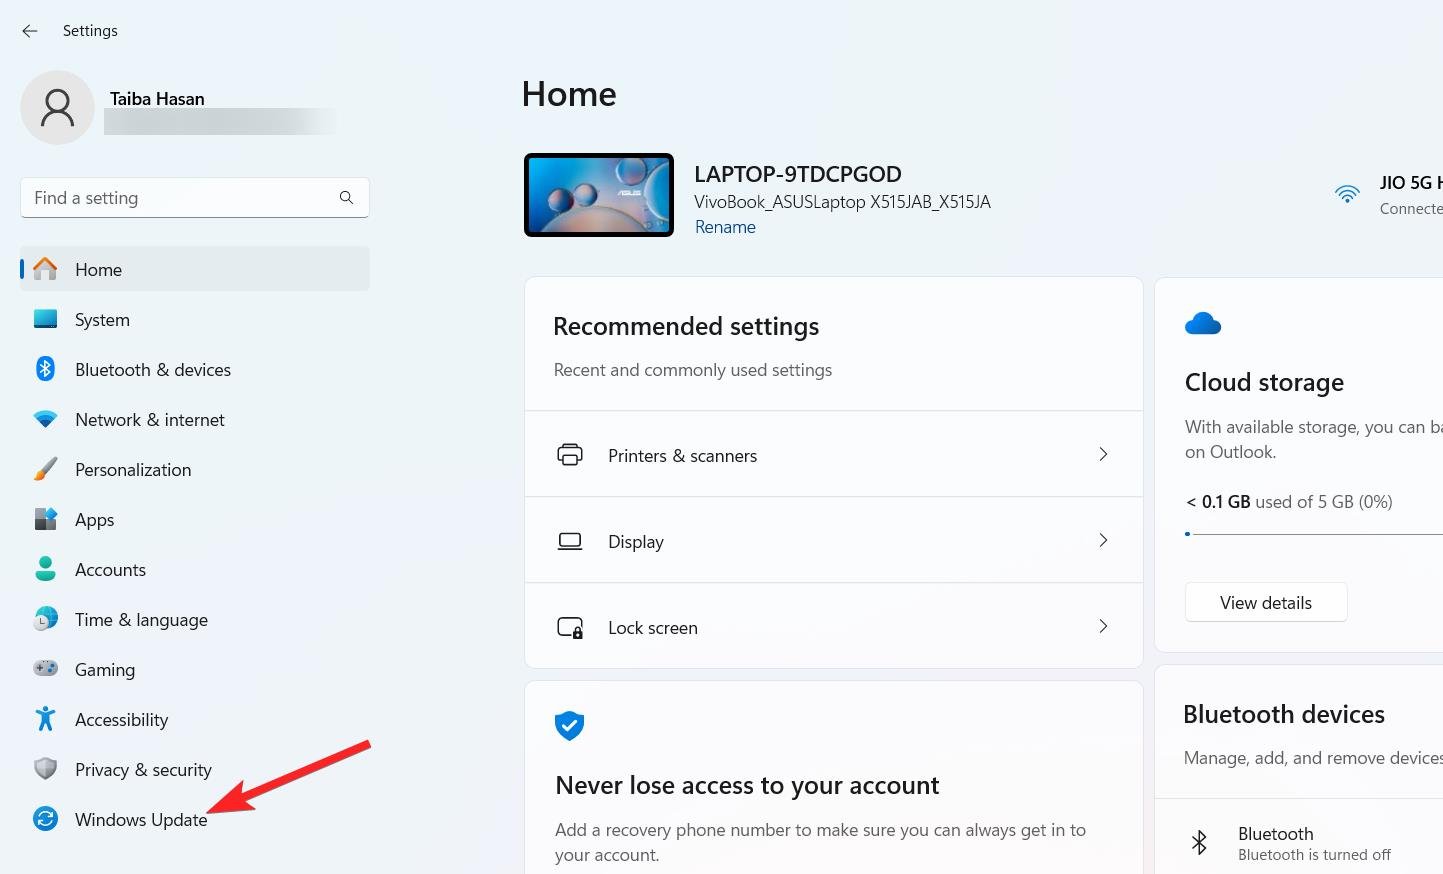
- Select Windows Update from the left sidebar.

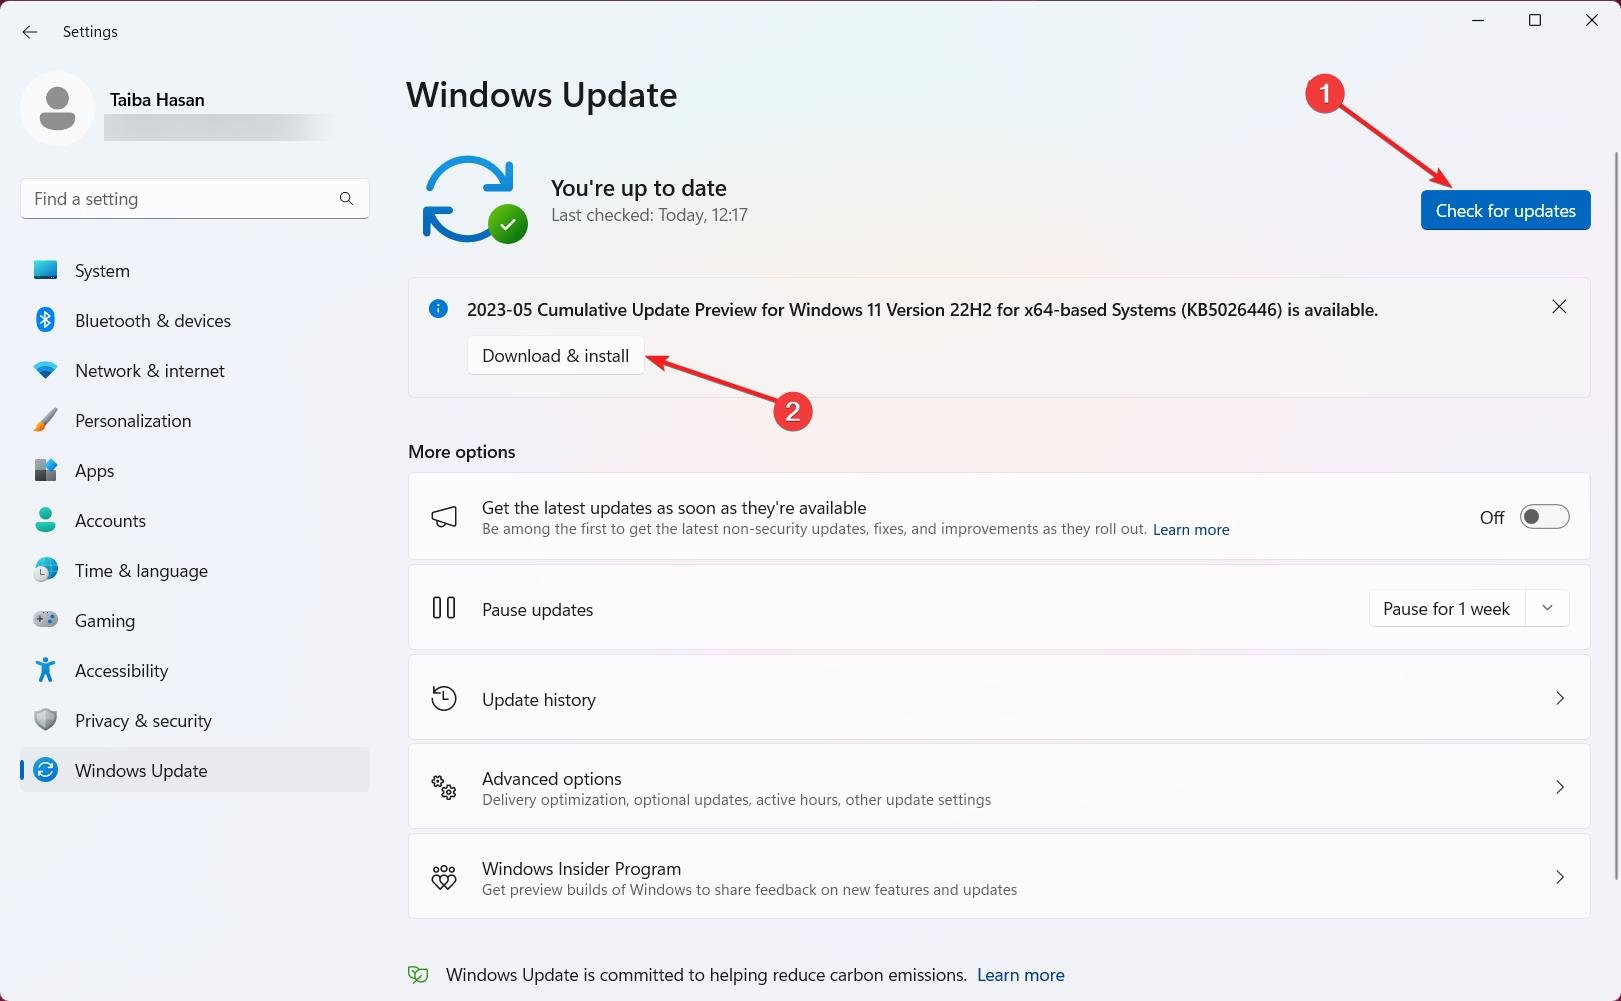
- To check for updates, click the relevant button on the top right.

- If applicable, click the Restart Now button.
- When you finish these steps, the system will scan for, download, and install any available updates.
7. Reinstall language packs
Having multiple language packs installed on your device can also cause such problems, especially if they have become corrupted. Removing every other language pack you have loaded and keeping the main one where Windows was installed can help resolve the problem at hand. Once your device has restarted, install any additional language packs you may use cleanly. So, let’s begin.
- Use the Windows + I shortcut combination to launch the Start menu.
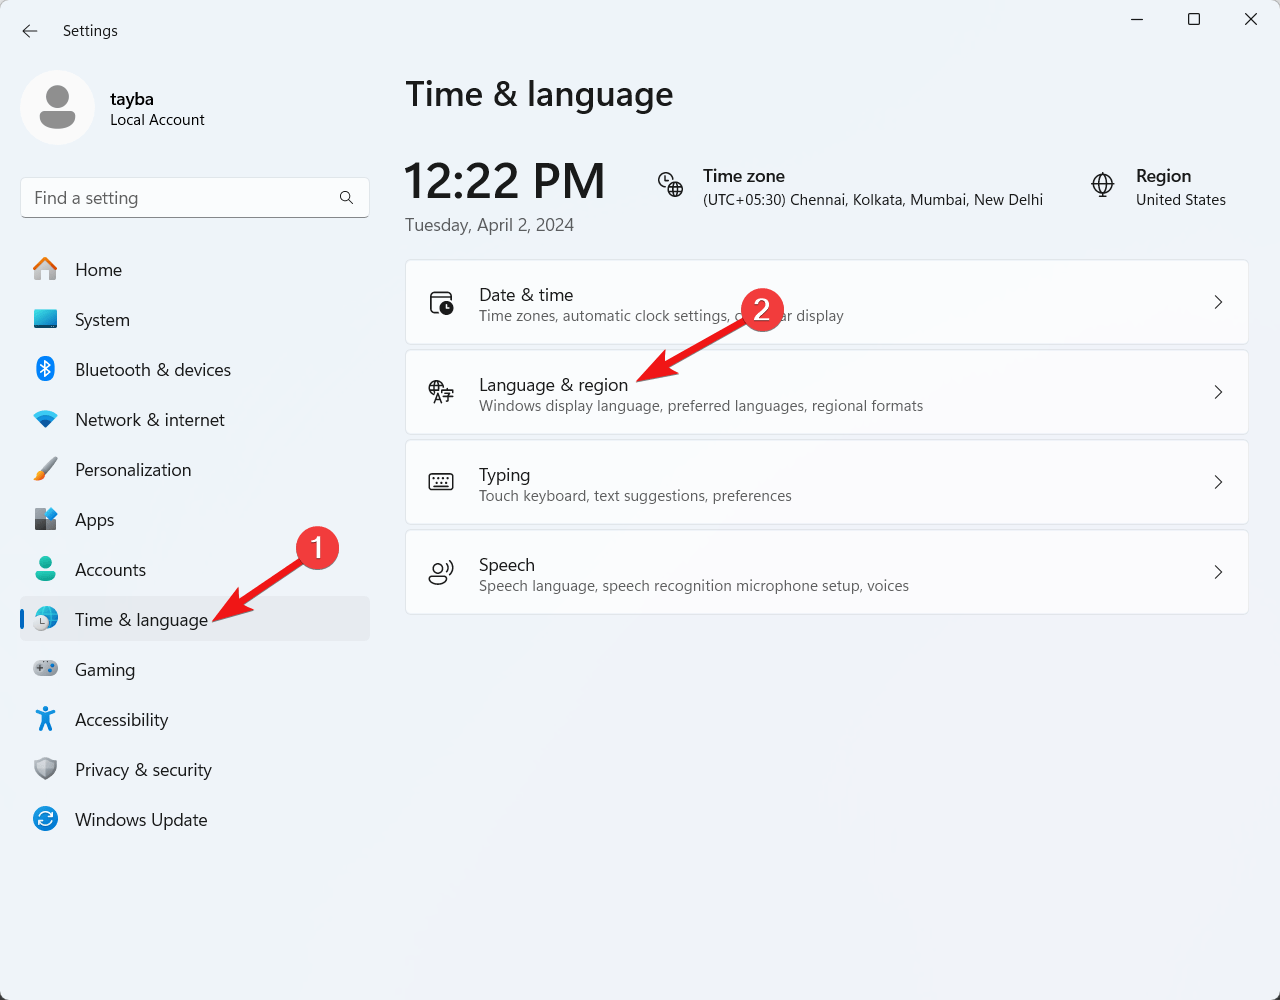
- Choose Time & Language from the left navigation bar followed by Language & region from the right section.

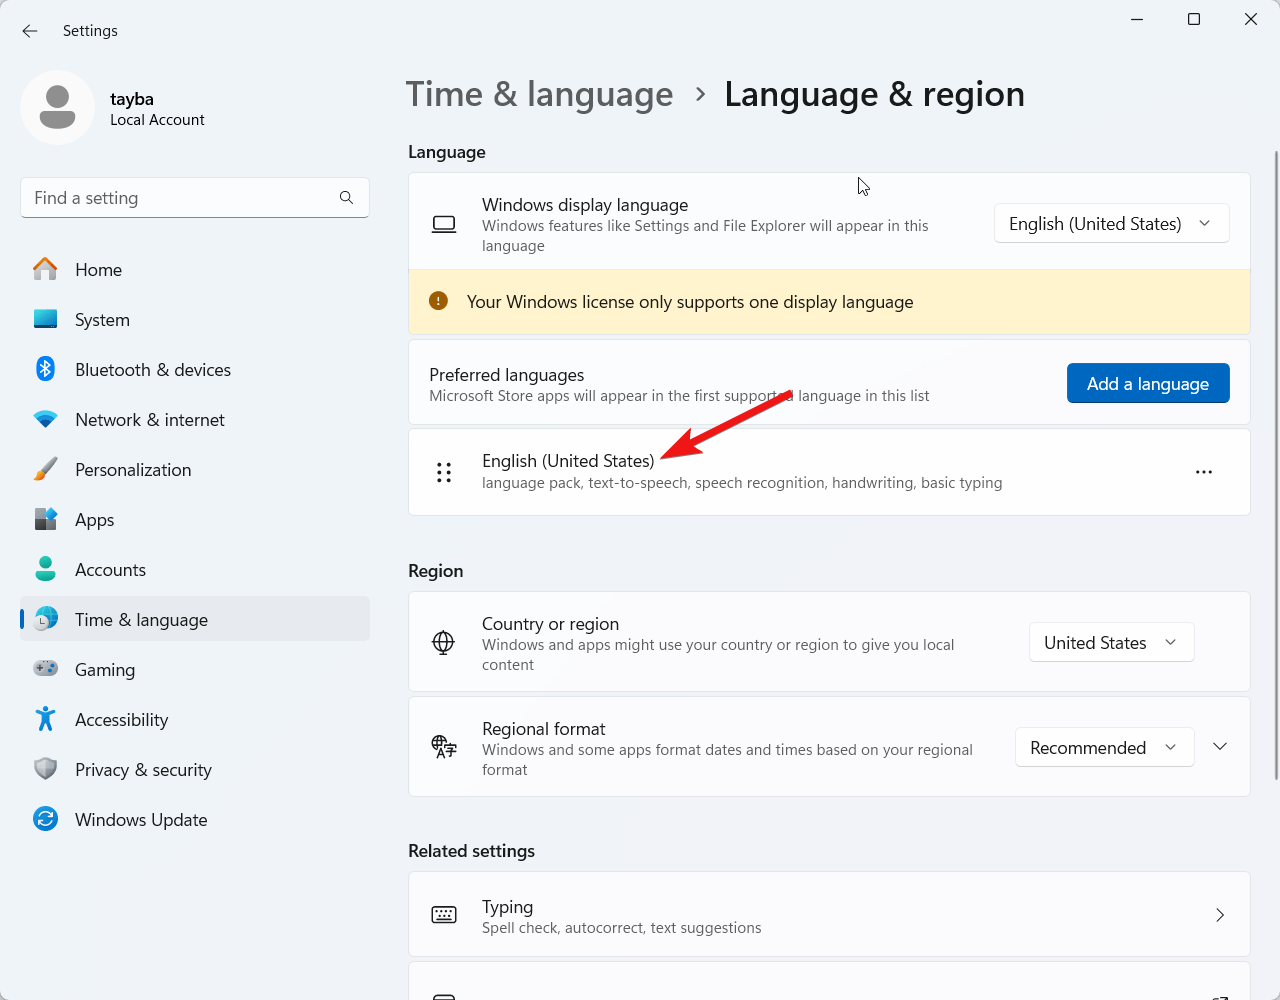
- Locate and click on English or your other desired Language under the Preferred Languages section.

- To remove the language pack, select Remove.
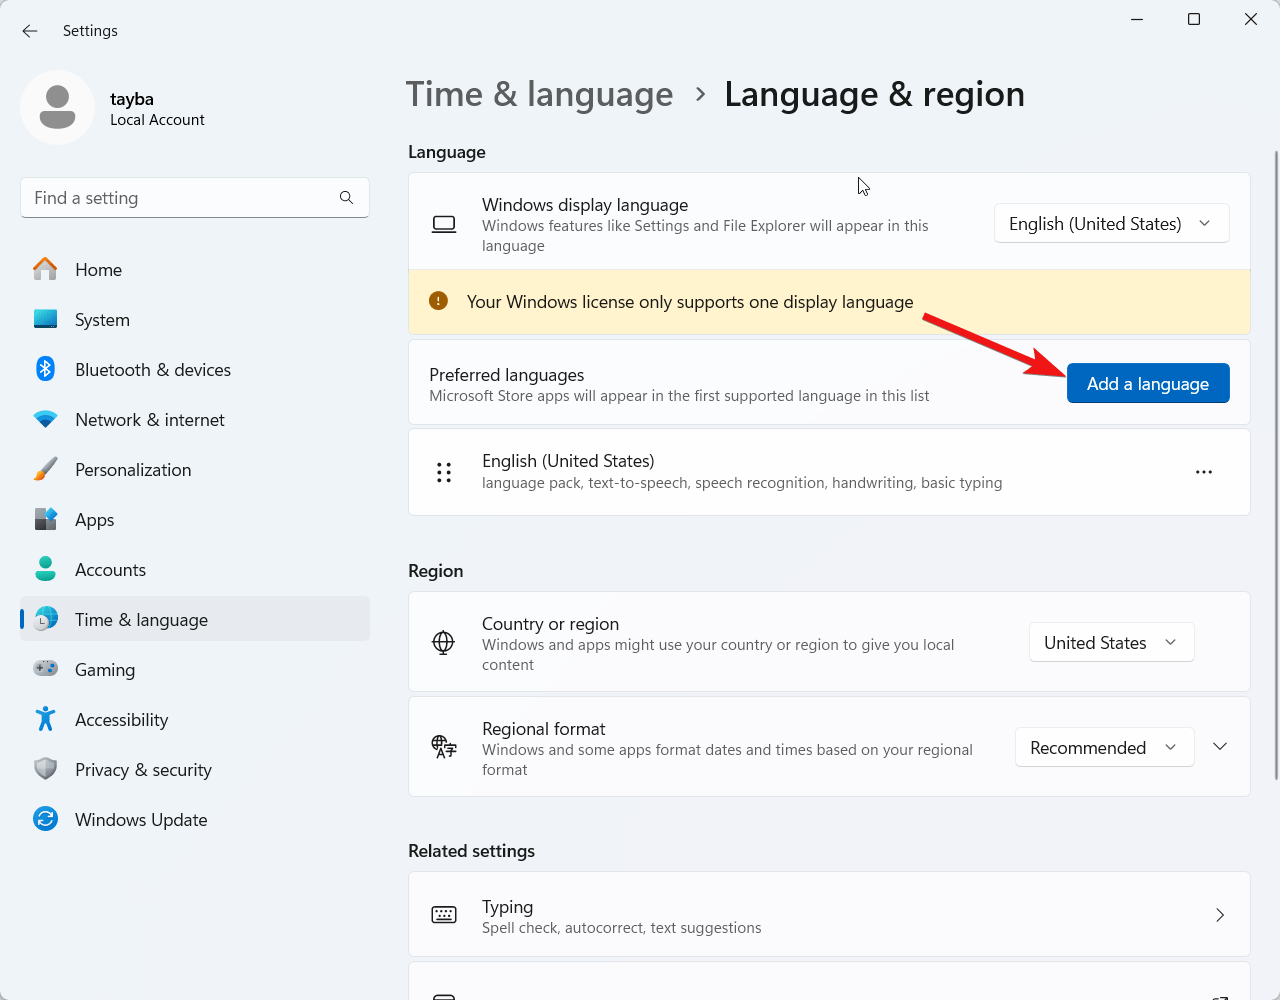
- Click Add a Language to reinstall English (or your preferred language).

- Choose English from the selection, click Install, and then click Next.
- To complete the installation, restart your computer.
Conclusion
That’s all it takes to have an operating Windows 11 PC and the same language on your lock screen. In most cases, the workarounds mentioned will easily work for you. If the language problem is not resolved, you may have to opt for a fresh Windows reinstallation. If you have any other queries, feel free to reach out.
If you've any thoughts on How to Fix Windows 11 Lock Screen in Another Language, then feel free to drop in below comment box. Also, please subscribe to our DigitBin YouTube channel for videos tutorials. Cheers!
