When it is about the media players, surely, VLC media player is one of the first names to strike the minds. After all, it is one of the most widely used media players worldwide. VLC supports almost all video and audio formats and provides an easy-to-operate interface, which is why it is considered the best. VLC player has been in the long run and is available for all Windows versions. However, it seems to create certain problems with Windows 11 operating system.
As many users have complained of encountering troubles using the VLC media player on Windows 11. According to some users, when they try to launch VLC media player on their Windows 11 system, it shows them a message saying, “This app can’t run on your PC“. On the other hand, a lot of users have complaints about VLC not playing videos or not working on Windows 11. Whatever the problem might be, today, we are going to look at some effective fixes for all these issues.
Ways to Fix Videos Not Playing on VLC in Windows 11
VLC media player not working on your system or not playing videos can happen due to various reasons. We will look at the most common causes together with a possible fix for each. So, here is why you might be facing such an issue.
Upgrade VLC to Latest Version
To make VLC compatible with Windows 11, developers have released several updates. If you recently have switched to Windows 11, it is quite possible that you’re still using the old version of VLC. So please check and download the latest version instead. Using VLC with the latest version will automatically fix most of the issues. You may download the latest version of VLC from here.
Re-Check Video Download
There are different video formats files available to watch videos, but each one of them operates differently. For MP4, files are easier to process and will even work if there are some errors in the file. On the other hand, filetypes like MKV, AVI, or VID filetypes are error sensitive and will crash even if there is the slightest error while downloading/copying the file.
So please check your download source of the file and make sure there are no corruptions while downloading. And always try to download the MP4 version where ever possible.
Increase Cache Values
When you run heavy video files on VLC, it needs to maintain a caching threshold to make sure you can watch videos in a smooth manner. But when it comes to heavy video files, sizing more than 10GB in size, VLC starts to lag or sometimes faces problems in rendering. In such cases, you have to increase the cache values in the preference tab.
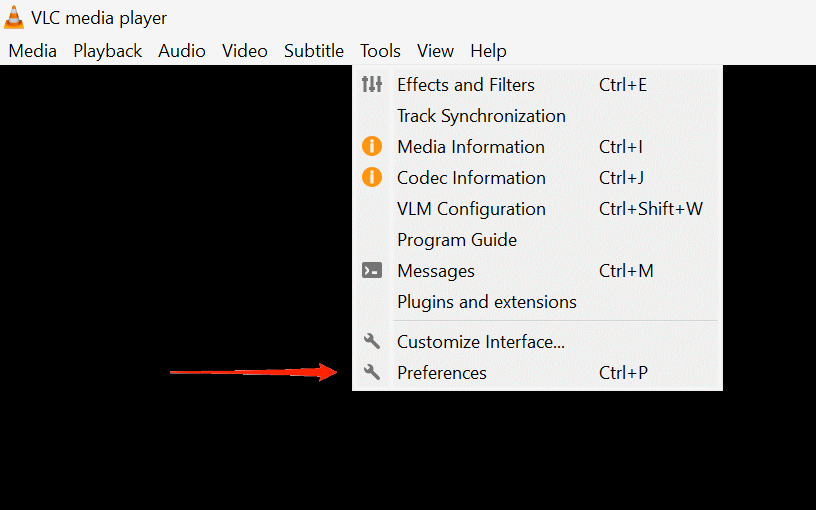
- Open VLC. Select Tools and go to Preferences.

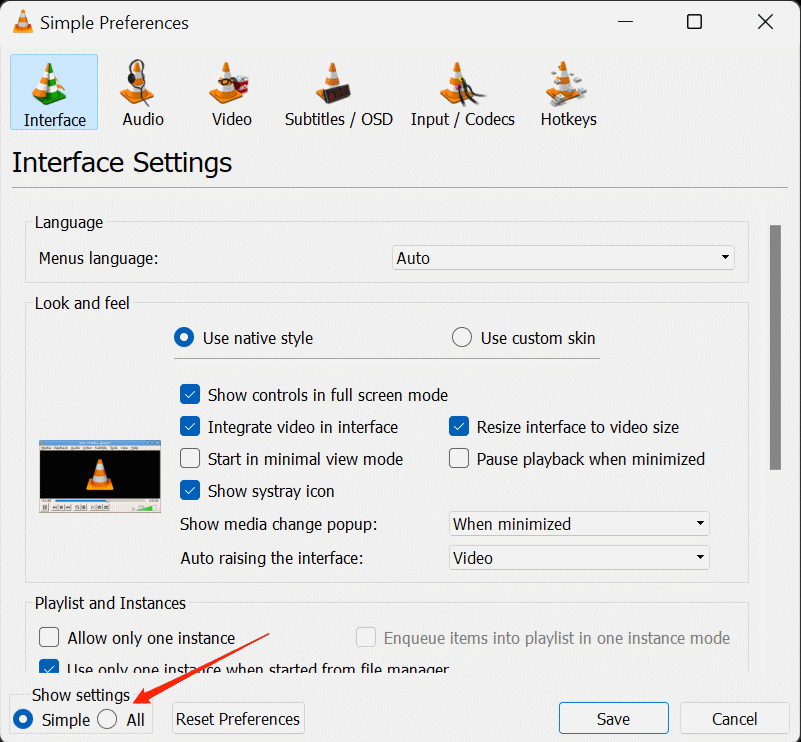
- Now, click on the Show Settings option and select ALL.

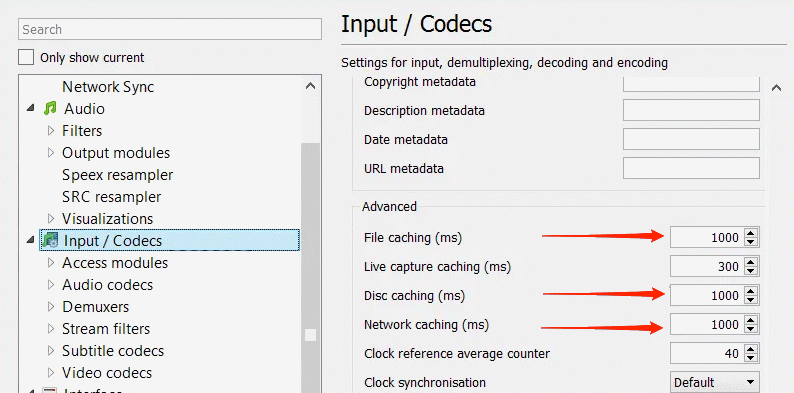
- Here click on Input / Codecs option. Change the values for File caching (ms) to a higher value like 1000 or 2000. Do the same for Network caching (ms) and Disc caching (ms) as well.
Configuring Video Output Mode
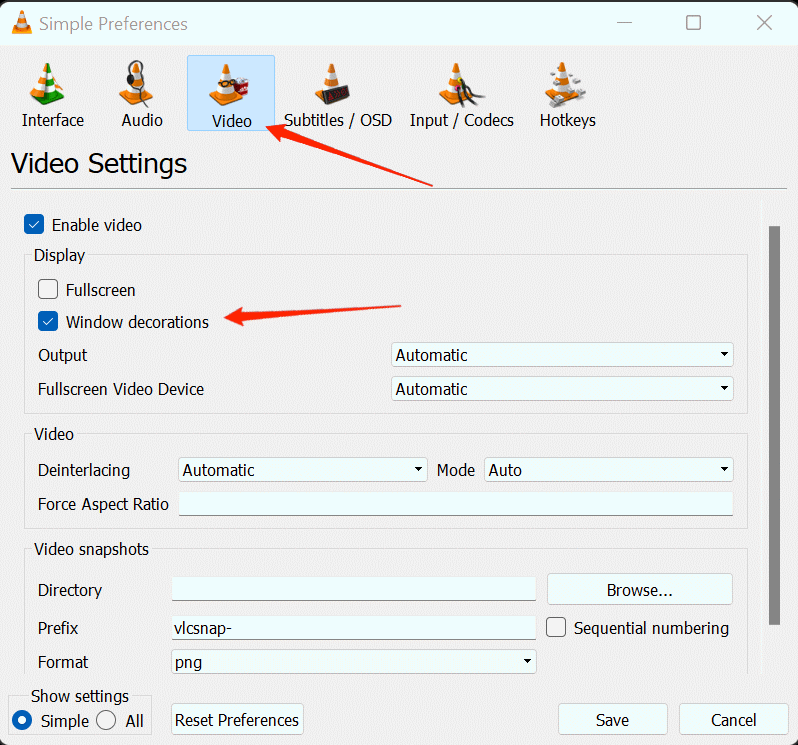
If the above methods don’t help much, you might consider configuring the video output mode. This can be achieved easily from the VLC player itself as you set for the appropriate X server attributes. The steps to configure video output mode in VLC media player are as follows:
- Open VLC Media Player.
- Go to Tools.

- Select Preferences. Head over to the Video Section.
- Make sure you check the Enable Video box.

- Now, check the Window Decorations option.
- Click on the X11 Video Output (XCB) from the drop-down menu.
- Save changes and close the VLC media player.
Once you are done with the above steps, open the VLC player again and check if it plays the video file this time.
Note: If X11 Video Output (XCB) doesn’t work for you (or not available in the list), then you may try Direct X or Open GL options.
Disabling Hardware Video Decoding
Sometimes VLC fails to play any video file format as it cannot support all the rendering effects. If the file you are trying to play has a lot of subtitle tracks, and if your video card fails to support this much information, it will hinder VLC from playing the video file.
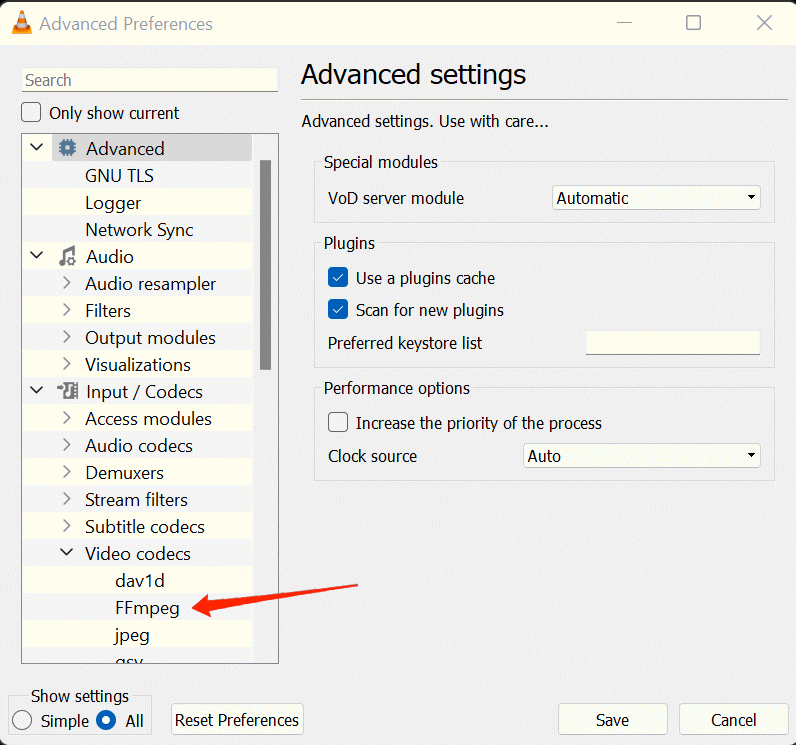
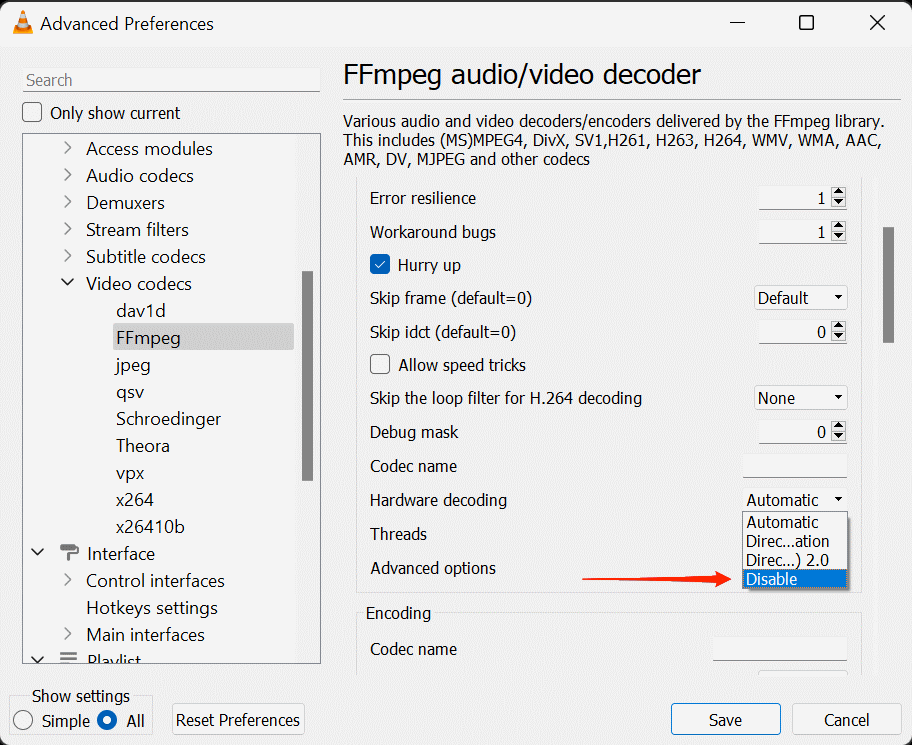
The best way to deal with such a situation is by disabling the hardware video decoding option in VLC. To do that, you can refer to the following steps:
- Open VLC. Select Tools and go to Preferences.

- Now, click on the Show Settings option and select ALL.
- Go to the Input/ Codecs option from the menu.

- Click on Video codecs and select FFmpeg.

- Go to Hardware decoding and select Disable.
Once you have disabled the Hardware decoding, restart VLC and try playing the file again.
Re-install VLC media player
Re-installing the application can come in handy if you are having trouble running or launching the application on your system. If you are on Windows 11, but still using the same old version of the VLC media player, it is possible that it may not run on your PC. Instead, it will display a message saying, “This app can’t run on your PC”.
Additionally, if the media player is having trouble playing the video due to the MP4 codecs, it is another problem that arises when using an outdated version of the application.
In such a case, try uninstalling the application from your computer and looking for the VLC player’s latest version on its official sources. Now, download and run the latest version on your Windows 11 OS.
Convert MP4 file to VLC compatible format
As most of the videos we play are in MP4 format, you might have encountered this issue when it says “Incompatible MP4 codec”. Well, a lot of times, upgrading the application to its latest version puts an end to this problem. However, if upgrading the VLC media player doesn’t fix it, you might have to convert it into a VLC compatible format.
You can find a lot of converters available online. Simply choose one of the services, upload your file for the conversion and finally download the converted version. Try playing the converted file on VLC again; if it plays without any interruption, well then, you just found your answer.
Note: If you don’t wish to go into the hassle of using converters, we recommend you to install a new video player alternative to VLC. Down below we have given some good free options to try!
Use Other Video Players
If none of the above methods works for you, then it’s quite possible that VLC is not supported on your system yet. But don’t worry, as developers are always trying hard to push new updates to make VLC more compatible with multiple devices. Until then, you may also look at other free alternatives to VLC, which works great in Windows 11. Here is a list of the Best Free Video Player Apps for Windows 11 to help you make your decision.
Final Words to Fix VLC Not Playing Videos
VLC as a media player, offers reliable service to its users. However, issues like this can be expected once in a while. VLC Media Player not playing videos or not working in Windows 11 issue is comparatively a common one. These issues basically occur when an outdated version is being used, or the media player has compatibility issues with the MP4 codec. Hopefully, the above-mentioned solutions will help you fix the issues. For more related queries, engage with us through your comments below.
If you've any thoughts on How to Fix VLC Player Not Working on Windows 11?, then feel free to drop in below comment box. Also, please subscribe to our DigitBin YouTube channel for videos tutorials. Cheers!
