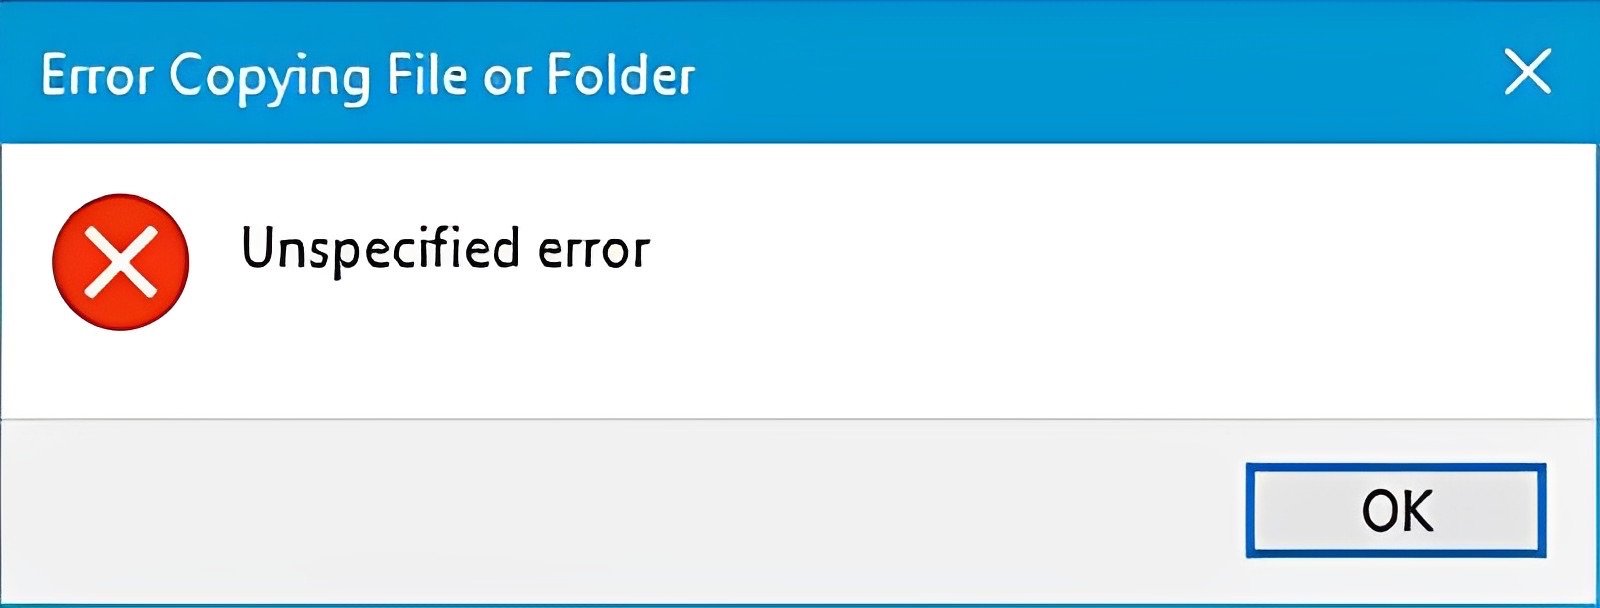
Are you getting an “unspecified error” when copying files or folders in Windows OS? In this guide, I have shared various troubleshooting tips to resolve that problem. Unspecified errors during copying a file or folder may arise if there is not sufficient storage in the target drive.
Copying to an external drive that is not in NTFS format can hinder the file/folder copying process leading to the unspecified error. If the target drive to which the data is being copied has write protection enabled on it then the copying process cannot be completed.
Often when the concerned file(s) being copied is corrupt, that may not allow you to complete the copy-paste process in Windows OS. It is important to know whether the file or folder you are copying is permitted to be copied.
In certain networks of systems, only the administrator may have the permit to copy files or folders. So, a user who is not an admin cannot complete the copy-paste procedure on a PC connected to that network.
Fix ‘Unspecified Error’ When Copying a File or Folder in Windows 11
Implement these fixes to complete copying your data on the Windows PC smoothly.
1. Allow Full Control to Modify Files or Folders on the PC
Having full control over a file or folder will allow you to read or write it as per your requirements.
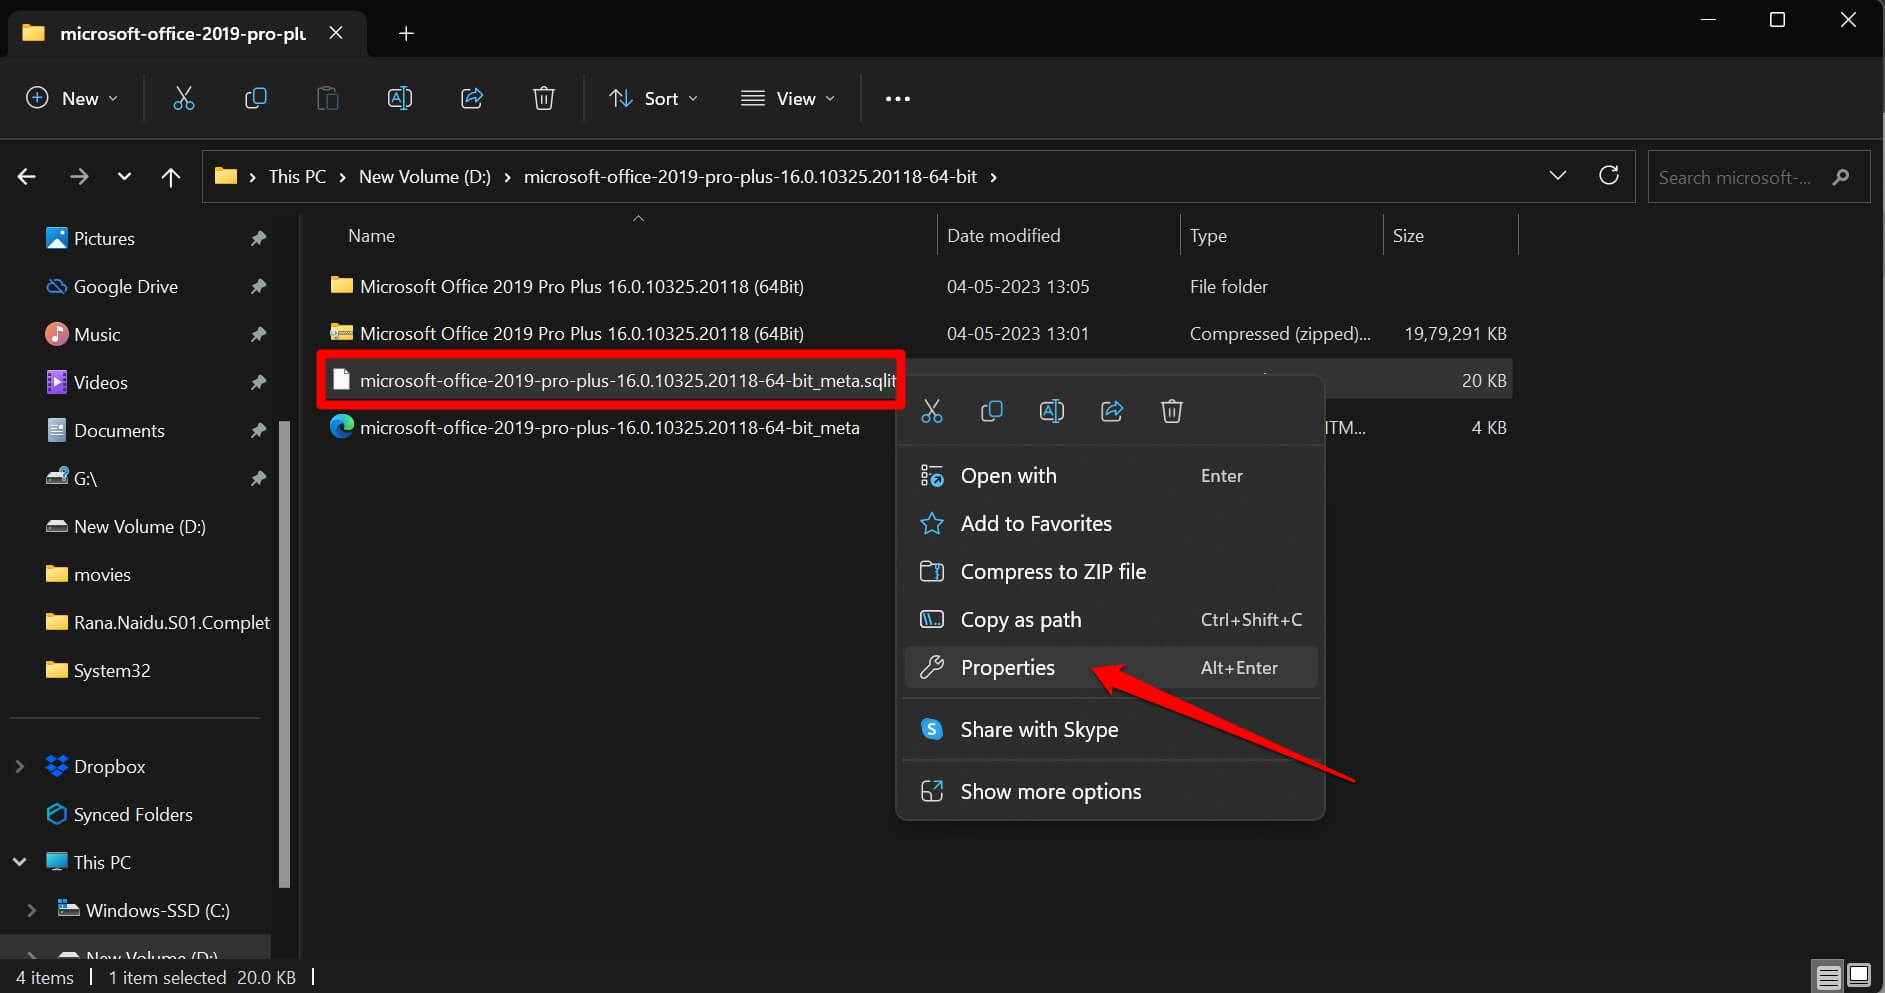
- Right-click on the problematic file or folder and click on Properties.

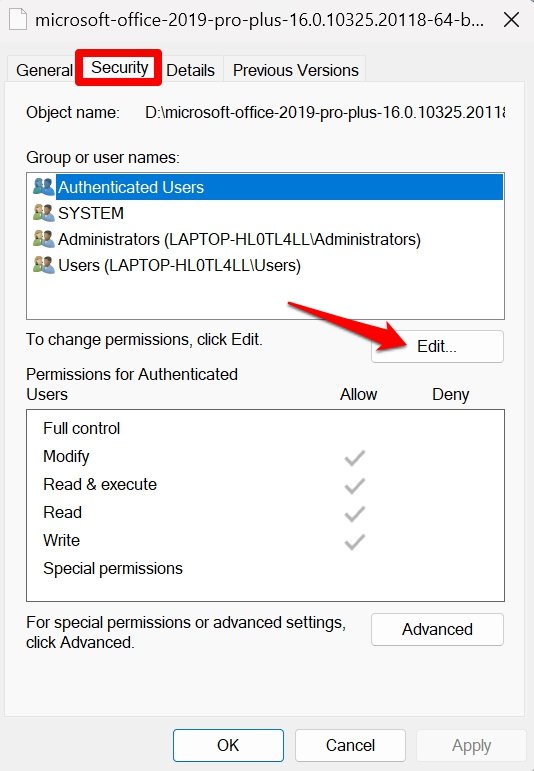
- Under the Security tab, click the Edit button.

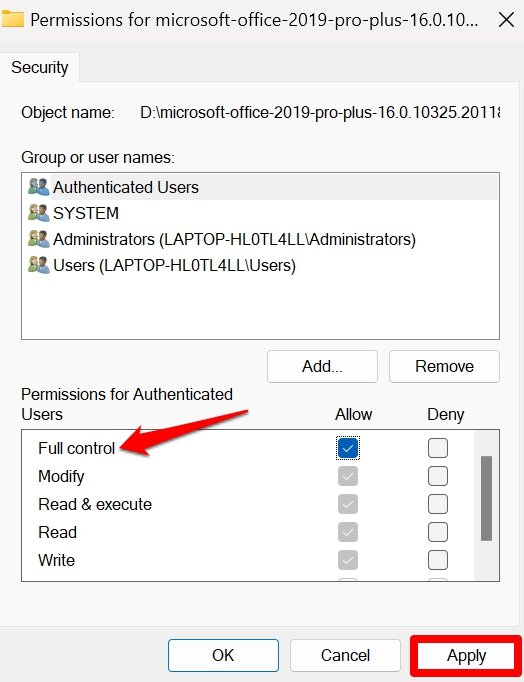
- Click the checkbox Allow beside Full Control.
- To confirm the changes click on Apply > OK.

2. Restart the Computer
For fixing random technical snags, a restart should be sufficient. On many occasions, this simple troubleshooting tip has worked for many Windows users.
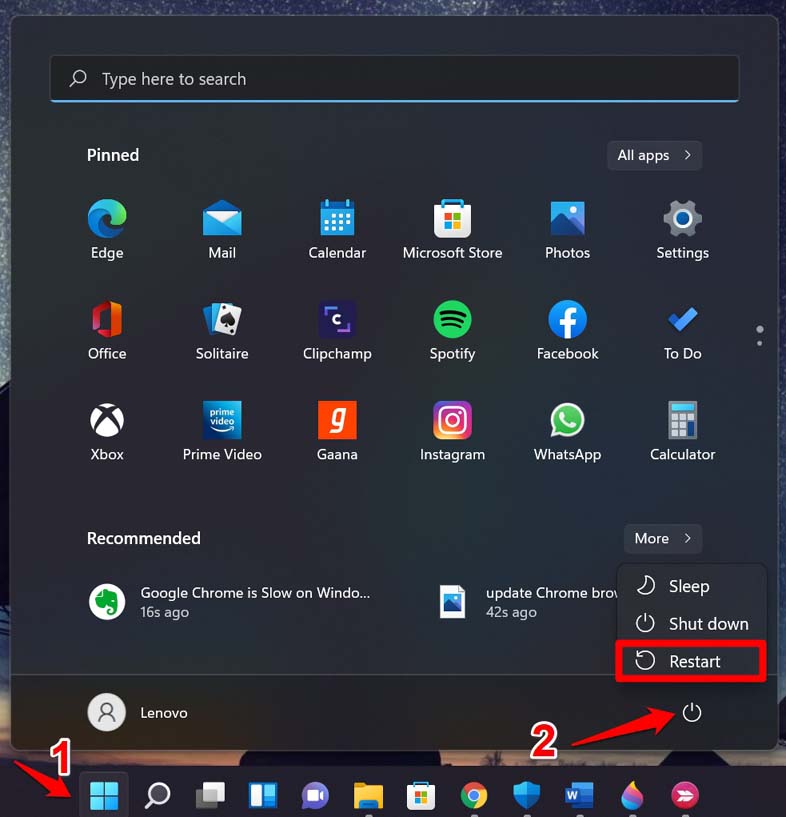
- Press the Windows key on your PC.
- In the search console, click the Power icon at the bottom right corner.
- From the menu, click on Restart.

Once the computer restarts, try to copy and paste the necessary files or folders and check if the “unspecified error” is still showing.
3. Use the File and Folder Troubleshooter
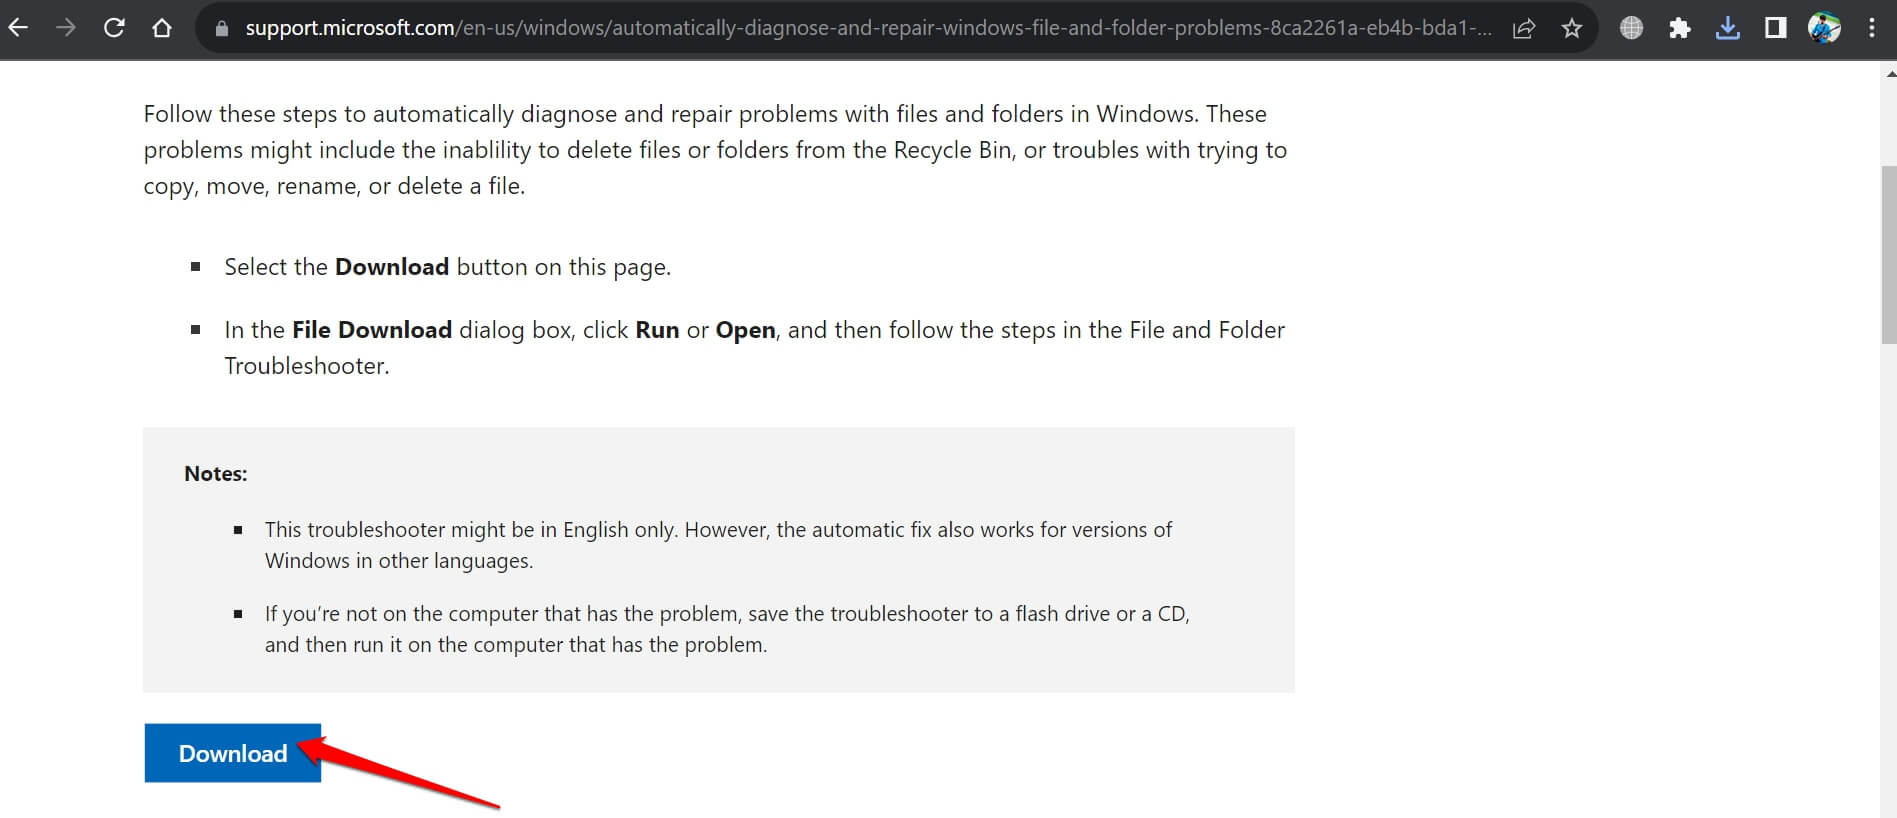
Windows OS has several dedicated tools to troubleshoot issues with various of its elements. There is one such File and folder troubleshooter. you can use that to look for corrupt or problematic files and folders on your PC and connected external devices. It will fix those files, thus allowing you to smoothly copy the files within the PC or to external directories.
- Download the File and Folder Troubleshooter on your PC.

- Launch the troubleshooter tool.
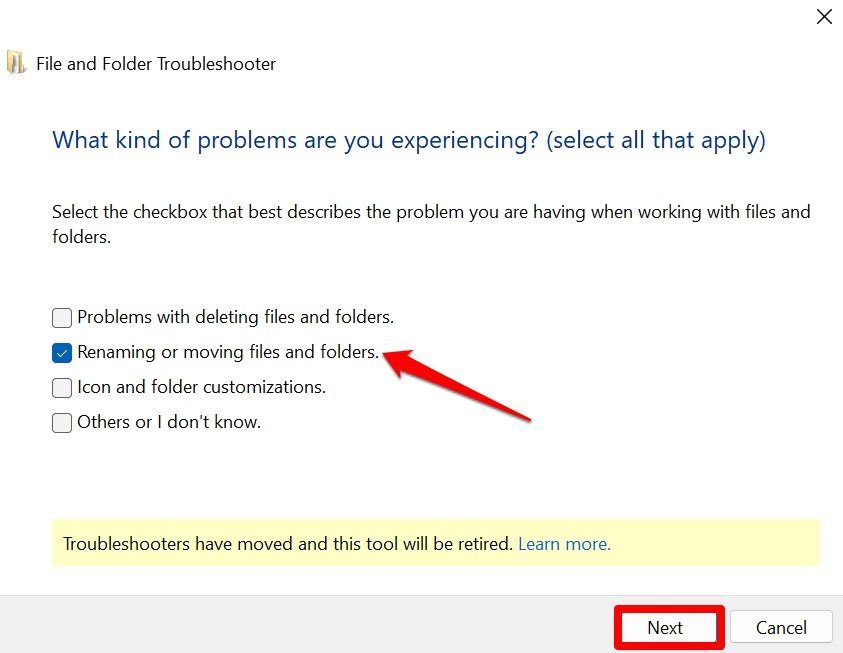
- Then, click on Next to start the troubleshooting.
- Select the option Renaming or moving files and folders.
- Click Next to continue.

4. Remove Write Protection from the Drive
Use the Terminal with administrator access to remove the write protection on the target drive to which you are copying the file or folder on Windows OS.
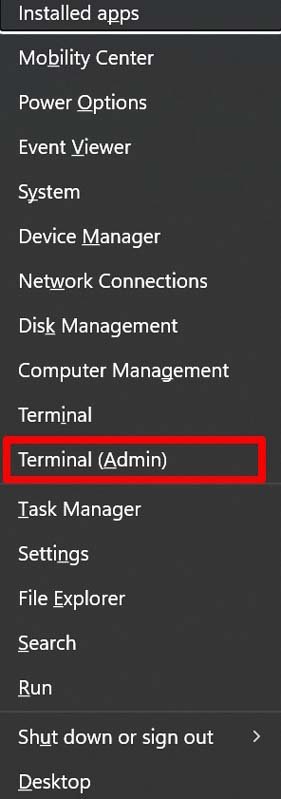
- Press Windows + X to launch the power user menu.
- select Terminal (Admin) from the menu.

- Click on Yes when the User Account Control dialog box shows up.
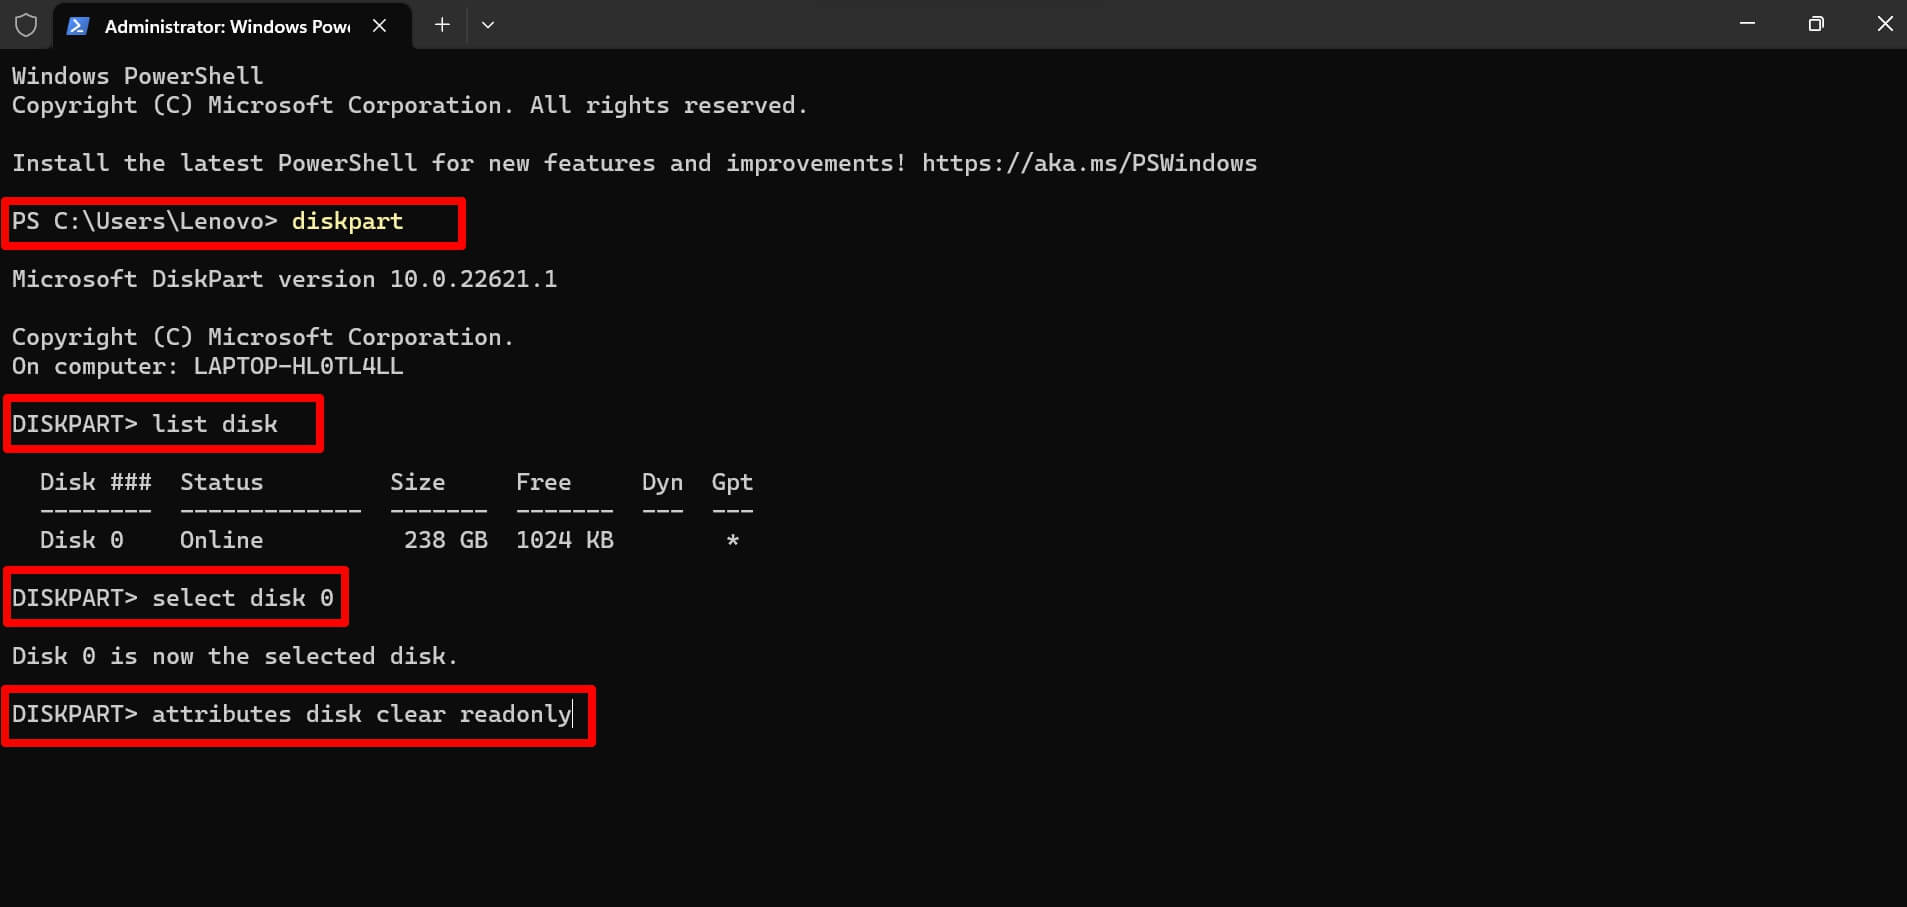
- Next, type the following command and hit enter.
diskpart
- Now, enter the command and press enter. It will show the drives and external drives connected to your PC.
list disk
- To access the drive for which you want to remove the write protection
Select disk X
PS: ‘X’ is a placeholder for the actual number that represents the drive whose write protection you are planning to remove.
- Now to remove write protection for the selected drive, enter the command.
attributes disk clear readonly
- Press enter.

5. Check the File Format of the Drive
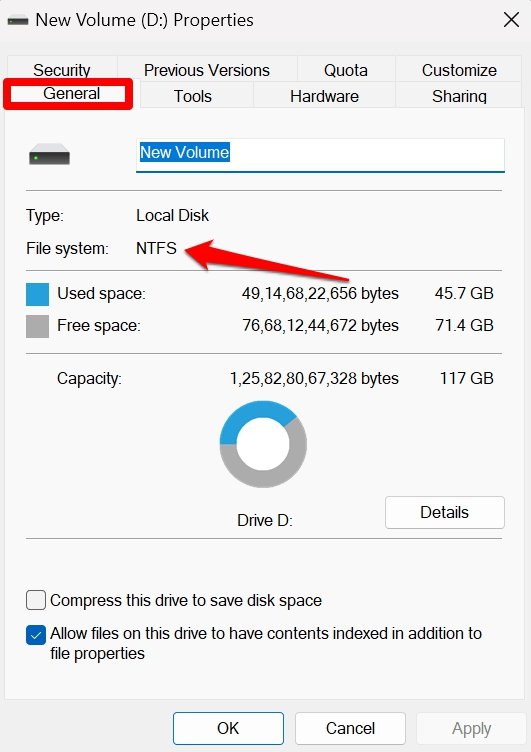
If you are trying to copy data to an external drive, it should be in NTFS file format. If it is of FAT32 type, the copying of the file will not be successful, and it will result in the “unspecified error”. To check whether the target drive is of NTFS file format or not,
- Access File Explorer by pressing Windows + E.
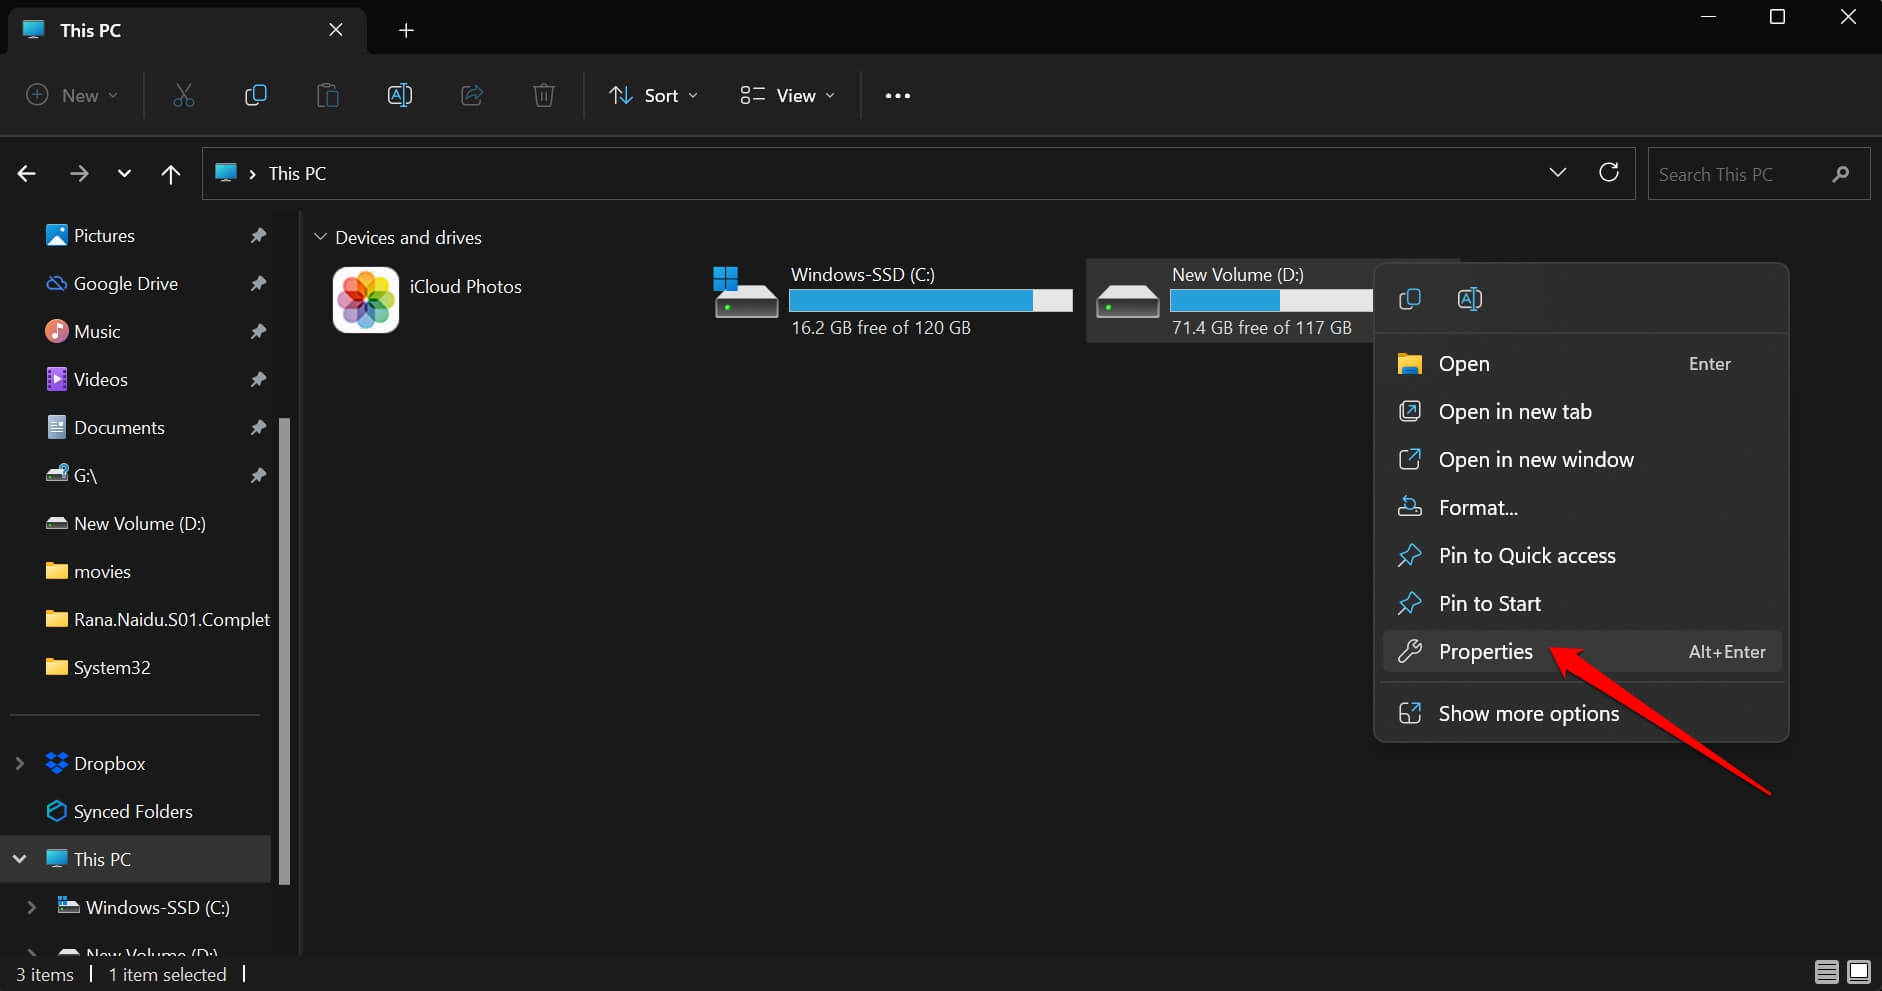
- Right-click on the drive which you want to check for file format and select Properties.

- Click the General tab of the Properties dialog box.
- Check the File System section to know the supported format.

If a storage device is of FAT32 type, you have to format it to change it into the NTFS system to proceed with copying and pasting your data.
6. Scan for Malware
Often having malware on a certain drive or a file or folder can stop it from getting copied within the computer or to an external drive. This can result in Windows throwing the “Unspecified error” during the failed copying attempt.
You have to manually search your computer for any possible malware that Windows Defender may have missed out on and get rid of that.
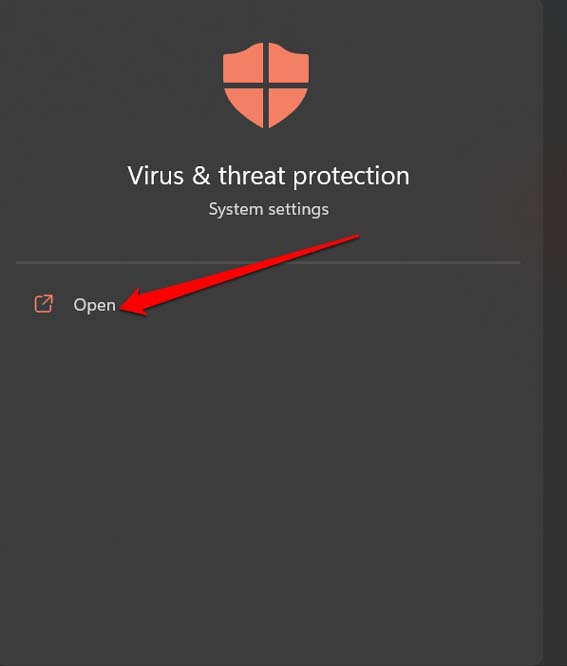
- Launch the Virus and Threat Protection using Windows + S.

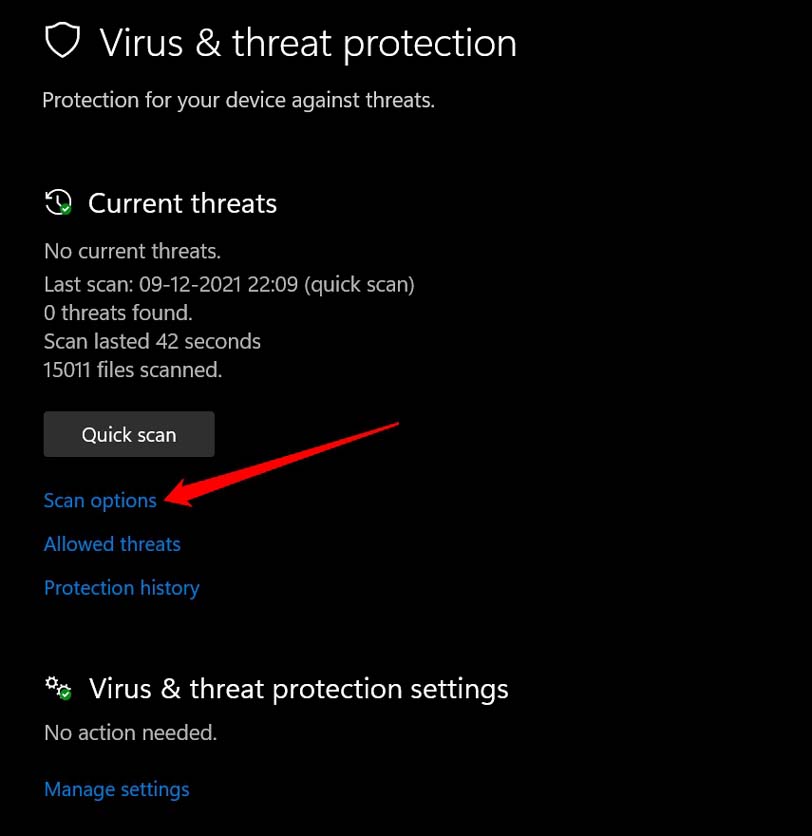
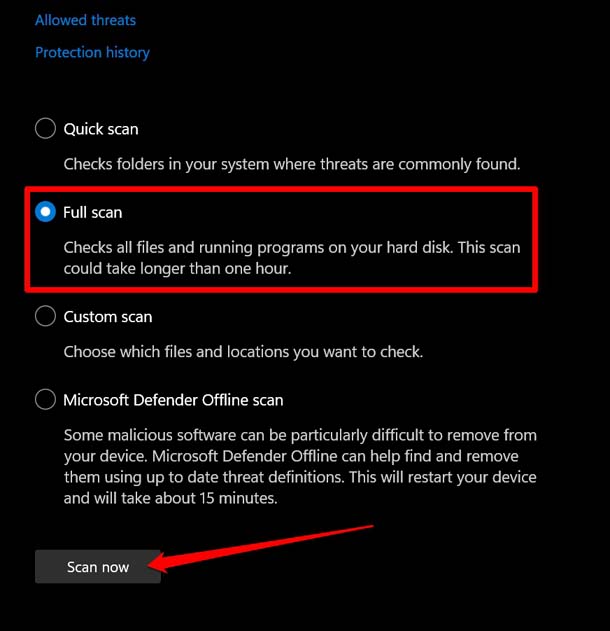
- Click on Scan Options.

- Next, select Full Scan and click on Scan Now to start the scan for malware.

The malware scanning will take a while to complete depending upon the volume of information present on your PC. If any malware is spotted, follow the instructions on the screen to remove it promptly. Then restart the PC and try to copy the file or folder that was returning the “unspecified error”.
7. Check if Sufficient Storage is available in the Target Drive
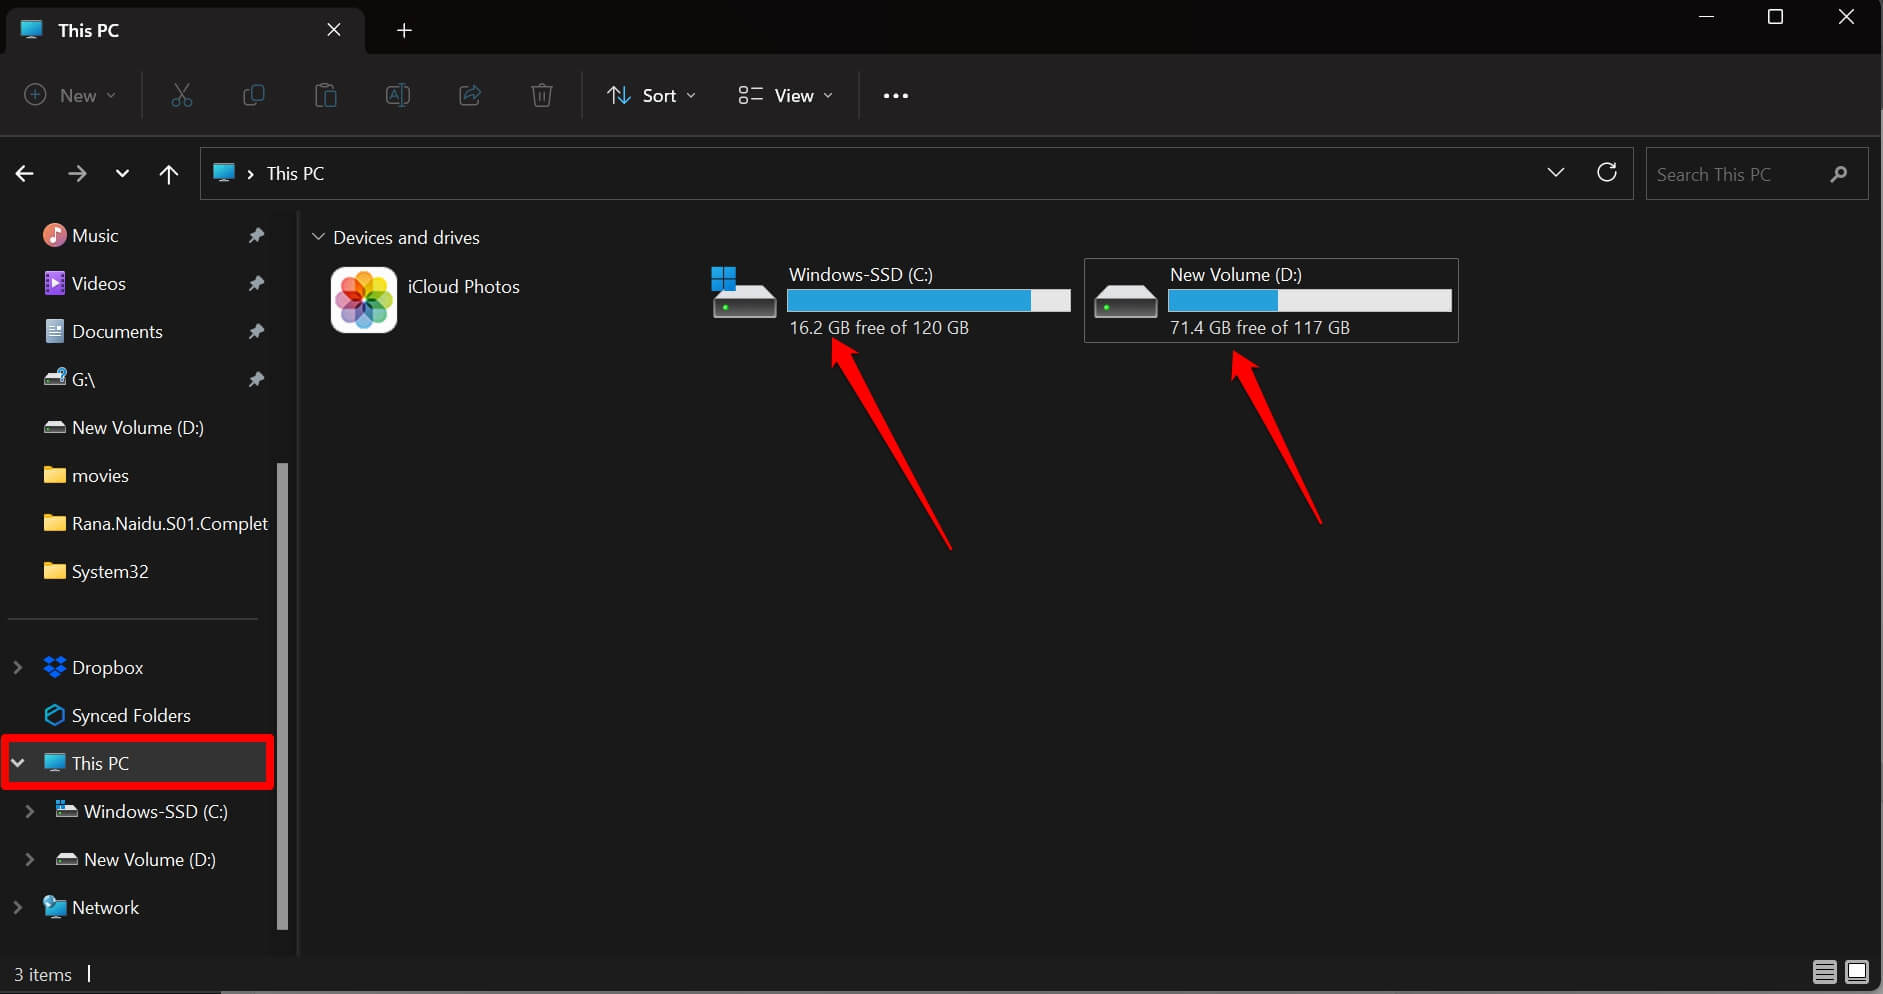
All the hard drives/SSD and external drives are listed within This PC section of File Explorer. Under each disk drive, you can see the used storage and available storage capacity mentioned.
- Press Windows+ E to launch the File Explorer.
- On the left column, click on This PC to highlight the storage details of all the hard drives and external storage devices associated with your PC.

You need to ensure that the drive into which you want to copy one or more files/folders has sufficient storage space to house those files.
Copy Files and Folders Easily on Windows 11
Copying and pasting data within the PC is a simple mechanism. It gets complicated when the system throws error messages and doesn’t let you copy your files to a destination drive on the computer. I hope these tips and tricks will help you fix the “Unspecified Error” when copying a file or Folder in Windows 11.
If you've any thoughts on How to Fix ‘Unspecified Error’ When Copying File or Folder in Windows?, then feel free to drop in below comment box. Also, please subscribe to our DigitBin YouTube channel for videos tutorials. Cheers!

