Are you encountering a specific error message “This Setting Is Managed by Your Administrator” on Windows 11? Usually, when you try to make changes to some settings of Windows Security or any security policies on Windows 11, this error message will stop you from doing so.
The message means that the administrator of the PC doesn’t allow you to make changes to the security settings as per your will. It makes sense when you are working on a PC in your office or college. Only the admin of the computer network is authorized to make changes to any settings on the computer.
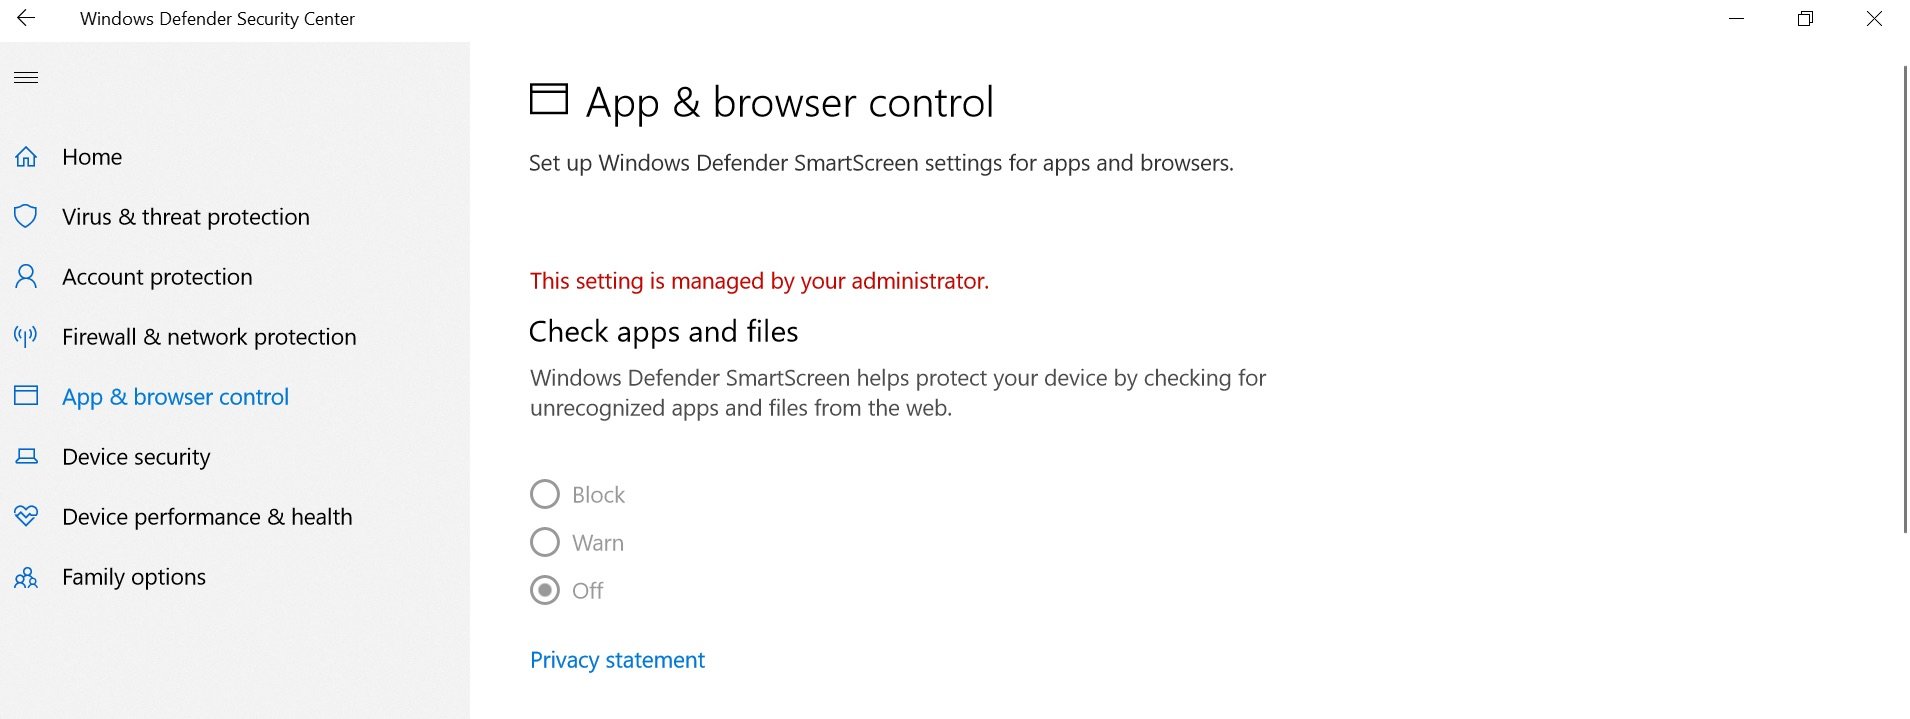
Strangely, users with a personal computer at home also encounter this error message stopping them from modifying any settings within the Windows security. I have outlined a few troubleshooting tips that will help you fix the “This Setting Is Managed by Your Administrator” error on Windows 11.
Reasons for Setting Managed by your Administrator Issues
Before heading to the troubleshooting part, let us understand the possible reasons responsible for this error.
The “This Setting Is Managed by Your Administrator” warning may be caused by
- A corrupt system file
- Some flawed security policies
- Any bug in the Windows Registry.
Bugs on Windows OS or in the Windows Security app may also trigger the error not allowing you to make changes to security settings.
Top Ways to Fix ‘This Setting Is Managed by Your Administrator’ Error
Let us get started with the troubleshooting tips to enable access to change the security settings on your Windows 11 PC.
1. Update the Windows OS
Start by updating the Windows OS to a newer build. This will take care of fixing the bug issues on the operating system that may have been causing the “This Setting Is Managed by Your Administrator” error.
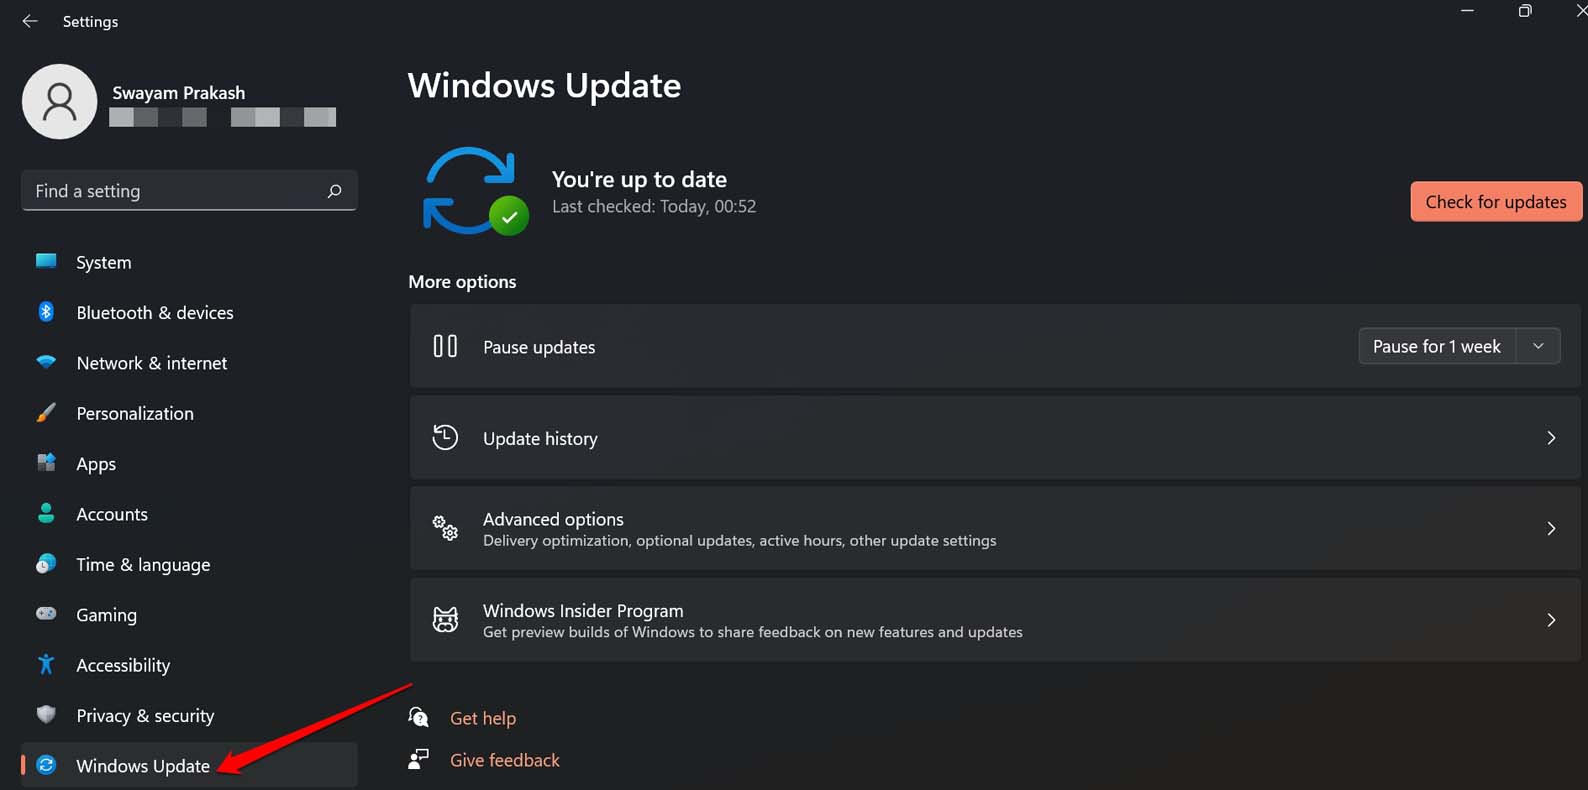
- Go to Windows settings by pressing Windows + I.
- Click on Windows Update on the left-hand panel.

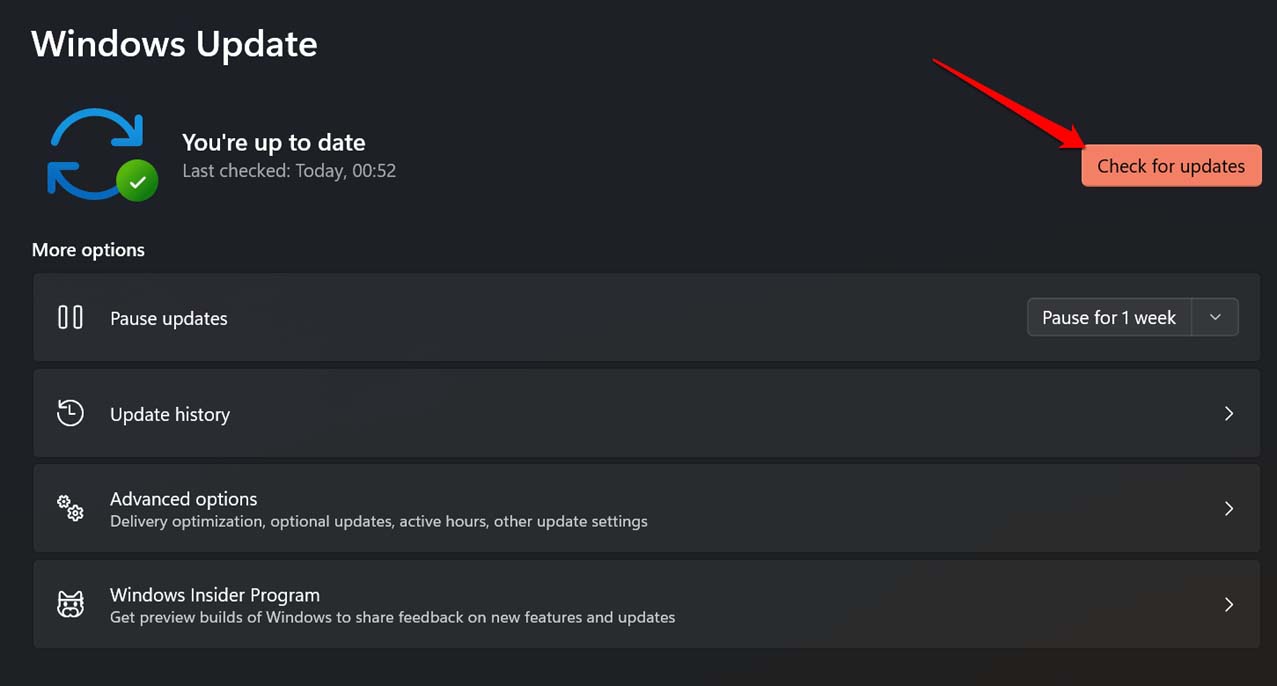
- Then click on Check for Updates.

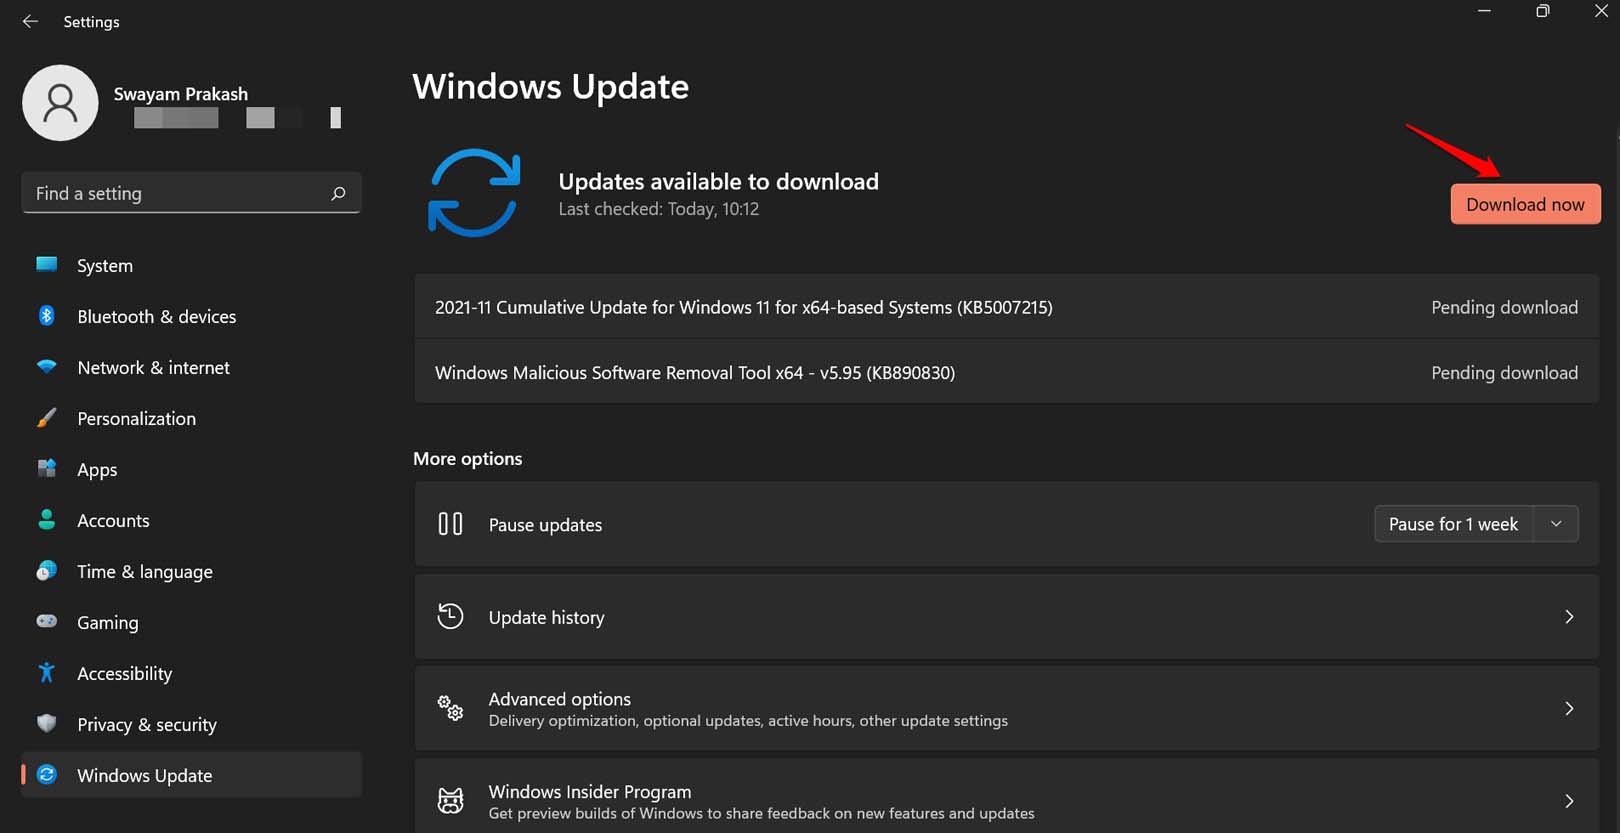
- If any new update is available, click on Download Now.

If your PC is connected to the web and you have permitted auto download of the software update, the updating will happen automatically. All you have to do is restart the PC to finish the installation.
2. Look for Corrupt System Files and Fix Them
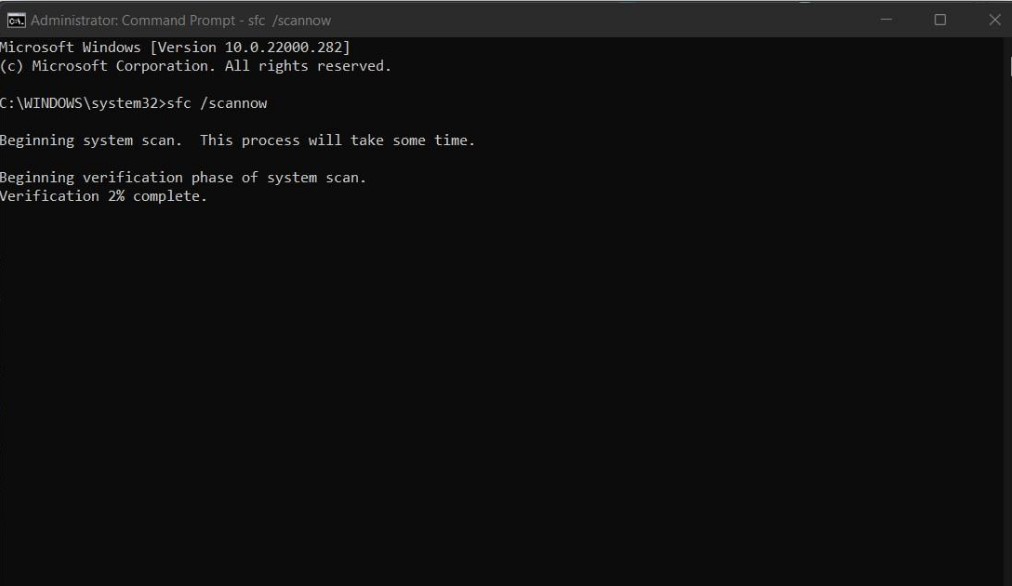
Use the SFC and DISM scan to look for corrupt system files on your PC. Here are the steps for that.
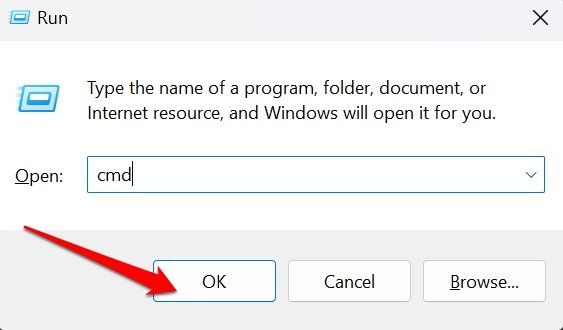
- Press Windows + R to open the Run box.
- Type in cmd and press enter.

- Enter this command.
sfc /scannow

- Press enter.
Do not interrupt while the search for corrupt system files is in process.
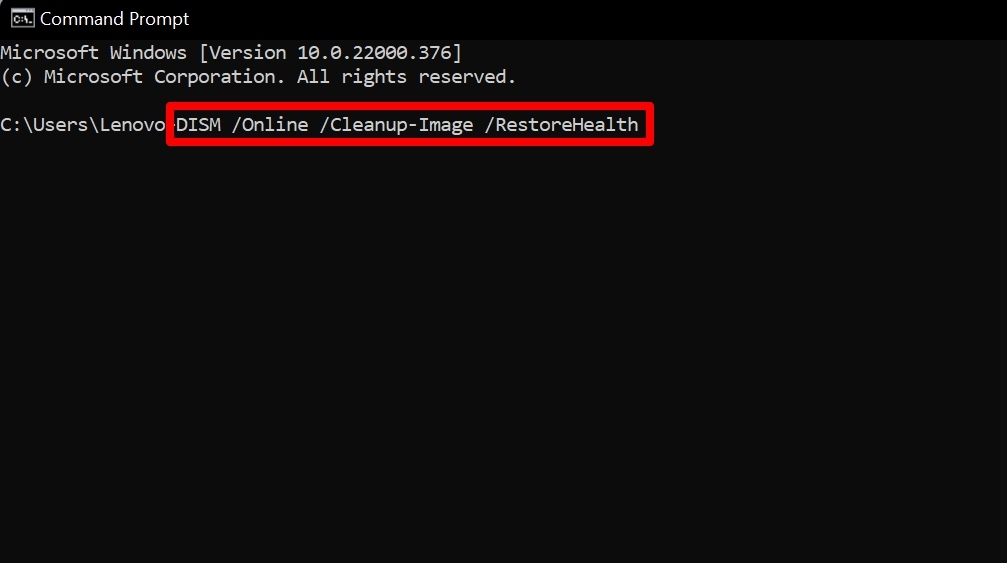
If you want to follow the DISM scan, follow these steps.
- Open cmd using Windows + R as mentioned in the previous steps.

- Provide these commands and execute them one by one.
DISM.exe /Online /Cleanup-image /CheckHealth

DISM.exe /Online /Cleanup-image /ScanHealth

DISM.exe /Online /Cleanup-image /RestoreHealth

3. Re-Register Windows Security App
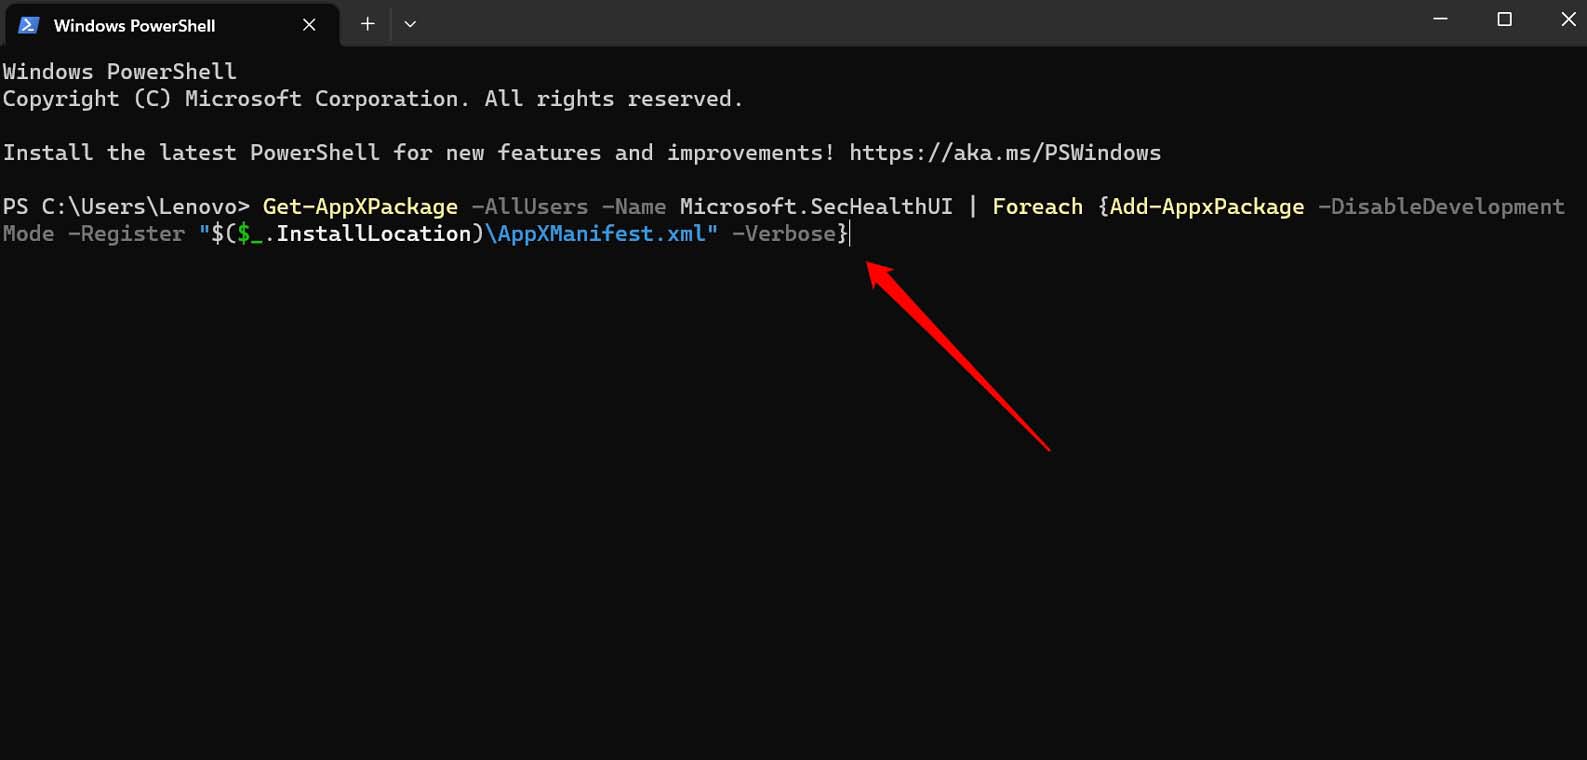
You may re-register the Windows security app through a PowerShell command. It is a great way to fix the “This Setting Is Managed by Your Administrator” error in the Windows security app.
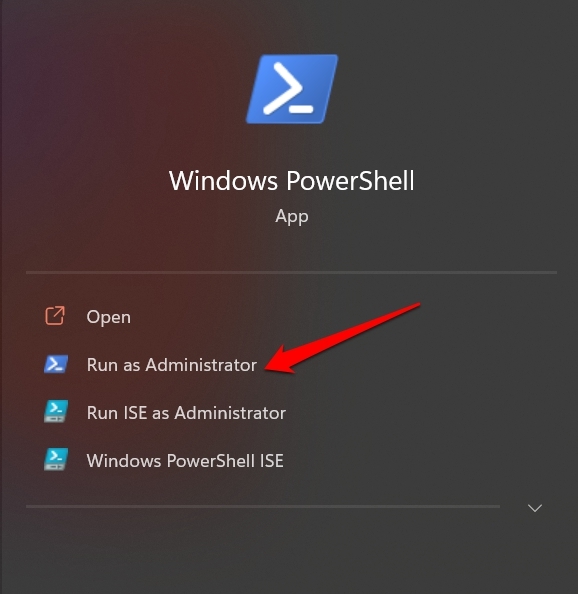
- Press Windows + S to open the search console.
- Type PowerShell and click Run As Administrator when the appropriate result shows up.

- Enter the following command and press enter.
Get-AppXPackage -AllUsers -Name Microsoft.SecHealthUI | Foreach {Add-AppxPackage -DisableDevelopmentMode -Register "$($_.InstallLocation)\AppXManifest.xml" -Verbose}
- Restart the PC.
Now, access the Windows security app settings and try to make the changes that you want.
4. Make Changes to the Windows Defender Policies
Access the Group Policy Editor to make changes to policies related to the Windows Defender.
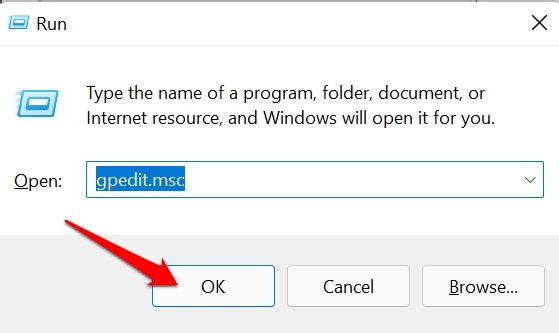
- Press Windows + R to bring up the Run box.
- Type “gpedit.msc” and press enter.

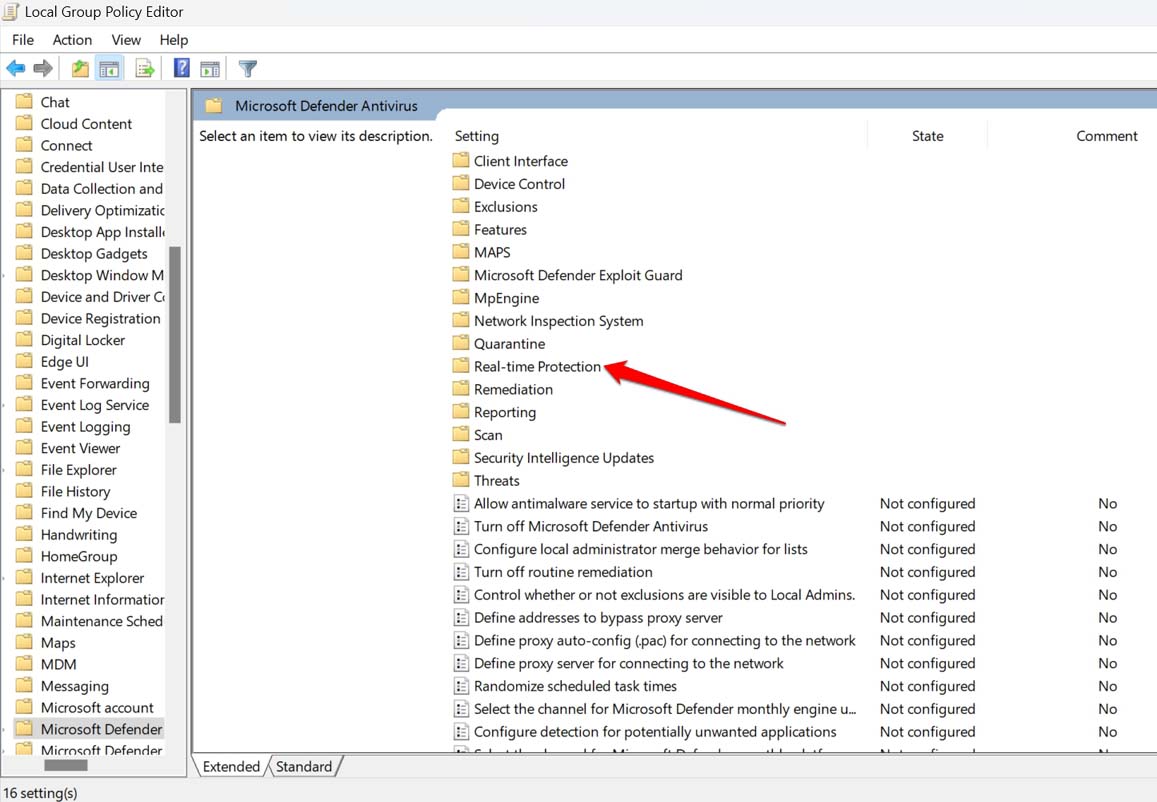
- On the left-hand panel, under Computer Configuration, click Administrative Template > Windows Components.
- On the right-hand side, double-click Microsoft Defender Anti-virus > click on Real-Time Protection.

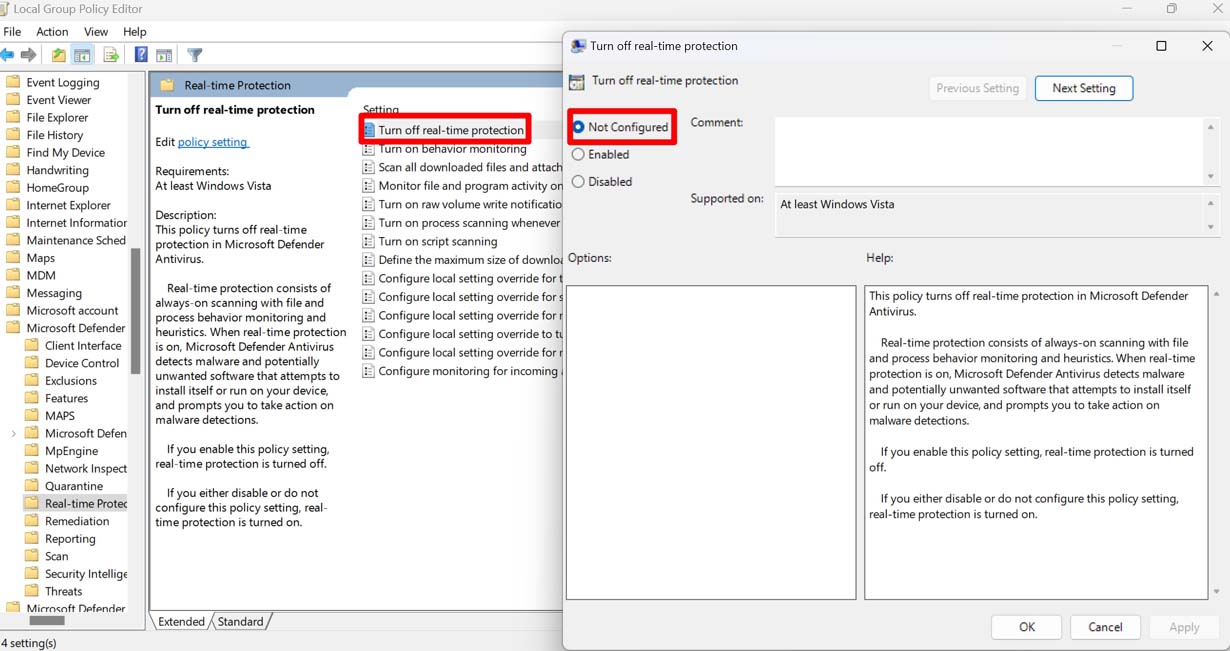
- Double click on Turn off real-time protection.
- Select Not Configured and click on Apply.

5. Remove Windows Defender from the Registry
Access the Windows Registry and delete the registry key of Windows Defender. I suggest backing up the parent registry and copying it to an external drive such as USB storage.
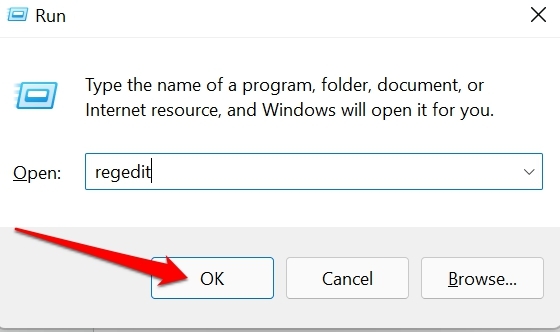
- Press Windows + R.
- In the Run box, type regedit and press enter.

- Follow this path within the Registry.
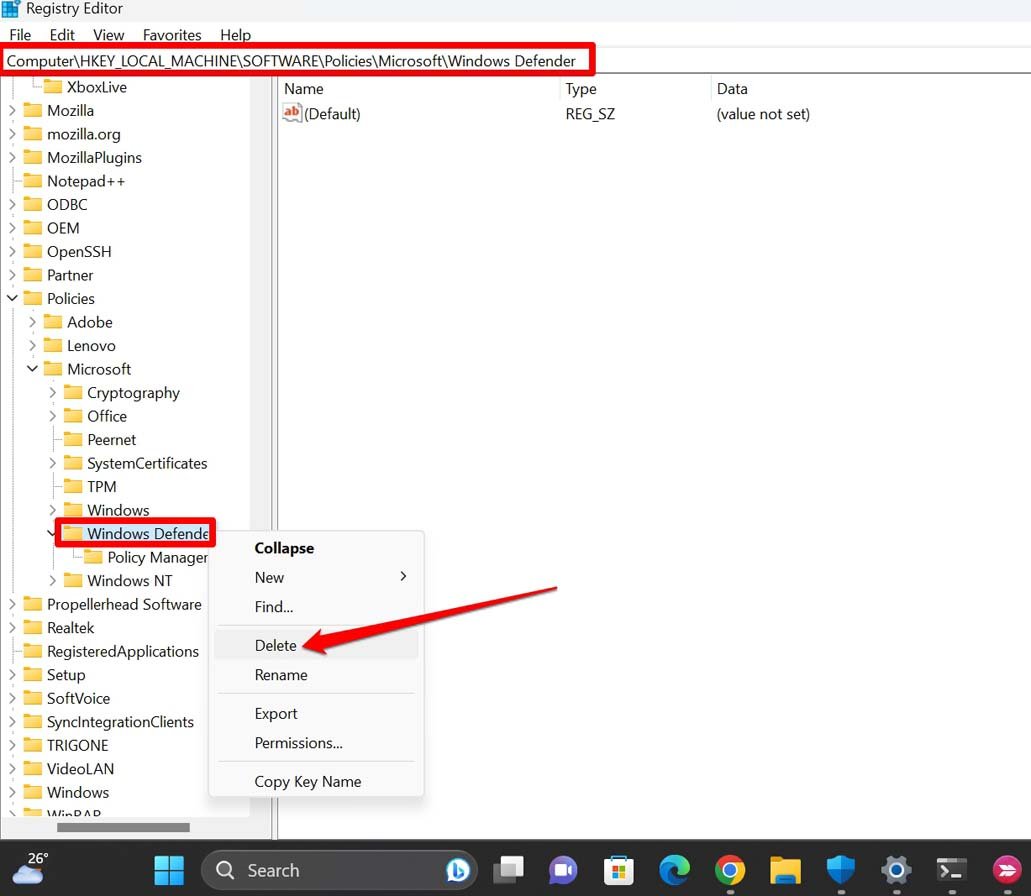
HKLM\Software\Policies\Microsoft\Windows Defender
- Right-click on the Windows Defender key and select Delete from the menu.

- Confirm the deletion by clicking on Yes on the confirmation pop-up.
NOTE: Modifying the Windows registry may make some apps buggy. Carry out this troubleshooting at your discretion. DigitBin or the author will not be liable for any incidental technical problem arising due to improper modification of registry keys.
6. Reset Windows Security App
Resetting the Windows security app will change all the security settings back to the default values. It is often useful in resolving technical issues arising due to wrong settings.
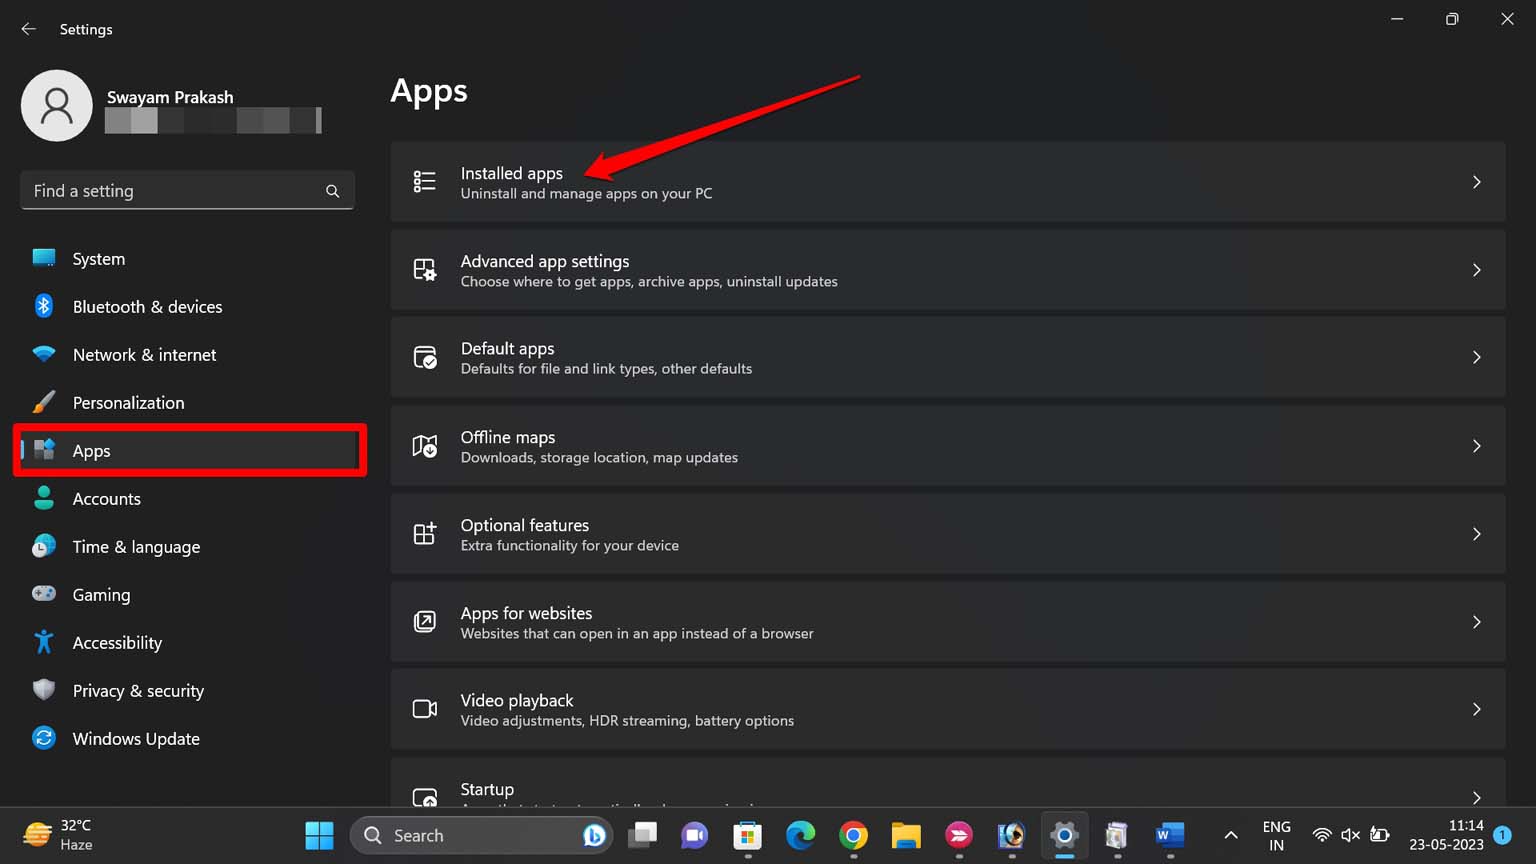
- Press Windows + I to go to the Windows settings.
- Click on Apps > Installed Apps

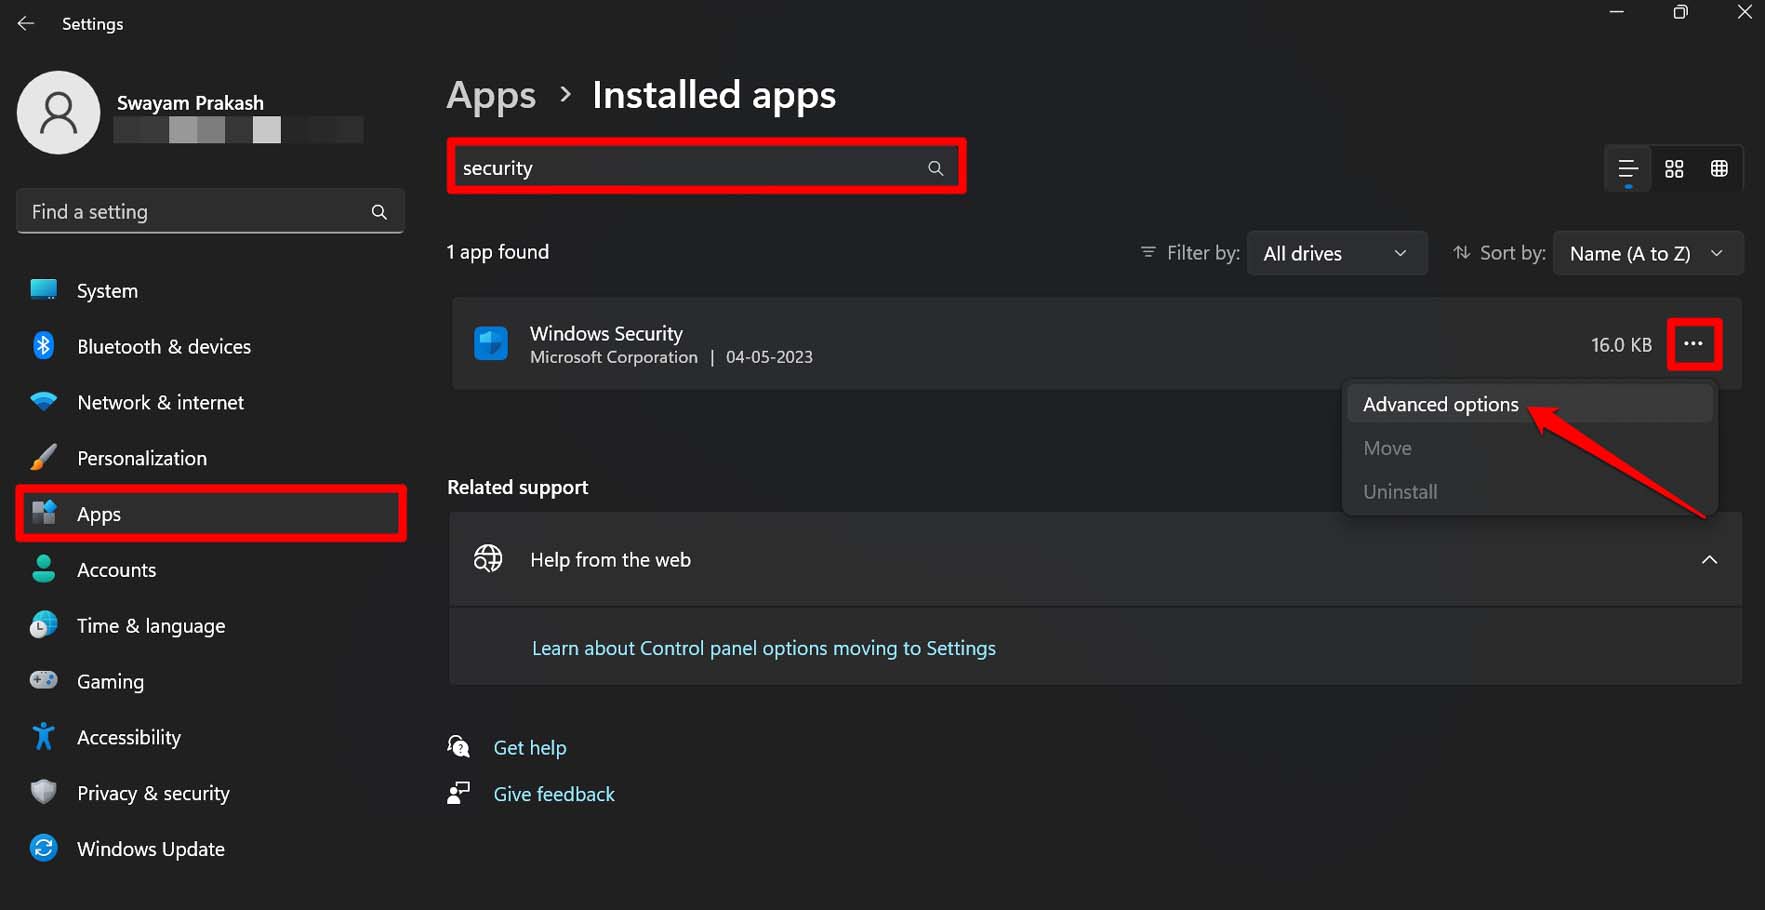
- In the search field of Installed apps, type Security.
- As the Windows Security app shows up, click the 3-dot button next to it and select Advanced Options.

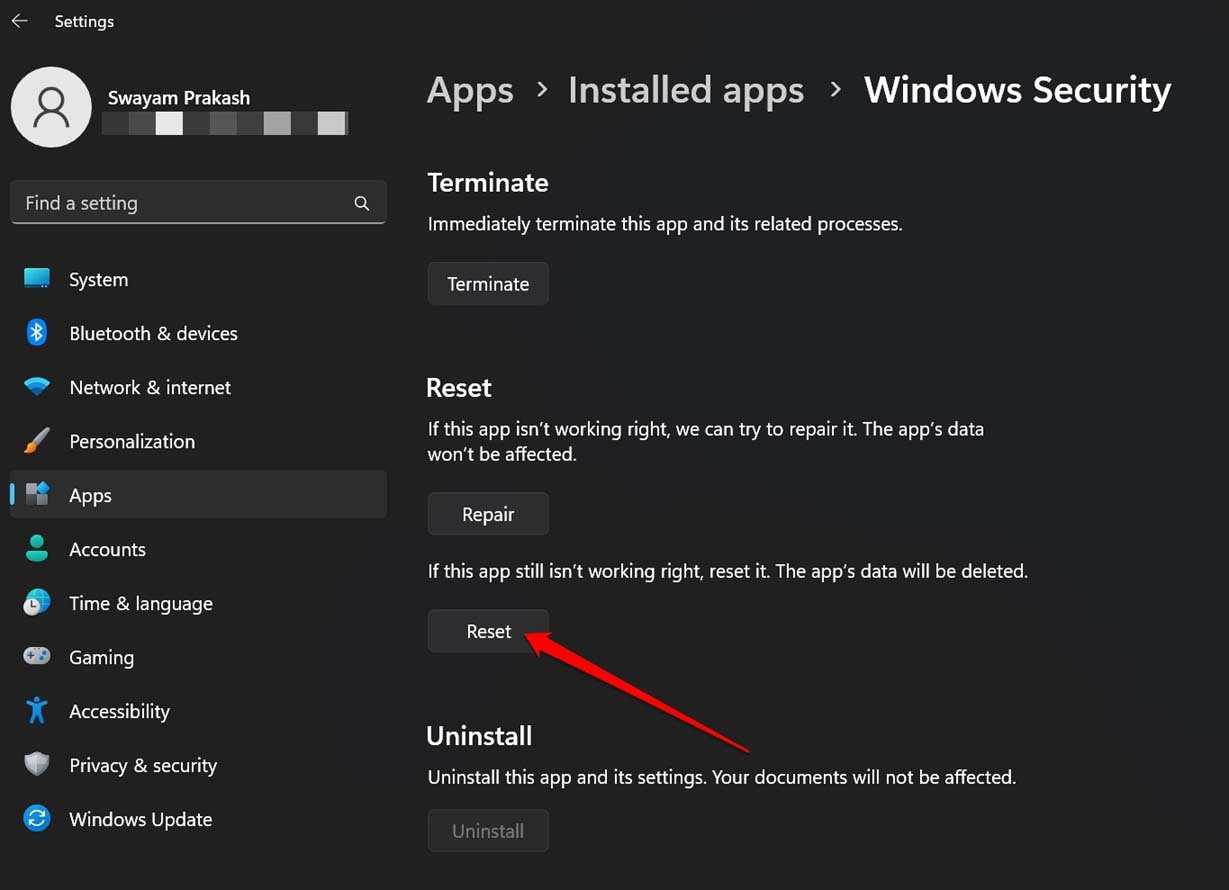
- Now, scroll to the Reset button and click on it. Confirm the action.

- Restart the PC and access the Windows Security app to add new settings.
Make Changes to Security Settings Without Any Hassle
These troubleshooting tips should essentially fix the “This Setting Is Managed by Your Administrator” error on your Windows 11 PC. Making changes to the security settings of your computer will be now possible. Make sure that any change you make in the security settings doesn’t;t make your PC vulnerable to any cyber threat.
If you've any thoughts on How to Fix ‘This Setting Is Managed by Your Administrator’ Error on Windows 11?, then feel free to drop in below comment box. Also, please subscribe to our DigitBin YouTube channel for videos tutorials. Cheers!

