Is the Steam gaming library app not opening on your Windows 11 computer? Then, in this guide, I will discuss why this issue happens and what are the troubleshooting tips you can use to fix the problem and get Steam working on your PC.
Maybe it’s an issue with permission that doesn’t allow you to run certain apps on the computer. Usually, if you are using a PC in a public network such as a cybercafe or your office, then you need administrator access to run such apps. Also, you may be using an older version of the Steam client for Windows which may be incompatible with the build of Windows 11 installed on your PC.
There may be some bug on the Windows 11 OS which usually can happen due to installing an early build of the software. The app cache of Steam for Windows 11 may be filled with junk data for a long time. This leads to various technical glitches on the app and affects its features. The Steam app may not be opening due to poor internet connectivity which is another simple reason gamers miss out on.
1. Restart Windows
As usual, you will start the troubleshooting by restarting the PC.
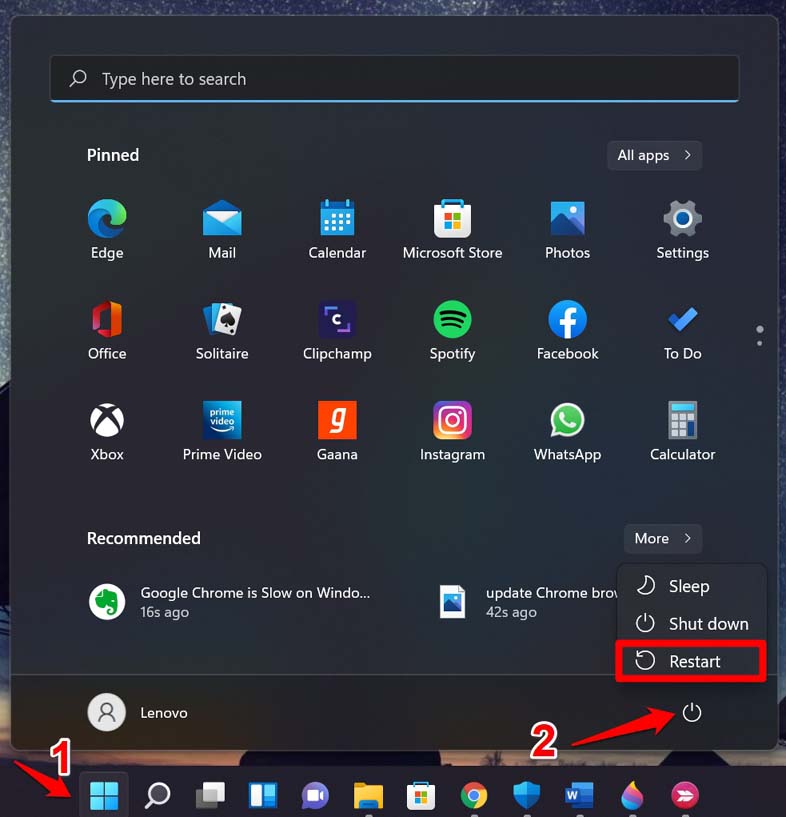
- Tap the Windows key on your keyboard.
- Then select the Power icon at the bottom right corner of the search console that shows up.
- Next, from the menu, select Restart.

- After the reboot, open Steam client for Windows.
Most users report that doing this has fixed the issue with Steam and the app then opens without any issue.
2. Close and Re-launch Steam on your Computer
Try to close the steam app from Task Manager if it is not opening even after repeated attempts. The idea is to stop the process and restart it to eliminate any glitches which may be happening in the active process. In the next iteration, the glitch would not be present anymore.
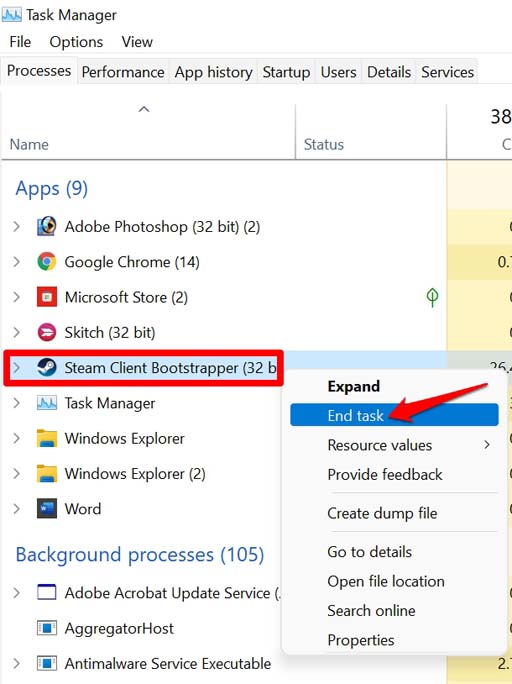
- Open Task Manager by pressing Ctrl + Alt + Delete keys.
- Click on Processes.
- Navigate to Steam and right-click on it.
- Select End Task.

- After a few seconds launch the Steam app once again. now, it should open and you should be able to access your profile without any issues.
3. Update Steam Client for Windows
Updating the Steam app is very easy. Here is how you should go about it.
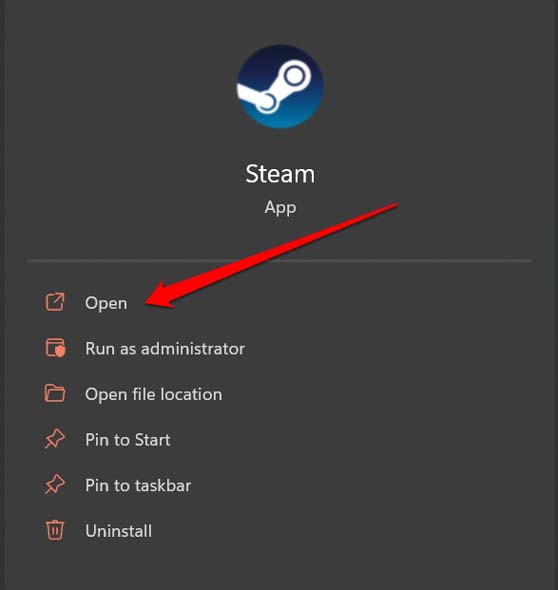
- Press the Windows key on the keyboard.
- Type Steam and click Open the correct results appear.

- As you open the Steam app, it automatically starts to download the latest update provided your computer is connected to WiFi.

4. Update Windows OS
Try to update the Windows OS to the latest build as well. The current build may have bugs that require fixing.
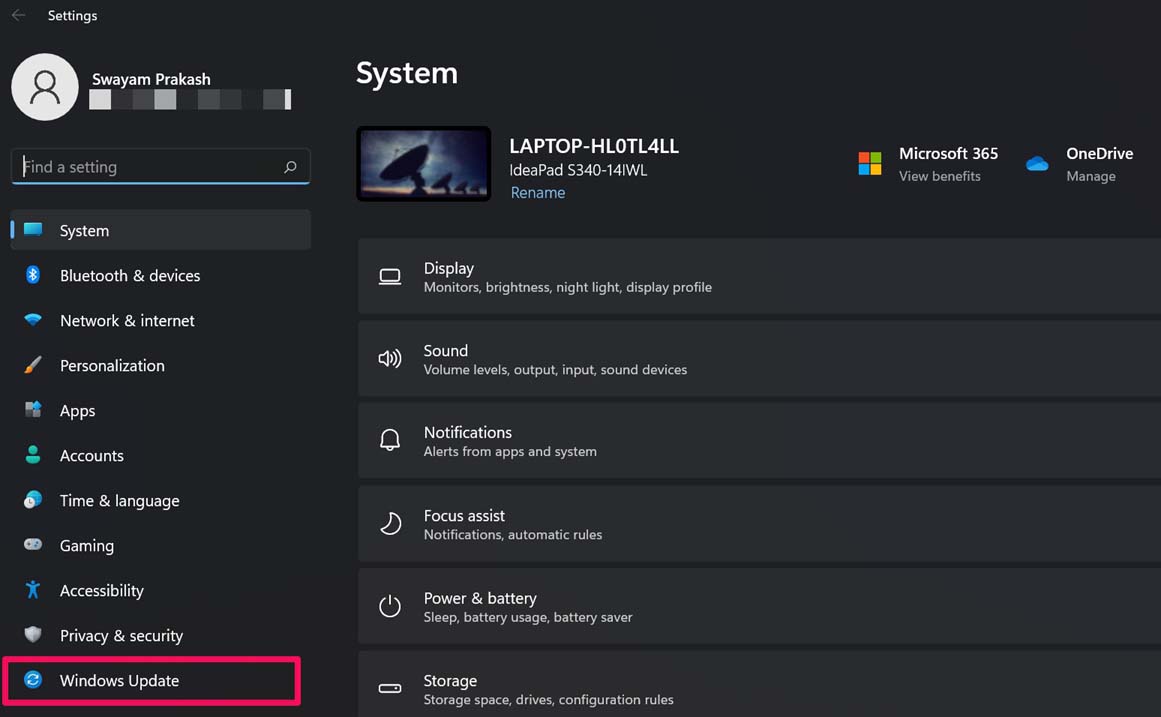
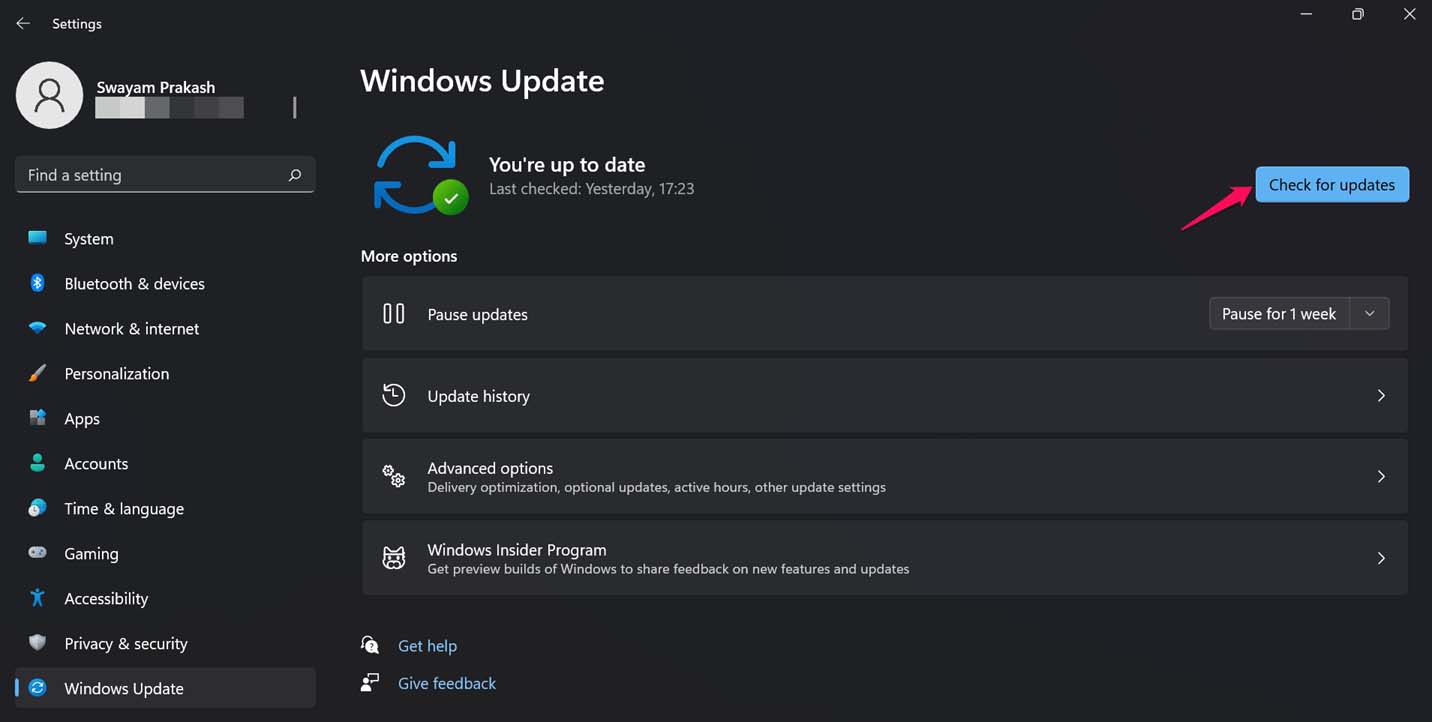
- Press Windows + I to bring up Windows settings.
- On the bottom-left corner, click on Windows Update.

- Then click on Check for Updates.

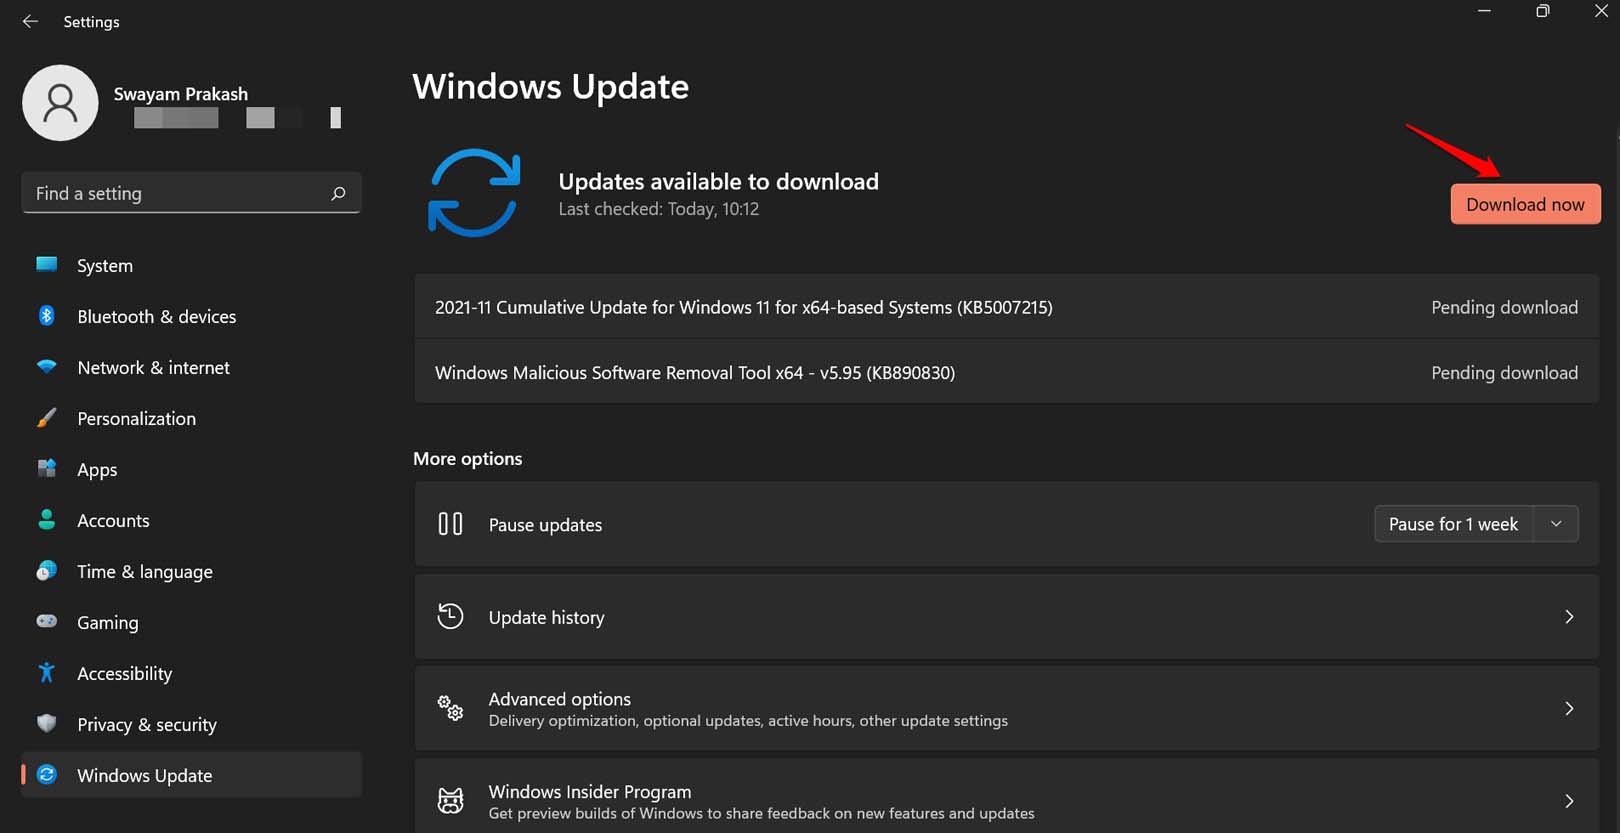
- Windows will search for available updates and notify you about the same.
- Grab the update for your Windows OS by clicking on Download Now.

- Let the PC restart and after that open Steam. You should be able to use the app to play your favorite games.
5. Run Steam App with Administrator Access
If you own the computer on which you are trying to access Steam client for Windows, then you should be able to run the app without any problem. Otherwise, you can run the application by accessing it as an administrator.
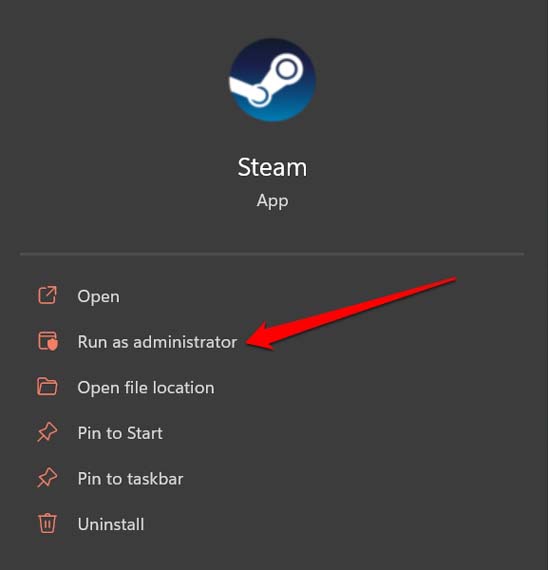
- Click the Windows key to bring up the search console.
- Then type Steam in the search.
- When the appropriate results show up, click on Run As Administrator.

On the other hand, if you are at your workplace or in a public network such as cyber cafes then you need to let the network administrator of the establishment about your issue and allow the Steam app to run on the computer.
6. Check and Fix Internet Connection
If Steam is not opening on your Windows 11 PC, then you need to check whether your internet or WiFi connection is stable or not. Try to open other apps that require the internet to run. If those apps do not run, then indeed the issue lies with the internet.
You can ask for support from your ISP or manually try to reset the router and internet connections. Also, you may try to connect to an alternative network that may be available.
Windows OS has this troubleshooting tool to fix internet connections. you can use it as well.
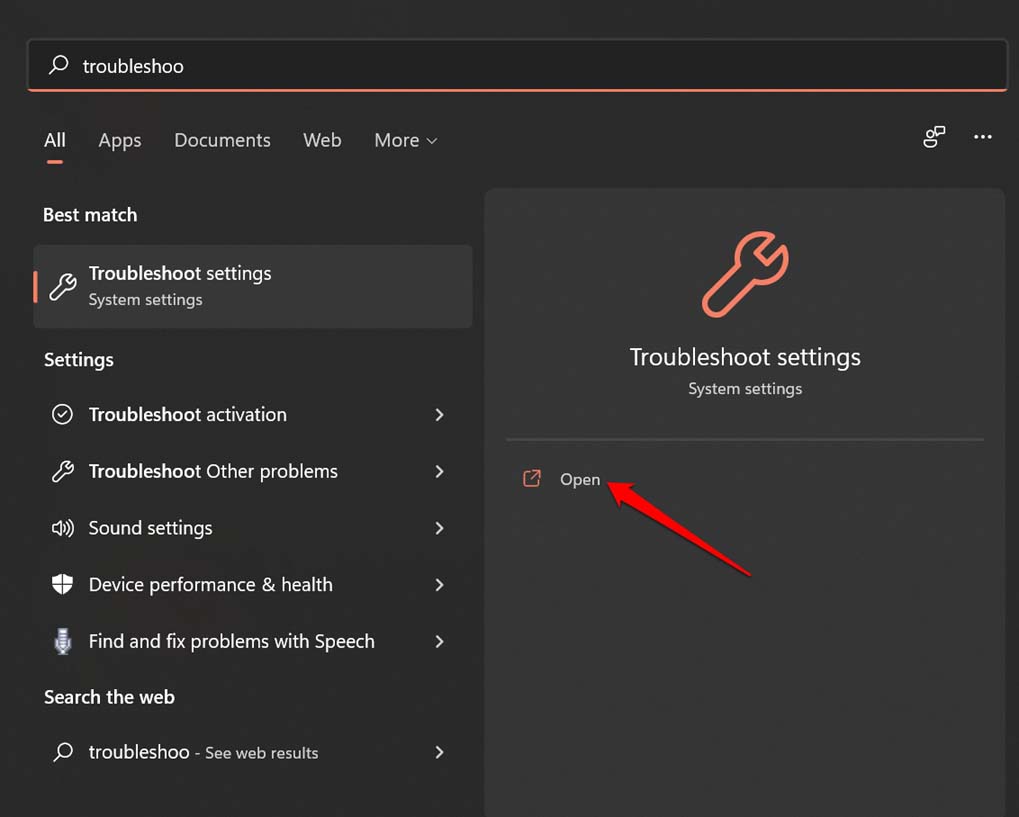
- Click on the Windows key of the keyboard to bring up the search console.
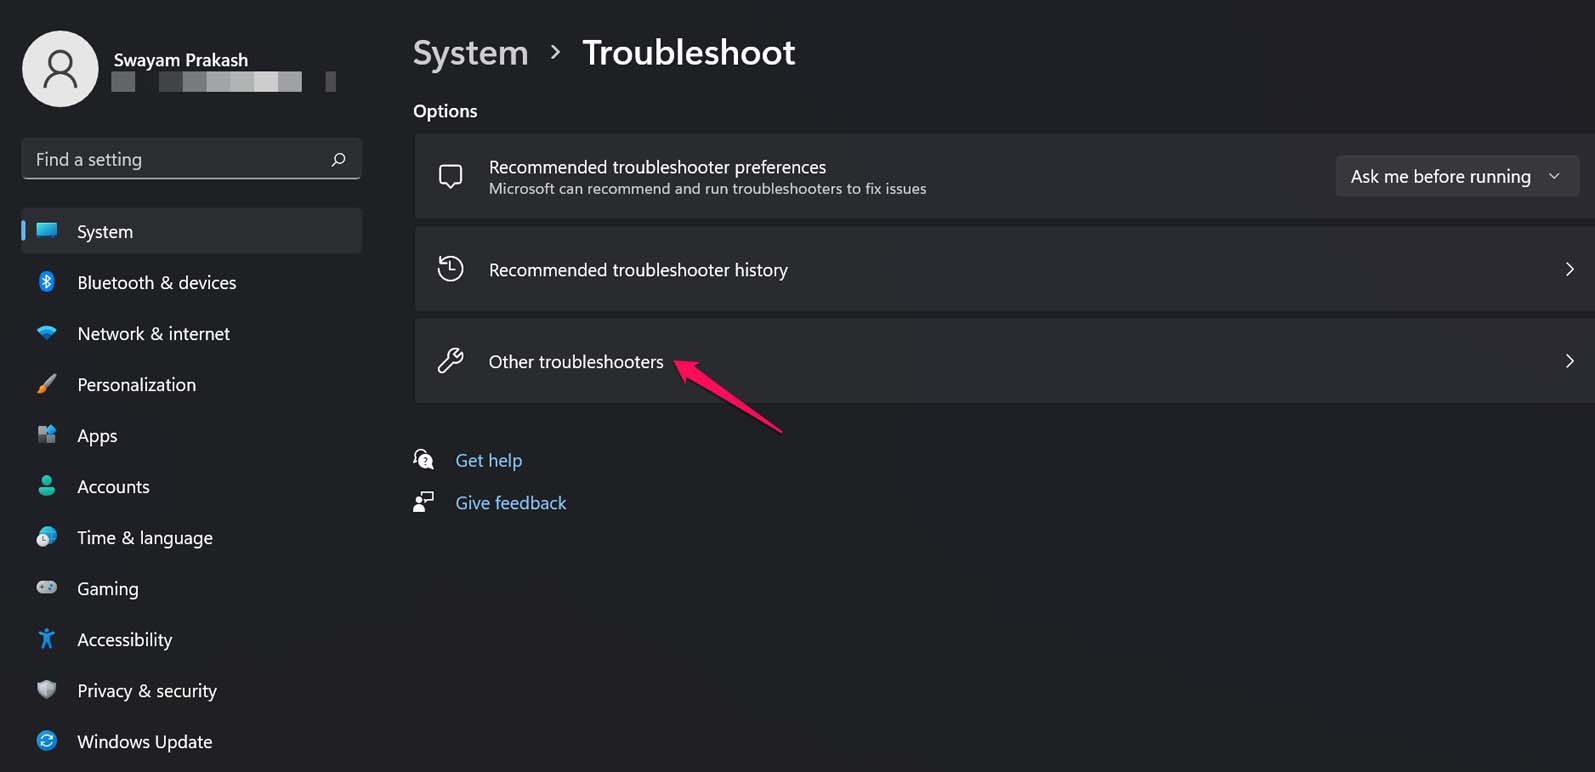
- Then type Troubleshoot Settings and click Open when the appropriate options show up in the result.

- Then click on Other Troubleshooters.

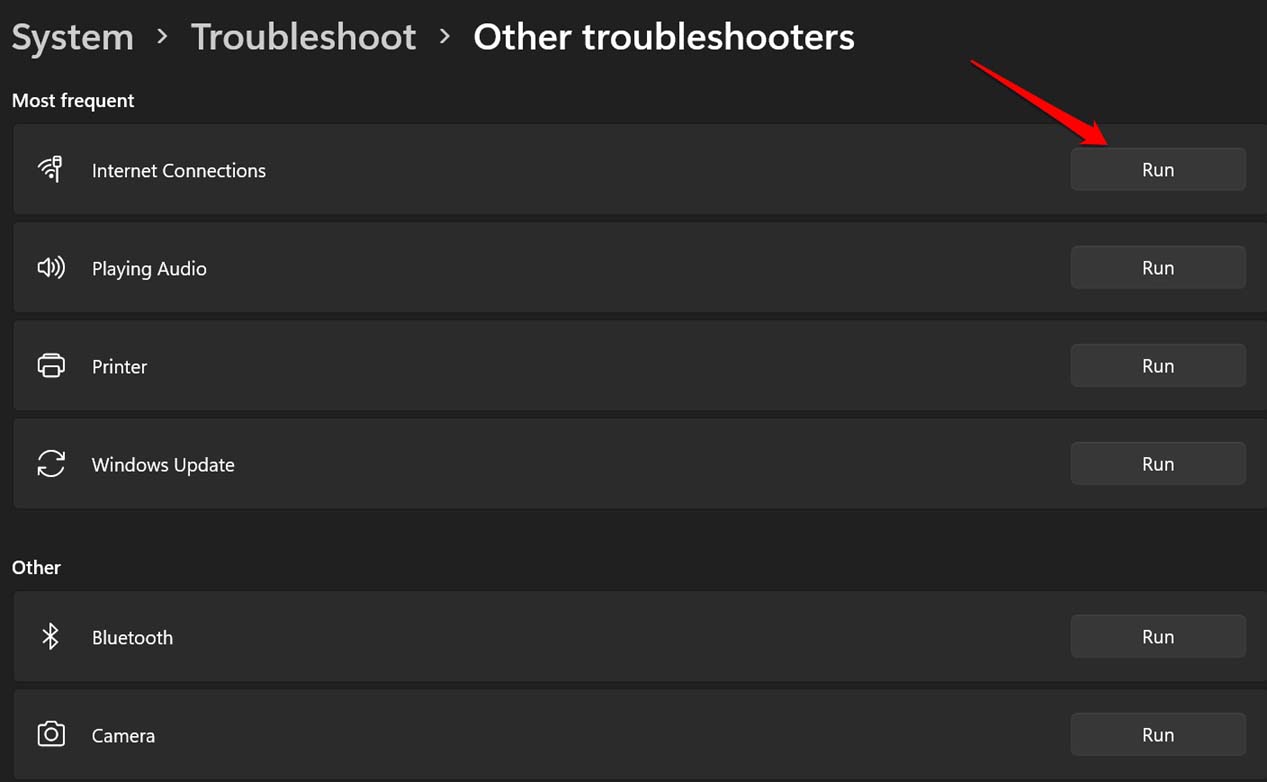
- Now, click on the button Run beside the option Internet Connections.

- It will now begin to search for technical issues and fix the same on your computer.
After carrying out this troubleshooting check if you can run Steam on your PC.
7. Clear the Steam App Cache on your PC
To remove junk data present in the app cache of the steam Windows client, here are the steps you have to follow.
- Locate the App Cache folder in the hard disk drive where Steam is installed on your computer.
- By default the Steam app is installed in the C: drive of the PC.
- Within the C: drive navigate to the folder Program Files(X86).
- Under this folder, you should navigate to the folder Steam and access it.
- Within that, you should see an offer App Cache.
- Simply select this App Cache folder and delete it.
8. Uninstall and Re-install Steam App for Windows 11
Finally, if all of the above tips are not fixing the issue with Steam, then you can uninstall the Steam client for Windows and reinstall it back. This should resolve all the issues with the app.
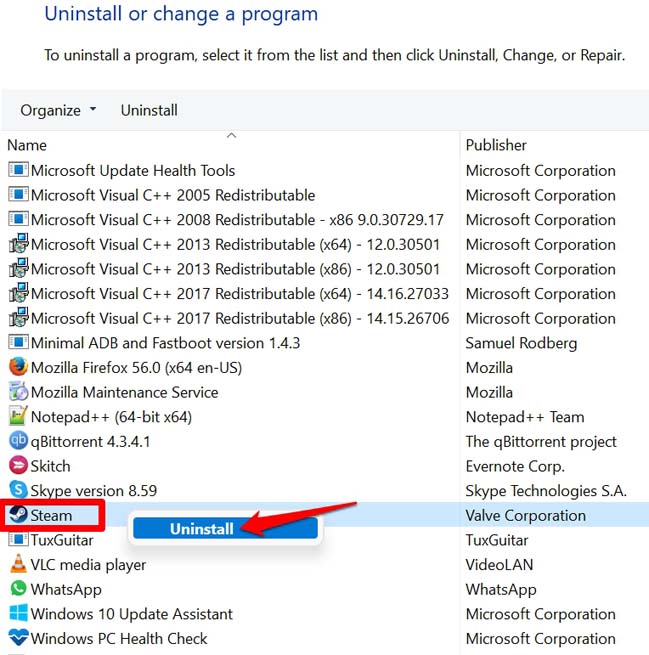
- Press the search icon on the Windows taskbar.
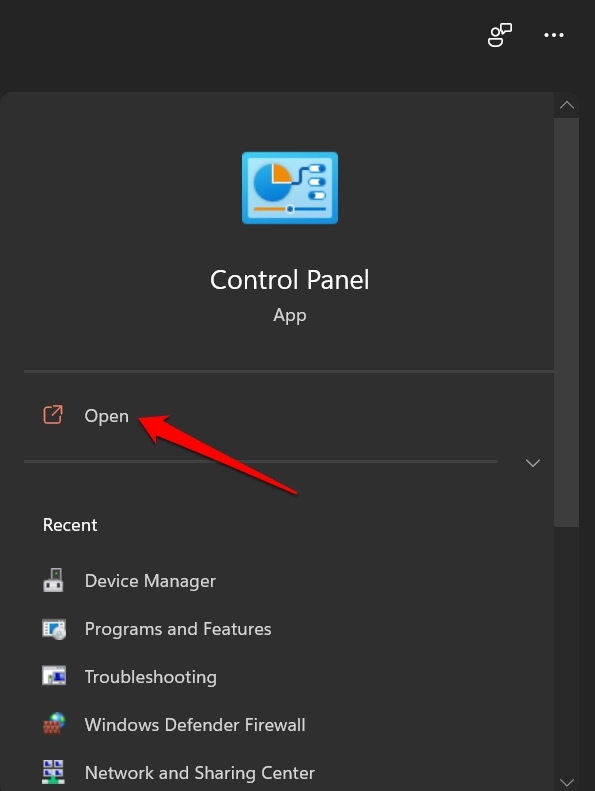
- Type Control Panel and click Open when the results show up.

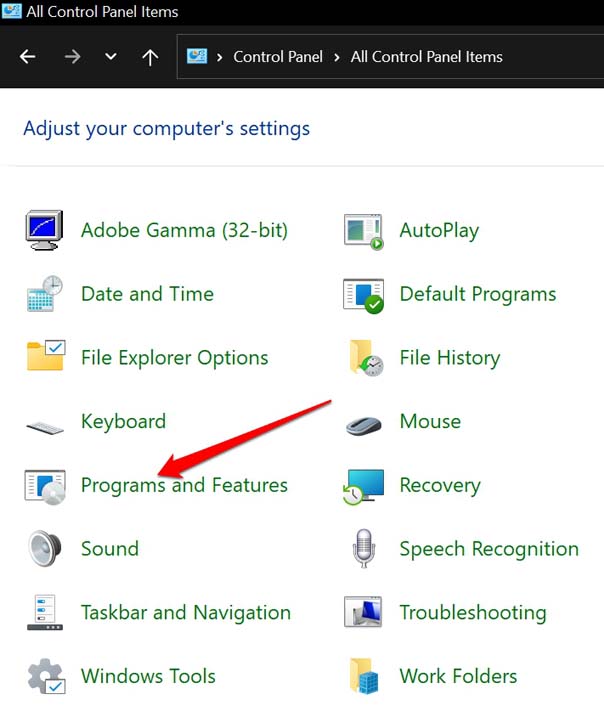
- Now, under the Control panel, select Programs and Features.

- Navigate to Steam.
- Right-click on it and select Uninstall.

- Confirm the uninstallation process.
- Now, visit the official website of Steam and download the latest Steam client app for Windows.

So, these are the various troubleshooting tips that you can follow to fix the issue of Steam not opening on your Windows 11 computer.
If you've any thoughts on How to Fix Steam Not Working on Windows 11?, then feel free to drop in below comment box. Also, please subscribe to our DigitBin YouTube channel for videos tutorials. Cheers!

