Let us know how to fix the “An Error Has Occurred, Not All of the Updates Were Successfully Uninstalled” error on Windows. Microsoft pushes software updates regularly to add new features, optimize the performance, and fix any underlying bugs in the Windows OS. At times, the latest hotfix build you install on the PC may also have bugs or errors on it.
On Windows OS there is a facility to roll back your software updates. In case you confirm that the currently installed software update is buggy, you can uninstall it. However, due to certain other setbacks, sometimes the system is unable to remove the installed. This is where you encounter the “Not All of the Updates Were Successfully Uninstalled” error.

Tips to Fix Not All of the Updates Were Successfully Uninstalled Error
Here are several methods to uninstall the software updates that are being stubborn and not getting uninstalled from your Windows PC.
1. Perform a Clean Boot
A clean boot will run only the system apps and stop all the third-party apps. That will help you to identify if any third-party app you have installed on your PC may be causing the software updates not to get installed.
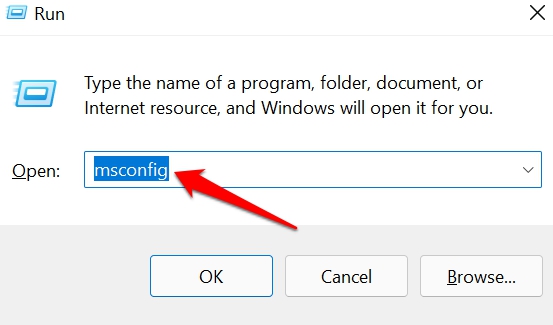
- Press Windows + R to launch the Run box.
- Type msconfig and press enter.
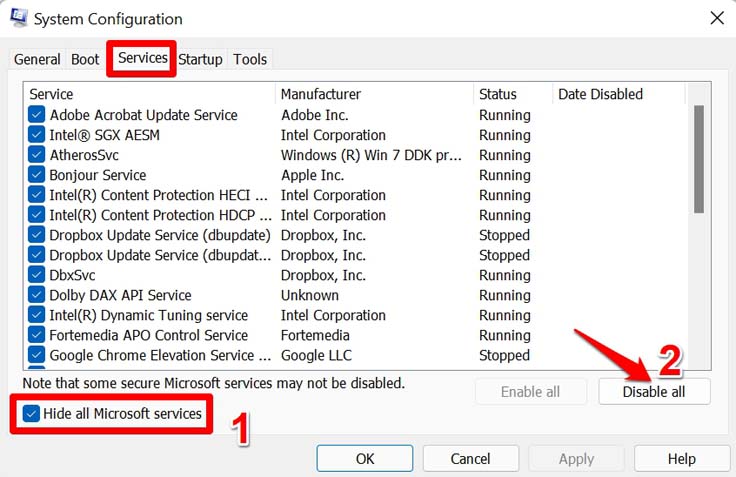
- In the System Configuration dialog box, click the Services tab,
- Click on the checkbox beside the ‘Hide all Microsoft services’ checkbox
- Next, click the Disable All button.
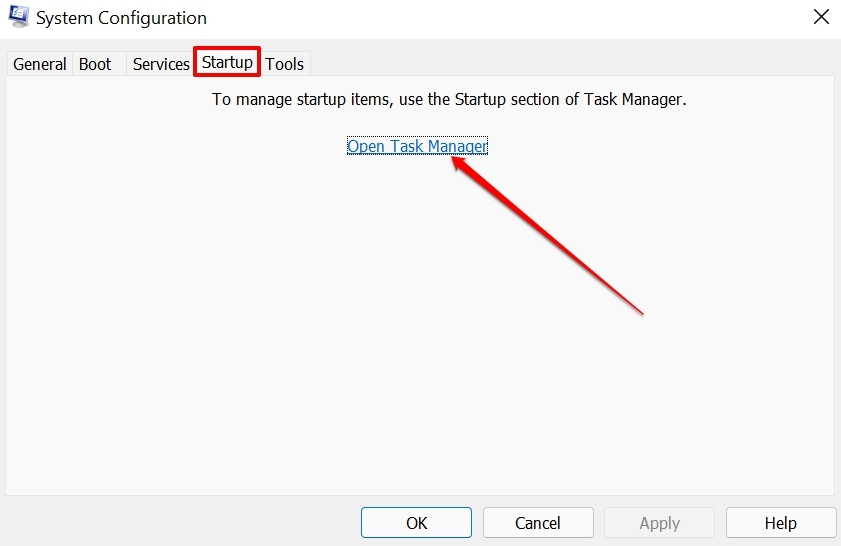
- Click the tab Startup > click on Open Task Manager.
- Under the Startup tab, click on a third-party app.
- Click the Disable button at the top.
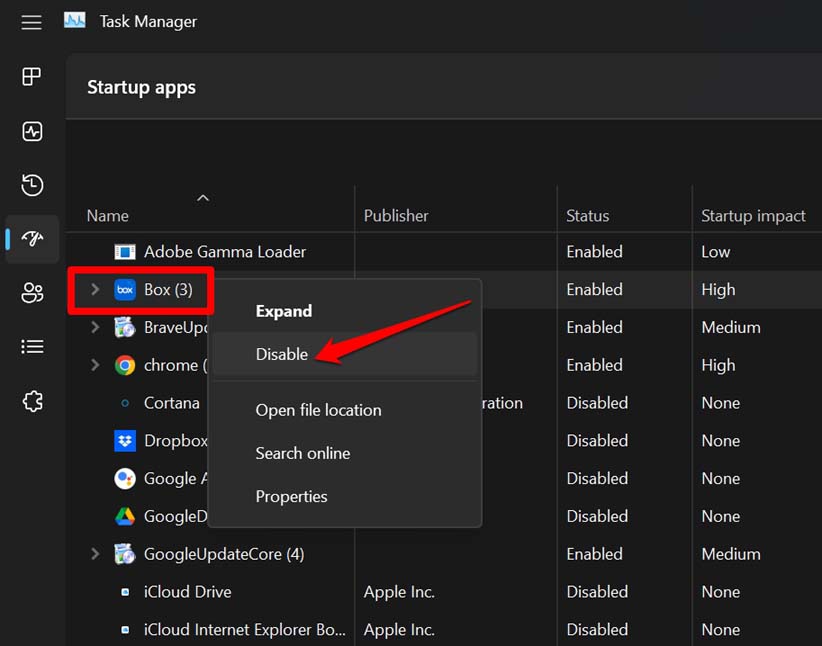
- Repeat the above step for all other third-party apps that you want to disable at the clean boot.
Once you have disabled all the third-party apps, restart your PC. Once the PC boots up, uninstall the software updates that you could not remove previously.
2. Modify Registry Entry
By modifying certain Windows registry entries, you can remove the Windows updates that are stuck and not getting uninstalled.
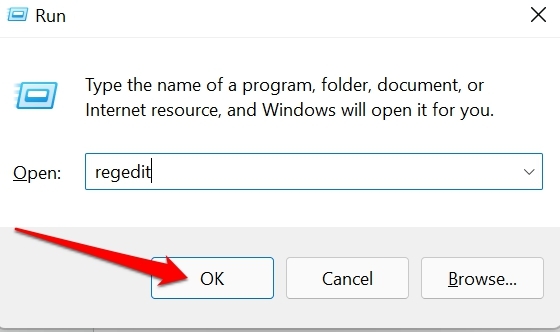
- Press Windows + R to access the Run box.
- Type regedit and press enter.
- In the Registry address bar follow the path I have mentioned.
HKEY_LOCAL_MACHINE\System\CurrentControlSet\Control\Print
- Right-click on the Print key > click New > select DWORD (32-bit) Value from the menu.
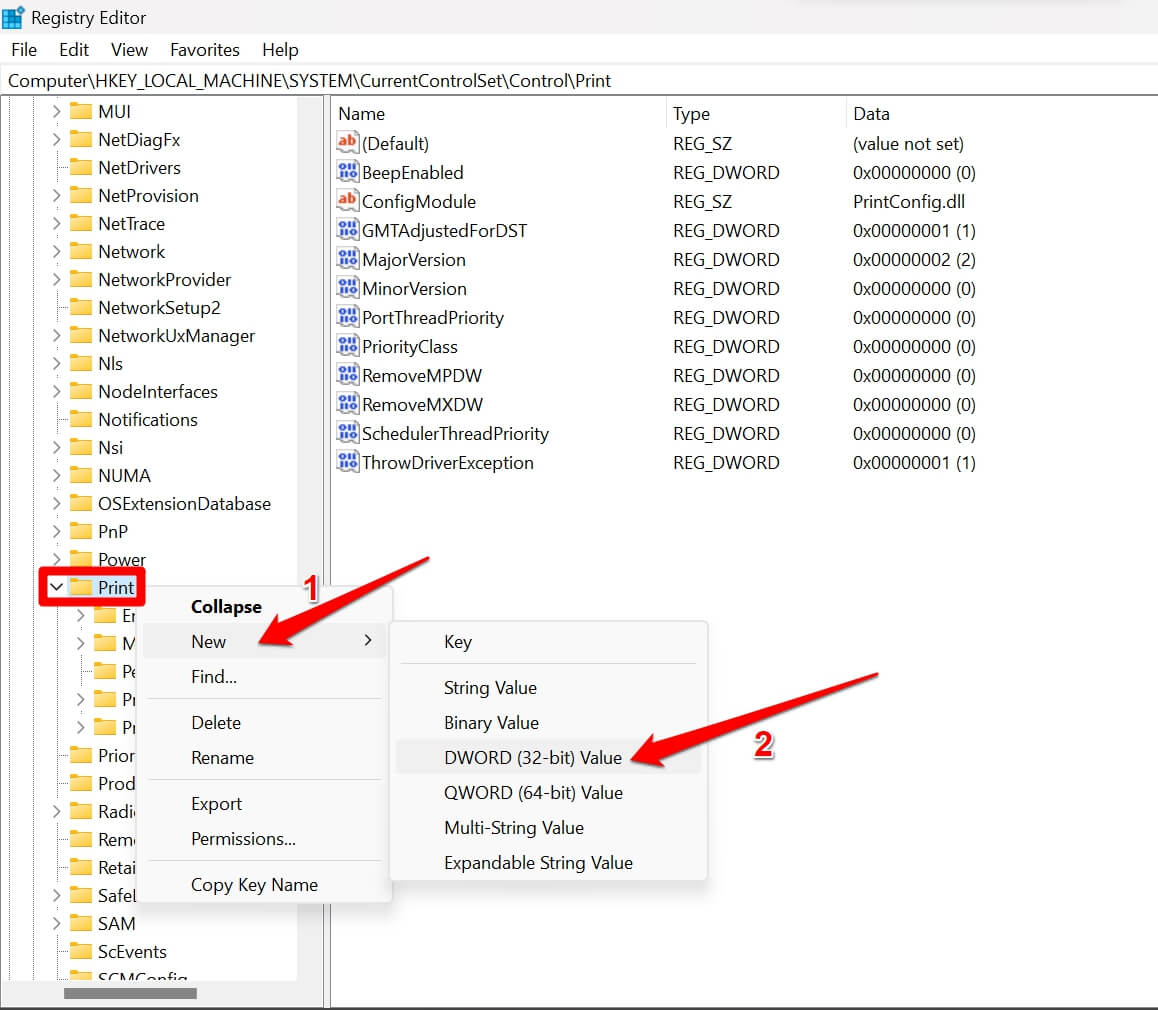
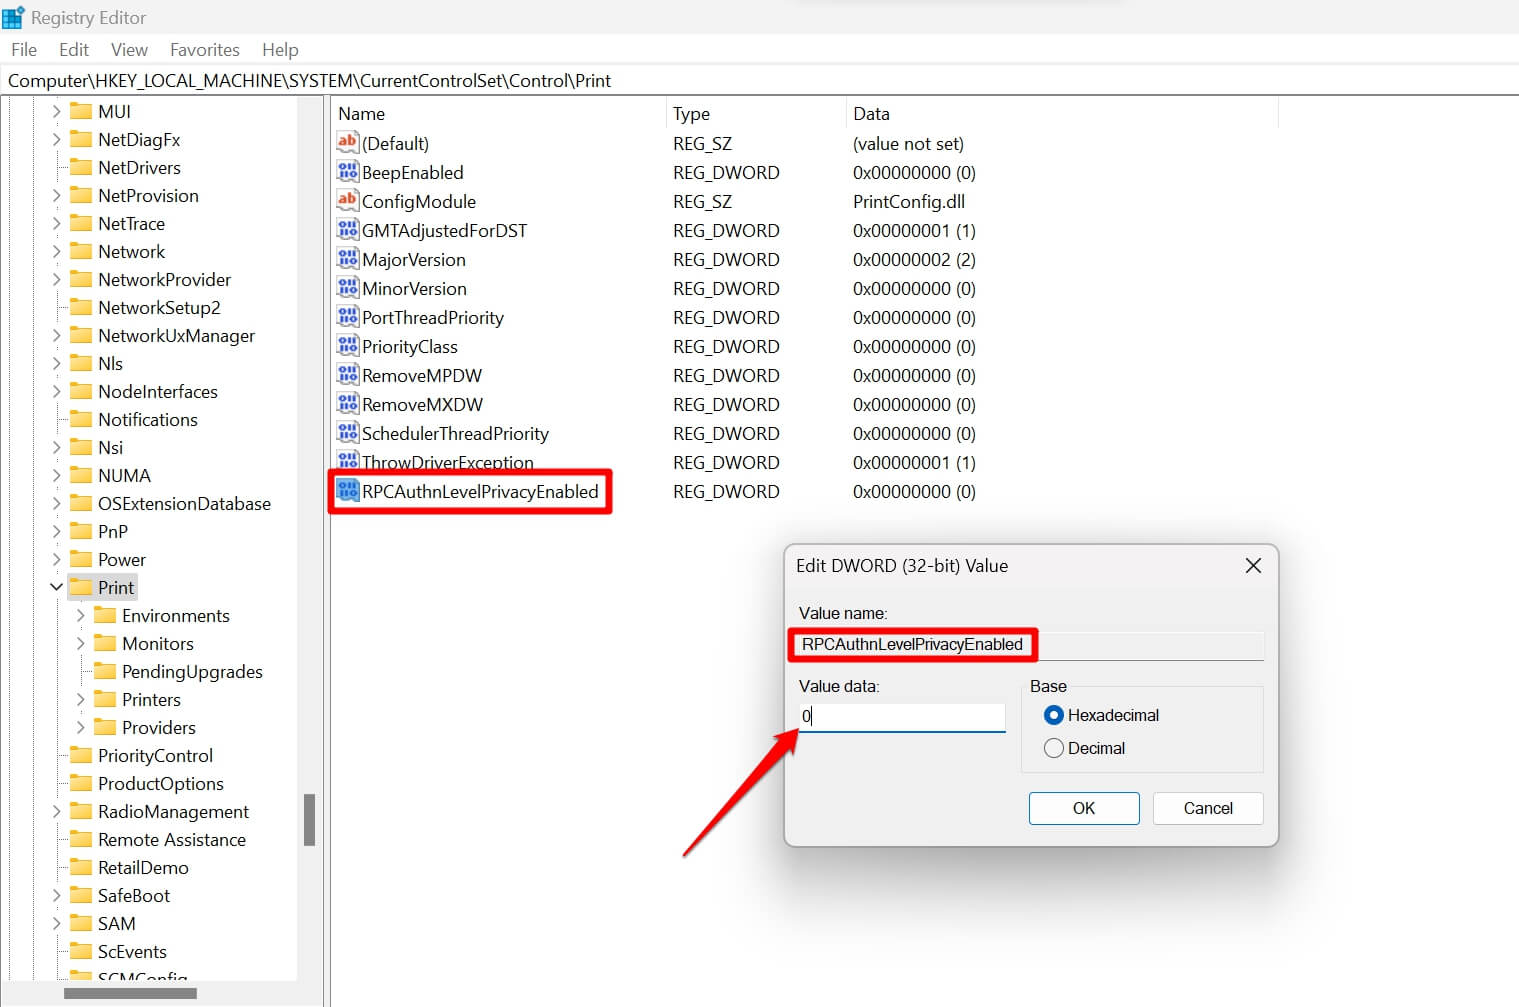
- Set the element name as RPCAuthnLevelPrivacyEnabled.
- Double-click on the D-WORD element RPCAuthnLevelPrivacyEnabled.
- In the Value data field, set the value as 0.
- Click on OK.
- Exit the Windows Registry.
Restart the computer and follow any of the methods to uninstall the software updates that you were not able to uninstall previously.
NOTE: Modifying the Registry can cause the Windows OS or certain features on it to behave strangely or become dysfunctional. Proceed with the steps at your risk. For any erroneous execution of the steps resulting in technical issues on your PC, DigitBin/Author will not be responsible.
3. Uninstall the Update Using Command Prompt
This simple troubleshooting tip requires you to list out the available and uninstalled software updates on your PC. Then execute a command to remove the update package currently installed on the Windows OS.
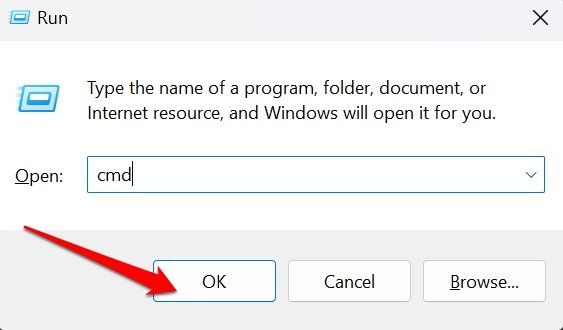
- Press Windows + R to launch the run box.
- Type cmd and press enter to launch the Command Prompt.
- To view Windows update history enter this command.
wmic qfe list brief /format:table
- Note the HotfixID which is the software package currently installed on your PC.
- Now, enter the following command. In “kb: number“Replace the number with a numeric value beside KB which is present under the HotfixID obtained in the previous step.
wusa /uninstall /kb:number

- Click Yes to confirm. The problematic software update will be removed right away.
4. Use the DISM Tool to Remove the Software Update
We know that the DISM tool which is the acronym for Deployment Image Servicing and Management is usually implemented for fixing corrupt system files. You can also use the tool to remove the Windows software updates that remain uninstalled. Here are the steps for you to follow.
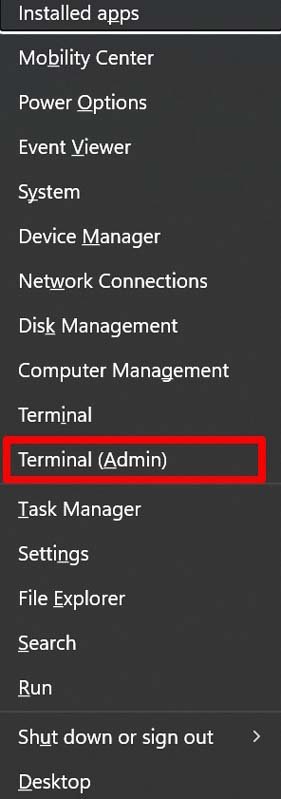
- Press Windows + X to launch the power user menu.
- From the menu, click on Terminal (Admin).
- Click on the Yes button on the User Account Control (UAC) prompt.
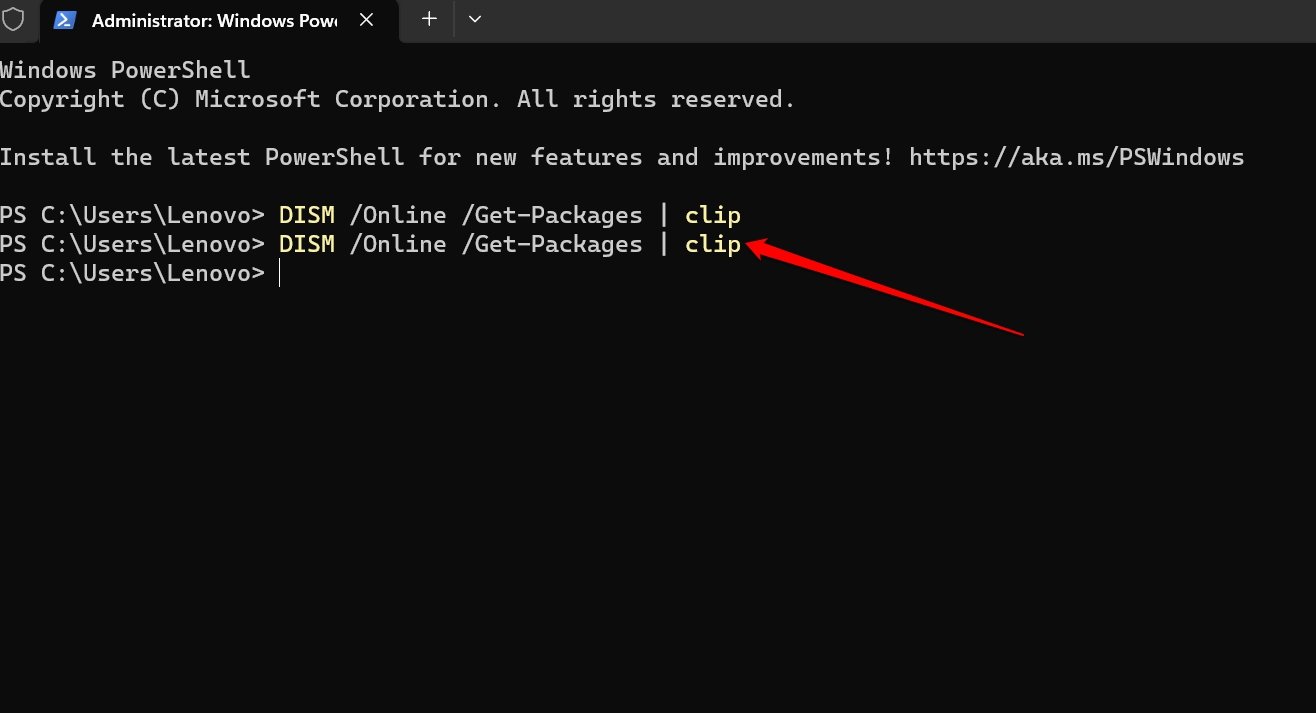
- Enter the following command. The result of the command will be copied to the Windows clipboard
DISM /Online /Get-Packages | clip
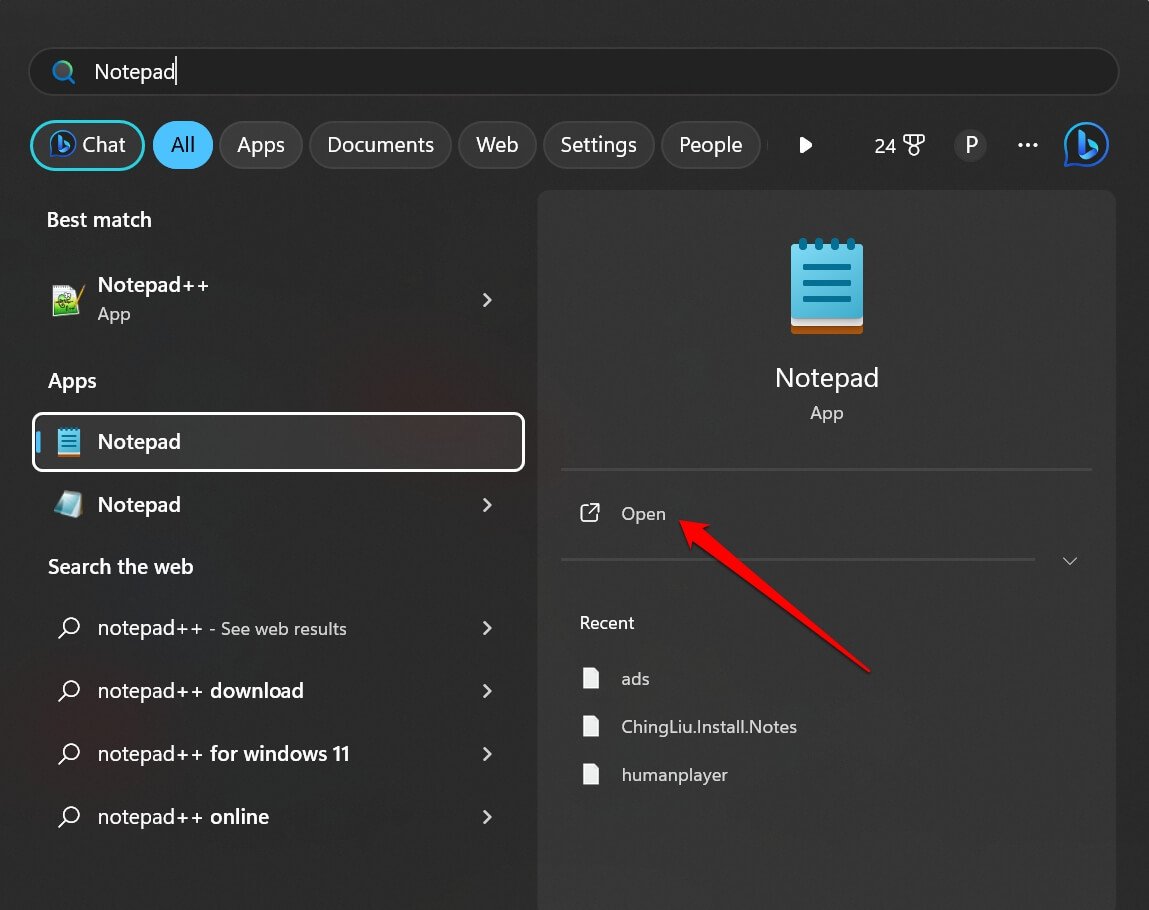
- Now, press the Windows key, and in the search field type Notepad. Click Open.
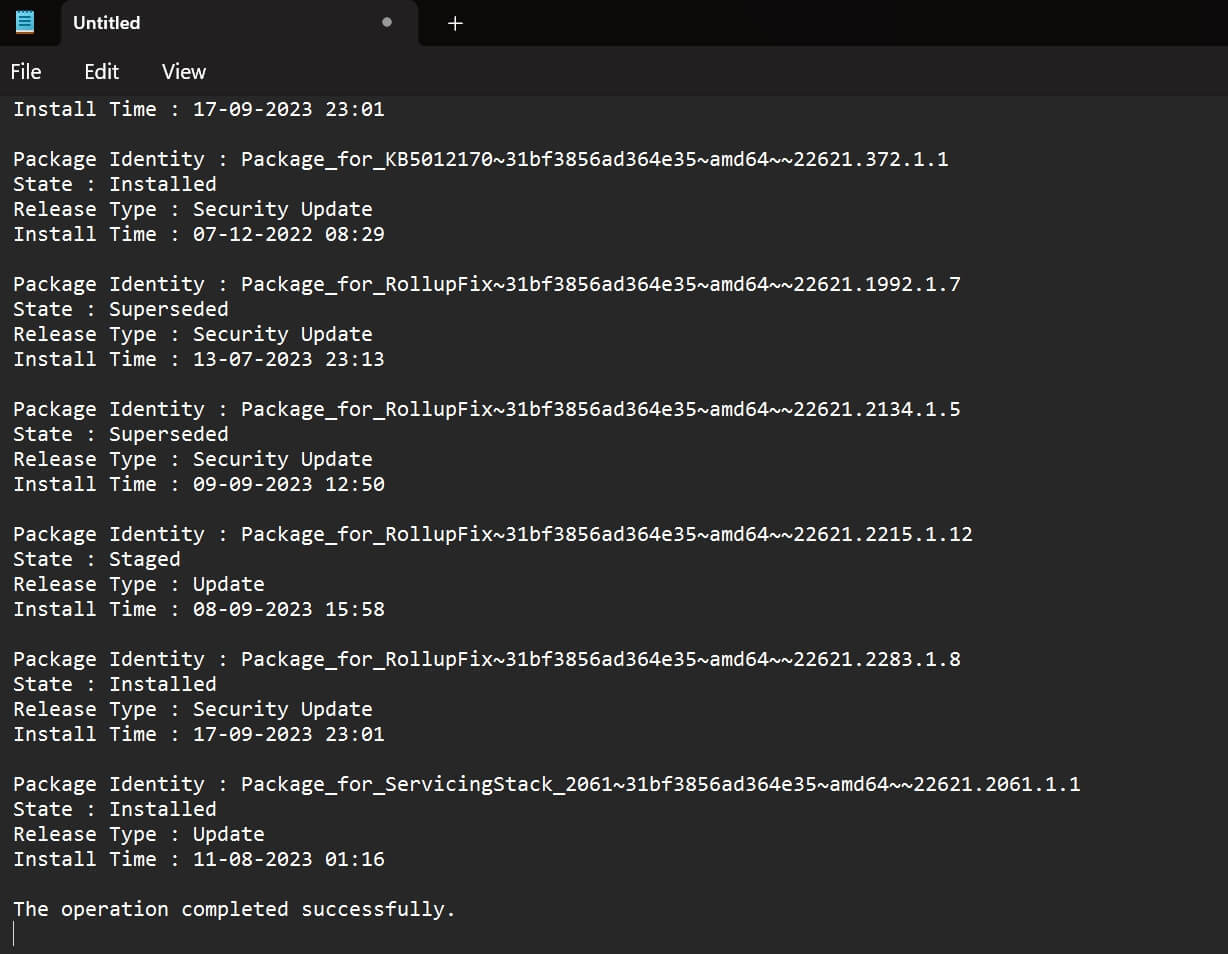
- Press Ctrl + V on the Notepad text field to paste the copied output of the command you executed in step 4.
- Scroll to Package Identity and copy the identity value (figures after the colon).
- Switch to the command prompt and enter the following command.
dism /Online /Remove-Package /PackageName:Package_ID
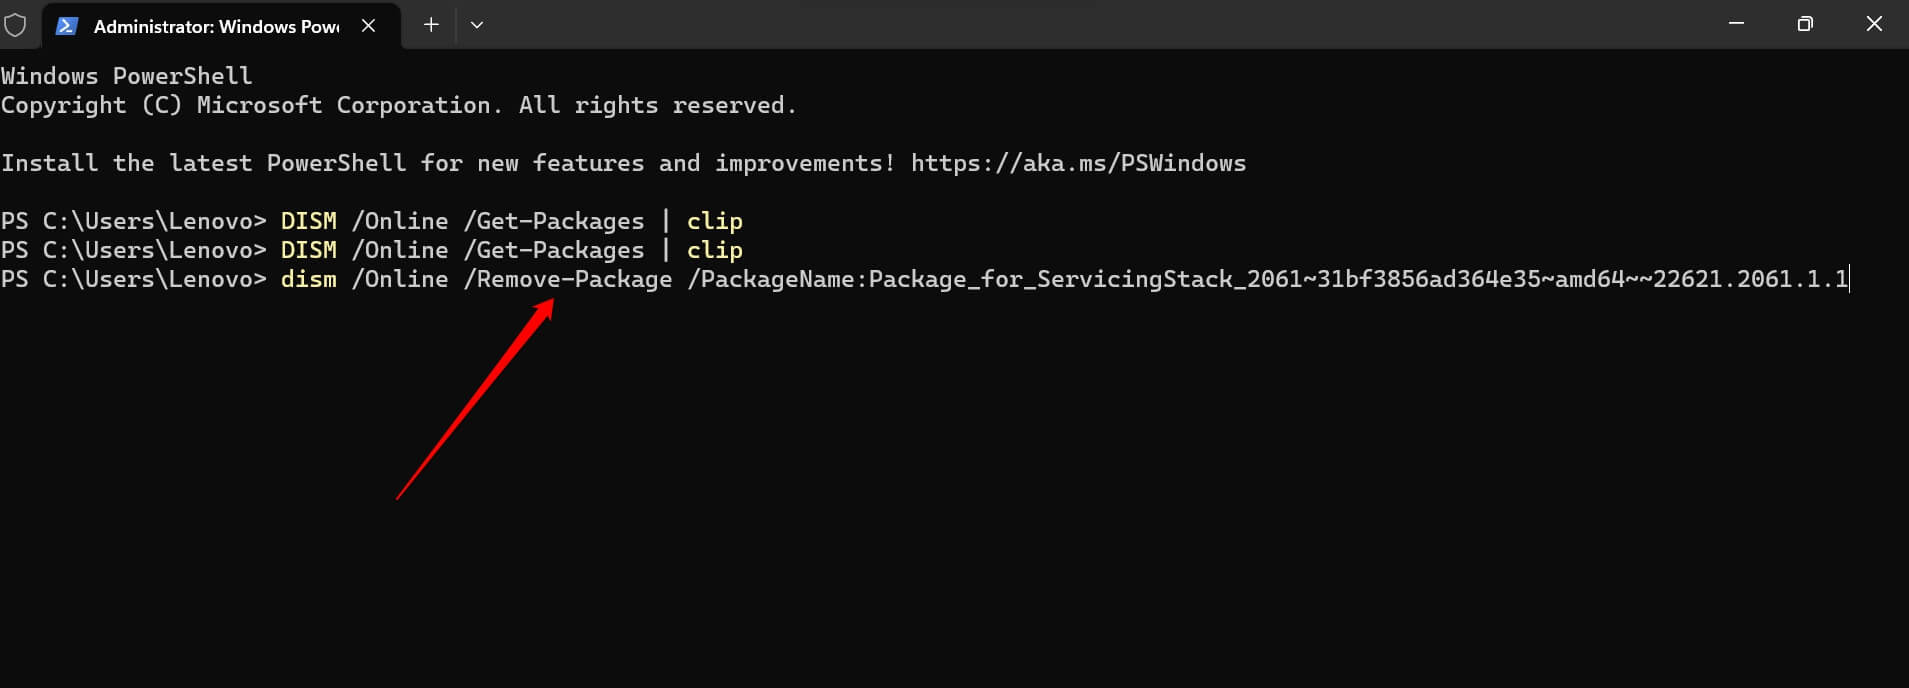
NOTE: In the above command, replace the placeholder “Package_ID” with the value of the Package ID you copied in step 7.
The above step should completely uninstall the software update package that you could not remove previously.
5. Reset Windows Update Components
Resetting the update components of Windows OS will remove all the existing bugs on them allowing you to uninstall the Windows update easily. Follow the steps below to reset the Windows Update components.
- Launch Windows PowerShell using Windows + S. [select Run As Administrator]
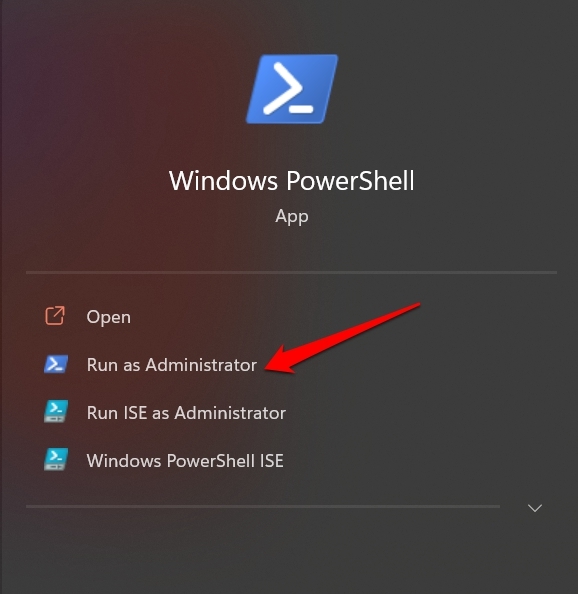
- Click on Yes when the UAC prompt shows up to make changes to the PC.
- Enter these commands one after the other and execute them.
net stop wuauserv
net stop cryptSvc
net stop bits
net stop msiserver
ren C:\Windows\SoftwareDistribution SoftwareDistribution.old
ren C:\Windows\System32\catroot2 catroot2.old
net start wuauserv
net start cryptSvc
net start bits
net start msiserve
Now, try uninstalling the active Windows software update. You should be able to remove them without facing any more issues.
Remove the Faulty Windows 11 Update
It is important to remove the buggy software updates from your PC. Otherwise, they will cause more technical issues alongside the existing snags in the system thus affecting your user experience. I hope these tips will help you to fix the “Not All of the Updates Were Successfully Uninstalled” Error on Windows 11.
If you've any thoughts on How to Fix ‘Not All of the Updates Were Successfully Uninstalled’ Error on Windows?, then feel free to drop in below comment box. Also, please subscribe to our DigitBin YouTube channel for videos tutorials. Cheers!
