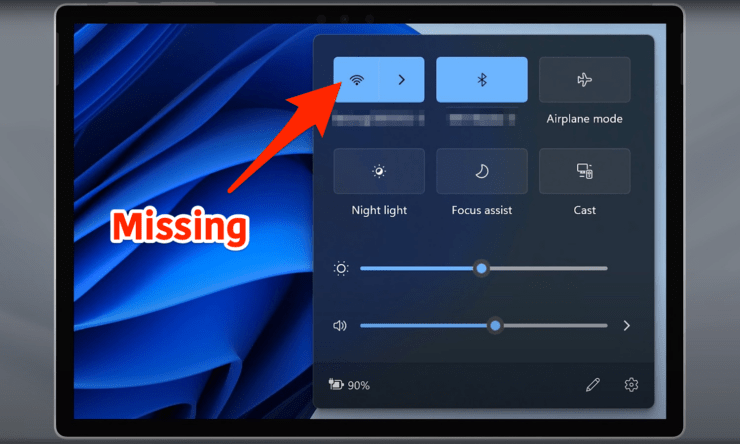
So, you’ve booted up your Windows 11 PC, and guess what—no Wi-Fi toggle in the Action Center. Well, this often happens with my PC as well and I can understand the frustration. But, don’t worry, you are in the right place reading the right guide. This guide will walk you through some easy fixes to get that Wi-Fi toggle back where it belongs. Let’s dive in.
What Causes WiFi Toggle Missing in Action Center?
Before diving in, let’s take a pause and understand why this happens. Well, there could be a few reasons why:
- Your PC has a technical glitch that caused the Wi-Fi toggle to disappear.
- Your Wi-Fi adapter is disabled.
- Your Wi-Fi adapter’s drivers aren’t working properly and need an update or a reinstall.
- There’s an issue with the network settings.
- Airplane mode is toggled on.
Now that we have diagnosed the issue with some potential reasons, let’s jump into the solutions.
Also, while it may seem a little too obvious, make sure to turn off Airplane mode before you get started.
1. Restart your PC
Sometimes, the simplest solution is the best. Try a restart and see if that helps. Follow the steps below.
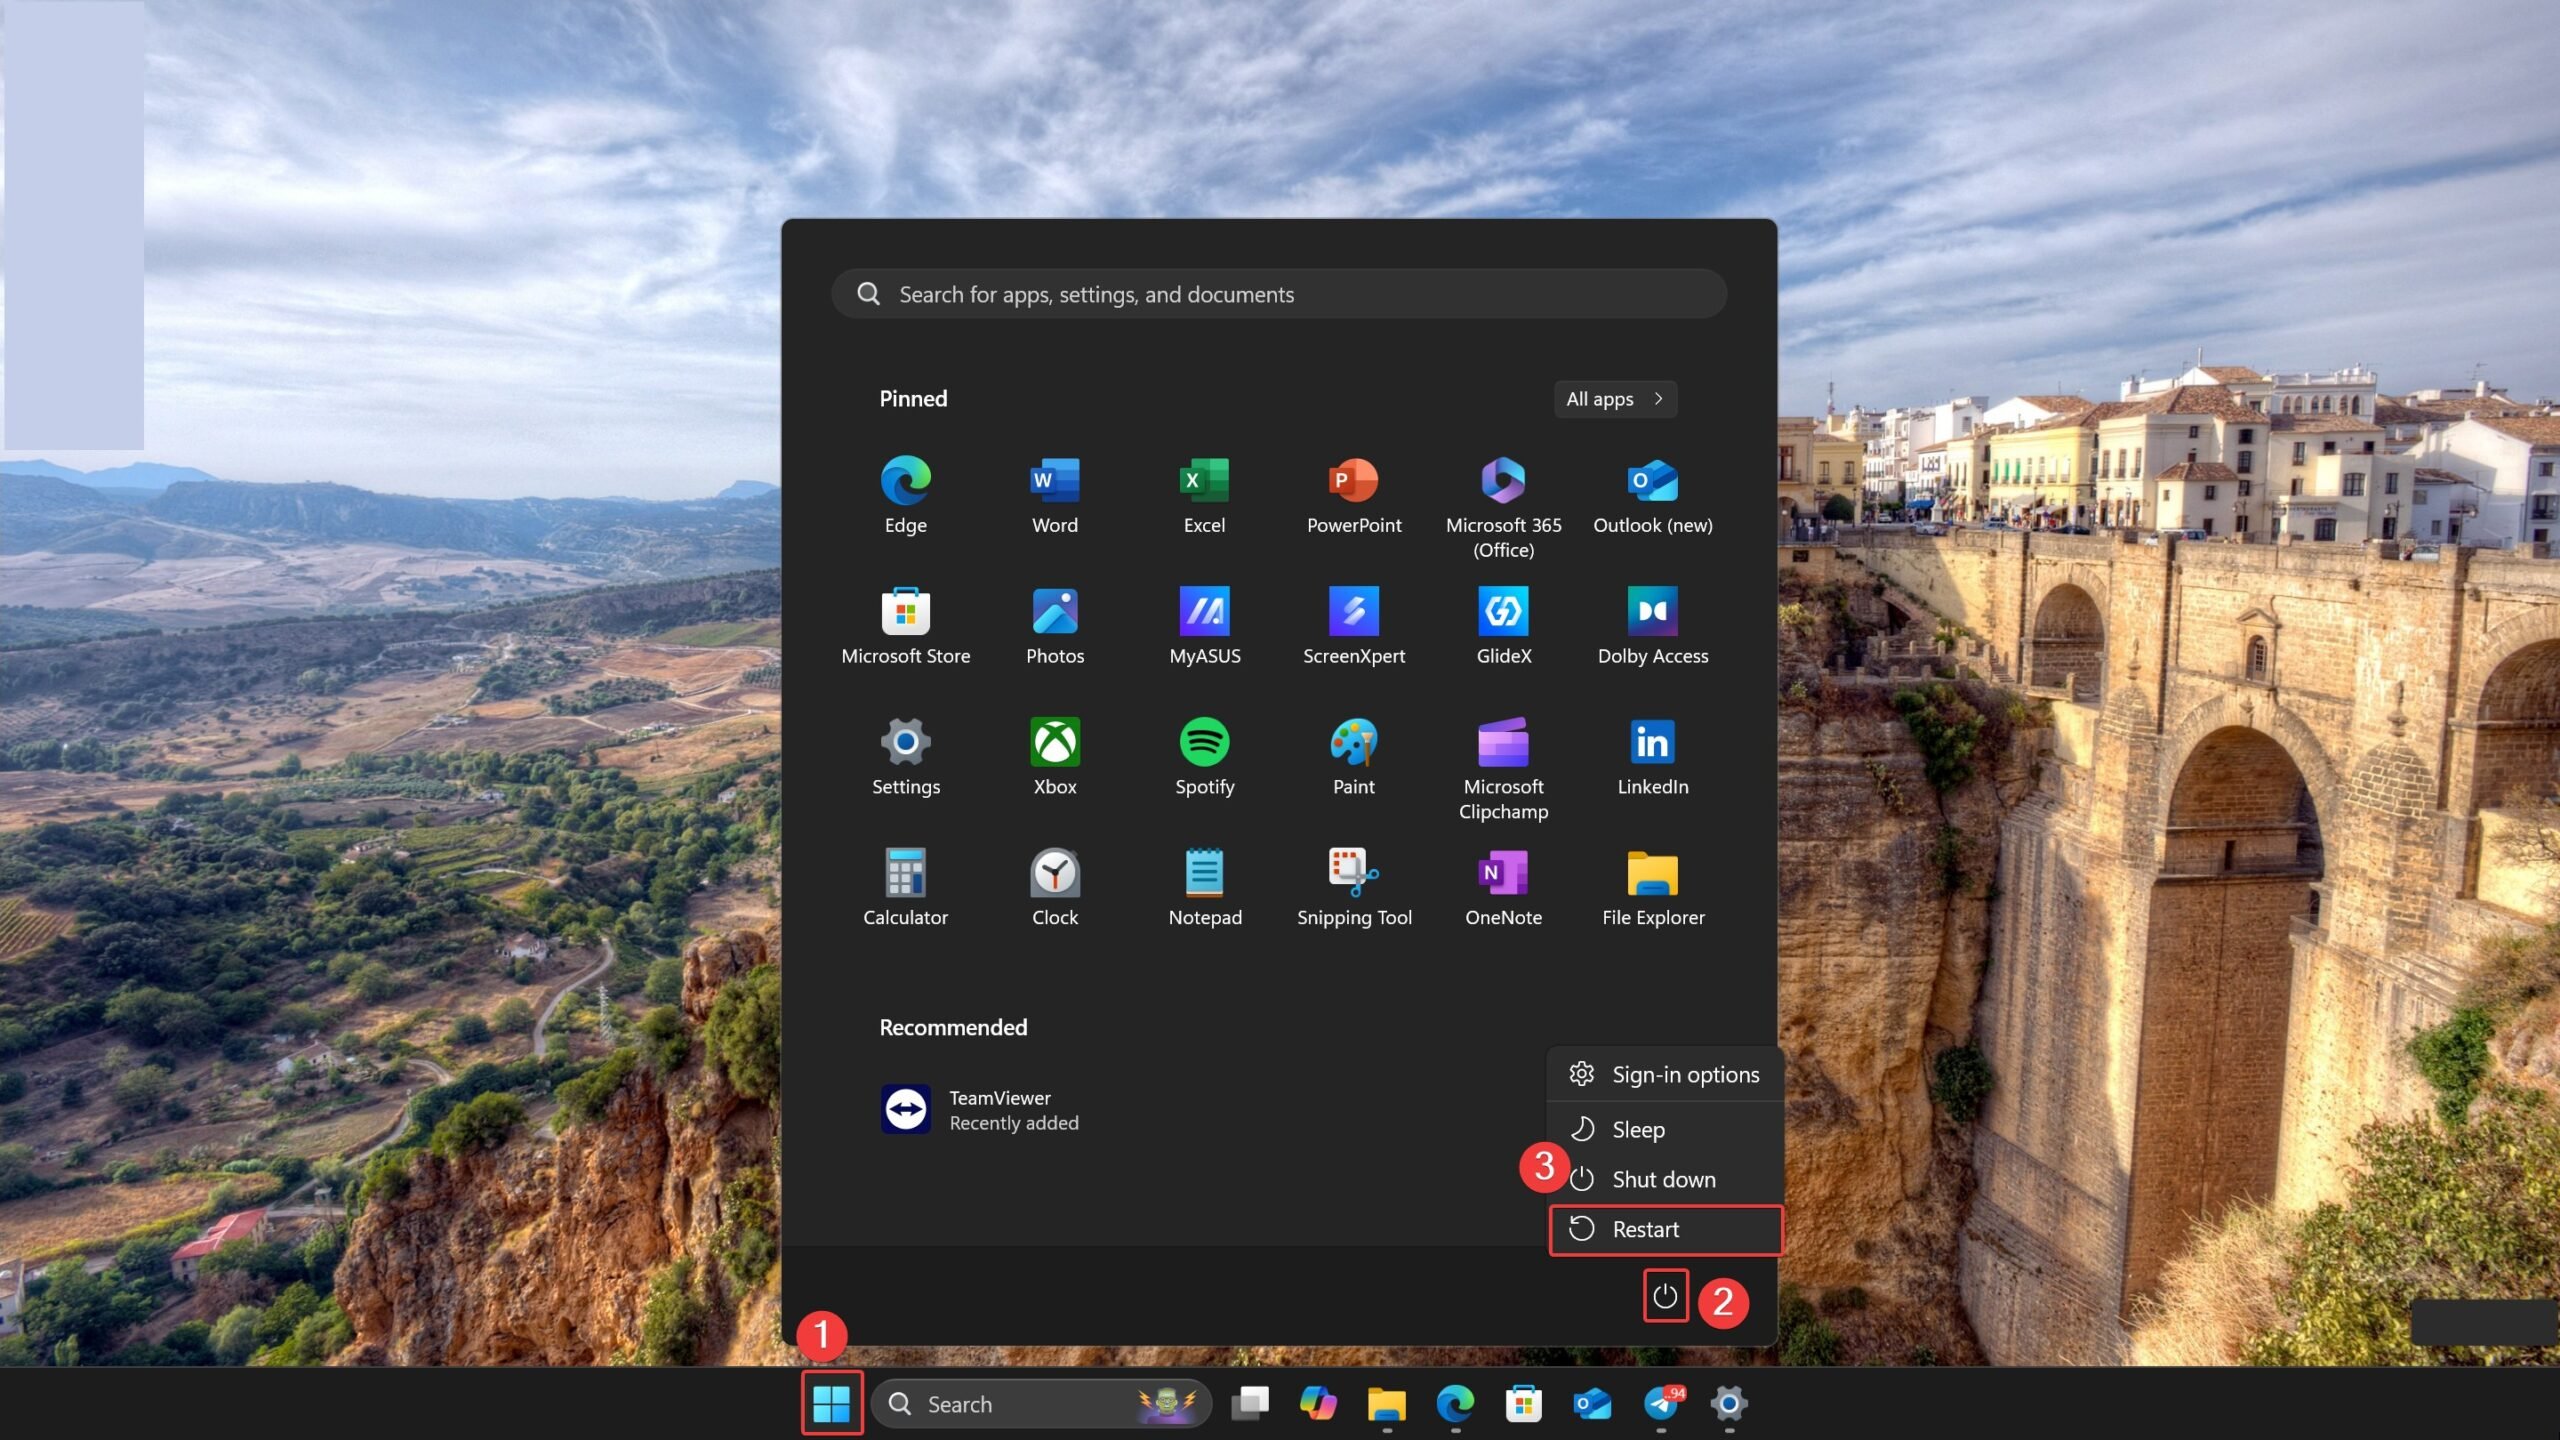
- Press the Windows key on your keyboard.
- Then, click on the Power icon.
- Select Restart.

- Alternatively, you can press and hold the Power button to restart your Windows laptop.
2. Check if your Wi-Fi Adapter is Enabled
Another simple solution is to make sure that the Wi-Fi adapter is turned on. The Wi-Fi toggle might be missing because your Wi-Fi adapter is turned off. Follow the steps below to enable it.
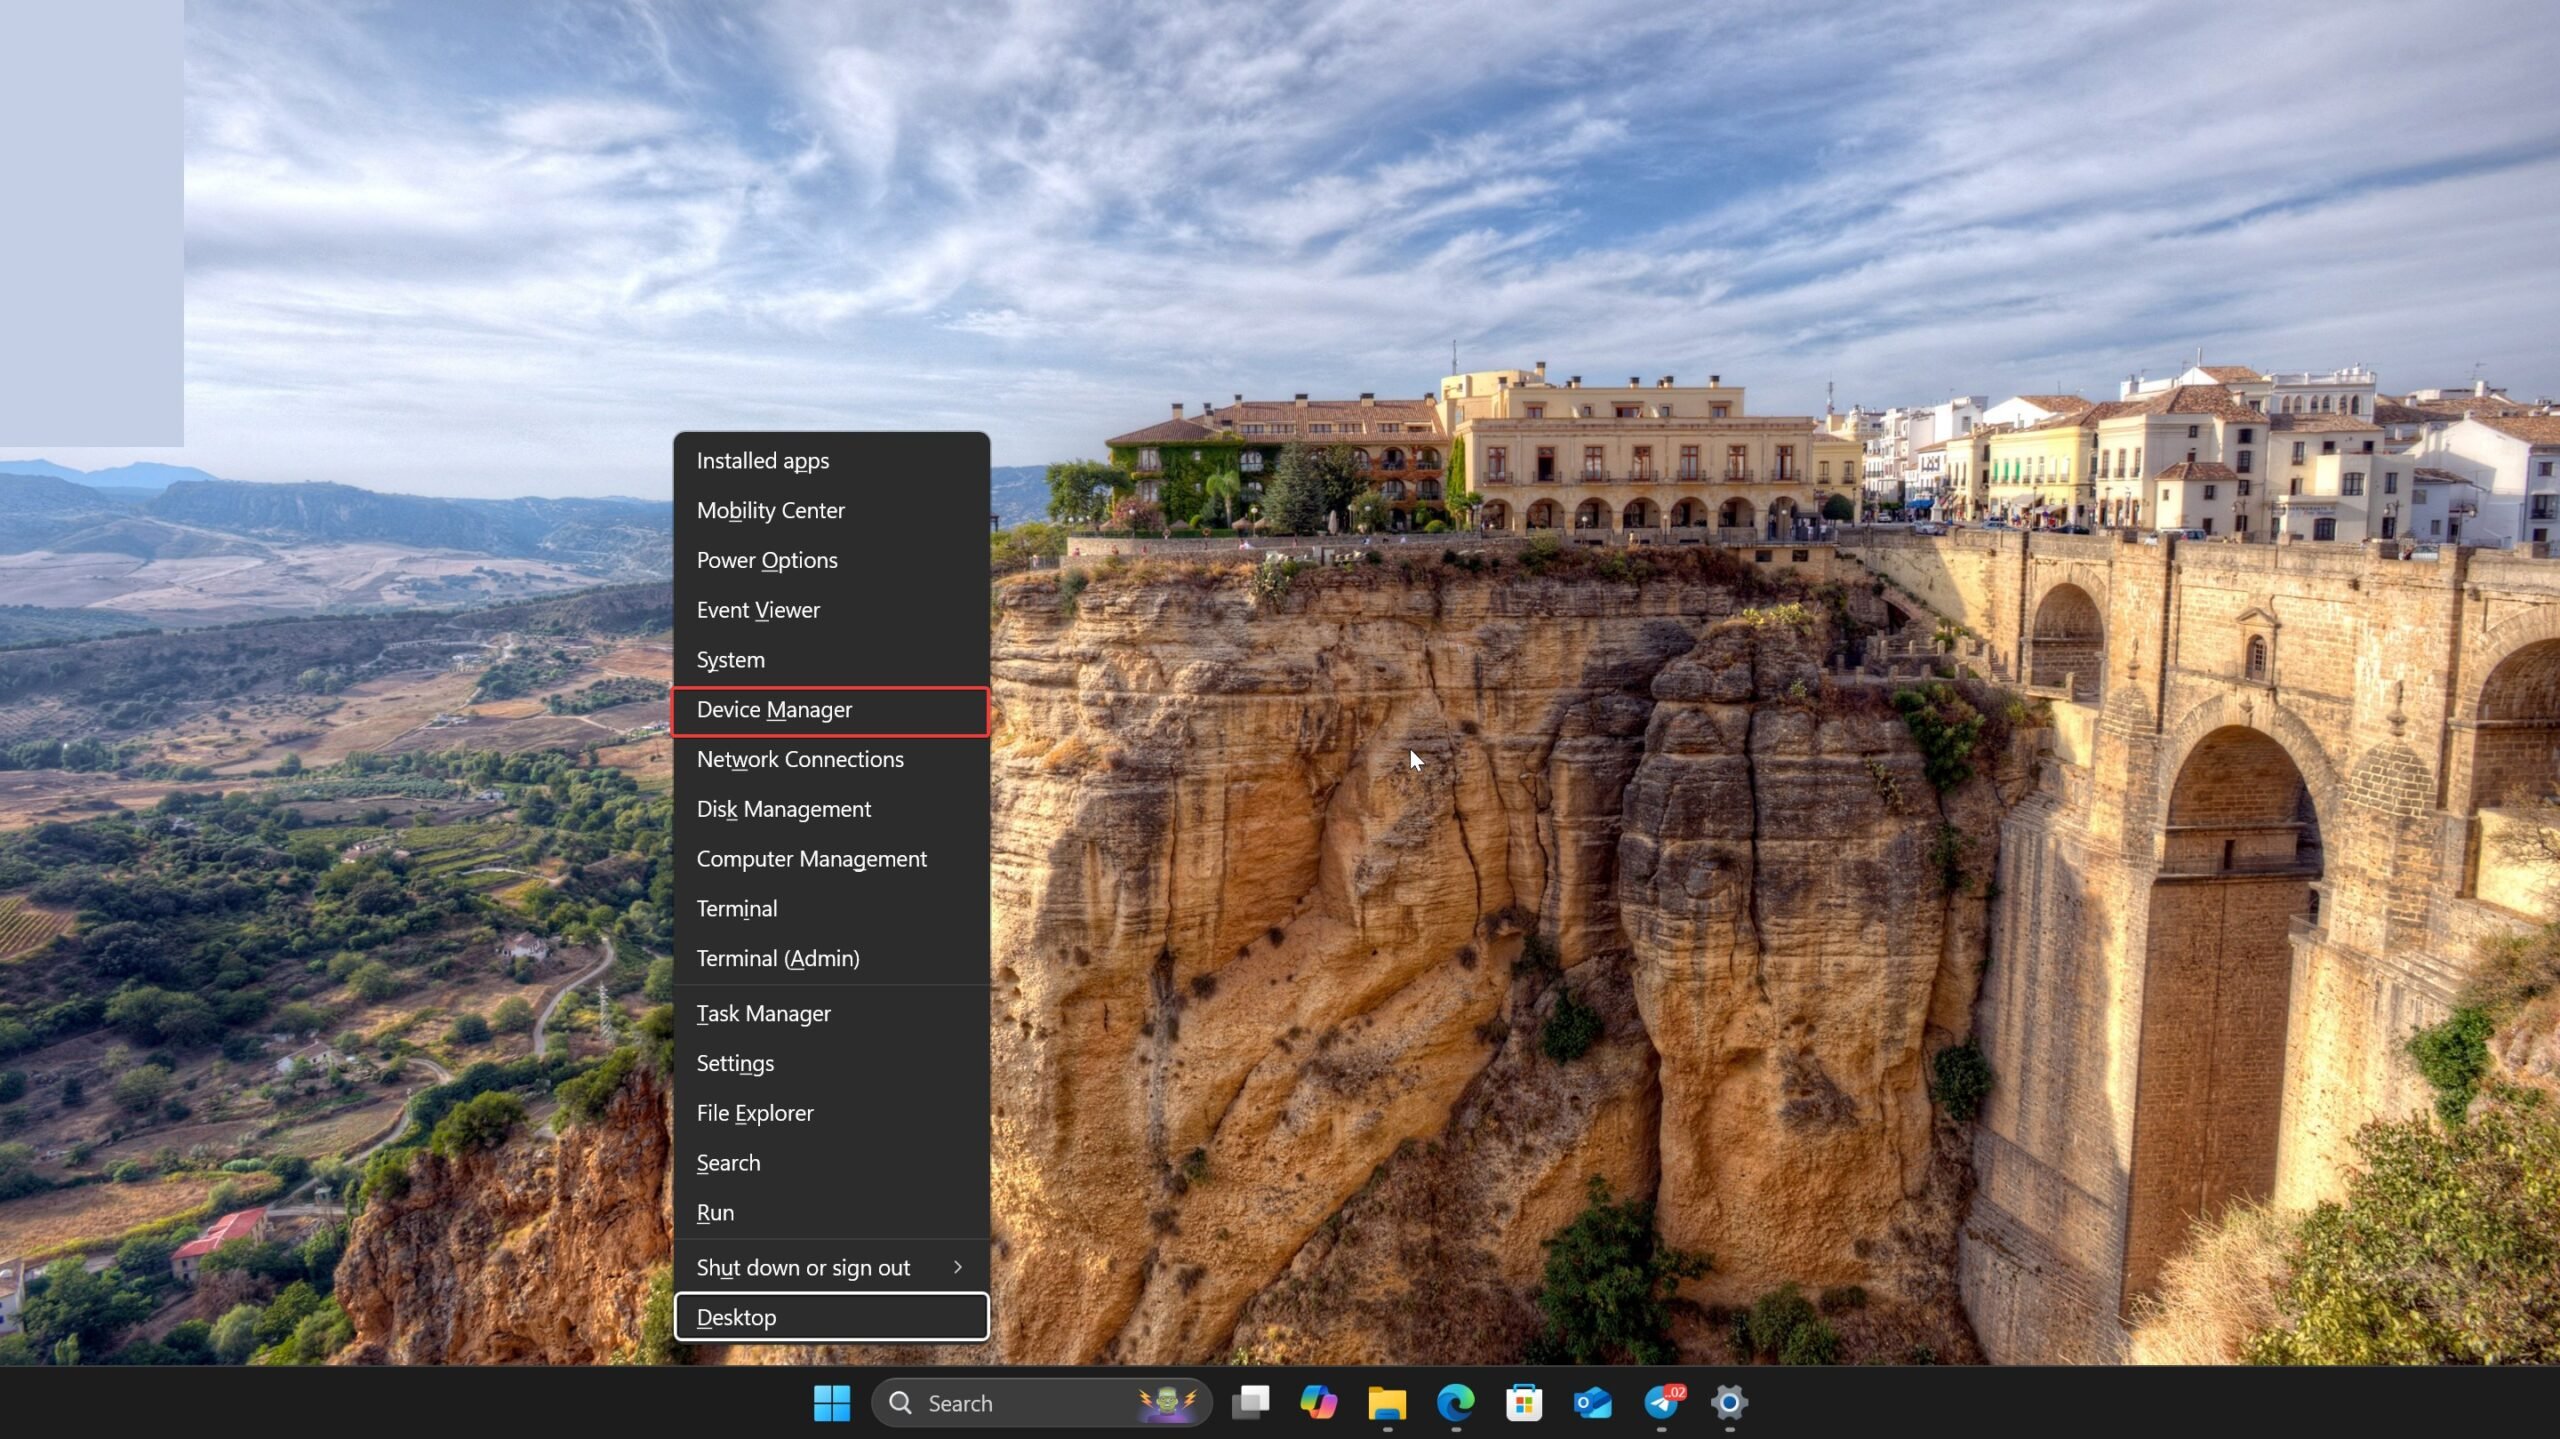
- Press the Windows key + X and select Device Manager from the Power User menu.

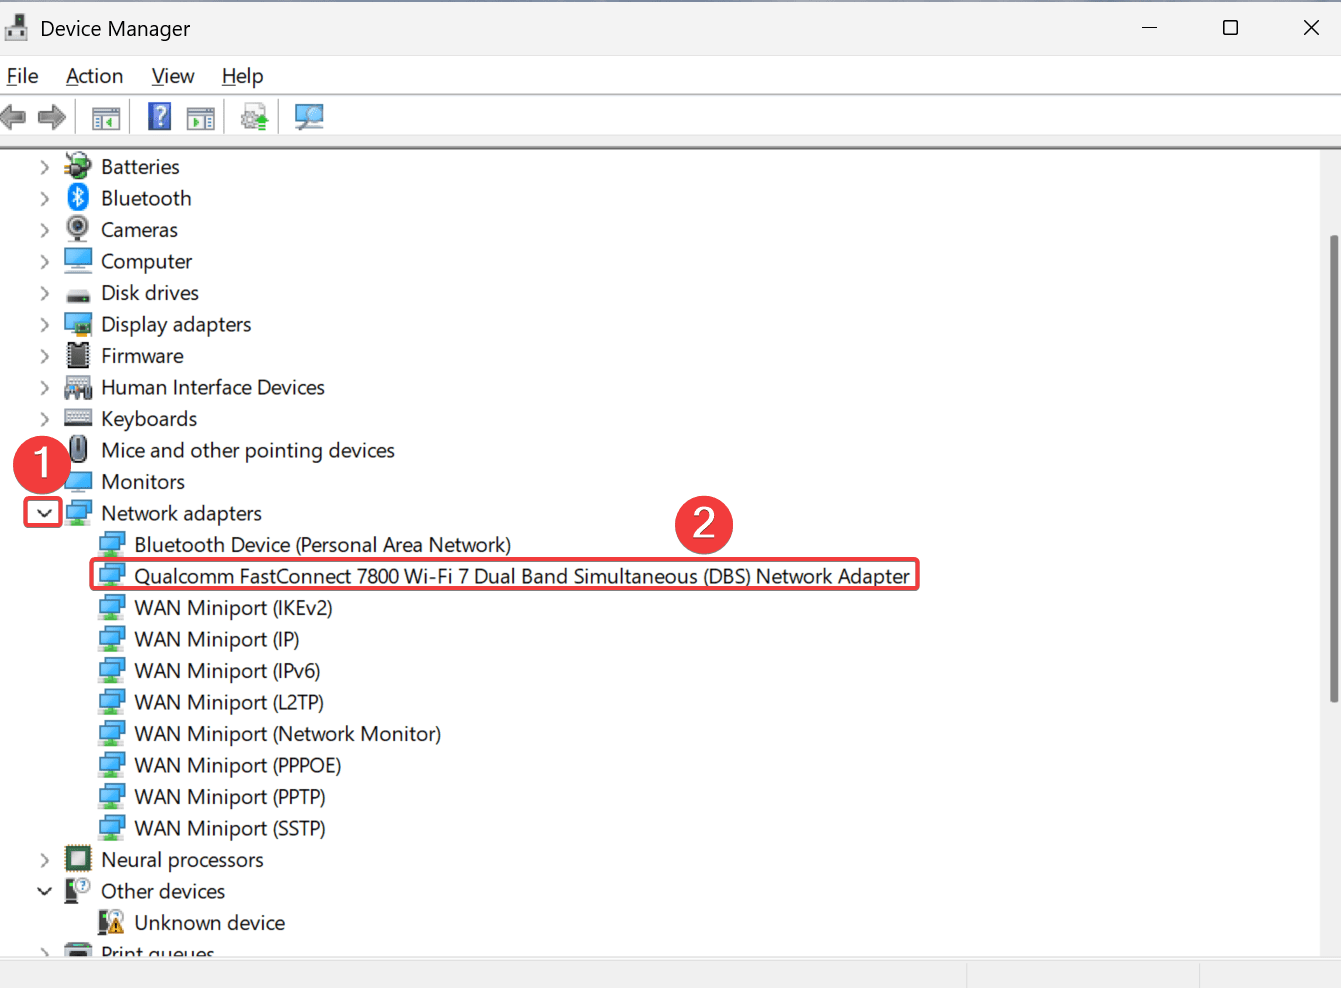
- Click on the tiny arrow next to “Network adapters” to expand that section.

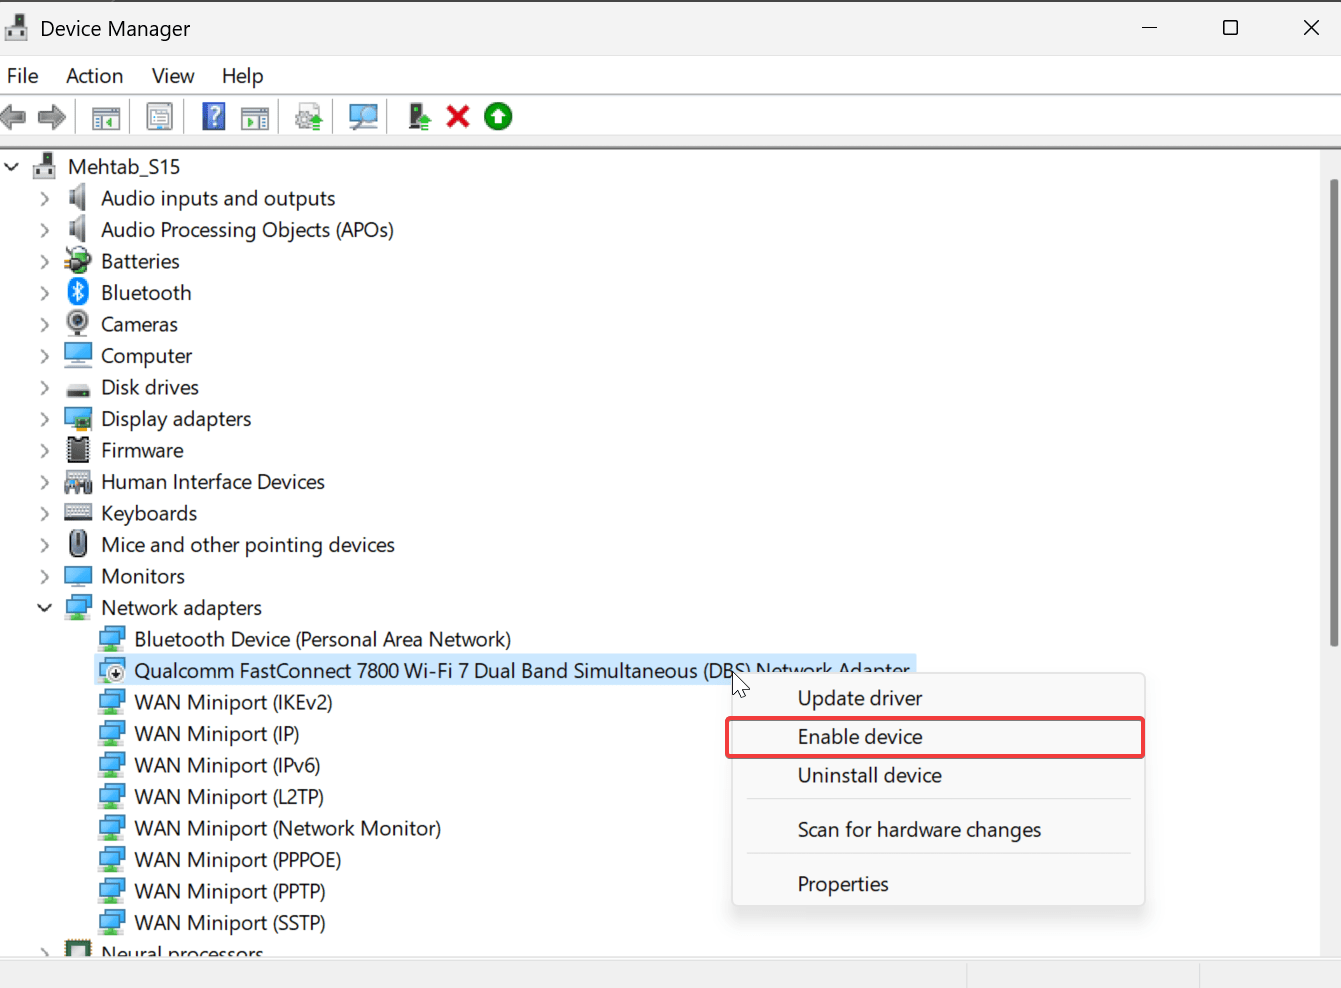
- Look for your Wi-Fi adapter. If it’s disabled, right-click and select Enable.

After enabling, the Wi-Fi toggle should reappear in the Action Center. Press the Windows key + A to check.
3. Update or Reinstall your Wi-Fi Drivers
Outdated or corrupt drivers can also mess with your Wi-Fi toggle. Here’s how to update or reinstall them.
Update Driver
- Press the Windows key + X and select Device Manager from the Power User menu.

- Click on the tiny arrow next to “Network adapters” to expand that section.

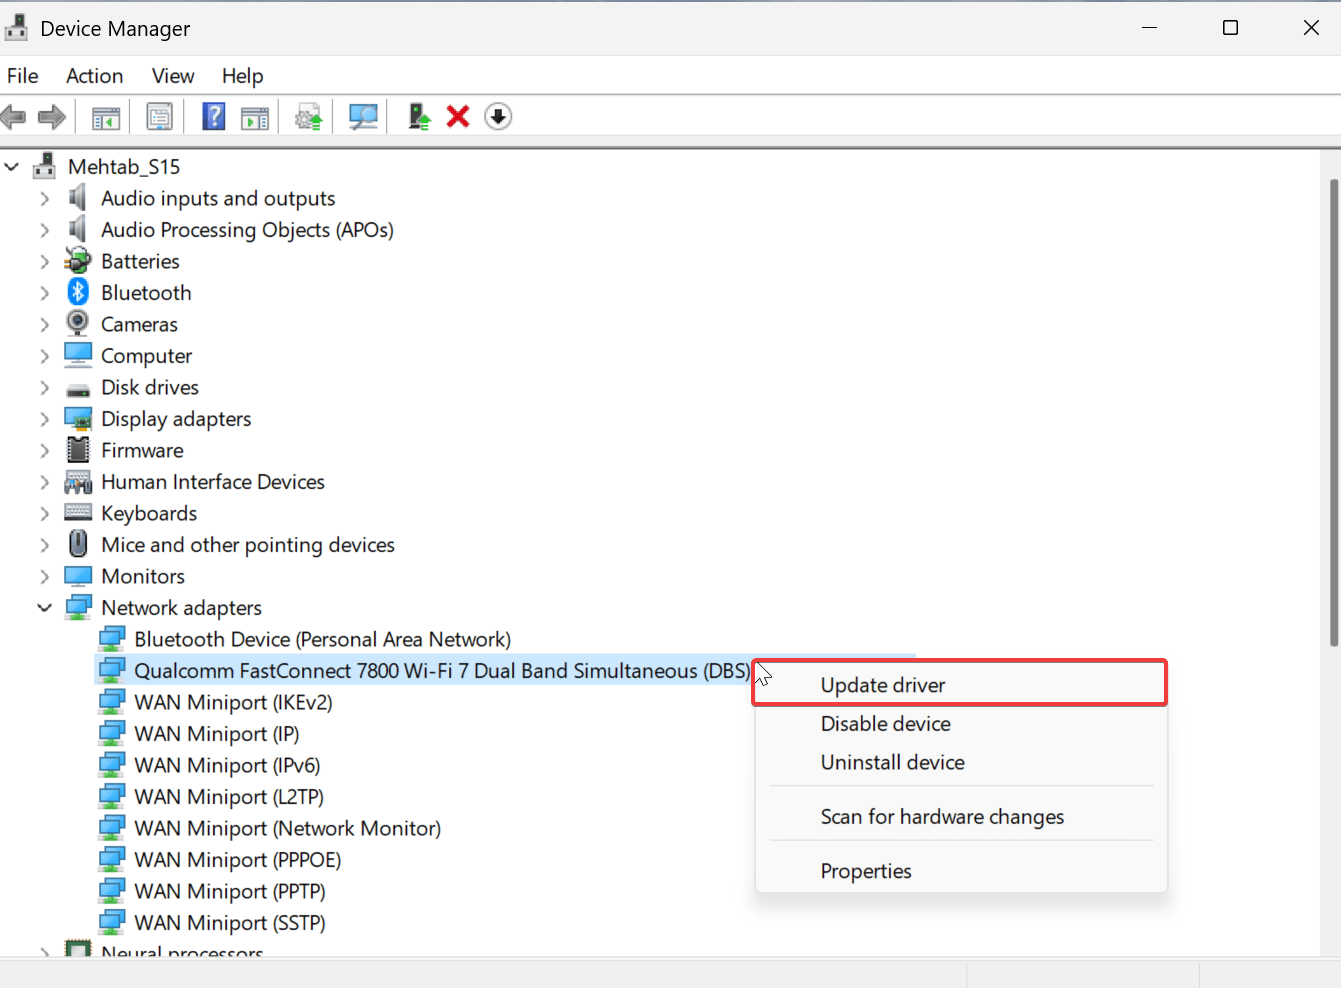
- Now, right-click on your Wi-Fi adapter and select “Update driver.”

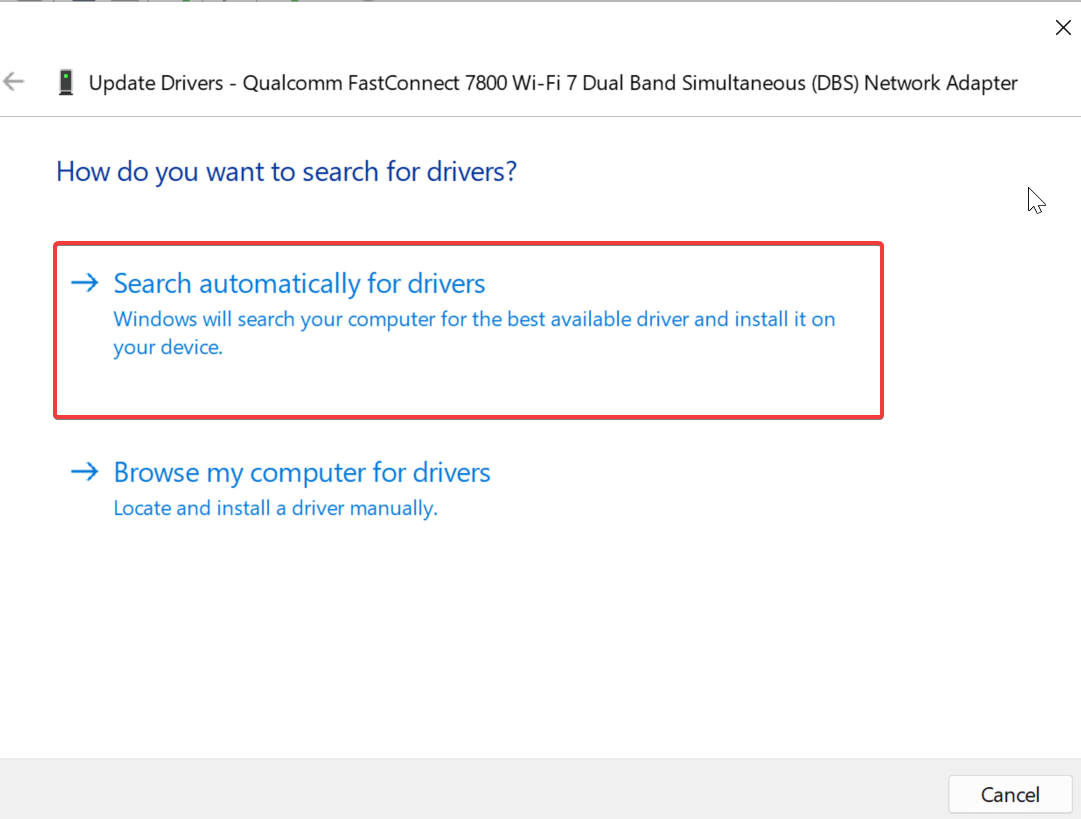
- Choose “Search automatically for drivers” and follow the prompts on the screen.

- Make sure to restart your PC once the update is finished.

Reinstall Driver
- If updating doesn’t work, try reinstalling.
- Right-click on your Wi-Fi adapter and select “Uninstall device.”
- Restart your computer, and Windows will automatically reinstall the driver.
4. Downgrade your Wi-Fi Adapter’s Driver
If updating and reinstalling don’t work, try downgrading. It means that the current version of the driver is corrupted or incompatible with either your PC or the latest Windows version. In this case, you can try installing an older version of the driver, when the Wi-Fi toggle was there. Follow the steps below.
- Press the Windows key + X and select Device Manager from the Power User menu.

- Click on the tiny arrow next to “Network adapters” to expand that section.

- Now, right-click on your Wi-Fi adapter and select “Update driver.”

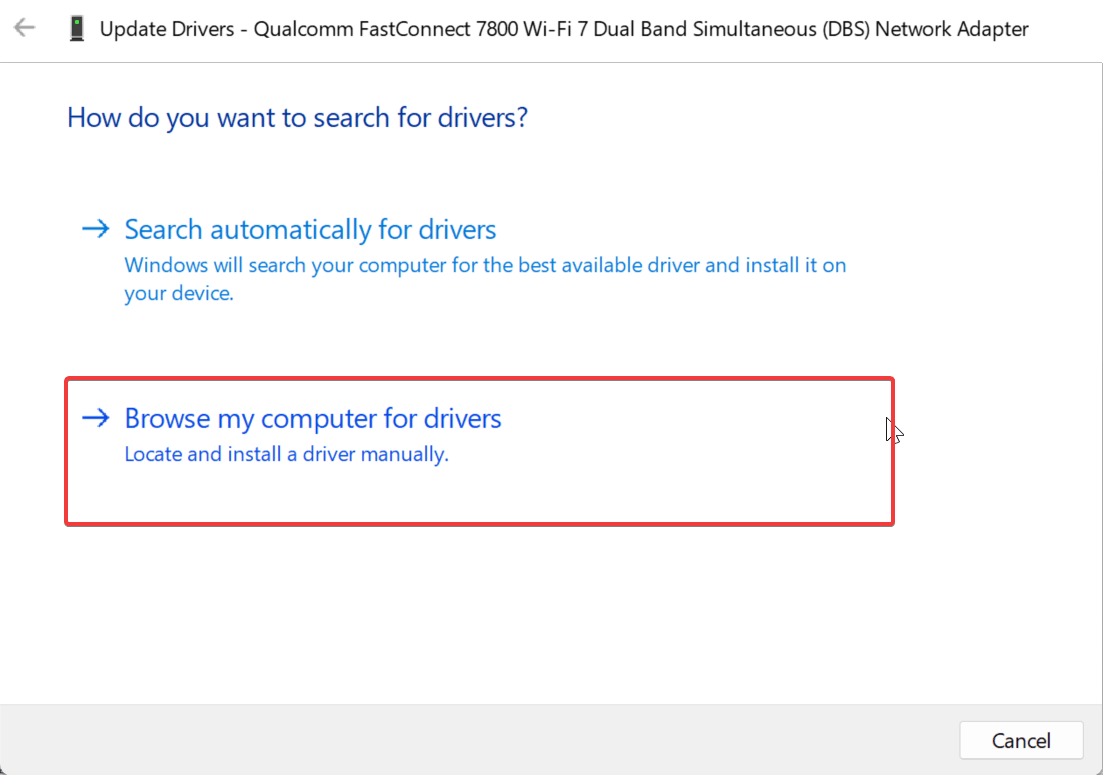
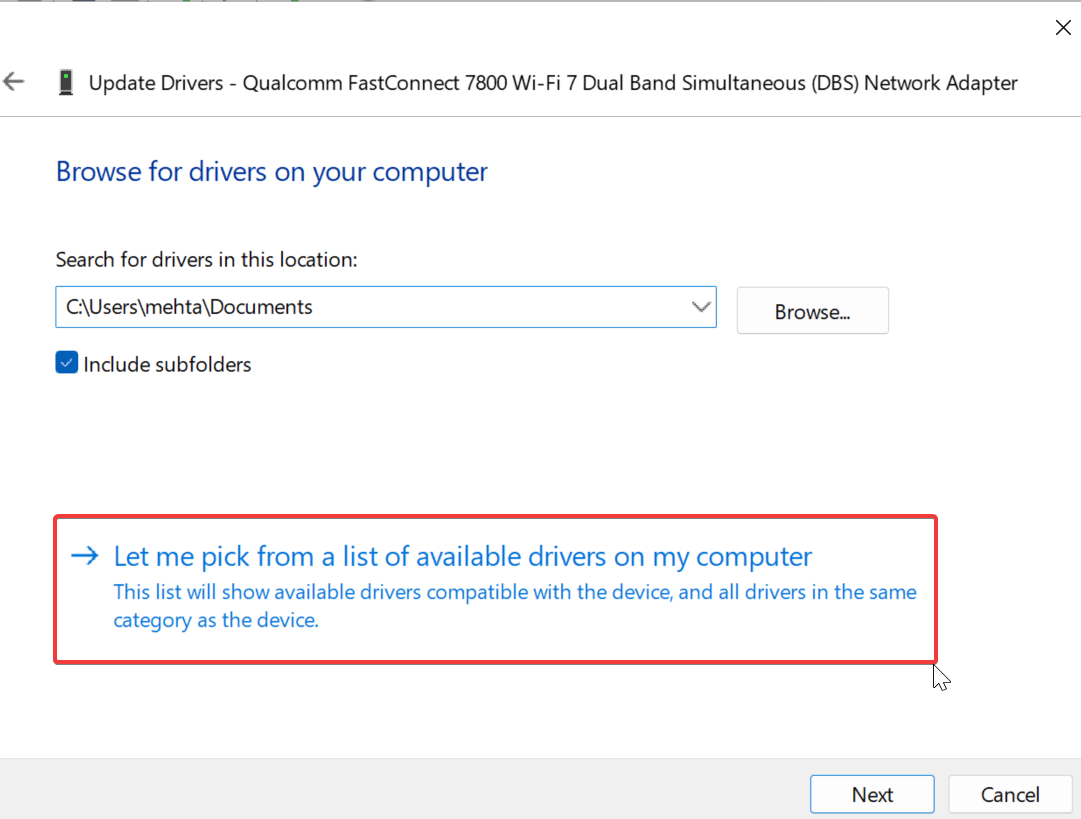
- Choose “Browse my computer for driver software” and follow the prompts on the screen.

- Then, click on “Let me pick from a list of available drivers on my computer.”

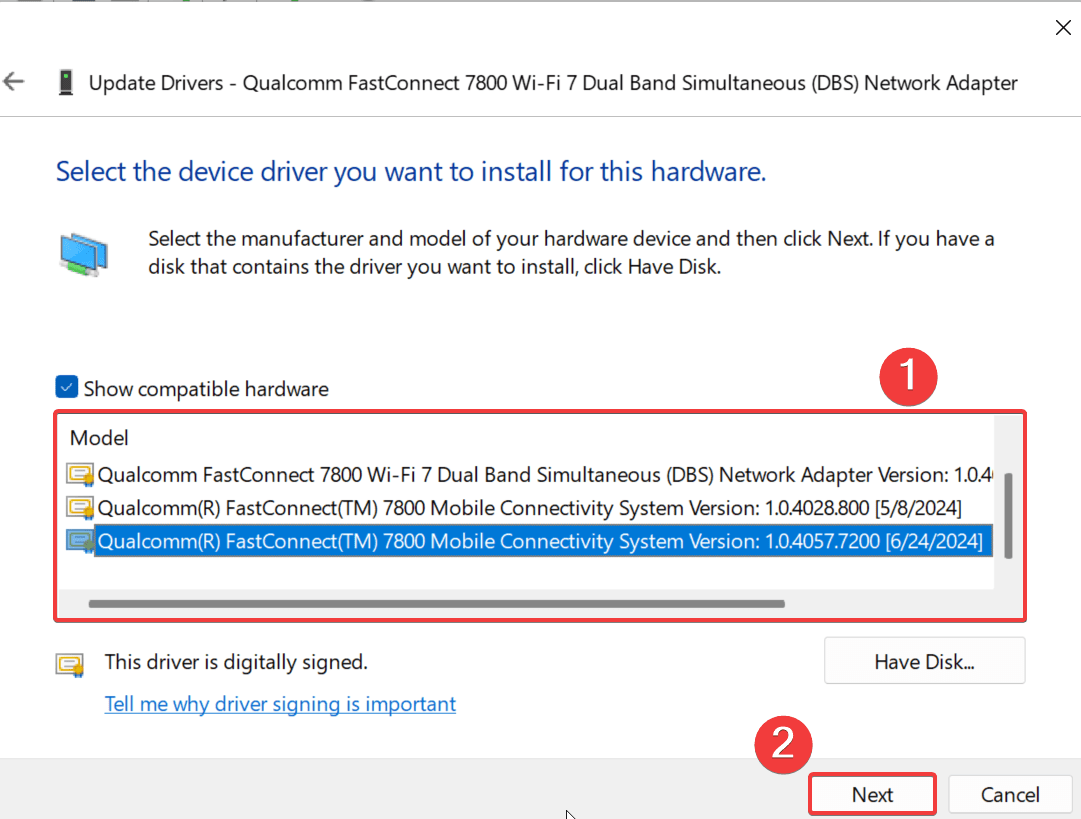
- Check the box next to “Show compatible hardware.”
- Select an older version of the driver on the list. Make sure it’s the one that was working earlier. You can try this multiple times if you are not sure.
- Once you have selected the right driver version, check on Next and restart your PC.

Note: Restarting your PC is a must for every driver update/reinstall/downgrade.
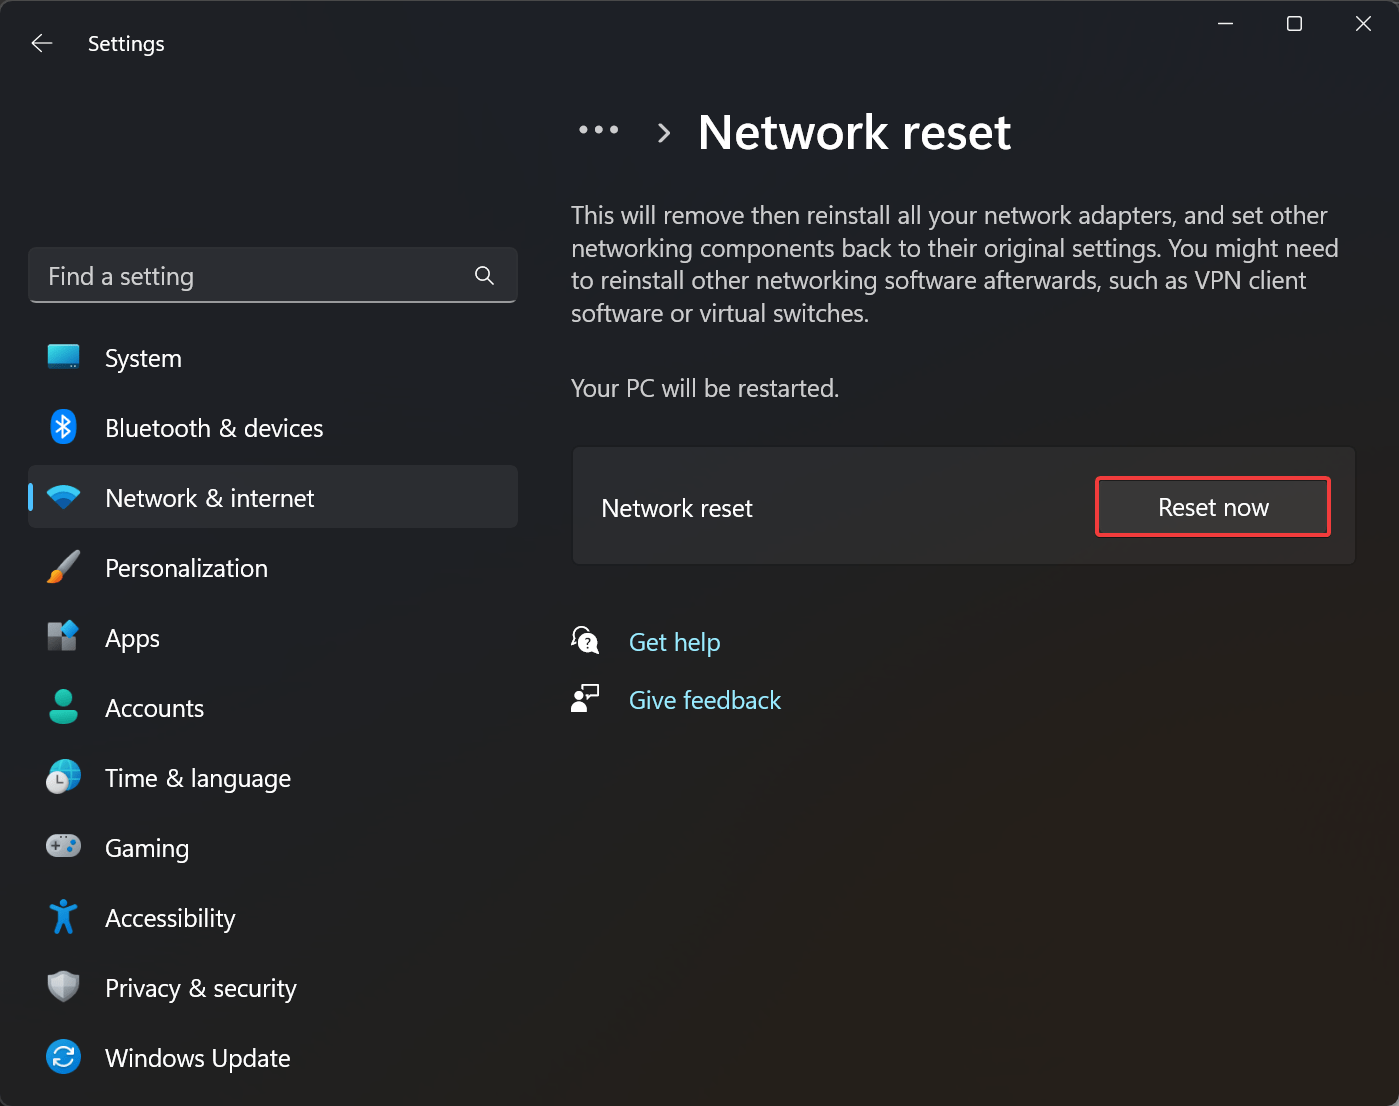
5. Reset Network Settings
When all else fails, resetting your network settings might do the trick. This will fix any misconfigured settings that could be causing the issue. Follow the steps below.
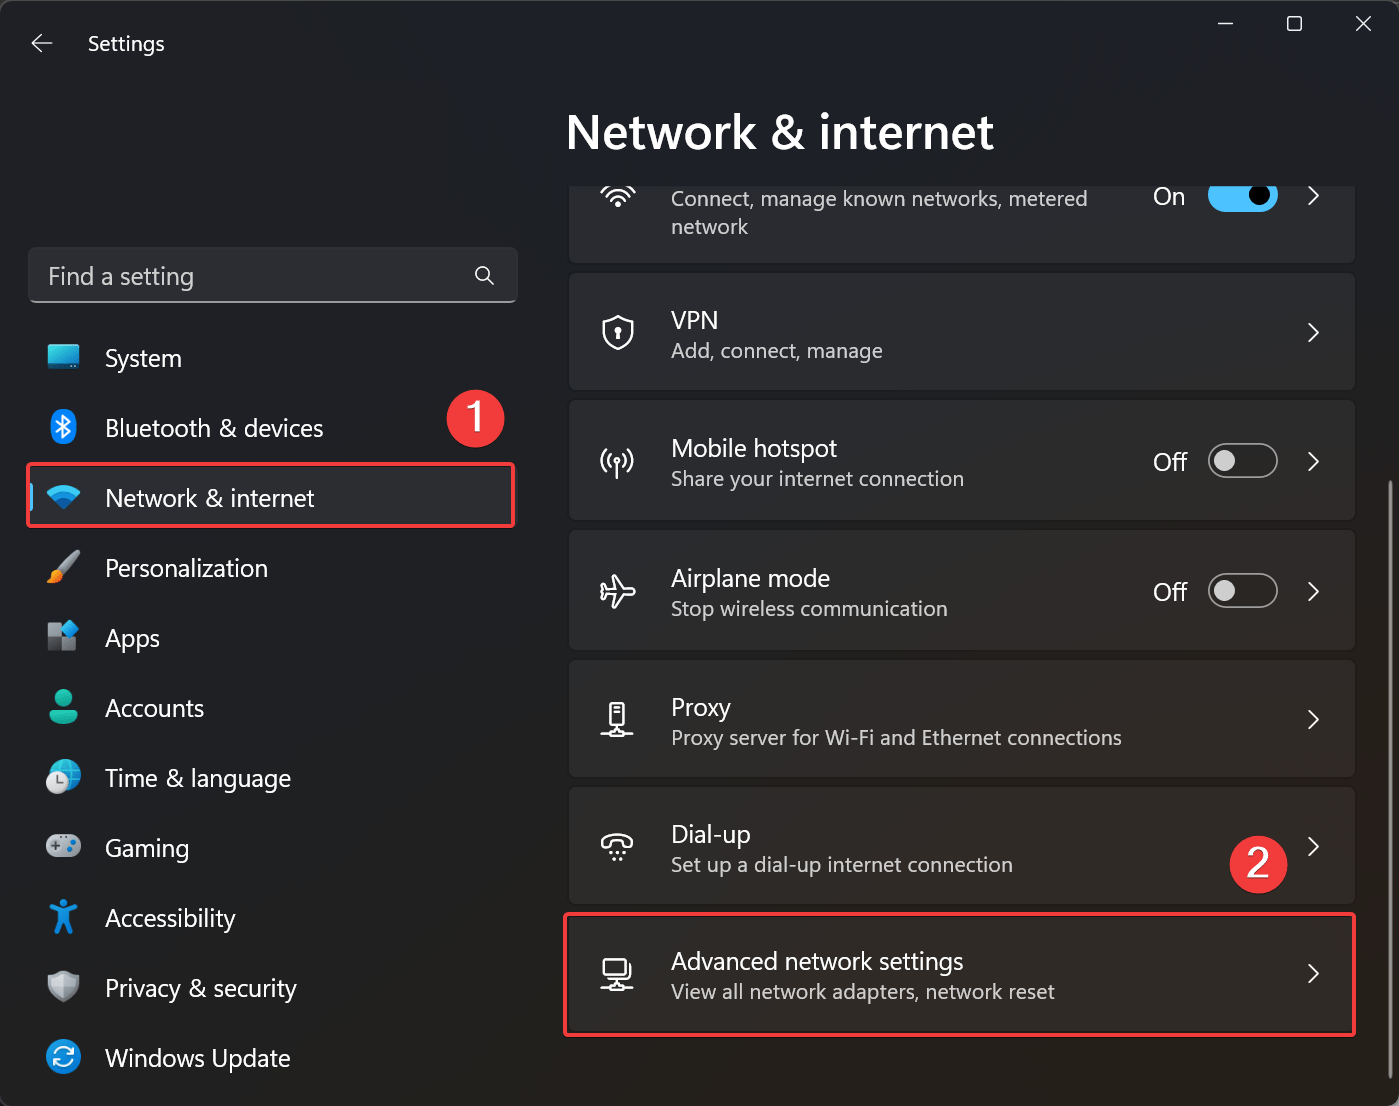
- Press the Windows key + I on your keyboard to open the Settings app.
- Now, click on Network & internet on the left.
- Once there, click on Advanced Network Settings.

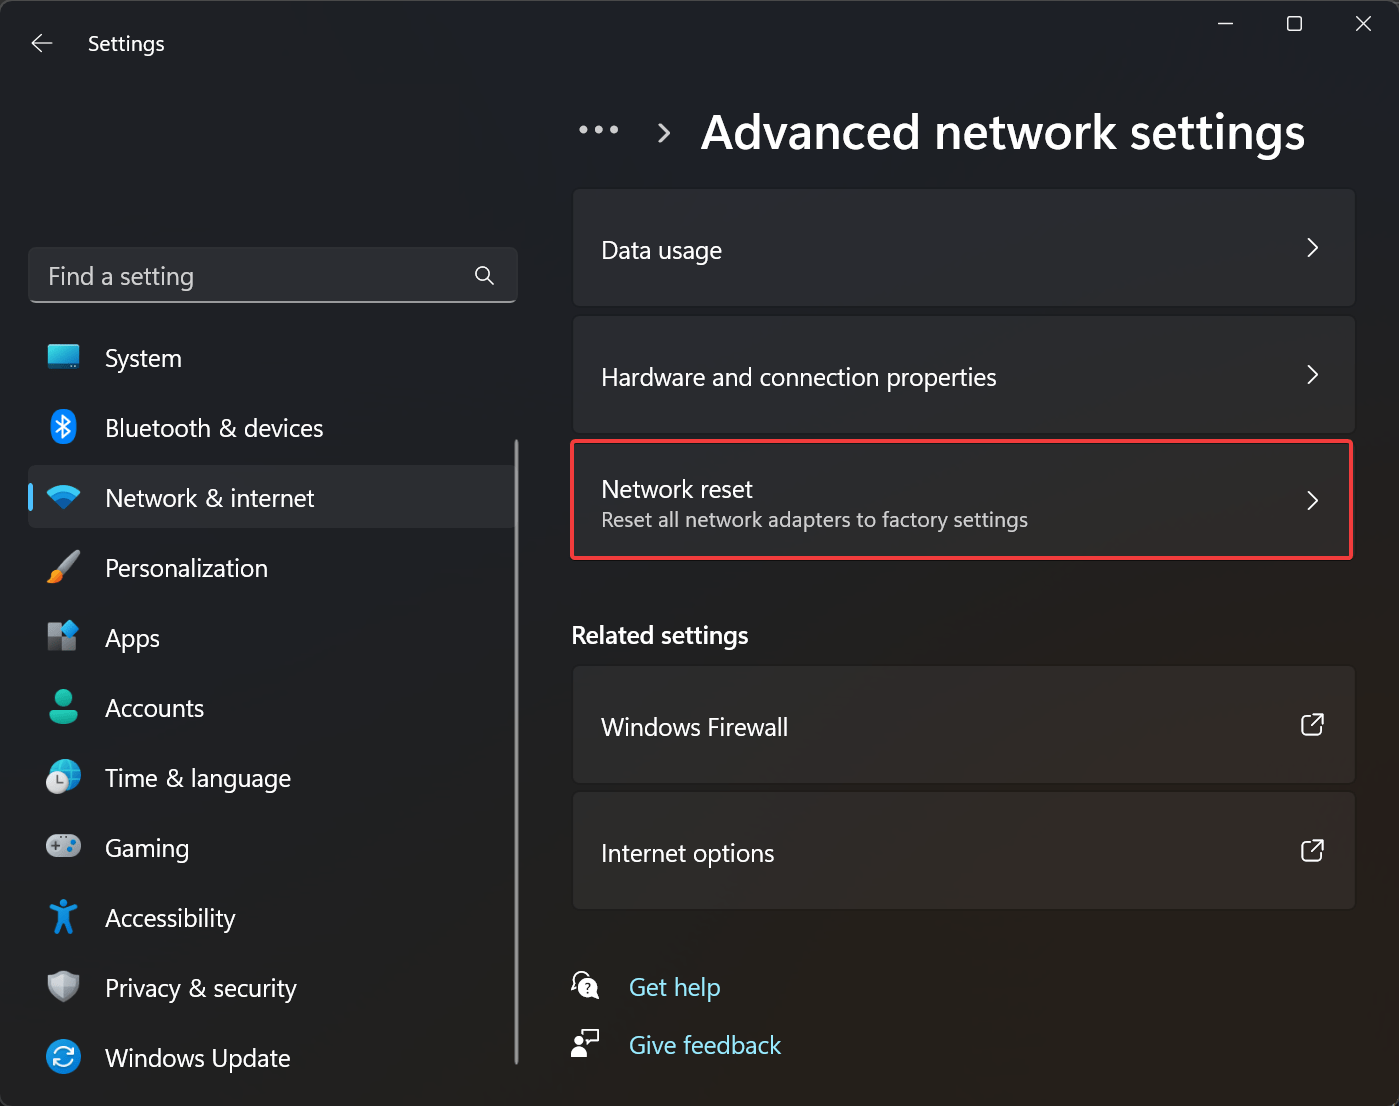
- Select Network reset.

- Clock on Reset now and finally select Yes to confirm.

Your PC will restart, and your network settings will be reset to default. Note that you’ll need to reconnect to your Wi-Fi network afterward.
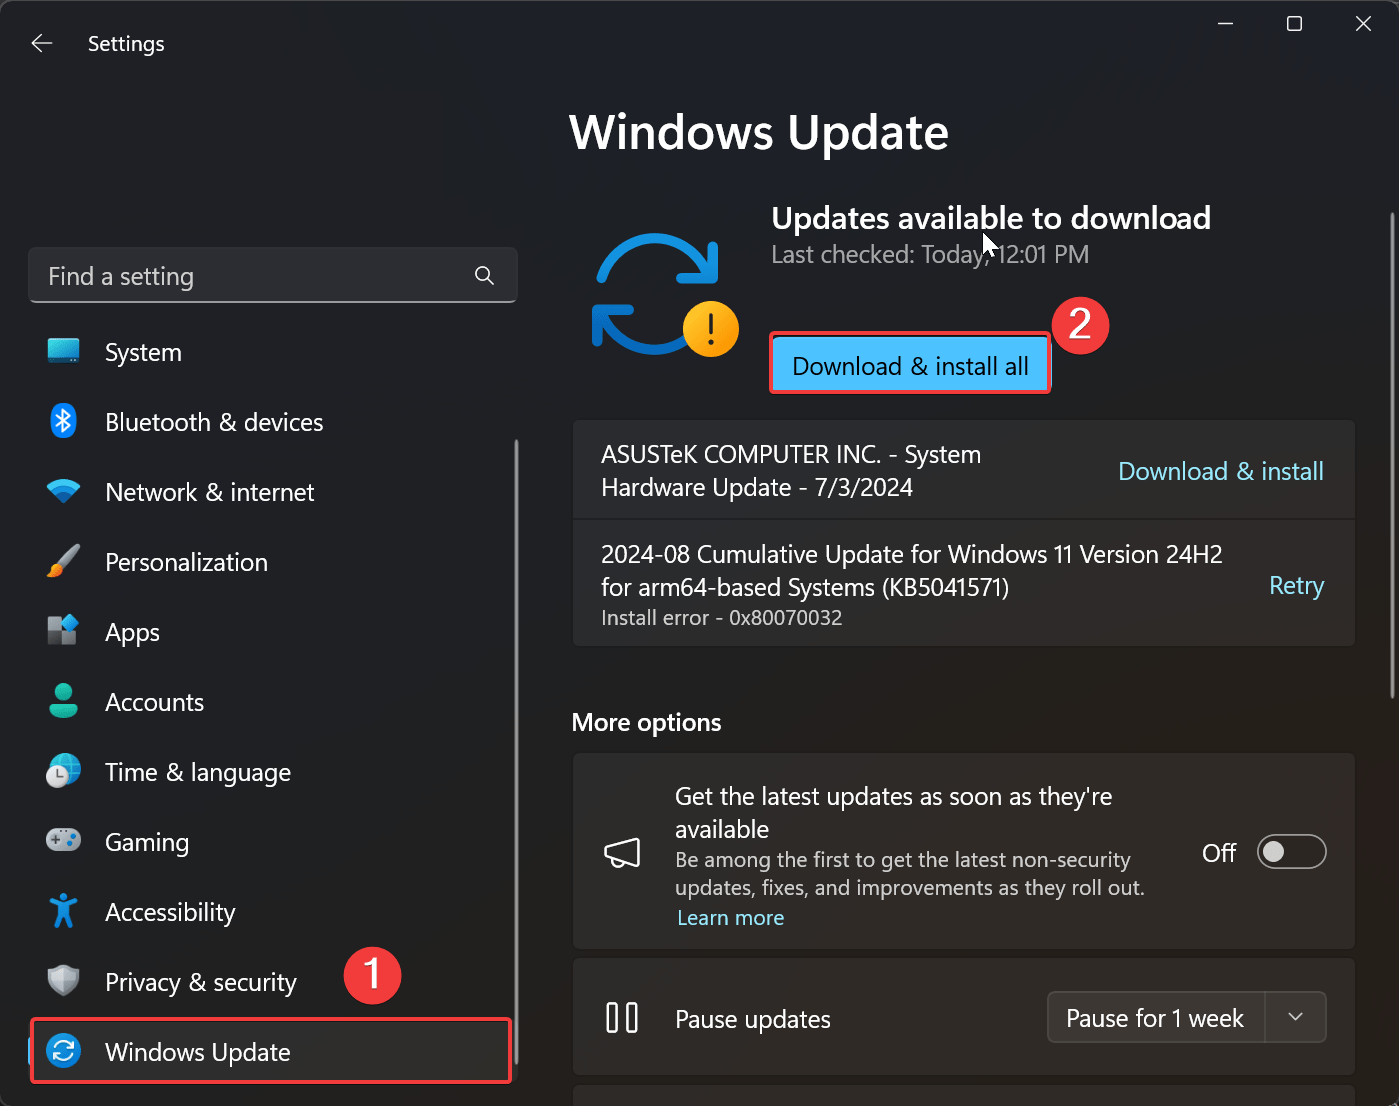
6. Check for Windows Updates
Sometimes, Windows updates can bring back missing features or fix bugs. Follow the steps below.
- Press the Windows key + I on your keyboard to open the Settings app.
- Now, click on Windows Update on the left.
- Click on Check for updates.
- If an update is available, click on Download & Install All.

- Finally, click on Restart now.
Once the updates are installed, restart your computer and see if the Wi-Fi toggle has returned.
Final Words
With these steps, you should have your Wi-Fi toggle back in the Action Center in no time. Whether it’s a simple setting or a more technical fix, you’re covered. If you’re still having trouble, contact your manufacturer for help. In the meantime, you can use ethernet or USB tethering to access the internet.
If you've any thoughts on How to Fix No Wi-Fi Toggle in Action Center on Windows 11, then feel free to drop in below comment box. Also, please subscribe to our DigitBin YouTube channel for videos tutorials. Cheers!
