This guide will make you aware of six different methods to fix the issue of Night Light not working in Windows 11. If you have a habit of working late at night, then you must be aware of the difficulty of dealing with the glaring bright lights emitting from the screen. Continue using in this manner, and eye strain and headaches are usually on the cards.
This is where the Windows Night Light functionality comes in handy. It minimizes the blue light radiation and, in turn, applies a yellow hue to the overall display, thereby giving it a warmer tone. First introduced in Windows 10, it has been carried forward to the latest OS build as well.
However, there seem to be a few rough edges this time around. Many users have voiced their concerns that the feature is not working in the latest iteration of Windows. Likewise, some have reported that it remains enabled only for a few seconds before being automatically disabled.
So if you are also getting bugged with any of these issues, then this guide shall come in handy. Given here are various methods that shall help you fix the issue of Night Light not working in Windows 11. Follow along.
Fix 1. Re-Enable Night Light
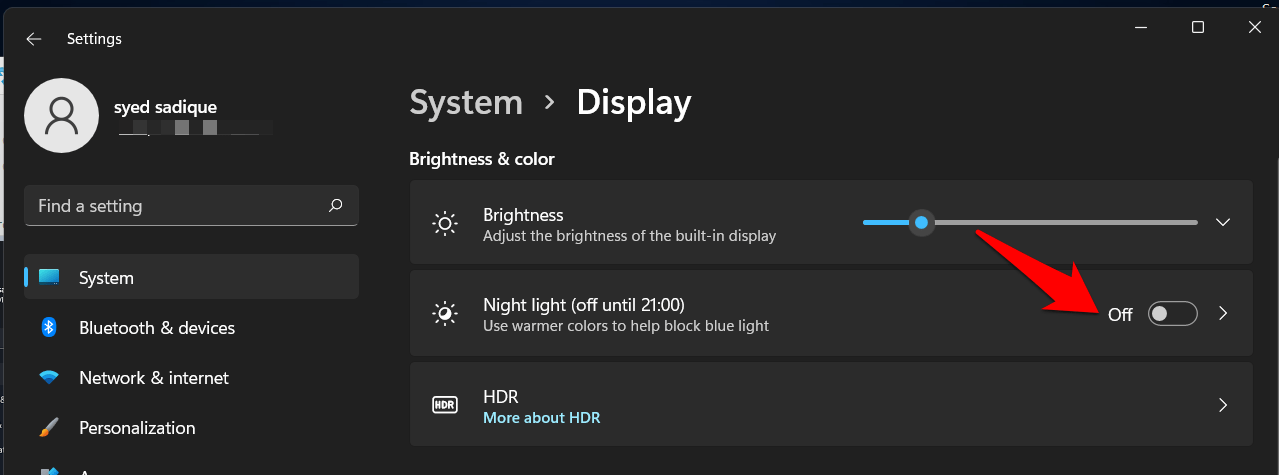
Let’s start off with the basic workaround of refreshing this feature by disabling and then re-enabling it. Here’s how it could be done:
- To begin with, open the Settings menu via the Windows+I shortcut keys.
- Then go to System → Display and turn off Night Light.

- Now wait for a few seconds and then re-enable it back on.
- Check if it is able to fix the Night Light issue in Windows 11.
Fix 2. Set a Custom Schedule
If you aren’t able to manually enable this feature, then there’s another nifty approach that you could take. This involves creating a custom schedule and letting Windows enable the Night Light on your behalf. Here’s how:
- Head over to the System → Settings → Display section.
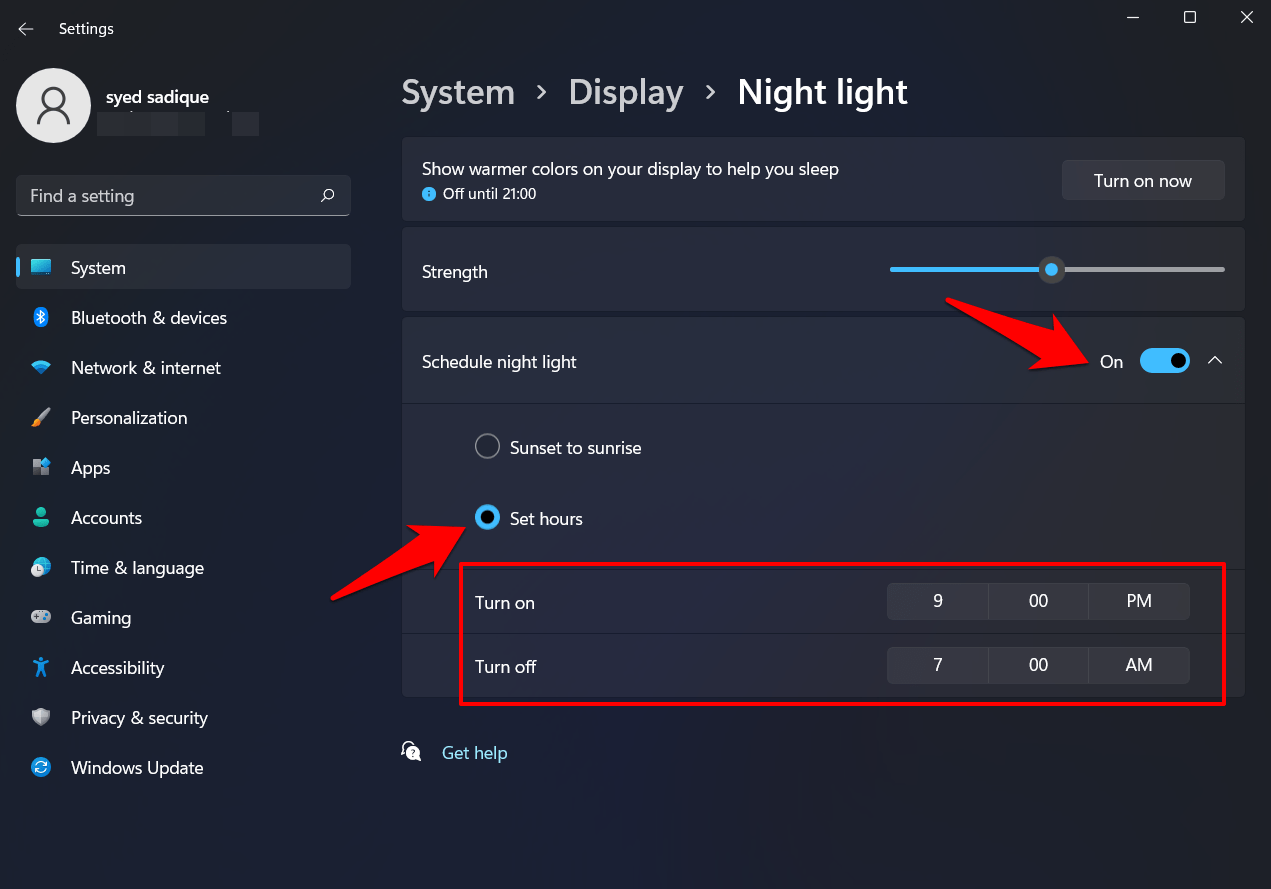
- Then go to Night Light and enable the toggle next to Schedule Night Light.
- After that, select Set Hours and assign it the Turn On and Turn Off times.

- Keep the ‘Turn On’ time just a minute ahead of the current time so that you would be able to test it right away.
- Now wait for a minute and then check if it fixes the issue of Night Light not working in Windows 11.
Fix 3. Update Graphics Drivers
Using old or outdated graphics card drivers has been known to conflict with this feature. Therefore, you should consider updating these drivers to the latest build, which could be done as follows:
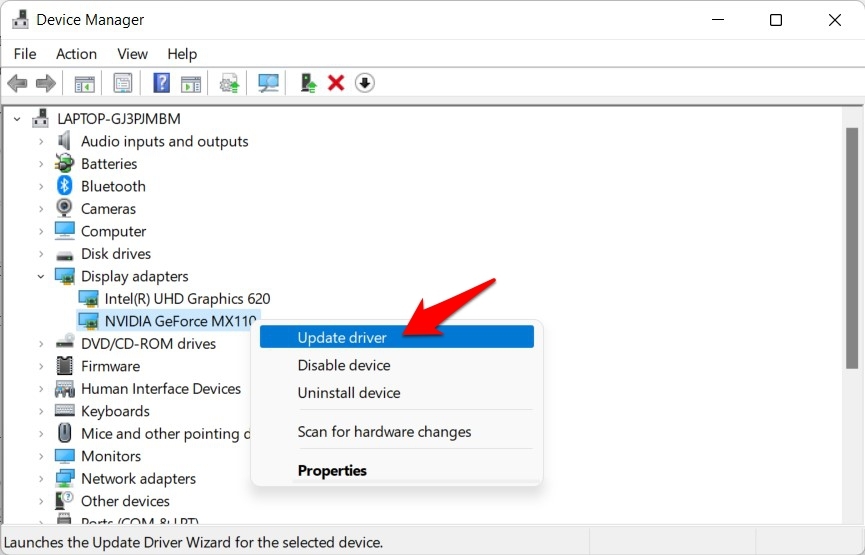
- Use the Windows+X shortcut keys and select Device Manager from the menu that appears.
- Then expand the Display Adapter sections, right-click on your graphics card, and select Update Drivers.

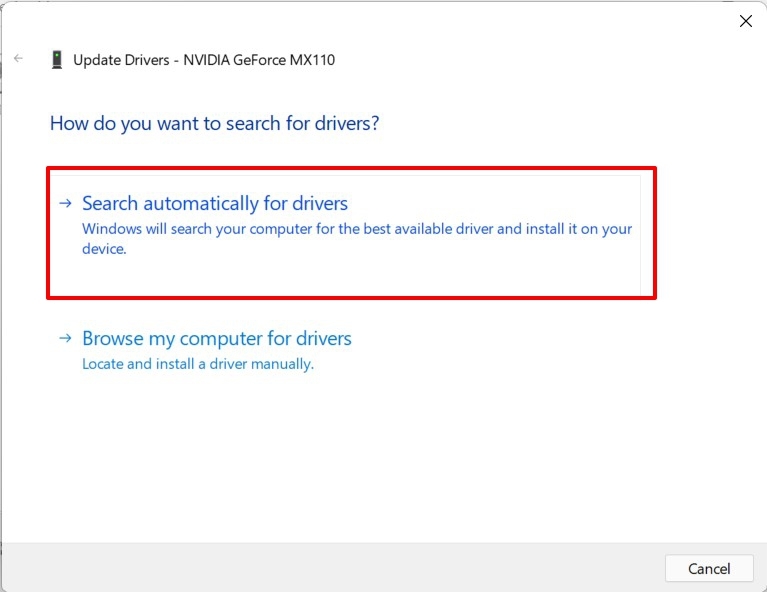
- After that, select Search automatically for drivers.

- Windows will now search online for the latest drivers and will download and install the same.
- Once the installation is complete, restart your PC. Then verify if it was able to fix the issue of Night Light not working in Windows 11.
Fix 4. Disable HDR
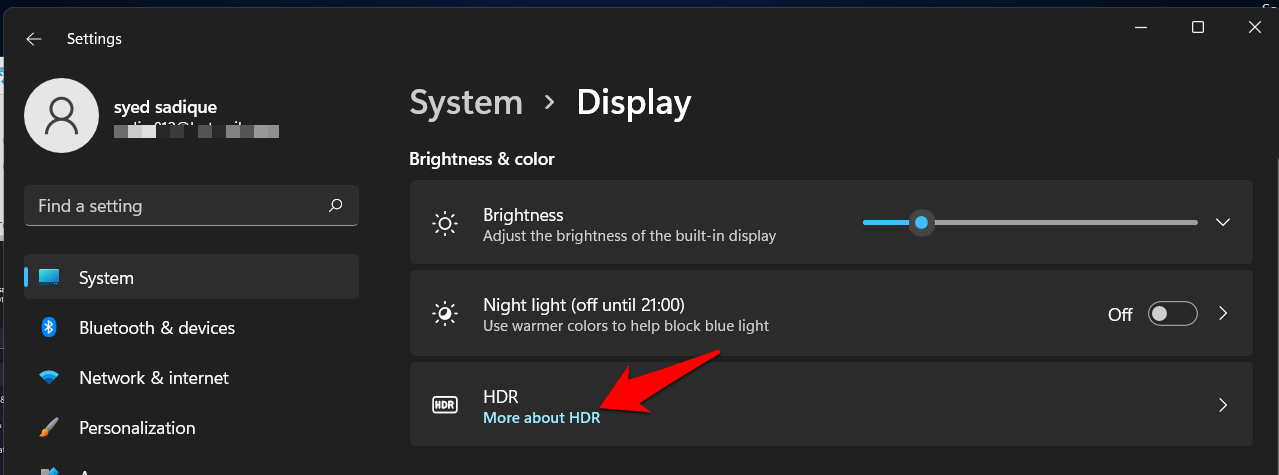
By default, your PC’s display is set to Standard Dynamic Range. However, Windows gives you the option to increase the display’s brightness, color, and contrast by enabling the High Dynamic Range Mode.
But once you turn on the HDR, it could create a few roadblocks for other display-related features, including Night Light. Therefore, you should consider temporarily disabling this feature, using the instructions given below.
- Open the Settings menu via the Windows+I shortcut
- Then head over to Display and turn off the Use HDR toggle (if supported).

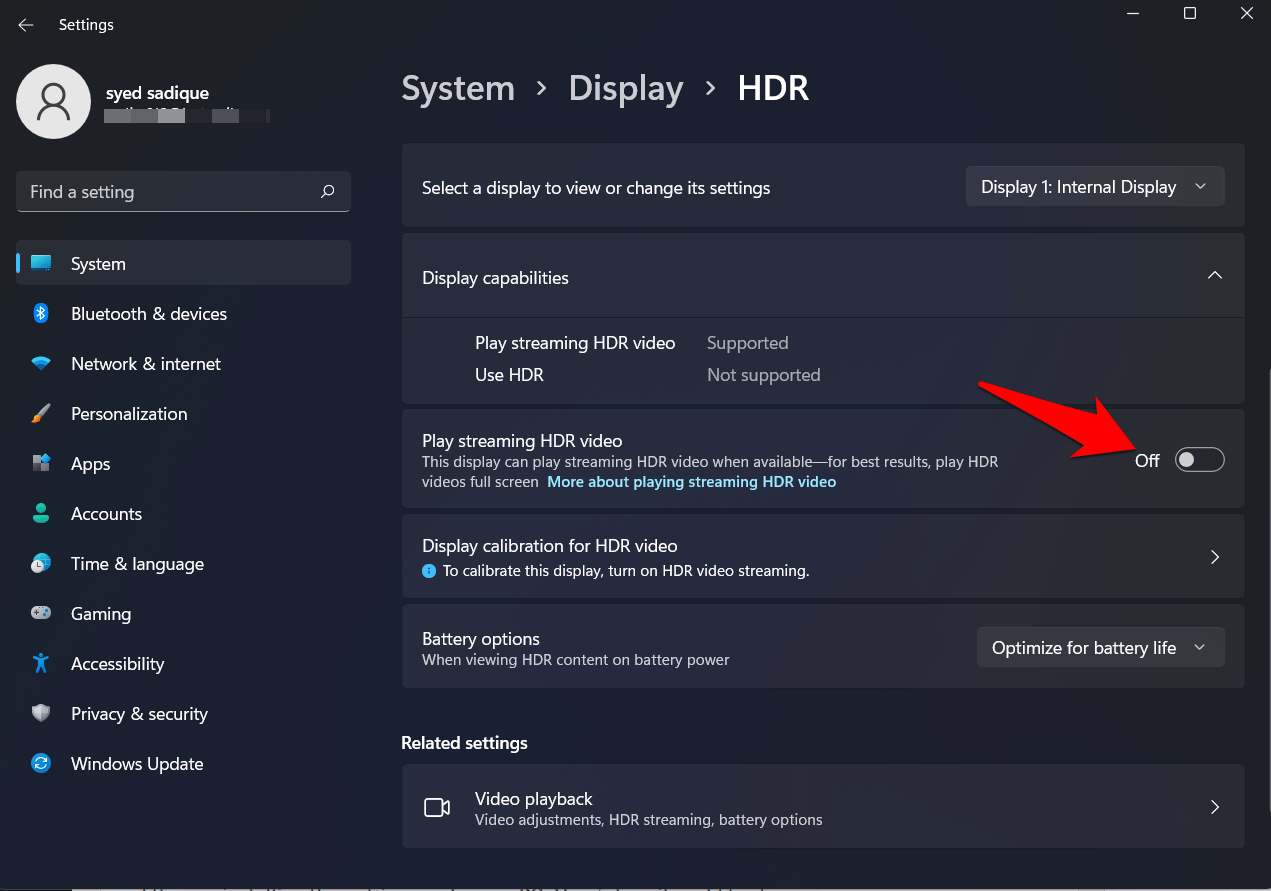
- Likewise, open the HDR menu and disable the Play Streaming HDR video option as well.

- Once done, verify if the Night Light not working in Windows 11 issue has been fixed or not.
Fix 5. Re-Install Graphics Driver
If updating the graphics drivers didn’t manage to spell out success, then you should consider uninstalling and then re-installing these drivers onto your PC. Here’s how it could be done:
- Use the Windows+X shortcut keys and select Device Manager from the resulting menu.
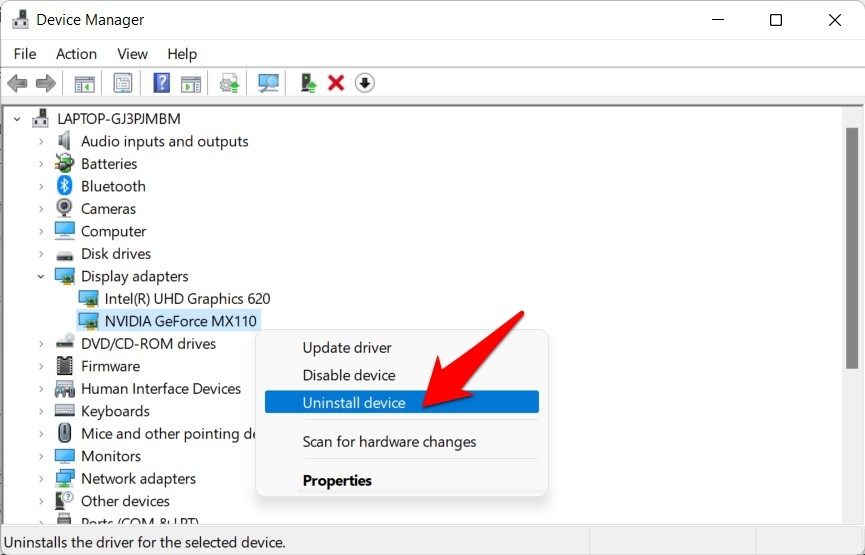
- Then expand the Display adapter section, right-click on your graphics card, and select Uninstall Device.

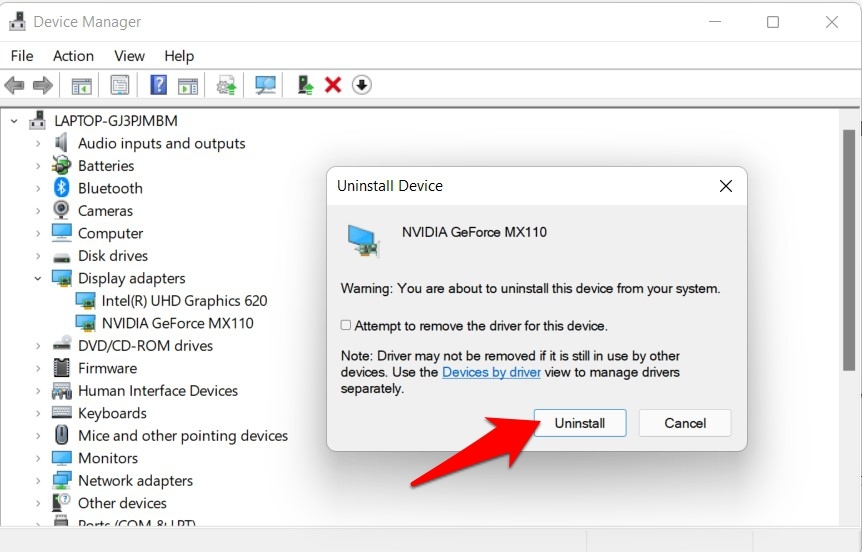
- Click Uninstall in the confirmation dialog box that appears.

- Once done, restart your PC and the drivers should be re-installed.
- If that doesn’t happen, then again go to Device Manager.
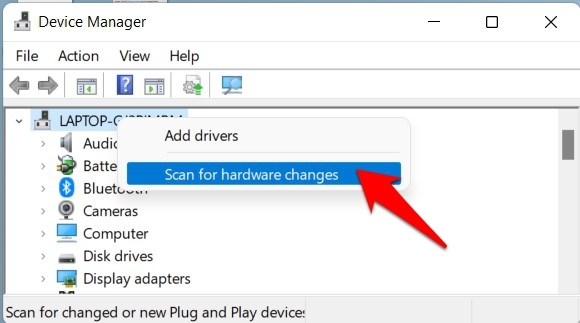
- Then right-click on your PC name and select Scan for hardware changes.

- Windows will now scan for all the missing drivers on your PC and will subsequently install them.
- Once done, it should have fixed the Night Light not working in Windows 11 issue as well.
Fix 6. Reset Night Light via Registry Editor
If none of the aforementioned methods managed to work out in your favor, then you should consider resetting this feature by deleting one of its registry entries. Refer to the below instructions for the same:
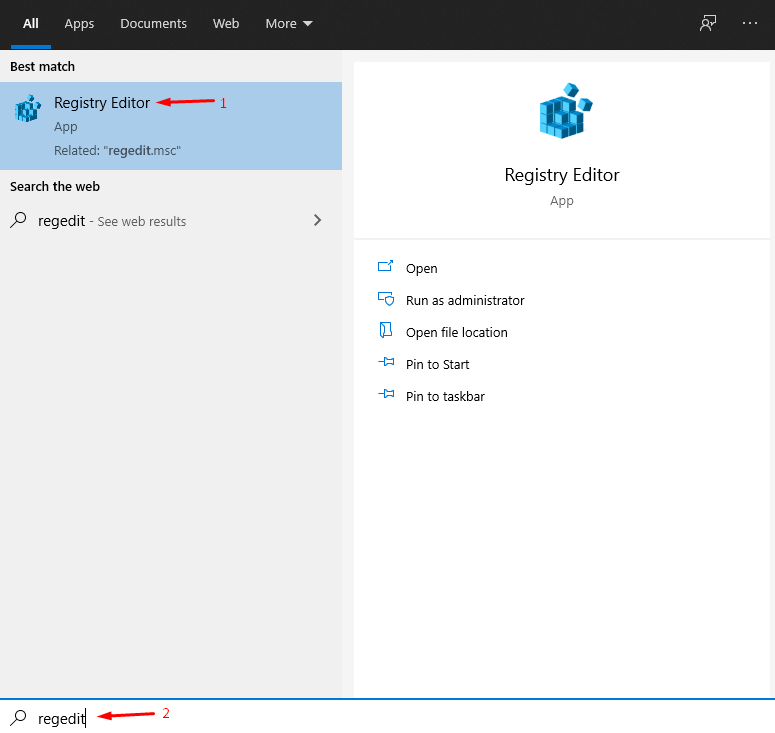
- Head over to the Start Menu and launch Registry Editor.

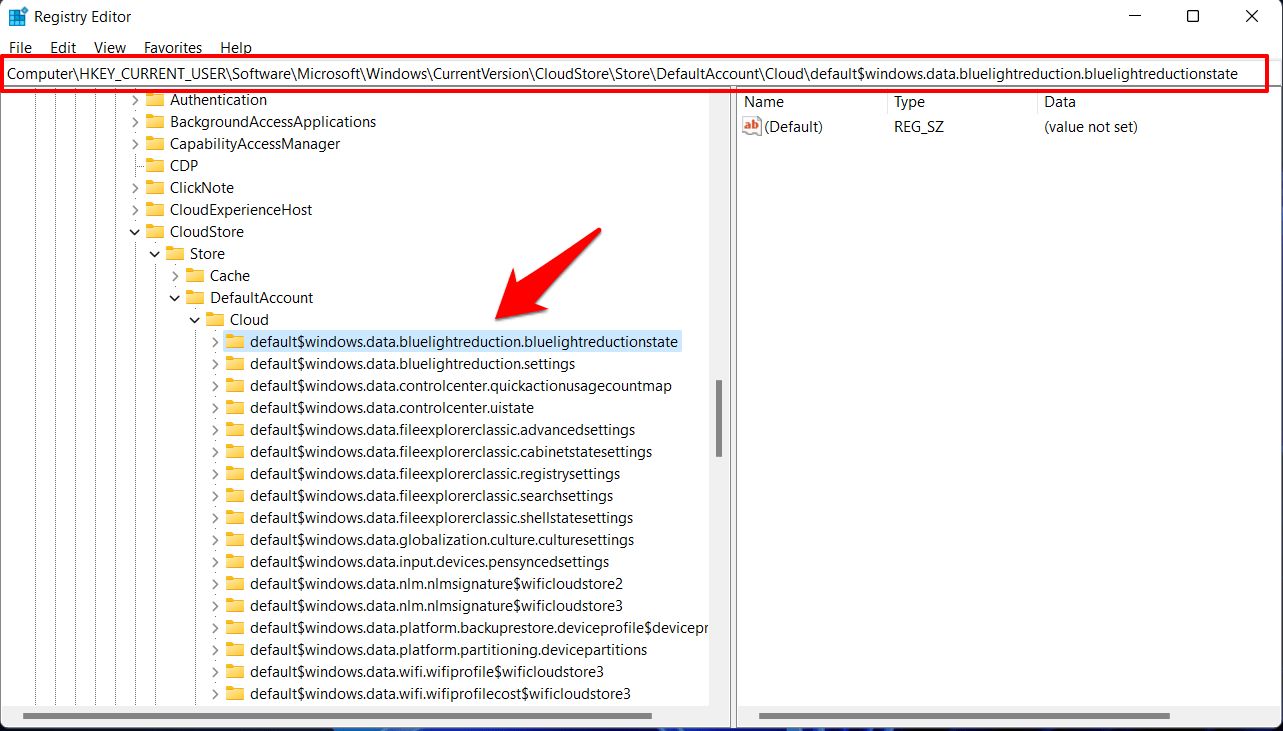
- Then copy-paste the below location in its address bar and hit Enter.
Computer\HKEY_CURRENT_USER\Software\Microsoft\Windows\CurrentVersion\CloudStore\Store\DefaultAccount\Cloud
- Now expand the Cloud folder and select the following file (it will be the first one):
$windows.data.bluelightreduction.bluelightreductionstate

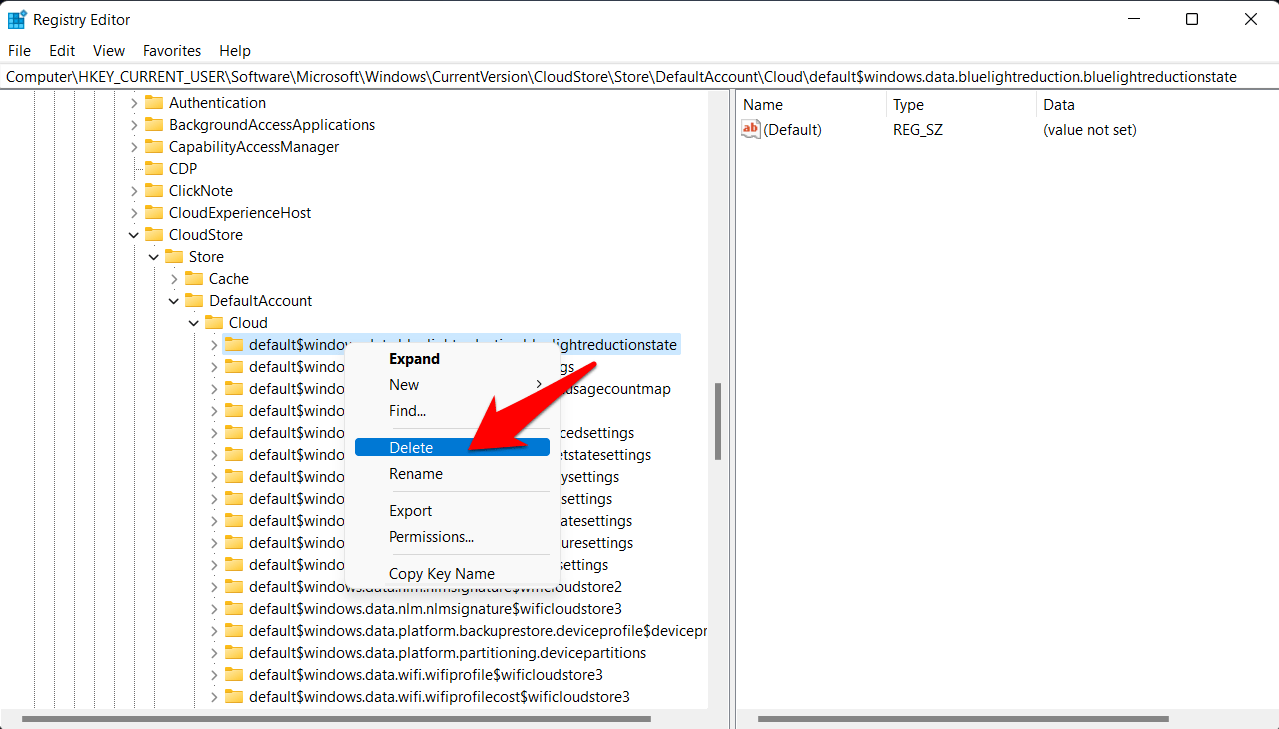
- Right-click on that file, select Delete and click Yes in the confirmation dialog box.

- Once done, restart your PC, and the underlying issue would now have been rectified.
Fix 7. Scan DISM for Corrupt Files
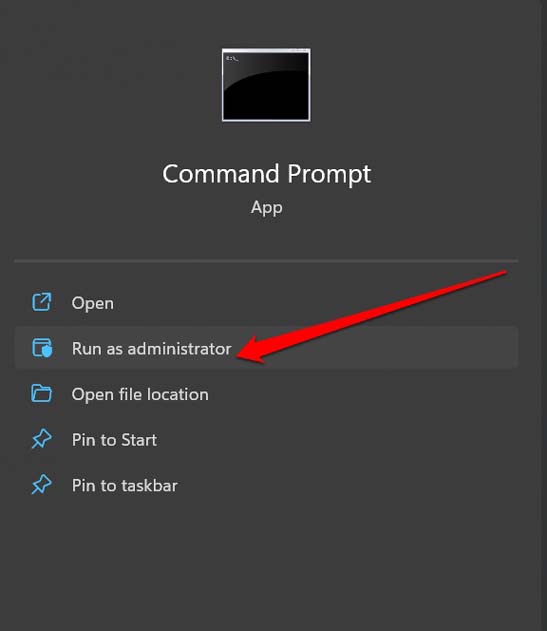
SFC and DISM scans are carried out using the Command Prompt interface of Windows. Follow the steps below to use these tools to get rid of corrupt system files.
- Launch the Command Prompt.

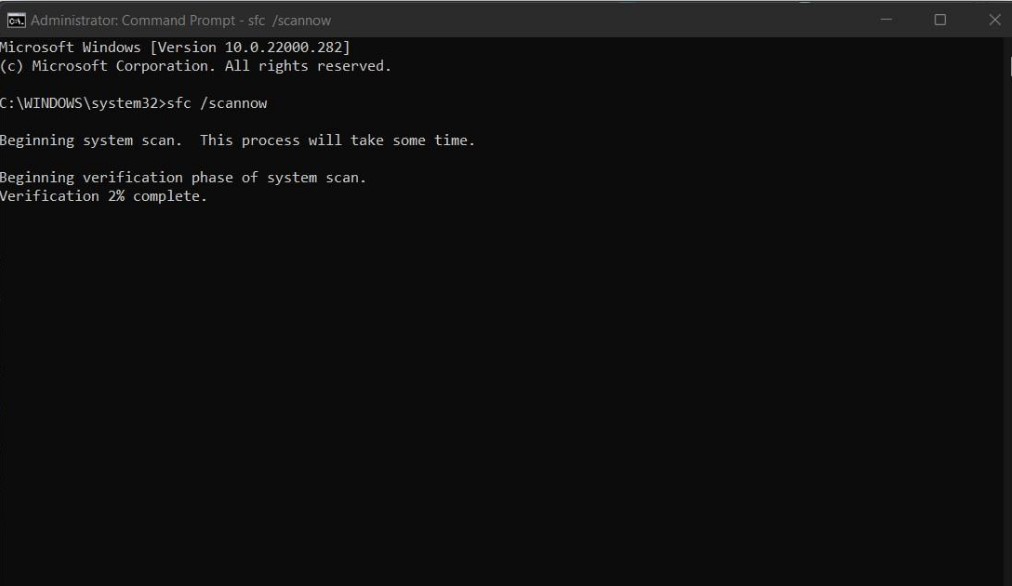
- Enter the command.
sfc/scannow

While the system keeps checking for corrupt system files and fixes them, you have to wait patiently. Make sure not to interrupt the scanning.
Secondly, you can implement the DISM scan.
- Open the Command Prompt.
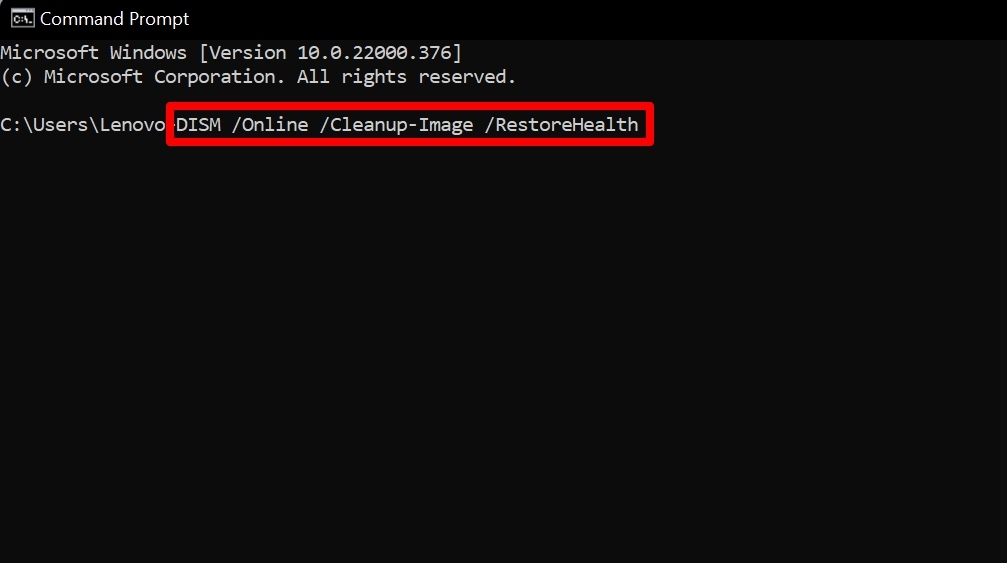
- Enter these commands and execute them.
DISM.exe /Online /Cleanup-image /CheckHealth

DISM.exe /Online /Cleanup-image /ScanHealth

DISM.exe /Online /Cleanup-image /RestoreHealth

Conclusion
Do note that there isn’t any universal fix as such. You will have to try out each of the below-mentioned workarounds and then see which one works out in your favor.
So with this, we round off the guide on how you could fix the issue of the night light not working in Windows 11. We have listed six different methods for the same.
Do let us know in the comments section which one managed to give out the desired results. Likewise, all your queries are welcomed in the comments below.
If you've any thoughts on How to Fix Night Light Not Working in Windows 11?, then feel free to drop in below comment box. Also, please subscribe to our DigitBin YouTube channel for videos tutorials. Cheers!

