When you leave your PC inactive for a while, its screen gets locked to save power. For some Windows users, the screen lock won’t activate after a certain time. In this guide, I have shared some troubleshooting tips to fix the issues with lock screen time out not working on Windows 11.
There may be some incorrect configuration with the lock screen timeout. That prevents the feature from functioning after user inactivity for a period. Also, if the screen saver settings have not been configured properly, that may cause some trouble for Windows to enforce the lock screen.
Best Ways to Fix Lock Screen Timeout Not Working on PC
Follow these troubleshooting methods to get the lock screen timeout to work again.
1. Make Changes to the Screen Saver Settings
Start the troubleshooting by correctly configuring the screensaver settings for your PC.
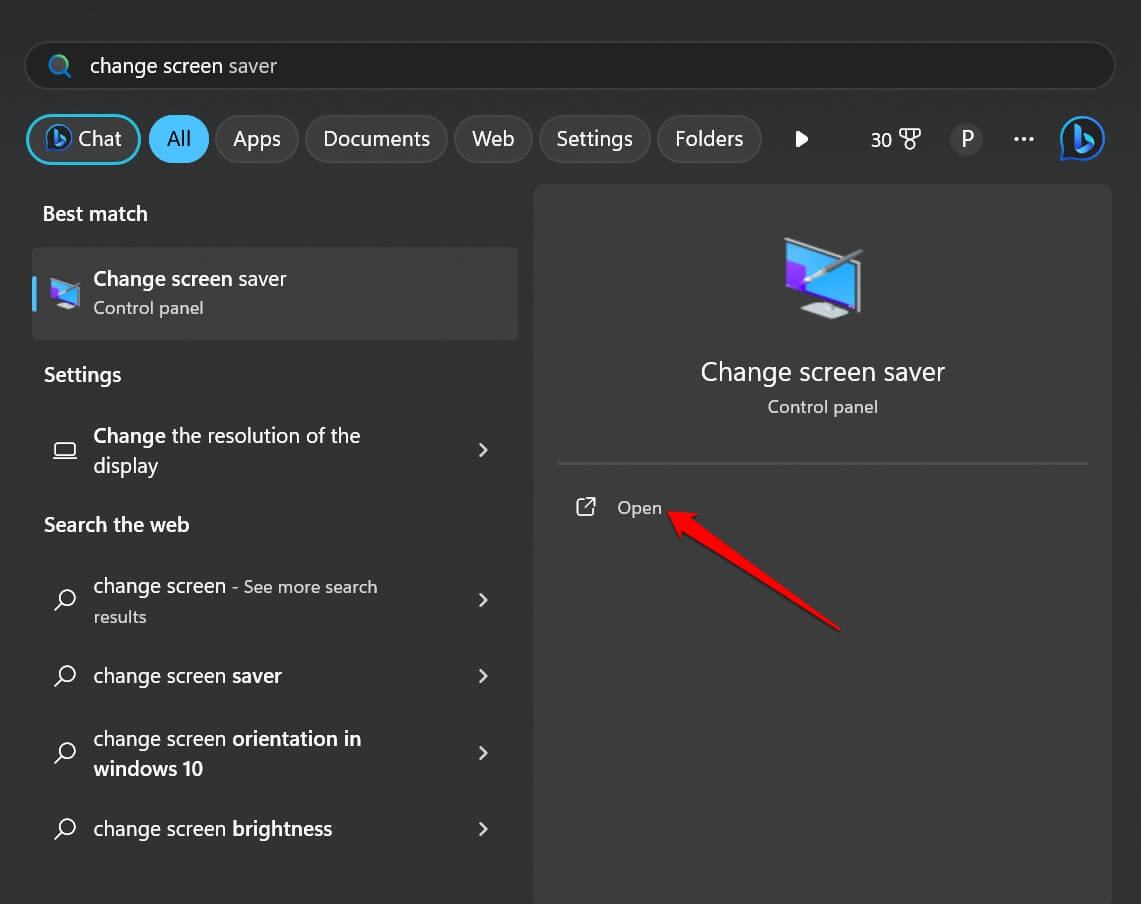
- Invoke the search console by pressing the Windows key.
- In the search box, type change screen saver.
- Click Open when the correct search result shows up.

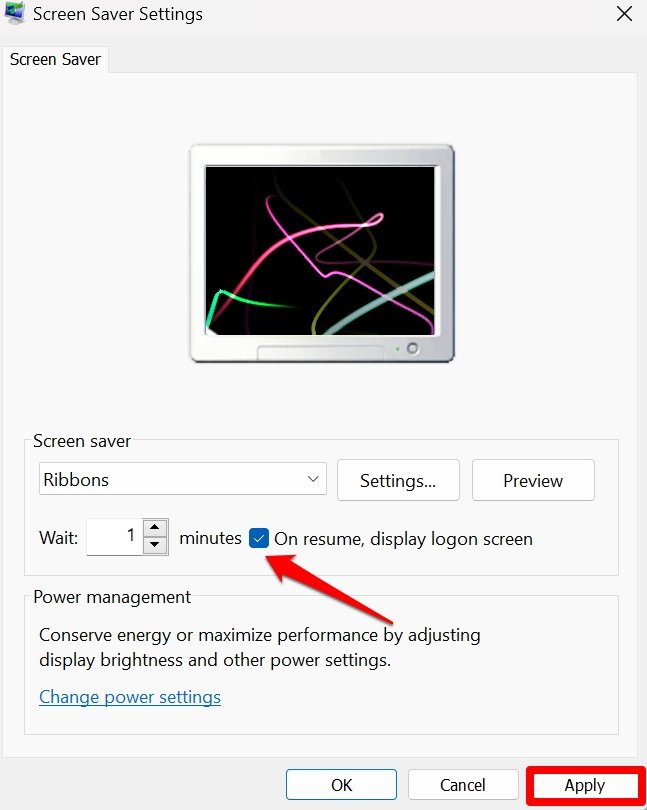
- In the Screen Saver Settings dialog box, click the checkbox On Resume, Display log-on Screen
- Now, set your preferred waiting time, after which the screensaver will kick in.
- Also, select a screensaver from the dropdown list.
- Click Apply > OK to save the changes.

2. Set the Screen Timeout Settings
Now, you should go through the power and sleep settings on the PC to set the correct timeout settings depending on a particular criterion.
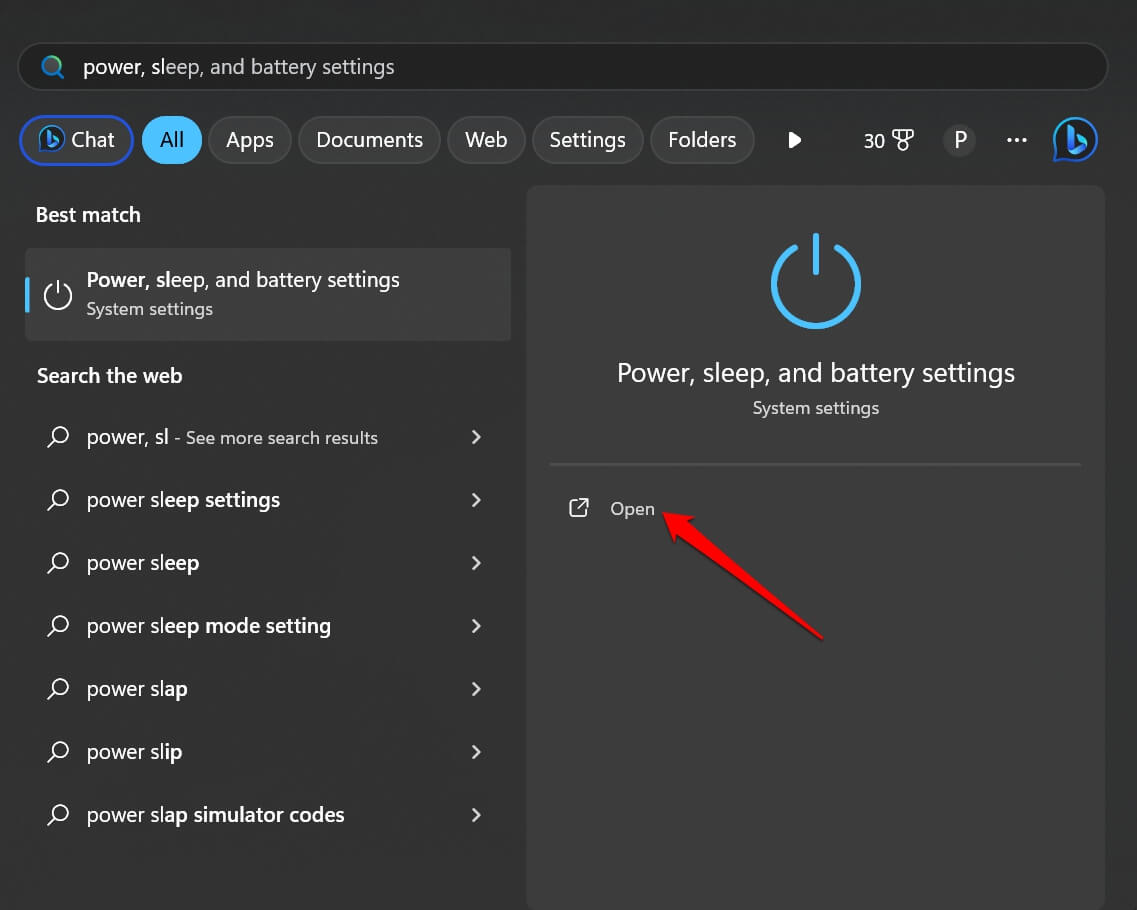
- Press Windows + S to bring up the search.
- Type power, sleep, and battery settings. Click Open when the search result appears.

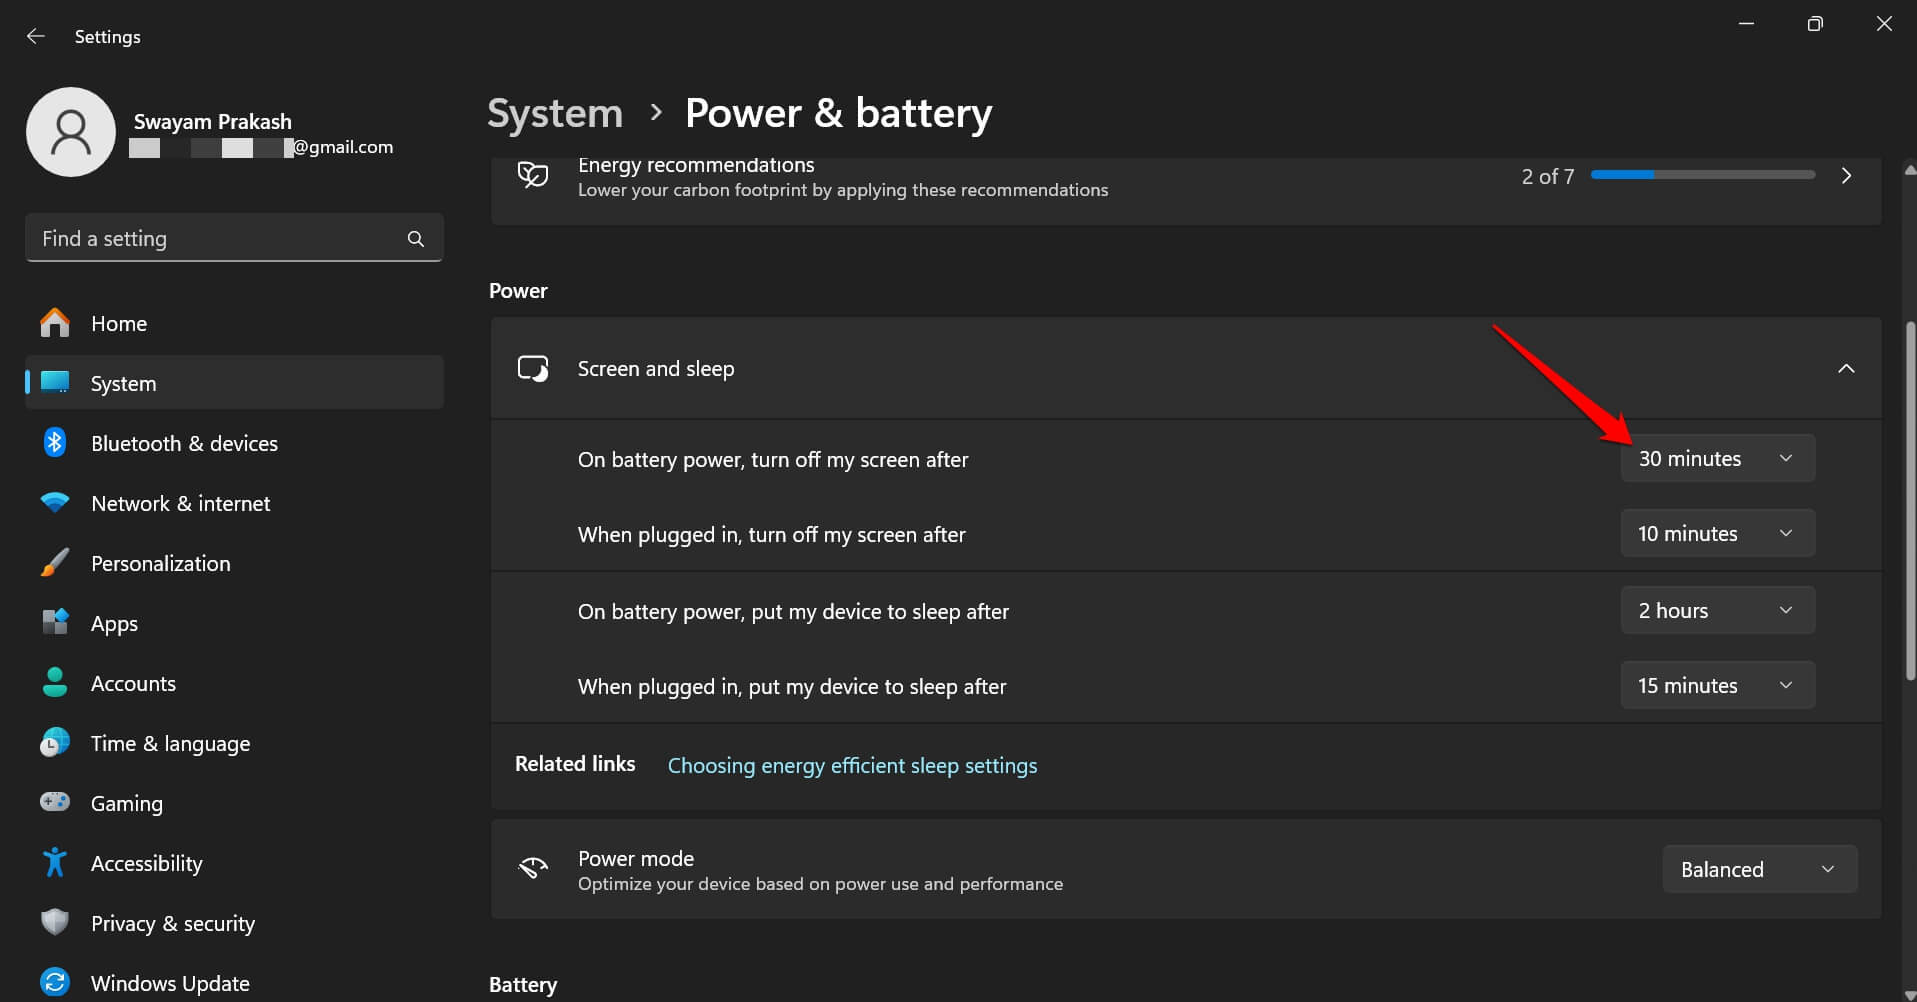
- Under the section Power, click to expand Screen and Sleep.
- Set the timeout limit for various conditions as shown in the screenshot.

- Close the power, sleep, and battery settings.
Now, let the PC become idle and observe if the lock screen activates or not.
3. Enable Screen Saver Through Group Policy Editor
You can manage the screensaver settings of Windows 11 and enable the screensaver on Windows using Group Policy Editor.
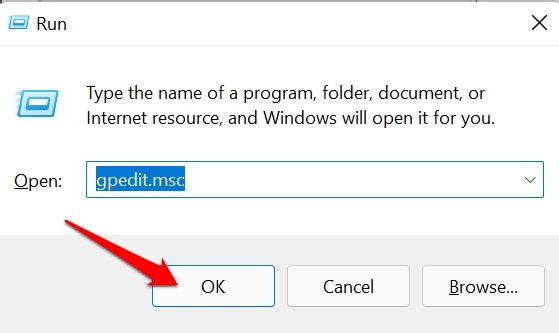
- Press Win + R hotkeys to bring up the Run box.
- Type in gpedit.msc and press enter.

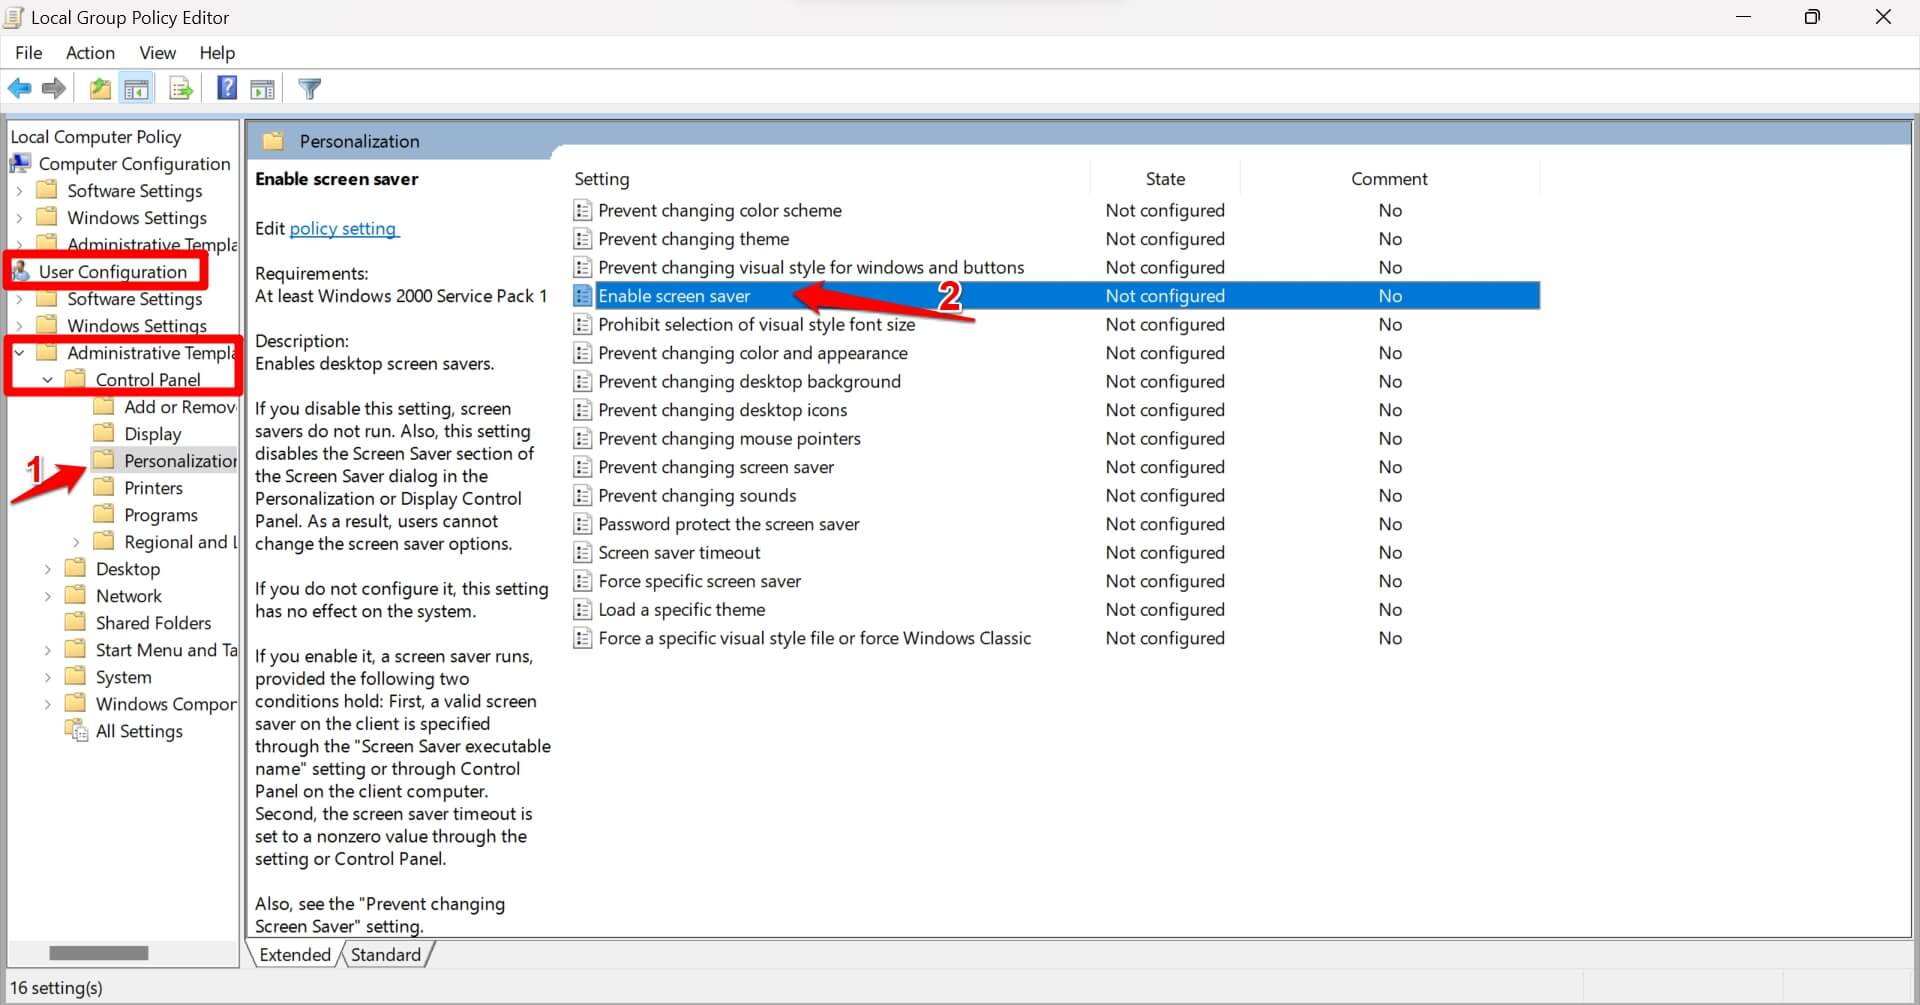
- Follow this path on the left-hand panel of the group policy editor.
User Configuration > Administrative Templates > Control Panel > Personalization
- Under the Personalization Settings panel, double-click on Enable Screen Saver.

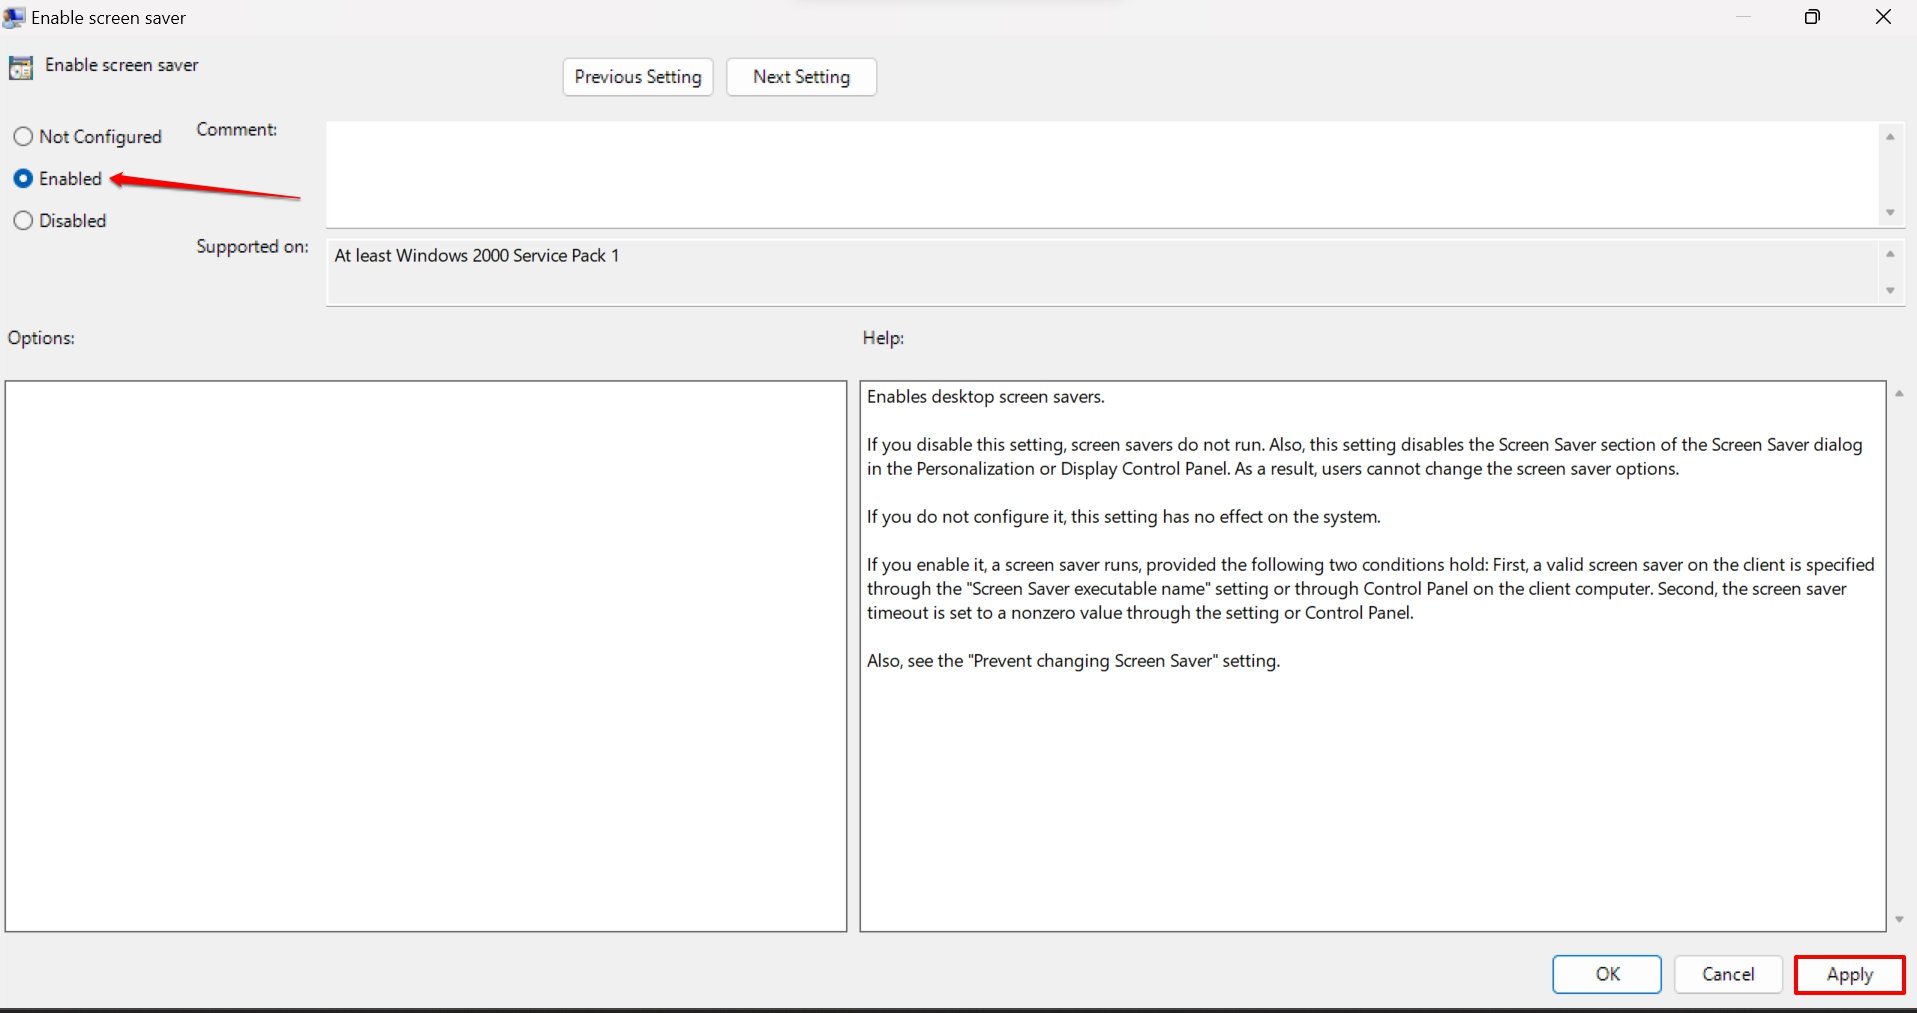
- Set the status to Enable.
- Click on Apply followed by OK to save the changes.

Close the Group Policy Editor and restart the computer. Observe if the lock screen time-out is functioning correctly.
4. Update Windows OS
Often bugs in the Windows 11 build can cause various glitches, and one of them is the lock screen not activating after the preset time.
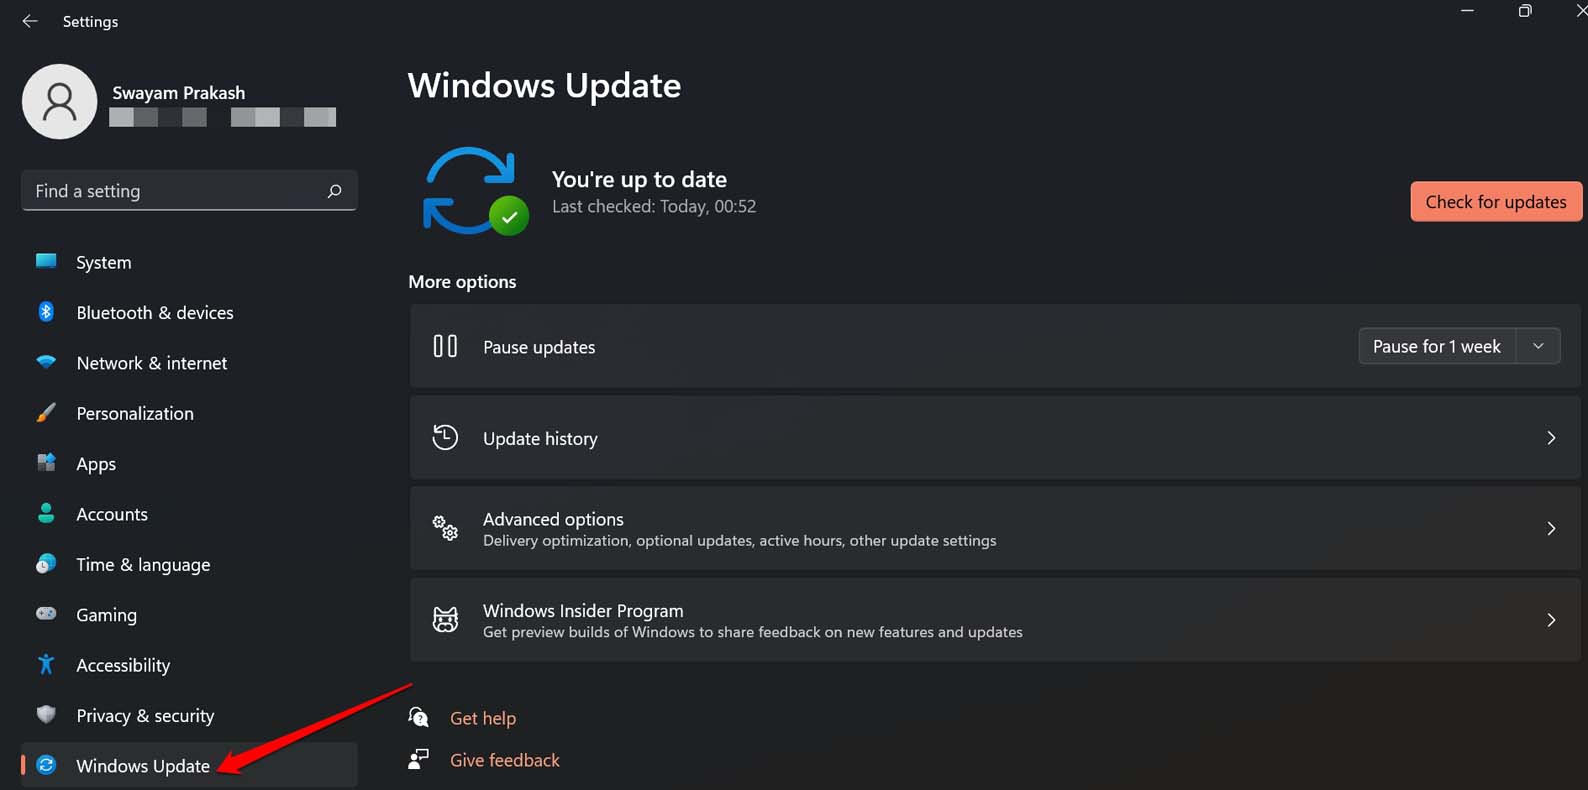
- Press Windows + I to launch the settings.
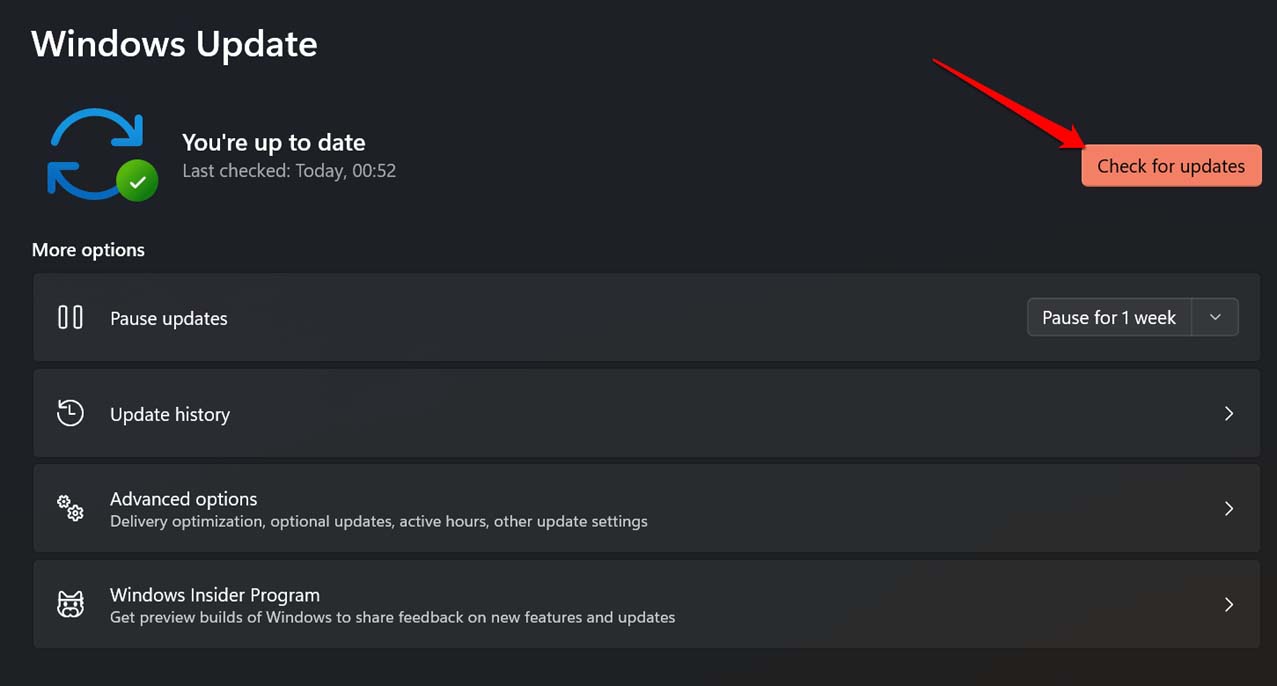
- Click on Windows Update on the left-hand panel.

- Now, click on Check for Updates.

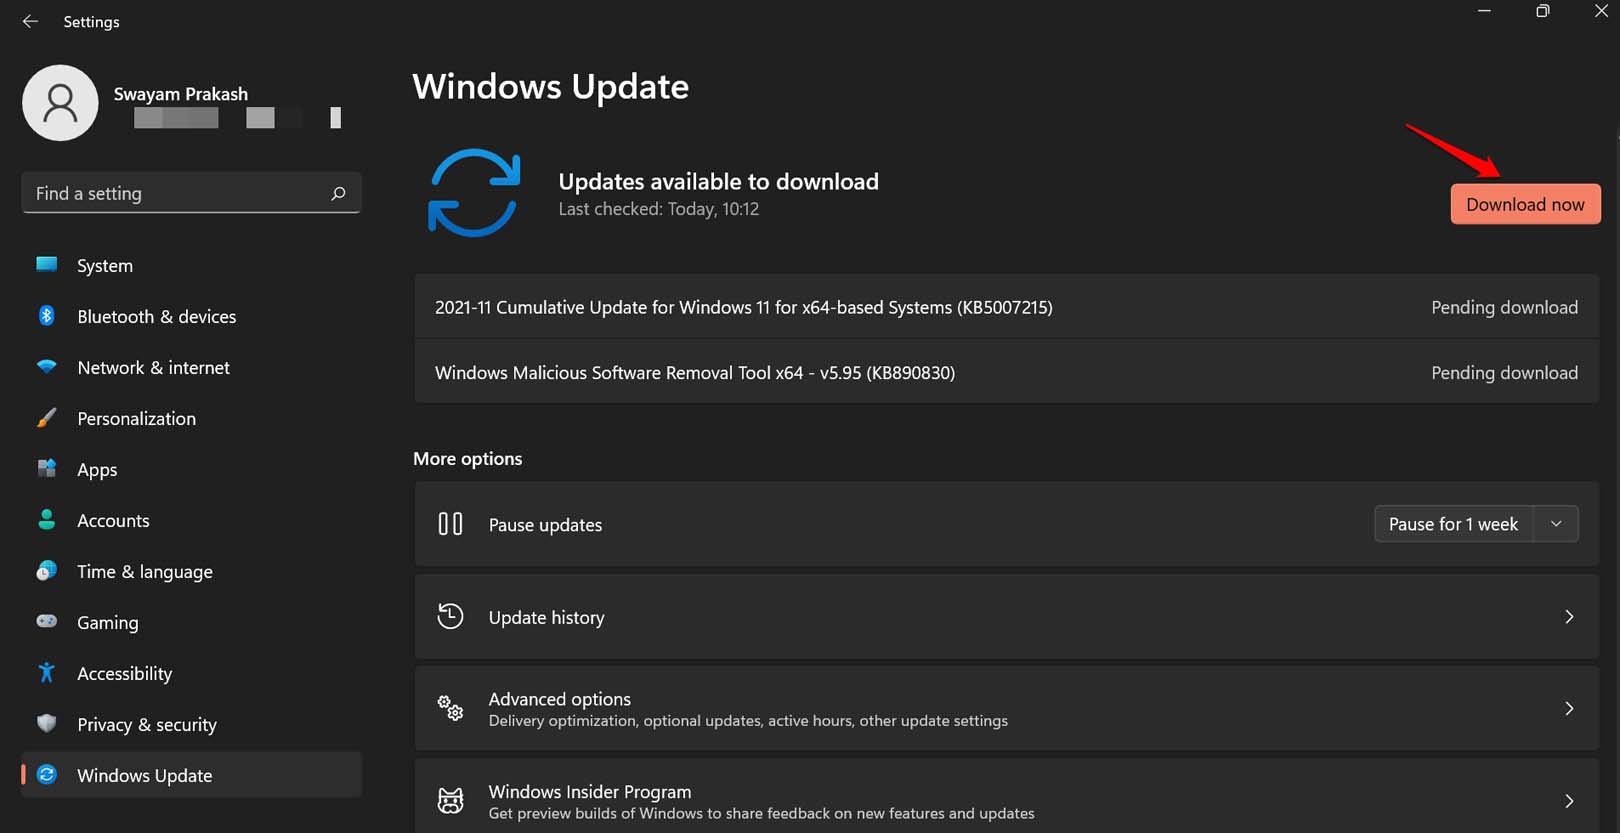
- If an update is available, click on Download Now.

Reboot the PC after installing the update and check if the screen is getting locked after a certain time set by you.
5. Perform a Clean Boot
A clean boot will allow the native apps, services, and apps from Microsoft to run. No third-party apps will run to check whether they are causing the problem with the lock screen time out, rendering it dysfunctional. You can then remove the problematic third-party app from your PC.
To perform a clean boot on Windows 11,
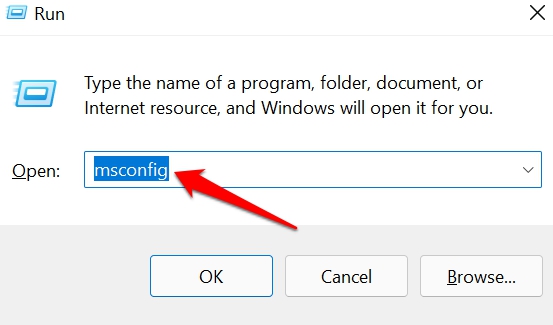
- Press Windows + R to launch the Run box.
- Type msconfig and press enter.

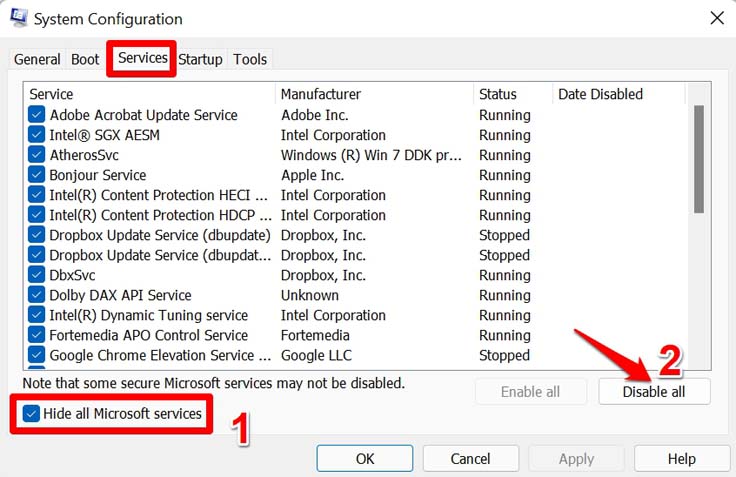
- Under the Services tab, click the box beside ‘Hide all Microsoft services’.
- Next, click on the Disable All button.

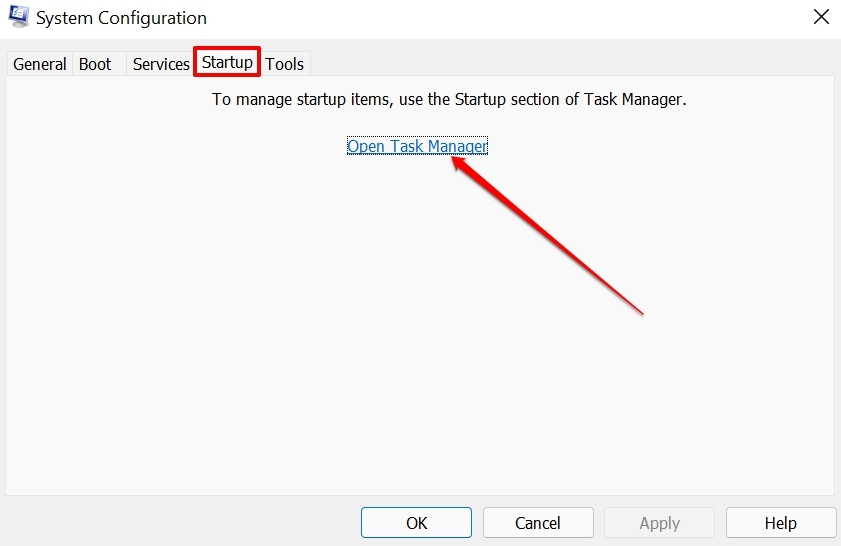
- Click on the tab Startup > Open Task Manager.

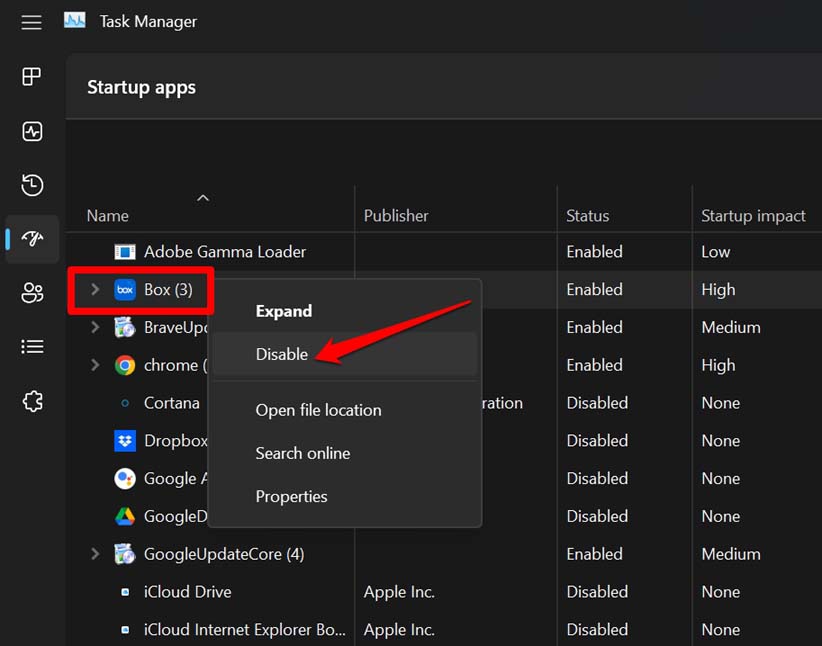
- Scroll to a third-party app and click on Disable.

- Repeat the above steps to disable other third-party programs installed on your PC.
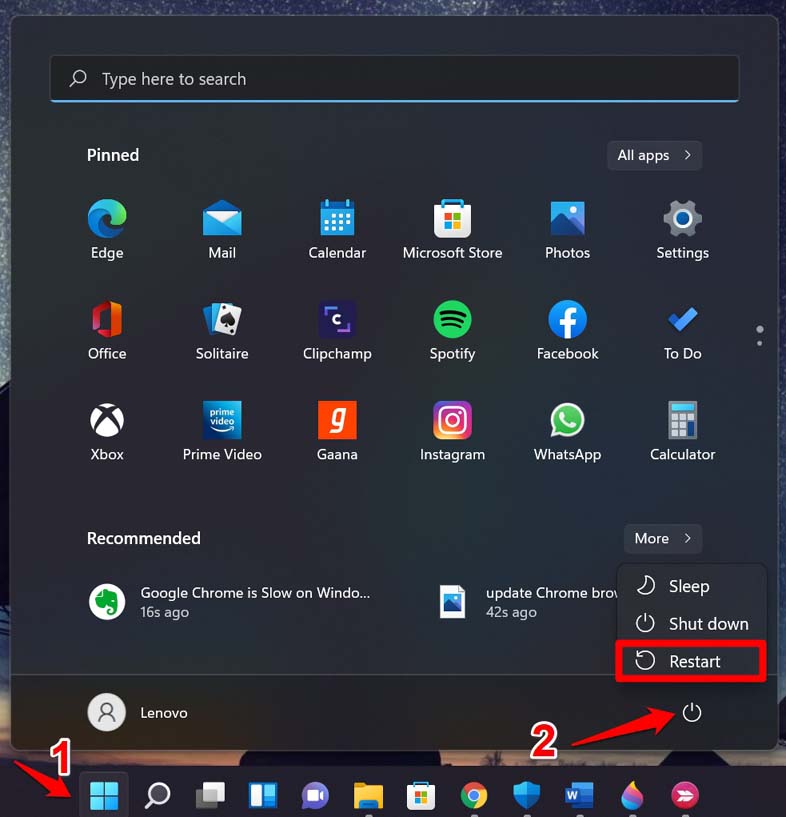
- Restart the PC.

After restarting the PC, if you notice that the lock screen is working normally, it means one or more third-party apps may have issues with them. You may uninstall the third-party apps individually to check which faulty app is causing problems working the lock screen timeout.
6. Disconnect External Devices Linked to the PC
If you have one or more external devices connected to your computer, remove them for a while. Sometimes, when devices like an external keyboard, USB drive, or external hard drive are connected to a PC, they may cause some errors with the lock screen. After disconnecting those devices, check if the lock screen works on your PC. Restart your PC as well.
Bottom Line
It is important that when you are not using the PC, the screen should be locked. It will save power and also prohibit others from accessing your PC. If the lock screen time out on Windows 11 is not working, then these troubleshooting tips should help you fix the issue.
If you've any thoughts on What to do if Lock Screen Timeout Not Working on Windows 11, then feel free to drop in below comment box. Also, please subscribe to our DigitBin YouTube channel for videos tutorials. Cheers!

