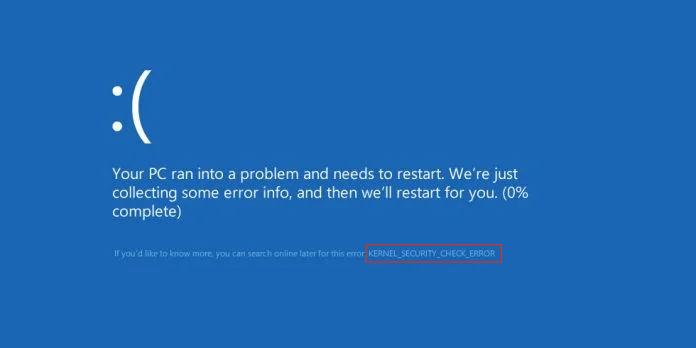
Have you recently encountered the blue screen of death BSOD on your Windows PC with the Kernel Security Check Failure stop code? Many Windows users have reported an abrupt system with the above error code on several forums. Kernel security check failure is a fatal error that indicates that some of the essential system files have become corrupted and have failed the integrity check.
For some users they usually showed up when trying to migrate to the latest iteration of Windows, signifying incompatible system components.
Top Ways to Fix the Kernel Security Check Failure Error
The BSOD with the kernel security check failure error usually occurs due to a variety of reasons, such as memory-related errors, virus infections, problematic Windows updates, and outdated drivers. Regardless of the reasons, you can easily fix the error by implementing the solutions listed below.
1. Boot your PC in Safe Mode
To execute the troubleshooting methods listed below, you will have to restart your PC in safe mode. To do so, you first need to access the WinRE after the BSOD crash. Below are the steps to boot your PC in safe mode from the Windows recovery environment.
- Long press the Power button for at least 10 seconds to power off your Windows PC.
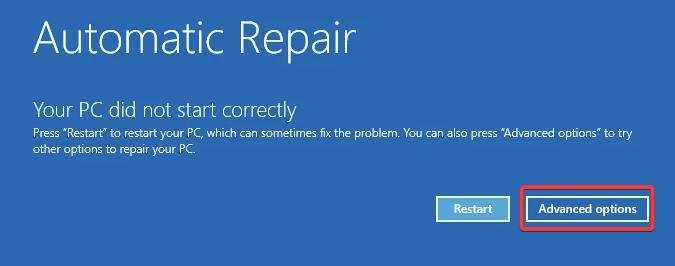
- Press the Power button to power on your computer, and on the first sight of the Windows start, hold down the power button once again to turn it off. Repeat the same process three times to enter Automatic Repair mode.
- Click the Advanced options button to enter the Windows Recovery Environment.

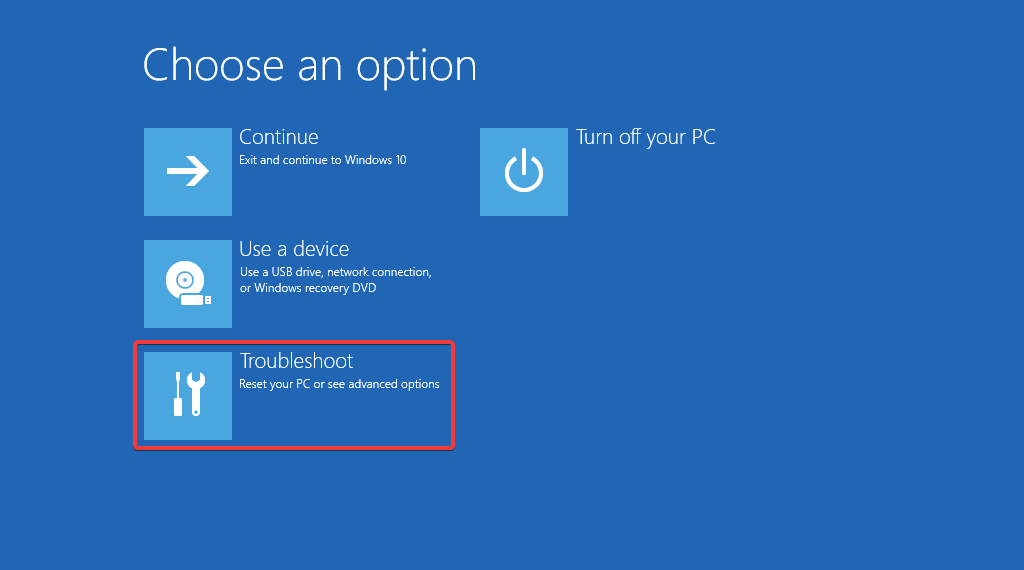
- Select Troubleshoot from the Choose an option window.

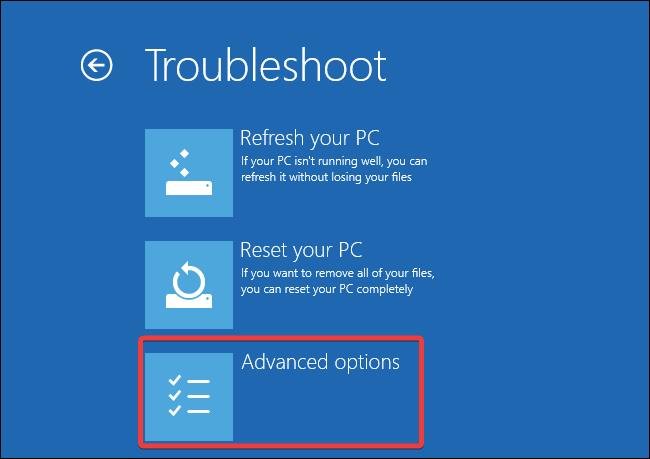
- Next, select Advanced options.

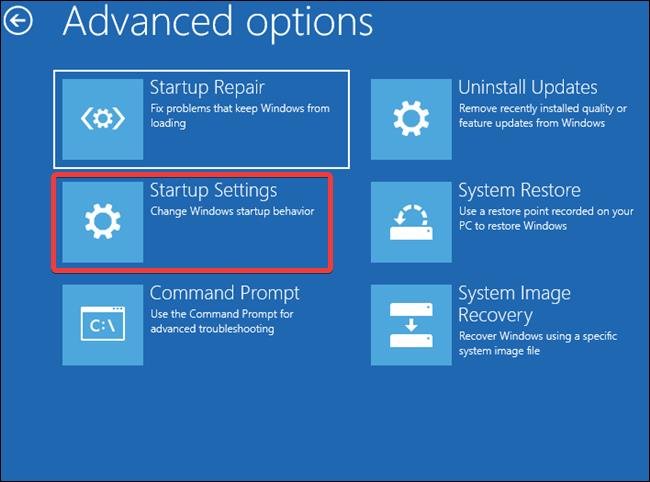
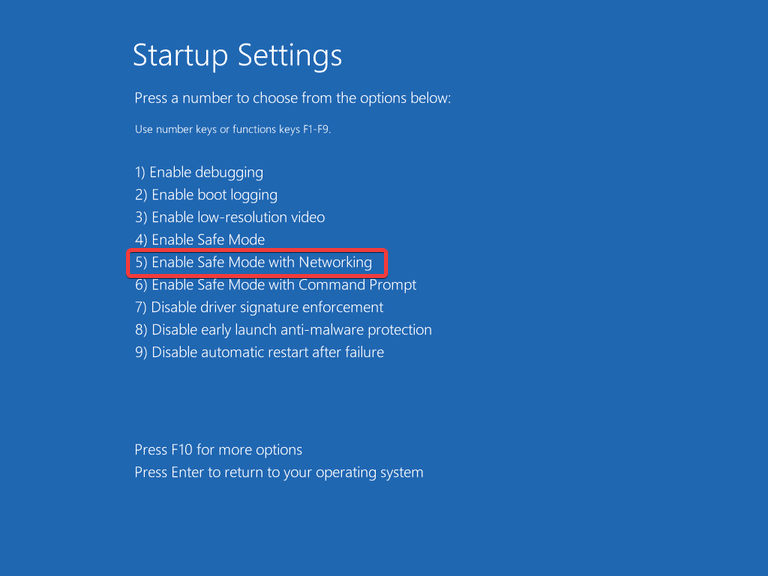
- Choose Startup Settings from the Advanced Options.

- A list of options will appear. Hit F5 to select Safe Mode with networking option.

2. Run the Windows Memory Diagnostic tool
In most cases, issues with the RAM lead to prevent data accessibility leaving the system unstable. This causes a BSOD crash with the Kernel Security Check Failure error message. Fortunately, we can leverage the built-in Windows memory diagnostics tool to diagnose the underlying memory problems, which should fix the error at hand.
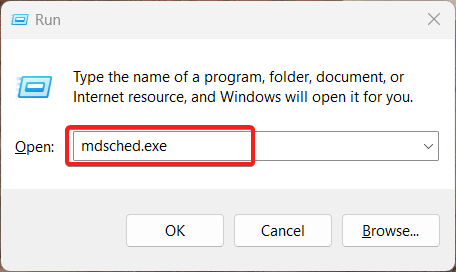
- Use the Windows + R shortcut to bring up the Run dialog box.
- Type mdsched.exe command in the text box and hit the Enter key to open the Windows Memory Diagnostic tool.

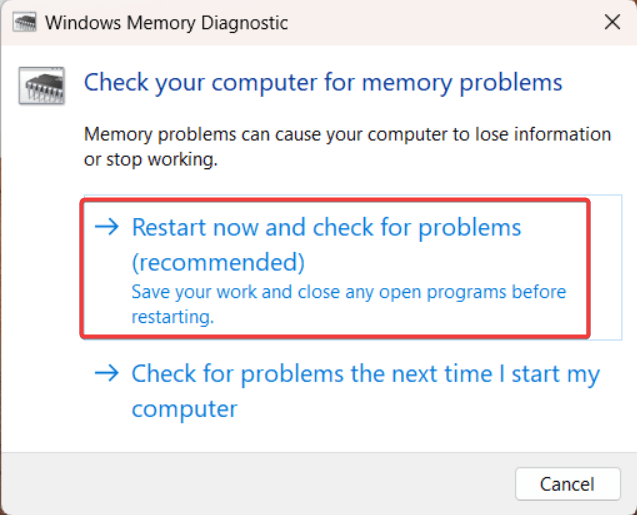
- Choose Restart now and check for the problems (recommended) option from the popup.

Wait for your system to reboot and check your RAM. Upon Restart, it will present the diagnosis report automatically. In case of defective RAM, you will have to visit the repair store to get it fixed.
3. Check the Hard Disk for Errors
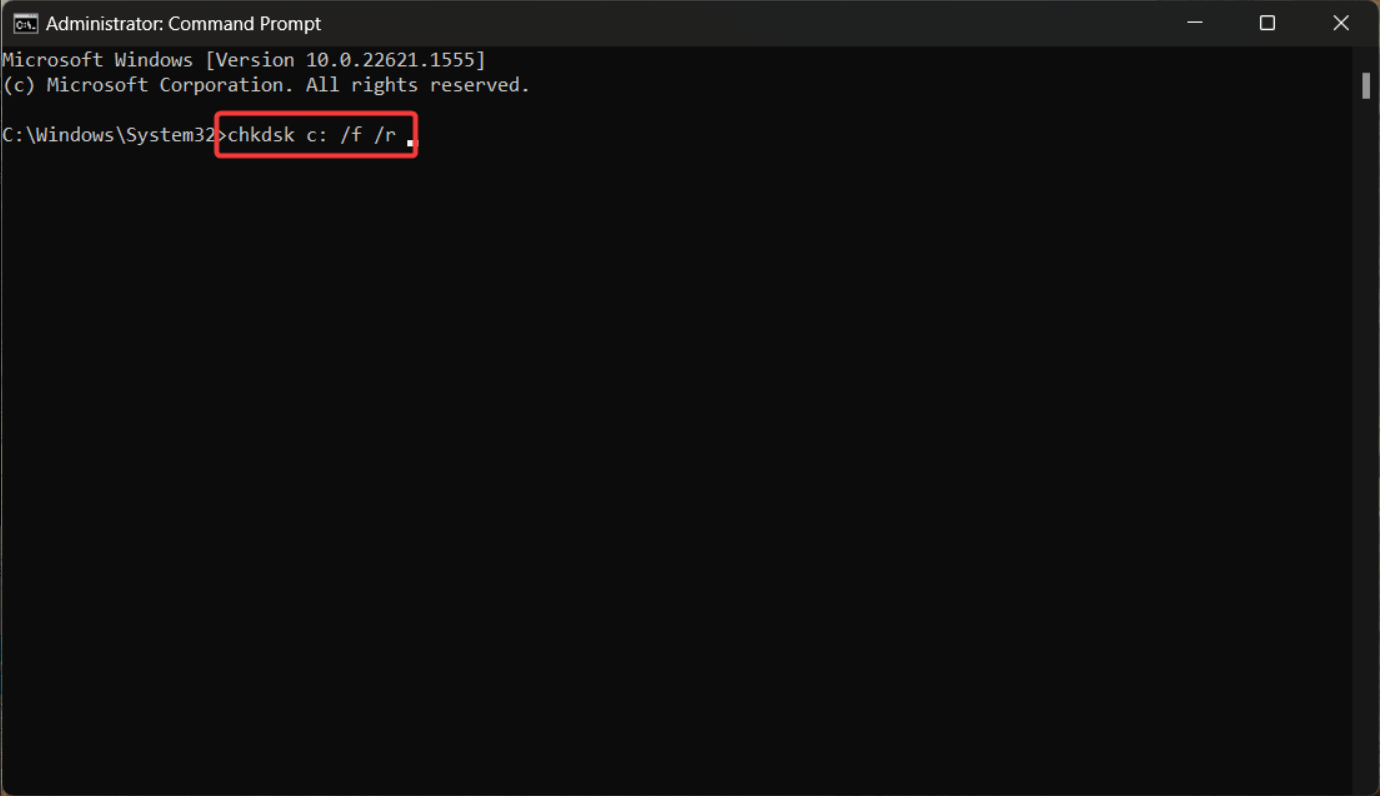
There is a possibility of damage to the hard disk, which may be triggering the kernel security check failed BSOD error. To fix this, you can run the CHKDSK command, which will scan and report your hard disk for bad sectors, repairing the corrupt hard drive. Below is the step-by-step process to run the CHKDSK scan and recover the damaged files.
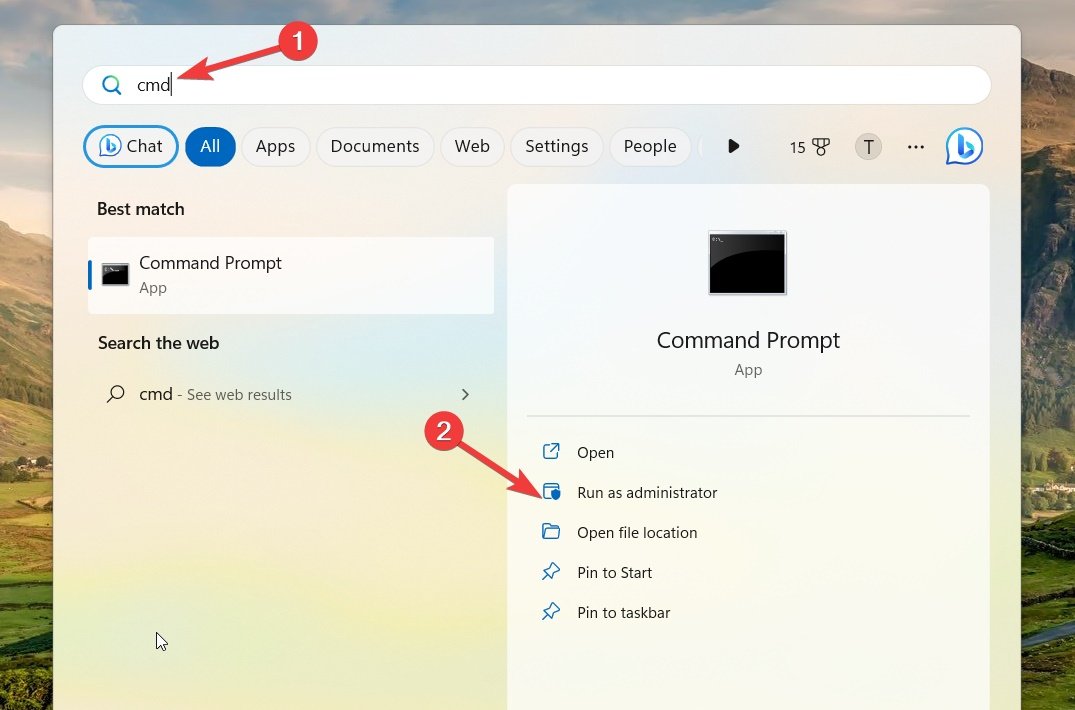
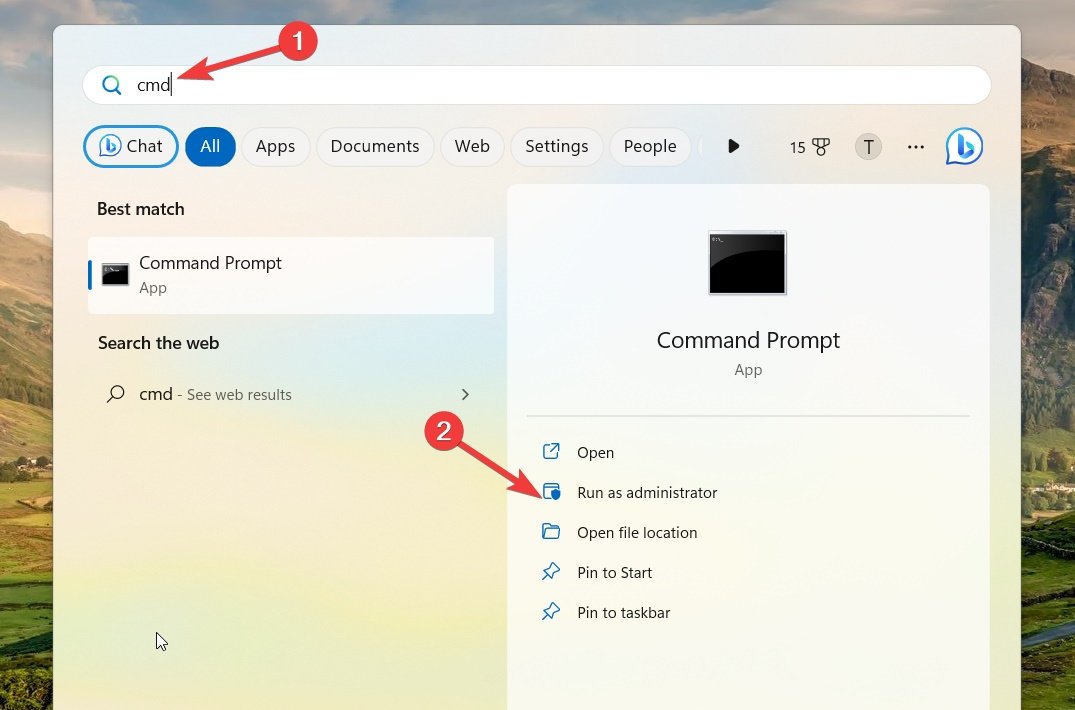
- Press the Windows key and type cmd in the search bar. Select the Run as administrator option from the search results.

- Click Yes on the UAC prompt to grant administrative privileges.
- Type or paste chkdsk C: /f /r command and press the Enter key.

- Press the Y key followed by Enter to initiate the check disk utility.
Note: The letter C denotes the partition having Windows, and you can replace it with the alphabet representing the OS.
Your PC will now reboot and will scan your disk to detect bad sectors, which may take a while. After you get the message 0 KB in bad sectors, your system should no longer crash with the Kernel Security Check Failure error.
4. Update system drivers
In our research, we found that kernel security check failure errors can also occur because of outdated or incompatible device drivers. Most of the time, this happens when you have recently upgraded to the new version of Windows. To rule out this cause, you should update system drivers to the latest available version. Here is how you can go about it.
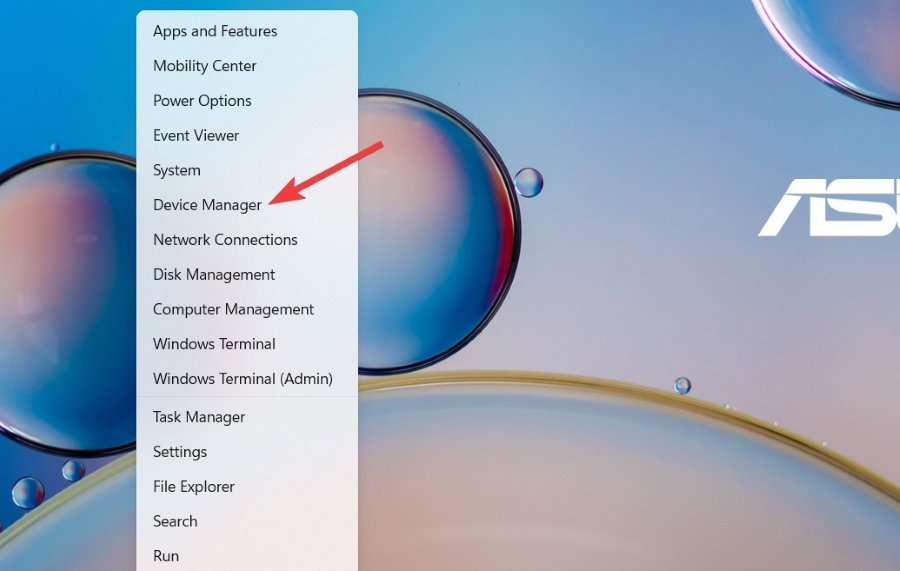
- Right-click the Windows icon and select Device Manager from the quick links menu.

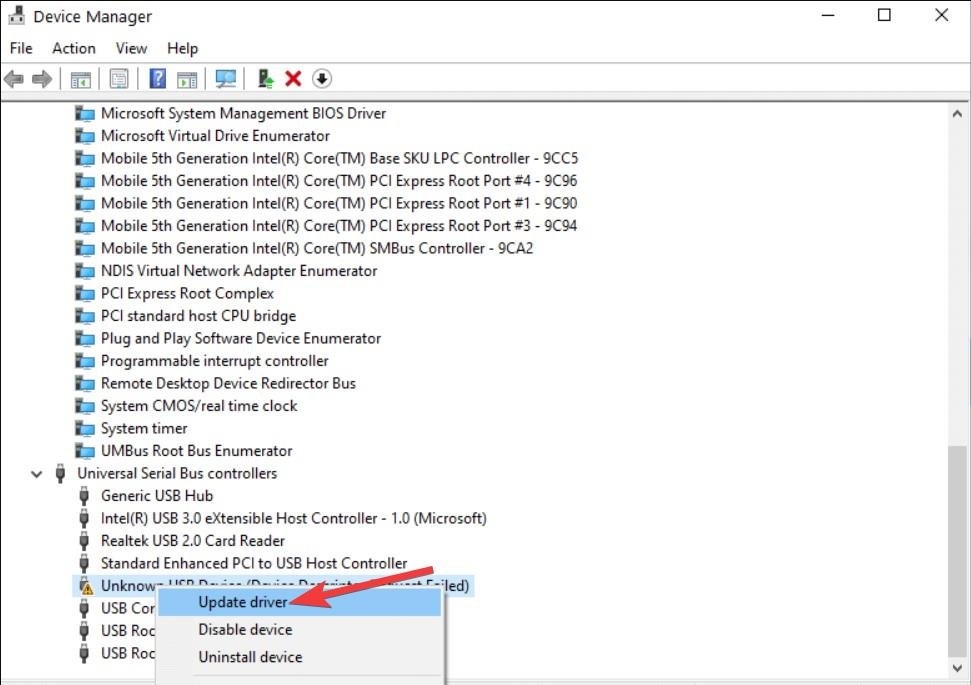
- Click to expand each device category and view the list of drivers.
- Look for a yellow warning icon to identify the problematic driver, right-click it, and select the Update driver option.

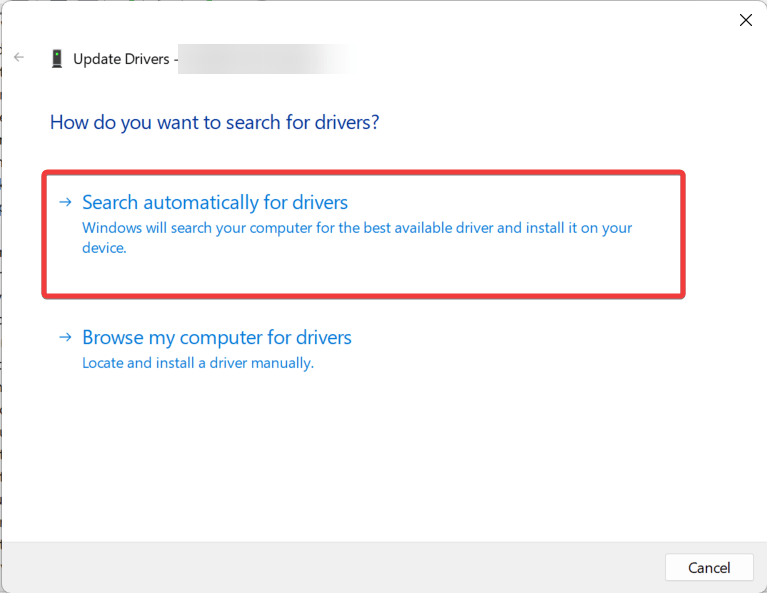
- Choose Search automatically for the drivers option from the next popup.

Windows will now look for the update, and if it finds any, it will install it. You can then restart your system to see if the system crash due to the Kernel Security Check Failure error is fixed.
5. Update Windows
Microsoft keeps rolling out new updates to performance issues caused by trivial bugs. If you haven’t updated your PC for a long time, errors like these are unavoidable. Hence, it is recommended that your system should be running on the latest available update. Here are the steps you need to follow.
- Use the Windows + I shortcut key to bring up the Settings window.
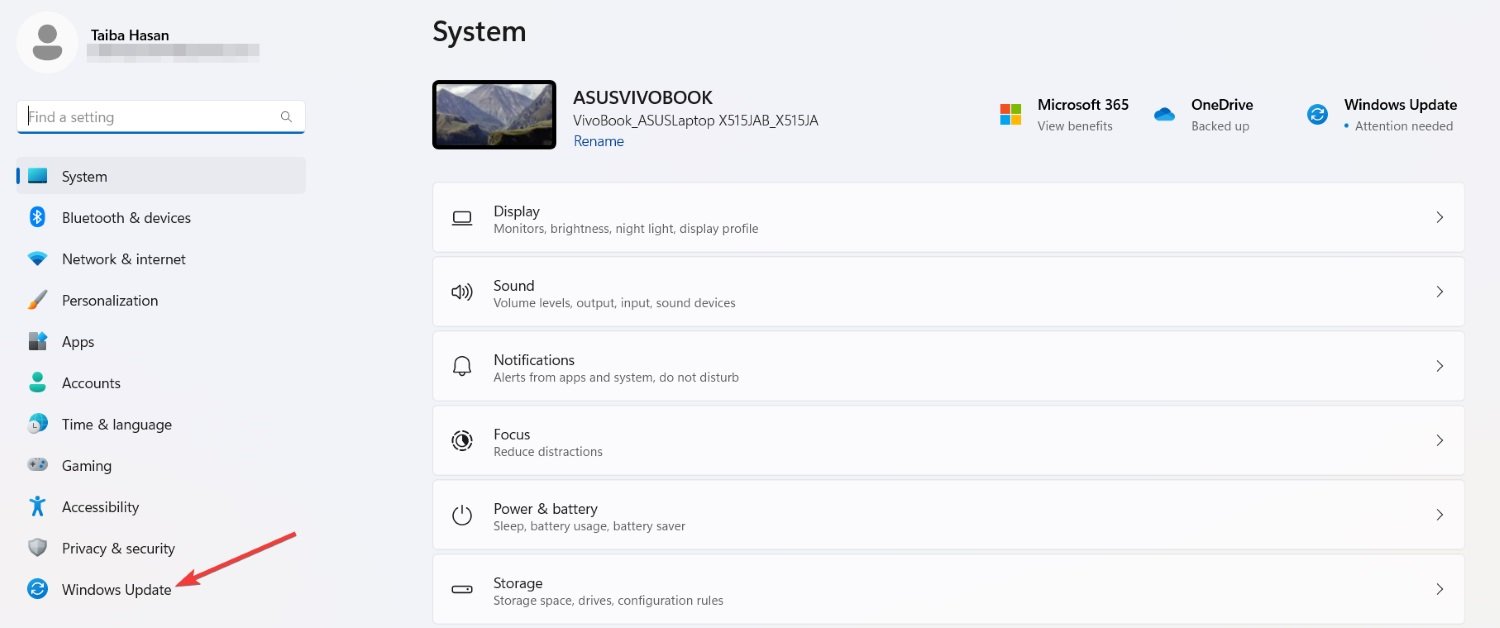
- Select the Windows Update option from the left navigation panel.

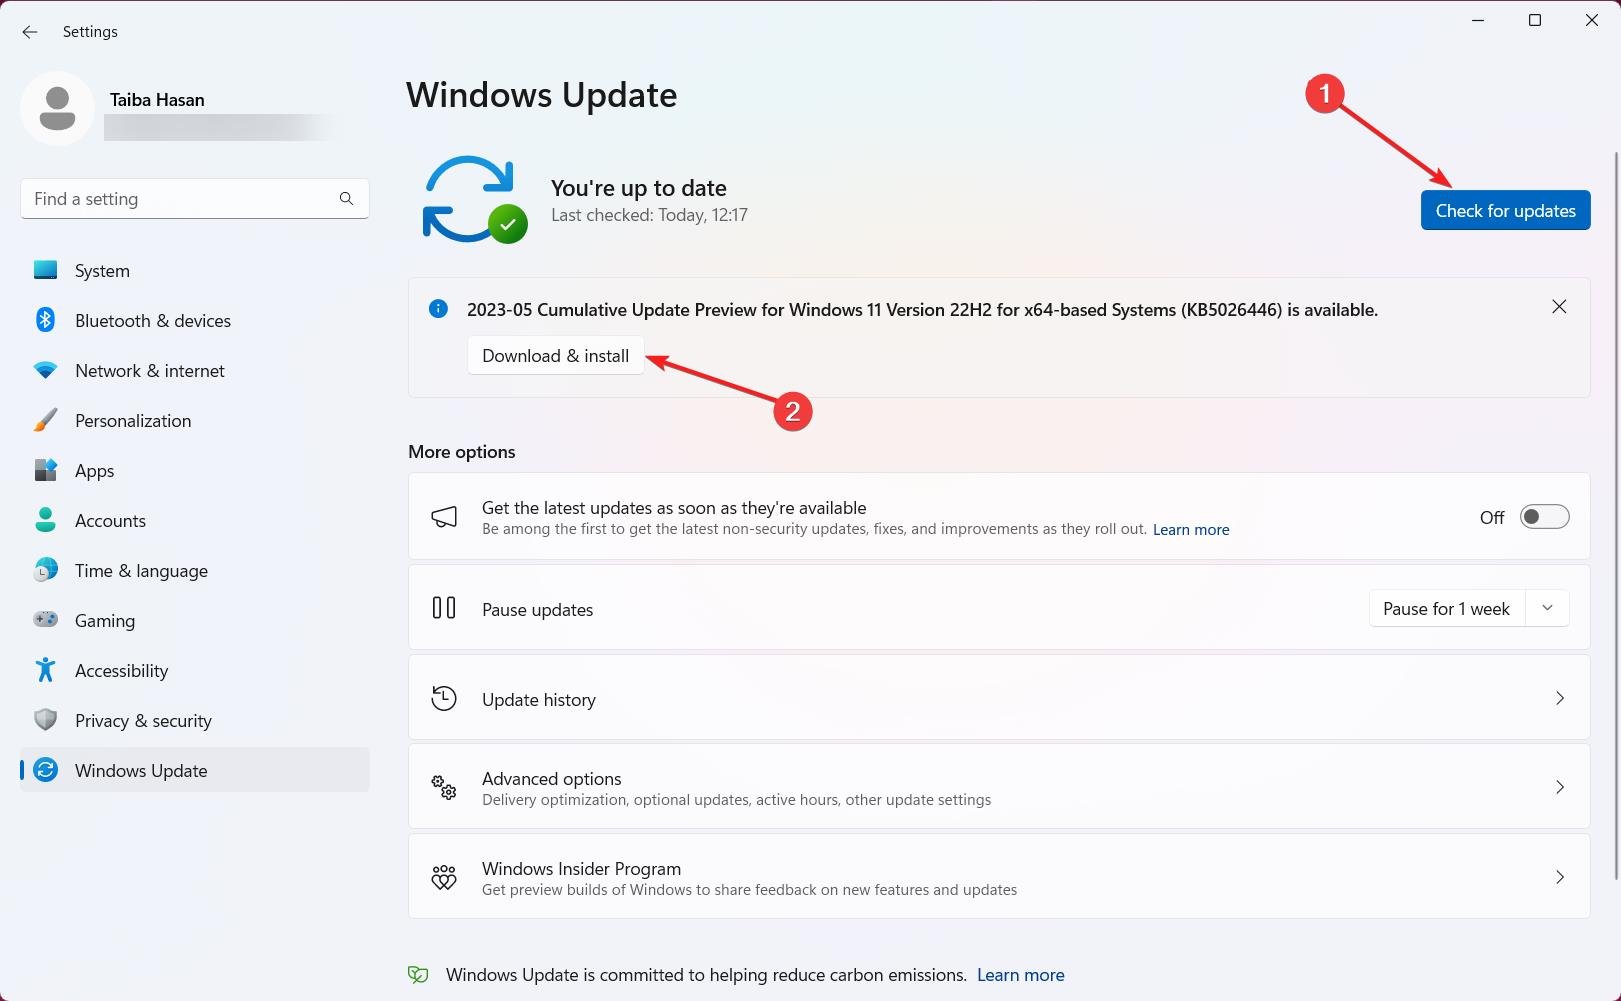
- Press the Check for Updates button located on the top.

Windows will now check if any updates are available and will start downloading and installing them automatically. Once done, you will be prompted to restart your PC.
6. Run SFC and DISM Scans
If the problem persists, there are changes in the system files that might have been damaged during the Windows update. Hence, repairing corrupted system files and disk images using the SFC scan and DISM tool should be your next course of action. Here’s how to do it:
- Ensure that no programs are running in the background.
- Use the Windows + S shortcut to open the Search menu, type cmd in the search box and select Run as administrator option.

- Press Yes on the User Action Control prompt.
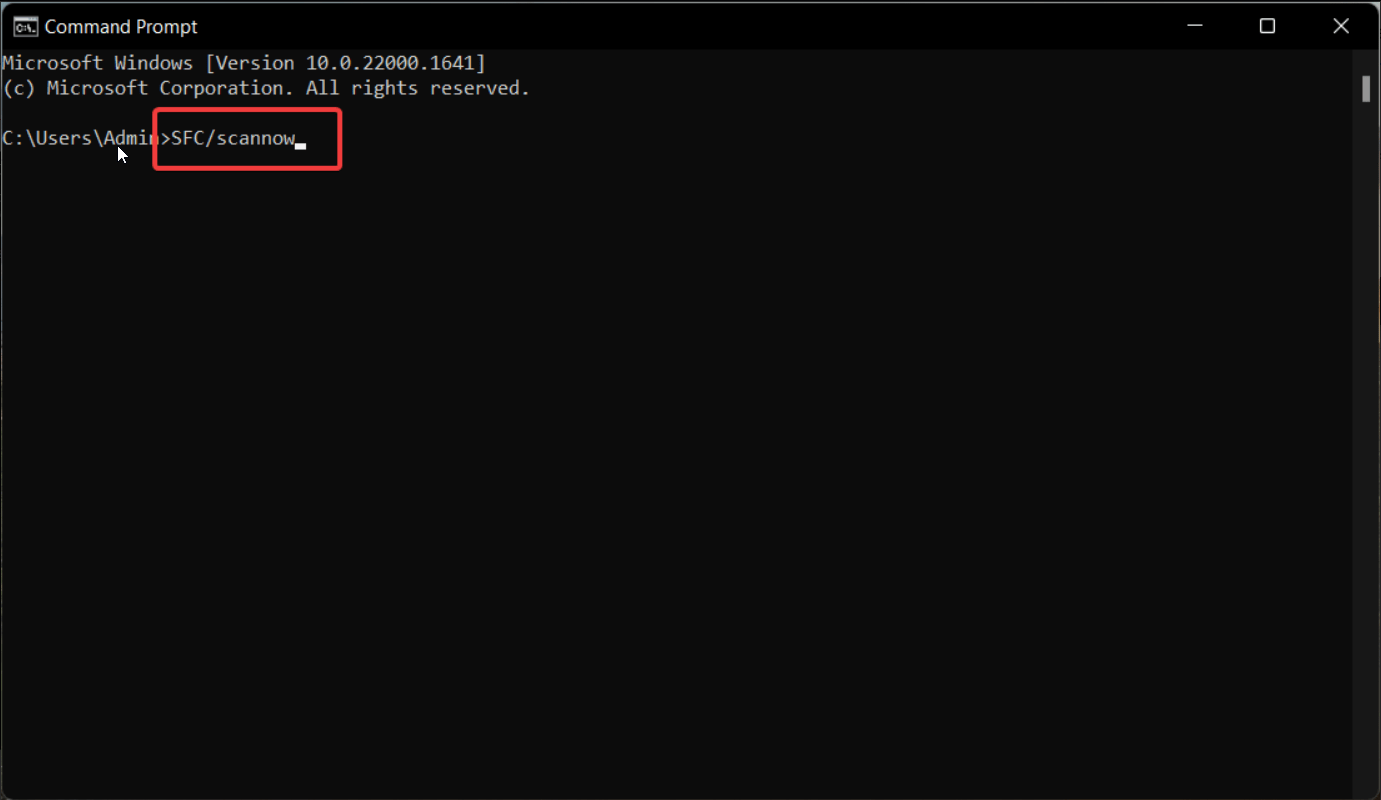
- Type or paste the SFC/scannow command and press the Enter key.

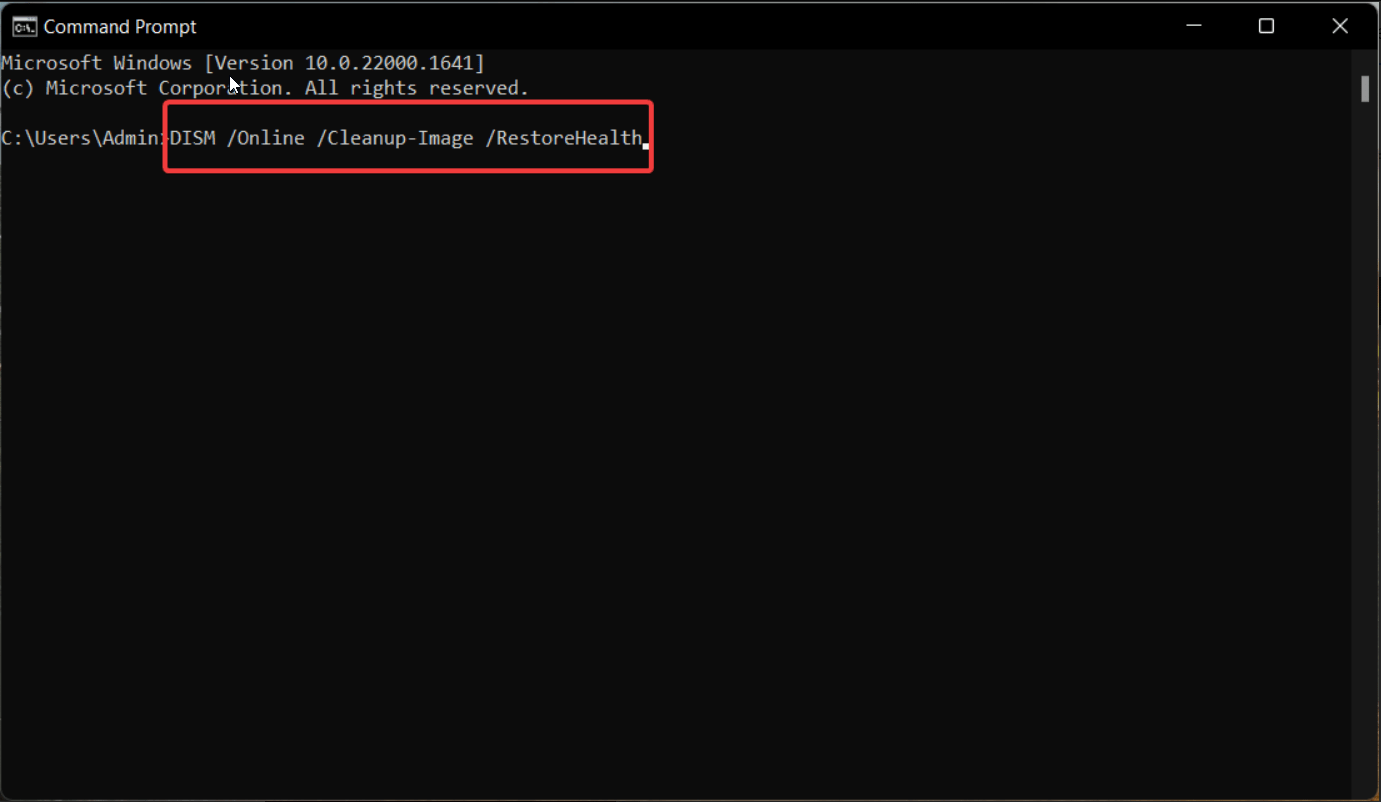
- After the scan is complete, paste the DISM /online /cleanup-image /restorehealth command and press Enter to initiate the DISM scan.

After the DISM tools finish running, restart your Windows PC and see whether or not the kernel security check failure error bothers you.
7. Perform a System Restore
A recently installed Windows update or an incompatible third-party app may leave the system unstable, which may result in the kernel security check failure BSOD error. You can easily use the system restore feature of Windows to roll back the recent changes. Follow the procedure described below to perform system restoration.
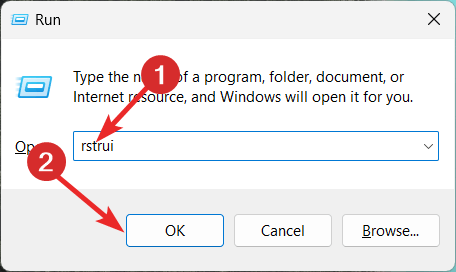
- Use the Windows + R shortcut to launch the Run dialog box.
- Type rstrui in the text box and press the OK button to access the System Restore wizard.

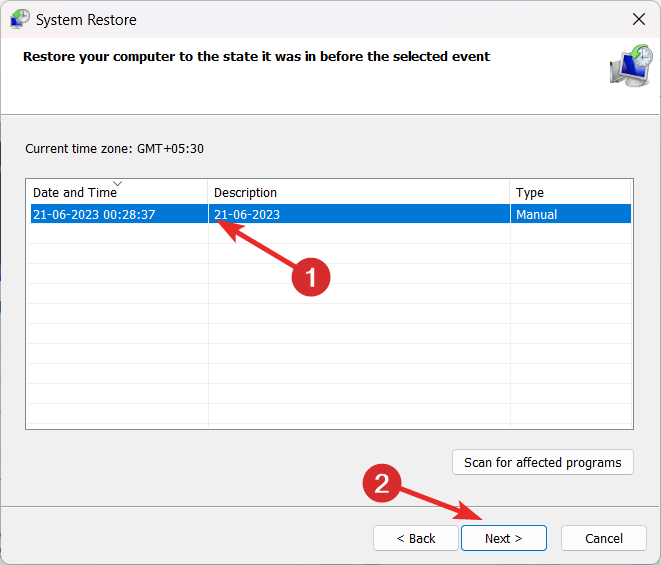
- Choose that restore point from the list of options and press the Next button.

- Press the Finish button on the next page to begin the system restoration process.
Note: You can only restore your Windows PC to a previous state if a restore point was created on your system beforehand.
8. Reset your PC
If none of the fixes listed above could resolve the kernel security check failure error, you should reset your PC as a last resort. Doing so will reinstall Windows and remove all the problematic settings and underlying bugs without deleting your data. Implement these steps to reset your Windows PC:
- Use the Windows + I combination to launch the Settings app.
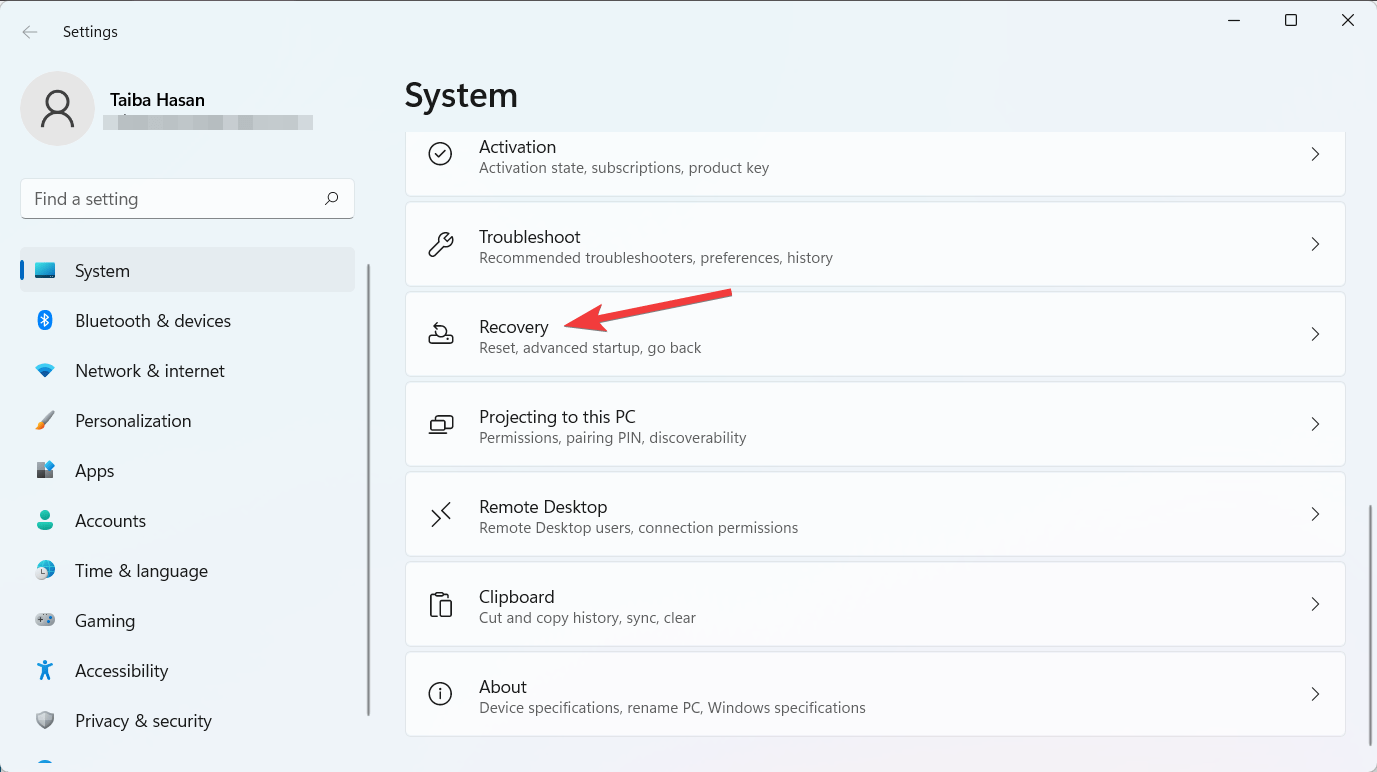
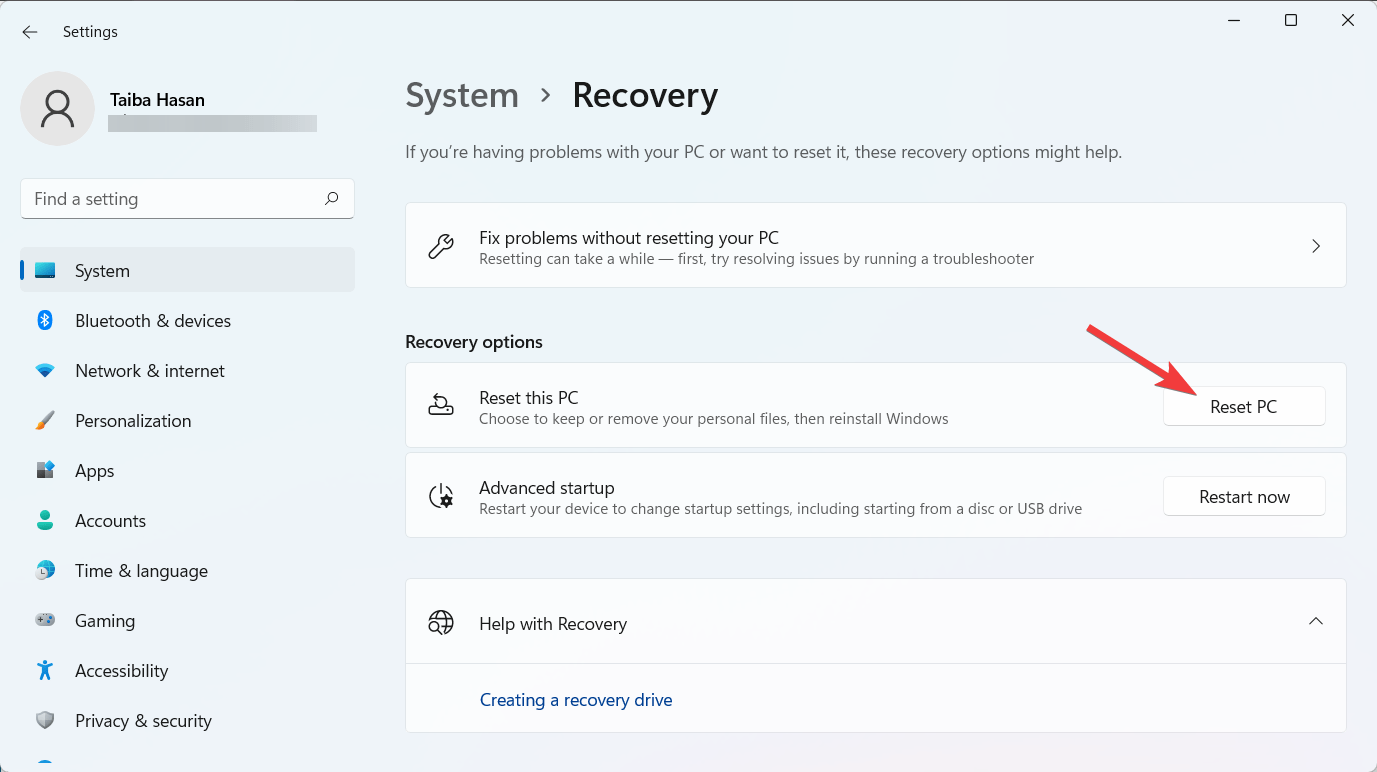
- Scroll down the System settings and choose the Recovery option.

- Next, press the Reset PC button located next to reset this PC option.

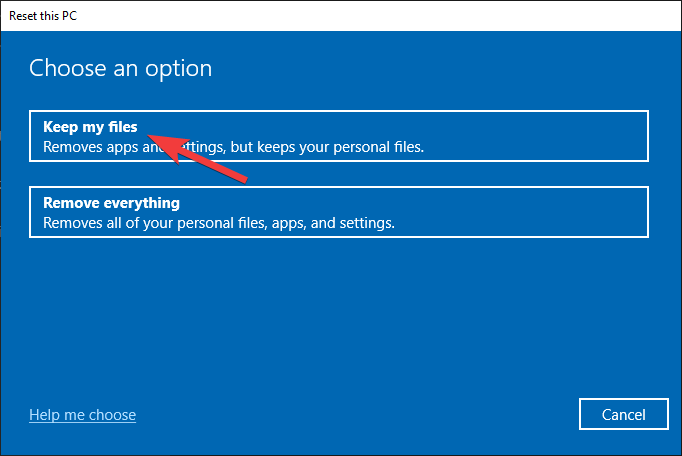
- Choose the Keep my files option from the Reset this PC dialog box to reset the PC without losing your essential files.

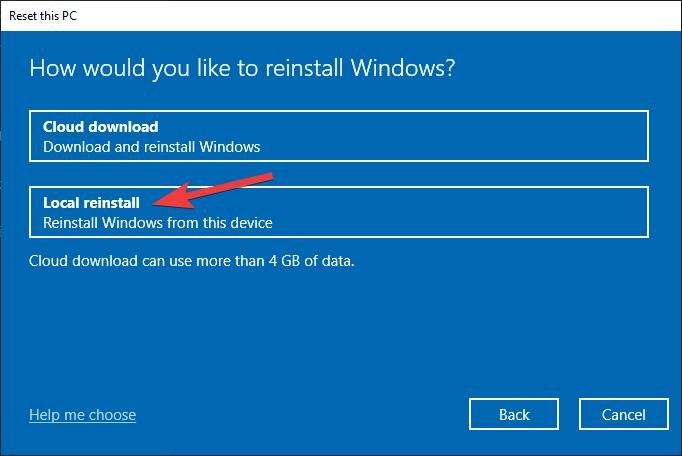
- Select the Local reinstall method from the next window if you do not have a stable internet connection.

Wait patiently for the Windows reinstall process to finish. Make sure that you do not turn off your PC during the process. Once completed, your Windows computer will not be in a brand new state, hopefully, you will no longer encounter the kernel security check failure error.
Last Words
That’s all about it! We are positive that reinstalling Windows will fix the kernel security check failure if it originated because of a software-related fault. However, if the problem still exists on your device, it is hardware related. We will advise you to book an appointment with the service center and get your hardware checked. If the RAM or the disk drive is faulty, you may have to get it repaired or even, in some scenarios even, replaced.
So which of the methods listed in this guide worked in your case? Do let us know in the comments.
If you've any thoughts on How to Fix Kernel_Security_Check_Failure Error?, then feel free to drop in below comment box. Also, please subscribe to our DigitBin YouTube channel for videos tutorials. Cheers!

