iPhone’s camera is considered one of the best smartphone cameras in the smartphone industry. Moreover, facing the issue with the same can be drastically dreadful. But there is nothing to worry about it if you are facing the issue. We have already gathered all the information, solutions, fixes that will most probably fix the camera issues on iPhone 12, 12 Pro, and 12 Mini.
Common Issues Faced with Camera
- Camera Stuck or Freeze
- Black screen
- Flash not working
- Camera features and options missing
Follow the below various methods to fix it. Note that a few below methods can wipe your storage, so better to take a backup before proceeding…
Methods to Fix if iPhone 12 Camera Problems
Here are Simple Solutions to Fix Camera Not Working or Loading Issues on your iPhone 12, Pro, and Mini
Switch Camera
This is the first method of the solutions we are going to implement to get it working. The system usually resets any settings that are causing the camera not to work while switching the camera.
So, if you are having issues with the rear camera then try to switch it to the front camera, similarly do the same if you are having issues with the front camera.
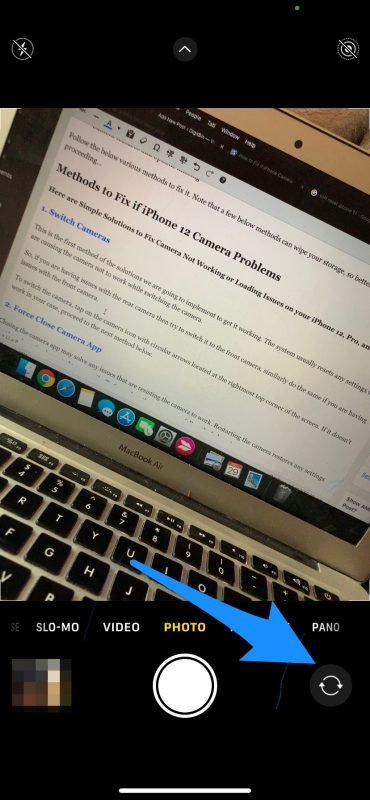
To switch the camera, tap on the camera icon with circular arrows located at the rightmost top corner of the screen. If it doesn’t work in your case, proceed to the next method below.
Sometimes the issue may with the app itself, it is better to download any other Camera app from App Store and check if the downloaded app is able to connect with the phones Camera Hardware and if it is able to click photos, if yes than below stops can come handy to solve the issue.
Force Close Camera App
Closing the camera app may solve any issues that are resisting the camera to work. Restarting the camera restores any settings that have been implemented temporarily. To force close the camera app, follow the below steps.
Use the gesture controls to open the multitasking window by dragging the screen from the bottom and then close the app by swiping up the Camera App.
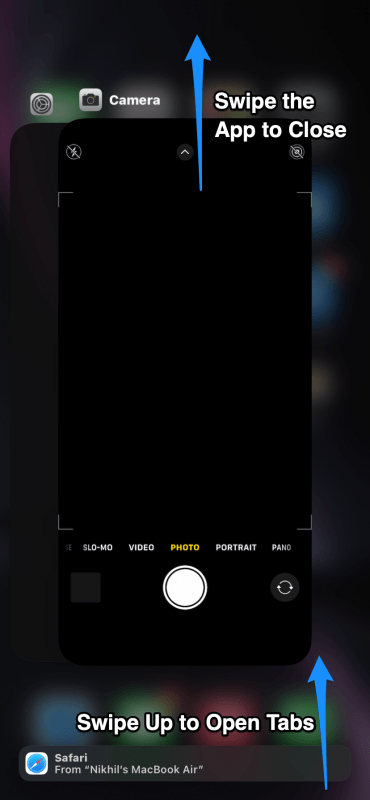
After closing the app, wait for at least a few minutes, maybe 5 minutes then open the camera app again and check whether it is working or not.
Reboot/Soft Reset
Rebooting is the best solution in any case whether you have issues with a camera or any other setting in the smartphone. We don’t think you need any guide for restarting your device. So, reboot the device and check whether the camera issue is solved or not.
A soft reset is a term we use in the technology industry which means rebooting any device forcefully. To soft reset, your iPhone, follow the below steps.
- First, you need to press the Volume Up button and then release it instantly.
- Then again you need to press the Volume Down button and then release it instantly.
- After that press and hold the sleep/wake button until you see the Apple logo.
- Release the button once you see the Apple logo.
- Now your iPhone will Reboot Normally.
After reboot, check whether your iPhone’s 12 camera issue still exists or not. If it still exists then proceed to the next step.
Toggle Off VoiceOver
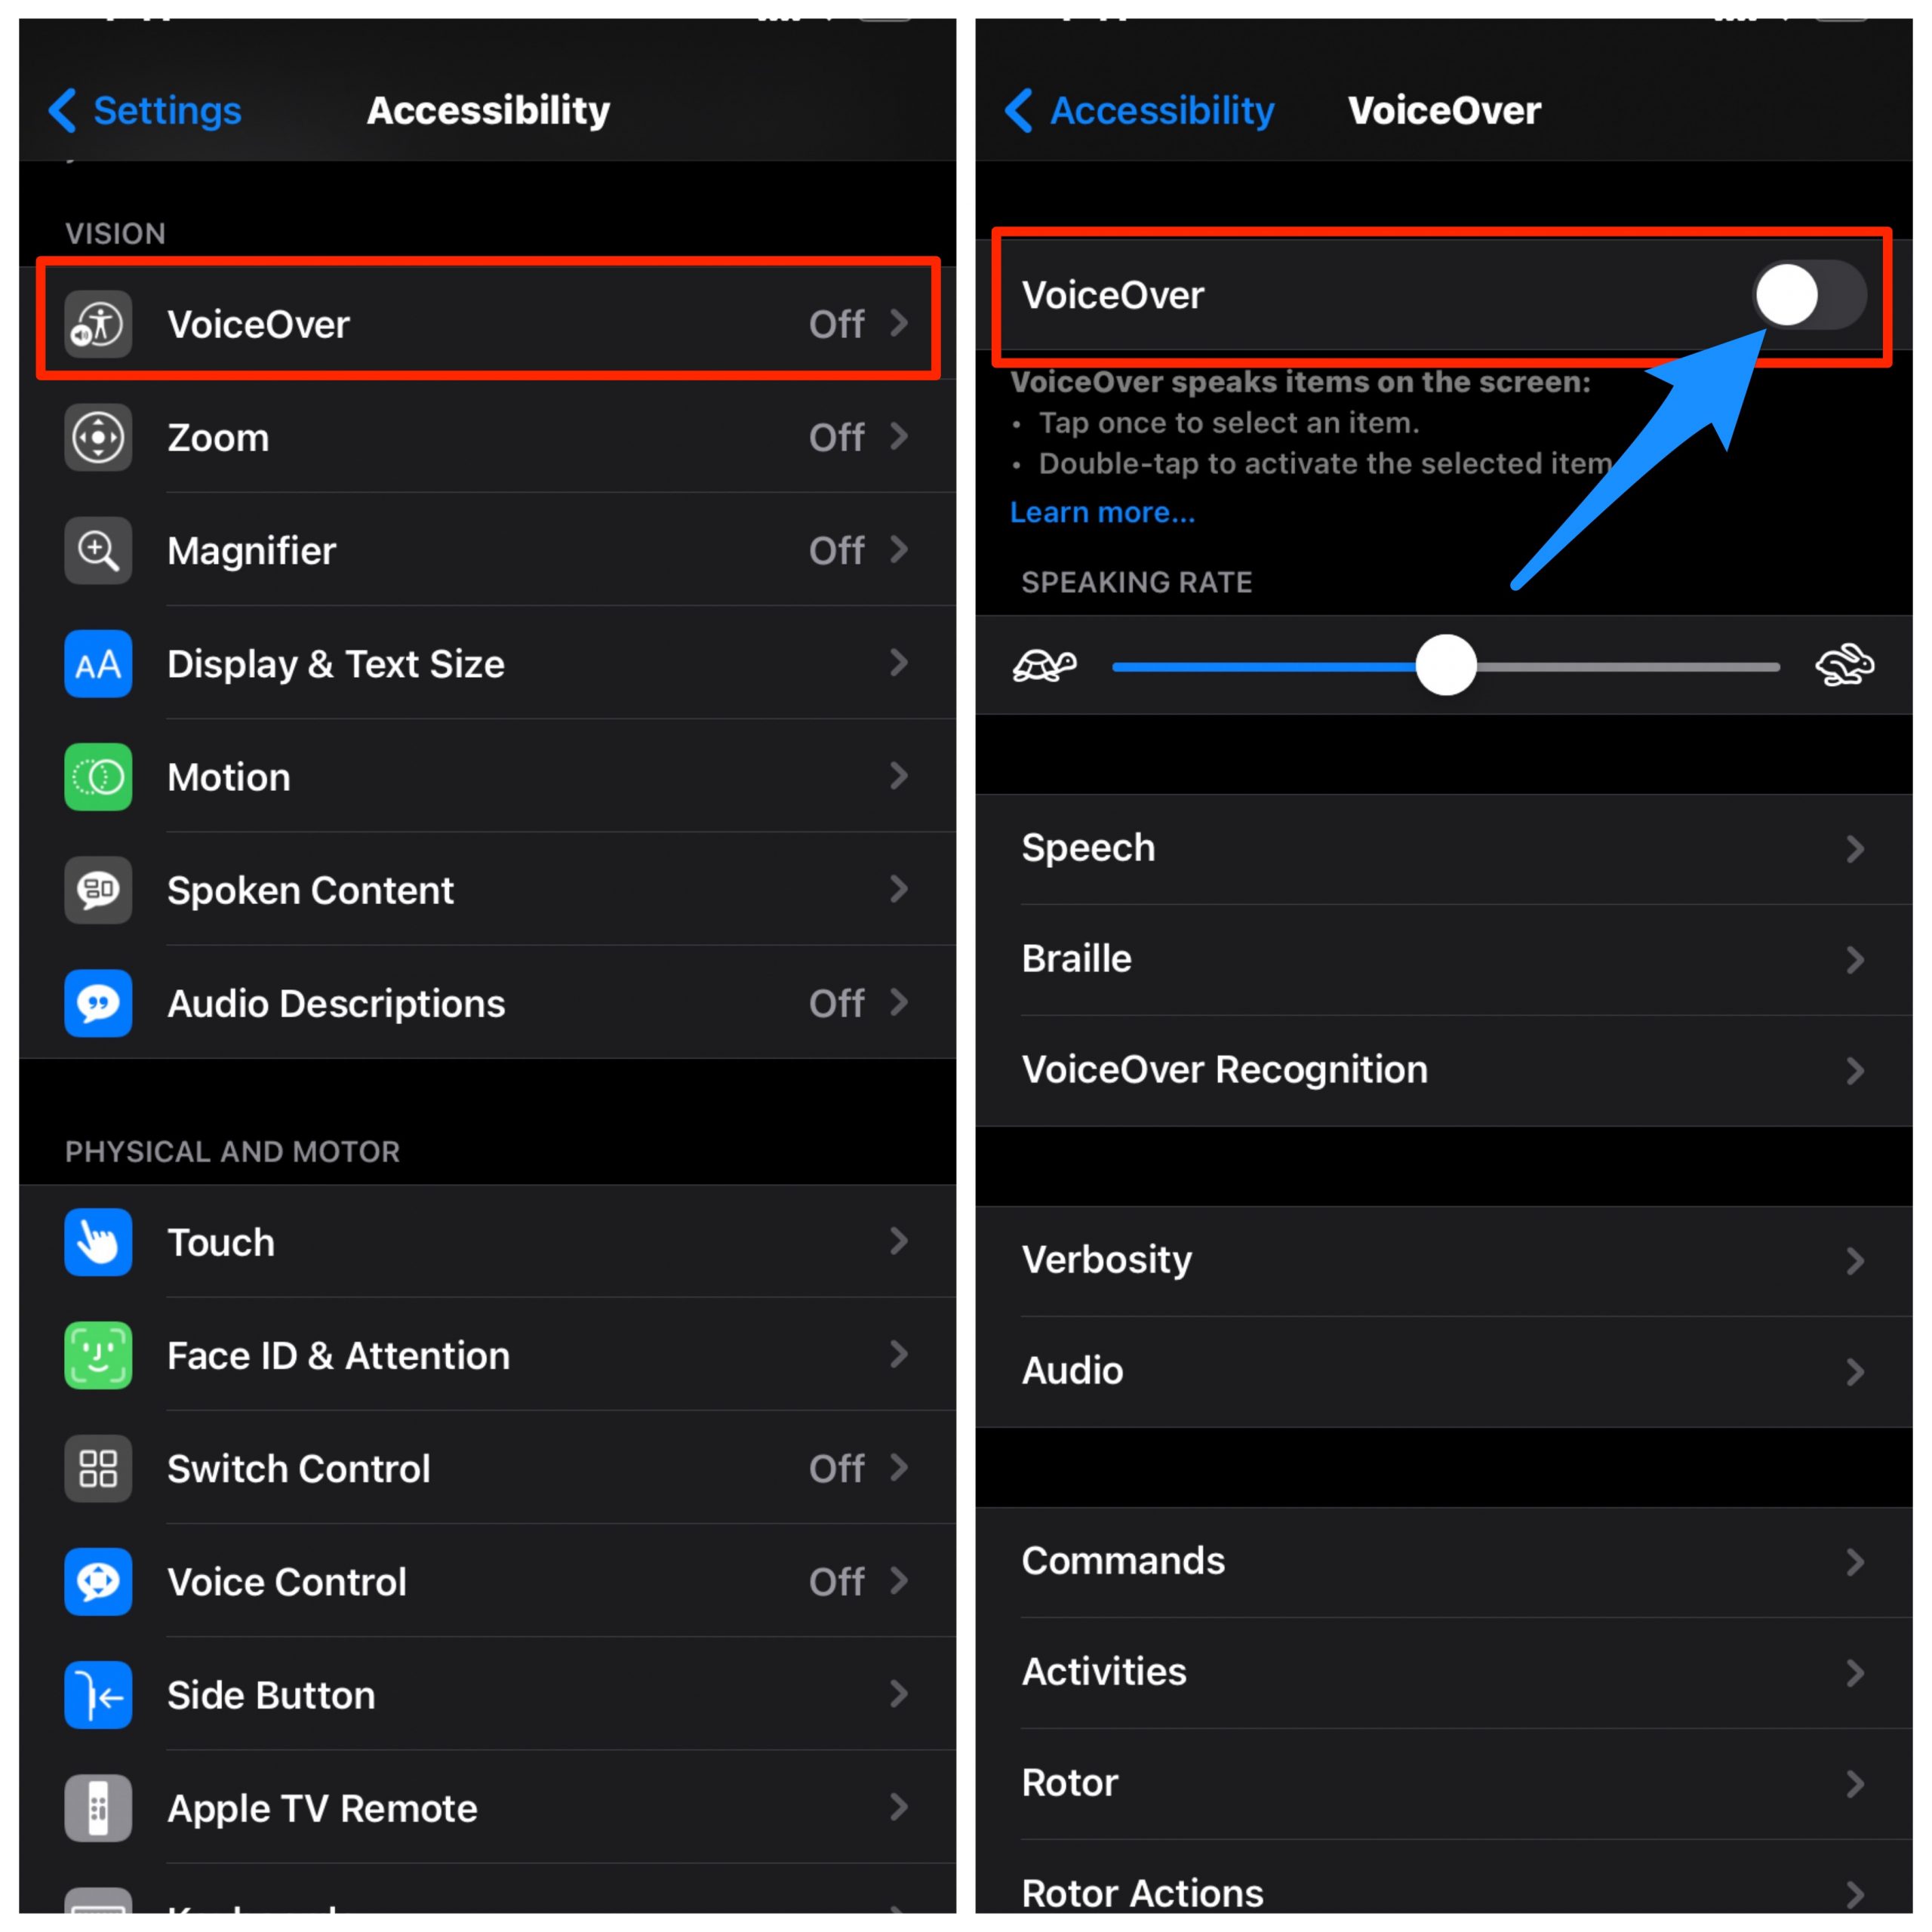
In many cases, the camera issue is observed when the VoiceOver feature is ON, so in this method of solution, we are going to turn off the VoiceOver feature and check whether it works or not. To turn off the VoiceOver feature, follow the below steps:
- Open the Settings app from the app drawer.
- Then navigate to General settings.
- Now scroll down and search for Accessibility settings.
- After tapping on Accessibility, search VoiceOver, and open it.
- After opening VoiceOver, slide the toggle which is in front of the VoiceOver label towards the left to turn it off.

- After turning it off, reboot your iPhone.
Analyze Storage
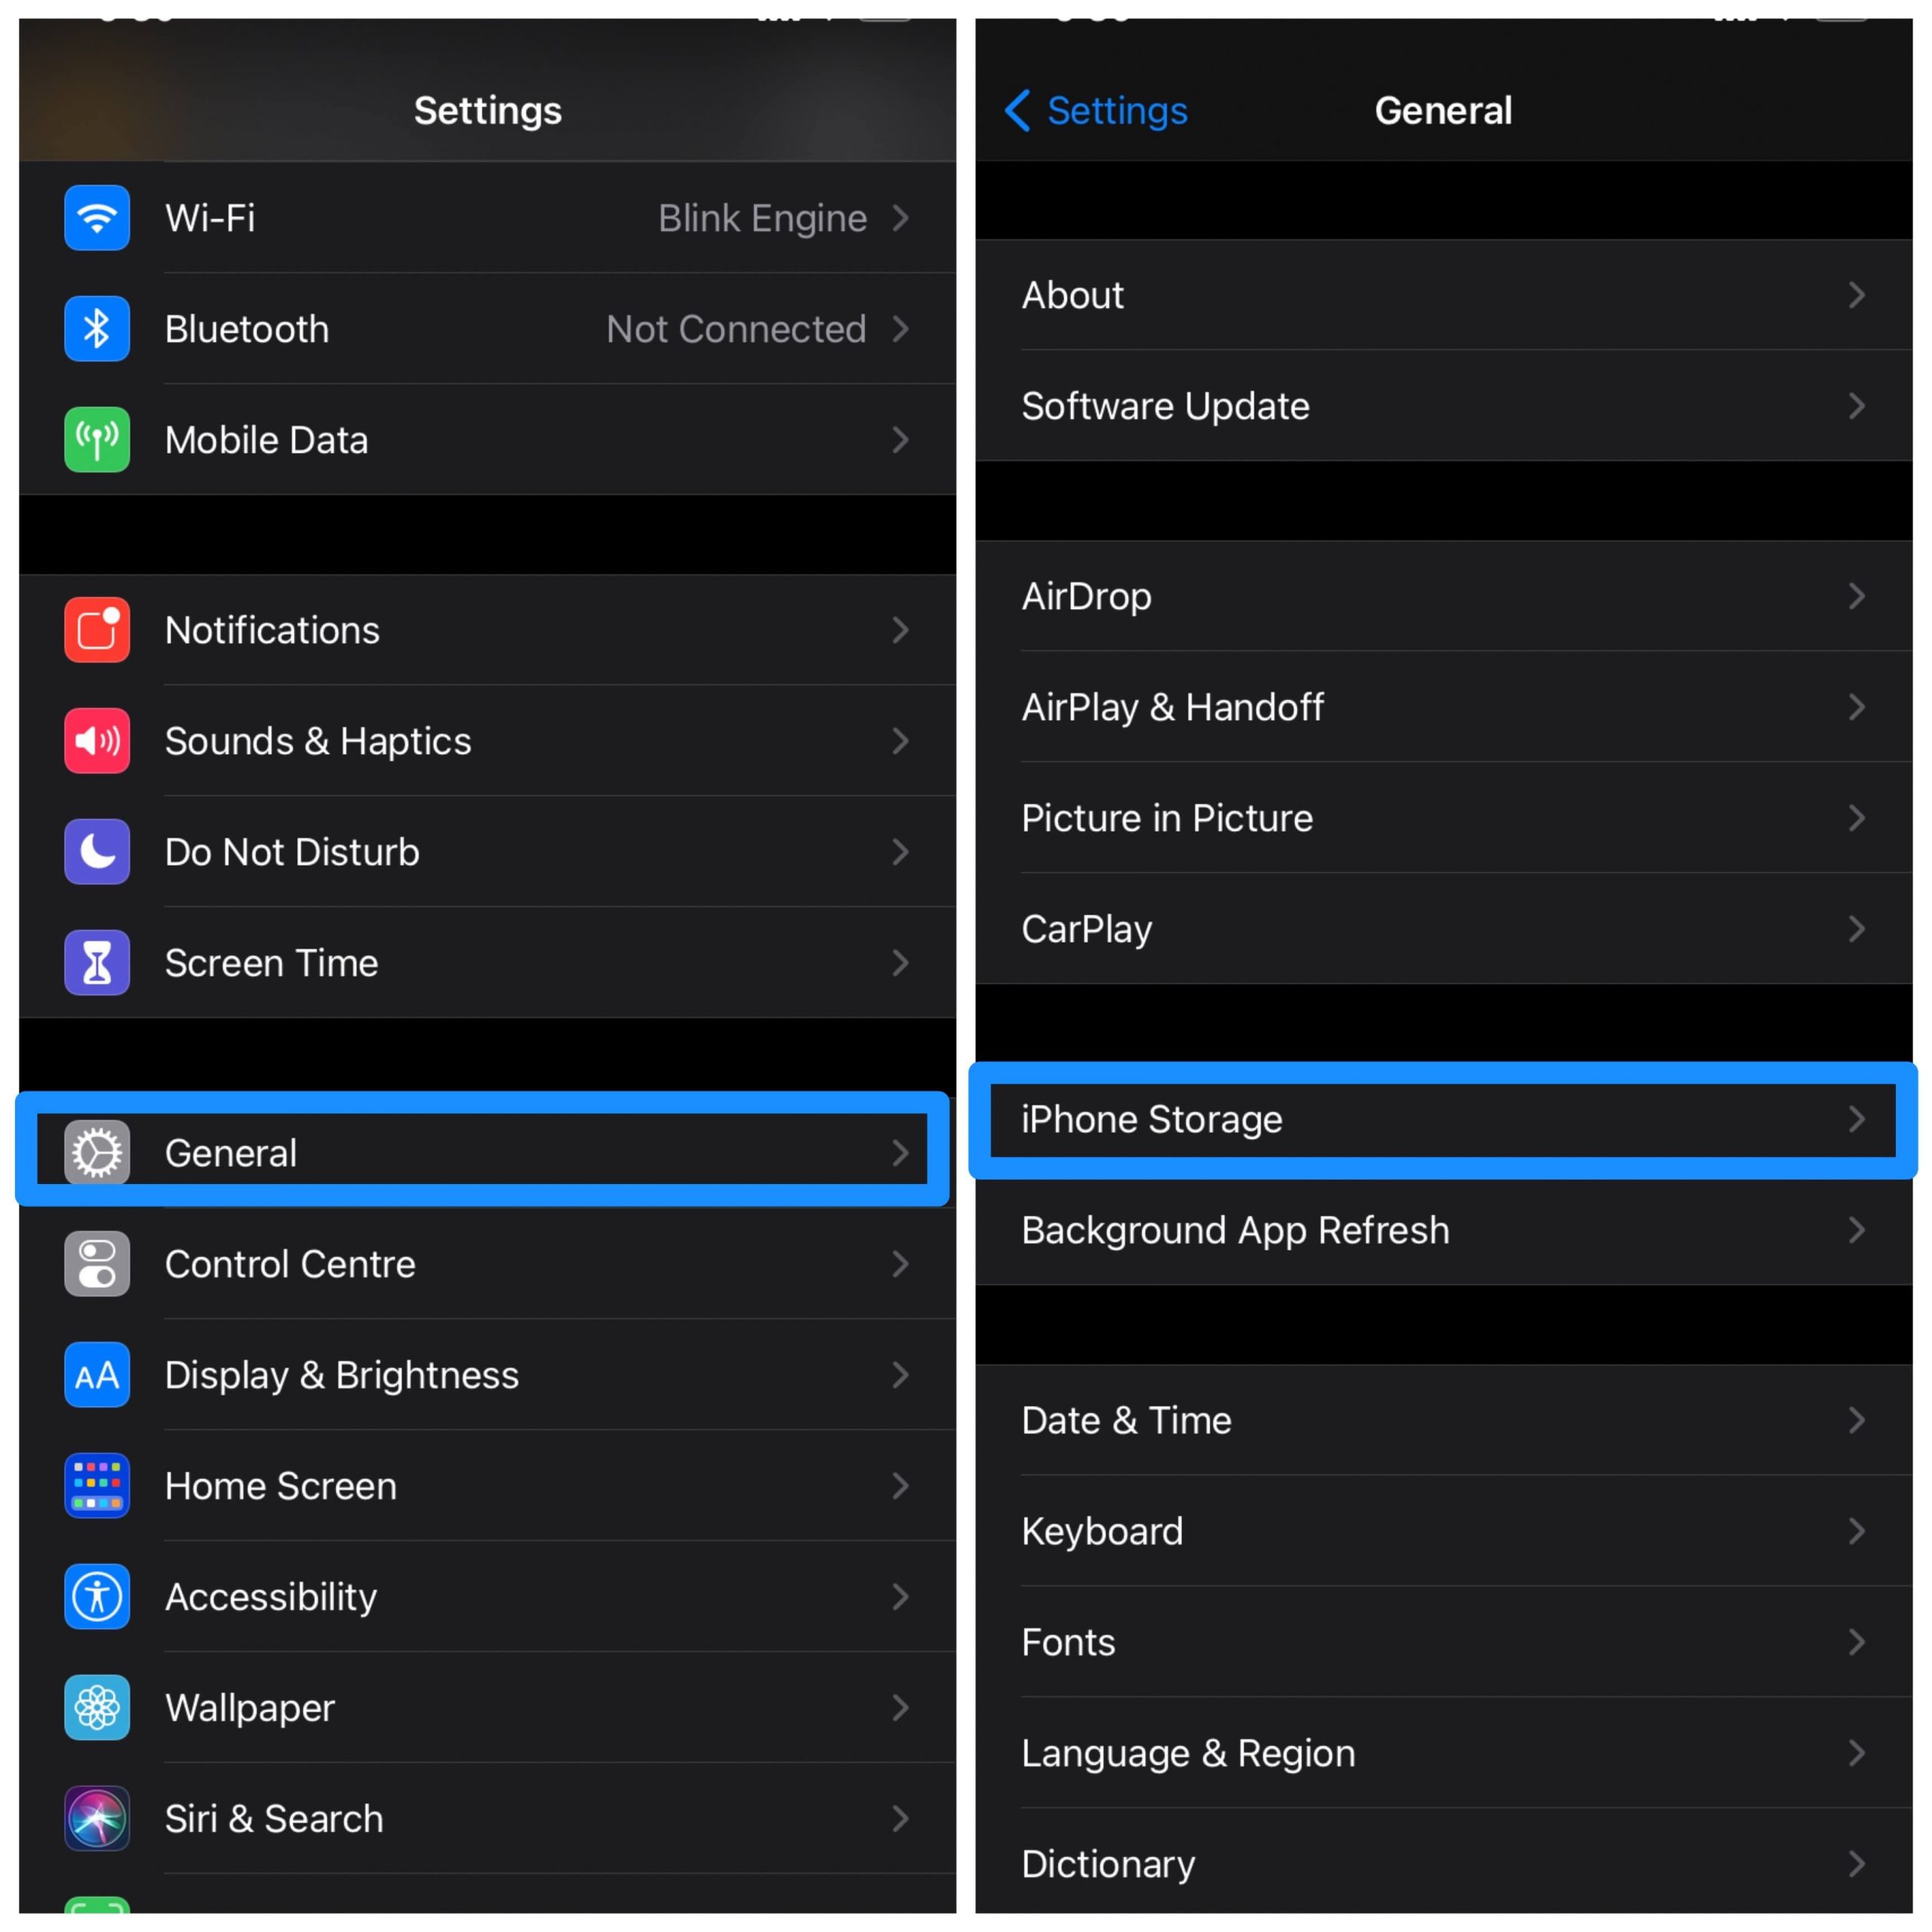
Sometimes due to low storage, the iPhone creates such issues, so in this method, we are going to free up some space. Follow the below steps to do so:
- Open the Settings app from the app drawer.
- Then navigate to General settings.
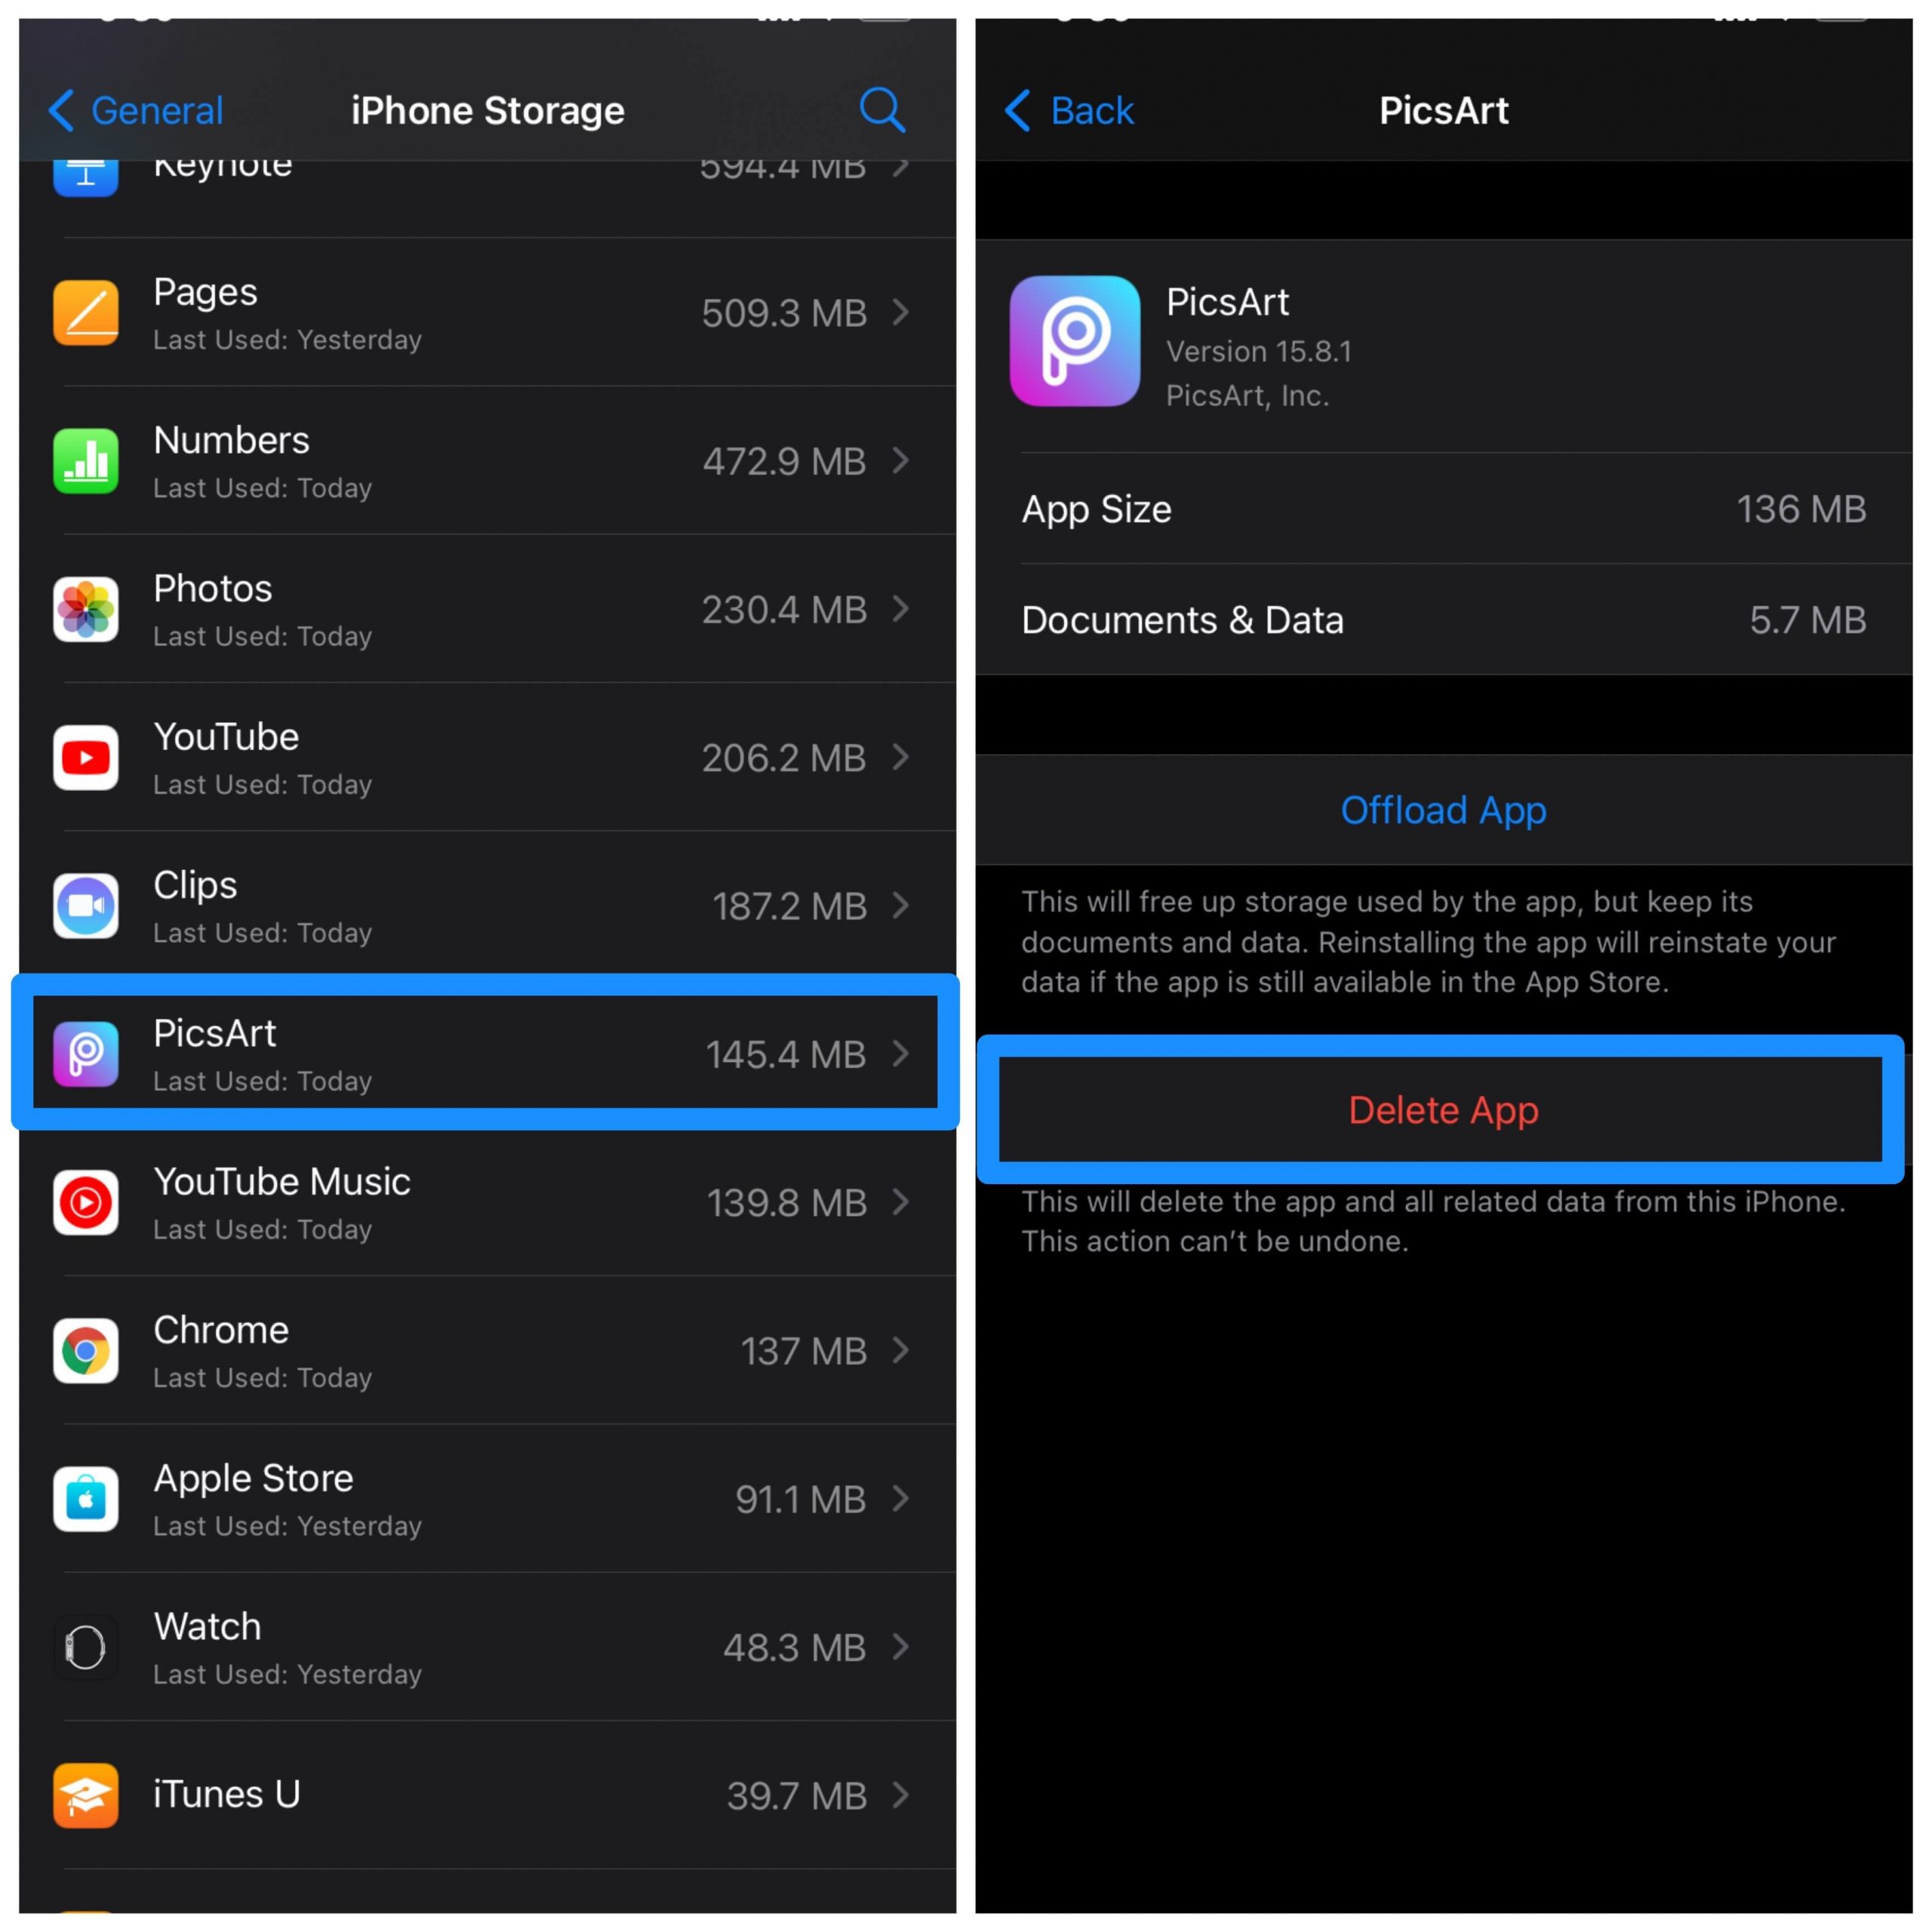
- Now, go to iPhone Storage.

- Here you will see all the apps that are taking storage spaces.
- Analyze them and delete and unnecessary apps and files

After freeing up space, check the camera whether it is working or not.
Reset All Settings
Well, if the above methods aren’t working in your case then most probably there might be some issues with your system settings. In this method, we are going to reset all system settings to default. To do so, follow the following steps carefully:
- Open the Settings app from the app drawer.
- Then navigate to General Settings.
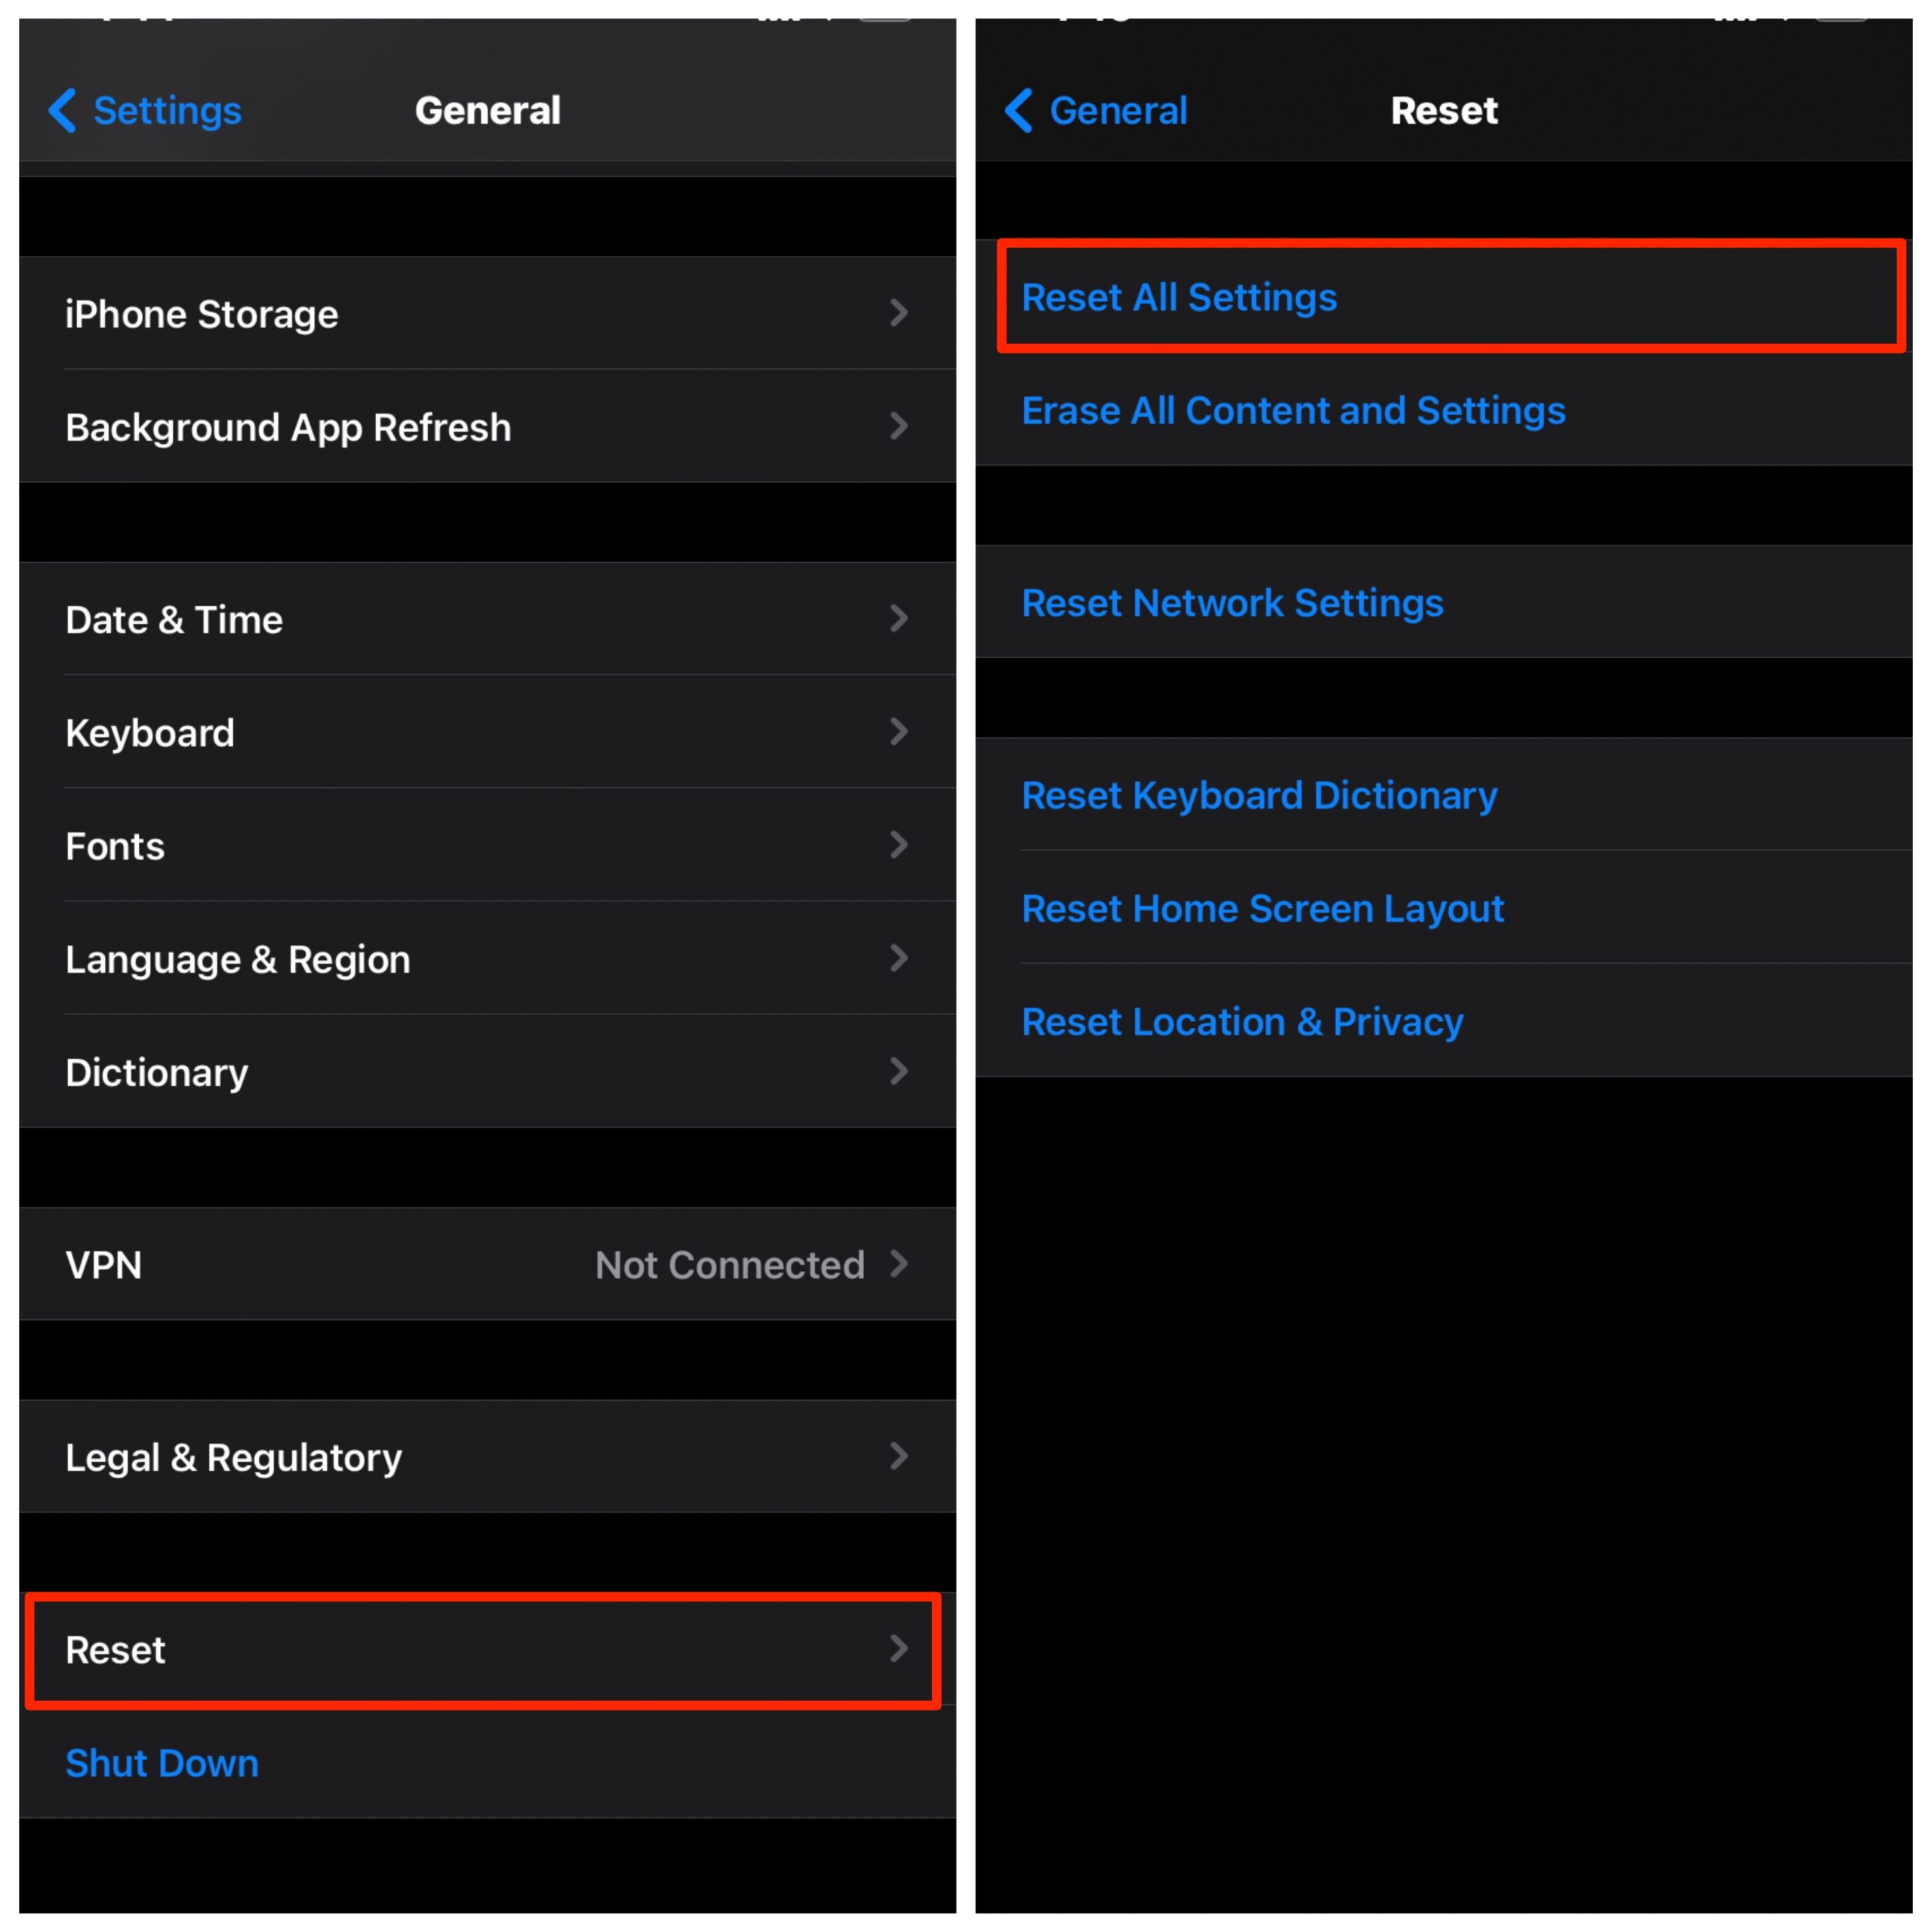
- Now, scroll down till the end and select the Reset option.
- The reset window will be opened, now, tap in the first settings that say ‘Reset All Settings’.

- Then you will be prompted to enter your passcode.
- After successfully entering the passcode, another confirmatory prompt will appear with two buttons, ‘Cancel’ and ‘Reset’.
- Tap on the Reset button and you are good to go.
Update to the Latest iOS Version
If none of the above methods worked, then there is a possibility that your iPhone’s OS isn’t updated. So update the iPhone to the latest iOS version to resolve the issue. To update follow the below-mentioned steps:
- Open the Settings app from the home screen.
- Then navigate to General Settings.
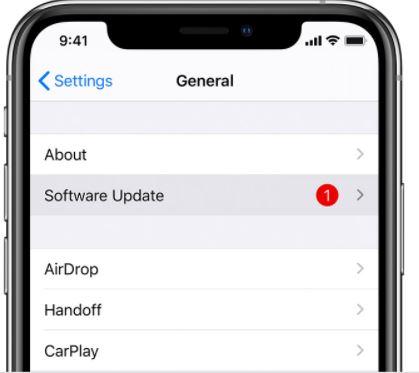
- Now tap on the Software Update option.

- If there is an update available, follow the onscreen instructions to install the updates on your iPhone.
Perform Factory Reset
- Open the Settings app from the app drawer.
- Then navigate to General settings.
- Now, scroll down till the end and select the Reset option.
- The reset window will be opened, now, tap in the settings that says ‘Erase All Content and Settings’.
- Then you will be prompted to enter your passcode.
- Finally, follow the on-screen prompts to complete the factory reset process.
Restore Your iPhone (Using iTunes)
Disclaimer: We at DigitBin can not be held responsible for anything that happened to your device performing the below steps. All the below steps are quite technical to performed by a normal user. So proceed with caution.
→ Via Recovery Mode
This method will involve the use of iTunes and the iPhone’s Recovery Mode. Carefully follow the methods:
- First, you need to press the volume up button and then release it instantly.
- Then again you need to press the volume up button and then release it instantly.
After that press and hold the sleep/wake button until you see the Connect to the iTunes logo, don’t stop when you see the Apple logo.
Now, connect your iPhone 12 to the computer, and wait for the system to open iTunes for you.
On the iPhone screen, you will see two options: Update and Restore.
Tap on the Restore options.
Now, iTunes will attempt to reinstall iOS without erasing your data.
After that iTunes will download the software for your device.
This may take time
→ Via DFU Mode
This is the deepest type of recovery one can perform in an iPhone. This type of recovery is usually performed by the Apple officials but you can also perform it on your own. Follow the below steps carefully to perform the restore via DFU Mode:
Connect your iPhone 12 to your computer using Apple certified lightning cable. Open iTunes and Make sure that the device is detected by iTunes.
Now, we will perform a few tricky steps to boot into DFU mode.
- Press release the volume up button.
- Press release the volume down button.
- Press and hold the Side button (Power Button) until the screen goes black.
- Release the Side button once the screen blacks out.
- Quickly press and hold both the Side and volume down buttons together for 5 seconds.
- After 5 seconds, release the Side button without letting go of the volume down button.
- Continue holding down the volume down button for at least 5 seconds.
Don’t let go until you see a recovery prompt appear in iTunes or Finder. Once it does, let go of the Volume Down button and look at your iPhone’s display. If your screen is black, you are right in DFU Mode.
Once DFU mode is opened, a popup will appear in iTunes, saying iTunes has detected your iPhone.
Now follow the on-screen instructions to restore your device.
Conclusion
That was all you need to know to fix the issue where the iPhone camera isn’t working. If none of the above methods worked for you then you need to visit a nearby Apple customer service center, there might be hardware malfunctions that can be claimed in the warranty period if you have any.
If you've any thoughts on How to Fix iPhone 12 Camera Not Working? , then feel free to drop in below comment box. Also, please subscribe to our DigitBin YouTube channel for videos tutorials. Cheers!
