Is the HDMI to DisplayPort not working on your PC? Then check the troubleshooting tips explained in this guide to understand how to fix this connectivity error. While the HDMI port is very commonly seen across all models of computers, DisplayPort is more popular with gamers. Using DisplayPort, you can transmit both audio and video signals simultaneously.
Often cable incompatibility can cause the connection problem between the HDMI and DisplayPort. Mismanaged display settings and buggy display drivers on the PC can contribute to the connectivity and functional errors of cables connected to the computer or external monitor.
Best Tips to Fix HDMI to DisplayPort Not Working
Here are some tips and tricks that offer the best possible ways to resolve the connection error when HDMI and DisplayPort are involved. Let us check these out.
1. Restart Your Device
If you are using an auxiliary external monitor or even the display of your PC, the HDMI to DisplayPort connection issues may arise due to any temporary bug on the system. Try to restart the PC.
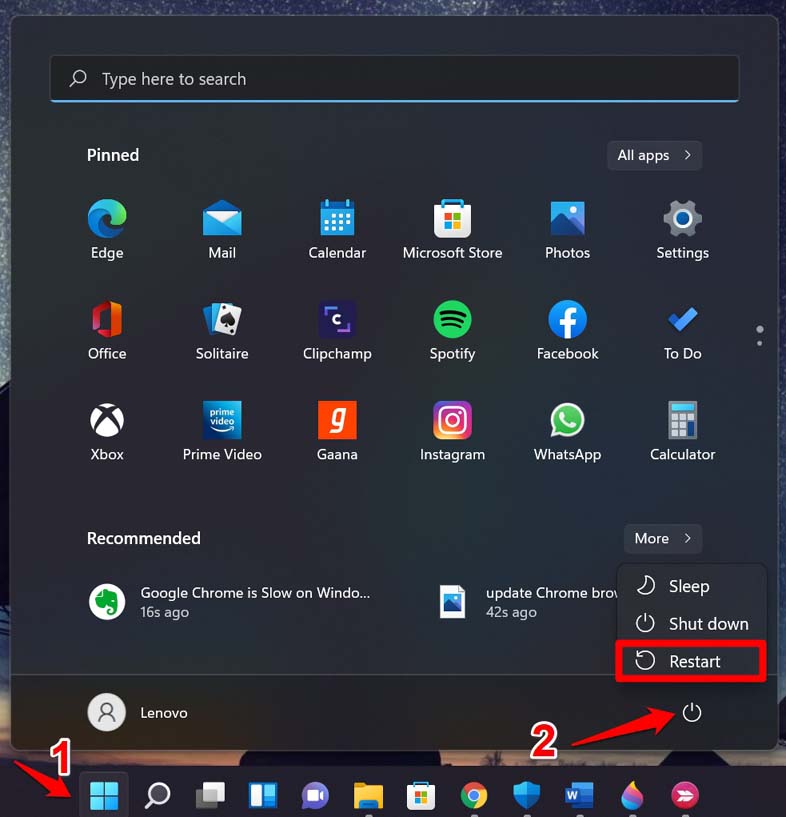
- Press the Windows key to open the search console.
- At the bottom right corner of the search box, click on the Power icon to open a menu.
- From the menu, click on Restart.

If using an external monitor, simply press the power button on the front or back of the display to turn it off and quickly reboot. If restarting the device or the monitor did not fix the HDMI to DisplayPort error, then move on to other troubleshooting methods.
2. Set the Correct HDMI Input on Your Computer/Monitor
While the DisplayPort may work just fine, you need to ensure that you have set the correct HDMI input on your computer.
- Open the Settings section of your display device. [the setting options layout may vary from one monitor to another]
- Within Settings, click on Input.
- Under Input, check if the correct HDMI cable is set as the input as per the HDMI cable that you have connected to the PC/monitor.
3. Check for Faulty Cables and Dysfunctional Ports
Check that the connectivity is not loose and whether the cable has any damage that you can see externally. If the cable has any dent or if it is bent, then replace the faulty cable. You should also check that the cables are connected properly.
Remove the cable from the ports, and reinsert it firmly. Speaking of which, sometimes the ports may have been damaged. Even though the cable is working, the faulty ports will cause connectivity errors. Try to clean the ports with a clean soft cloth for sometimes dust and debris may get accumulated on the reports causing difficulty in connecting cables.
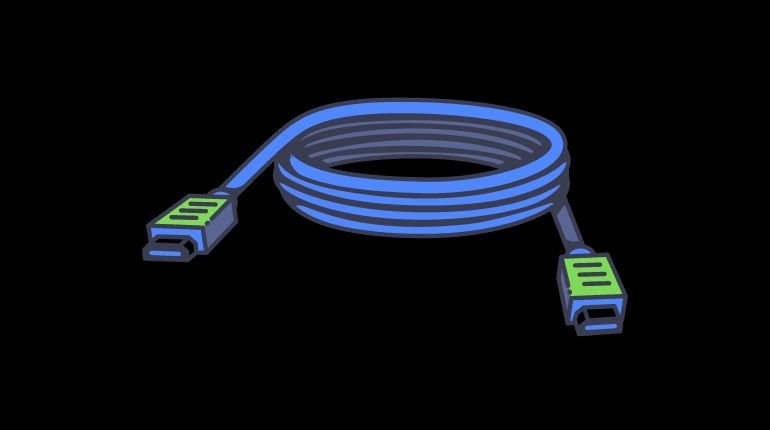
While purchasing the cables, always clearly mention to the seller what you need those cables for and ensure that the cables are compatible with the device(computer/monitor) you intend to use them with.
4. Enable the HDMI Port on Your Device
Here are the steps to check that HDMI connectivity has been enabled to facilitate the transmission when you connect cables between your computer with another display unit.
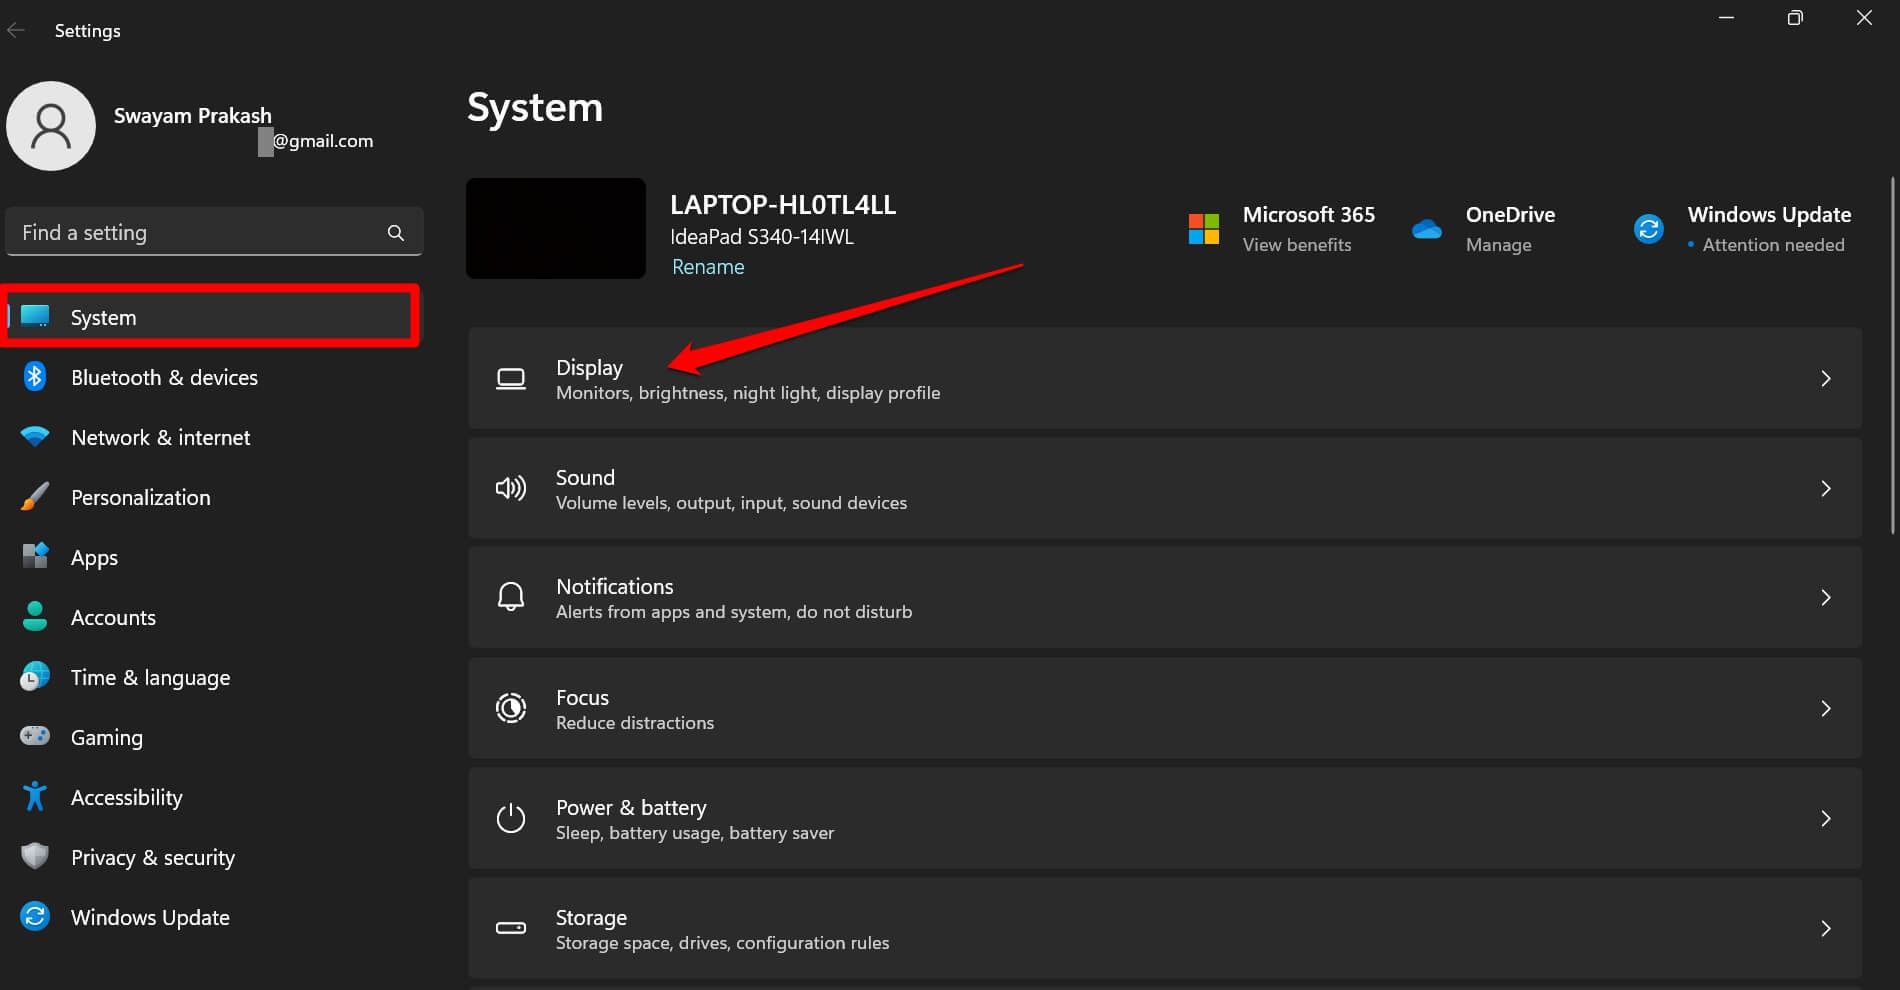
- Press Windows + I to open the Settings of Windows.
- On the left sidebar, click on System.

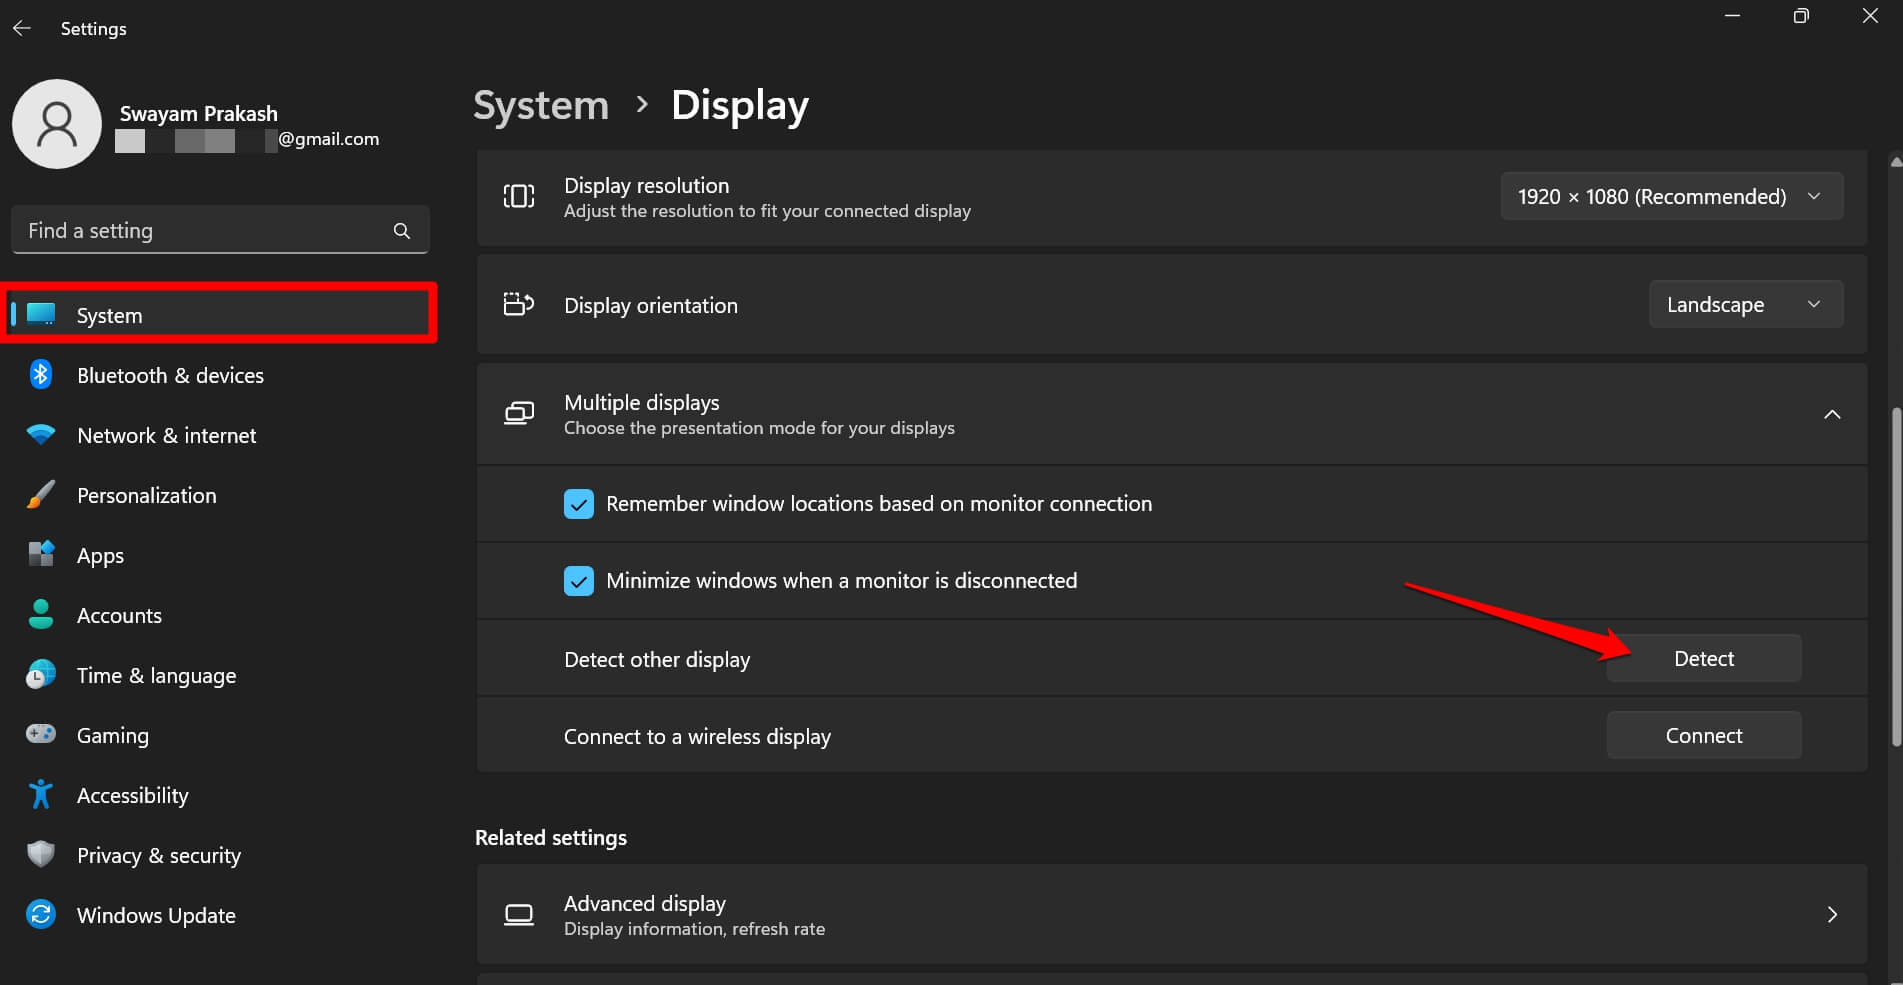
- Now click on Display and scroll to Multiple Display.
- Under that click on the button Detect beside the tab Detect Other Display.

- Click on the Display dropdown to select the correct settings to enable HDMI connectivity on the device.
Before performing the above steps, make sure you have duly connected all the the devices.
5. Install Pending Driver Updates
To fix any bug issues on the display adapter of your PC, you can manually upgrade to the latest build. Here are the steps.
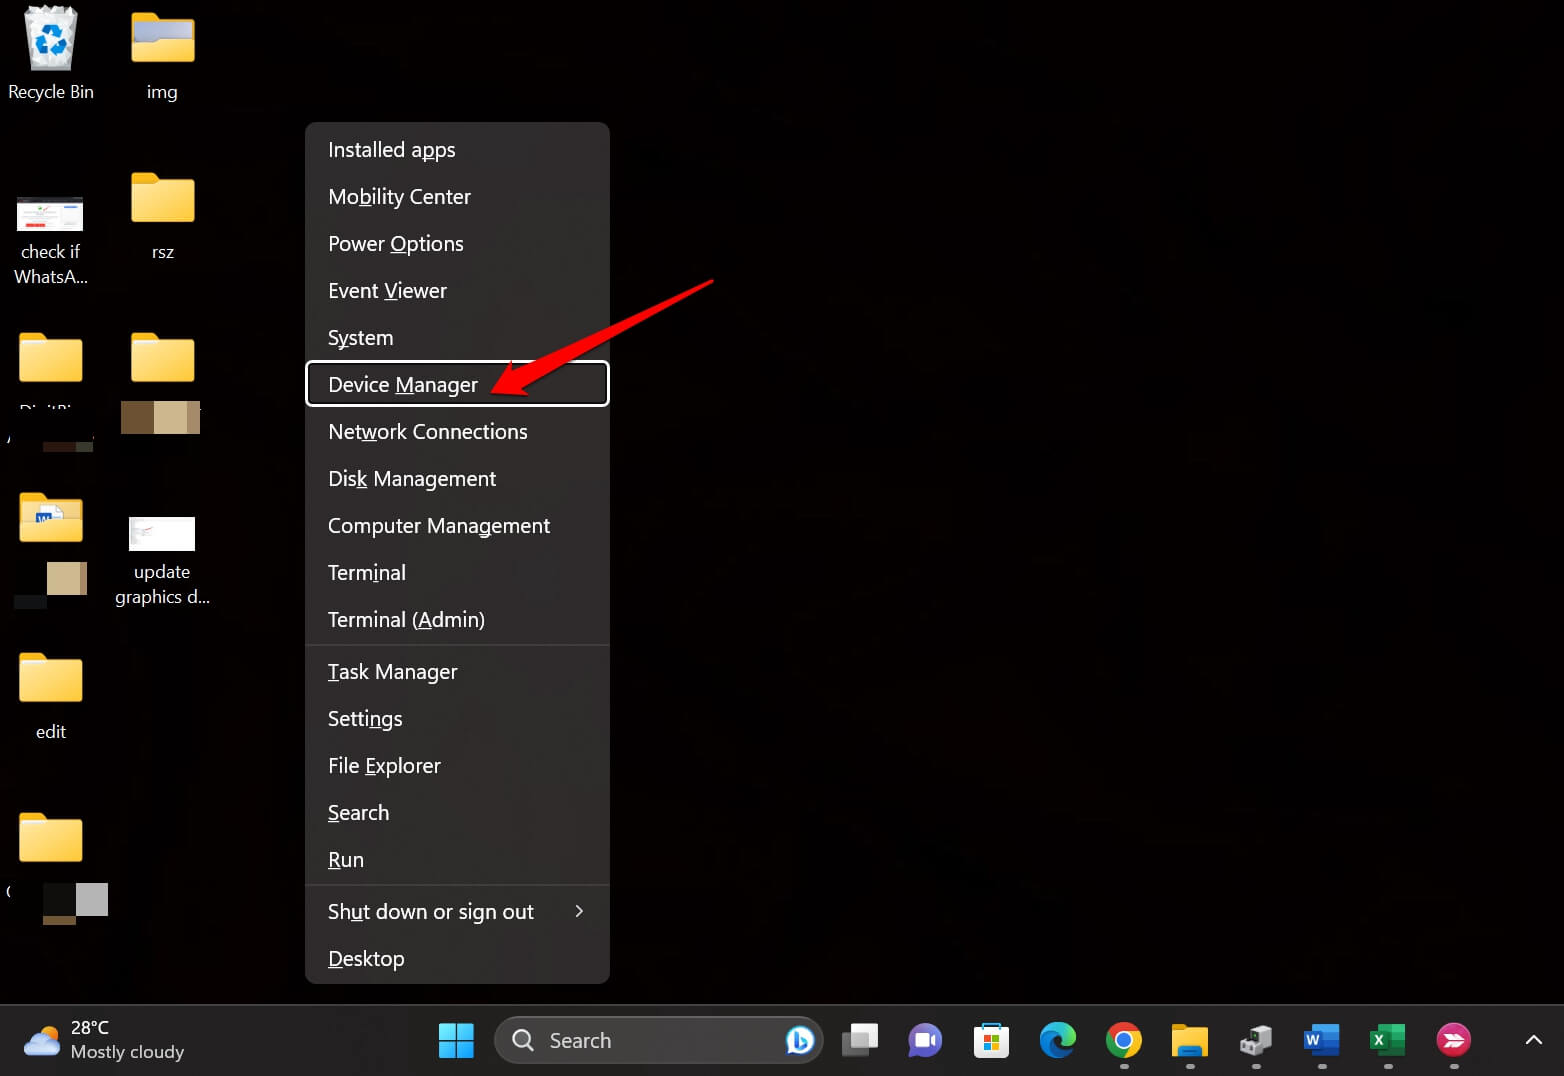
- Press Windows + X to see the power user menu.
- From the menu, click on Device Manager.

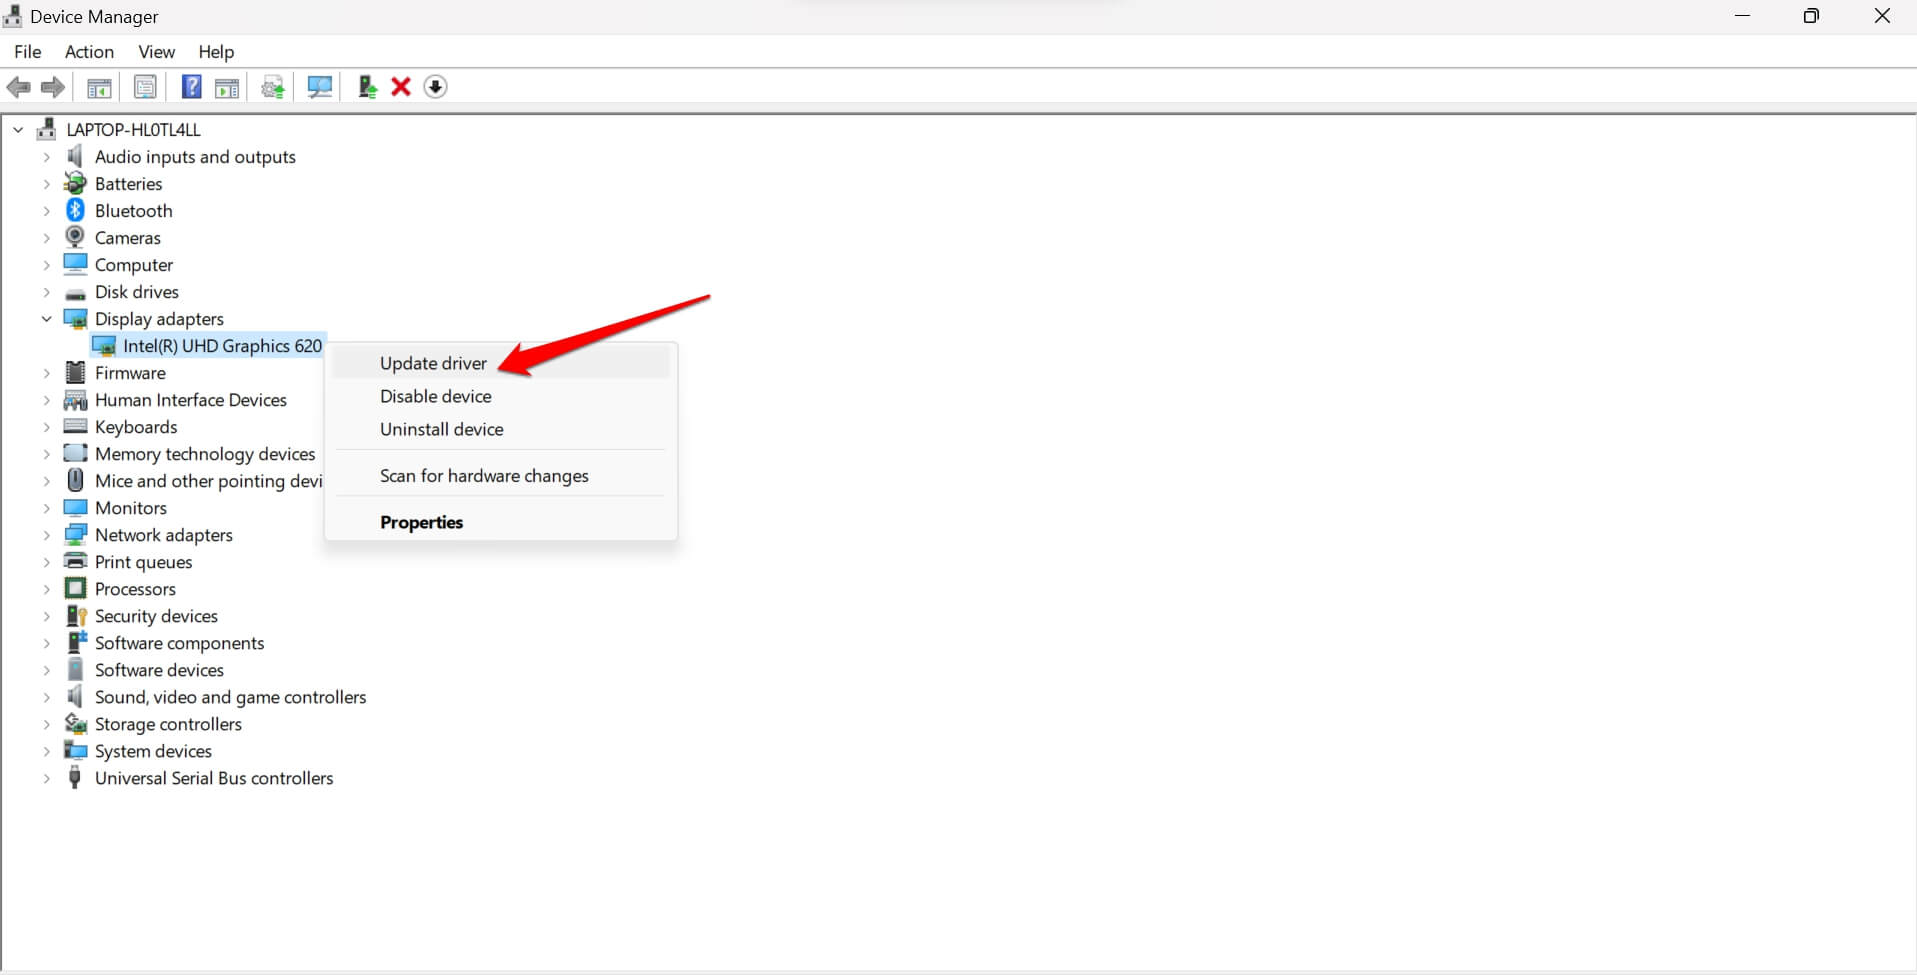
- Scroll to Display Adapter and click to see the display unit integrated into your PC monitor.
- Right-click on the Display Adapter and select the option Update Driver.

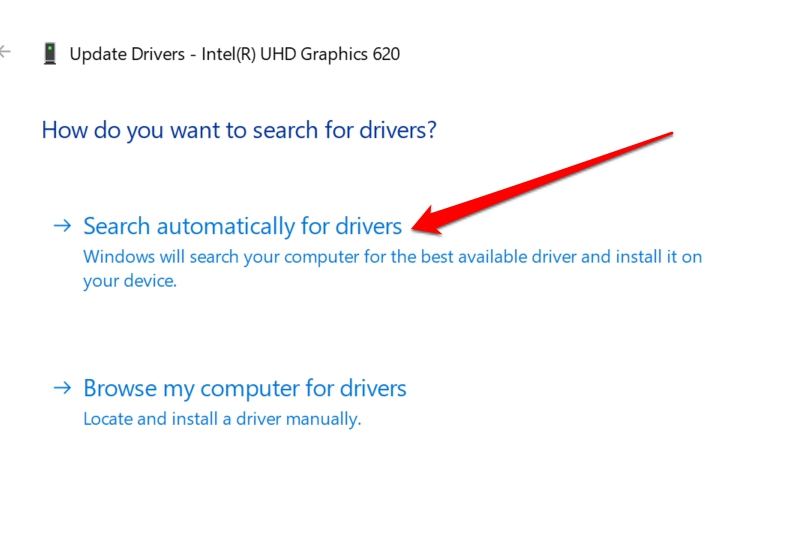
- When the dialog box shows up, click on Search automatically for Drivers.

Now, provided your PC is connected to the WiFi, the system will start searching for the latest driver build available for the Display unit and install the same. Follow the on-screen instructions and do not interrupt the process of driver update download or installation.
After updating the drivers, make sure that all cables are connected properly, and check if the transmission is happening smoothly or still there is any technical error that you are facing. If it was the older build of the driver causing connectivity issues with DisplayPort and HDMI, that should be fixed with this troubleshooting method.
Fix the HDMI to DisplayPort Connectivity for Smoother Transmission
High-quality and better picture resolution is today’s demand with the rise in visual content consumption. 4K has become common, and DisplayPort is a great tool for achieving such visual definition while enjoying gaming or similar engaging content with enriched resolution. So, it is important to fix the HDMI to DisplayPort connection error on your device. I hope this guide was useful.
If you've any thoughts on How to Fix HDMI to DisplayPort Not Working?, then feel free to drop in below comment box. Also, please subscribe to our DigitBin YouTube channel for videos tutorials. Cheers!
