The Google Pixel series has made its mark with its inventive features and reflexive user interface, but like any product, it is not immune to glitches and issues. The inability to charge is one of the most common issues hogging smartphones, and Google Pixel is no exception.
Learning the probable causes and solutions is essential to cope with and fix the underlying problems of why Google Pixel is not charging. So, to help you out, we will walk you through the practical solutions that will come in handy when you are unable to charge your Google Pixel such that the device’s charging capacities are restored.
Troubleshooting the Google Pixel Not Charging issue
Finding the underlying reason for the issue is critical for coming up with a workable solution. Given that this issue is related to charging, it only makes sense to think of the reasons causing charger-related troubles. The battery might appear to be the most evident suspect, but it’s crucial to point out that Google Pixel smartphones have non-removable batteries.
As a result, buying an extra battery to utilize to perform tests is of no use. Therefore, a methodical procedure to repair needs to be taken. So without wasting any time, let’s jump towards viable solutions.
1. Backup Your Google Pixel
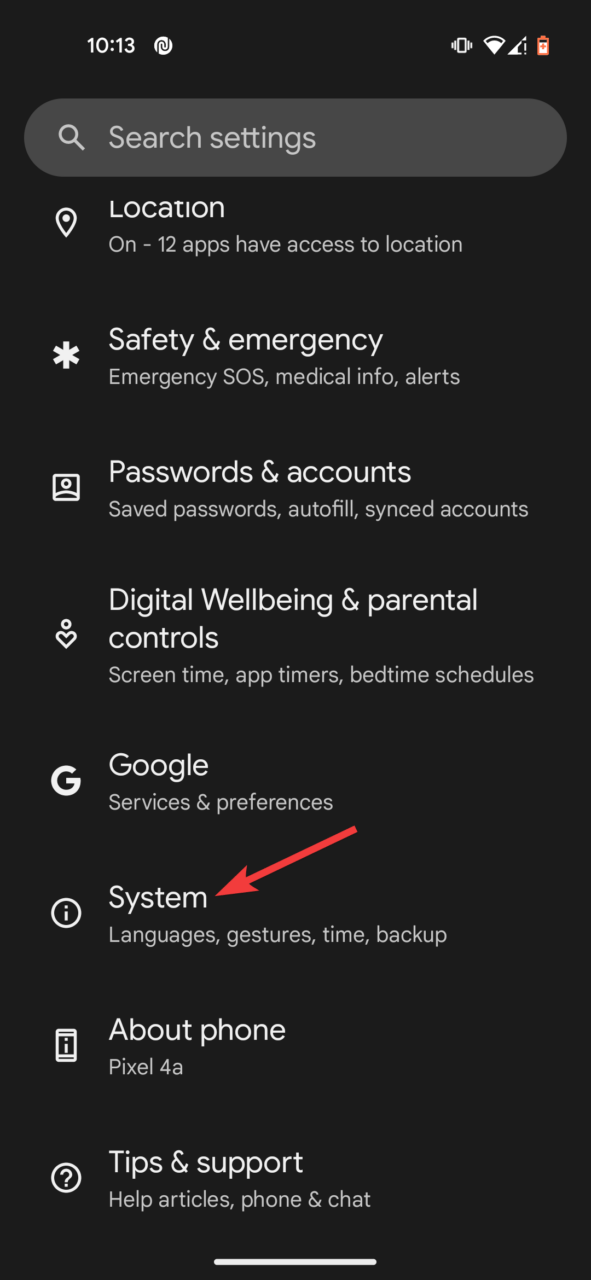
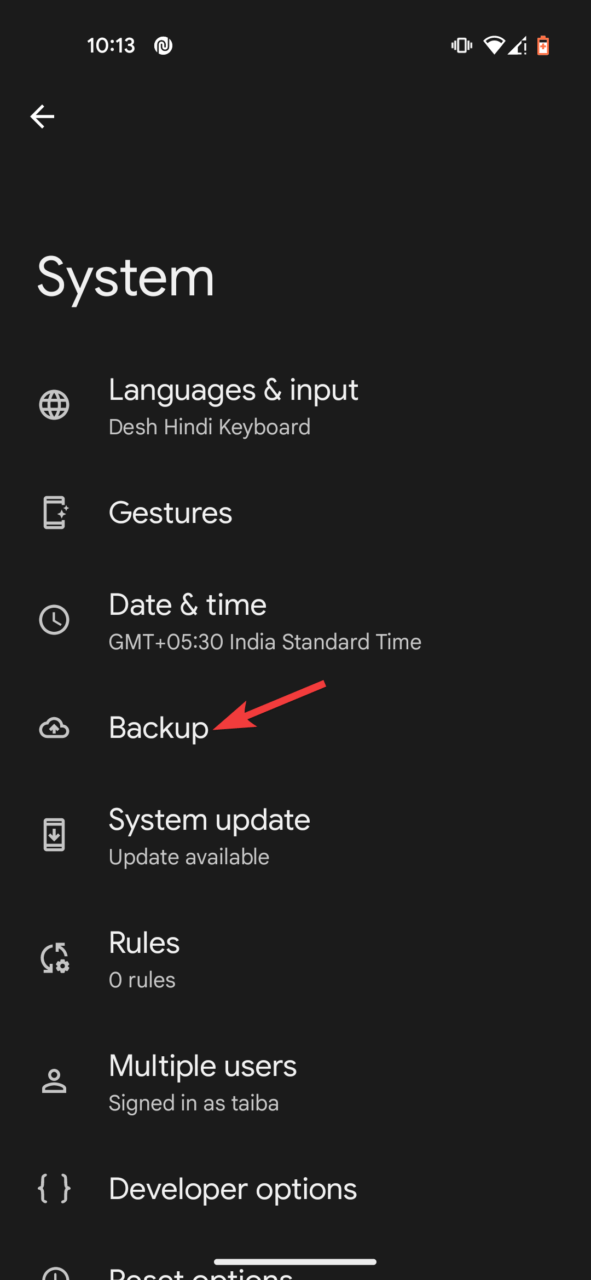
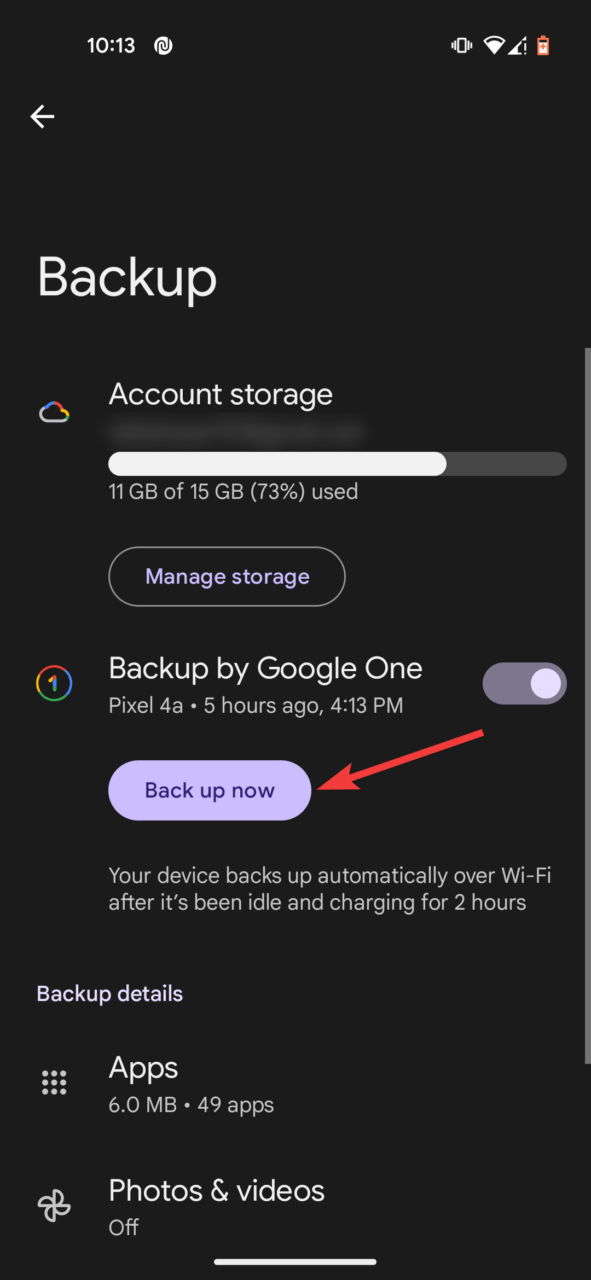
Before moving with the workarounds to resolve the issue, make sure to create a backup of your Pixel phone. Safeguarding your data is critical in case the issue with your phone worsens. Google Pixel allows you to turn on the automatic backup option. To trigger this feature, follow these steps:
- Open the Settings app on your smartphone.
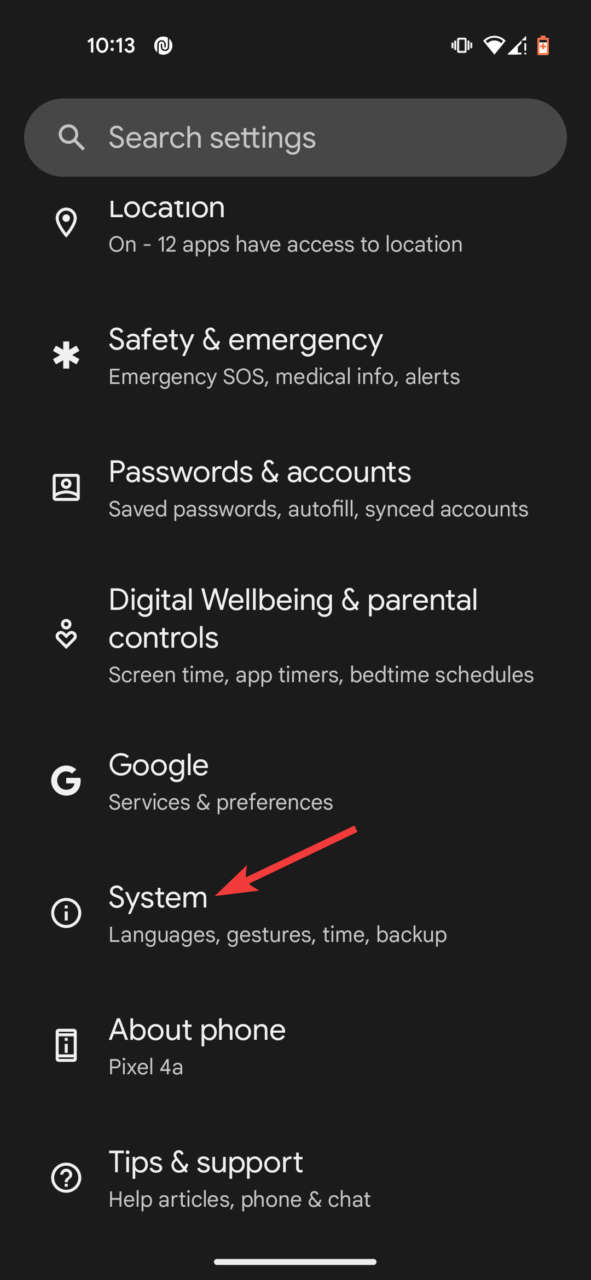
- Scroll down and tap System.

- Select the Backup option.

- Finally, click the Back up Now button to initiate the backup process.

For those who haven’t utilized the automatic backup feature before, Google’s automatic backup protects a wide array of your data, encompassing contacts, photos, videos, calendar events, messages, settings, and many apps.
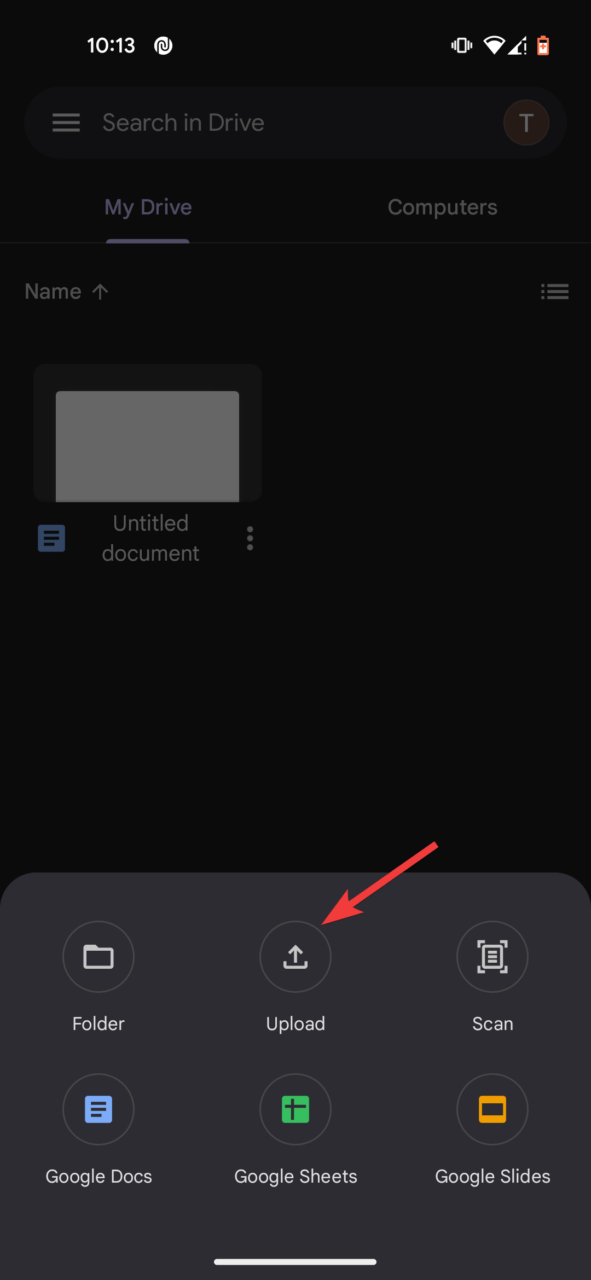
You can manually back up specific files stored on your Pixel to Google Drive. If you go for manual backups, remember that any data previously backed up automatically (before turning off the feature) will be removed from your Google account. To manually backup your data, execute these steps:
- Access Google Drive and click on the + icon.

- Then, tap on Upload, followed by Upload Files.

- You’ll be prompted to select the files you want to back up.
Subsequently, you can back up all your files on your personal drive account. After your Google Pixel data has been safely backed up, you need to proceed to the methods given next.
2. Inspect if your Google Pixel is too Hot
Is your Google Pixel too hot? Operating numerous applications simultaneously or long gaming sessions can cause your phone’s temperature to increase tremendously. If the device’s temperature is elevated, specific actions such as charging may become disabled or significantly slower to avoid potential harm. We suggest you wait for your device to cool down before beginning the charging process.
3. Link your Phone to a Computer
First things first, you need to determine whether the power adapter is at fault or if it’s your charger causing the problem. For this, you can connect the Google Pixel smartphone to your laptop or computer and see if it resumes charging instantaneously.
You can also try a different power outlet to ensure that it is not a problem. If the phone does not show any visible signs of charging, the charger might be at fault. If your Pixel device still does not respond, you need to rule out the USB cable-related underlying causes.
4. Examine the USB Cable for Damage
The USB cable is crucial for setting the link between the charger and the primary device. The charging process may be hindered if the cable gets impaired. Anything could prevent the device from charging. So run your index finger along the cable’s length and look for any kinks, cracks, or breaks.
Carefully inspect the cable and connectors at both ends for any signs of debris, lint, or corrosion that might damage the connectors, and remove them. Plug your charger into the power outlet and then your pixel smartphone. Try holding and twisting the cable in different directions to see if the charging is resumed. This will help identify a loose connection that might be hampering the charging process.
You can also use a different cable to determine whether the problem is with your cord or the charging port of your Google Pixel.
5. Inspect the Charging Port
Once you’ve reviewed both the power adapter and the USB cable and the issue remains unresolved, it’s critical to evaluate the utility port of your Google Pixel smartphone. Check for bent pins or corrosion within the port. If you find any debris or lint, carefully extract them, and for any corrosion, use compressed air to clean it out.
Remember that a loose connection might not be visibly apparent but still can be a possible cause. To determine this, insert the cable into the charging port and join the charger to a power source.
While doing this, gently alter the angle of your phone. If there’s a loose connection, it might be resolved by getting a new charger or cable.
6. Soft Reset your Google Pixel
The inability of the Google Pixel to not charge could be a result of a potential software glitch. To rule out this prospect, a simple step you can take is to force restart your Google Pixel smartphone. This measure involves rebooting the phone, which will reset the cache memory. It’s worth mentioning that your data, files, and applications won’t be affected. Here’s how to soft reset your Google Pixel smartphone:
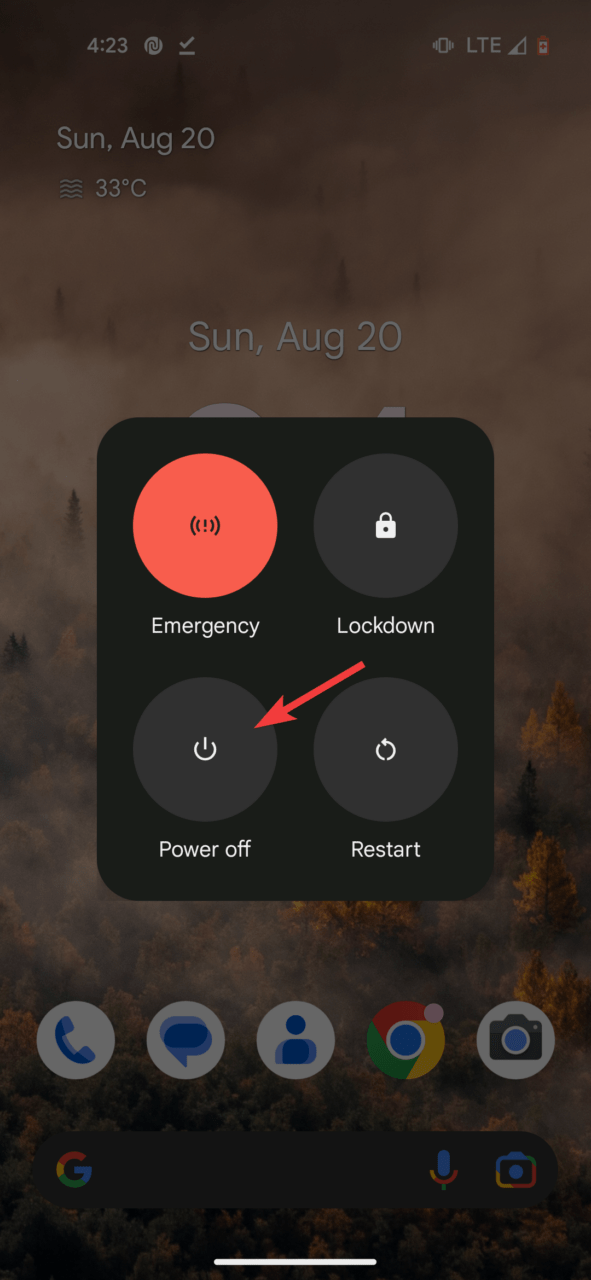
- Press and hold the Power button for a few moments.
- When the power menu emerges, select the Power off option.

- After a brief delay, push the Power button again to turn on your smartphone.
- Once the restart process is done, you can test whether the charging is resumed on your Google Pixel device.
7. Perform a Factory Reset
If you haven’t managed to resolve the charging-related issues in Google Pixel or it bothers you quite often, you will have to perform a factory reset of your Google Pixel smartphone. This move will restore your phone to its initial default settings and will erase all the data.
Hence, it’s critical to create a backup of your phone’s data by the step-by-step process described above. After creating the backup of your Google Pixel smartphone, follow the steps below to factory reset your device.
- Click the Settings icon to access the device settings.
- Scroll down and choose the System option.

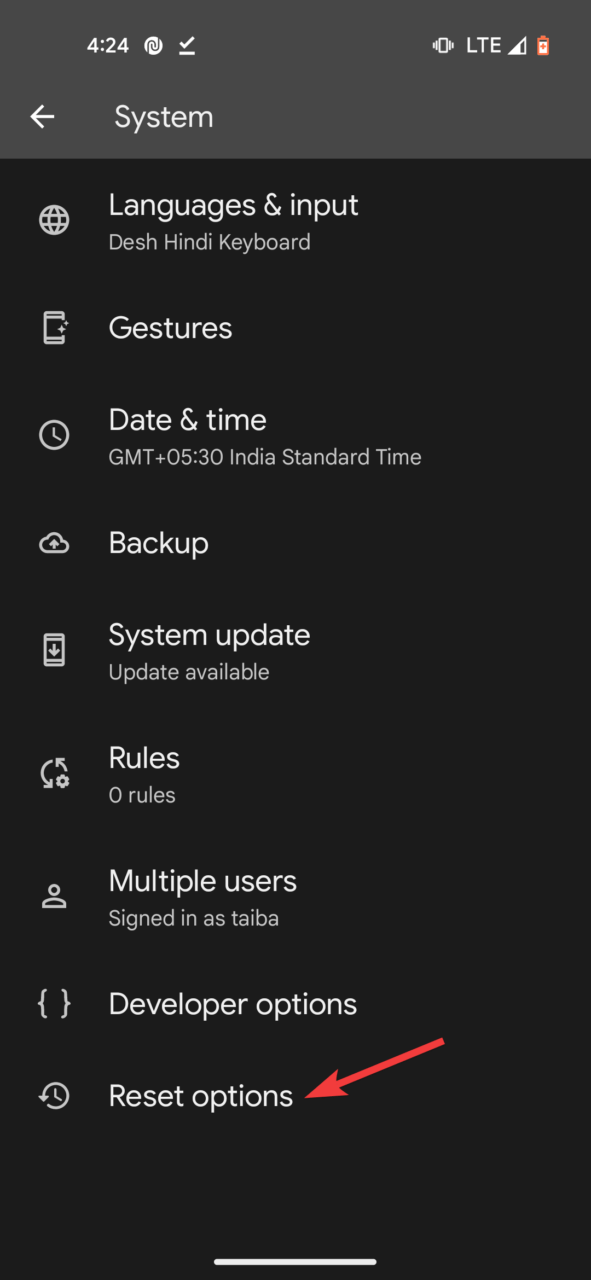
- Next, tap the Reset options.

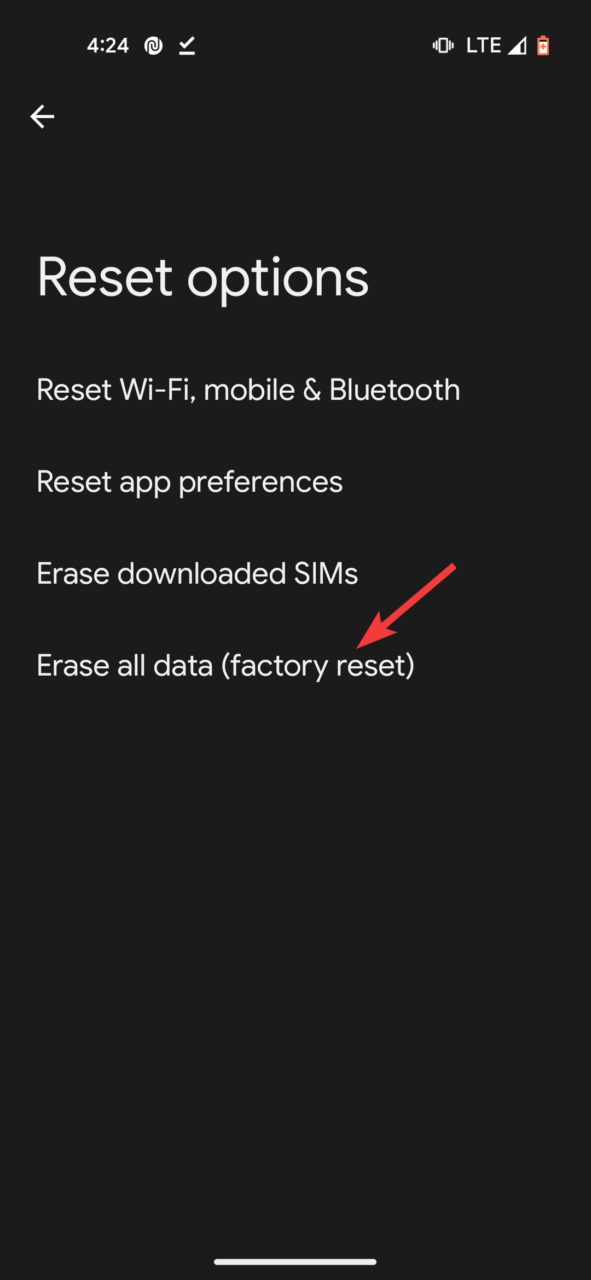
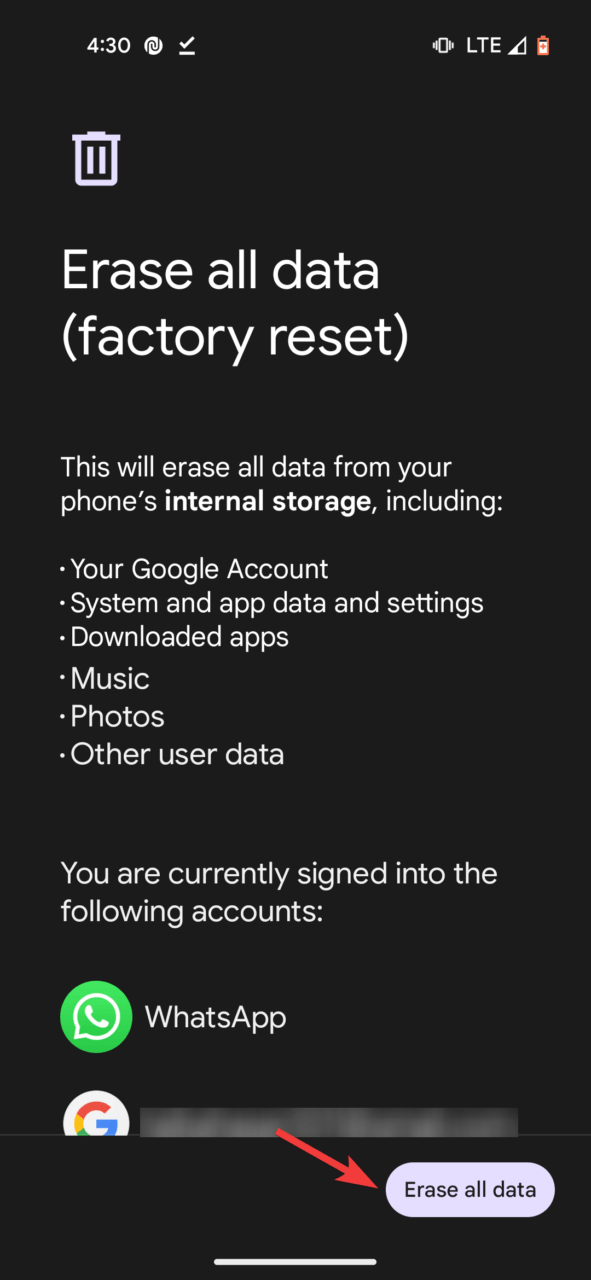
- Now select Erase all data (factory reset).

- If prompted, Enter your PIN or Password to proceed.
- Tap on Erase all data to confirm your action.

Your Google Pixel smartphone will reboot and initiate the factory reset process. Once done, the charging-related issues prevalent on your device will be resolved.
Last Words
So have you had any luck restoring the charging process on your Google Pixel by trying the workarounds given above? In case the issue isn’t resolved yet, it’s because of physical or liquid damage to your Google Pixel smartphone. You can contact the Google Pixel repair center, which has support options for in-warranty and out-of-warranty damage. https://support.google.com/pixelphone/answer/9004345?hl=en
If you've any thoughts on How to Fix Google Pixel Phone Not Charging?, then feel free to drop in below comment box. Also, please subscribe to our DigitBin YouTube channel for videos tutorials. Cheers!
