In this guide, I have shared some troubleshooting tips to fix the Google Chat desktop app if it is not working on Windows 11. Google Chat has been in the instant messaging scene since 2017. Earlier, it used to go by the name Google Hangouts which was later rebranded to Google Chat in 2020. During its initial days, the app was available for Google Workspace users in the business environment but later become accessible to everyone with a Gmail account.
Google Chat can be used from a web browser by going to chat.google.com. It is also available as a standalone app that you can directly integrate into your PC from the web browser with one click. Sometimes, the standalone PC client of Google Chat may not work. The major reason, in most cases, can be a faulty network that cuts off the connectivity of the device from the WiFi.
The second major reason for Google Chat not opening on Windows 11 could be a server outage. Google deploys powerful servers, but they, too, go rogue sometimes due to a surge of users. Due to this, Google Chat may become unresponsive.
Top Ways to Fix Google Chat App Not Working on Windows 11
Here are the different fixes that you can apply and try to make Google Chat Windows 11 client functional on your computer.
1. Connect the PC to a Stable Network
It is important to fix the network connection on your device. If you have access to a secondary WiFi network, connect your computer to that instead of the faulty network that is constantly disrupting. You may manually disconnect the router from the power outlet and reconnect it.
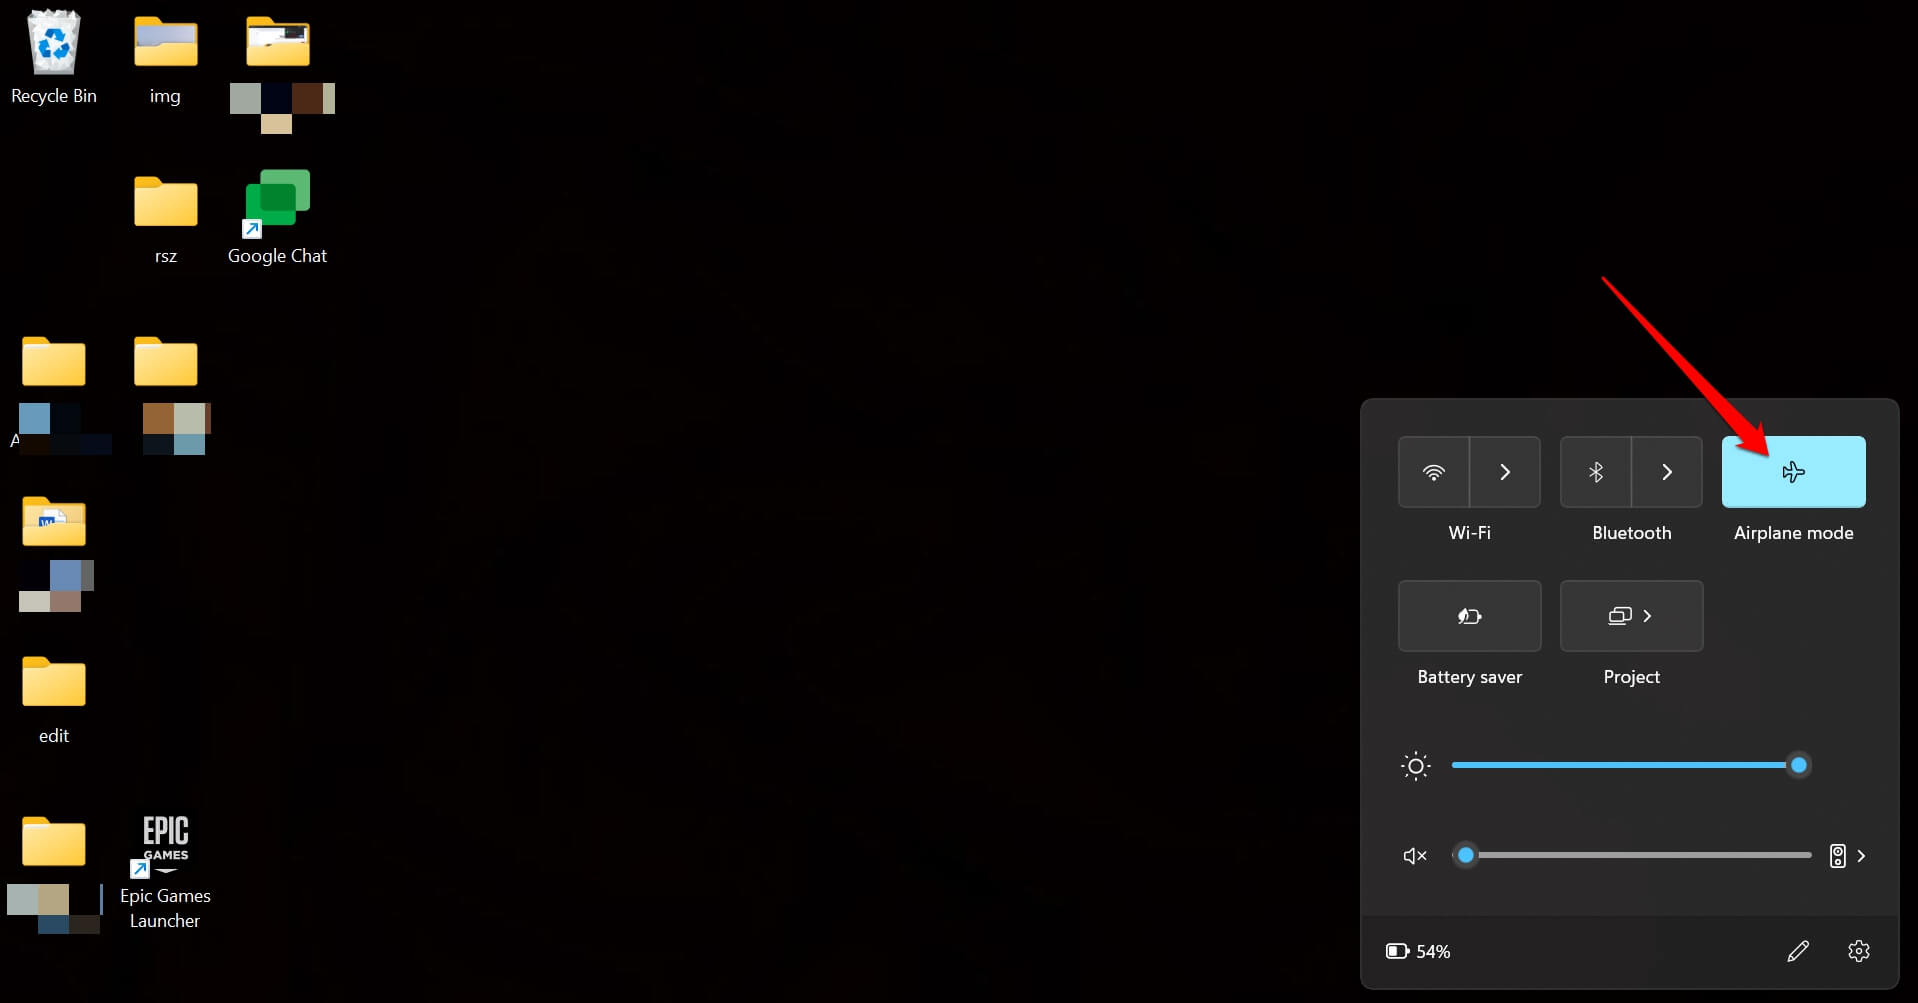
Try to enable the flight mode on Windows 11 and disable it. This is often considered a useful hack to overcome network issues.
- On the taskbar towards the right, click on the section that highlights the WiFi, sound, and battery icons.
- It will expand a section that has an option for Airplane mode. Click on it to enable the flight mode for Windows 11.

2. Disable Metered Network on Windows 11
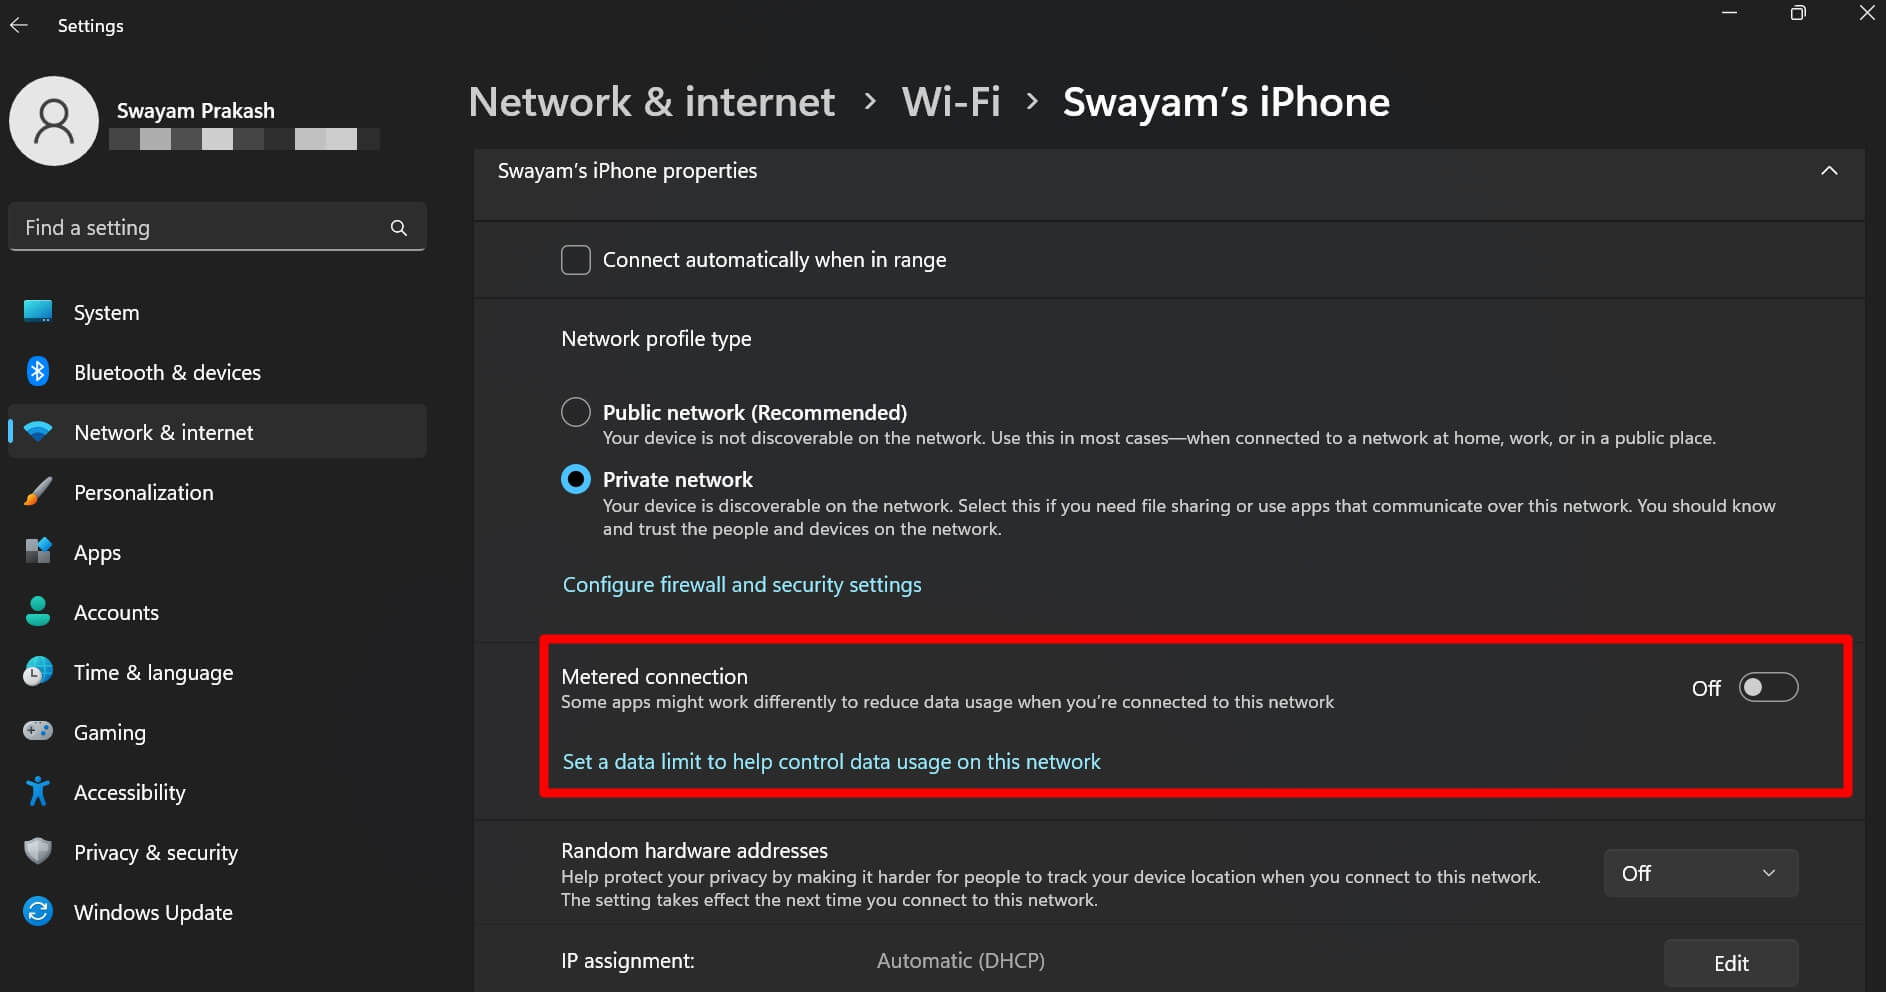
Is the metered network enabled on your Windows 11? This will slow down the network and it may hamper the way certain apps work, including the Google Chat app. So, check that metered network has been disabled on Windows 11.
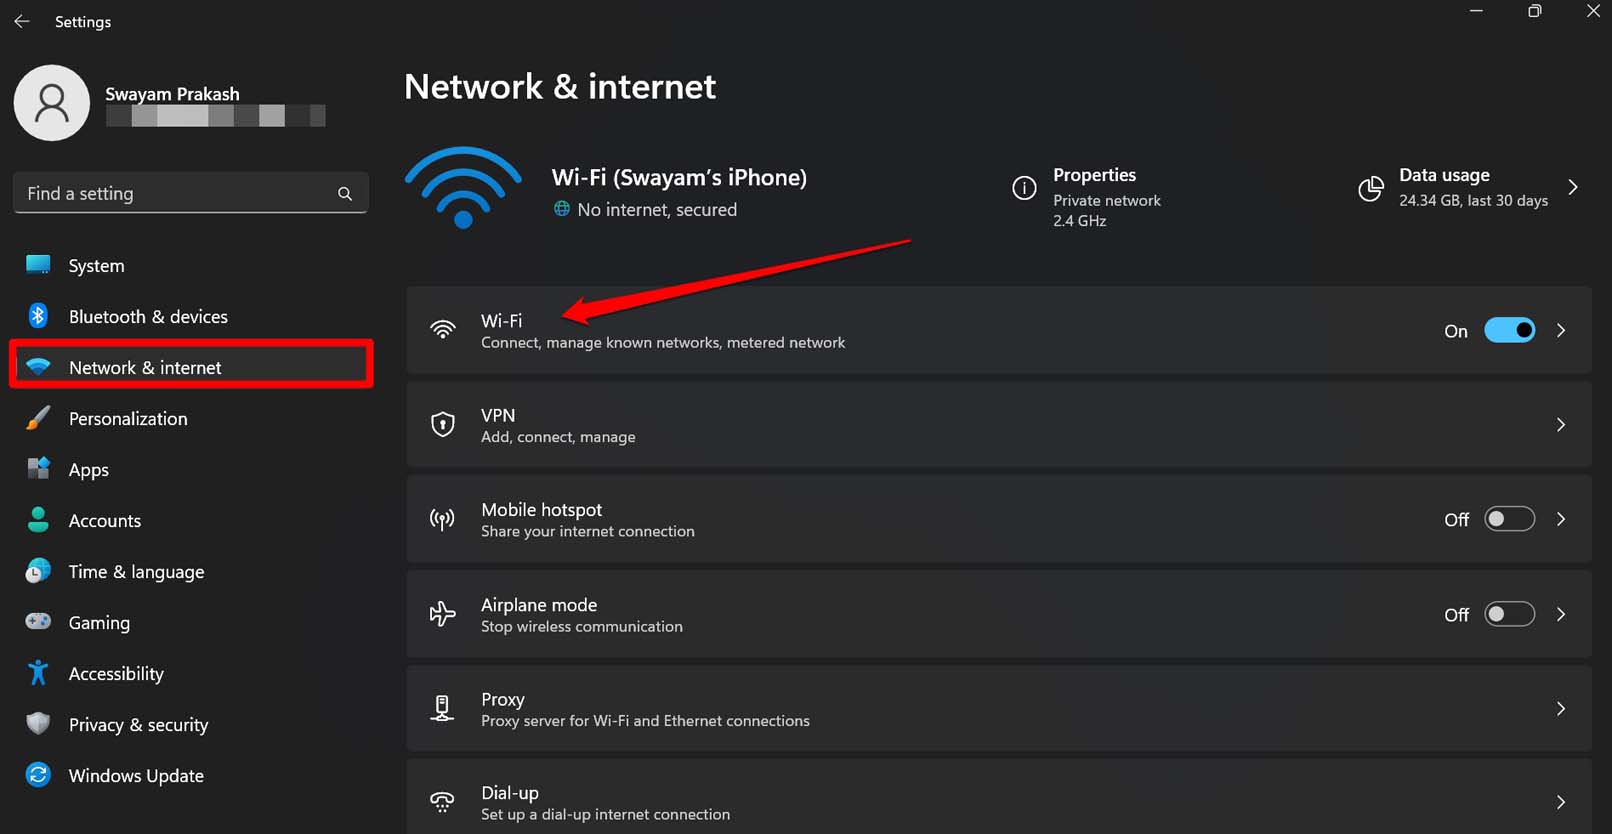
- Open the Windows settings by pressing Windows + I hotkeys.
- Click on Network and Internet on the left-hand panel.
- Next, click on WiFi.

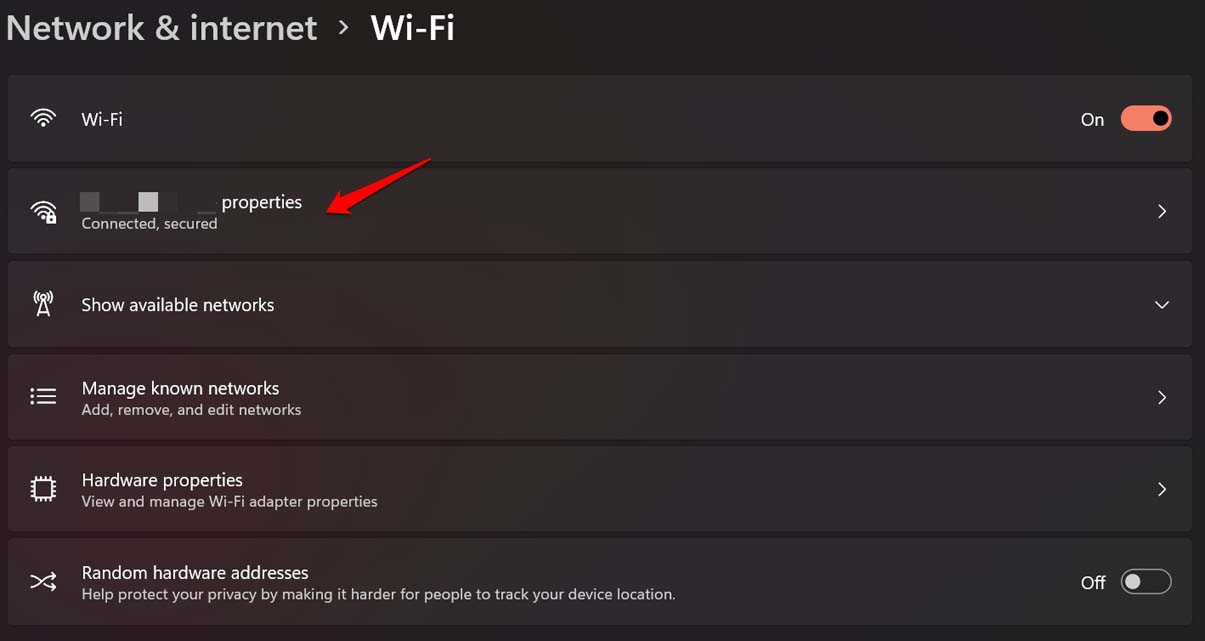
- Now, click on <WiFi name> properties.

- Scroll to Metered Connection and click the toggle beside it to disable the feature.

Now, open Google Chat and check if it is working.
3. Update Windows 11 to a Newer Build
Sometimes, when using desktop client apps meant for Windows 11, issues may arise with the app if the operating system has some bugs in it. So, to eliminate the possibility of snags on Windows 11 causing Google Chat to be unresponsive, upgrade Windows 11 to a newer version.
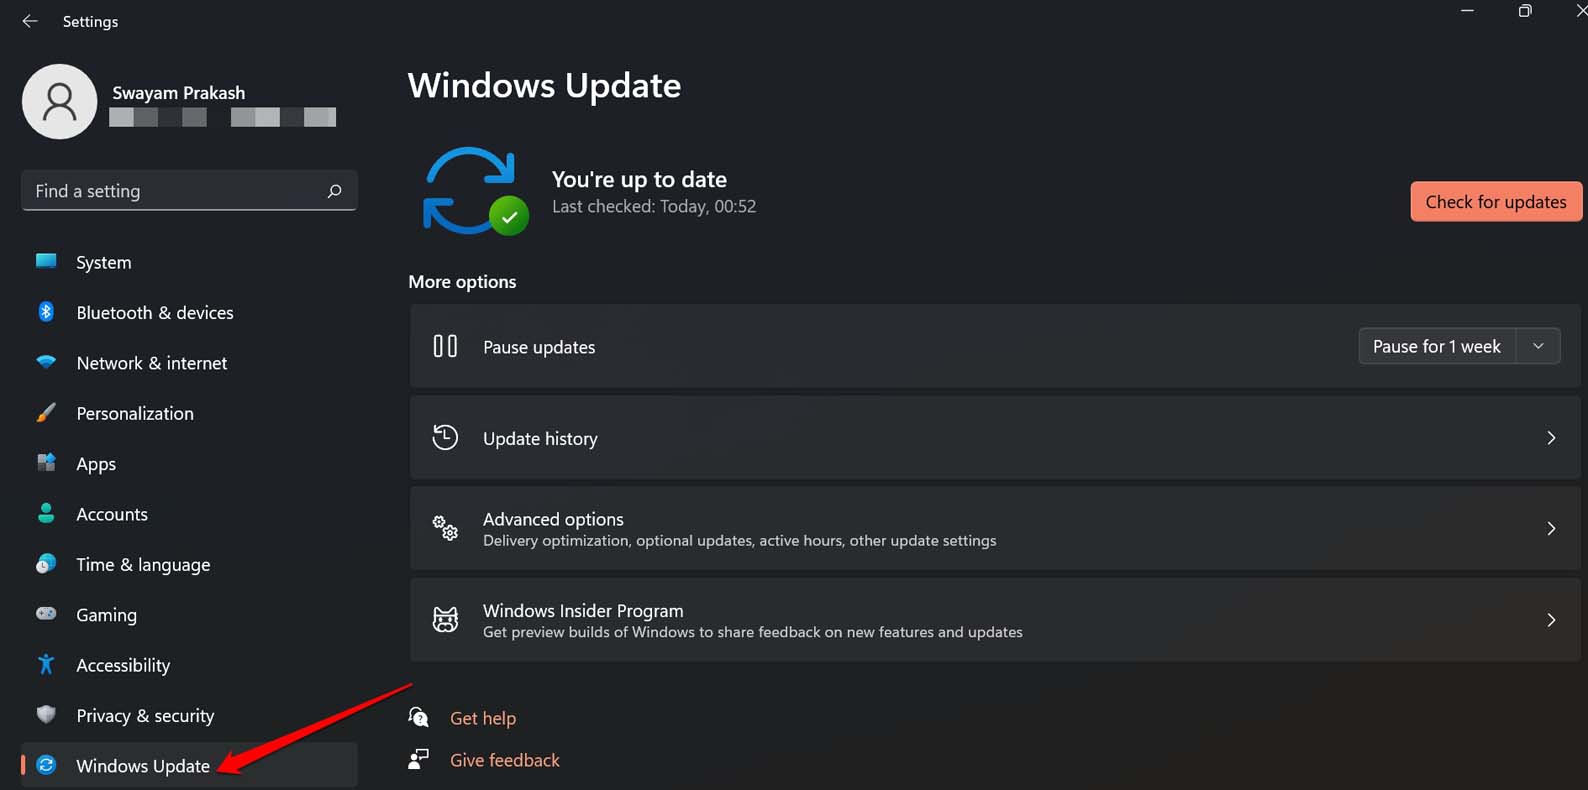
- Press Windows + I to open Settings.
- On the left panel, click on Windows Update.

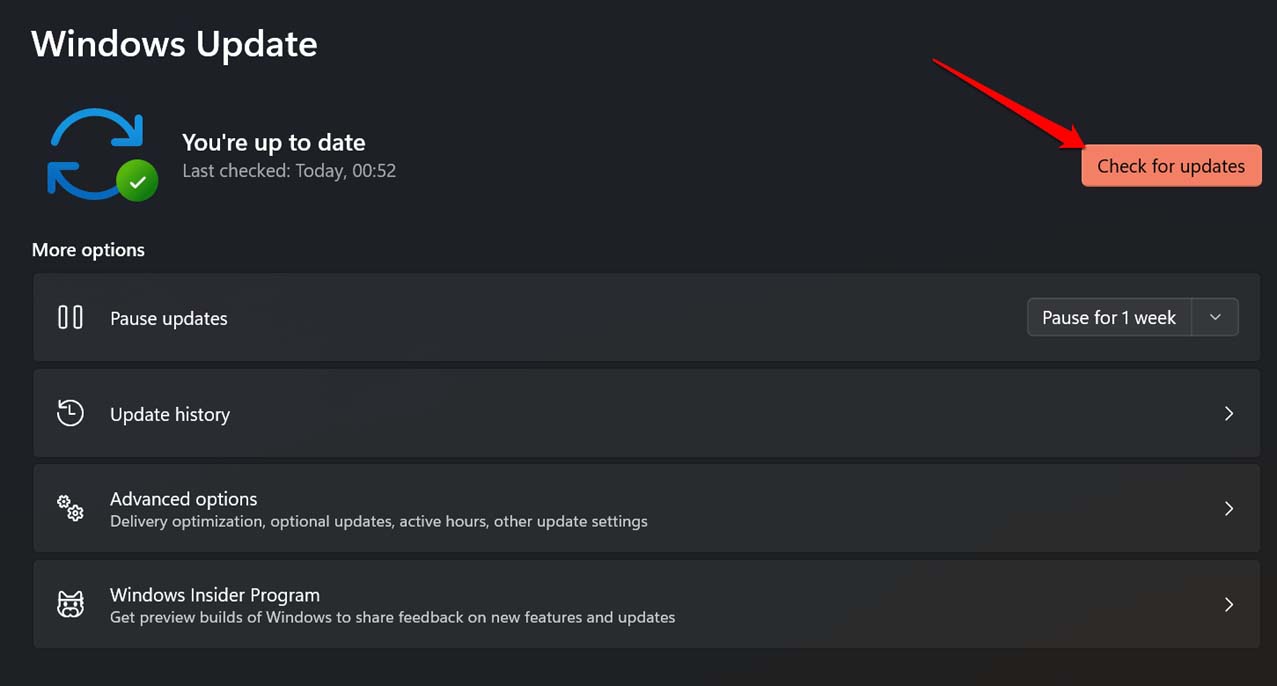
- Next, click on Check for Updates.

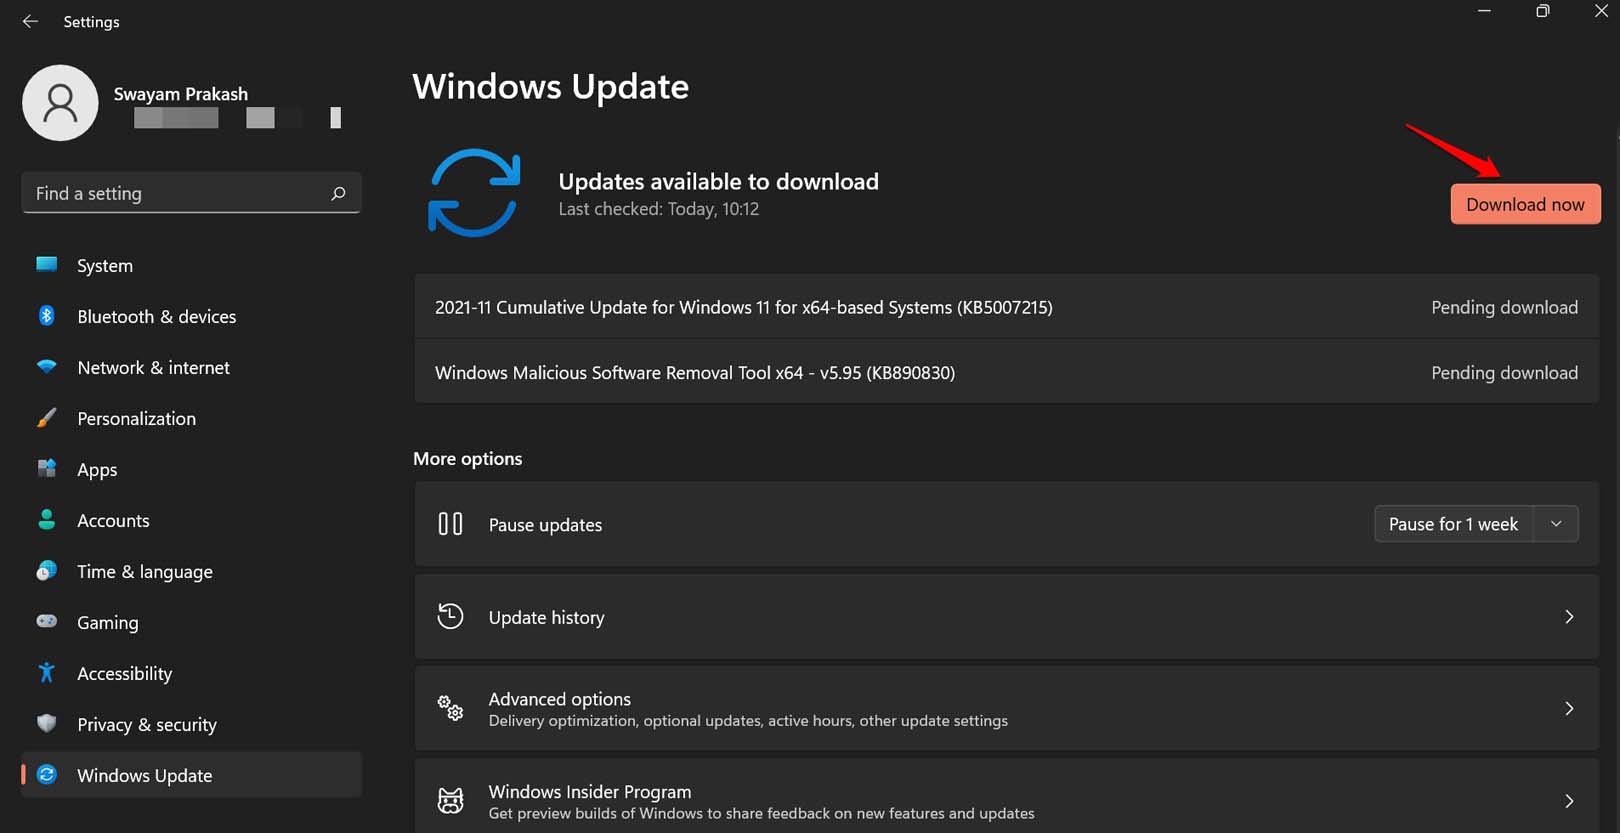
- If an update is available, click on Download Now to start the installation.

After the update is downloaded, follow the instructions to complete the rest of the installation process. Make sure have the internet connected to your PC.
4. Check if Google Servers Are Down
Visit the Downdetector website to check if Google servers are facing any outages. Apart from that, follow the official handles of Google on its respective social media to check for official updates or news shared regarding the server down or maintenance. If there is a server outage, then wait until it gets fixed.
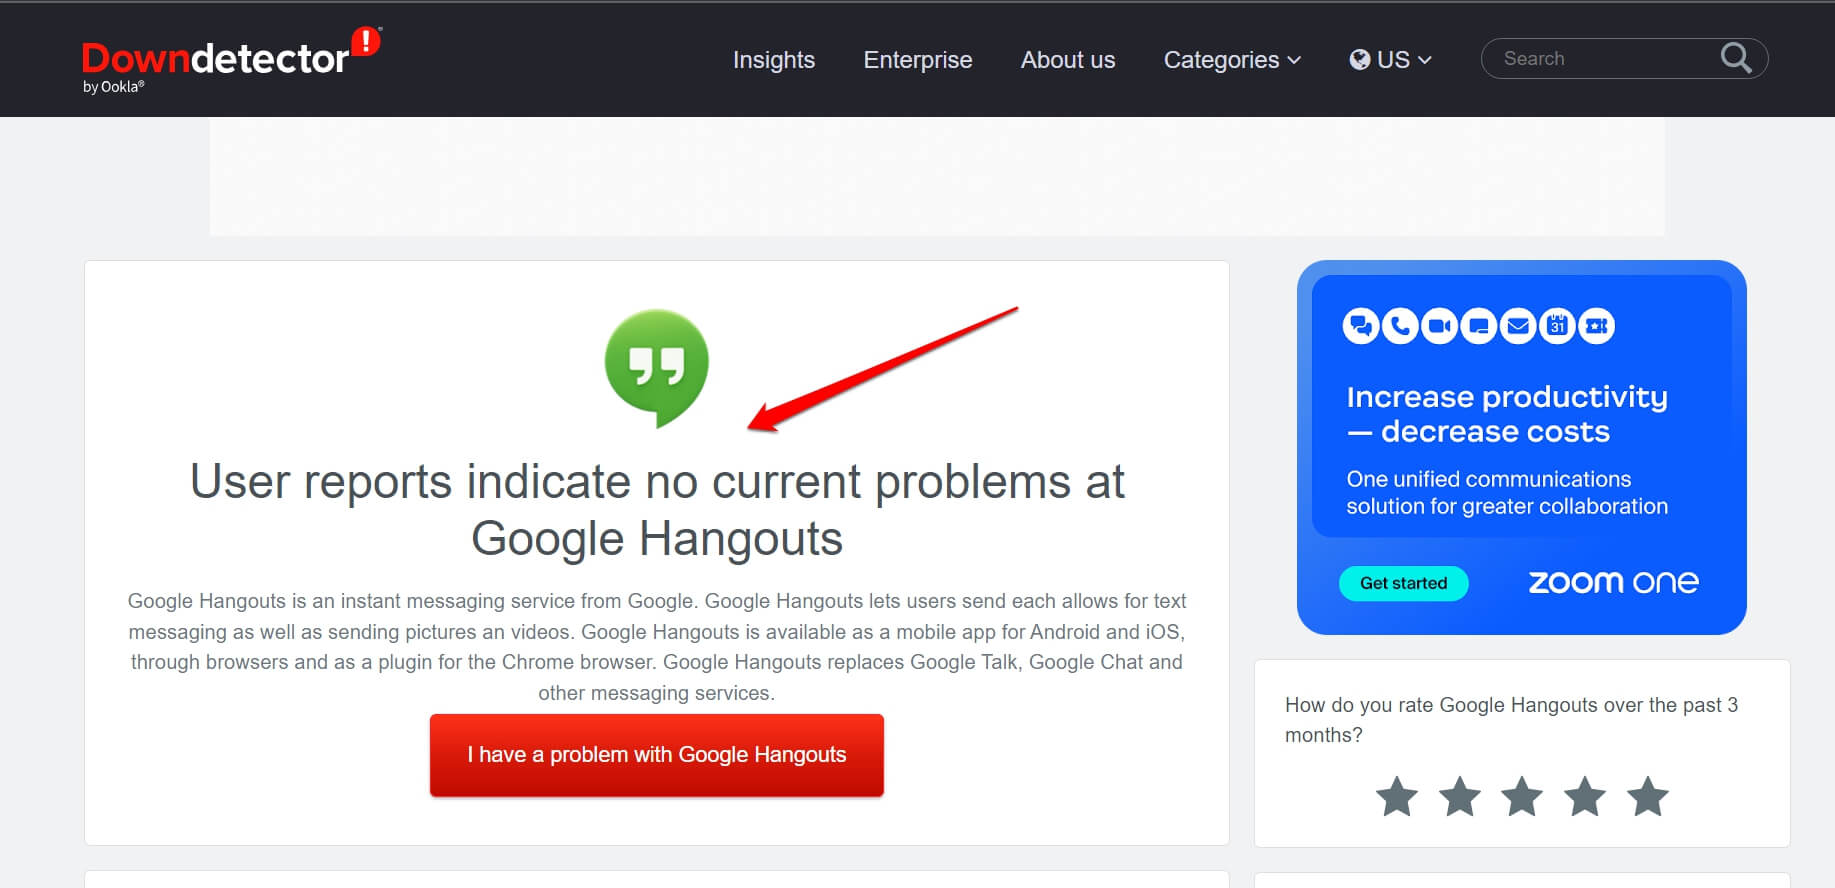
Leave for a few hours and then try to launch the Google Chat desktop app on your Windows 11 computer. Check if you can send and receive messages on it.
5. Enable Chat Notifications in Google Chat
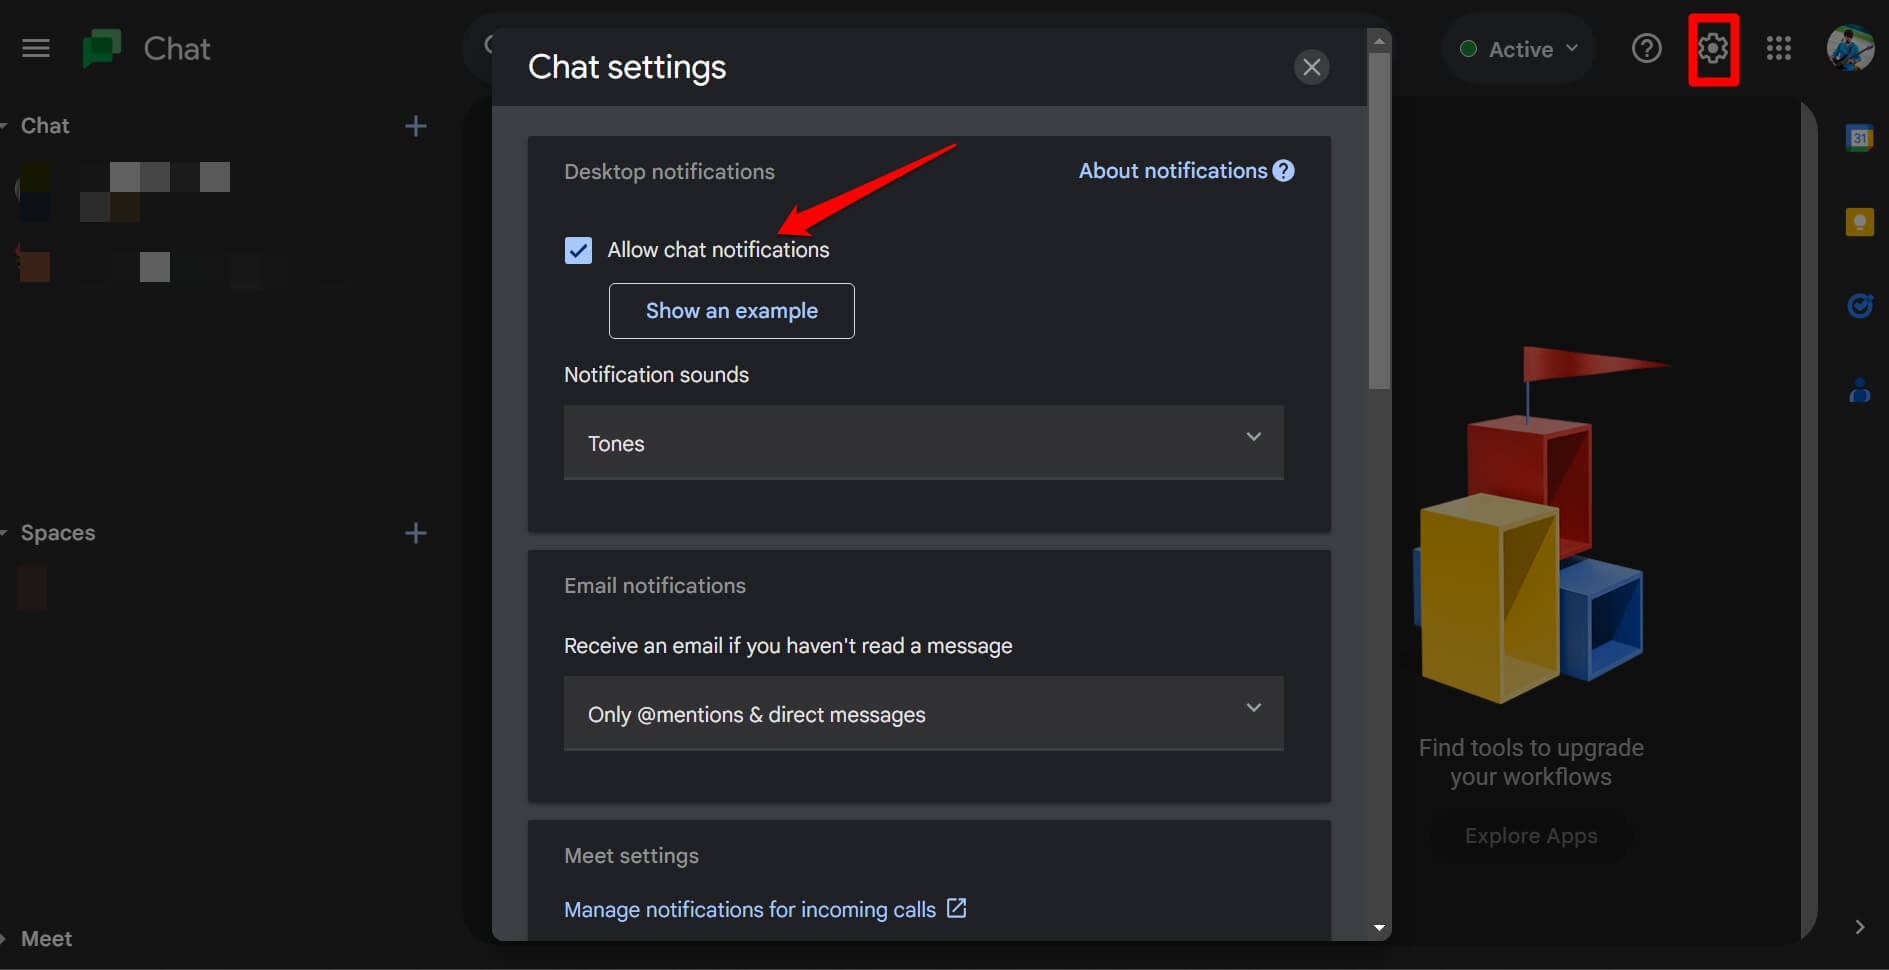
If you are not receiving any messages, check that chat notifications are enabled in the Google Chat settings.
- Launch the Google Chat app.
- Click the gear icon to go to Settings.
- Click the checkbox beside Allow Chat Notifications.

- Close Google Chat and relaunch it.
If it was a case of disabled notification, you should now receive all the messages duly on your Google Chat.
6. Uninstall and Reinstall Google Chat Client App
You can uninstall the desktop client for Google Chat and reinstall it at any time. Go for this fix when other troubleshooting methods are not working.
To uninstall the Google Chat desktop client,
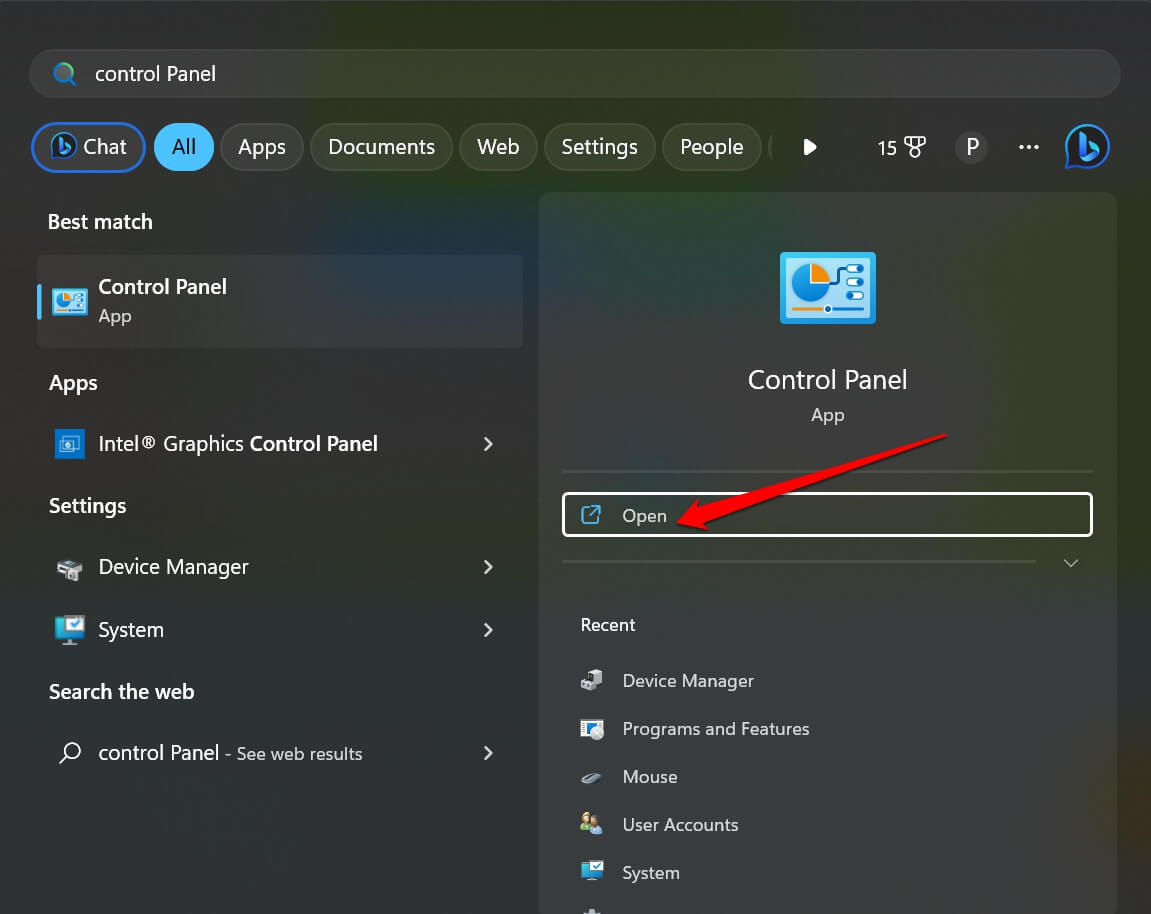
- Launch the Control Panel.

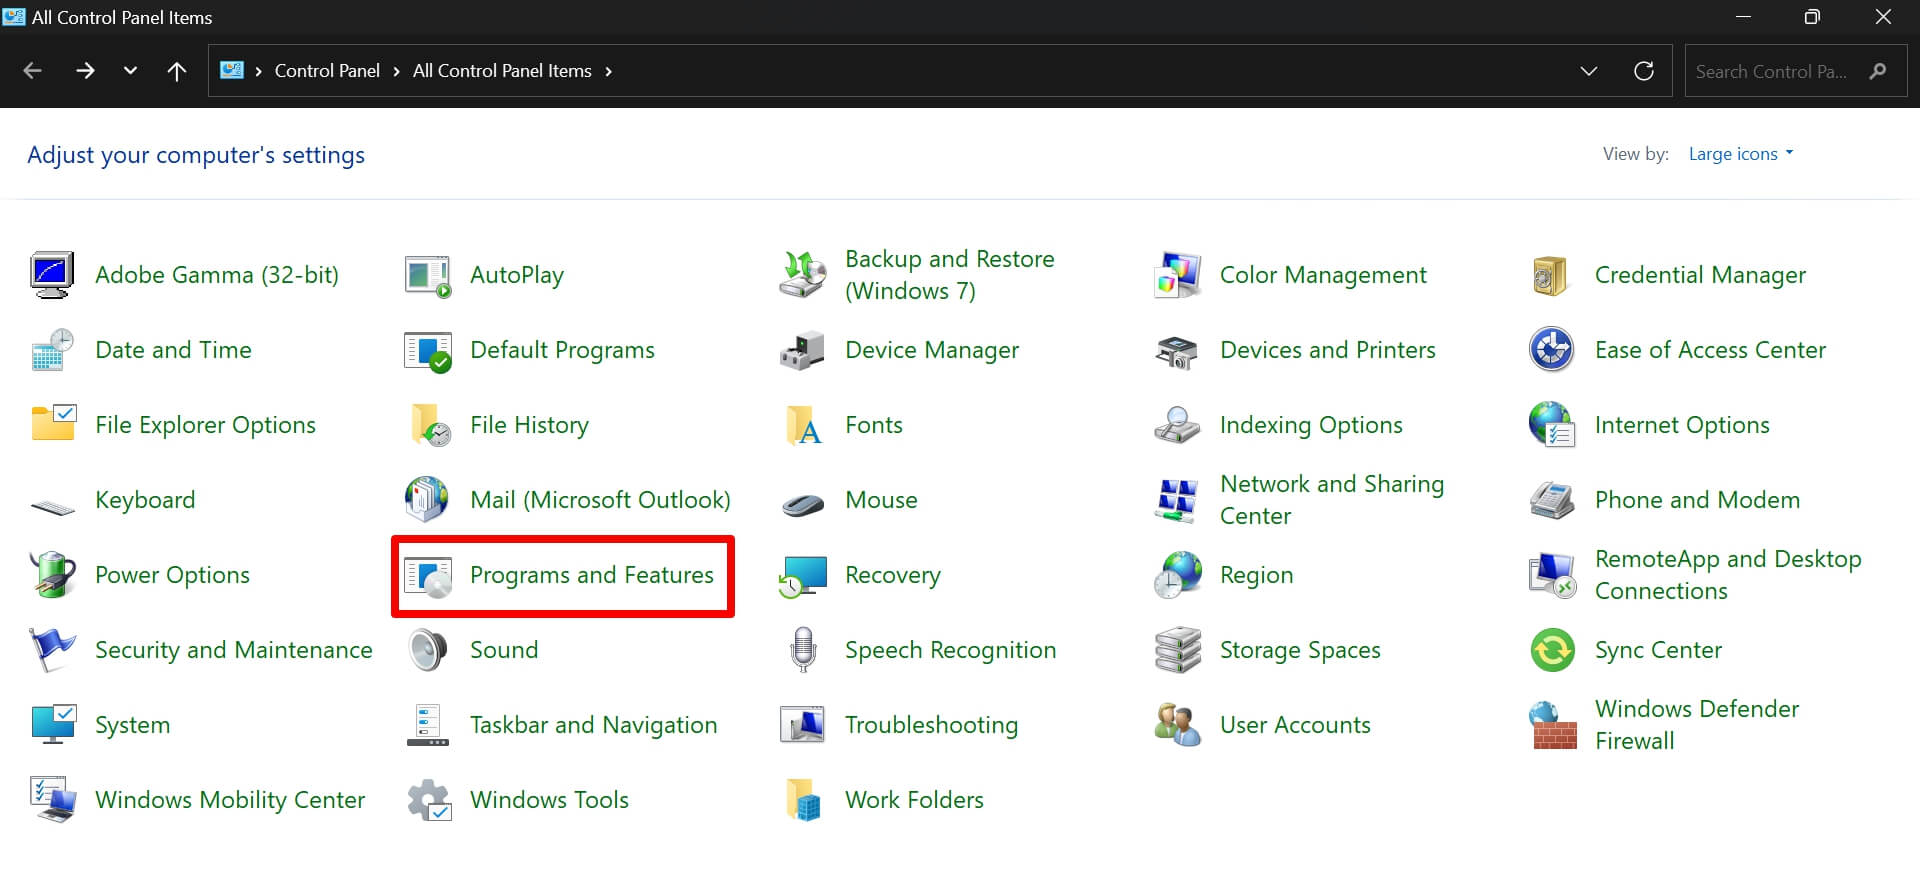
- Click on Programs and Features.

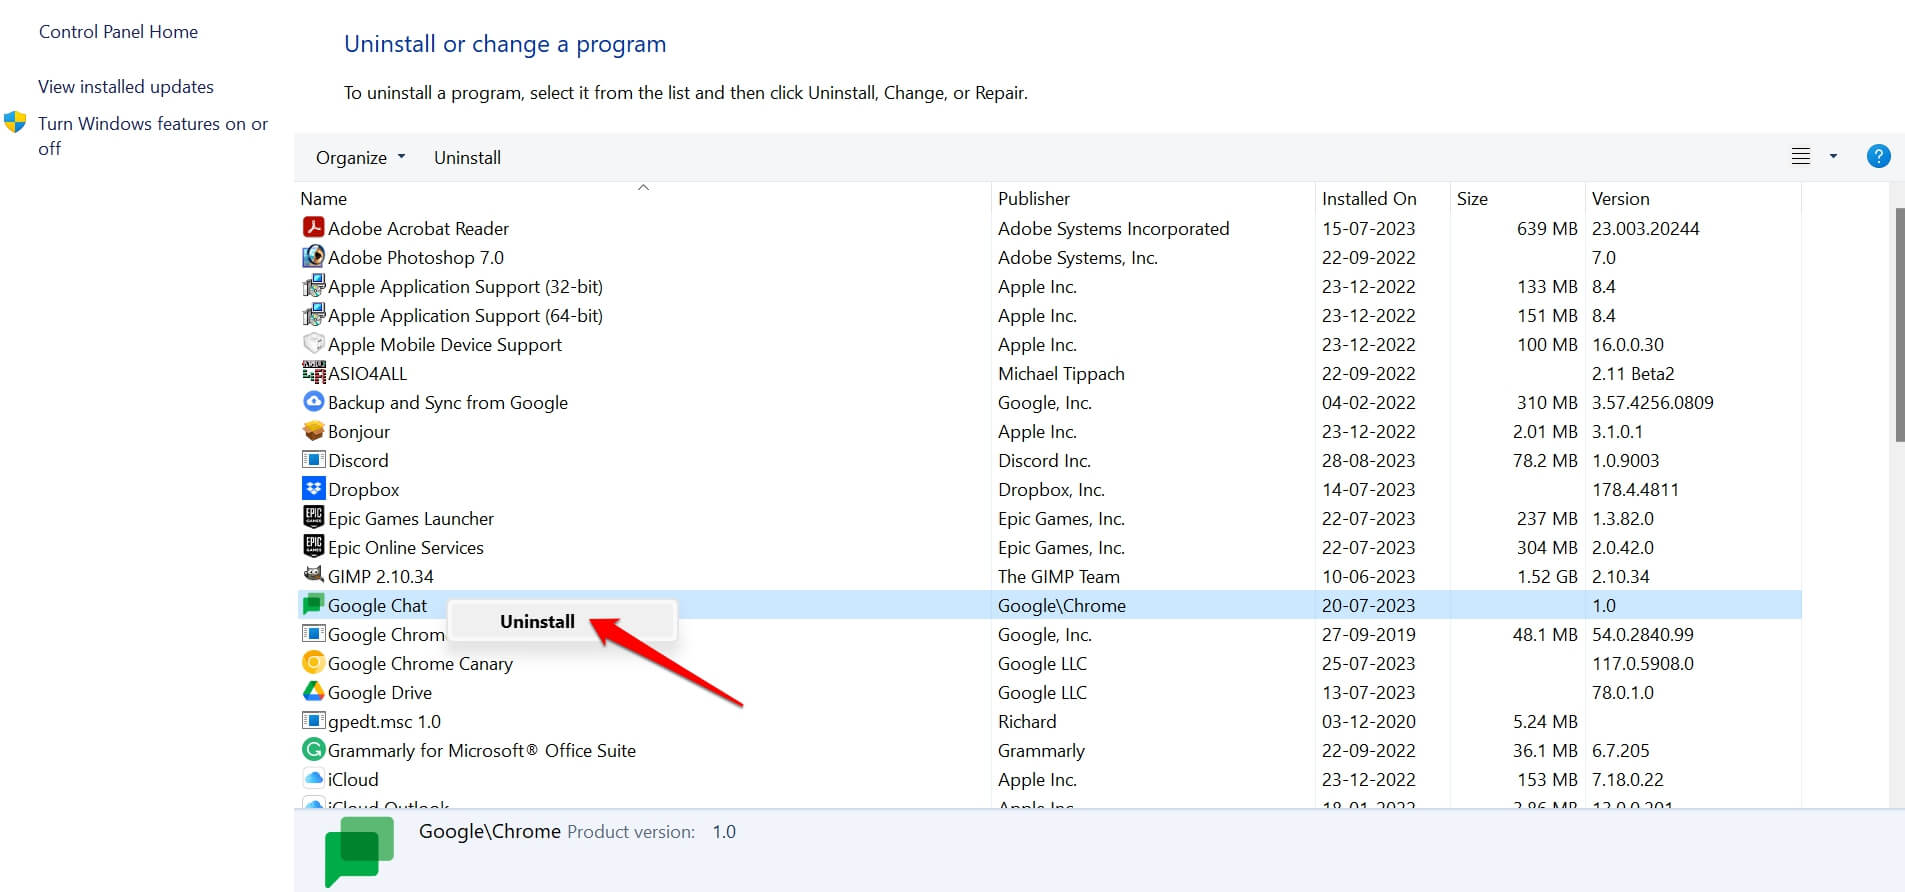
- Then scroll to Google Chat and right-click on it. Select Uninstall.

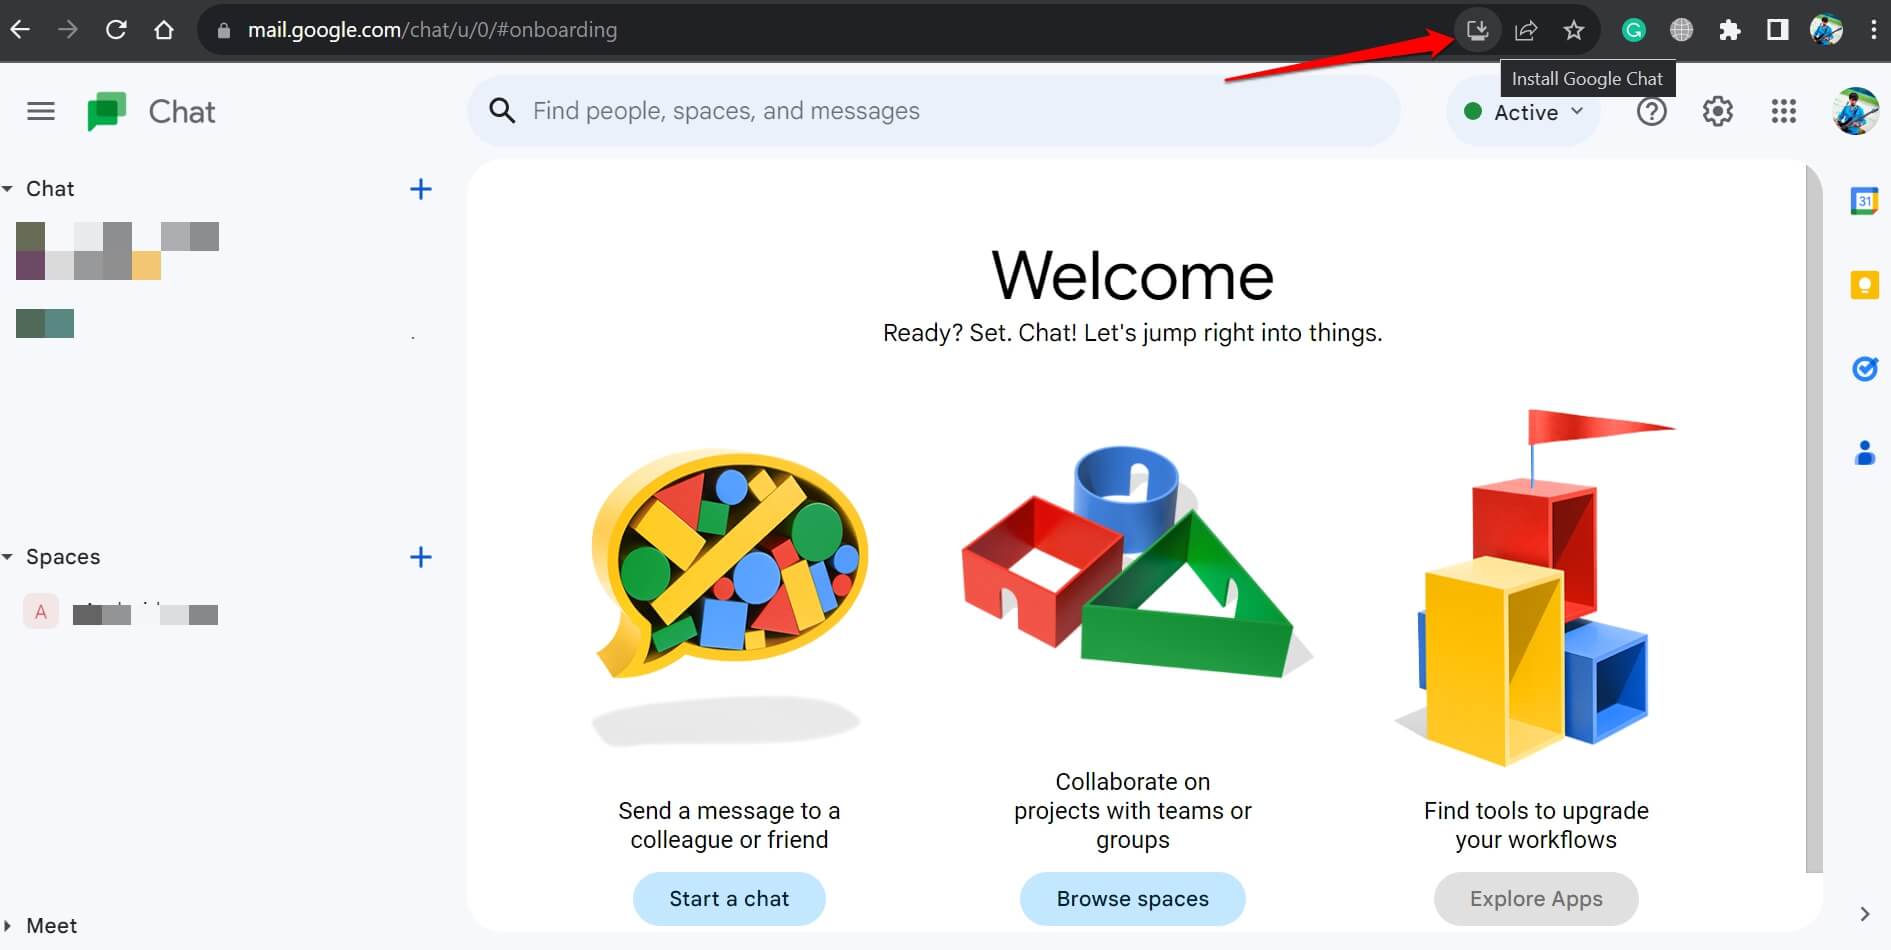
- To install Google Chat on Windows 11, go to chat.google.com using the browser
- In the URL bar, towards the right, click on the icon Install Google Chat.

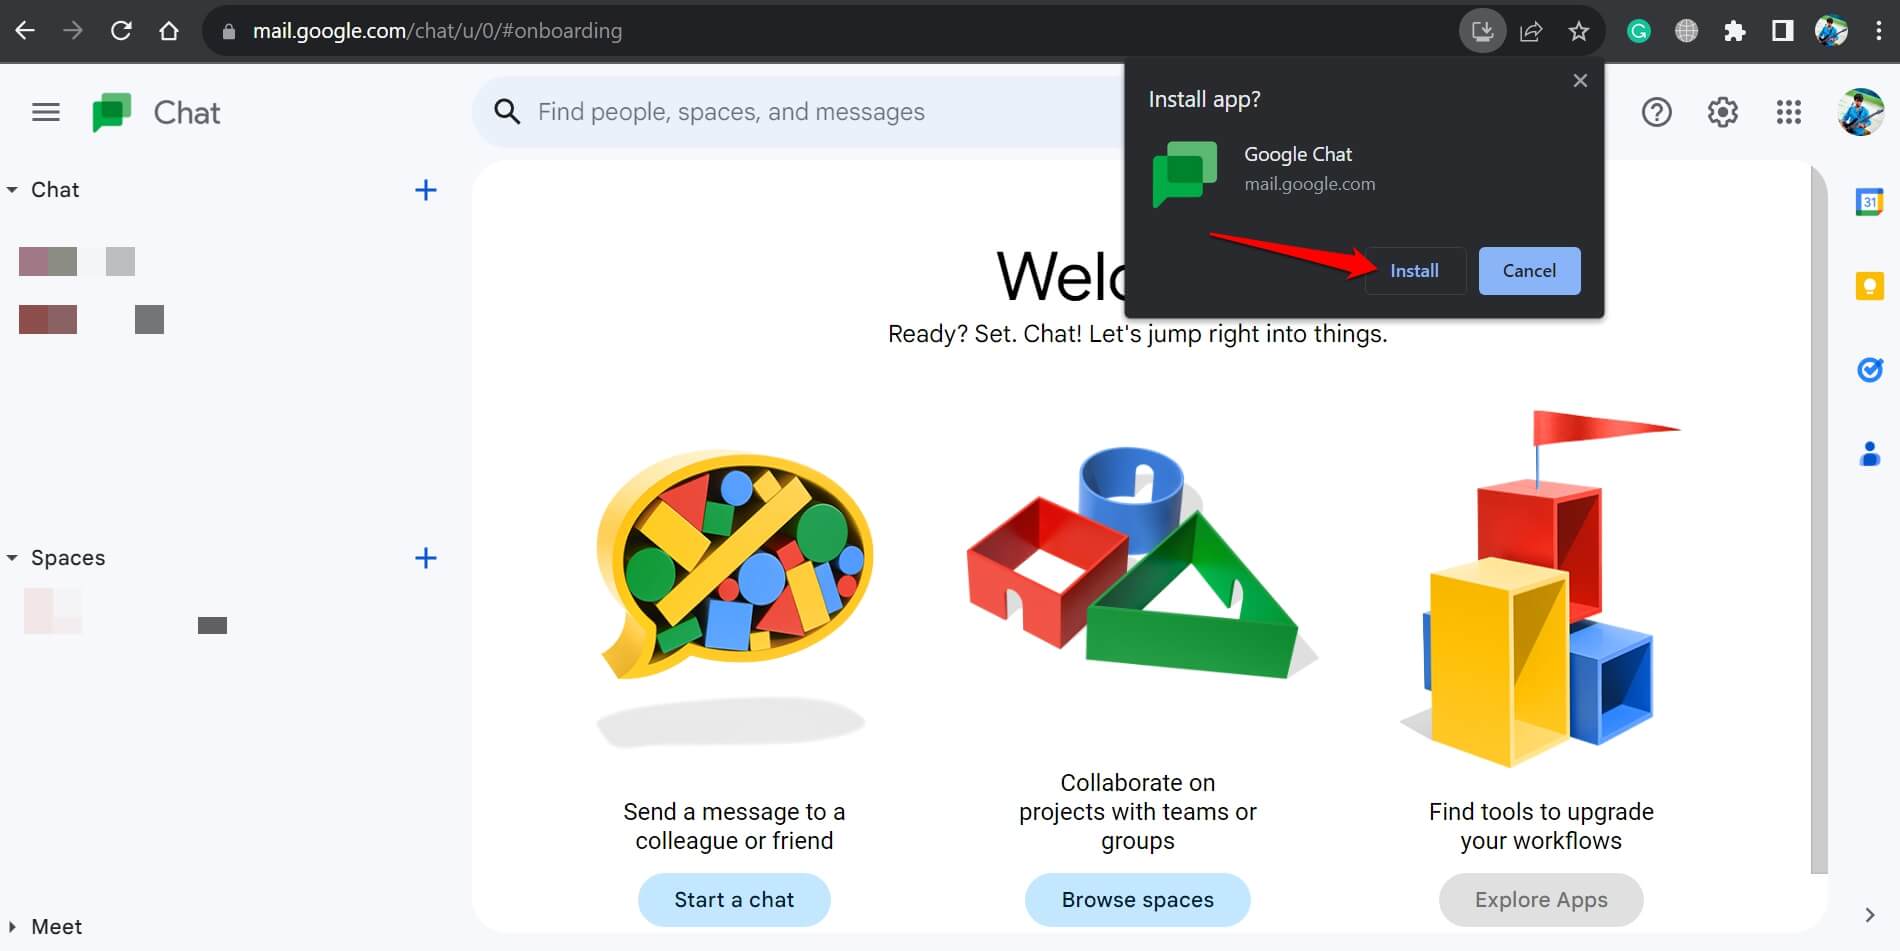
- Confirm by clicking on the button Install on the popup.

Send Important Messages Using Google Chat Desktop App
Let us wrap up this guide on “How to Fix Google Chat Desktop App Not Working on Windows 11?”. These tips and tricks will help you resolve the problems and in resuming instant messaging on the Google Chat desktop client for Windows computers.
If you've any thoughts on How to Fix Google Chat Desktop App Not Working on Windows 11?, then feel free to drop in below comment box. Also, please subscribe to our DigitBin YouTube channel for videos tutorials. Cheers!
