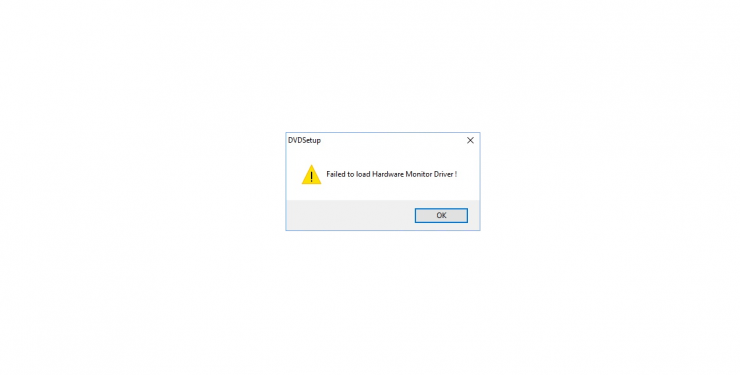
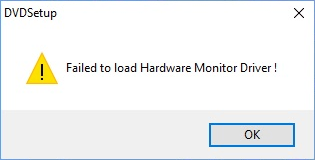
Although Windows 10 OS is a polished operating system, there are still several bugs and issues that creep up the OS, every now and then. While some issues are easy to handle and fix, there are many problems like the “Generic PnP Monitor Problem” that have been troubling the users in the recent past. This problem is not new, but the problem is something that has emerged for several users from time to time. Apparently, when this issue surfaces on Windows 10 PCs, a message pops up saying, “Failed to load Hardware Monitor Driver!”
If you are also experiencing the same issue on your Windows 10 PC, then you have come to the right place. As in this post, we will give you a detailed guide on how you can fix this issue. To give you a head start, the most probable reason for the generic PnP monitor error is due to outdated drivers or insufficient hardware. If users who have upgraded their Windows 10 operating system may also face this issue pop up. Thankfully, this guide is here to help you. With that being said, let us get straight into the article itself:
What is the Generic PNP Monitor Driver issue?
Before we go ahead and follow the steps to fix this issue, it is better to understand the root cause of this Generic PnP Monitor Driver issue on Windows 10. First of all, PnP stands for “Plug and Play.” This means that all the devices that you can use simply by plugging in that external hardware with your PC are known as a plug and play device. Besides, PnP hardware does not require the user to install the driver.
.When this happens, then Windows installs a generic driver for the external monitor, but this does not always work, as there may be a mismatch. This leads to the “Failed to load Hardware Monitor Driver!”
The issue may also show up when you have upgraded your Windows 10 OS. Adding a second monitor with your primary one shows the former as the real one and the latter as a Generic PnP Monitor. Unbranded monitors or cables not recognized by Windows 10 can also be the reason behind this issue.
How to Fix Hardware Monitor Driver Issue on Windows 10?
Once you have gone through the above section and understood what is the root cause for this issue, let us look at the potential fixes that will help you resolve the Generic PnP Monitor Driver issue in Windows 10.
Uninstall Generic PnP Monitor Driver
Sometimes, rolling back also helps you solve this PnP Monitor issue. And for that, you need to uninstall the Generic PnP Monitor driver.
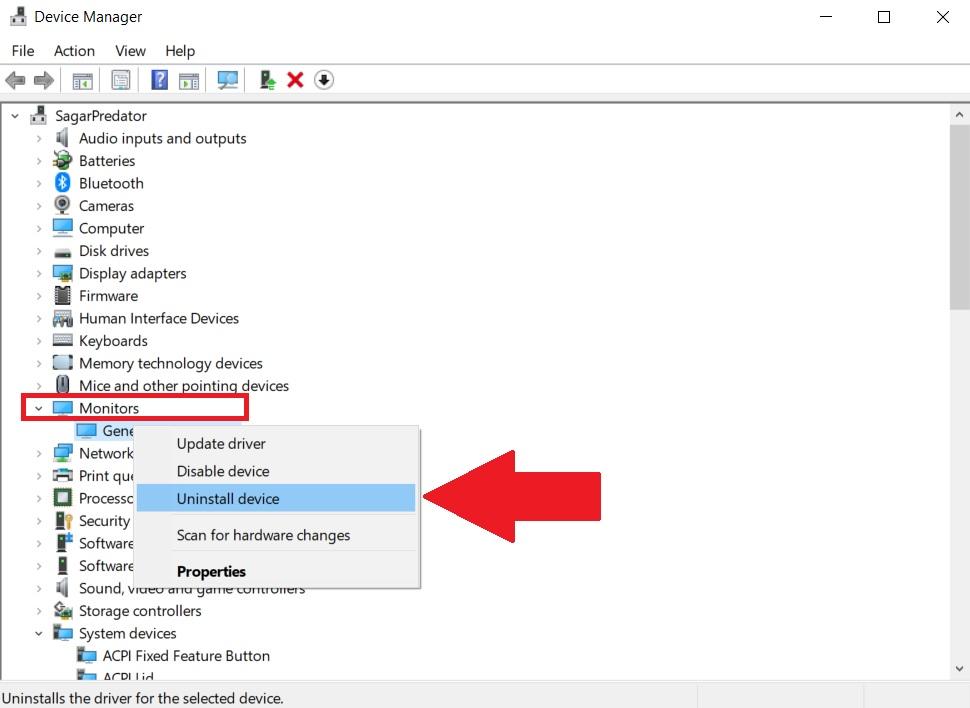
- Press Win+R keys and type in “devmgmt.msc” to open Device Manager.
- In the Device Manager window, look for the Monitors section.
- Under the Monitors section, you will see the Generic PnP Monitor option.
- Right-click on it and tap on the Uninstall device option.

- Once that is done, you can scan for hardware changes. This will trigger Windows 10 to install the monitor as a real monitor and not as a generic PnP monitor.
If this does not solve your problem, then head over to the next step.
Update Generic PnP Monitor Driver
If uninstalling does not do the trick for you, then you can take your chances by updating your generic PnP monitor driver.
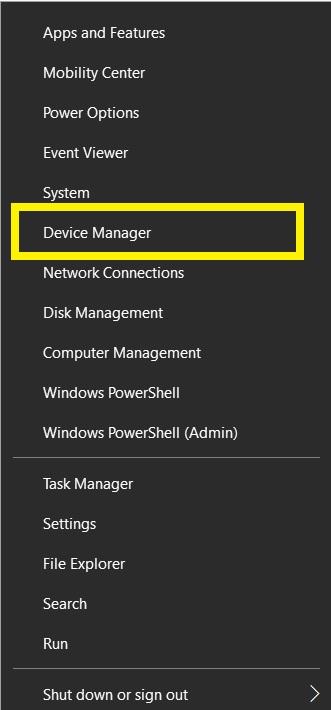
- Right-click on the Start menu and tap on Device Manager. You can also press Win+R keys on your keyboard and enter “devmgmt.msc” to open Device Manager.

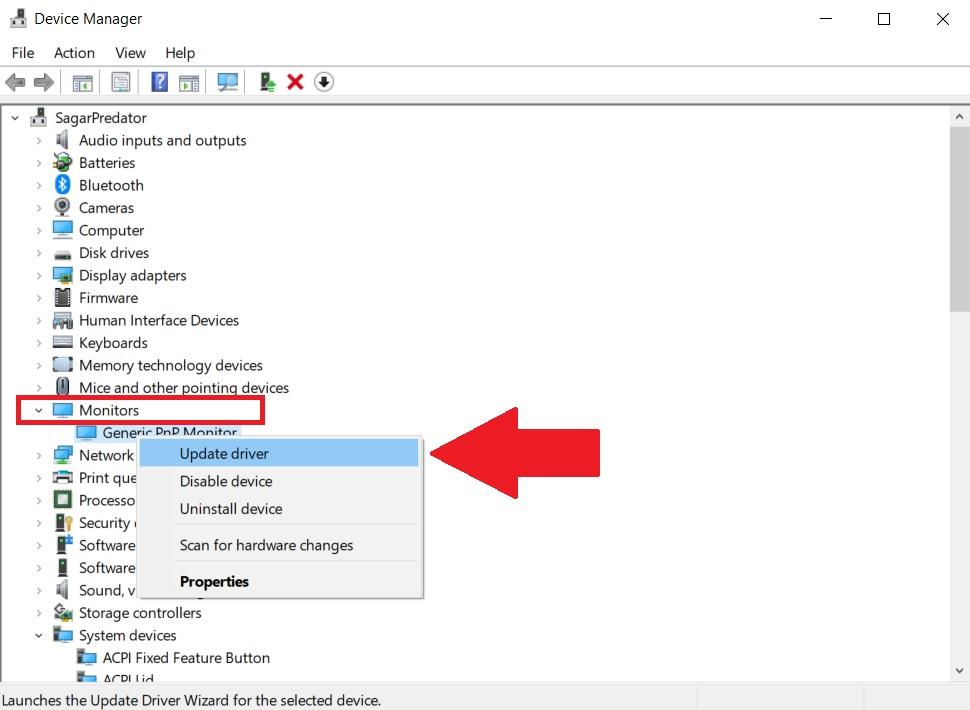
- In the Device Manager windows, expand the Monitors section.
- Under the Monitors section, you will see Generic PnP Monitor. Right-click on it and select the Update Driver option.

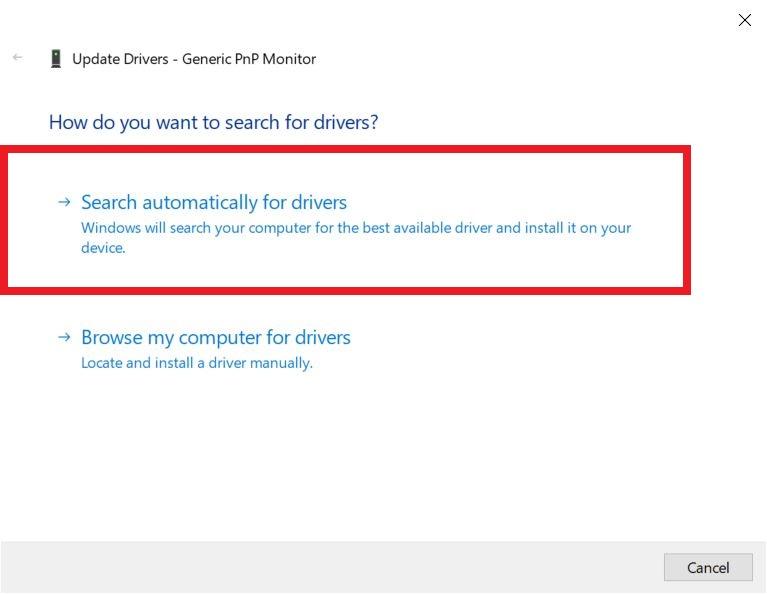
- After you are done with the last step, a new dialog box will appear which will ask you to either “Search automatically for updated driver software” or “Browse my computer for driver software” options.
- You need to tap on the first option, i.e. “Search automatically for updated driver software”. This will download and install the driver automatically from the internet.

- Once the driver is installed, restart your PC and see if this fixes your problem or not.
Run the System File Checker
You may need to run the system file checker, which is a built-in Windows 10 utility tool that can help your scan and fix corrupted drivers on your PC.
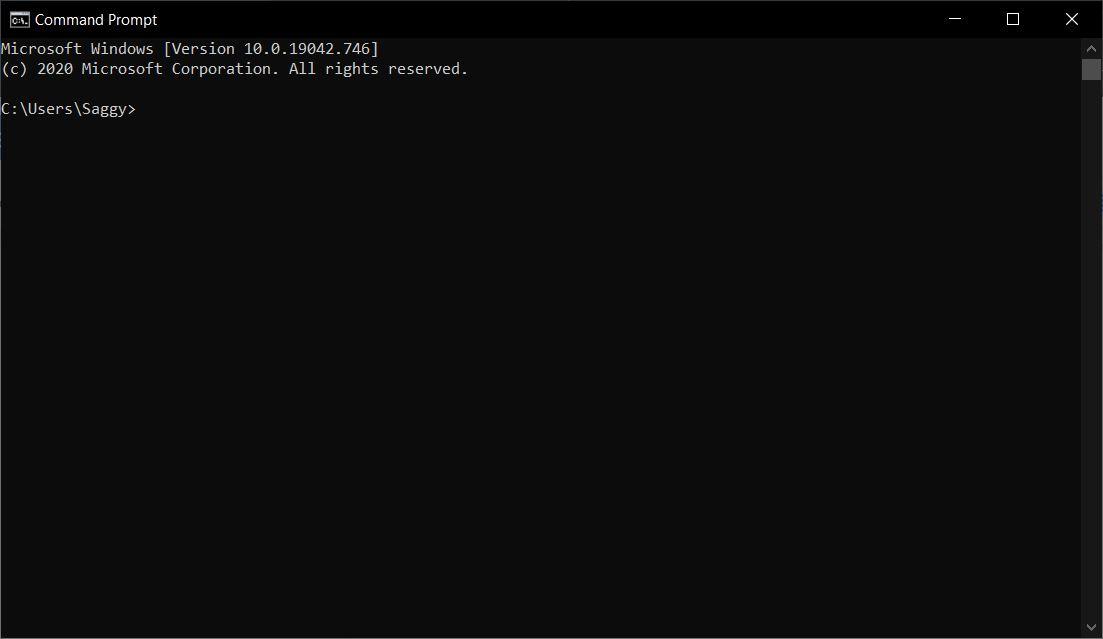
- Tap Win+R and type in “cmd” to open a command prompt.

- In the new command prompt window, type in “sfc /scannow” and press Enter.
- The System File Checker will scan your PC and look for corrupted drivers. Note that the scanning process may take up to 15 minutes to complete. So be patient.
- Once the process is complete you can see if this fixes your generic PnP monitor issue or not.
Check For Latest Windows Updates
We have already mentioned that Generic PnP Monitor issues can creep up due to old drivers as well. So, you need to make sure that you have installed the latest version of Windows 10 on your PC, as Microsoft also fixes several bugs and issues with every update. Always make sure that you are running the latest version of Windows 10 available on your PC or laptop. You can do this by:
- Click the Windows icon and search for Update.
- It will open the Windows Update menu.

- Here press the Check for updates button.
- This will start checking for the latest version of Windows 10. If a new update is detected, it is highly recommended that you install the update on your PC.
Check Cable Connection
Last but not the least, all you can do is check if there are faulty connections or not. If yes, then this could be the reason your monitor is not being detected as the main monitor.
- Power off your monitor and PC.
- Remove the power cord of the monitor and wait for about 10 minutes before plugging it back in.
- Unplug the HDMI or Video cable from your CPU and wait for 10 minutes.
- Plug back all the cables in their respective sockets and see if this fixes the issue or not.
Conclusion
So, there you have it from my side in this post. Though this error is quite common, the solution to it carry vary depending on the root cause of it. So, better go through all the solutions mentioned in this post. For more such awesome coverage, follow DigitBin. Until the next post…Cheers!
If you've any thoughts on Fix Generic PnP Monitor Problem on Windows 10, then feel free to drop in below comment box. Also, please subscribe to our DigitBin YouTube channel for videos tutorials. Cheers!
